14
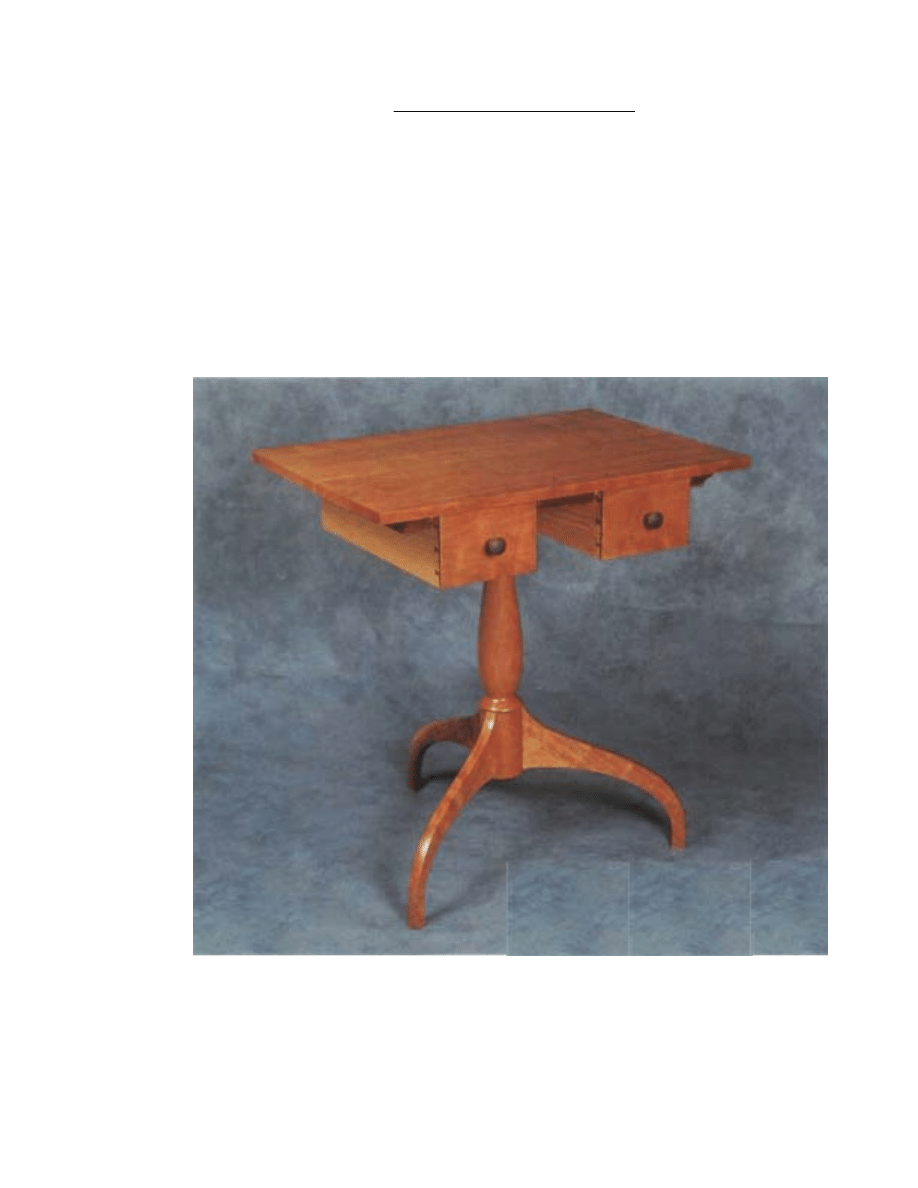
SHAKER-STYLE
PEDESTAL STAND
Cherry, Walnut, White Pine
Copyright 2004 Martian Auctions
59
MAKING THE SHAKER STYLE
TWO DRAWER PEDESTAL STAND
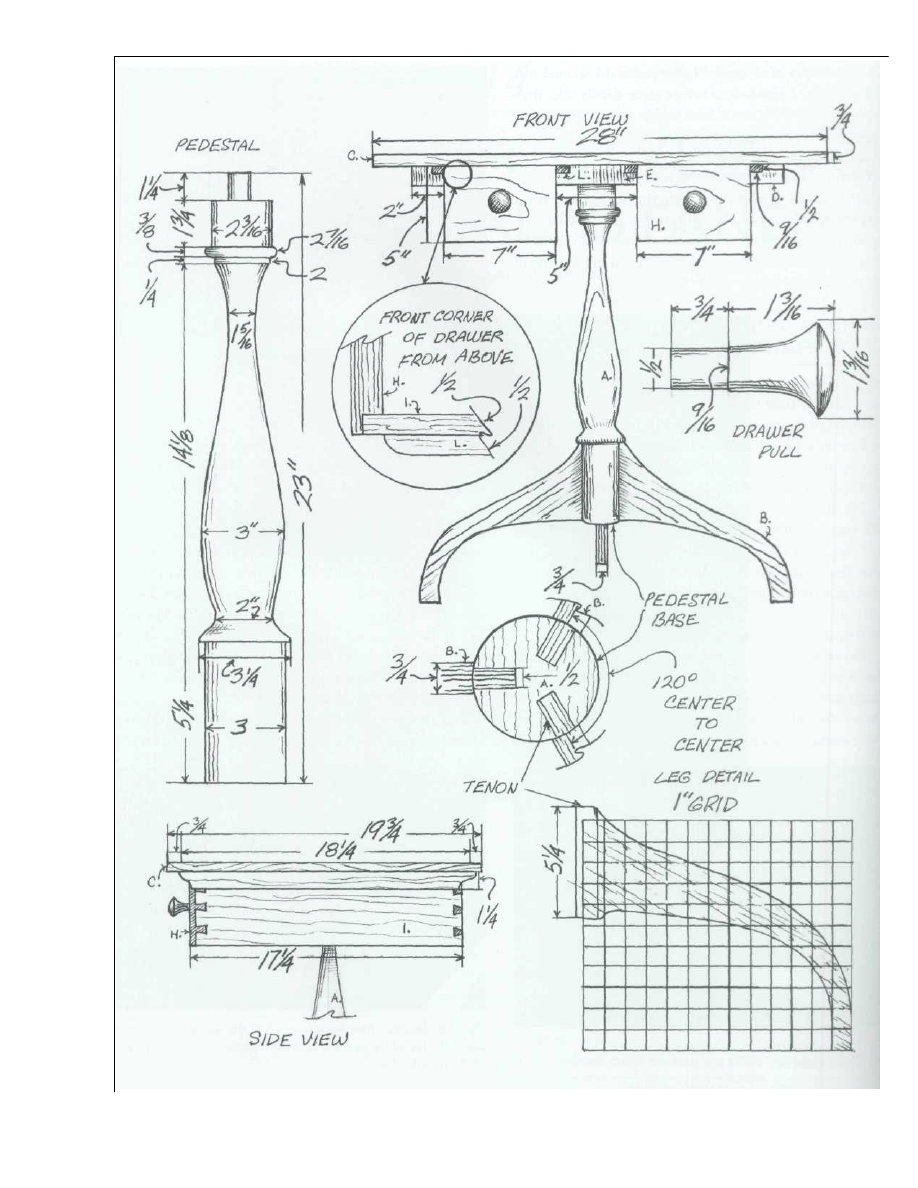
After the stock has been dimensioned, glue-up the top
panel and set aside to cure. The pedestal is turned next.
Although the arrangement of coves, beads and vases will
be determined by the craftsman's individual tastes, there
are two areas along the length of the pedestal that must
be shaped to meet the requirements of joinery.
The first of these is the very top section, the one that
will eventually become the tenon fitting into a mortise cut
into the center cleat. In order to create at this location a
joint that would lock more positively than would a round
tenon in a round mortise, I decided to cut that tenon into
a l"X 1" square. This meant that the diameter of that top
section could be turned to no less than 1 7/16".
The second area requiring special attention is the base
into which the tenons (or sliding dovetails) are fit. The
exact diameter of this section is, of course, up to the discre-
tion of the individual craftsman, but it is very important
that a consistent diameter be maintained along the full
5 1/4"
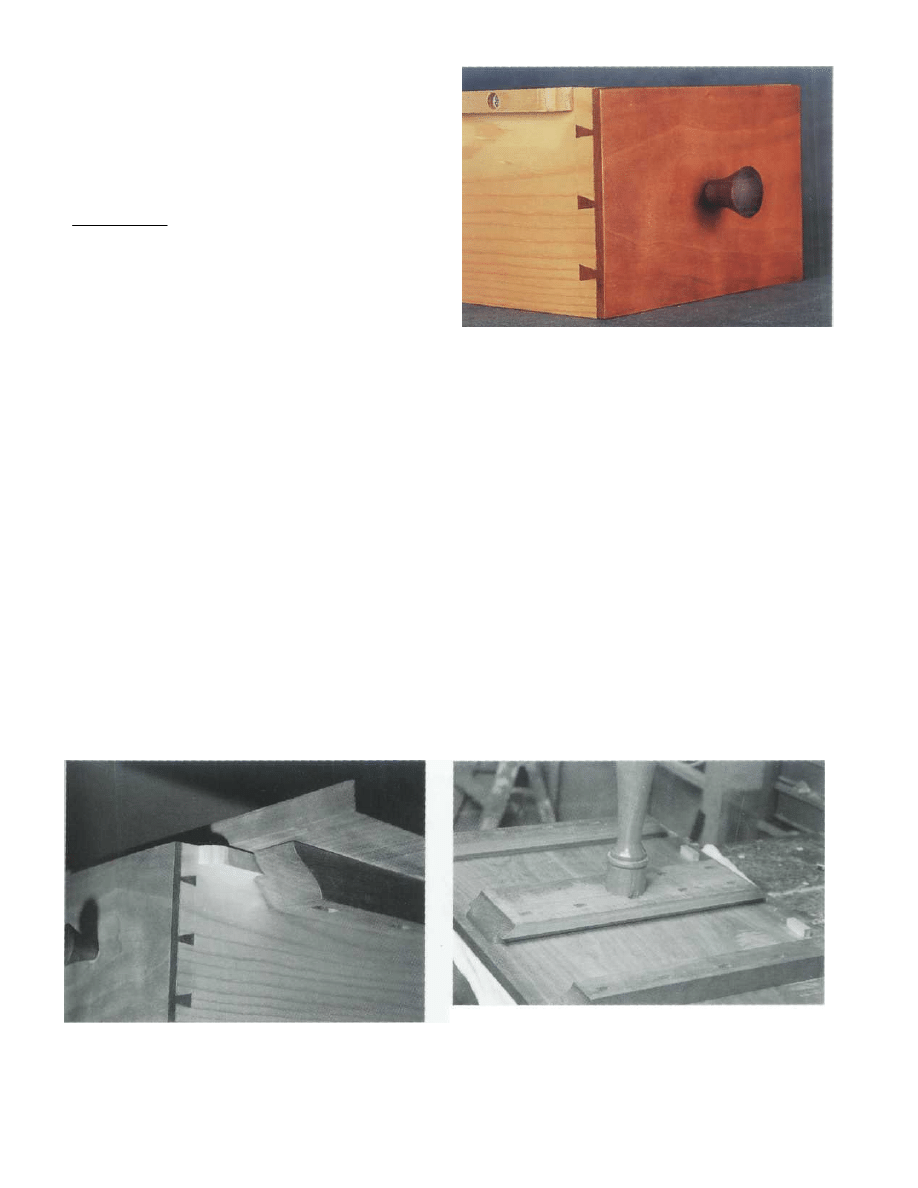
The walnut drawer pulls contrast nicely with the cherry drawer
fronts.
length of this section because the shoulders of the three
legs will be fit tightly against this turned face, and any
variation in diameter will result in gaps at those shoulders.
The next step, which is taken before the work is removed
from the lathe, is marking leg locations on the base of the
pedestal. This can be done by using the lathe's indexing
head. Briefly, an indexing head is a disk centered on the
lathe's axis that is divided into thirty-six sections, each
representing 10° of the disk's circumference. On my lathe,
there is a spring-loaded peg that can be set into any of
thirty-six holes marking these divisions. To locate the cen-
terline of the first leg, I release the peg into any of the
holes, locking the work into that position. Then, with the
tool rest snugged against the base of the pedestal, I draw a
line along the 5 1/4" base. This line marks the centerline
of the first leg. To find the second line, I remove the peg,
rotate the work, allowing the peg to slide into the next
1
Here, a drawer runner can be seen
sliding into its rabbet.
2
After the cleats have been fastened to the top, glue the tenon
at the top of the pedestal into the mortise cut into the center of
the middle cleat.
Copyright 2004 Martian Auctions
60
Copyright 2004 Martian Auctions
61
hole. This process is repeated until I have worked my way to
the twelfth hole. Here, I draw another line along the tool rest,
marking the centerline of the second leg. Then, counting out
twelve more stops on the indexing head, I arrive a: the
centerline for the third leg.
Although the indexing head simplifies the process of
dividing the circumference of the pedestal base into three
equal sections, there is an alternative requiring only a com-
pass, a pair of calipers and a rule. First, with the calipers and
a rule, determine the diameter of the base. Then, multiply half
of that diameter by 1.732. Separate the points of the compass
by this distance, and position the stationary leg of the
compass at any point on the cylinder's circumference. Make a
line along the tool rest at that point. Then, make a second line
at the point at which the opposite leg of the compass is
farthest from the first line. Then advance the compass so that
its stationary leg rests on this second line. Finally, draw a
third line along the tool rest where the opposite leg of the
compass is farthest from the second line, completing the
process of dividing the circumference of this cylinder into
three equal sections.
Fit the three legs of this stand into 5
1/4
" long sliding
dovetails cut into the base of this pedestal. To this point, I've
cut the joints on every pedestal table I've made by hand, and it
is inevitably a laborious process. To cut the dovetail mortise, I
place the pedestal between 1 "-thick blocks of Styrofoam held
in place by a towel wrapped in tape, securing the entire,
awkward assembly in my vise. This method works but it is
slow and a bit clumsy.
The dovetail tenons are even more difficult to cut. I begin
these by scoring lines which mark the shoulders on the faces of
the 3/4"-thick legs. Then, crowding the teeth of a fine-toothed
backsaw against the waste side of this line, I cut the shoulders.
Complicating this process even further is the fact that the
shoulders have to be undercut so that they form a sharp knife-
like edge. This is necessary so the shoulders make tight contact
with the round base. Maintaining an accurate alignment along
the full 5 1/4" length of these shoulders is very tricky, but not
as tricky as cutting the face of the dovetail. This cut begins on
the end grain of the leg and, like the shoulder, was a full 5 1/4"
long. The saw delights in wandering to one side.
After having made several of these stands with hand-cut
sliding dovetails, I'm ready to suggest some alternatives. First,
if I were to make another with the dovetail joints, I would take
the time to build a fixture that would allow the dovetail
mortises to be cut with a router while the pedestal is still
mounted on the lathe. A reeding or fluting fixture would work
nicely for this purpose. The tenons, of course, could be
readily cut on a table-mounted router.
But I really believe that, if I were to make another of
these stands, I would drop the dovetail joints and switch to
mortise-and-tenon construction. Not only would this be
much easier to cut, it would, I think, result in no loss of
strength since it would provide an equal amount of glue
surface and, at least in this particular application, there is
little mechanical advantage to the dovetail joint
After profiling the legs on the band saw and fitting their
tenons into the mortises cut into the pedestal, flatten and
smooth the tabletop (see chapter five) and cut to its final
length and width. Then, profile the ends of the cleats on the
band saw, and cut rabbets for the drawer runners.
Using a backsaw, cut the tenon at the top of the pedestal
to its 1"X 1" final size. Cut a matching mortise into the
center of the middle cleat. Dry-fit this to the tenon.
At this point, fasten cleats to the bottom of the tabletop
using no. 12 wood screws passing through oversized holes
(holes that will allow the top to expand and contract in
response to seasonal changes in humidity) in the cleats.
Build the drawers with through dovetails at the back and
half-blind dovetails at the front. Screw drawer runners to the
tops of the drawer sides and fit them to the rabbets in which
they will slide. Turn and install pulls. Fasten drawer stops
(two blocks of wood screwed to the underside of the top)
into place. The piece is ready to finish.
Copyright 2004 Martian Auctions
62
Wyszukiwarka
Podobne podstrony:
Table Shaker pedestal table
Stand Building a Plant Pedestal
Stand Display Pedestal Plans
oak dining table
Coffee Table 1
Audyt wewnetrzny (SGHowy) Stand Nieznany (2)
table style2, ♥Dokumenty
table cellspacin5, ❀KODY RAMEK I INNE, Ramki
table border (2)
Foresight Resolution Table
Chess Table
arkusz ang stand pr cz2 A
lumber cut off stand
Stand.V.8 kom, Wycena gruntów
multiplication table
bassinet and stand
więcej podobnych podstron