The Eel's Head Brewery
Something evil stirs beneath the famous seaside Eel's Head Brewery. Four people are dead. Can
the PCs get to the bottom of the mystery?
The Eel's Head Brewery is an adventure for 4 to 6 level one PCs. It is designed for use with
the Castles & Crusades
®
game system, developed by Troll Lord Games.
Credits
Design, Writing, Editing, and Maps
Robert MacAnthony
Playtesting
Matthew O. Boley, David L. Burgan II, Andrew Felling, A. John Miskowiec
All artwork is derived from public domain images. All art, including maps, was produced using The Gnu Image Manipulation Program (GIMP)

The Eel's Head Brewery
Aegis
About This Adventure
This adventure is designed for use with any
existing campaign. No reference is made to a
specific campaign world or setting, and the Eel's
Head Brewery and the village of Srilkind are
described only in general terms with respect to
their surroundings. While the setting is described
here as a mountainous, sea-side locale, as the CK,
you should feel free to fill in or alter details to
better fit within your game setting.
This PDF is optimized for on-screen
viewing, the font size chosen so that an entire page
can be displayed on most computer screens with
the words remaining legible. Links are provided
within the document for easy navigation between
descriptions of encounter areas and monster stats,
new spells, and the like.
2
Copyright
© 2010 Aegis
TM
Games. Aegis
TM
is a trademark of Sigil
Writing Services
TM
(
sigilwrites@gmail.com)
. Castles & Crusades
®,
C&C
TM
, and CK
TM
, are trademarks of Chenault & Gray, LLC. This
adventure is best used in conjunction with the C&C
TM
Player's
Handbook and Monsters and Treasure books, published by Troll
Lord Games.
For a printer-friendly version (with a smaller
font size and lacking the graphical elements
and borders of this PDF), please e-mail
sigilwrites@gmail.com.

The Eel's Head Brewery
A Brief History of the Brewery and Surrounds
The famed Eel's Head Brewery sits on a
rocky outcropping just outside the fishing village
of Srilkind, overlooking the cold, tossing ocean to
the west and the snow-capped mountains to the
north. Both Srilkind and the brewery have long
enjoyed relative peace, only rarely coming into
conflict with the loosely-organized goblin tribes
that travel through the area while hunting or
fishing. In recent weeks, things have changed.
Most of the history of the area concerns the
natural caverns that twist through the rock
beneath the brewery. Centuries ago, dwarves from
the northern mountains used the cool seaside
caverns as waypoints - places to rest during long
trading expeditions to the south. Eventually, the
dwarves constructed a temple at the site, cutting in
to the very rock of the natural caverns to add a
touch of refined dwarven stonework to the area.
The temple became a familiar and comforting
resting place for dwarves traveling to and from
lands north.
The dwarves were forced to abandon the
temple after an earthquake shook the region and
the sea rushed in, every inch of the structure
claimed by the cold salt water. The temple
remained abandoned for decades until it was
discovered by sahuagin, who took control of the
place and converted it into a place of worship
dedicated to their own dark shark god.
The sahuagin maintained the temple as their
own for around twenty years, but the sea slowly
receded and they too abandoned the structure as
air replaced water. In time, knowledge of the
temple passed from sahuagin lore and the place
was forgotten.
The Eel's Head Brewery was founded on the
site many years after the exodus of the sahuagin.
The ale brewed in the caverns beneath the Eel's
Head grew famous and the village of Srilkind
sprang up nearby, providing homes for brewery
workers and their families, as well as the goods
and services needed by a small village. Though
both the villagers and the brewery used the
caverns underneath as a source of natural
refrigeration for food and drink, the ancient
temple remained undiscovered.
By the time the PCs enter Srilkind, the sea
has receded further and the entrance to the temple
is just visible from the water, though it looks like
little more than a small sunken cavern. Members
of a goblin tribe discovered the entrance some
weeks ago while fishing in the area, and a bold
goblin swam through the underwater entrance and
into the chambers beyond. When he returned with
tales of air-filled rooms and passageways in the
elevated areas beyond the entrance, the goblin
tribe took up residence in the abandoned temple,
finding it the perfect place to hide from their
enemies while remaining near fish, their primary
source of food.
Now, another earthquake has shaken the
area around Srilkind, with dire consequences for
the goblin tribe and the humans in the area. As the
temple rumbled and cracked, rubble filled the
entrance, trapping members of the goblin tribe
inside. This cave-in opened access to the temple
from the caverns above - caverns used by the
brewery and villagers of Srilkind. Worse, the
earthquake opened an access route from an
underground sea, water bubbling up to form a
pool in small caverns branching from the temple
itself. This underground sea is inhabited by
sahuagin, and an ambitious young cleric named
Sektesh seeks to reclaim this long-lost temple of
her ancestors.
Brewmaster Brugni Ketilsson has dispatched
a villager named Rogmar to seek official aid, but in
the meantime brewing operations are at a
standstill.
3

The Eel's Head Brewery
Srilkind
The village of Srilkind is a village of around
sixty-five men, women, and children, many of
whom are directly involved with the Eel's Head
Brewery, and almost all of whom depend in some
way on the success of the brewery for their
livelihoods.
The village is located near the edge of the
sea, extending to the small docks provided for the
fishing boats that come and go on a daily basis.
The brewery is located atop an outcropping of rock
that extends to the northwest, out into the sea, and
which rises rapidly from the village. The distance
from the village to the brewery is around half a
mile. A single road leads to Srilkind from the
outside world, and a second, narrower road
extends from the village to the brewery itself.
Srilkind is dependent on the sea for food.
Fish serve as a primary source of meat, though
fishermen also take in seals for their skin, meat,
and fat. The eggs of seabirds are harvested from
the rocky crags around Srilkind and the brewery,
most commonly by lowering someone over the
edge of seaside cliffs on a long rope so that they
can gather eggs from the nests in the area. There
have been sightings of goblins trying to mimic this
egg-gathering activity, though they do so well
away from the village and typically flee when
villagers approach.
Other meat sources include cattle, which
roam a wide, fenced region to the east of the
village. The twenty odd head of cattle in the area
are owned by Geir Magnesson, who trades leather
and meat with the other villagers. Magnesson also
owns fifteen dairy cows, which produce most of
the milk and cheese used by the villagers. Dairy
products are often stored in the cool caverns
beneath the Eel's Head Brewery.
Many villagers also own sheep, which are
allowed to roam free, unlike Magnesson's cattle.
Brands are used to distinguish the sheep of one
man from those of another. The sheep provide
fleece and also milk to the villagers of Srilkind.
The village is loosely organized, with timber
houses scattered around a large area, most of
which have fields adjacent for growing barley, rye,
oats, beans, onions, and cabbage. Magnesson and
others also grow hay for feeding livestock.
Natural resources in the area include timber,
iron, and fur from various animals, and these are
sometimes sent south with the brewery's ale to be
traded in distant lands. The bulk of these resources
are used directly by the inhabitants of Srilkind.
Srilkind lacks 'professionals' for preparing
clothing, foodstuffs, and the like. There is no
dedicated tailor or butcher, for example. Each
family takes part in making clothing, needed
leather supplies, butter, and cheese, or preparing
fish and other meats for storage. Around twenty-
five villagers work directly with the brewery,
taking care of the day to day needs of the brewing
operation. Srilkind does have a skilled blacksmith
as well as a cooper, both of whom are largely
occupied with work at the brewery.
Srilkind has no inn, though villagers have
been known to take in travelers for a few days at a
time – for a price. Further, the brewery has
accommodations that can be made available to the
PCs should they decide to help investigate the
recent deaths.
There is little formal authority structure in
the village. A council of seven men elected by the
villagers meets once a month (or as needed) to
discuss the needs of the village and resolve
disputes. Criminal activity is rare, and when it
occurs the council addresses the matter, forming a
group to track down the criminal if necessary. The
last major crime in the village, a murder of one
young man by another, took place ten years prior
and is still a source of talk in the village.
Because of the rarity of crime, and violent
4

The Eel's Head Brewery
crime in particular, most of the villagers are
greatly concerned about the recent deaths at the
brewery. Word of the killings spread quickly, and
most villagers suspect goblins.
It is likely the PCs will spend some time
exploring Srilkind and talking to the villagers who
live there. As CK, you should be prepared for this
when running the adventure. While the basic
aspects of the village are provided here, and some
key NPCs are described in detail, the vast majority
of details about the villagers of Srilkind, the layout
of the village, and other specific characteristics, are
not set forth here. These aspects of Srilkind are
purposefully left untold because they do not
directly impact this adventure. Do not let this
hamper the actions of your PCs. Rather than
limiting the adventure, the open-ended aspect of
the description of Srilkind and its inhabitants
should be taken as an invitation to invent.
As your players move through Srilkind and
speak to the villagers, a number of side quests may
occur to you, any of which can further involve the
PCs in the daily life of Srilkind and give them an
interest in the village's welfare. Goblins may be
plundering the herds of sheep that roam free,
grazing in the grassy areas around the village. The
villagers may ask the PCs for help with this.
Goblin activity along the coast may compel the
villagers to ask the PCs to serve as 'bodyguards' as
they fish the area. Rumors of 'demons' following
the deaths at the brewery may result in the
villagers leading the PCs on a moonlit search along
the coast for evidence of these 'demons.' Many
possibilities exist. Keep in mind, however, that if
the PCs seek fame and fortune as a consequence of
solving the mystery at the brewery, they are on a
schedule. Presumably, Rogmar will return with aid
at some point and the PCs may lose their
opportunity.
The Eel's Head Brewery
The two-story stone building that is the
visible portion of the Eel's Head Brewery sits atop
a stony outcropping a half mile northwest of
Srilkind. While the building is itself impressive in
contrast to the structures in the village, the larger
part of the brewery is underground.
A narrow road leads from Srilkind to the
brewery, and while the area is rocky the road has
been smoothed and is fairly well maintained so
that carts of ale may be easily transported from
the brewery to the road or docks of Srilkind. When
the PCs first approach the brewery, they will
notice quite a bit of activity outside the building.
Workers haul sacks of provisions, or stack sacks
and crates in storage sheds around the brewery. A
stable for horses is present, with the capacity to
hold fifteen horses at any given time.
The brewery's stonework is non-descript.
While clearly well-built, there is little in the way
of ornamentation to mark the exterior of the
building. Inside, however, the PCs will see the
fruits of the brewery's success. The furniture is
fine, as are the rugs and tapestries that warm the
various rooms. Floors are immaculate in their
cleanliness.
The ground floor of the brewery includes
closets, storage areas, sitting rooms for
entertaining visitors to the brewery, and a
substantial kitchen for preparation of meals for
visitors and workers. The upper floor holds the
living quarters of Brewmaster Brugni Ketilsson, as
well as those of a handful of important workers.
Also on the top floor are a dozen well-furnished
guest rooms. Brugni will offer the PCs room and
board if they decide to investigate the deaths and
put a stop to them.
Further details concerning the brewery will
be important as the PCs talk to Brugni and look
into the recent strange occurrences. Those details
5

The Eel's Head Brewery
are provided in the section entitled “Investigating
the Deaths,' below.
Maps of the storage level beneath the
brewery, as well as the ancient temple, are
provided with this adventure. Maps of the upper
level of the brewery are not provided as the exact
layout of these areas is not important to the
adventure as written and is left entirely to the
imagination of the CK.
Eel's Head Ale
Eel's Head Ale is a rich, heady ale that is highly prized
by the nobility and the wealthy for many hundreds of
miles. Even dwarves grudgingly admit that it is an
excellent brew – considering its human origins, that is.
The secret ingredient in the ale is a sugar-rich algae that
is harvested from the ocean floor near Srilkind. This
seaweed lends a slightly sweet flavor to the ale and gives
it the faintest of blue casts in the right light. It also
smooths the drink so that the ale, which contains around
12% alcohol, doesn't taste overly strong. Unbeknownst to
even Brugni, the seaweed also contains a compound that
causes mild euphoria and may even be slightly addictive.
The PCs may notice the seaweed during interactions
with Arnfast or Groa. If Brugni discovers that they know
his secret ingredient, he will implore them to keep that
knowledge in strict confidence.
Random Encounters
The area around Srilkind is largely
wilderness, and PCs adventuring into the
surrounding hills and mountains are likely to
encounter a variety of foes. Though the present
adventure does not directly involve exploration of
the surroundings, the PCs may wish to undertake
such exploration on their own, or may be asked,
for various reasons, by the villagers of Srilkind to
perform tasks that take them into the wilderness.
The tables below provide day and night
random encounters for the area around Srikind.
The CK should consult the appropriate table every
six hours that the PCs spend in the wilderness
more than two or three miles from Srilkind. The
area immediately around Srilkind rarely has
trouble with the other humanoids in the region.
As CK, you may modify the tables at will,
adding, removing, or substituting creatures to
better conform to the your game world.
Day Time Encounters
D100 Result
Creature Encountered
No. Appearing
01-03
Ant, Giant
1d10 Workers
04-10
Bear, Black
1d4
11
Blink Dog
2d6
12-22
Dwarf Patrol
4d6
23-27
Gnoll Patrol
2d4
28
Hill Giant
1
29
Hippogriff
1
30-40
Human Patrol
2d6
41-44
Ogre
1d4
45-50
Orc Patrol
2d8
51-00
No Encounter
N/A
Night Time Encounters
D100 Result
Creature Encountered
No. Appearing
01
Blink Dog
2d6
02-12
Gnoll Patrol
2d6
13-17
Dwarf Patrol
4d6
18
Leucrotta
1
19-29
Goblin Patrol
2d6
30-35
Hobgoblin Patrol
2d6
36-40
Human Patrol
2d6
41-51
Orc Patrol
2d8
52-58
Spider
1d6 small or 1d4
medium
59-65
Wolf
3d6
66-00
No Encounter
N/A
Details concerning each of these encounters
6

The Eel's Head Brewery
are provided in the section labeled 'Foes,' below.
Attention should also be paid to the verisimilitude
of the world. The goblin tribes in the area tend to
stay near the coasts, while the other humanoids
are spread throughout the mountains and hills
north and south of Srilkind, though as a rule none
venture terribly close to the village or brewery. If
the party encounters a gnoll patrol in a given area,
give thought to whether it is reasonable to provide
an orc patrol in the same area six hours later. It
may be that the orcs are pushing beyond their
territory and into that of the gnolls, but such
encounters should be handled in a way that is
plausible given the setting. Of course, the decision
as to how to handle random encounters ultimately
rests with the CK.
Involving the PCs
As CK, you may of course use any suitable
hook to involve the PCs in the goings on at the
Eel's Head Brewery. One of the easiest ways to
involve them is to simply have them happen upon
Srilkind and the brewery in their travels and, over
the course of discussions with villagers, learn of
the recent deaths at the brewery.
A more engaging means of involving the
PCs entails their meeting of Rogmar Sturlusson
and learning from him of the trouble at the
brewery.
With the last set of deaths at the brewery,
Brugni became concerned and dispatched Rogmar
to plead aid from the lord or other authority
responsible for Srilkind and its surroundings. The
authority structure of the region will vary
depending on the game world in which this
adventure is used, as well as the location of the
village and brewery in that world.
The PCs may encounter Rogmar at an inn or
roadhouse as he journeys to seek aid for the
brewery. Over the course of a few drinks, the PCs
will learn Brugni's troubles. In all likelihood, the
PCs are familiar with Eel's Head Ale, though it is
unlikely they have tasted it, for it is quite costly
and Brugni maintains a sense of exclusivity by
picking and choosing to whom he will sell the ale.
As Rogmar spins his tale of the deaths at the
brewery, and his mission to seek aid, it should
become clear to the players that it will be some
time before Rogmar reaches his destination, and
that even more time will pass before he returns
with aid (if in fact he can secure any). An
enterprising PC might realize that the party could
reach the brewery, look into the deaths, and
potentially solve the mystery before Rogmar
returns with 'official' aid.
Thus, either with or without the knowledge
of Rogmar, the PCs may set out for the Eel's Head
Brewery. The PCs will likely contemplate a reward
for their efforts. Further, because of the reknown
of Eel's Head Ale, they may realize that whoever
solves the mystery at the brewery is likely to make
a name for themselves. For a low-level party, this
may prove to be quite an inducement to the PCs.
Dramatis Personae
The section below provides detailed
information on a handful of important NPCs. Of
course, these are far from all of the inhabitants of
Srilkind and the surrouding area. As CK, it is up to
you to breathe life into the area as a whole, and as
such you should feel free to introduce other
personalities into the adventure as necessary.
Brugni Ketilsson
Brugni Ketilsson is current
proprietor and brewmaster of the
Eel's Head Brewery, a position he
has held for over thirty years.
He is
an affable man, though his good
nature turns deadly serious when
7

The Eel's Head Brewery
the topic of discussion turns to running the
brewery and the recent tragic events in the caverns
below.
Though Brugni sent a messenger named
Rogmar for 'official' help, he will respond
favorably to any offer by the PCs to help with the
troubles beneath the brewery. The deaths have
caused brewing to stop, and Brugni is not only
worried about the monetary loss he is incurring,
but also the damage to his reputation if orders for
his fine ale are not met. He is also concerned that
whatever lurks in the caverns below will
eventually gather its courage and move into the
brewery proper, or even into the village of
Srilkind.
Brugni has no wife or children, his work at
the brewery occupying his every waking moment.
If the PCs delve into deeper discussions with the
man, they will learn that, though he never
married, he once had a son who has long-since
died, a casualty of one of the rare skirmishes with
the goblin tribes in the area. Brugni will offer little
more than surface details about his son's death,
and if pressed by the PCs, will make it quite clear
it is not a subject he wishes to discuss.
Further, the recent death of his apprentice
Marek has caused him some anxiety, both because
he grew to care about the young man and because
Marek came from a fairly wealthy merchant
family. Brugni has sent word of Marek's death to
the man's family, but has not yet received a
response. Though he is not overly worried, he is
somewhat anxious that Marek's family will hold
him responsible for the death of their youngest
son.
Arnfast Farmaor
Arnfast is a grizzled fisherman
who has spent his entire life
fishing the coast along Srilkind.
The PCs are unlikely to
encounter him in Srilkind unless they are up just
before dawn, when Arnfast makes his way to his
small boat to set out for the day, or just after dusk
when he returns with the day's haul. If the PCs
look for him during the day, they will spot his boat
somewhere within a couple of miles to the north
or south of the Srilkind docks. The precise location
is within the discretion of the CK. If the PCs spot
Arnfast's boat and hail him, he will come ashore,
provided he has seen or heard them, and tell the
PCs his thoughts about the strange goings on near
the brewery.
If the PCs encounter Arnfast in Srilkind, he
will be short with them. His days are long and he
is either just setting out or returning after a long
day fighting the waves and gathering fish and
other items. If the PCs persist in questioning him,
he will tell them only that he has seen some
unusual things along the coast lately. If he is just
setting out for the day, the PCs will be able to
persuade him to talk for a moment, but if he is
returning for the evening, he will tell them to seek
him out during the day, when he has more time.
Arnfast has seen some curious things in
recent weeks, one of which is merely interesting,
the other disturbing. Of interest is the fact that
goblins have been active in the waters near the
brewery of late. More than once, Arnfast has seen
them from a distance, braving the waves in their
poorly-built fishing vessels. Although it is not
unheard of to encounter goblins fishing the local
waters, these encounters typically occur further
north, not in the waters just near the brewery.
Arnfast is not sure why the goblins have chosen to
fish in this area, but the groups he has encountered
have always been small and though they have seen
him they have not threatened him in any way.
Nevertheless, Arnfast has kept his distance from
them. Arnfast has not told Brugni of the goblin
presence because he deemed the threat to be small
and was worried that, given the death of Brugni's
8

The Eel's Head Brewery
son at the hands of goblins, the Brewmaster would
overreact. If the PCs do not already know Brugni
had a son who was slain by goblins, Arnfast will
tell them.
The more disturbing activity has all
occurred within the past month. Arnfast has seen
strange, humanoid shapes in the waters near
Srilkind and the brewery. He has seen these shapes
only around dusk or dawn. Arnfast describes
bulbous eyes watching from a distance – eyes that
seem to reflect the faint light of early morning or
dusk. Once, he saw a number of these creatures
lumber ashore just north of the brewery and
describes them as 'demons' who walked like men
but were finned, with long, webbed fingers
silhouetted against the sky.
The presence of these 'demons' has so
disturbed Arnfast that he will not fish near the
outcropping on which the brewery is perched, nor
anywhere to the north of there, near dusk or
dawn. He begins his day fishing to the south, then
covers the territory near the brewery and further
north during mid-day, returning to the waters to
the south as the day draws to a close.
If the PCs encounter Arnfast in his boat,
they will notice, in addition to fish, a large mass of
blue-green seaweed in the boat. If the PCs
question Arnfast, he will tell them that the
seaweed is used as a food source. In fact, the
seaweed is a special component of the Eel's Head
Ale, but Arnfast will not divulge this secret.
Groa Farmaor
Groa is the wife of Arnfast the
fisherman. She is referred to as
'crow' by many of the villagers,
and has a relatively dour
disposition. She is also given to
fits of frenzied emotion, and
lately her nerves have been more on edge than
usual because Arnfast has confided in her about
the presence of the 'demons' in the water, though
he has sworn her to secrecy.
In the mornings, the PCs may see her
carrying sacks of provisions from her tiny home in
Srilkind to the brewery. Often, she is carrying fish
or other foodstuffs for the workers at the brewery.
Twice a week she carries the dried seaweed that
the brewery uses for its ale. The PCs will not be
able to determine what she is carrying at any
given time unless they search her sacks or, as a less
invasive alternative, ask her. She will freely tell the
PCs what she carries, unless it is the seaweed, in
which case she will make something up.
If the PCs press her concerning the deaths at
the brewery, she will become agitated, though she
knows nothing directly about the deaths other
than the names of the victims and that they died
violently. If the PCs continue to pry, she will let on
that her husband has seen strange things along the
coast. She will not volunteer details, but if the PCs
are persistent, she will eventually tell them, in a
hushed, fearful whisper, that Arnfast has seen
'demons' in the water. After this revelation, she
will be practically beside herself and will take to
her bed for two days, unwilling to talk further.
Even after that she will not be of much use to the
PCs, for she knows nothing else about what is
going on.
Sektesh
Sektesh is a sahuagin cleric
who discovered the ancient
temple beneath the brewery after
the most recent earthquake
opened access into the temple
from the subterranean sea.
Sektesh plans to use this discovery to advance her
position within sahuagin society, and thus has not
revealed its existence to any but her most loyal
9
No
Image
Available

The Eel's Head Brewery
servants. This failure to disclose the temple's
existence to the sahuagin hierarchy is fortuitous
for the PCs, because the number of sahuagin
reinforcements available to help Sektesh as the PCs
delve into the depths of the temple is limited.
Sektesh is canny and will use every
advantage that presents itself to her, including
greater numbers, knowledge of the layout of the
temple, and the presence of water-filled areas
within the temple and surrounding natural
caverns. She cannot communicate directly with
the PCs, but if defeat is unavoidable she will do
her best to surrender, biding her time until she can
make an escape and plot the PC's eventual
downfall.
Entering Srilkind
This section details the sights seen by the
PCs upon entering Srilkind, as well as the general
reaction to them by the villagers. As with other
portions of this adventure, no detail presented here
is set in stone. As the CK, you can and should vary
them in order to conform with your game world.
For example, as described below the villagers take
an extremely dim view of half-orcs. If, in your
game world, half-orcs are quite common or tend to
be well-received, simply alter the reaction of the
villagers accordingly.
The road into Srilkind crests a small rise
before desceding into the village itself. The PCs
will notice the village spread out over a fairly wide
valley that extends to the very shore of the sea.
Sparse bushes and scrub trees dot the landscape.
Timber houses are scattered around the area, most
of which have crop fields adjacent to them. The
road that takes the PCs into Srilkind extends to the
rough center of the village, then simply dissipates
into nothing. At the far edge of the village, a series
of three docks extend into the cold ocean water.
The brewery is off to the right of the village as the
PCs travel along the road, a separate, narrow road
extending along the rocky outcropping on which
the brewery is situated.
As the PCs enter the village, they will not
draw much attention from the villagers. Travelers
to and from the brewery are known, and the
villagers will not be surprised to see the PCs either
walking along the road or traveling on horseback.
If the PCs include elves, gnomes, or halflings, they
will notice lingering looks, for while the existence
of these races is known in Srilkind, representatives
of the same are not often seen. Dwarves do travel
through the area on a regular basis and will not
elicit any surprise from the villagers. As a rule, the
villagers will be kind to the PCs. The one exception
to this is when the PCs include one or more half-
orcs. The half-orc race is viewed with distrust and
even outright scorn by the villagers.
If the PCs hail any of the villagers, they will
find they are, in large part, happy to talk to
outsiders, though if the work day is not yet at an
end, the villagers will beg off any lengthy
conversation in order to return to their duties. If
the PCs did not encounter Rogmar and learn of the
troubles in Srilkind, but rather are just fortuitously
passing through the area, it will not take them
long to learn of the deaths at the brewery – it is
the topic of nearly every conversation.
Investigating the Deaths
Upon reaching the brewery, the PCs will be
well-received once it becomes clear to Brugni they
are there to help. Brugni will offer room and board
for the period of time covering the PCs
investigation. He will also offer up to 150 gp per
PC, though he will start negotiations at a smaller
number. The production of Eel's Head Ale is at a
stand-still, and Brugni is eager to resume his
operations.
10

The Eel's Head Brewery
Encounter Areas
Storage level
1.
Stairs to Brewery
This narrow stairway leads from the
brewery building into the cool caverns beneath.
The stairs are old and cracked, though serviceable
and easily traversed. At the bottom of the stair a
thick wooden door opens into the cavern area.
As the PCs make their way down stairs and
open the door into the caverns, they will
experience a noticeable drop in temperature and
smell the ocean, heavy on the air. The sound of the
ocean is also fairly loud here, amplified by the
cavern walls.
During the day, the caverns are dimly lit, as
daylight from outside penetrates somewhat into
this area. At night this area will be dark. Sconces
are present at regular intervals along the walls of
the cavern, and each holds a torch that the PCs can
light.
2.
Exit to Ocean
The caverns open onto the sea at a height of
about fifteen feet above the surface of the water.
The PCs will see the white-crested waves beneath,
breaking against the cliff into which the cavern is
formed. During daylight hours, the PCs may see
Arnfast's boat in the distance.
3.
Site of First Two Deaths
Numerous casks of ale and barrels of hops,
grains, and other foodstuffs line the walls, stacked
up to three barrels high. Brugni will show the PCs
where the first two bodies were found. The dead
were workers charged with maintaining some
degree of organization in the caverns and hauling
barrels or casks back and forth between the
brewery and the caverns as needed.
Though the bodies have long-since been
removed, evidence of violent death remains. Dark
blood stains the floor and one grain barrel has
been ruined, a jagged, gaping hole in one side
spilling grain onto the hard stone floor. Apart from
the removal of the bodies Brugni has ordered that
nothing be disturbed.
Upon close examination, the PCs will notice
deep gouges along the broken barrel, near the site
of the hole. The PCs may recognize these as claw
marks, though they will not be able to determine
the identity of the creature that made them.
Examination of the floor will reveal a faint
white residue on the ground. A PC tasting the
residue will identify it as salt. If the PC has spent
much time near the sea, it will be apparent that
the residue is sea salt.
The white residue occurs in blotches
scattered around the ground. If the PCs look for a
pattern to the blotches, they will see that they are
vaguely directional, leading toward the site of the
last two deaths.
4.
Site of Last Two Deaths
This portion of the caverns is deeper, darker,
and colder than area 2, above. Like area 3,
however, it is used primarily for storage. Barrels
and casks line the wall, and a row of heavy shelves
holds items ranging from additional food and
brewing ingredients to replacement parts for the
brewing apparatus.
This is the site of two more deaths – a
brewery worker, as well as Brugni's apprentice,
Marek. As in area 3, the ground is stained with
blood. The white sea-salt residue is more
prominent here.
A pile of rubble here resulted from the most
recent earthquake, and an examination of the pile
11

The Eel's Head Brewery
will reveal that a portion of the floor has caved in,
providing a roughly three-foot by four-foot
opening to the temple, described in area 5, below.
5.
Access to Temple
White residue surrounds the opening to the
temple level and is also present on the rubble that
extends down to the temple level. The area below
is pitch dark, but use of a torch of other light
source will reveal the floor of a corridor some
twelve feet below the level of the cavern.
Characters can climb down the rubble and
into the temple level with little difficulty, though if
more than one PC is one the rubble at a time there
is a 25% chance a potion of the rubble will break
free, causing the characters on the rubble pile to
tumble to the floor of the temple below. This will
not damage the character, but it makes a loud
noise that reverberates in the quiet of the temple.
Temple Level
The temple level is subject to minor flooding
with the tides, as the cave in at area 2 does not
render the structure air-tight. Although tide
calculation is difficult and changes with the
seasons, for ease of description assume the two
high tides are twelve hours apart, with low tides
halfway between them. For example, high tide at
6:00 a.m., low tide at noon, high tide at 6:00 p.m.,
low tide at midnight. This is a vast
oversimplification, but makes it easy to
incorporated tidal changes into the adventure.
At high tide, the temple level is under about
six inches of water. PCs traveling at this time will
have to deal with the possibility of getting
equipment and other items wet. They will also
make a good deal more noise while navigating the
temple during these times. The water recedes by
around three hours after high tide, and slowly
begins to creep back in around three hours before
the next high tide. Once the water has receded the
temple is free of standing water except at the pools
present in the natural cavern formations and the
area of standing water in the kitchen (area 7).
For every hour the PCs spend exploring the
Temple Level, there is a 20% chance they will
encounter two
sahuagin warriors
. If the sahuagin
spot the PCs first, they will seek out a good place
to ambush or trail behind the PCs to attack from
the rear when the PCs are vulnerable. If they
encounter such a group of patrolling sahuagin
twice, they will not encounter another as Sektesh
keeps a certain number of warriors with her at all
times.
If the PCs leave the temple to return to the
brewery for an extended period of time, the
sahuagin in the temple will discover the PCs have
been there, and in each of the encounters provided
below the sahuagin will be on-guard and
expecting company.
Further, Sektesh will have arranged a
surprise for the PCs upon their return. The
sahuagin will have cleverly concealed a barbed
fishing net in the rubble at area 2 used by the PCs
to climb down into the temple. When the first PC
descends the rubble to return to the temple level,
two sahuagin near the door to area five will pull a
rope, causing the net to close around the PC. If the
sahuagin are successful in capturing the PC in the
net, they will immediately drag him down the
hallway toward them, where they stab repeatedly
through the net until the PC is dead. If the other
PCs have not pursued, they will drag the corpse of
the dead PC through area 12 and into the pool
leading to area 13, where the body can be
consumed at leisure. If the PCs engage the
sahuagin at the area where they have set their
trap, the sahuagin will do their best to kill any
captured PCs (the goal being reduction of the party
by at least one member) and then attempt to flee
12

The Eel's Head Brewery
back to area 13.
A final note on the sahuagin – the temple
area includes numerous pools of water and under
water areas. Sahuagin will need to return to these
areas regularly. Sahuagin in are 12, for example,
will take turns returning to the pool of water in
the corner of the room to avoid drying out, which
can ultimately be deadly to a sahuagin. Some
sahuagin warriors may also be under the effect of
Sektesh's new Sea Skin spell (see the section
entitled “New Spells,” below).
1.
Entrance
The PCs can enter this area in two ways. If
the entrance has been discovered from the outside,
while exploring the rocky shoreline of the ocean
around the brewery, PCs may swim into area 1
from outside. If the PCs entered the temple
through the cave-in at area 2, they can enter this
area by excavating the rubble between the two
areas. If the PCs enter from area 2, both the sound
of waves crashing against the rocks from just
beyond the entrance, and the ebb and flow of the
water filling the entrance will tell them they are
nearing the outside.
The entrance area is a small natural cavern
that slopes down and away from the temple itself
until the opening is submerged. Any PCs in this
area will hear the crash of waves from the ocean
just outside the entrance. Any PC wishing to swim
out of the cavern to the sea beyond will have to
travel thirty feet underwater before emerging on
the other side.
Rubble fills the area between the entrance
and area 2, preventing movement between the
two. A party of four PCs could clear out enough
rubble to allow passage with about six hours of
sustained work.
Two poorly-crafted goblin canoes are also
here, the wood cracked and warped with age. Each
can hold two PCs for a time, though water will
begin to seep into the boat as soon as the PCs
climb in.
2.
Cave In
The cave in has cleared an area for the PCs
to descend into the temple from the brewery
caverns (see the description of the brewery, above).
PCs can descend only one at a time, though the
descent is not particularly difficult or dangerous I
the PCs descend one at a time.
Any light source the PCs have will reveal
damp stone walls forming a corridor ten feet wide
and ten feet high. Carved into the stone of the
walls are broken images whose details are hard to
discern. To the north, the corridor continues into
the darkness. To the south, the passage is filled
with debris, preventing movement in that
direction.
A PC closely examining the walls will see
that the images carved into the walls were once of
dwarves, with a variety of scenes depicted, ranging
from battles with orcs to dwarves hard at work at
their forges. Most of these carvings have been
smashed, the rock chipped away in crude fashion.
A few rough images of sharks or other fish have
been carved into the walls at various intervals.
The PCs can clear out the rubble to area 1
should they wish to do so. A party of four,
working diligently, could clear out enough to the
rubble to pass in around six hours. As CK you
should make clear to the players that such an
action would create a fair amount of noise. The
monsters residing within the temple will not
remain idle while the PCs conduct their
excavation.
3.
Natural Cavern
This natural cave formation ends at a dark,
cold, salt-water pool. This pool provides the means
13

The Eel's Head Brewery
by which the sahuagin enter the temple. It leads to
a vast underground sea inhabited by the sahuagin
and other creatures, both deadly and benign.
Without magical aid, no character can swim far
enough to emerge in the air space above the
underground sea – the distance is simply too far.
PCs entering the pool and exploring the immediate
area should realize fairly quickly that they cannot
swim under water long enough to use this pool as
a means of travel.
This cavern is typically empty, but there is a
25% change that two
sahuagin warriors
will be
here at any given time. If present, the sahuagin
will attack the PCs with tridents or claw and bite
attacks. They will fight fiercely, but if one is killed
the remaining sahuagin will attempt to escape into
the pool. (insert Continuing the Adventure – The
Underground Sea).
4.
Meeting Chamber
This room was once used as a meeting room
by dwarves stopping at the temple as they passed
through the area. Wooden components of the
furniture, as well as tapestries that once adorned
the walls, have long since rotted. The body of a
goblin lies near the center of the room. The
hapless creature has been eviscerated, its entrails
scattered messily. A PC examining the goblin's
wounds will see that the goblin was not killed
cleanly, as with a blade, but appears to have been
torn open.
5.
Meeting Chamber / Goblin Barricade
This room is identical in most respects to
room 4, above, and in fact served the same purpose
when the dwarves built the temple. Presently, it
differs from room 4 in that nine
goblins
have
barricaded themselves inside, trying desperately to
protect themselves from the sahuagin that have
invaded the temple. The door is barricaded from
the inside with lengths of wood and iron spikes. A
PC can force the door open with a successful
strength check (CL 3).
The goblins are terrified, and will not attack
the PCs immediately, recognizing that the PCs are
not sahuagin. They have been trapped within the
temple since the earthquake caused the cave-in at
area 2 some weeks prior. None of the goblins speak
common, but if the PCs attempt to communicate
with them and do not act in an overtly threatening
manner, the goblins will communicate what they
know of the layout of the temple (which includes
every area except areas 6, 13, and 14) in exchange
for the PC's promise to help them escape. The
leader of this ragtag group is named Gribok, and
he will lead any attempts at communication with
the PCs.
The goblins are tired and weak, and as CK
you may decide that none of them are at full hit
points. If given no other choice, the goblins will
put up a spirited fight to the death.
6.
Dwarven Armory
The entrance to this area is concealed by a
secret door cunningly hidden by the various
carvings on the wall of the temple chamber. PCs
actively searching for the secret door may be able
to find it, though the dwarven stonework
concealing it is so good that the CL for finding the
secret door is 5.
The first thing the PCs will note upon
entering the room is that it is free of water
damage. Even when the temple was submerged,
the fine craftsmanship of the secret door prevented
the room from filling with water. The sahuagin
never discovered the room during their occupation
of the temple, and thus the room remains
undisturbed.
This room was an armory, used for storage
and minor repair of armor and weaponry when
14

The Eel's Head Brewery
the dwarves occupied the temple. Bits and pieces
of armor are strewn about the room, and there are
two full sets of dwarf-sized ring mail present.
There is also a partially complete suit of dwarf-
sized splint mail, along with the necessary
components to complete the suit of armor. Other
bits of armor and standard weaponry can be
placed here at the discretion of the CK.
Hanging on the far wall are four exquisitely-
carved dwarven warhammers. Though these are
not magical, the workmanship is extraordinary
and the metal is unblemished despite the passage
of time. Each hammer will sell for 50 gp on the
open market, and may be worth more to a
collector.
Shelves are set in the north wall of the
room. They are filled primarily with rivets, scraps
of leather or cloth (much of which is falling apart),
or various tools used for the repair of armor. In
one drawer, a large leather bound book is present
in an oiled leather case. The book is written in
dwarven and details the dwarven part of the
history of the temple, described in the background
section, above. In addition, it appears to have been
used as a guest book, to log the names of travelers
who stayed in the temple on their way to or away
from the dwarven Kingdom to the north.
7.
Kitchen
This large room includes a central block of
stone, five feet by five feet, carved from the very
ground of the room. The stone was used for
butchering meat and other food preparation
during the time the dwarves inhabited the temple.
Now, the flayed, eviscerated body of a goblin is
sprawled atop it. Two wooden doors are present
along the northeast wall of the room.
The western corner of the room includes a
large cooking pit, and around the pit lay the
scattered stone blocks of a chimney that once
stood around the pit, a rusted, brittle iron door
laying amidst the rubble. Observant characters
will notice a series of ventilation holes in the
ceiling where the chimney once vented into the air
spaces above the temple level.
The cooking pit has long been unused and is
now home to three
urchins
who traveled into the
temple with the high tide and remained in what
has essentially become a tide pool in the cooking
pit. The urchins are black and it is hard for the PCs
to see them in the dark water. When the PCs near
the edge of the water, however, the urchins attack
by shooting spines containing a paralytic poison.
The sound of fighting or other noises from
this room may draw the attention of the sahuagin
in area 12.
8.
Storeroom
This small area was once used to store food,
drink, spices, and the like for use in the kitchen. A
row of shelving is carved into the stone of the
northeastern wall, though nothing of value
remains on the shelves. The tattered remains of
sack cloth and bits of broken glass are all that are
left, and even the sack cloth will disintegrate if the
PCs pick it up.
9.
Storeroom
This area is identical to area 8, above, except
that the moldy, crumbling remains of a number of
kegs are present. The lowermost shelf carved into
the northeast wall has a secret compartment that
can be discovered by a PC searching that area.
Inside is a scroll well-preserved in an oiled leather
case. It is not a magical scroll, but rather a recipe,
set forth in dwarven script, for brewing of a strong
dwarven stout. The recipe will be of value to
Brugni, as well as to the dwarves in the north who
will be grateful for the return of this lost recipe.
15

The Eel's Head Brewery
Because the recipe includes some dwarven secrets,
a dwarf in the party would likely be opposed to
turning it over to Brugni or selling it to a highest
bidder.
10.
Antechamber
The door leading into this area is locked and
has not been disturbed either by goblins or
sahuagin.
This area was once a nicely furnished
antechamber where the dwarven head of the
temple could sit with visitors and talk at length.
Nothing of value remains, however. Bits of tattered
tapestry hang from the walls or lay in clumps on
the floor. The wood of fine chairs and an elongate
table now lay, soft and molding, on the hard stone
floor. Though no creature has entered this room
since the dwarves abandoned the temple, it is clear
that seawater did manage to infiltrate it, and all
furniture and tapestries are ruined beyond salvage.
11.
Priest's Quarters
This room served as a bedchamber for the
dwarven priest in charge of the temple. A tattered
and mold-covered mattress lies atop a stone
support caved from the floor up. The quality of the
stonework and remains of the mattress tells the
PCs this was once a fine room indeed.
Beside the bed sits a wooden chest. It is
locked, but the mechanism is old can can be easily
picked. Further, the condition of the wood is such
that the chest can be easily broken apart. Inside
the chest are four bottles of thick, clear glass. Each
is stoppered and sealed with wax so that the
contents are well-preserved. Unfortunately, the
labels that were affixed to the bottles have long
since been destroyed by the encroaching water
over the years, leaving only a faint residue where
the labels were once affixed to the bottles.
The liquid inside is a clear, odorless fluid,
and by all appearances could be fresh water. In
actuality, each is a potion of Cure Light Wounds.
12.
Temple
This high-ceilinged room was once a place
of worship for the dwarves who built the temple.
Now, the statue of the dwarven god that once
looked out over the worshippers here lays on the
floor, cracked into hundreds of pieces, the image of
the god purposefully broken and chipped away by
the coarse tools of the sahuagin.
In place of the dwarven statue that once
stood at the center of the room stands a
tremendous statute of a shark, its body upright and
emerging from the likeness of a spray of water, its
mouth open to reveal terrible teeth. The eyes of the
statue are set with amber, which reflects any light
source the PCs bring into the room as they survey
the corridor to the northwest.
In front of the shark statue stands an altar
carved of multi-colored coral. Brown, red, and
orange swirl through this crude structure. A
residue like rust or dried blood covers its upper
surface. The back of the altar has an open area
with small shelves carved into its structure. On
these shelves are two scrolls and two bottles, also
carved of coral.
In the southern corner of the room is a deep
saltwater pool 12a that leads into area 13.
This room is inhabited by four
sahuagin
warriors
. If they heard fighting or other noise from
beyond the door to this area, two will be hiding in
the northeast alcove, one in the southwest alcove,
and one behind the coral altar, waiting to surprise
the party as they enter. If they did not hear any
noise, they will be busy dragging pieces of the
fallen dwarven statute into the pool 12a.
Two of the sahuagin warriors wield tridents,
and two wield longswords. When combat starts,
16

The Eel's Head Brewery
one wielding a longsword will remove a small,
glass bottle from a pouch at its side an attempt to
smash it against the altar (preferably by smashing
it against the altar, though by throwing it if need
be). This sahuagin will be the one hiding behind
the altar if sahuagin are hiding to surprise the
party.
When the glass bottle smashes against the
altar, it will break and blood will splash across the
surface of the altar and begin running down its
sides. The coral altar appears to absorb the blood,
which disappears into the altar as into a sponge.
The eyes of the shark statue begin to glow and at
the start of the next round any sahuagin within
fifty feet of the altar will be under the effect of a
bless spell.
The sahuagin in this room are under strict
orders from Sektesh and will fight to the death.
If the PCs defeat the sahuagin in this room
and then leave the temple without pushing on to
area 13, Sektesh will have two sahuagin warriors
waiting for them in pool 12a upon their return.
A search of the altar will turn up two
additional bottles of blood. In order to activate the
altar, the blood must be from a warm-blooded
creature. At least one of the bottles contains
human blood. The sahuagin employ an
anticoagulant to ensure that the blood remains
liquid.
Also found in an open space at the rear of
the altar are two scrolls. The spells on the scrolls
are spells Sektesh has been developing for her own
use (see the section entitled “New Spells,” below).
13.
Natural Cavern
This natural cavern formation contains the
remains of half-eaten goblins, as well as those of
any PCs who have died earlier if their bodies were
taken away by sahuagin. Apart from these
remnants of meals, the area contains a fair amount
of rubble and numerous stalactites and stalagmites
that were reduced to mere stumps long ago when
the sahuagin first occupied the area and these
caverns were all under water.
An emaciated goblin named Trikit hides
near the center of the narrow corridor that loops
back on to itself from area 13. He has created a
hiding space in an indentation along the corridor's
wall and floor and sleeps beneath a mound of
rotting, tattered cloth and other debris. If the PCs
make noise, he will come to investigate, peering
from the corridor into the main portion of area 13.
If the PCs spot him and give chase, he will flee to
his hiding place, which the PCs will find with little
difficulty if they search along the walls and floor
near the remains of stalagmites that litter the area.
Trikit is terrified of the sahuagin and he is
certain his tribe has been decimated. He is
scatterbrained and inconsolable, unless the PCs
met the rest of his tribe in area 5 and let them live.
If the PCs are able to communicate to Trikit that
some of his tribe yet live, he will settle down and
will tell the PCs what he knows. Admittedly, he
knows very little, other than that an apparent
leader of the 'fish demons,' whom Trikit describes
as wearing gold bracelets and a necklace, dwells
beyond the pool in area 13a.
Trikit is a coward at heart and will not agree
to any course of action that includes him
venturing into the pool or into other areas where
sahuagin may be encountered. If the PCs threaten
to kill him unless he undertakes such missions, he
will be reduced to a howling, sobbing state,
writhing on the floor and begging for his life (and
likely attracting unwanted attention with his
noise). If the PCs carry out their threats of harm,
Trikit's mental state will just devolve further.
Having given the PCs what little
information he has, Trikit wishes to be led back to
the other members of his tribe, where he and his
fellows can be escorted to safety. Barring that, he
17

The Eel's Head Brewery
wants to go back to his hiding place while the PCs
get rid of the sahuagin or, more likely in Trikit's
estimation, the sahuagin get rid of them.
The pool in area 13 has a glyph of warding
inscribed over it. The glyph is a blast glyph and
can only be seen if read magic is cast on the edge
of the natural cavern at the far end of the pool. The
first non-sahuagin to enter the pool sets off the
glyph, which does 2d4 hit points of damage.
14.
Sektesh
The PCs will emerge into this cavern via the
pool at its center. There is no other entrance or exit
from the room. The room is lit by two torches, and
PCs swimming carefully into the cavern will see,
before they emerge, that it is lit, and also see
shadows of at least two sahuagin near the edge of
the pool.
If the PCs have entered the temple, and then
left at least once, their presence is likely known to
Sektesh. In this case, Sektesh and the four sahuagin
warriors in the room with her will be on alert. If
Sektesh has no reason to suspect the presence of
the PCs, she and her warriors will be at relative
ease here in their sanctuary.
When the PCs arrive,
Sektesh
and her
warriors
will not be in the water. Sektesh has been
experimenting with her new Sea Skin spell (see the
section entitled New Spells, below), and she and
her immediate guard spend more and more time
out of the water under the effects of the spell.
The sahuagin warriors are standing at
various points throughout the cavern, talking in
their own harsh language or passing the time in
other mundane ways. Sektesh herself, wearing an
ornate necklace and golden bracelets, is crouched
before a brazier in one corner. The brazier contains
no coals, but is filled with pieces of coral and
various fish and animal bones that Sektesh uses in
her divinations. Sektesh's belongings are detailed
in the section entitled 'Foes,' below.
Once the presence of the PCs is noted,
Sektesh will order her warriors to attack while she
casts spells from a distance. They will do so
visciously, though if Sektesh is personally
threatened they will attempt to rally around her.
Sektesh will cast Aspect of the Shark on herself if
she is forced to fight at melee range, but if all looks
hopeless she will attempt to surrender with the
goal of escaping later, and perhaps killing one or
more of the PCs in the process.
Alternate Ending
Provided below is an alternative scenario for
wrapping up the adventure. Modifying the
adventure as outlined below will raise the
difficulty level substantially.
In the alternate ending, each aspect of the
adventure is exactly as described above, except
that areas 13 and 14 are on a lower level than the
rest of the temple and are entirely underwater.
Thus, the final battle with Sektesh and her minions
will take place in an underwater environment.
Also, the goblin Trikit is not present.
The PCs will likely find the prospect of
confronting the sahuagin underwater to be quite
forbidding. They are not likely to find magical aid
in Srilkind, though potions and the like may be
available at the discretion of the CK. A better
alternative is to allow the PCs to use their own
ingenuity to develop a plan to confront their
aquatic foe.
Depending on the technology level of the
world in which this adventure is used, the Eel's
Head Brewery may have any number of items that
will help the PCs. Tubing, valves, containers, and
the like can be used to construct makeshift
containers for air to help the PCs breathe
underwater. Lacking these things, the PCs may
acquire animal skins rubbed with fats and oils to
18

The Eel's Head Brewery
render them impervious to water. These may be
used as air bladders to allow the PCs to breathe for
a period of time while exploring the underwater
areas.
Keep in mind, however, that sahuagin are an
intelligent foe. It is quite likely that they will direct
at least a portion of their attacks at the PC's air
bladders or other equipment designed to help the
PCs breathe underwater. Further, the sahuagin are
much quicker than the PCs underwater, and will
use their speed advantage wisely. Even moving
only half their speed and attacking in the same
round, the sahuagin will attempt to position
themselves such that the PCs have difficulty
attacking in return. Further, those sahuagin with
tridents will use the reach offered by that weapon
to their advantage.
Underwater exploration and combat
presents other challenges as well. For example, if
the PCs are using torches as a light source, they
will have to find another means of illumination
before descending into the water-filled areas. No
non-magical fire can be used in this environment.
Thrown weapons will be useless
underwater, and other ranged weapons suffer a -2
to hit for every five feet of range over which they
are used (e.g. firing a crossbow a distance of fifteen
feet will result in a -6 to hit the target). Normal
penalties for range apply in addition to this
underwater penalty. Further, weapons used for
bludgeoning or slashing attacks will suffer a -2 to
hit (although if the PC can improvise and attack in
a thrusting manner with these weapons, the
penalty may be avoided, though the CK should
alter the weapon damage accordingly).
Spells and spell-like effects that include fire
will also be inoperative unless the caster makes
and INT or WIS check (CL 5; use INT for arcane
spells and WIS for divine spells) in order to
successfully create the effect underwater. Further,
spells with verbal components may not be
effective underwater unless the caster has some
means of pronouncing them clearly.
While underwater, PCs also have to contend
with the possibility of drowning. A PC with CON
as a prime ability can hold his breath for a number
of rounds equal to his CON score, provided that
the PC is not exerting himself. A PC with CON as
a secondary ability can hold his breath for a
number of rounds equal to one-half his CON score,
again provided that he is not exerting himself.
While in combat or otherwise exerting
himself, a PC with CON as a prime ability can
hold his breath for a number of rounds equal to
one-half his CON score, while a PC with CON as a
secondary ability can hold his breath for a number
of rounds equal to one-fourth his CON score.
Once a PC can no longer hold his breath, he
begins to drown. Each round that a PC is
drowning, he must make a CON save, with a CL
for the first round equal to the level of the PC.
Each round thereafter, the CL increases by one.
After the PCs first failed save, he falls unconscious.
After the second failed save, he is dying, and after
the third failed save he is dead.
Foes
Detailed below are the various enemies the
PCs may encounter over the course of the
adventure. Details of all but the new monsters can
be found in the C&C
®
Monsters and Treasure book.
Scripted Encounters
Sahuagin Warrior (Medium Humanoid)
Hit Dice: 2 (d8)
AC: 16
Move: 30 (60
swim)
Attacks: Trident (1d8); Talon (1d4); Bite (1d4); Other
weapon (by type)
Special: Blood Frenzy; Darkvision 60 ft; Freshwater
Sensitivity; Light Blindness; Speak with Sharks; Water
19

The Eel's Head Brewery
Dependent (see C&C
®
Monsters and Treasure)
Saves: P
Int: High
Treasure: 1
XP: 15+9
Items: By treasure type. In addition, each sahuagin warrior
has 2d10 small coins made from coral. These are used as
money among the sahuagin but are or little value on the
surface.
Temple Level
,
Area 12
,
Area 14
Goblin (Small Humanoid)
Hit Dice: 1 (d6)
AC: 15
Move: 20
Attacks: Weapon (by type)
Special: Darkvision 60 ft
Saves: P
Int: Average
Treasure: 1
XP: 5+1
Items: By treasure type
Goblin Barricade
Sektesh (Sahuagin Cleric; Medium Humanoid)
Hit Dice: 3 (d8)
AC: 17
Move: 30 (60
swim)
Attacks: Trident (1d8); Talon (1d4); Bite (1d4); Spells (see
below).
Special: Blood Frenzy; Darkvision 60 ft; Freshwater
Sensitivity; Light Blindness; Speak with Sharks; Water
Dependent (see C&C
®
Monsters and Treasure)
Saves: M
Int: High
Treasure: 2
XP: 15+9
Spells: Detect Good, Detect Magic, Endure Elements, Bless,
Shield of Faith, Aspect of the Shark, Sea Skin
Items: By treasure type. Potion of Remove Paralysis.
Sektesh's necklace provides a +1 bonus to AC.
Area 14
Random Encounters
The following vital statistics are provided
for creatures appearing on the random encounter
tables provided with this adventure:
1.
Giant Ants (Workers): Neutral, small,
animal intelligence, HD 1d6, AC 16, primary
attributes are physical, bite attack (1d3).
Return to
Encounters
2.
Bear, Black: Neutral, medium, animal
intelligence, HD 3d8, AC 13, primary attributes are
physical, 2 claws (1d6) and bite (1d8), special
attack is a hug.
Return to Encounters
3.
Blink Dog: Lawful good, small, average
intelligence, HD 2d10, AC 16, primary attributes
are mental, bite (1d6), special abilities are blink,
darkvision 60', teleport, and twilight vision.
Return
to Encounters
4.
Dwarf Patrol: Lawful neutral, small,
average intelligence, primary attributes are
physical, special abilities are dwarf traits and deep
vision 120'.
If fewer than 10 are encountered, each will
be a first level fighter, HD 1d10, AC 15 (mail shirt
and shield, normal helm), battle axe (1d8).
If more than 10 are encountered, one will be
a Lieutenant, third level fighter, HD 3d10, AC 16
(full chain shirt), bearded axe (3d4).
If more than 20 are encountered, two
Lieutenants will be present.
Return to Encounters
5.
Gnoll Patrol: Chaotic evil, large, low
intelligence, primary attributes are physical,
special ability is darkvision 60'.
If fewer than 10 are encountered, HD 2d8,
AC 15 (scrap armor, large wooden shield), heavy
mace (1d8), slam (2d4).
If more than 10 are encountered, one will be
HD 2d8+2, AC 17 (scrap armor, large wooden
shield), flail (1d8+2), slam (2d4+2).
Return to Encounters
6.
Goblin Patrol: Lawful evil, small, average
intelligence, primary attributes are physical,
special ability is darkvision 60'.
If fewer than 10 are encountered, HD 1d6,
20

The Eel's Head Brewery
AC 15, dagger (1d4).
If more than 10 are encountered, one will be
HD 1d10, AC 16 (small shield), short sword (1d6).
Return to Encounters
7.
Hill Giant: Chaotic evil, large, low
intelligence, HD 9, AC 17, primary attributes are
physical, 2 fist (1d8), giant club (2d8), special
attack is rock throwing, special ability is twilight
vision.
Return to Encounters
8.
Hippogriff: Neutral, large, animal
intelligence, HD 3d10, AC 15, primary attributes
are physical, 2 claw (1d6), bite (1d10), special
abilities are darkvision 60' and twilight vision.
Return to Encounters
9.
Hobgoblin Patrol: Lawful evil, medium,
average intelligence, primary attributes are
physical, special ability is darkvision 60'.
If fewer than 10 are present, HD 1d10, AC
15, halberd (1d10).
If more than 10 are present, one will be HD
2d10, AC 16, halberd (1d10+2)
Return to Encounters
10.
Human Patrol: Varied good alignment,
medium, average intelligence, primary attributes
are physical.
If fewer than 10 are present, HD 1d8, AC 12,
long sword (1d8).
If more than 10 are present, one will be HD
2d10, AC 16 (mail shirt, shield), long sword
(1d8+1).
Return to Encounters
11.
Leucrotta: See New Monsters, below.
12.
Ogre: Chaotic evil, large, low intelligence,
HD 4d8, AC 16, primary attributes are physical,
slam (1d10), stone axe (1d10+3), special abilities
are darkvision 60' and twilight vision.
Return to
Encounters
13.
Orc Patrol: Lawful evil, medium, low
intelligence, special ability is darkvision 60', light
sensitivity.
If fewer than 10 are present, HD 1d8, AC 13,
battle axe (1d8) or long bow (1d6).
If more than 10 are present, one will be 2d8,
AC 14, two-handed axe (1d12+2).
Return to Encounters
14.
Spider: Neutral, small, animal intelligence,
HD 1d4, AC 14, primary attributes are physical,
bite (1d2), special attacks are poison and web,
special ability is twilight vision.
Neutral, medium, animal intelligence, HD
3d8, AC 15, primary attributes are physical, bite
(1d6), special attacks are poison and web, special
ability is twilight vision.
Return to Encounters
15.
Wolf: Neutral, small, animal intelligence,
HD 2d8, AC 13, primary attributes are physical,
bite (1d8), special attack is trip, special abilities are
scent, twilight vision, and track.
Return to Encounters
New Monsters
LEUCROTTA
NO. ENCOUNTERED: 1-4
SIZE: Large
HD: 6 (d8)
MOVE: 40 ft.
AC: 16
ATTACKS: 2 Hooves (1-6); Bite (3-18)
SPECIAL: Mimicry; Powerful Bite
SAVES: P
INT: Average
21

The Eel's Head Brewery
ALIGNMENT: Chaotic evil
TYPE: Magical Beast
TREASURE: 6
XP: 210 + 6 per hp
The leucrotta is a strange and fearsome
creature that haunts the remote, rocky regions of
the world. This large creature may appear from a
distance to be a small, emaciated horse, but closer
examination reveals its truly bizarre features – a
badger's head framing a large maw of sharp, bony
protrusions that are extensions of the jawbone
rather than actual teeth; the body of a starved cat;
legs like those of a stag ending in razor-edged,
cloven hooves.
Leucrotta are evil creatures, delighting in
the torment and misery of others. They are canny
as well, and may attack foes of greater number,
using their wits to cull weaker enemies from the
group or to cause their guard to be let down.
COMBAT: In combat, the leucrotta seeks to bite
with its powerful jaws (see below) and pummel its
foe with its deadly hooves. The creature is able to
attack to its rear as well, kicking backwards with
its hind legs.
SPECIAL: The leucrotta can mimic the voice of a
human male or female. It will use this ability to
lure unsuspecting prey, preferring to stay hidden
until the last possible moment.
The leucrotta's powerful jaws allow it to
deliver more damage when biting than a creature
of comparable size.
Return to Encounters
URCHIN, Black
NO. ENCOUNTERED: 1-6
SIZE: Small (3' diameter)
HD: 1 (d8)
MOVE: 20 ft.
AC: 16
ATTACKS: 2 spines (1d4)
SPECIAL: Paralysis (see below)
SAVES: P
INT: Semi
ALIGNMENT: Neutral
TYPE: Magical Beast
TREASURE: Nil
XP: 10 + 1 per hp
The black urchin is a member of a family of
small, marine organisms. It appears as a ball-like
organism covered in numerous sharp spines. The
creature is approximately 3' in diameter.
Each round a black urchin can fire two
spines at one or more targets. The spines do 1d4 hit
points of damage on a successful hit. In addition, a
PC struck by the spines must make a successful
CON save or be paralyzed for 1d4 turns.
Return to Area 7
New Spells
The following spells are found on the scrolls
Sektesh keeps in the temple (area 12). These spells
are of limited used to the PCs, though a wizard of
appropriate level can cast them. Effects on non-
sahuagin are provided in the spell descriptions
below.
ASPECT OF THE SHARK (Level 2 wizard)
CT: 1
R: Touch
D: 1 tn/level
SV: None
SR: Yes
Comp: V, S, M
When cast upon a single sahuagin, this spell
causes a shimmering around the head of the
creature as its head elongates and shark-like teeth
form in its mouth. The sahuagin's head takes on an
appearance somewhere between that of a shark
22

The Eel's Head Brewery
and a sahuagin. The affected sahuagin delivers a
bite for 1d6 damage rather than the 1d4 delivered
before the transformation.
In addition, the affected sahuagin gains the
senses of a shark, as detailed under the shark entry
in the C&C Monsters & Treasure book.
The material component for this spell is a
shark's tooth.
Though this spell is designed for use on
sahuagin, a wizard of another race will be able to
understand and cast it. Because the spell was
created with sahuagin biology in mind, applying it
to other races can cause deletrious effects, as
outlined in the table below.
d100 roll
Effect
01-35
The spell fails to produce
any effect
36-70
The spell works as described
above, though the
transformation causes the
recipient a great deal of pain
and results in a hideously
deformed head. There is a
10% chance that the effect is
permanent.
71-95
Transformation occurs but
PC falls unconscious
96-00
Tranformation is too great.
More of the head and body
than anticipated is
transformed, leaving the PC
a strange cross between
shark and human. This
effect can only be removed
by dispel magic. The PC
must be placed in salt water
within 30 rounds or die.
SEA SKIN (Level 2 wizard)
CT: 1
R: Touch
D: 1 hr/level
SV: None
SR: Yes
Comp: V, S, M
When cast upon a sahuagin, this spell causes
a shimmering layer of sea water to envelop the
creature. This water protects the sahuagin's skin
from drying and also allows the sahuagin to
breathe normally as it would under water.
If cast on a non-sahugain, the effect is the
same. A PC under the effect of this spell will have
to begin to hold his breath immediately, and the
rules for drowning come into play.
A PC with CON as a prime ability can hold
his breath for a number of rounds equal to his
CON score, provided that the PC is not exerting
himself. A PC with CON as a secondary ability
can hold his breath for a number of rounds equal
to one-half his CON score, again provided that he
is not exerting himself.
While in combat or otherwise exerting
himself, a PC with CON as a prime ability can
hold his breath for a number of rounds equal to
one-half his CON score, while a PC with CON as a
secondary ability can hold his breath for a number
of rounds equal to one-fourth his CON score.
Once a PC can no longer hold his breath, he
begins to drown. Each round that a PC is
drowning, he must make a CON save, with a CL
for the first round equal to the level of the PC.
Each round thereafter, the CL increases by one.
After the PCs first failed save, he falls unconscious.
After the second failed save, he is dying, and after
the third failed save he is dead.
Other PCs can assist the drowning PC by
manually scooping water away from the affected
PC's mouth, but the spell effect causes that water
to be replaced almost immediately. As CK, you can
use your discretion to determine how much help
other PCs can provide in this manner (and thus
23

The Eel's Head Brewery
how deadly this spell is to a non-sahuagin).
The material component for this spell is a
pinch of sea salt.
Modifying the Adventure
As CK, you should feel free to take this
adventure, or any portion of it, and make it your
own. You can change the plot to suit your needs or
preferences, or use different monsters so that the
adventure better fits in your existing campaign.
The information provided below is intended to
provide a few ideas for the CK to consider for
taking the adventure in a different direction.
•
Brugni is aware of the sahuagin in the
cavern and has been working with them.
The sahuagin have been providing him with
a secret ingredient for his ale, and in
exchange he has agreed to keep their
presence in the temple quiet. Recently,
though, the cleric Sektesh has risen in
position among the sahuagin and she finds
the agreement with Brugni to be an insult
and sacrilege. Sahuagin do not deal with
surface dwellers. Having consolidated her
hold on power in the temple, she has
directed attacks against the surface dwellers
in hopes of driving them from the area.
Brugni is beside himself not only because of
the deaths of the workers but because he is
afraid truth will come out regarding his
dealings with the sahuagin.
•
The water has not receded from the temple.
With the recent earthquake, the previously
unknown temple has been revealed and the
sahuagin have been provided with a way
into the caverns beneath the brewery.
Sektesh and her devotees, who despise
surface dwellers, are responsible for the four
deaths in the caverns. Once the PCs discover
the temple, the discover that the entire
structure is submerged. This variation will
present special challenges to the PCs, and
the CK should make sure that even though
the PCs are level 1, they have access to
sufficient resources from the brewery or in
Srilkind to deal with this underwater threat.
24

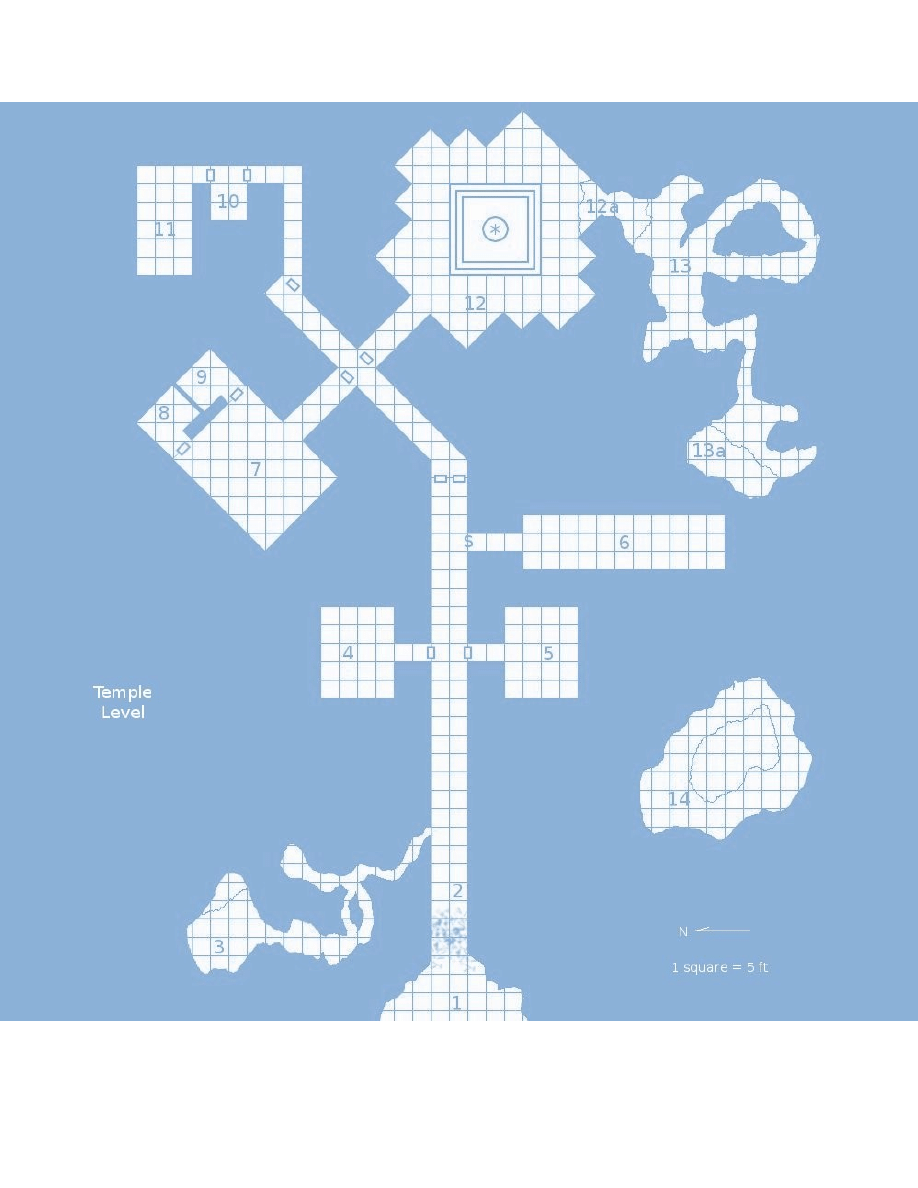
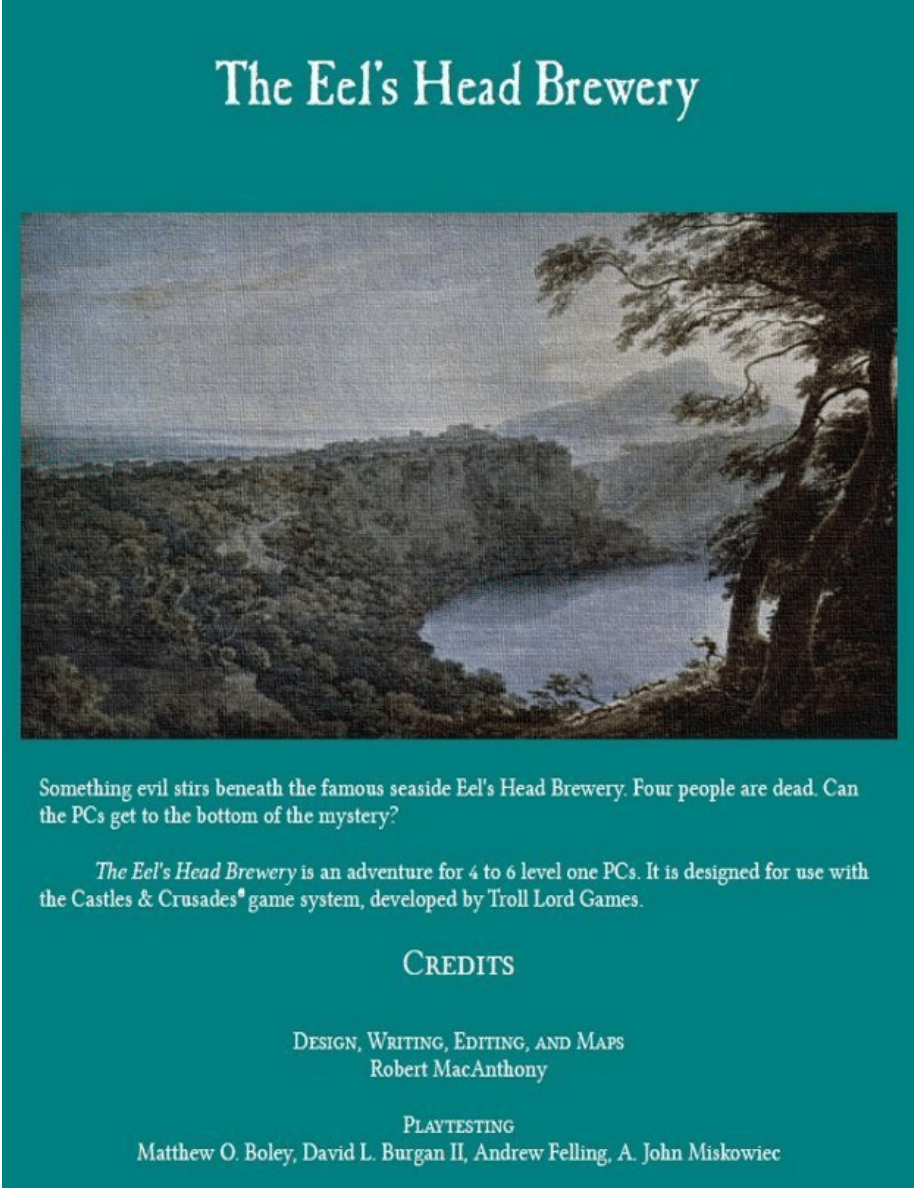
Wyszukiwarka
Podobne podstrony:
Castles & Crusades Castle Zagyg The Workhouse of Yggsburgh Town
Castles & Crusades Wilderlands of High Adventure
Castles & Crusades Errata
Castles & Crusades Inzae World Map
Castles & Crusades Multi Classing
Castles & Crusades Aihrde World Map
OSRIC The Curse of the Witch Head
Castles & Crusades Druid Pets
Castles & Crusades Monsters
Castles & Crusades Treasure Types
Castles & Crusades Martial Artist Class
Castles & Crusades Ilshara City of Jendar Map
Castles & Crusades Dragonlance Adventures
Castles & Crusades Castle Keeper's Aids
Burne Hogarth Drawing the Human head
Castles & Crusades Alternate Monster Experience Matrix
Castles & Crusades Wilderlands of High Adventure
Castles & Crusades Errata
Castles & Crusades Inzae World Map
więcej podobnych podstron