Tip #27 Everything You Wnat To Know About Sawing
Practically without exception, every project a woodworker builds begins by cutting your component
workpieces to size. If your project is comprised entirely of straight-edged stock, your cuts can usually be
performed most efficiently with a table saw. However, if you’re planning to crosscut a small amount (1”
to 6” or so) off the end of a long (8-foot or longer), narrow board, a hand-held circular saw, power miter
box or radial arm saw may be a more practical solution. Although you can perform this crosscutting
operation with a table saw, the optional saws mentioned above are more ideally suited for crosscutting
long boards since cumbersome workpieces can remain stationary while the saw blade is moved across
their surfaces.
Step-by-step tips for safer, more efficient table sawing
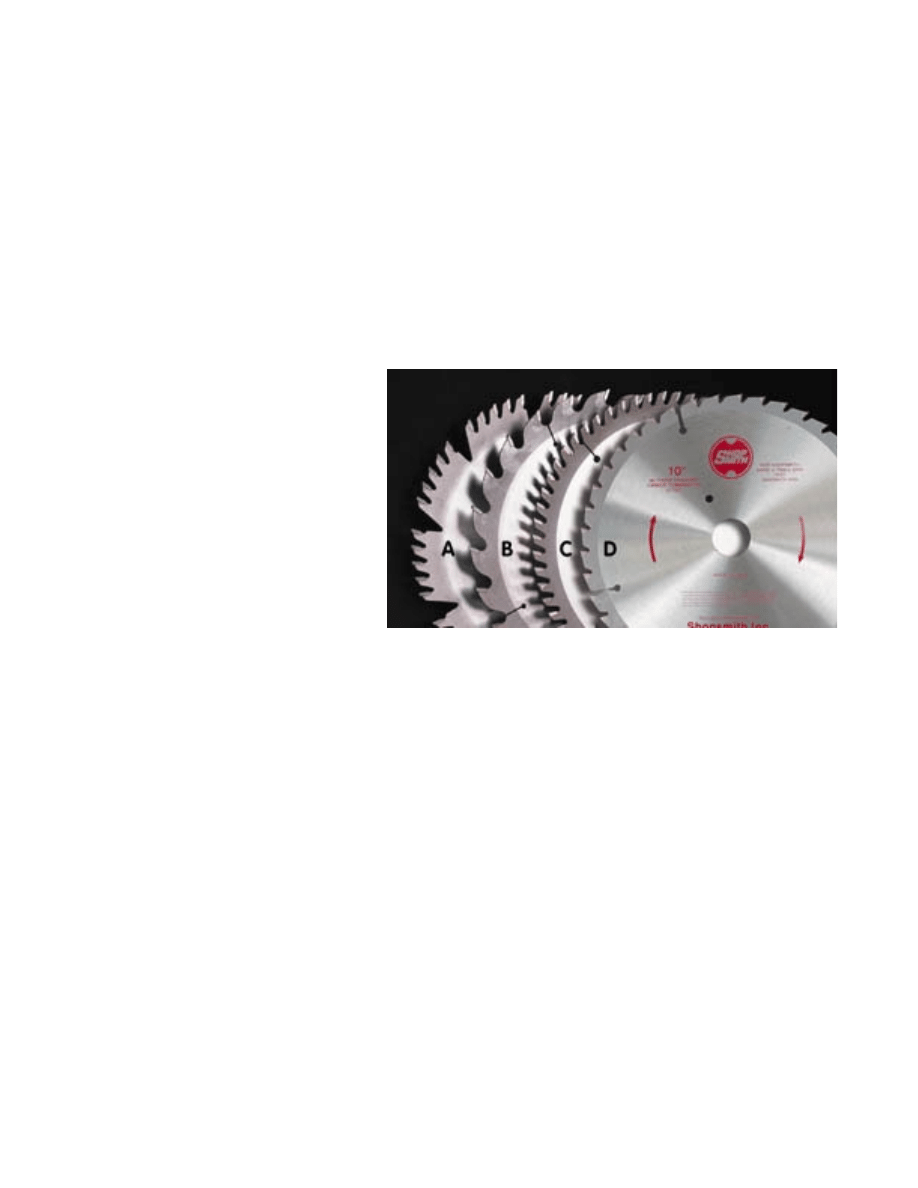
Select the right blade for the job.
There are thousands of blades available
for your table
saw...primarily, in one of the following
four configurations:
• (A) Combination Blades will
perform both crosscutting and
ripping operations on hard-
woods, softwoods, plywood and
composite boards. Although
they’re not the best blade for all
jobs, they are the most economi-
cal alternative, providing you’re willing to compromise a bit on performance.
• (B) Rip Blades have fewer teeth than a Crosscut Blade with deeper gullets. They are designed
for making the smoothest cuts when ripping boards with the grain of the wood. They should
NOT be used for making crosscuts across the grain of the wood.
• (C) Crosscut Blades have a lot of teeth and are designed for making the smoothest cuts when
crosscutting straight or diagonally across the grain of the wood. They should NOT be used for
making rip cuts with the grain of the wood.
• (D) Thin Kerf All-Purpose Blades are recommended for use when you want to maximize the
lumber you have or are cutting thick or tough woods. These blades will take a thinner saw kerf
(usually about 3/32”), which saves your wood and reduces the strain on your table saw’s motor.
• Hollow Ground Blades (not shown) are often referred to as “Planer Blades”. They’re made to be
thinner near their centers than at the outer edges to provide more clearance while making the cut.
As a result, they will make super-smooth cuts when crosscutting or ripping small amounts of
stock off a board. They should be reserved for finish cuts only and not be used for making heavy
sizing cuts.
•· Plywood Blades (not shown) are made for sawing plywoods, paneling and veneers. They offer
lots of very fine teeth (often, up to 200) to minimize splintering and fraying when cutting thin or
layered woods and can be used with equal results when crosscutting or ripping these thin materi-
als.
NOTE: For more in-depth information about Table Saw Blades and their uses, visit our July/
August, 2001 issue of Hands-On, Shopsmith’s on-line woodworking magazine. You’ll find it
in the “Archives” section under Hands-On at Shopsmith’s website —
www.shopsmith.com
Setting-Up The Table Saw To Make Your Cuts.
• Unplug your saw. Always disconnect your Table Saw
from the power while installing blades or making adjust-
ments where your hands might be in harm’s way. Once
all settings have been made, you can plug your saw back
in before proceeding with your cuts.
• Check all alignments. Be sure your saw is aligned
properly. Is the table adjusted so the miter gauge slots
are perpendicular to the face of your saw blade? Is the
rip fence parallel to the saw blade face? If either of these
are not set properly, your results will be inaccurate.
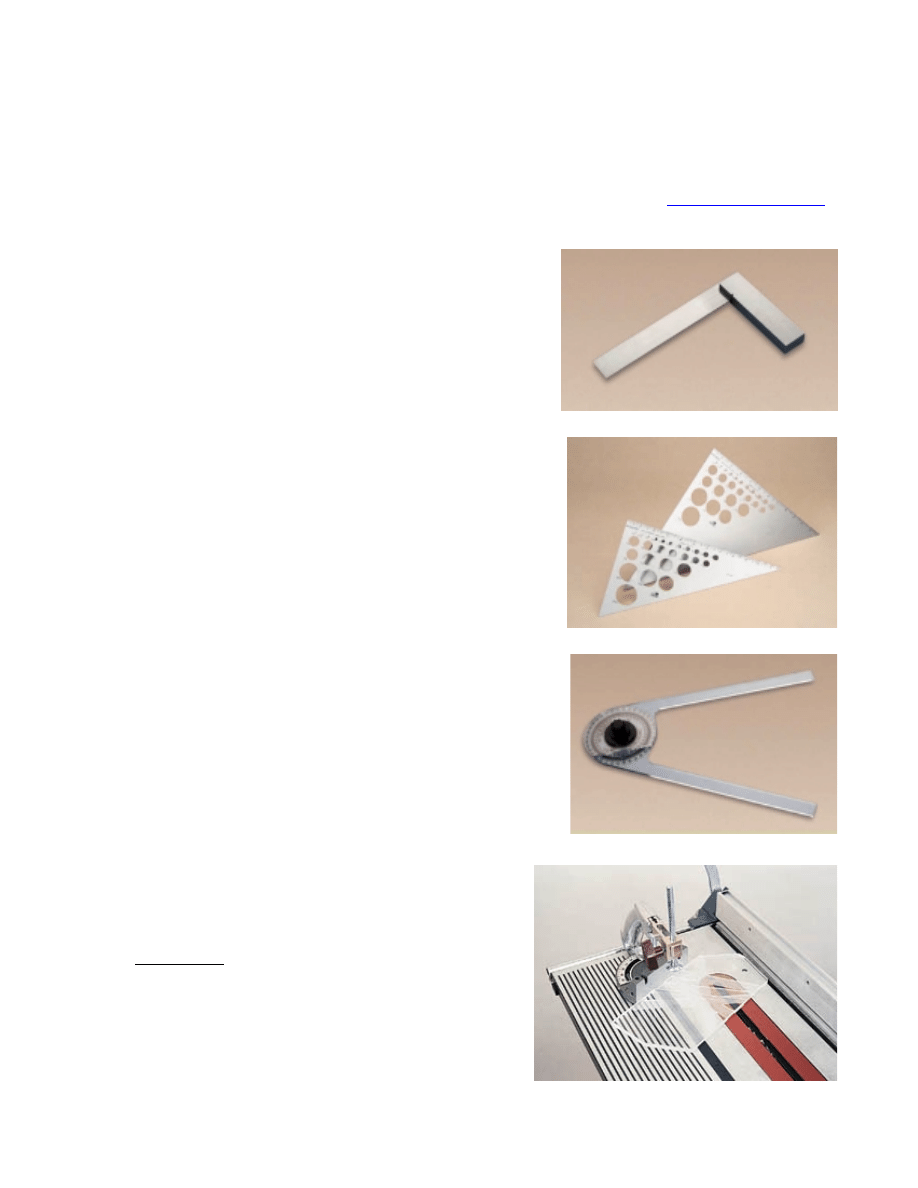
There are some excellent tools available to help you make
these settings precisely. A Steel Engineer’s Square or
set of Aluminum Triangles are great for setting your
Miter Gauge at an exact 90-degree angle to your saw
blade.
If you’re making a miter cut, you’ll need to use a Protrac-
tor/Bevel , special Angle Setter or similar device to verify
that you’ve made these miter settings properly.
Follow the guidelines in your saw’s Owner’s Manual for
the proper procedures and remember that you can’t make
an accurate cut unless your tool is set-up correctly.
• Adjust your work-guiding/holding devices. Set
your Miter Gauge, Rip Fence or other work-guiding/
holding device to make your cut.
WARNING ! NEVER attempt to make any kind of
a “freehand” cut on a Table Saw. ALWAYS use a
Miter Gauge, Rip Fence or special fixture to hold
and guide your workpiece through the cut. Failure
to use these devices will cause your workpiece to
bind and kick-back at you, causing personal injury!
Engineer’s Square
Aluminum Triangles
Protractor/Bevel
Angle Setter
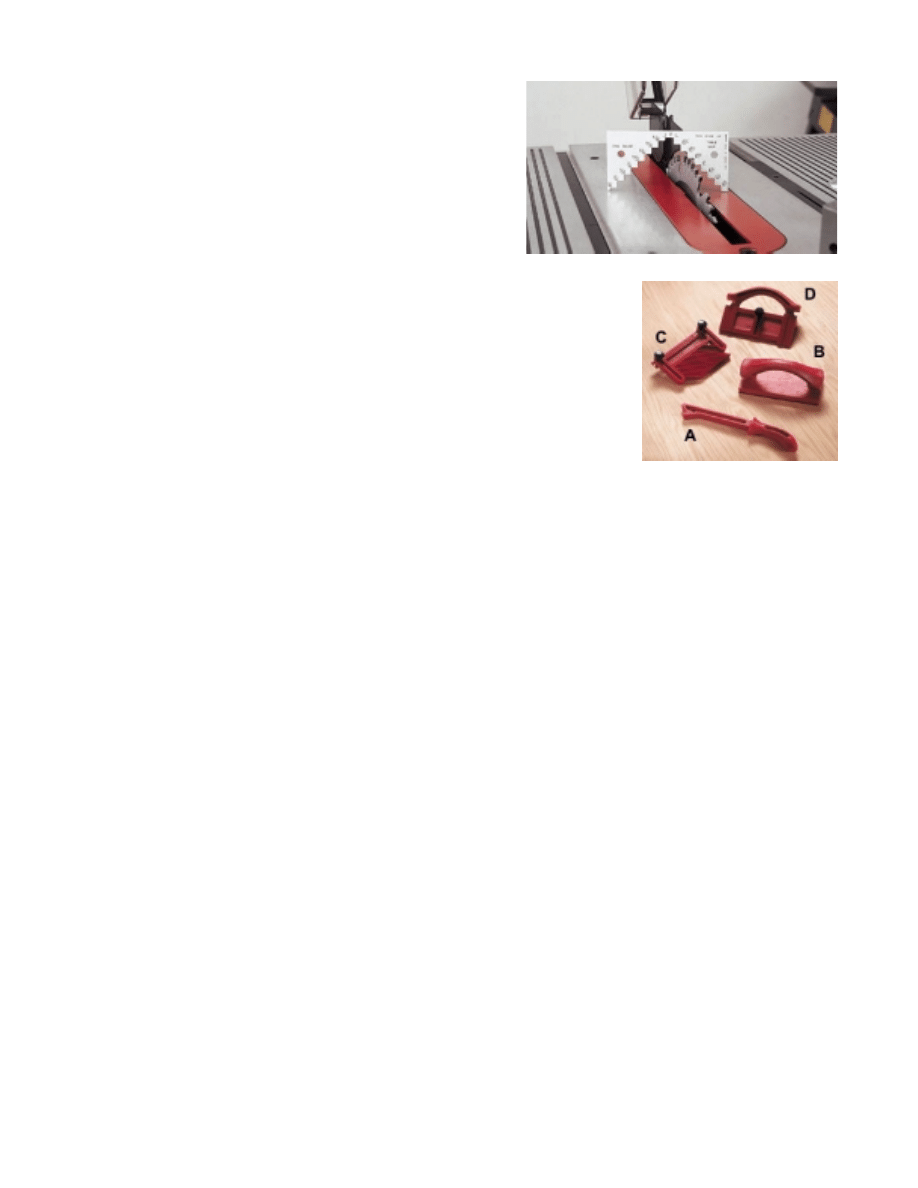
• Adjust your blade’s depth-of-cut. Set your
depth-of-cut so the blade protrudes no more than 1/
4" to 3/8” above the top surface of your stock.
This will help minimize splintering – and more
importantly – the blade will do a lot less damage to
you personally, in the event you do have an accident
while working with your saw. You can make this
setting by laying the edge of your stock against the
blade – or by using a special Stepped Gauge de-
signed specifically for this job.
• Install and use all safety devices. Always use upper and lower
saw guards, Push Sticks (A) , Push Blocks (B) Featherboards (C),
or Fence Straddlers (D) and any other safety devices that may be
applicable to the operation you’re performing. Don’t forget to wear
eye protection.
Crosscutting
Crosscutting is the act of cutting your workpiece across the grain of the wood – or “cutting to length”.
Usually, it’s best to crosscut your stock to length before ripping it to width. Why? Because it’s easier to
rip short pieces of stock than to rip long ones.
• When making crosscuts, use a crosscut or combination saw blade and ALWAYS guide your stock
through the cut with a Miter Gauge or similar work-holding device.
• Mark your cut line clearly with a SHARP pencil. Use a square to draw your line across the sur-
face and down the edge of the stock nearest the saw blade.
• Place your stock firmly against the face of your Miter Gauge and hold it in position by squeezing
the Gauge’s Safety Grip.
• Before turning-on your saw, move the stock forward until the tooth of your blade touches the cut
line you drew down the edge of your wood. Be sure the width of your blade’s teeth are on the
SCRAP SIDE of your drawn line. Loosen your grip on the Safety Grip to make this
adjustment...then grasp your stock firmly by squeezing the Grip.
• Pull everything back away from the blade again before turning on your saw and be sure both ends
of your stock will be adequately supported by your saw’s table or other auxiliary support
device...both before and after you make your cut.
• Position your body on the same side of the machine as the Miter Gauge and NOT in alignment
with the blade or the scrap portion of the stock.
Stepped Gauge
Safety Devices
Wyszukiwarka
Podobne podstrony:
everything you wanted to no about drilling
everthing you ever wanted to no about clamping
AMACOM, How to Negotiate Like a Child Unleash the Little Monster Within to Get Everything You Want
Do you want to start using stories
All you need to know about Telephony and Linux
Read this file if you want to thank me
Bon Jovi (You want to)Make A Memory
What do you want to be
where do you want to go
What You Need to Know about OCD
What you need to know about Angular 2
Do you want to be a
Live Rich Everything You Need to Know Stephen Pollan
Nial Fuller So you want to be a trader
Coins So You Want To Start Collecting Ancient Coins Web Library
Everything You Need to Know to Survive Teaching, Second edition
DO YOU WANT TO BE AN ACTOR
Kevin Mellyn Financial Market Meltdown, Everything You Need to Know to Understand and Survive the G
więcej podobnych podstron