This first step is important to understanding how the hand is constructed and were the pivot
points are. Once you are comfortable with the proportions of the hand it will be easier to draw
it in different positions. For now let's concentrate on the basic "Spread Fingered" hand. Follow
along and study your own hand as you go.
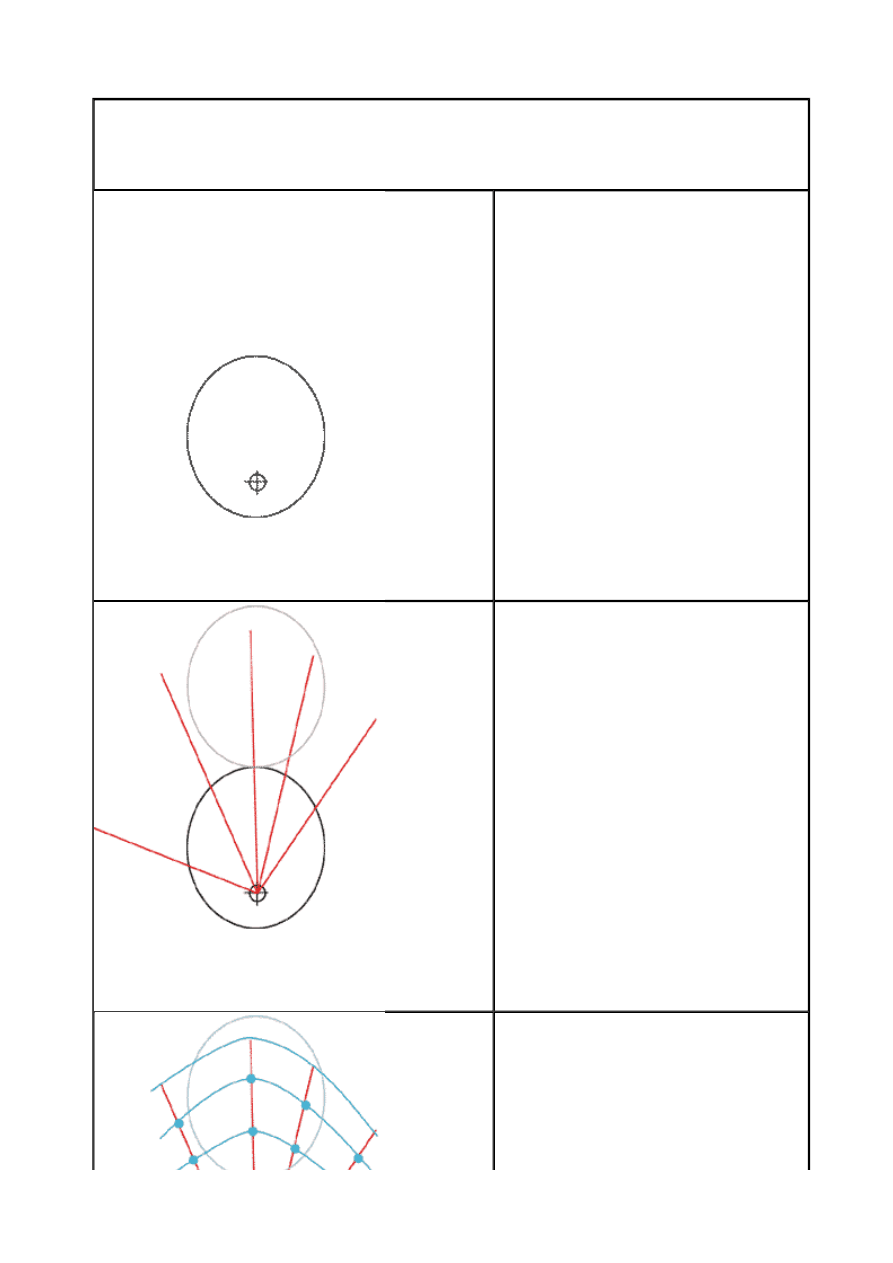
Hands : Step 1- the oval
Draw an oval. Much like the
one you see to the left.
Designate a point on the lower
center line of the oval. This is
the anchor point we'll use for
our fingers.
Hands : Step 2- radials
Draw 5 lines radiating out
from the anchor point.
The longest line will be the
middle finger...make it just
slightly shorter than 2 oval
lenghts.
Hands : Knuckle placement
The remaining finger lengths
fall on an arc from the height of
the middle finger. The knuckle
closest to the tip of the finger is
slightly less than 1/3 the way
down from the finger tip. The
next knuckle splits the
difference between the
remaining length to the top of
the palm oval.
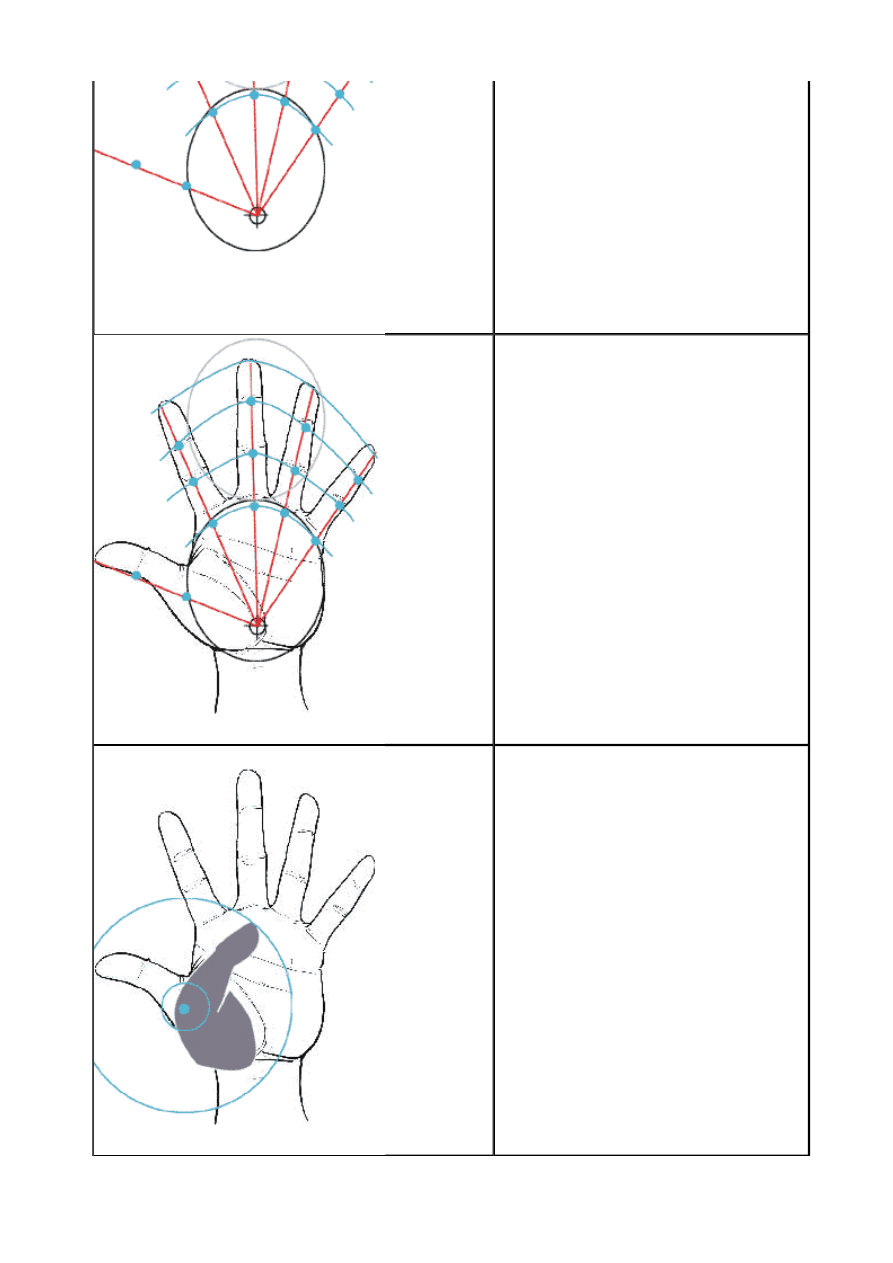
The thumb has 3 knuckles as
well but the anchoring is hidden
inside the palm.
Hands : Fleshing in
Flesh in the fingers as shown
here. The fingers start narrow
at the base..widen at the first
knuckle then taper down again
toward the tip. Believability is
added by drawing creases in
the places the hand bends the
most...at the knuckles and
along the palms. Look at your
own hand for reference.
Everybody's hand is slightly
different. This hand is
definately mine.
(Notice I am Right handed and
that's why my hand model is a
Left hand)
Hands : The opposable
Thumb
The thumb kinda has it's own
thing going on. It rotates
around on its own axis. The
thumb swings inward on its
Anchor Knuckle and bends
down at its second knuckle to
point at the base of the Ring
finger. The thumbs arc peaks at
the middle knuckle of the index
finger.
Hands : Finger lengths
The Index finger and the Ring
finger are nearly the same
height..about the halfway point
of the middle finger "tip". The
Ring finger is just slightly
longer.
The Pinky finger comes up to
the last knuckle line of the Ring
finger.
Notice how the hand is not
Square but Wedge shaped.
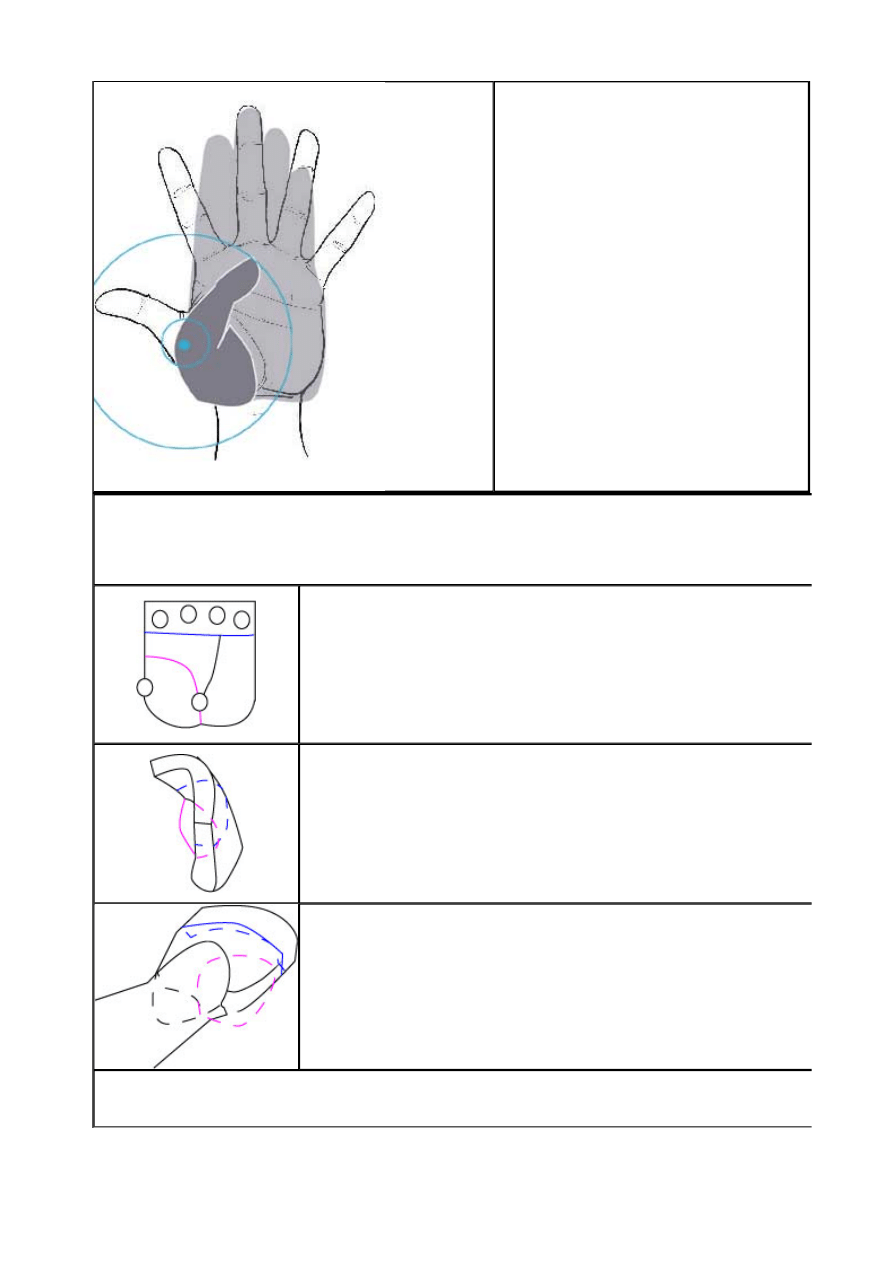
Hands are a nightmare for most artist...myself included. It's hard to contruct it in basic shapes
so I don't really try. Instead I break it up into major forms and really pay attention to where it
folds and bends. MAKE SURE YOU HAVE READ THE FIRST HAND TUTORIAL! This one
doesn't deal with proportions like the other did. This is more the form of the hand.
The hand is kinda like a
shovel...that's what we use it
for somtimes. You're palm
gives you the lines you need to
see were it bends. Above the
top blue line is the first row of
knuckles.
Don't make the hand a flat
wedge. It curves and follows
the contours of the lines on the
palm. Notice how the thumb
side of the palm pivots from the
center.
even when drawing the hand
from the back..pay attention to
the fold lines in the palm. It will
help you draw more natural
positions for the thumb and
fingers.
Below is a series of hand studies I drew based on the above diagrams. I kept some of my
stucture lines in tact so you could see what I was thinking when I drew them
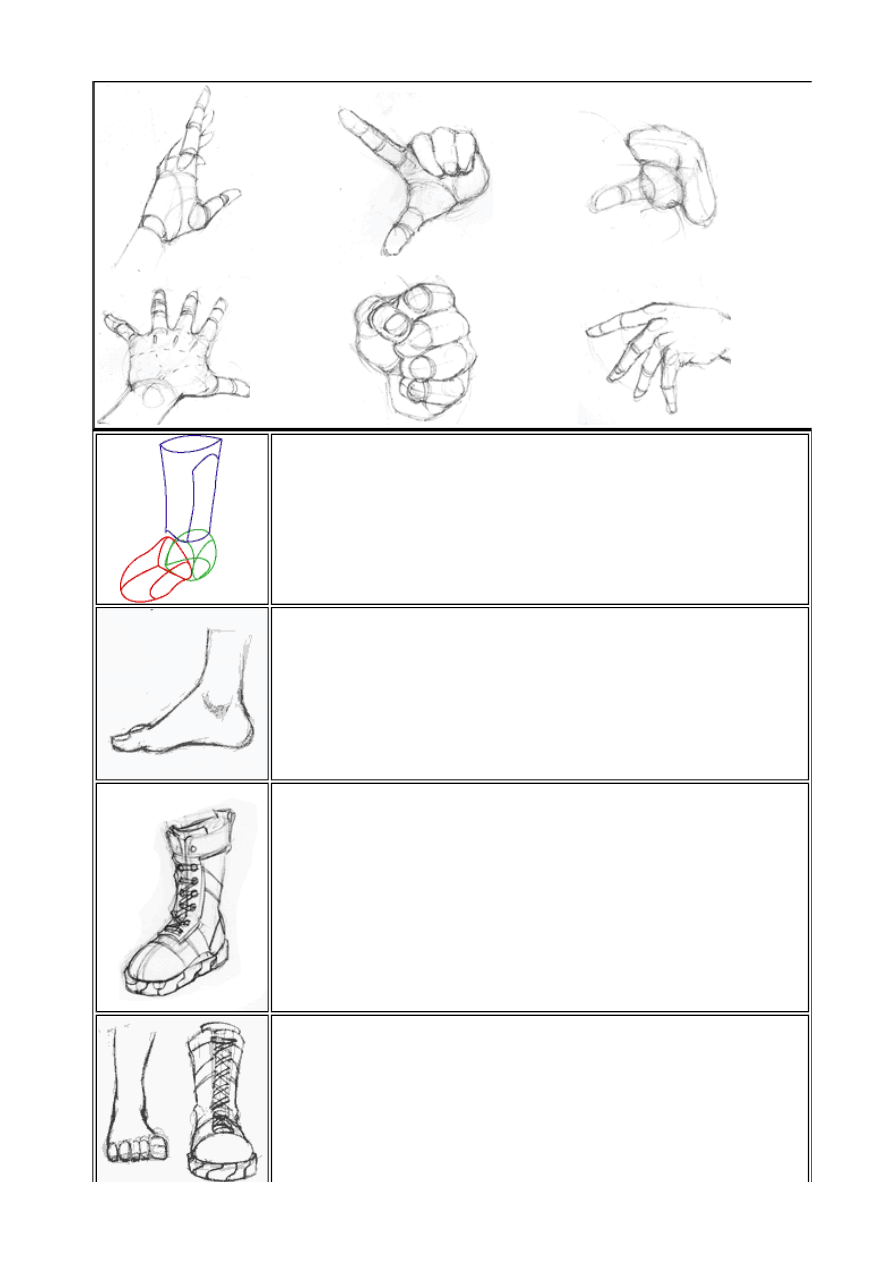
The Foot: Know your basic forms!
Like everything else you draw, the foor also consist of basic forms.
I break it down into 3 parts.
1) a cylinder for the shin
2) a half a peanut for the front
3) A roundish shape for the heel
Side view
Here you can kinda see those basic shapes beneath the foot.
The shin comes into the ankejoint which then branches back for
the heel and forward to the toes. Notice the foot does not sit FLAT
on the ground plane..there's an arch between the toe pads and the
heel pad.
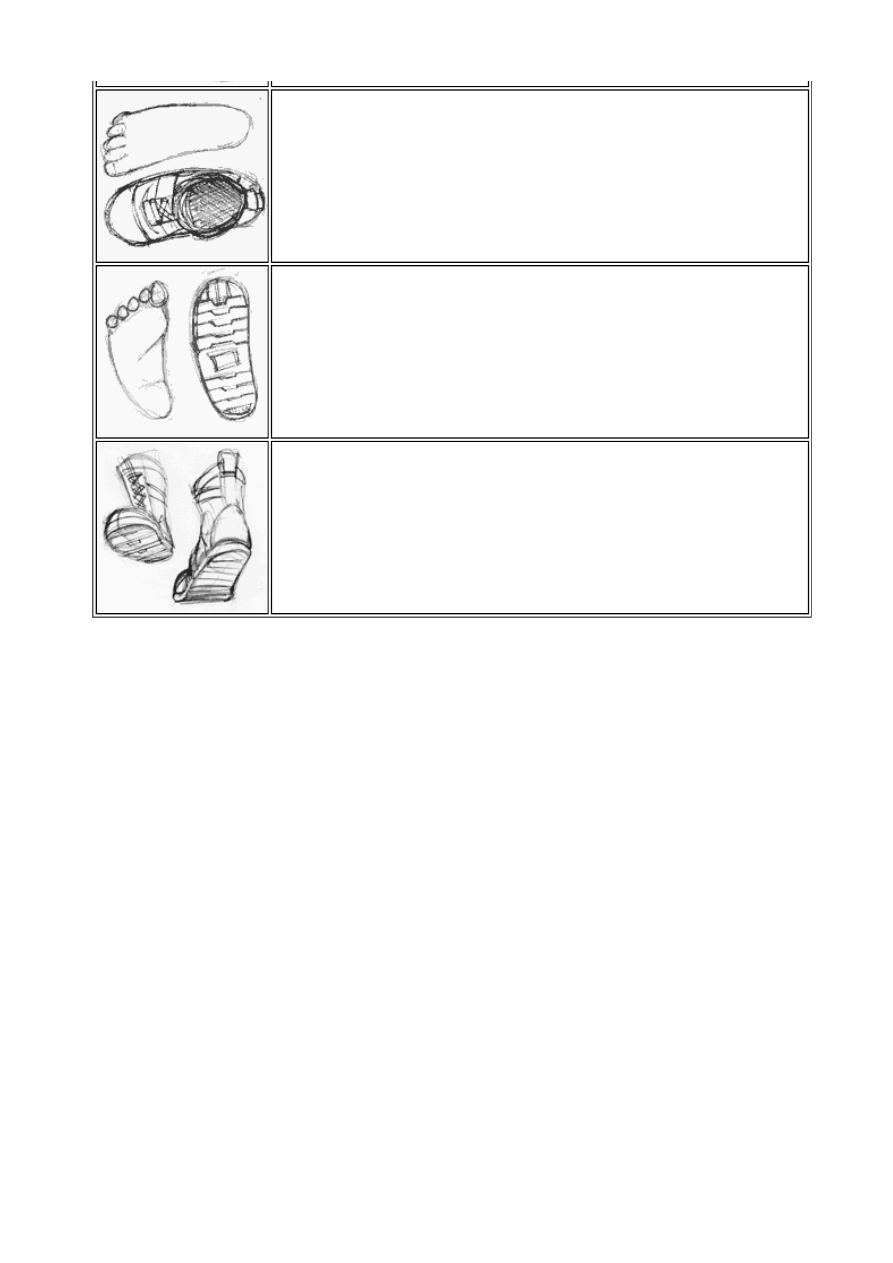
If the shoe fits...
A shoe is basically just a wrap for the basic foot shapes. Looking
at pictures of shoes will give you ideas for styles. Here I chose a
modified US Army Jungleboot. Make sure you make the Sole of
the shoe go below where the bottom of the foot would be. There's
about a 1/4 of an inch to 4" of rubber between the bottom of the
foot and the bottom of the sole.
If your stuck...
Draw the foot first. That will give you a better idea on how to wrap
the shoe around the foot form.
the Wedge
Notice how the foot is shaped like a rounded wedge the bend IN
towards the body's center. The toes are also arced like the fingers
of the hand...the middle toe is usually the longest.
The Instep
Okay, this foots a bit wide but you see the important structures.
Everyone's seen foorptints in the sand. The heel and Ball of the
foot are linked by the outside edge of the foot. The arch of the foot
doesn't come into contact with the ground.
Mastering forms in perspective
Once you understand how a foot is put together you can start
getting creative with action poses. Take a good look at those basic
shapes I drew in step one and see if you can find them in this
drawing to the left.
Practice Practice Practice!
Wyszukiwarka
Podobne podstrony:
Unknown Author Jerzy Sobieraj Collisions of Conflict Studies in American History and Culture, 1820
By GuiTop RONDO Romantic Guitar Duet Author Unknown Sheet Scores Partitions Spartiti Chitarra Gu
Dolby Home Theatre Speaker Guide 5 1 12 feet plus
Co Author Contact?tails
Sinners in the Hands of an Angry GodSummary
test - remedial module 8 , Author: Karolina Dąbrowska
Translation authors
TEST NA REMEDIAL 2 , Author: Iwona Dębosz
2011 11 18 Nexodal PIL PL renewal corrections authority clean EZid 27541
Hackmaster Quest for the Unknown Battlesheet Appendix
AuthorityRevolutionMindMap
Nieznane urządzenie Unknown device Identyfikacja nieznanych podzespołów w Menedżerze urządzeń
Amigurumi Hands by Kim Lapsley
Frequency Request Authorization
Słuchawka telefoniczna Hands free
TEST MODULE 11 , AUTHOR: Magdalena Kocoł
więcej podobnych podstron