Welcome to your third face painting lesson!
Your third lesson will include:
1. "An Easy Step-by-Step Guide to Painting a ‘Pretty in Pink’ Princess!!!"
2. "Tips on Makeup Accessories like Glitter and Stick on Jewels (Skin Jewellery)"
3. "Where to Buy Glitter and Stick on Jewels"
4. "How to Use Glitter and Stick on Jewels"
5. "Painting Tricks/Techniques Part 1"
6. "Get More Designs Now!"
Have Fun Face Painting !!
"An Easy Step-by-Step Guide to Painting a ‘Pretty in Pink’
Princess!!!"
Página Web 1 de 5
29-04-2007
http://www.facepaintingtips.com/fplesson3.html
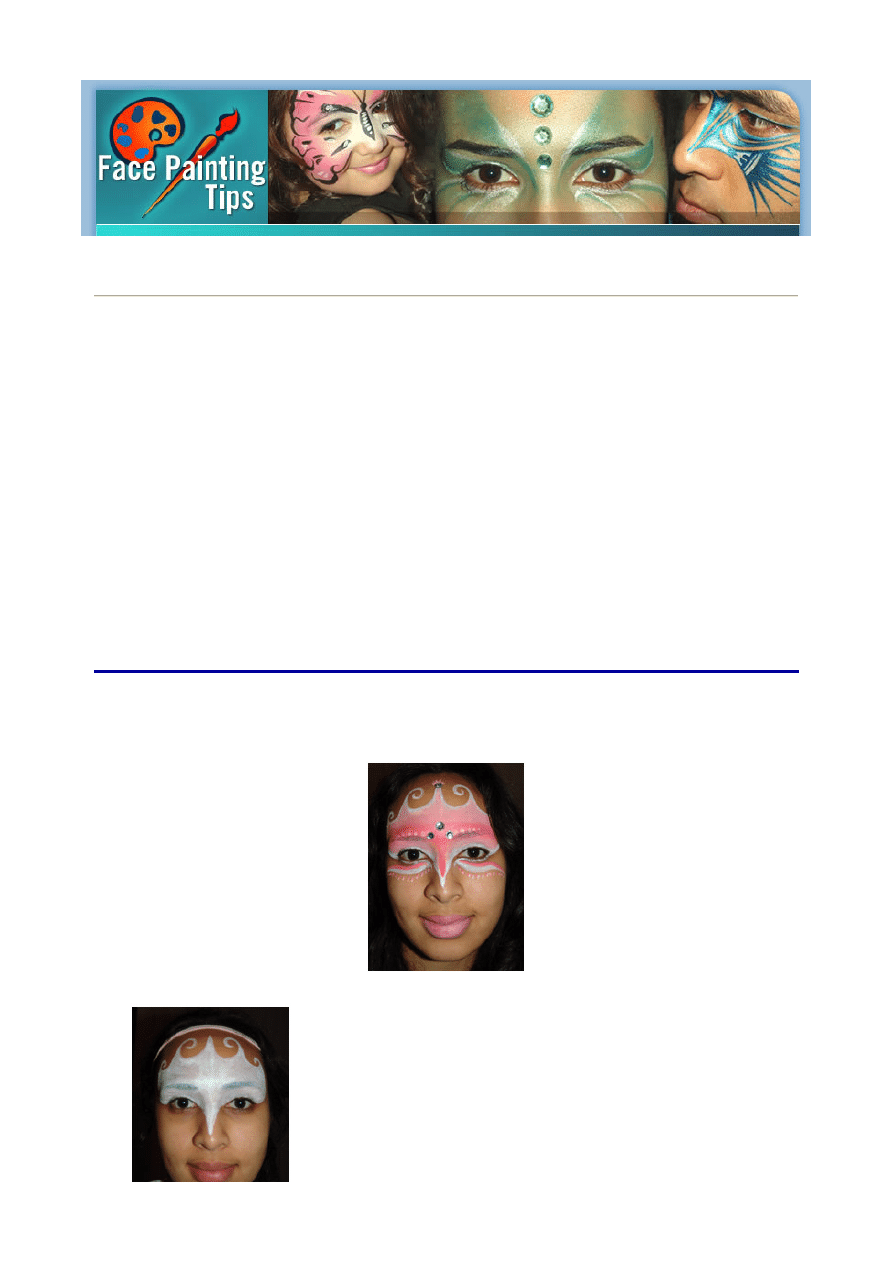
Step 1: Outline the white shape shown with a medium pointed brush. To make it easier for
yourself divide the face in two by painting a line down the middle from the tip of the point at the
top to the bottom of the point on the nose. For all of the curls start from the centre of the spiral
working your way out. Start with the two centre curls, then the outer curls which continue down to
the edge of the eye.
Step 2: You'll then want to bring the white underneath the eye
with a thin line curving it down towards the nose. From the end of
that line paint the shape shown onto the cheek and repeat on
other side.
Step 3: Paint with a light pink the inside of the white shape above the eye making sure you leave
a gap from the edge creating a white outline. You can leave the lower part of the eye lid white.
Then with pink paint a stripe on the top of the white shape below the eye. Paint a thick pink stripe
across the forehead, blend the pink into the light pink and continue the pink down the nose.
Tip: To create your light pink simply add white to your pink.
Step 4: Now that you have your basic shape you can begin to
add decorative elements with the pink. Using a small square tip
brush paint pink vertical lines on the cheek under the wavy
shape. Repeat on the other side.
Página Web 2 de 5
29-04-2007
http://www.facepaintingtips.com/fplesson3.html
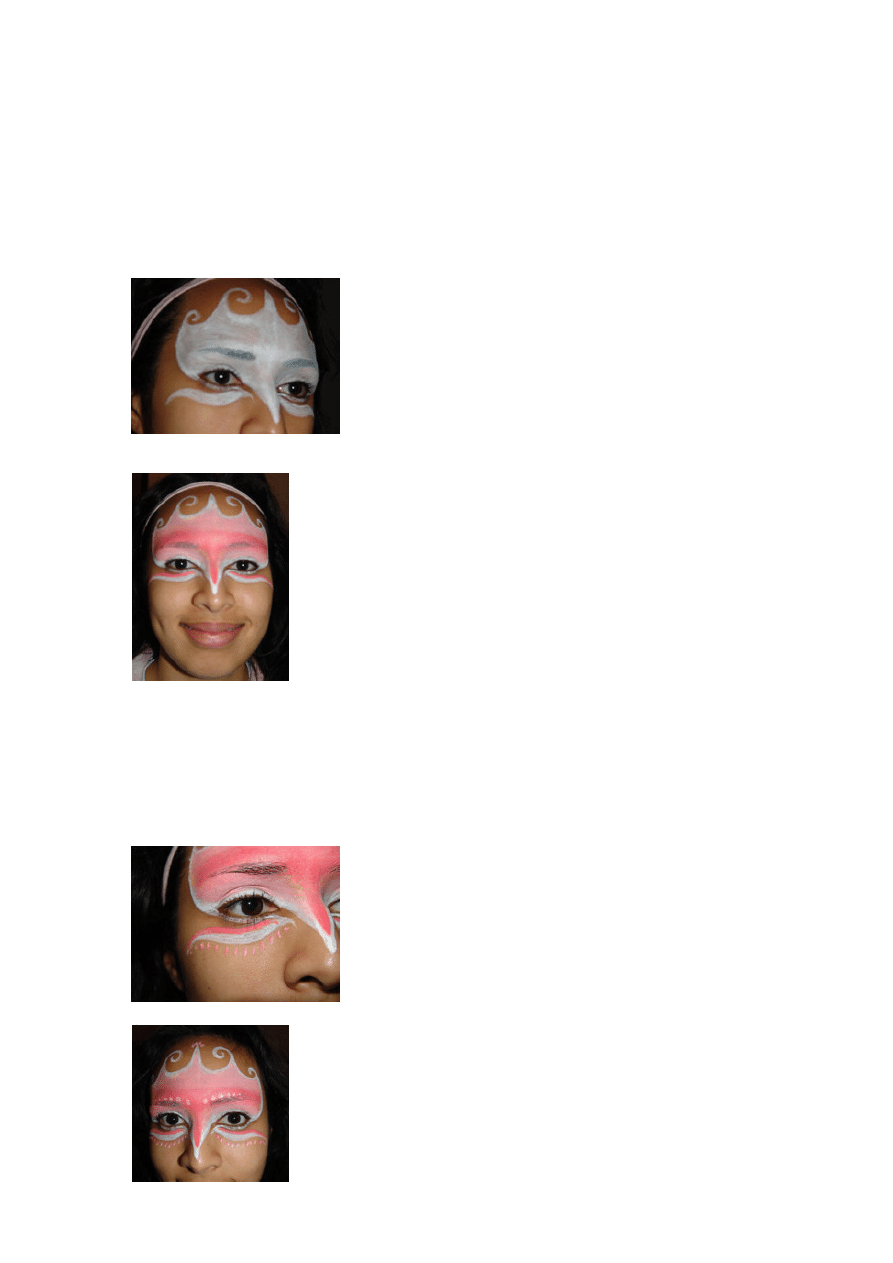
Step 5: Then with the same technique paint pink lines from the tip at the top of the forhead
spreading outwards. Using the light pink with a small pointed brush add lines next to the pink
ones on the cheek to add highlight. Then paint circles above the eyebrow going from larger size
in the center to smaller cirlcles at the end.
And don't forget that every princess likes pretty pink lips (either your pink paint or lipstick will do).
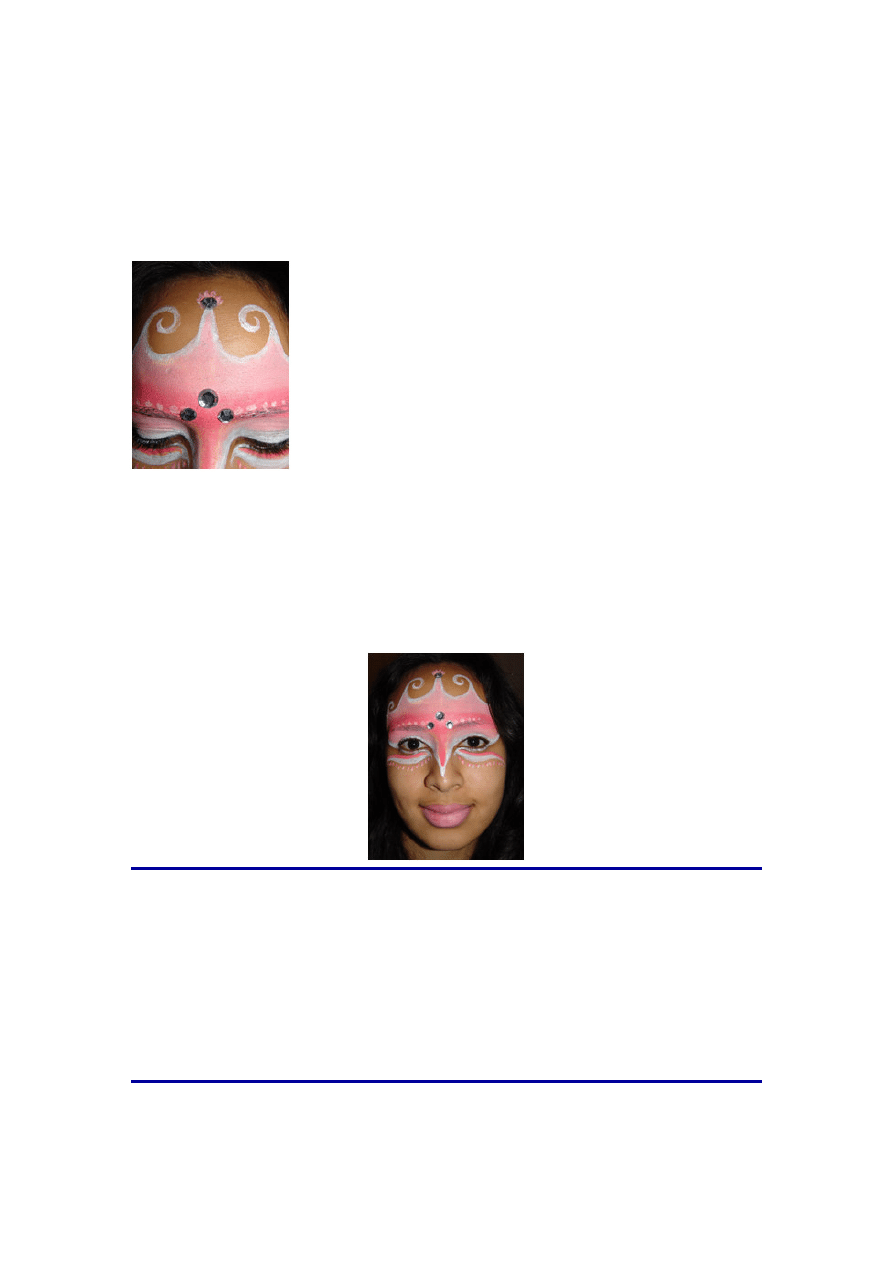
Step 6: You can decorate this design with glitter and or stick on jewels. In this design, stick on
jewels were chosen and placed as shown in the picture but you can get even more creative and
come up with your own glitter and stick on jewel combination.
And that's all there is to it!
"Tips on Makeup Accessories like Glitter and Stick on
Jewels (Skin Jewellery)"
Glitter and Stick on Jewels add a whole new dimension to your face painting! They can also
transform your face paintings for amateur to professional! They can be pretty cheap if you know
where to buy them and it’s very easy to apply! They work especially well with ‘princess’ and
‘fantasy’ designs and kids love them! As with face paint, you need to remember to only use glitter
and stick on jewels that are safe to put on a persons skin (eg. body glitter) Do NOT use aluminum
glitter – polyester only. Aluminum glitter can hurt the eyes and skin.
"Where to Buy Glitter and Stick on Jewels"
Glitter/ stick on jewels can usually be bought anywhere that face paints are bought but might be a
little more expensive. Glitter/ stick on jewels can also be bought at cosmetic shops online and
Página Web 3 de 5
29-04-2007
http://www.facepaintingtips.com/fplesson3.html

offline, party supplies stores, sometimes even toy stores, discount stores and grocery stores in
the party supplies selection. Like I’ve mentioned before, make sure you buy Glitter/ stick on
jewels that is made for safe application onto the skin like face/body glitter!
"How to Use Glitter and Stick on Jewels"
Stick on jewels are so easy to use even kids can do it. Simply peel off the back of the jewel and
stick the ‘sticky’ part of the jewel directly onto the skin or onto the paint that’s on the skin. That’s
it! Also you can get plastic jewels that need to be stuck on with a little dab of paint.
Using glitter can depend on the type of glitter:
Glitter Gel: This is as its name implies a gel based glitter. It is great for adding to face paint
designs or can be used just on it's own. You can easily apply using a brush and small brushes
tend to give a better result.
Glitter (Iridescent) Powders: are the finest glitter, a flour type powder. Mix a little powder with
the face paint and apply it to the skin. It will add a ‘magical’ touch, a high sheen to the finished
face. The powder can also be applied on its own with a moist brush or sponge.
Glitter Dust: This is a loose glitter, great for the face and body. To use, sprinkle the glitter onto
the paint whilst it is still wet (and the paint is already on the face). Alternatively, to have more
control - use a slightly damp brush to add glitter to part of your face painting design.
"Painting Tricks/Techniques Part 1"
In these lessons I wanted to answer face painting questions about painting techniques that keep
getting asked time and time again! Each part will have 2 techniques each.These ‘tricks’ will save
you time and a lot of frustration!
How Do I Hold the Brush Steadily?
Firstly make sure you’re relaxed and remember to relax your hand. Grip the brush not too tightly
but not too loosely, find a comfortable position for yourself. Try not to focus on keeping your hand
still, focus on the painting. A method you can use to keep your hand steady when painting is by
using your pinky finger, like an anchor. Place your pinky out and hold your brush perhaps lower
than usual keeping your pinky on the face as you paint should give you greater control..
Remember practice makes perfect so practice as much as you can!
How Do I Make the Colours Stand Out More and Make it Easier to Paint On?
Especially when doing full face designs, first paint a base coat – a thin layer of white paint onto
the face before painting the colours for the design (You can use a brush or sponge to apply the
base coat) Using a base coat will make the surface much more even which will then make it
much easier and smoother to paint your design on, it will also make the colours stand out more
and be more vibrant! Remember to let the white paint dry, unless you wish to blend the colour in
with the white for an effect.
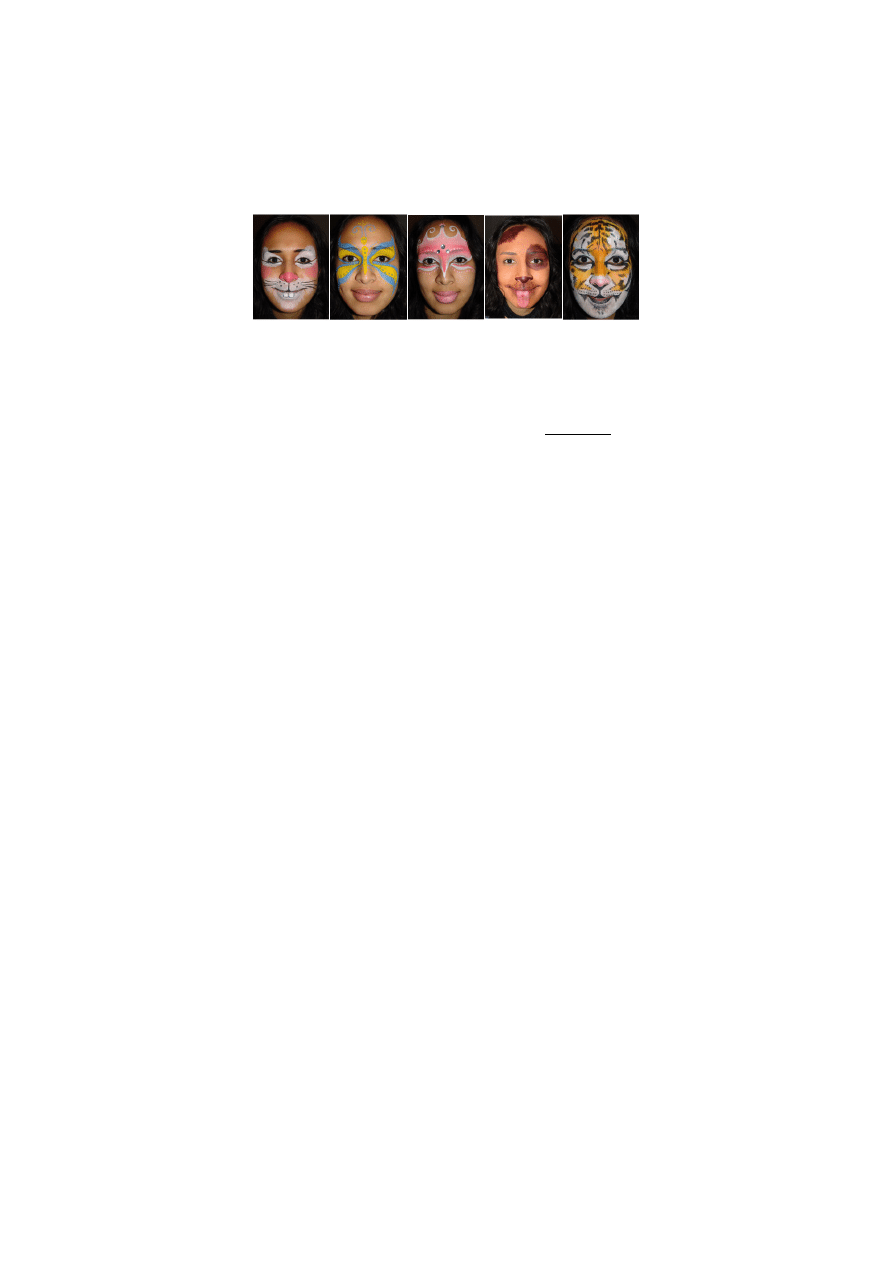
"Get More Designs Now!"
If you liked this design, found this information useful and want more now... then get your hands
on "The Comprehensive Guide to Face Painting".
It makes face painting fun, easy and quick to learn with 50 popular face painting designs and
easy step-by-step guides, you'll be face painting like a professional in no time!
Click here now to learn how to face paint with more face painting designs!
Página Web 4 de 5
29-04-2007
http://www.facepaintingtips.com/fplesson3.html
Copyright 2006 Philadelphia Tivoli
I hope you've enjoyed lesson 3 of your 5 free face painting lessons! Lesson 4 will be in
the mail tomorrow with a puppy dog face painting design.
There are heaps more great face painting tips to come so get your paints out and get
ready!!!
Google Site Stats - send feedback
Página Web 5 de 5
29-04-2007
http://www.facepaintingtips.com/fplesson3.html
Wyszukiwarka
Podobne podstrony:
face painting lesson 4 id 16748 Nieznany
face painting lesson 5
face painting lesson 1
face painting lesson 2
lessons from Finland id 267314 Nieznany
erg face id 163020 Nieznany
3 Face mill id 33659 Nieznany
więcej podobnych podstron