Copyright 2009
Joske
Cleaning the EGR valve (Electronic)
Tools Required:
A 4mm Allen Key
A 6mm Allen Key
A 10mm Socket
A 13mm Socket
A Ratchet
Rubber Gloves
Old Tooth Brush
Oven Cleaner (Caustic)
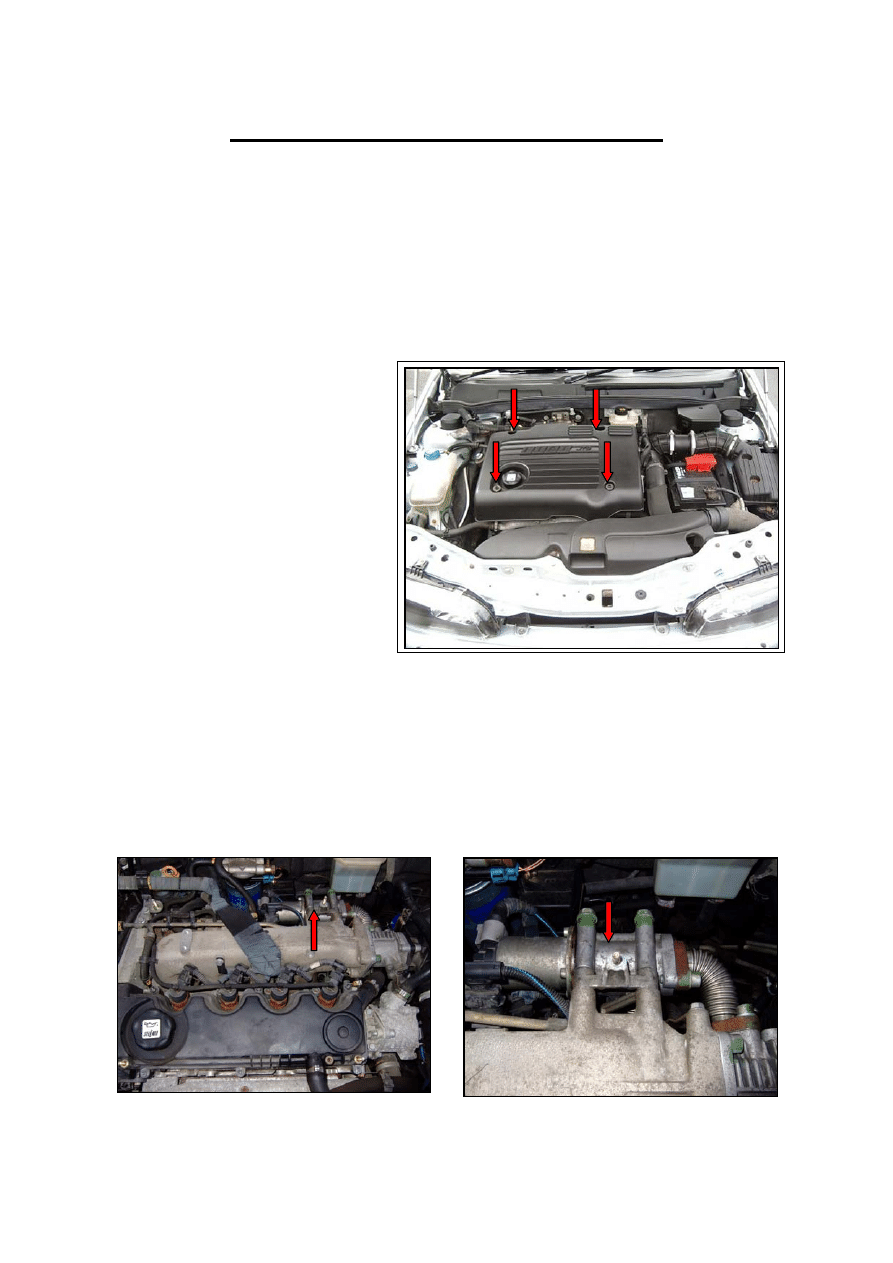
Step 1:
Remove the plastic engine cover.
Use the 10mm socket to remove all
4 nuts and washers. Remove oil filler
cap and remove the plastic engine
cover. Make sure to refit the oil filler
cap after the cover has been
removed to avoid anything falling
into the engine.
Step 2:
Locate the EGR valve and carefully disconnect the grey plug from the EGR valve. A small flat
headed screw driver will aid with disconnecting the plug.
EGR Valve
Copyright 2009
Joske
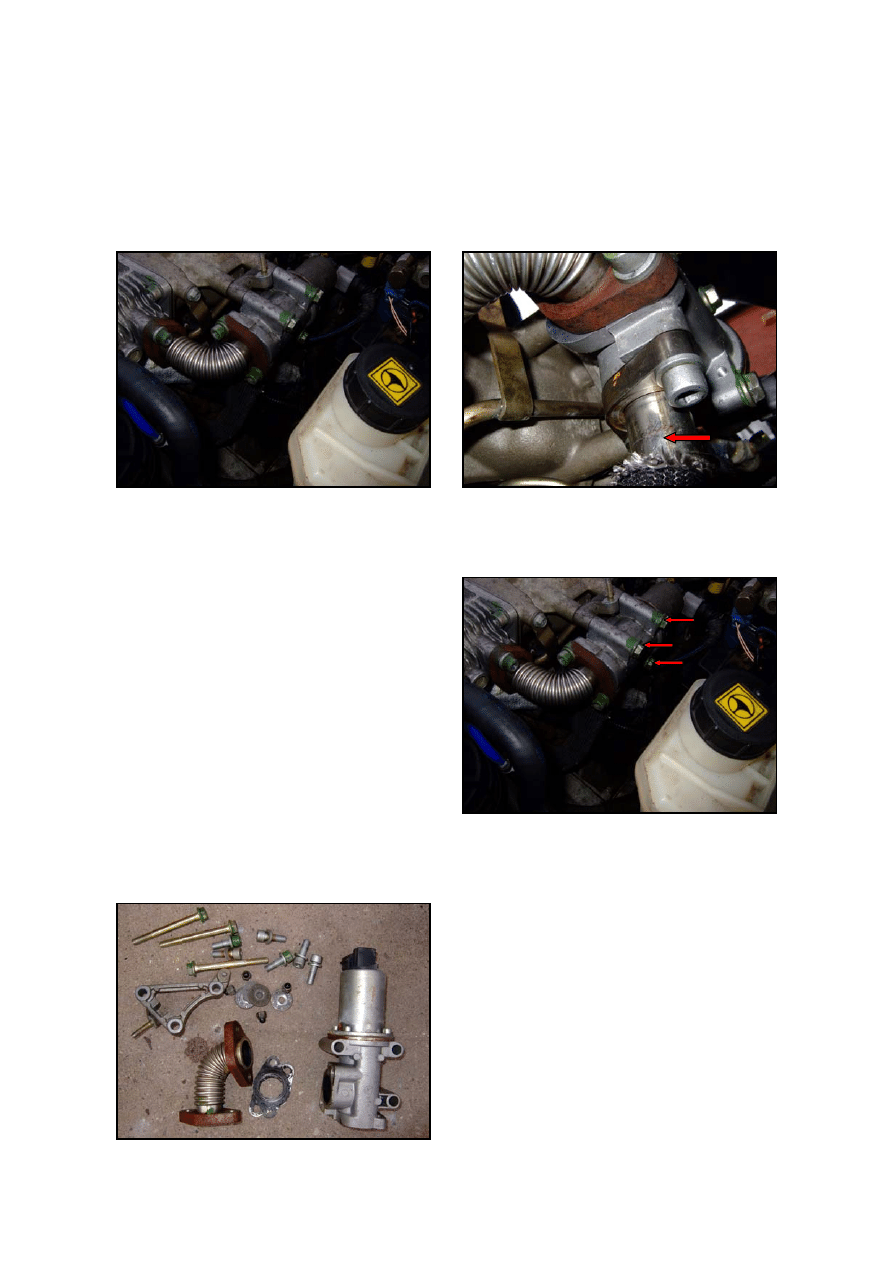
Step 3:
Unscrew bolts 1, 2, 3 and 4 using the 6mm Allen Key. Make sure not to lose the gasket seals
between the pipes and the EGR. (Bolt 4 is tricky to get at but not impossible, just take your
time).
Step 4:
Carefully support the EGR and bracket as you
remove the 3 bolts holding the EGR to the
inlet manifold using the 13mm socket.
You should now have an assortment of bolts,
nuts, gaskets, brackets and of course the
EGR valve.
1
2
3
4

Copyright 2009
Joske
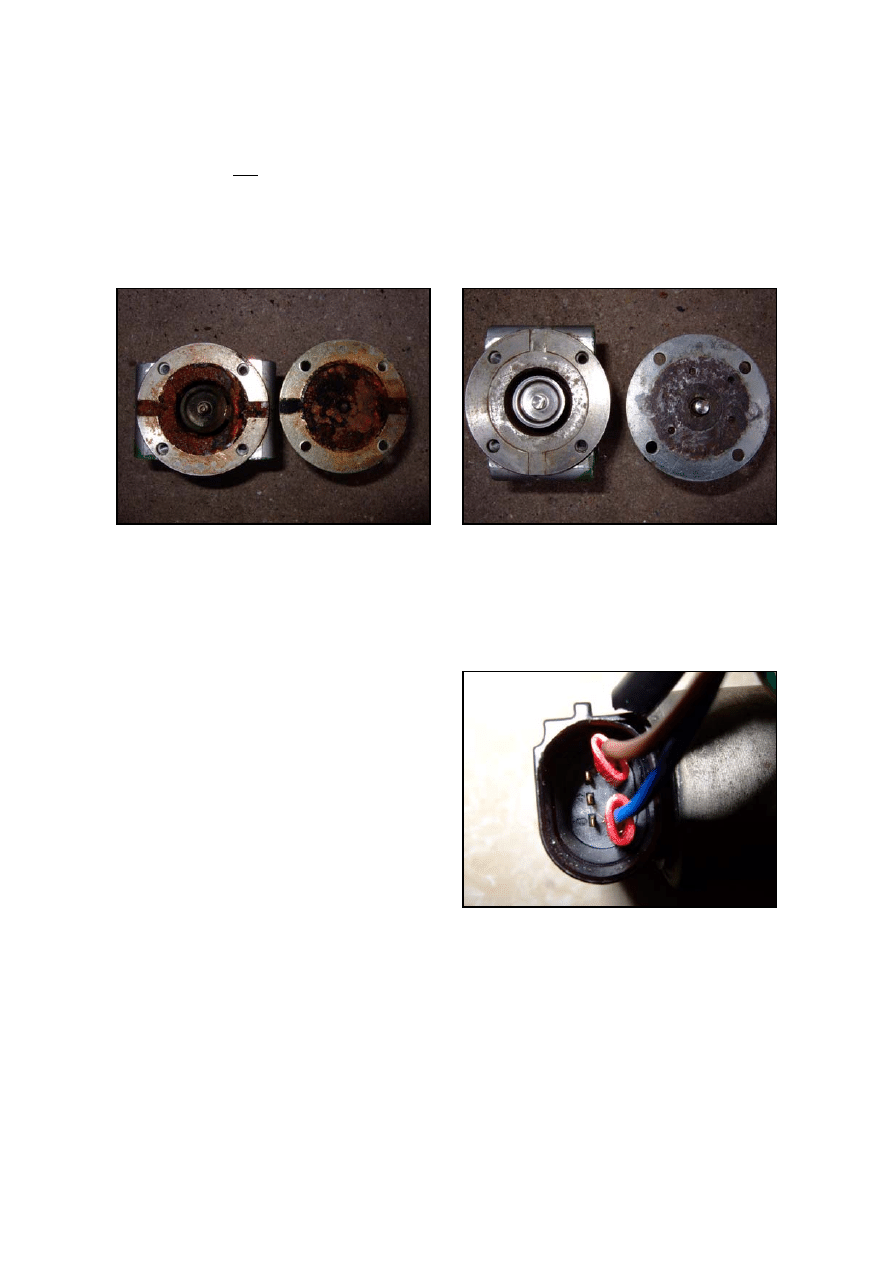
Splitting the EGR valve:
Use the 4mm Allen Key to remove the 4 screws holding the electronic part of the EGR valve
to the mechanical part. Also take care with the gasket between the two. As you can see
from the picture on the right, my EGR hasn’t been working for a long time and has corroded.
Cleaning the EGR valve:
I started with the mechanical part first. The spring was covered
thickly with the build up of carbon deposits that the spring was impossible to compress. I
used super strength caustic oven cleaner to clean the EGR valve, try not to get the caustic
cleaner onto the external part of the EGR otherwise the metal reacts with the caustic
cleaner and tarnishes the finish. WEAR GLOVES as it’s harmful to the skin. Spray the cleaner
into all the openings of the EGR and let it soak in for a few hours or overnight. Wash off
with warm water and remove deposits with an old tooth brush. Repeat for stubborn areas.
Copyright 2009
Joske
Cleaning the rest of the EGR valve:
Your EGR should not really look like this; it should be covered with a small amount of carbon
that you can brush off with an old tooth brush. My EGR had jammed for a long period of
time and moisture had accumulated between both parts and corroded the mechanical pin
and surrounding area. I used a Dremel with a sanding disc and carefully sanded the rusted
area. I then lubricated and freed up the metal pin.
Once you are satisfied the EGR valve is clean and moving freely, put the EGR valve back
together, making sure to refit the gasket between the electronic and mechanical parts.
Testing the EGR Valve:
You can test the EGR valve to see if works.
Connect a wire to a 12V source and a wire to
negative, then connect the positive 12V wire
to pin 1 and the negative to pin 5 as shown
in the picture.
Brown Wire = 12V Positive
Blue Wire = Negative
As you turn on and off the +12V power source you should see the valve open and close. If
not then your EGR valve may not be cleaned thoroughly enough or the electronical part is
faulty.
Once you are happy that the EGR valve is clean and working, refit the EGR valve back into
your car.
Copyright 2009
Joske
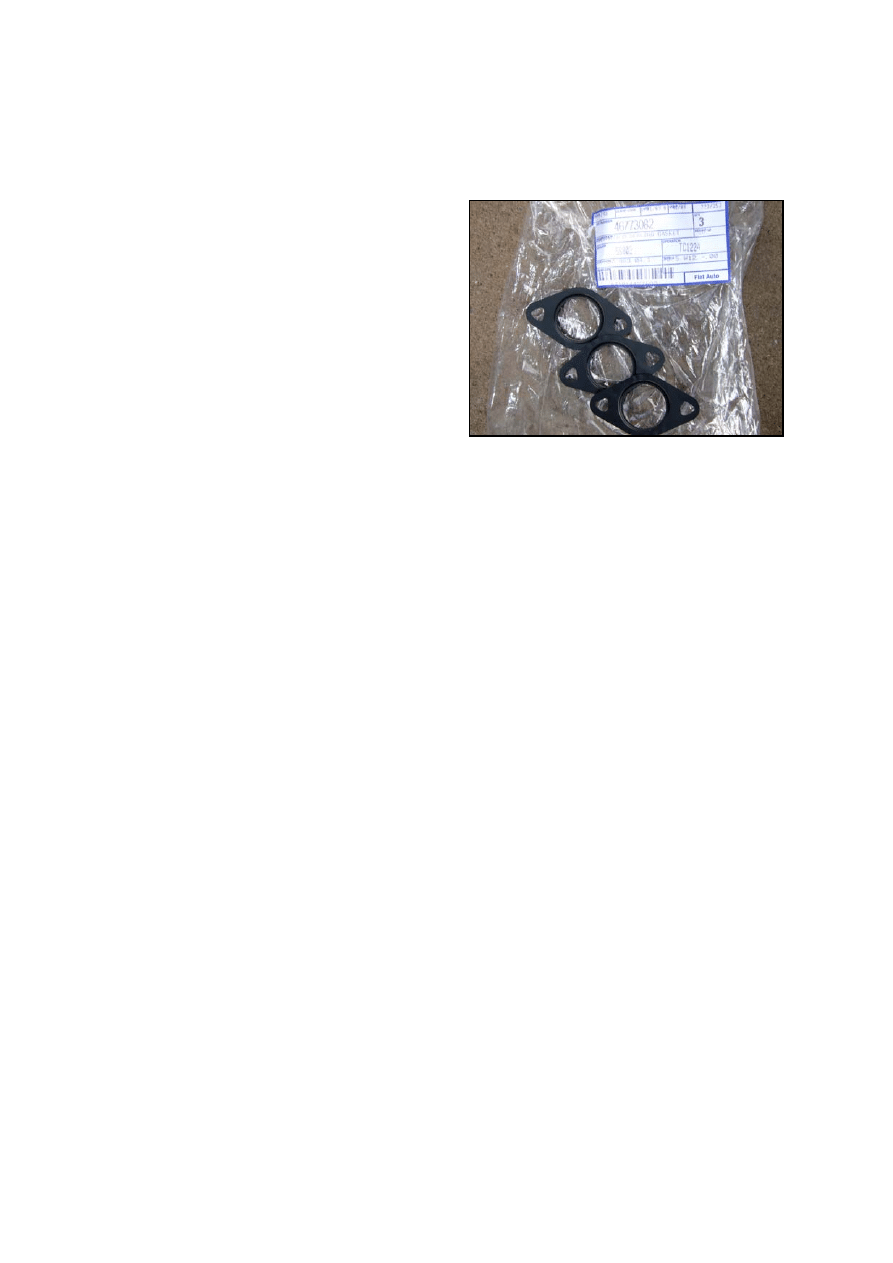
Refitting
It is always good practice to replace the two gaskets that fit between the EGR valve and the
inlet and outlet pipes. The part number is 46773082 (x2).
Firstly bolt the lower inlet pipe to the
bottom of the EGR valve using the
6mm Allen Key. This is the trickiest bit
and is best to do this first.
Secondly bolt the outlet pipe to inlet
manifold to the EGR valve using the
6mm Allen Key.
Fit the bracket behind the EGR valve
and bolt the EGR to the inlet manifold
with the 3 long bolts using the 13mm
socket.
Reconnect the grey EGR plug.
Refit the plastic engine cover, using the 4 washers and bolts with the 10mm socket.
Job done.
I take no responsibility for any damage caused or injury sustained to anyone who has
been following this guide. This guide has been written for reference and guidance only.
Wyszukiwarka
Podobne podstrony:
czyszczeie elektromagnesu egr
Czyszczenie elektrozaworu recyrkulacji spalin (EGR) w TD100
[Audi A4 B6 AWX] Wymiana czyszczenie zaworu EGR
[Audi A4 B6 AWX] Wymiana czyszczenie zaworu EGR i kolektora dolotowego
czyszczeie elektromagnesu egr
[Audi A4 B6 AWX] Wymiana czyszczenie zaworu EGR
Wymiana czyszczenie zaworu EGR
Wymiana Czyszczenie Zaślepienie zaworu recyrkulacji spalin EGR
czyszczeie elektromagnesu egr
Wymiana czyszczenie zaworu EGR
[Audi A4 B6 AWX] Wymiana czyszczenie zaworu EGR i kolektora dolotowego
Środek do czyszczenia przepustnic, zaworów EGR, kolektorów, zaworów dolotowych
Zaślepienie zaworu EGR w silniku x12sz
Czyszczenie elektrozaworów
Zaślepienie zaworu EGR w silniku x12sz
Czyszczenie prowadnic szyb elektrycznych w BBM
Czyszczenie prowadnic szyb elektrycznych, Fiat bravo instrukcja, Instrukcja do Fiata !
więcej podobnych podstron