Intro
I found on the internet (www.ledsee.com) a very cheap, only € 17,95 128*64 graphic display with touchscreen. It was sold with a controller for the touchscreen, but it would be nicer to read the touchscreen with the ad-converter that's build in much of the avr processors.
The big advance of a touchscreen is that all is in the software. If you make the traditional keypad and you need an extra key, or maybe change the key layout. It's not possible, or I will cost you money. For the touchscreen just write some code and finished.
The display has a Ks-108 controller, so controlling the display is easy, Mark has done all the work for this.
For this display a different datasheets on the net all with other connections. After some research the correct connections are;
1 |
Cs1 |
11 |
Db2 |
2 |
Cs2 |
12 |
Db3 |
3 |
Gnd |
13 |
Db4 |
4 |
+5V |
14 |
Db5 |
5 |
Contrast |
15 |
Db6 |
6 |
Cd |
16 |
Db7 |
7 |
Read |
17 |
Reset |
8 |
Enable |
18 |
Negative pwr |
9 |
Db0 |
19 |
Backlight A |
10 |
Db1 |
20 |
Backlight K |
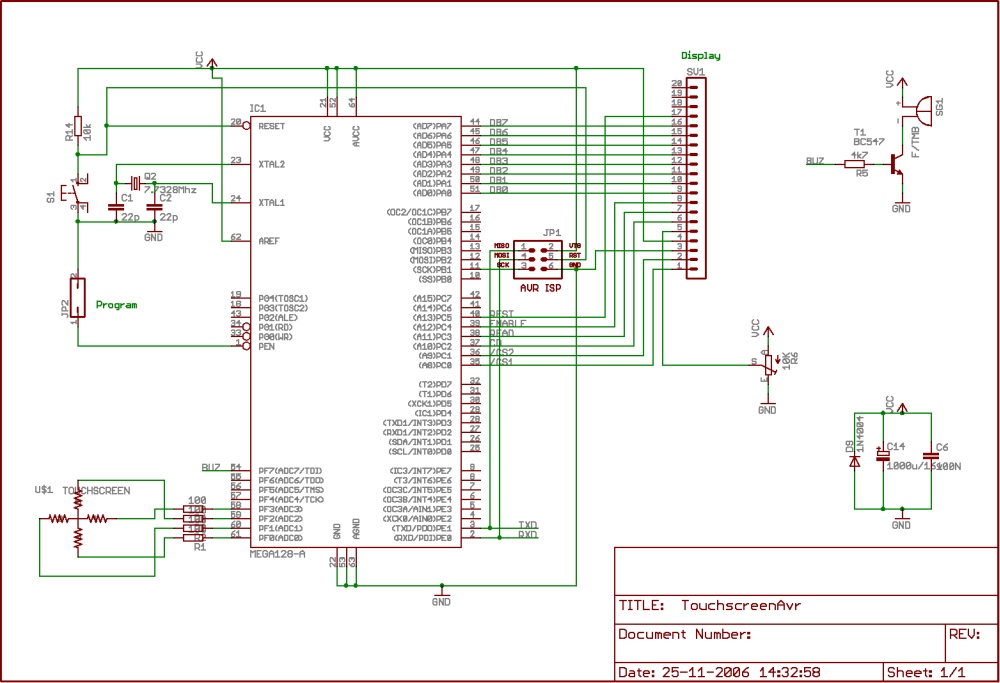
Pin 18 generates a negative voltage to drive the contrast for the display, this is not really necessary the circuit below works just fine for me.
Circuit diagram
I didn't connect pin 19 & 20 for the backlight. If you close the jumper (figure 1) on the back of the display the backlight it's connected with the display's powersupply. Also here you can see how to connect the touch screen with the Avr. In the circuit diagram there are some resistors in series with the touchscreen. This is not really necessary, but only for protecting the avr if you make a program mistake and shorting the io pins.

Figure 1
The basics of a touch screen
The touchscreen that's used here is a 4 wire resistive touchscreen. It's not more then 2 big resistors, one with the connection leads to the top and the other with the leads to the side. By pressing on the screen your making contact between the top and bottom layer. To determine the cordinates you read first the x value and then the y value. To say it simple;
Touchscreen x read, Set PF0 high and PF2 low and read PF1 or PF3.
Touchscreen y read, Set PF1 high and PF3 low and read PF0 or PF2.
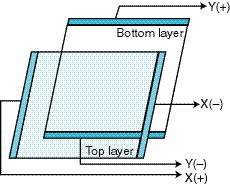
Figure 5
The application note
First of all i created a virtual keypad on the touchscreen.
Figure 4
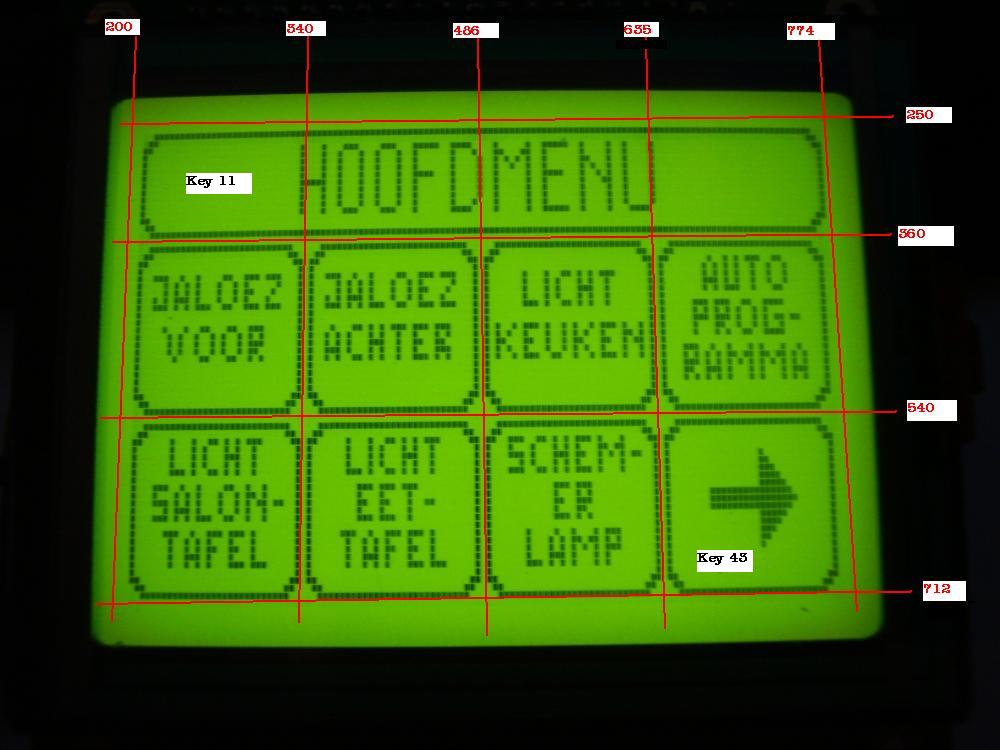
I have chosen for a 3x4 matrix where the upper row is smaller.
To determine the values as shown in figure 4, unremark the “Print Value” lines in the subroutine “Readtouch”, we need those values in the “Whichkey” subroutine to determine the begin and end of each key.
The buttons that i have used are 32x24 pixels. This is a nice size that you can operate with your finger.
The build in font's of the display or bascom are too large for my application so i draw my own buttons with build in fonts, see the bmp's in the download file.
The result
The BIG guys are using a calibration function, temperature compensation, but i don't think this is necessary for such small screen.
And here is the result created with the source code below:
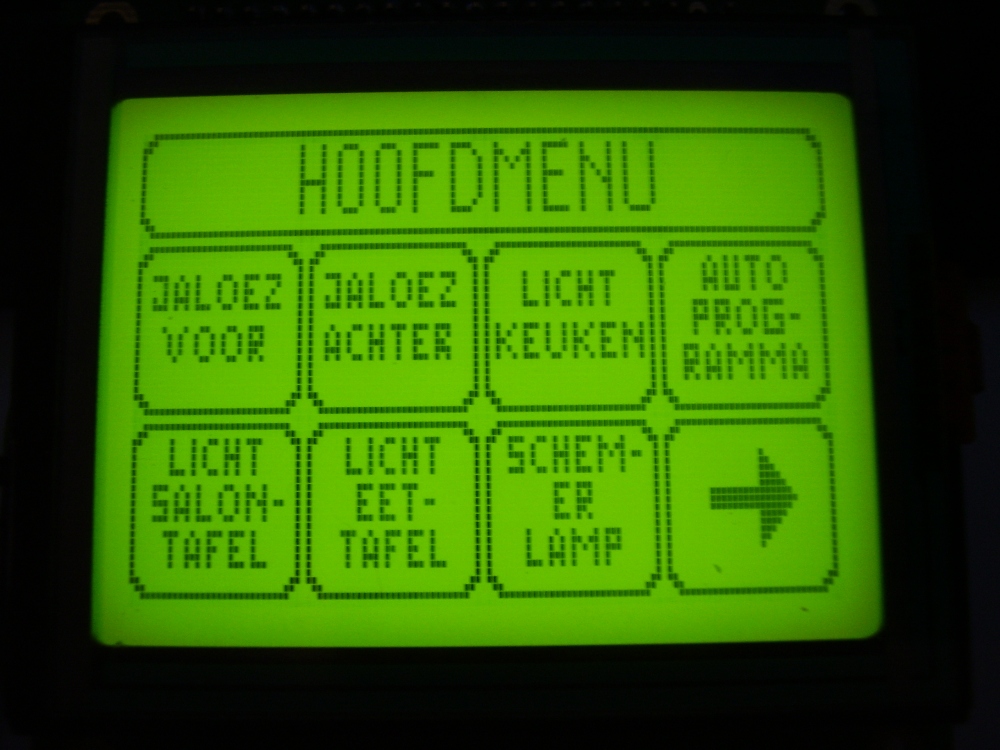
Figure 2 Mainmenu
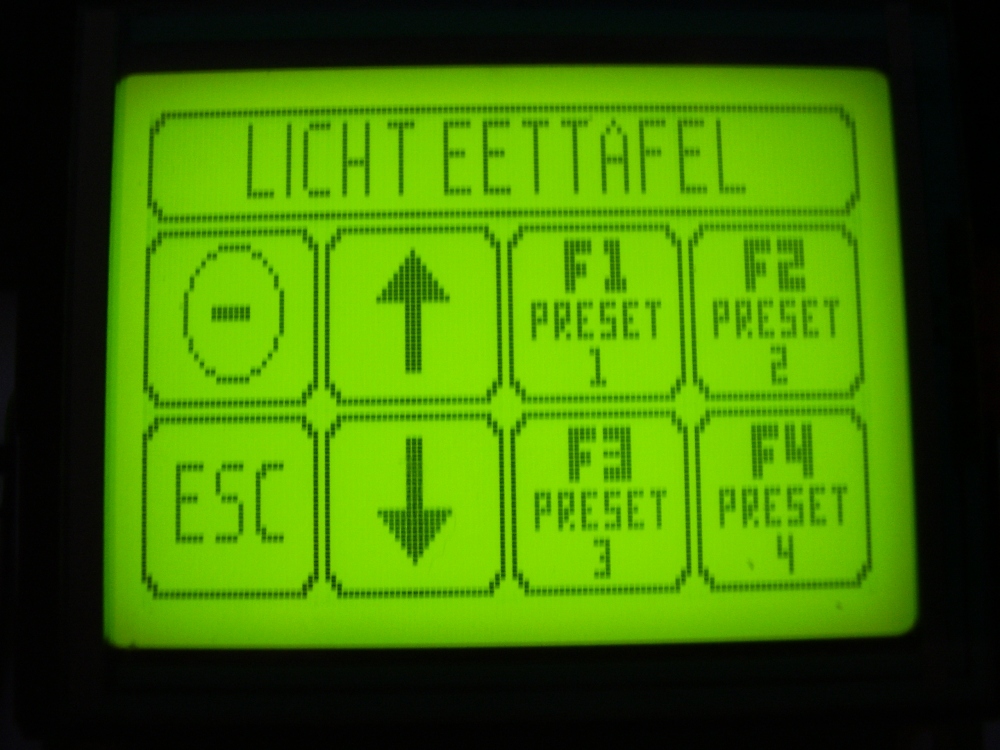
Figure 3 LichtEetafelmenu (menu 13)
Wyszukiwarka
Podobne podstrony:
l200 application note
Application Note CISPR 17 Measu Nieznany (2)
RS 422 and RS 485 Application Note
CISPR 17 IEC 1981 Transformers Application Note
PDIUSBH11A APPLICATION NOTE
Marketer s Toolkit (09) Pricing It Right Strategies, Applications, And Pitfalls(Harvard Business S
kompozytorklasowek gwo pl application pdfQuestions y=1339356508
Funai Hita9801 Service Note
Applications and opportunities for ultrasound assisted extraction in the food industry — A review
Sixteenth Note Drum?ats
Lab12 Applications
Baxter Vaccine Patent Application
Funai Hita9803 Service Note
Applications of polyphase filters for bandpass sigma delta analog to digital conversion
Magnetic Treatment of Water and its application to agriculture
applicationPhasesensitivedetection
więcej podobnych podstron