1274485749688
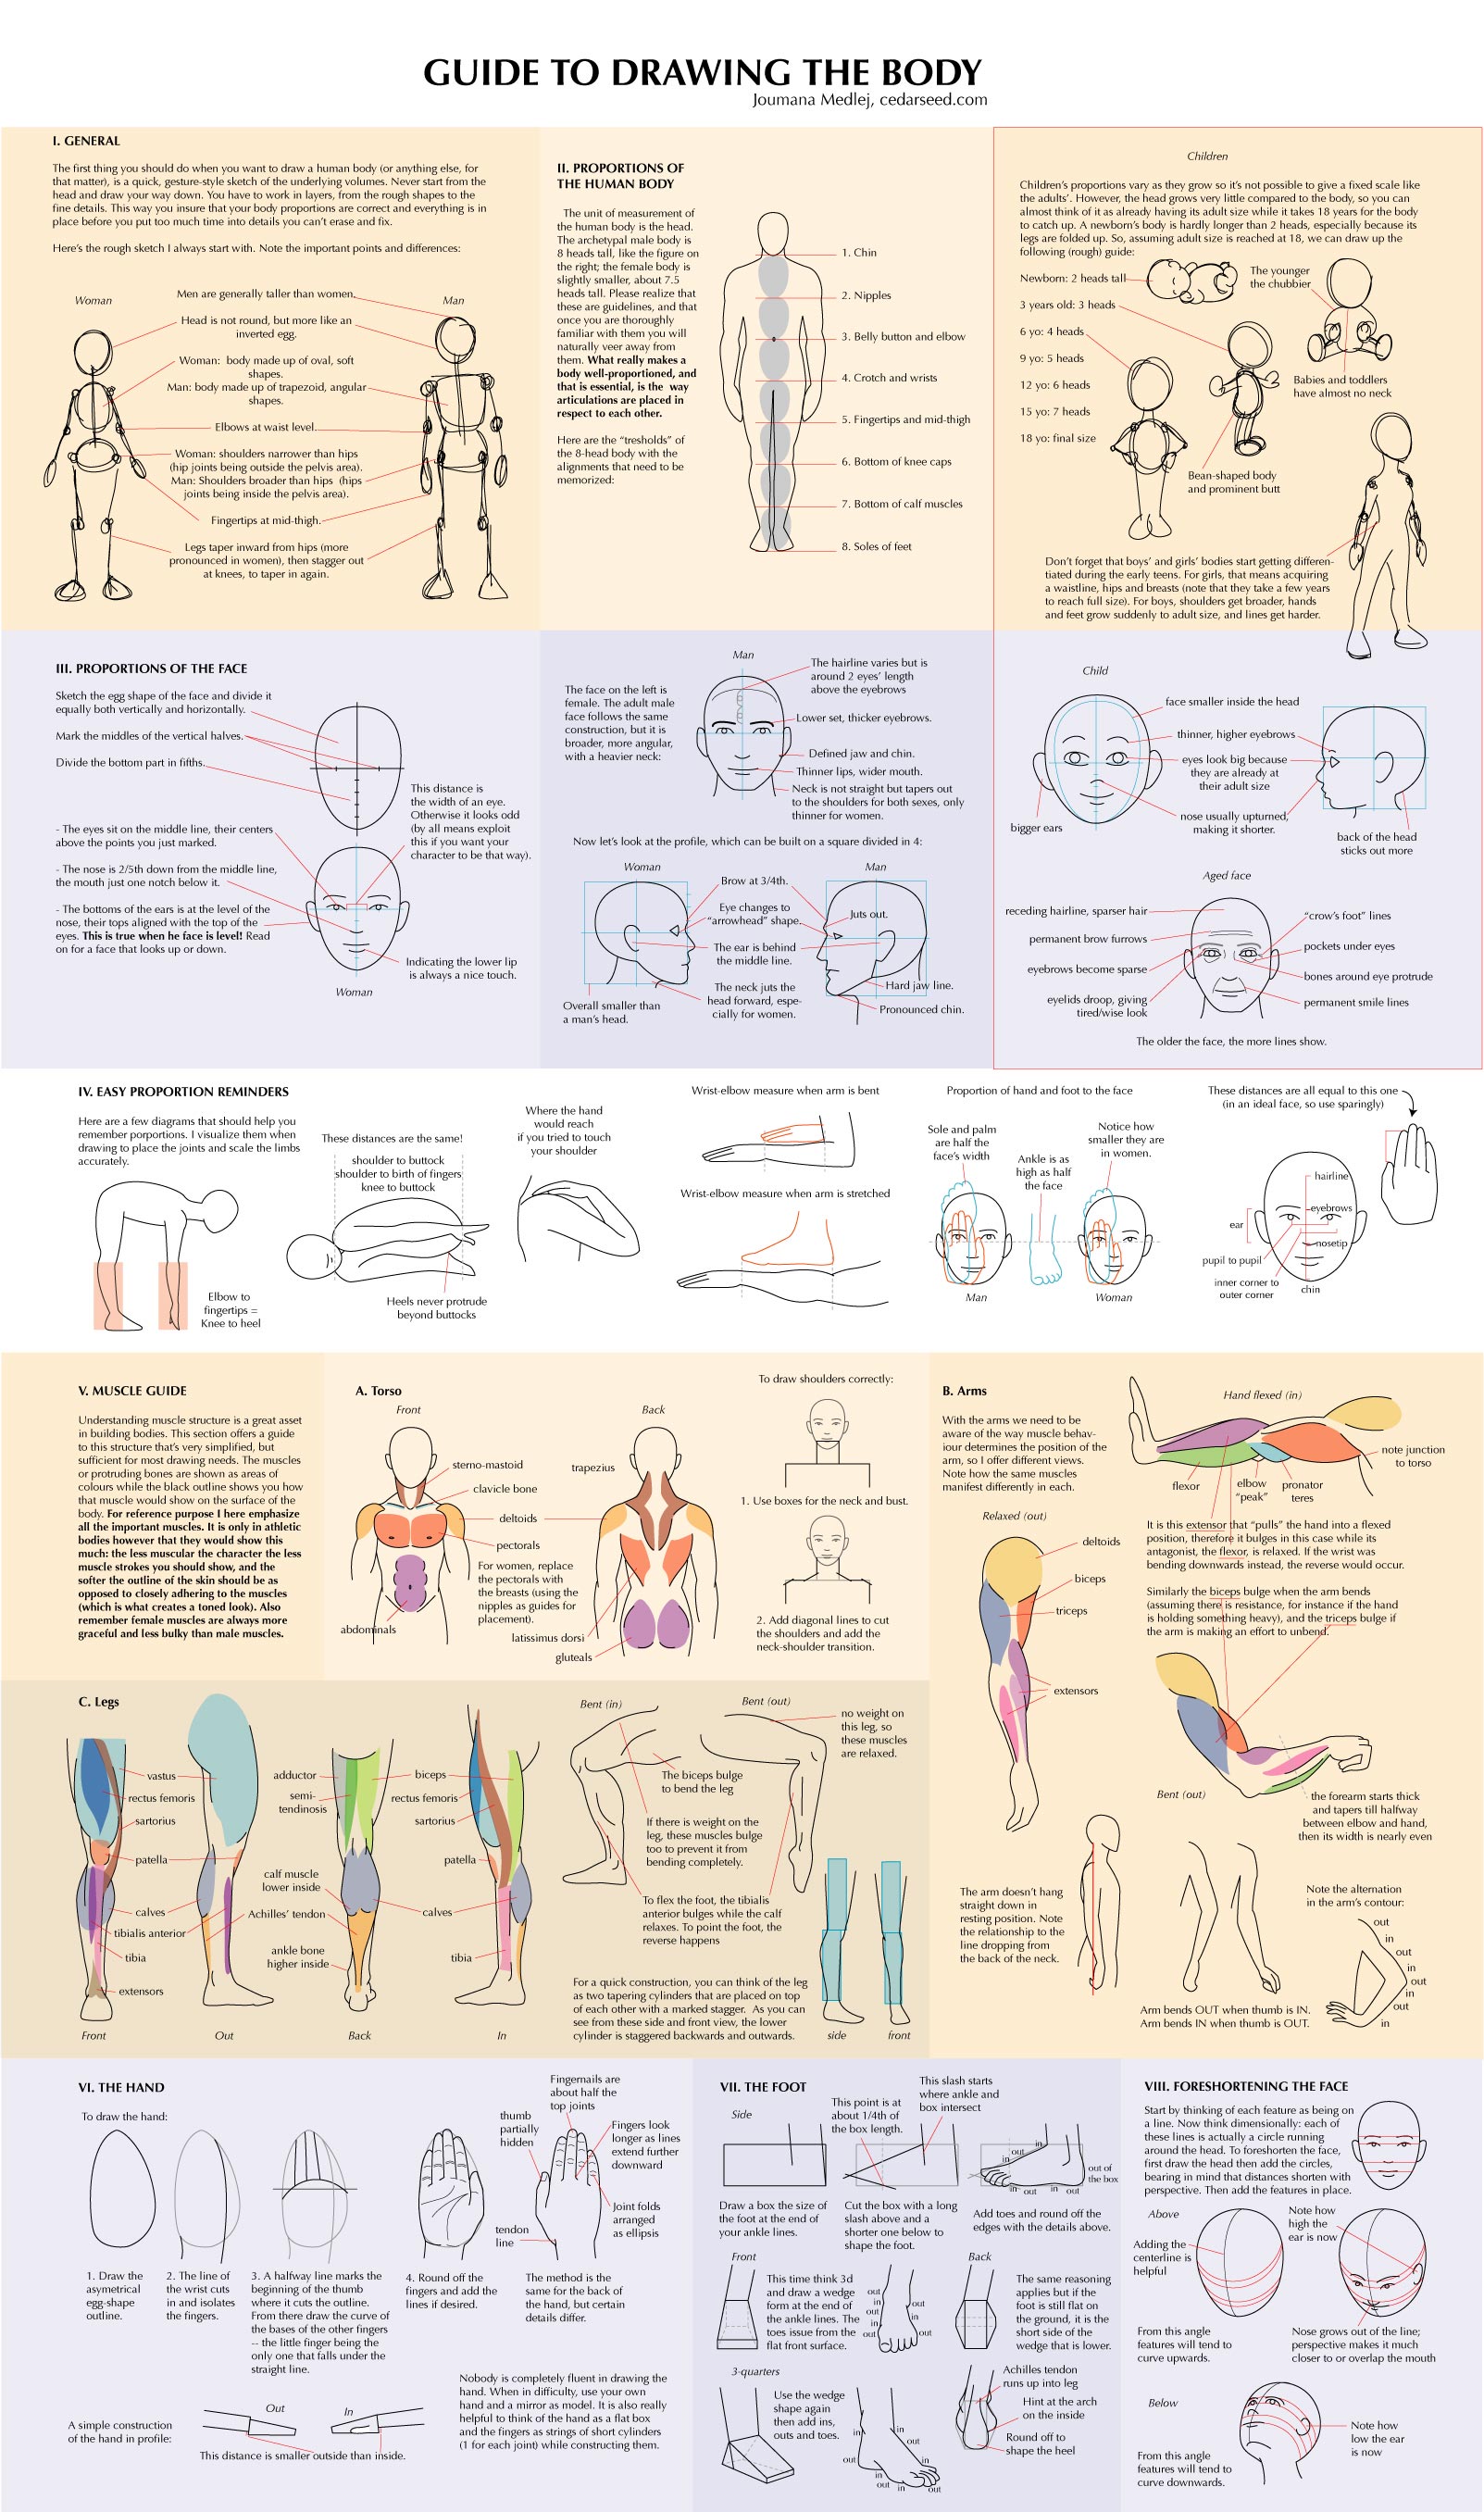
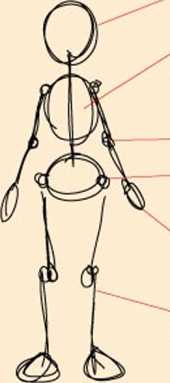
I. GENERAL
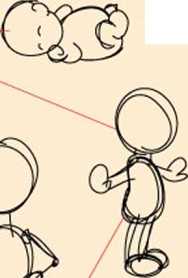
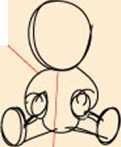
The first thing you should do when you want to draw a human body (or anything else, for that matter), is a quick, gesture-style sketch of thc underlying volumes. Never start from the head and draw your way down. You have to work in layers, from the rough shapes to the fine details. This way you insure that your body proportions are correct and everything is in place before you put too much time into details you can't erase and fix.
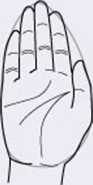
Here's the rough sketch I always start with. Notę the important points and differences:
Woman
Men are generally taller than womeii__
^ Head is not round, but morę like an _ iiwerted egg.
z Woman: body madę up of oval, soft shapes.
Man: body madę up of trapczoid, angular -shapes.
— Hbows at waist level___
Woman: shouldcrs narrower than hips (hip joints beingoutside the pelvis area). Man: Shoulders broaderthan hips (hips joints being inside the pelvis area).
Fingertips at mid-thigh.--"
Legs taper inward from hips (morę pronounced in women), then stagger out at knees, to taper in again.
Man
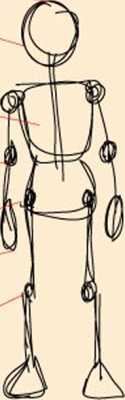
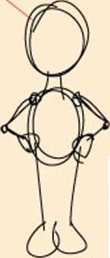
The unit of measurement of the human body is the head. The archetypal małe body is 8 heads tali, like the figurę on the right; the female body is slightly smaller, about 7.5 heads tali. Please realize that these are guidelines, and that once you are thoroughly familiar with them you will naturally veer away from them. What really makes a body well-proportioned, and that is essential, is the way articulations are placed in respect to each other.
Here are the "tresholds" of the 8-head body with the alignments that need to be memorized:
1. Chin
2. Nipples
3. Belly button and elbow
4. Crotch and wrists
5. Fingertips and mid-thigh
6. Bottom of knee caps
7. Bottom of calf muscles
8. Soles of feet
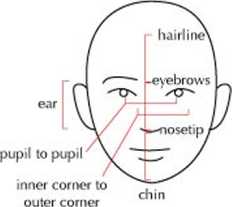
III. PROPORTIONS OF THE FACE
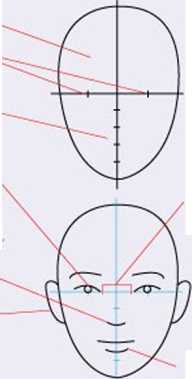
Sketch the egg shape of the lace and divide it equally both vertically and horizontally.
Mark the middles of the vertical halves.'«^a-_^
Divide the bottom part in fifths.
- The eyes sit on the middle linę, their centers above the points you just marked.
The nose is 2/5th down from the middle linę, the mouth just one notch below iL
- The bottoms of the ears is at the level of the nose, their tops aligned with the top of the eyes. This is true when he face is level! Read on for a face that looks up or down.
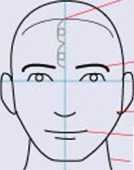
Woman
This dis ta lice is the width of an eye. Otherwise it looks odd (by all means exploit this if you want your character to be that way).
Indicating the lower lip is always a nice touch.
Ihe face on the left is female. The adult małe face follows the same construction, but it is broader, morę angular, with a heavior neck:
Man
^.The hairline varies but is around 2 eyes' length above the eyebrows
Lower set, thicker eyebrows.
Defined jaw and chin.
Thinner lips, wider mouth.
Neck is not straight but tapers out to the shoulders for both sexes, only thinner for women.
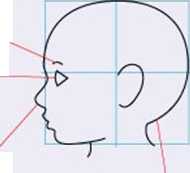
Now let's look at the profile, which can be built on a square divided in 4:
Woman Man
Brow at 3/4th.
Eye changes to arrowhead" shape
The ear is behind the middle linę.
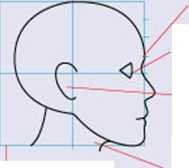
Overall smaller than a man's head.
The neck juts the head forward, espe cially for women.
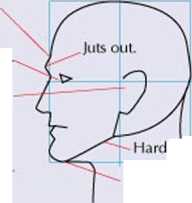
jaw linę. Pronounced chin.
Children
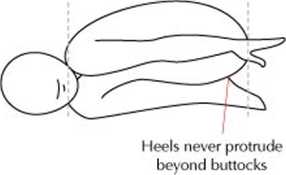
Children's proportions vary as they grow so it's not possible to give a fixed scalę like the adults'. Howcvcr, the head grows very little compared to thc body, so you can almost tiiink of it as already having its adult size while it takes 18 years for the body to catch up. A newborn's body is hardly longer than 2 heads, especially because its legs are folded up. So, assuming adult size is reached at 18, we can draw up the following (rough) guide:
Newborn: 2 heads tali 3 years old: 3 heads ^ 6 yo:4 heads,
9 yo:5 heads 12 yo: 6 heads 15 yo: 7 heads 18 yo: finał size
Babies and toddlers have almost no neck
Bean-shaped body and prominent butt
The younger the chubbier
Don’t forget that boys' and girls' bodies start getting differen-tiated during the early teens. For girls, that means acquiring a waistline, hips and breasts (notę that they tako a few years to reach fuli size). For boys, shoulders get broader, hands and feet grow suddenly to adult size, and lines get harder.
Child

bigger ears
nose usually upturned, making it shorter.
face smaller inside the head
thinner, higher eyebrows
eyes look big because they are already at their adult size
back of the head sticks out morę
Aged face
receding hairline, sparser hair ~~J~ \ /crow's foot" lines

__pockets under eyes
bones around eye protnide ■**- permanent smile lines
permanent brow furrows
eyebrows become sparse
eyelids droop, giving tired/wise look
The older the face, the morę lines show.
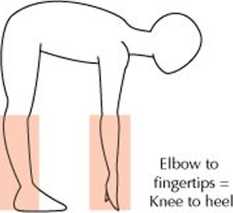
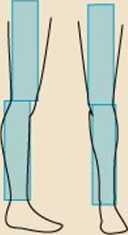
IV. EASY PROPORTION REMINDERS
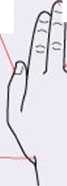
Here are a few diagrams that should help you remember porportions. I visualize them when drawing to place the joints and scalę the limbs accurately.
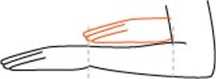
Wrist elbow measure when arm is bent
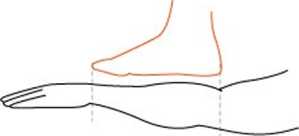
Proportion of hand and foot to the face
These distances are the same!
shoulder to bultock shoulder to birth of fingers knee to buttock
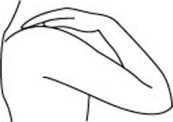
W here the hand would reach if you tried to touch your shoulder
These distances are all equal to this one ^ (in an ideał face, so use sparingly) \
Sole and palm are half the face'$ width
Notice how smaller they are in women.
Wrist-olbow measure when arm is stretched

Man
Ankle is as
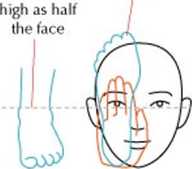
Woman
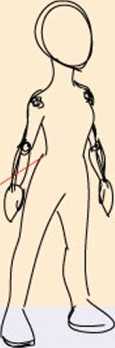
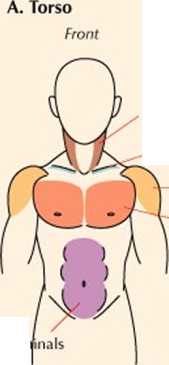
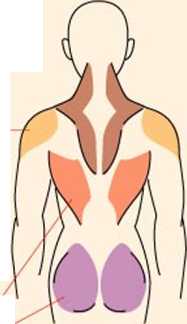
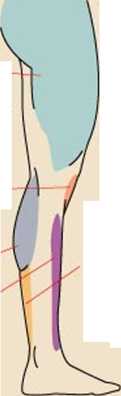
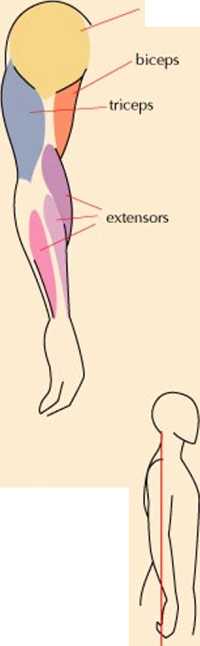
V. MUSCLE GUIDE
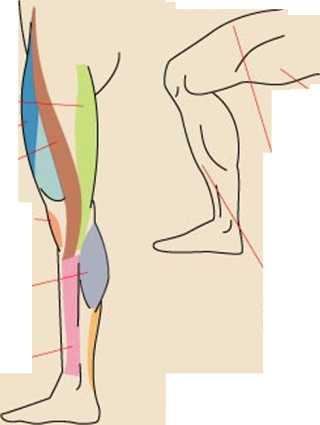
Understanding muscle structure is a great asset in building bodies. This section offers a guide to this structure that's very simplified, but sufficient for most drawing needs. The muscles or protruding bones are shown as areas of colours while the black outline shows you how that muscle would show on the surtace of the body. For reference purpose I here emphasize all the important muscles. It is only in athletic bodies however that they would show this much: the less muscular the character the less muscle strokes you should show, and the softer the outline of the skin should be as opposod to doscly adhcring to the muscles (whic h is what creates a toned look). Also remember female muscles are always morę graceful and less bulky than małe muscles.
abdon
To draw shoulders correctly:
stemo-mastoid ^ clavicle bonę
deltoids
' -pectorals
For women, replace the pectorals with the breasts (using the nipples as guides for placement).
latissimus dorsi gluteals
Back
trapezius
1. Use boxes for the neck and bust.

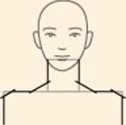
2. Add diagonal lines to cut the shoulders and add the neck-shoulder transition.
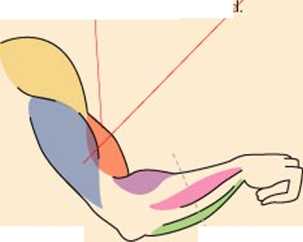
B. Arms
With the arms we need to be aware of the way muscle behav-iour determines the position of the arm, so I offer different views.
Notę how the same muscles manifest differently in each.

- vastus — rectus femoris ^sartorius
patella
- calves' tibialis anterior ^ tibia
extensors
adductor
semi- _ tendinosis
calf muscle lower inside ^
Achilles' tendon
ankle bonę higher inside
Bent (in)
biceps-rectus femoris sartorius
calves
patella
tibia
If there is weight on the leg, these muscles bulge too to prevent it from bending completely.
To flex the foot, the tibialis anterior bulges while the calf relaxes. To point the foot, the reverse happens
Bent (out)
The biceps bulge to bend the leg
no weight on this leg, so these muscles are relaxed.
Front
Out
Back
For a quick construction, you can think of the leg as two tapering cylinders that are placed on top of each other with a marked stagger. As you can see from these side and front view, the lower cylinder is staggered baekwards and outwards.
side
front
Relaxed (out)
deltoids
The arm doesn't hang straight down in resting position. Notę the relationship to the linę dropping from the back of the neck.
It is this extensor that “pulls" the hand into a flexed position, therefor^ it bulges in this case while its antagonist, the flexor, is relaxed. If the wrist was bending downwards instead, the reverse would occur.
Similarly the biceps bulge when the ami bends (assuming there is resistance, for instance if the hand is holding something heavy), and the triceps bulge if the arm is makiilig an effort to unbenj
Bent (out)

Notę the altemation in the arm'$ contour:
the forearm starts thick and tapers till halfway between elbow and hand, then its width is nearly even
Arm bends OUT when thumb is IN. Arm bends IN when thumb is OUT.

thumb
partially
hidden
Fingemails are about half the top joints
Fingers look iger as lines ■\ extend further 'A downward
Side
tendon
linę
Joint folds arranged as ellipsis
This slash starts
___J thc Ik>x
VIII. FORESHORTENING THE FACE
Start by thinking of each feature as being on a linę. Now think dimensionally: each of these lines is actually a circle running around the head. To foreshorten the face, first draw the head then add the circles, bearing in mind that distances shorton with perspective. Then add the features in place.

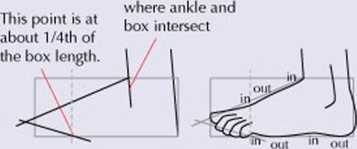
Draw a box thc size of the foot at the end of your ankle lines.
Cut the box with a long slash above and a shorter one below to shape the foot.
Back
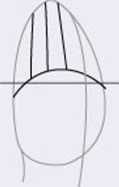
I. Draw the asymetrical egg shape outline.
2. Ihe linę of the wrist cuts in and isolates the fingers.
3. A halfway linę marks the beginning of the thumb where it cuts the outline. From there draw thc curve of the bases of the other fingers - the little finger being the only one that falls under the straight linę.
4. Round off the fingers and add the lines if desired.
The method is the same for the back of the hand, but certa in details differ.
Front
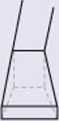
This time think 3d and draw a wedge form at the end of the ankle lines. The toes issue from the <xit fiat front surface.
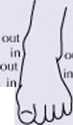
Out
A simple construction of the hand in profile:
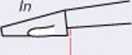
This distance is smalle> outside than inside.
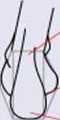
Nobody is completely fluent in drawing the hand. When in difficulty, use your own hand and a mirroras model. It is also really helpful to think of the hand as a fiat box and the fingers as strings of shorl cylinders (1 for each joint) while constructing them.
3 quar ter s

The same reasoning applies but if the foot is still fiat on the ground, it is the short side of the wedge that is lower.
Achilles tendon runs up into leg
Hint at the arch on the inside
Round off to shape the heel
Add toes and round off the edges with the details above.
|
Above |
-s. Notę how ^ |
|
( high the y | |
|
Adding the / |
\ ear is now / A 1 |
|
cenlerline is l |
j] |
|
helpful V: |
) W |
|
/ \ |
From this angle features will tend to curve upwards.
Nose grows out of the linę; perspective makes it much closer to or overlap the mouth
Below
From this angle features will tend to curve downwards.
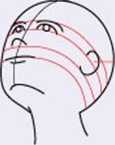
Notę how Iow the ear is now
Wyszukiwarka
Podobne podstrony:
GUIDE TO DRAWING THE BODYJoumana Medlej, cedarseed.com The ideałised body proportions used to Iearn
GUIDE TO DRAWING THE BODYJoumana Medlej, cedarseed.com The ideałised body proportions used to learn
f4 12 Pioperty Page Wizard - Select the Pioperty Pages Choose the Property Page(s) you want to use w
htdctmw 045 Look, the first thing a fledgling artist needs is self-confidence. And here’s the way to
G New Project Wizard xAdd Files Select the design files you want to include in the project. Click Ad
Step One STEP ONEClearly Define Your Expectations When you are ready to hire an virtual assistant th
prod sel?ditional Select only the additional products you want to install. ) Product SelectionR2007c
message 5 Click on the place where you want to flsh.
How to rotate a PDF file permanently? Ali you need to do is select the PDF document you want to rota
więcej podobnych podstron