43
BEADED AMULET PURSES • APPENDIX A 43
Appendix A
Beading Technigues
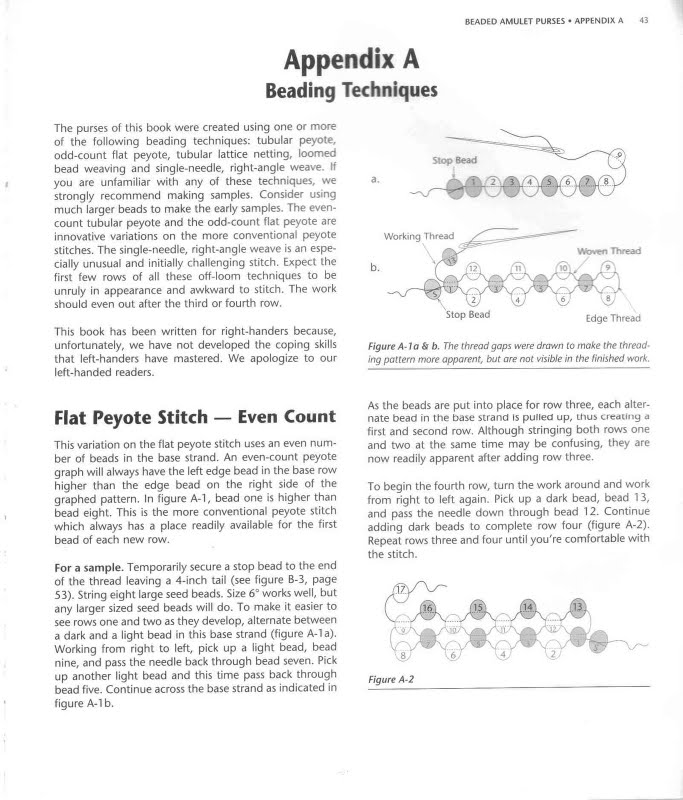
Figurę A-la&b. The thread gaps were drawn to make the thread mg paltem morę apparent, hut are not visib!e in the finished work.
The purses of this book were created using one or morę of the foliowing beading techniques: tubular peyote, odd-count fiat peyote, tubular lattice netting, loomed bead weaving and single-needle, right-angle weave. If you are unfamiliar with any of these techniques, we strongly recommend making samples. Consider using much larger beads to make the early samples. The even-count tubular peyote and the odd-count fiat peyote are innovative variations on the morę conventional peyote stitches. The single-needle, right-angle weave is an espe-cially unusual and initially challenging stitch. Expect the first few rows of all these off-loom techniques to be unruly in appearance and awkward to stitch. The work should even out after the third or fourth row.
This book has been written for right-handers because, unfortunately, we have not developed the coping skills that left-handers have mastered. We apologize to our left-handed readers.
Fiat Peyote Stitch — Even Count
This variation on the fiat peyote stitch uses an even num-ber of beads in the base strand. An even-count peyote graph will always have the left edge bead in the base row higher than the edge bead on the right side of the graphed pattern. In figurę A-l, bead one is higher than bead eight. This is the morę conventional peyote stitch which always has a place readily available for the first bead of each new row.
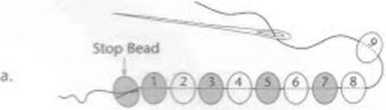
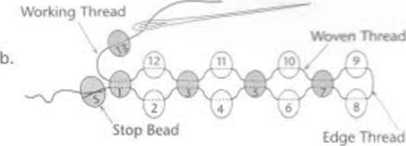
For a sample. Temporarily secure a stop bead to the end of the thread leaving a 4-inch taił (see figurę B-3, page 53). String eight large seed beads. Size 6° works well, but any larger sized seed beads will do. To make it easier to see rows one and two as they develop, alternate between a dark and a light bead in this base strand (figurę A-l a). Working from right to left, pick up a light bead, bead nine, and pass the needle back through bead seven. Pick up another light bead and this time pass back through bead five. Continue across the base strand as indicated in figurę A-lb.
As the beads are put into place for row three, each alternate bead in the base strand is puiied up, ihu> ucdiiny a first and second row. Although stringing both rows one and two at the same time may be confusing, they are now readily apparent after adding row three.
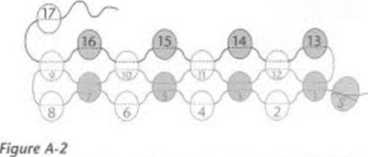
To begin the fourth row, tum the work around and work from right to left again. Pick up a dark bead, bead 13, and pass the needle down through bead 12. Continue adding dark beads to complete row four (figurę A-2). Repeat rows three and four until you're comfortable with the stitch.
Wyszukiwarka
Podobne podstrony:
BEADED AMULET PURSES • APPENDIX A 45 BEADED AMULET PURSES • APPENDIX A 45 Figurę A-8 Figurę A-6a &am
BEADED AMULET PURSES • APPENDIX Et SSTo begin single-needle, right-angle weave Tie the base strand i
BEADED AMULET PURSES • APPENDIX B 57How to read even-count tubular peyote graphs The tubular peyote
*4 AFPtNDtt A • BEADED AMULET PURSESFiat Peyote Stltch — Even-Count Decreasing at the sides Continui
*4 AFPtNDtt A • BEADED AMULET PURSESFiat Peyote Stltch — Even-Count Decreasing at the sides Continui
BEADED AMULET PURSES • PROIECT SEVEN i ) Figurę 4 To make the triangular points at the top of the pu
BŁADEO AMULET PURSES • APPENDIX A 49 Figurę A■ 17. Starting a nev/ row with an odd number of squares
10 PROJECT ONE • BEADED AMULET PURSES Figurę 4 To outline the hearts at the top rim. Begin a new thr
V • BEADED AMULET PURSES V • BEADED AMULET PURSES figurę A-14a & b ExitSingle needle,Rightangle
V • BEADED AMULET PURSES V • BEADED AMULET PURSES figurę A-14a & b ExitSingle needle,Rightangle
więcej podobnych podstron