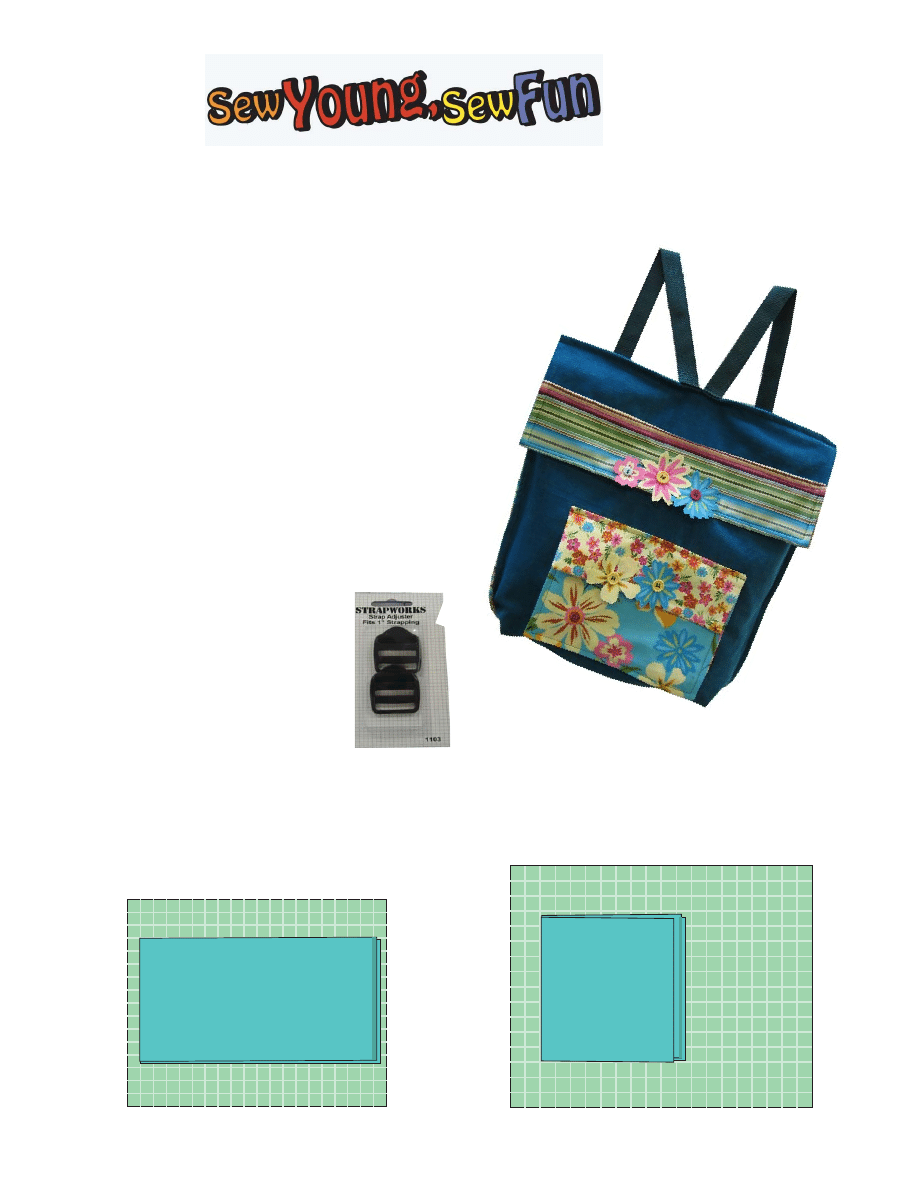
Be you, be one of a kind! Let’s design your own
backpack! Start by picking out your favorite fabrics! For
the back pack itself, it needs to be a sturdy fabric like
corduroy or denim. For the pockets, you can use any
fun cotton fabrics you like! We used the Sew You, Sew
Fun fabrics from RJR to coordinate with the corduroy.
They are part of a collection designed to be used
together, so coordinating the fabrics was easy!
Sewing Supplies:
1/2 yard Cotton Corduroy
1/2 yard Striped Cotton for Lining
1/3 yard Each of Two Coordinating Prints for Pocket
Rotary Cutting Mat, Cutter and Board
Sewing Thread
1/4” wide Steam-A-Seam
One 2” and One 3” strips of Velcro
One Sheet Steam-A-Seam 2
Approximately 5 buttons (one for each
free form fl ower)
One Package Strap Adjusters
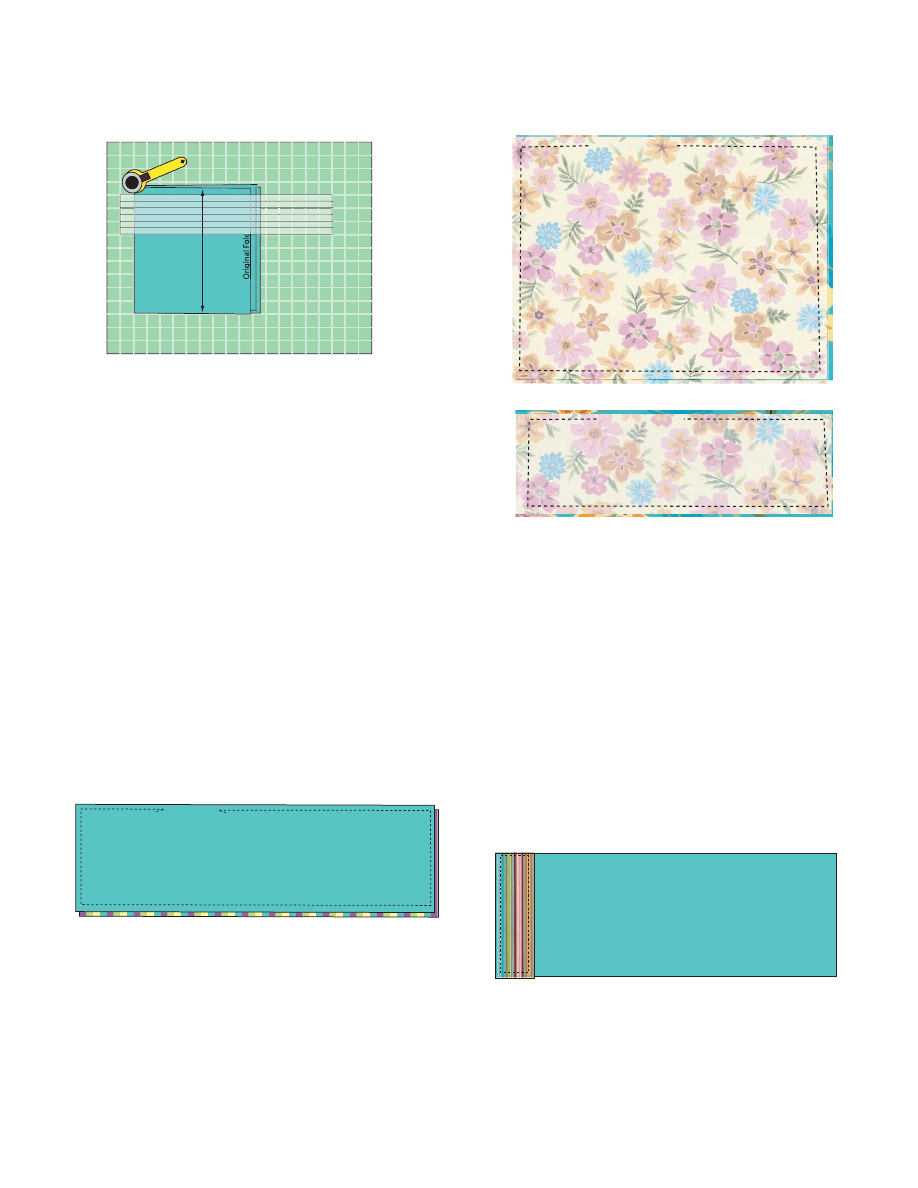
Cut:
1. Cut the corduroy and the striped lining fabric
into pieces 16” x 40”. Right now, your fabric is
18” x approximately 44”. The easiest way to cut
it is to put it on your cutting mat folded the way
it comes off the bolt.
2. Fold the fabric again, bringing the fold to the
selvages. You now have four layers. Line up the
fold along one of the lines on your cutting mat.
Kids Club
Sew You, Sew Fun Backpack
by Marie Duncan, Education Creative Coordinator
Fo
ld
S
e
lv
ages
Original F
old
New F
old
S
elv
ages
Line up her
e with line on mat
3. Place your ruler with one edge along the lines on
the board, and cut off the fabric along the ruler.
Then repeat for the other edge so the piece
measures 16”.
4. Then unfold the fabric and cut off the selvages
so the piece is 16” x 40”.
5. Repeat the same steps for the 1/2 yard of lining
fabric.
6. Cut pocket pieces from the coordinating prints.
From each fabric, cut one piece 10” x 7” and
one for the fl ap 10” x 4”.
Sew:
1. Select Straight Stitch. Place the corduroy and
lining right sides together, and sew all the way
around leaving a 5” opening. Line up the edge
of the fabric with the edge of the foot. Your
seam allowance will be about 3/8”. For this
project, it doesn’t have to be exact. Be sure to
back tack when you start and when you fi nish.
We are going to turn our piece right side out
through the opening.
2. Trim the corners diagonally, close to the
stitching. Turn right side out and press.
Make the Pockets:
1. Place the pocket pieces right sides together.
Sew around them as you did before, leaving a
4” opening to turn. Repeat for the smaller fl ap
pieces.
2. Trim the corners, and turn the pocket and fl ap
right side out. Press.
3. Steam-A-Seam is a paper backed fusible web.
It comes in sheets or in narrow rolls. To close
our openings, we want to use the 1/4” wide
Steam-A-Seam. Cut a strip the same size as the
opening. At the ironing board, place the strip
inside the opening with the paper side up. Press
lightly with a dry iron (no steam). Remove the
paper. Put the two fabric edges together, and
press with steam. The opening is now fused
closed. Repeat on the bag piece, the pocket and
the fl ap.
Finish the Back Pack:
1. On one end of your bag, fold the print lining to
the corduroy side 3”. Stitch around the print as
shown.
2. This is the fl ap. Fold it over 6” towards the
lining and pin.
New F
old
S
e
lv
ages
d
d
16"
Leave 4" open
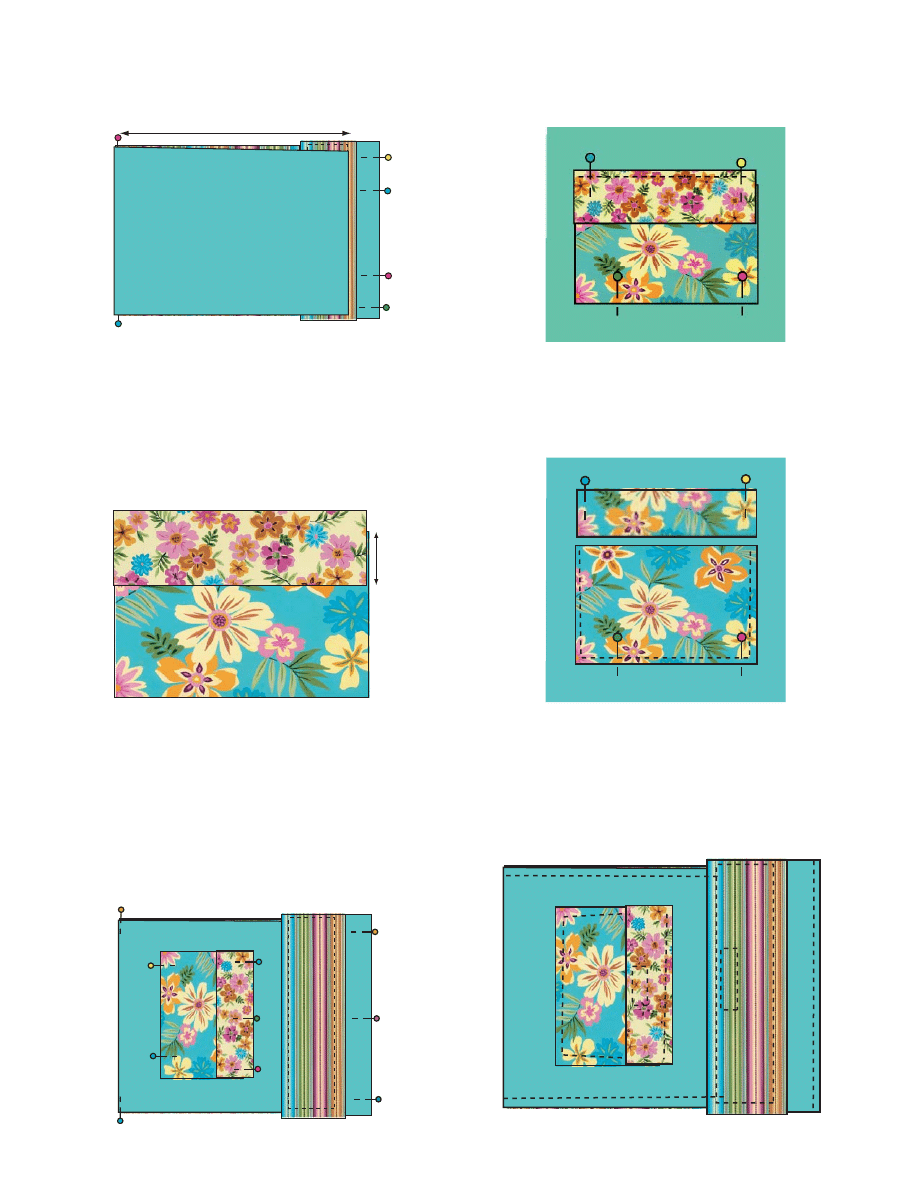
3. Fold up the other end 13”.
4. Place a pin at each end of the fold at the
bottom.
5. Stitch one piece of the 2” long Velcro on the
wrong side of the fl ap and the other piece on
the right side of the pocket. Place the fl ap and
the pocket so that they overlap about 2 1/2”,
and mark the placement of the Velcro.
6. Then sew on the Velcro. We used one print for
the outside of the pocket and the other print for
the outside of the fl ap. You could have them
match if you would like to.
7. Bring the fl ap to the outside of your backpack.
Place your pocket on your backpack, centered
from side to side and top to bottom as shown.
Pin through the top layer only.
F
old
13"
F
old
2 1/2"
8. Open out the backpack, and stitch the top of the
pocket fl ap to the corduroy piece. Be sure you
aren’t stitching through the pocket itself.
9. Fold the pocket fl ap up, and pin it out of the
way. Stitch the sides and bottom of the pocket
being sure to back tack securely at the top of the
pocket.
10. Stitch Velcro to the upper fl ap of the back pack
the same way you did to the pocket.
11. With the lining sides together, stitch the side
seams and across the top as shown.
F
old
F
old
Decorate:
1. Now, let’s decorate! Choose a print with large
fl owers. Using your sheet of Steam-A-Seam 2,
remove the paper backing from one side. That
will reveal a sticky surface. Stick it to the wrong
side of the fl ower fabric. Press with a dry (no
steam) iron.
2. Remove the remaining paper. Select a smaller
print and stick the wrong side of the smaller
print onto the sticky surface. Press with steam.
What you just did was to make a “stiffer” double
sided fabric, perfect to cut free form fl owers
from. Cut out some of the fl owers.
3. Pin them in place on your backpack. We put a
couple over each spot where we had sewn on the
Velcro.
4. Place a button in the middle of the fl ower. Look
in your Users Guide to fi nd out how to sew on
the button. Sew a button in the center of each
fl ower.
Square the Bottom:
1. To square the bottom of your backpack, you
need to turn it inside
out.
2. Match the side seam
to the bottom, and it
will form a triangle.
Measure up 1” and
sew across as shown.
3. Turn your backpack right side out.
Attach the Straps:
1. To keep the ends of the straps from fraying,
either run the end of the webbing through
the fl ame on a candle, if it is synthetic like
polyester, or zig zag over the ends. Cut the
2 yard piece in half. Cut a 6” piece off each
of the 1 yard pieces. This will give you two
6” pieces and two 30” pieces. Finish all the
ends.
2. Pin one end of each 30” strap in the center
of the back of the backpack as shown.
Stitch them in place, going over the lines
where you topstitched. Stitch with a small
zig zag stitch, going back and forth over it
several times so it will be very sturdy.
3. Stitch the short
ends on the
bottom the
same way.
4. Slide the strap
adjusters on
following
package
instructions,
and attach the
straps together.
1"
Wyszukiwarka
Podobne podstrony:
backpackmats2
backpackmats1
Backpacking A Different Way of?mping
backpack mats 3
backpackmats2
backpackmats1
A Sarong in my Backpack Adventures from Munich to Pushkar
Paw Patrol Rubble with Backpack omalovánka Omalovánky k Vytisknutí Zdarma
C Bird Feeder Tutorials Sale Backpage
Camping & Backpacking (no TOC)
toddler backpack pattern
poglądowa mapa Swanetii, marshruti logo, backpackersi blogspot com
backpack mats 3
więcej podobnych podstron