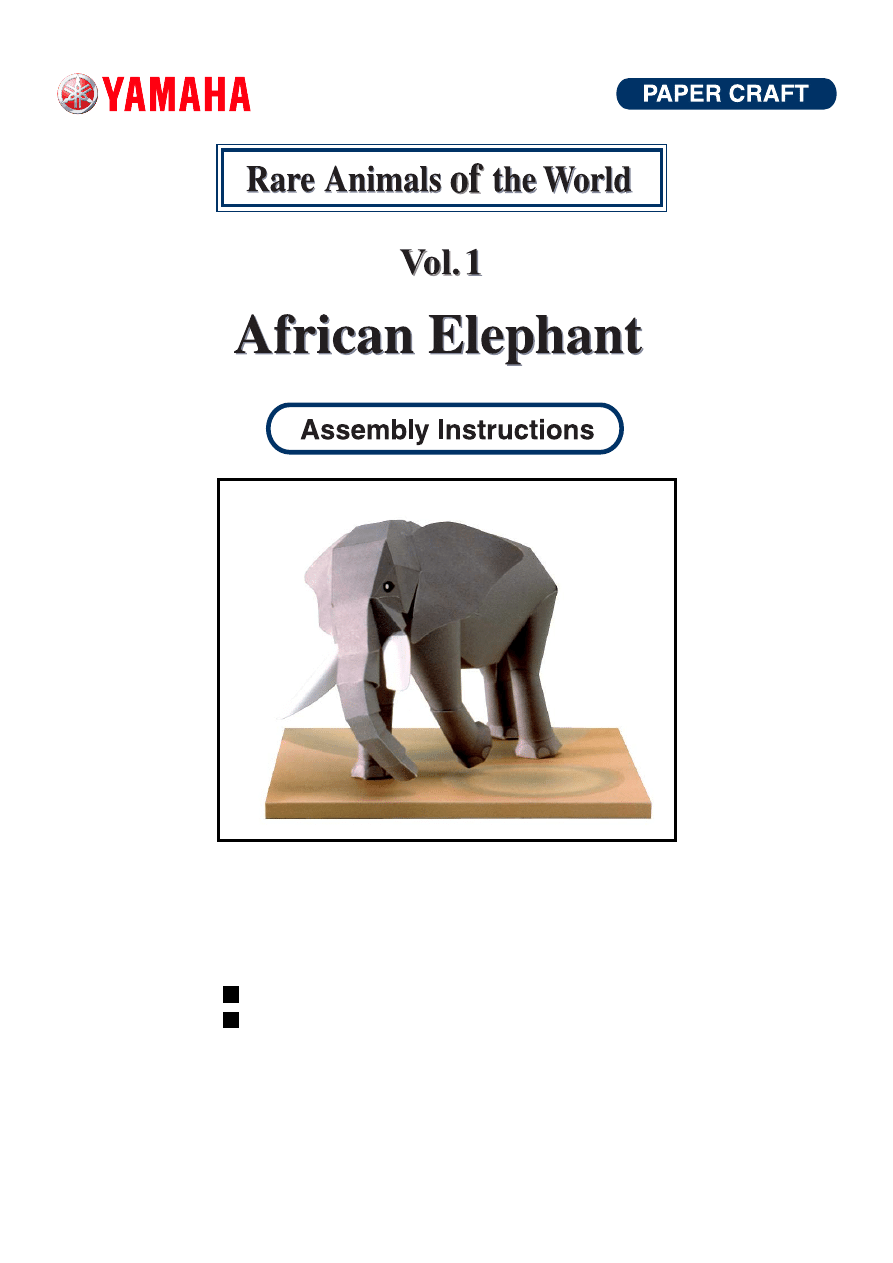
Thank you for downloading this paper craft model of the African elephant.
By matching the names and numbered parts in the instructions, you and your family
can complete a paper craft model of this rare and beautiful animal.
Assembly instructions: Six A4-sized sheets.
Paper craft: Three A4-sized sheets with 14 parts in all
These instructions apply only to the "African elephant".
These Paper Craft parts are easier to work with when printed out on strong,
thick paper (like postcard stock).
*In creating these Paper Craft models we use 135kg Kent paper stock (0.18mm).
- 2 -
Items of Caution
*Take care when using sharp or pointed objects or when
using bladed cutting tools. Place a heavy sheet of paper
under the paper you want to cut.
*Use glue and other adhesives only in well-ventilated
areas.
*When printing, use a slightly reduced font size. There
may be differences in dimensions, depending on the type
of printer used.
Tools and materials needed
-Ruler -scissors - blade cutter or "Exacto-knife" - awl or
other pointed tool (for making a folding crease) - felt pen
- pin set - glue - hand towel ( for cleaning your fingers) -
dictionary or other heavy book ( to press the papers flat).
*Cut carefully with cutting blade, Exacto-knife or
scissors.
*For folding parts, first use an awl or other pointed
tool to make a light crease along the dotted or solid
line. This will make the folds straight. Avoid making
strong creases, as this will cause the paper to tear.
*As an adhesive, white wood glue is recommended.
Avoid over application as this will cause the paper
to wrinkle.
*Before beginning assembly, test adhesive amounts
on extra paper.
*Occasionally, white spots will be apparent on folds
and cuts. Use a marker or pencil to fill in these spots.
It is recommended that this be done after each stage
of assembly because coloring becomes more diffi-
cult once parts are assembled.
To begin
1
How to assemble
2
One - point Advice
*Follow the working method and markings carefully.
*Cut carefully along the outter line with cutting blade,
Exacto-knife or scissors.
Fold along these lines. The printed
surface should be on the outside of
the folded shape.
Solid lines
Basic working method and markings
Dotted line
Fold along these lines. The printed
surface should be on the inside of
the folded shape.
Broken lines
Cut out parts marked with an as-
terisk(*).
Cut along these lines.
Do not fold or cut the parts
marked .
Red dots are the reference positions
for gluing surfaces.
- 3 -
12
1
3
Fold or Curve
Glue
Indication of Working Methods
Assembly
Please refer to page 2, "Basic working
method and markings," symbol chart to as-
semble each part.
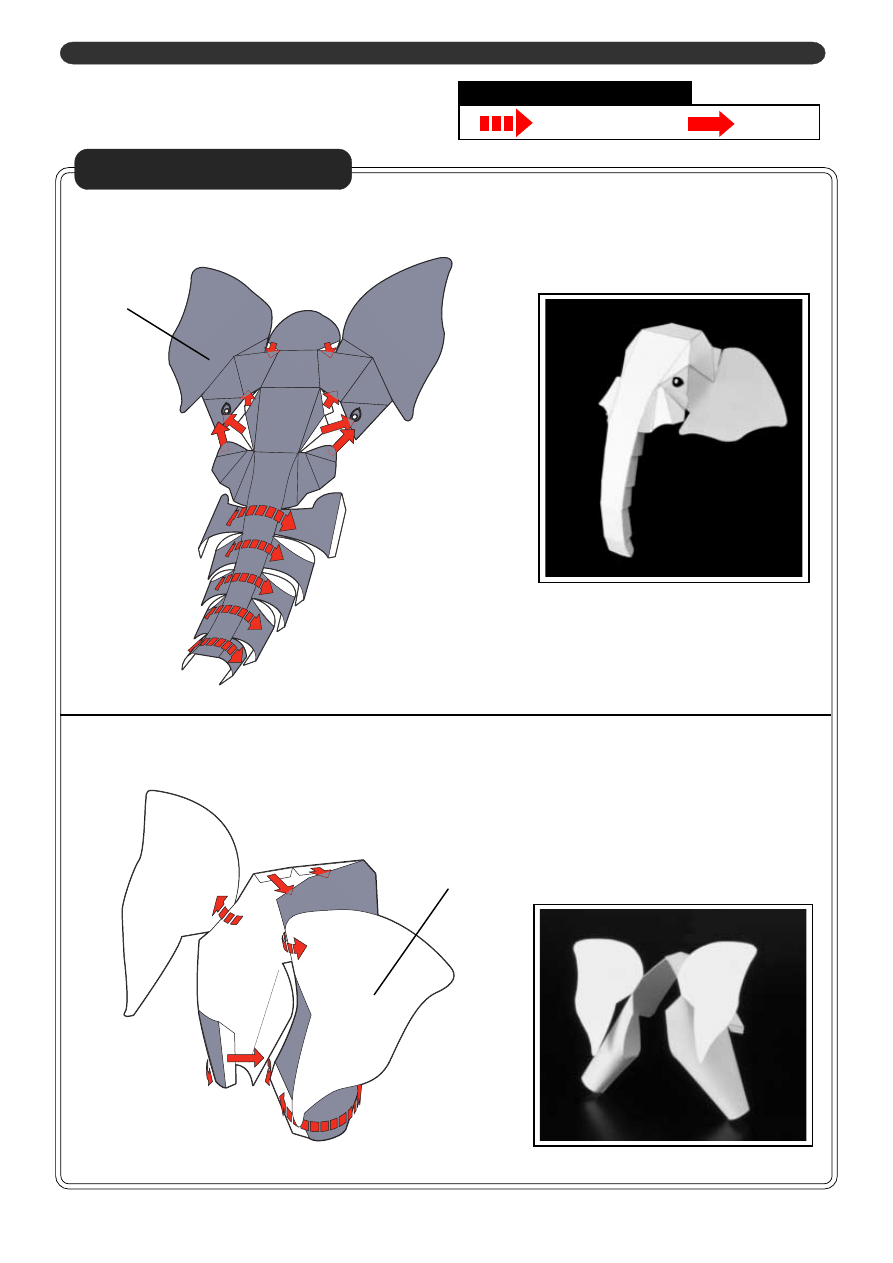
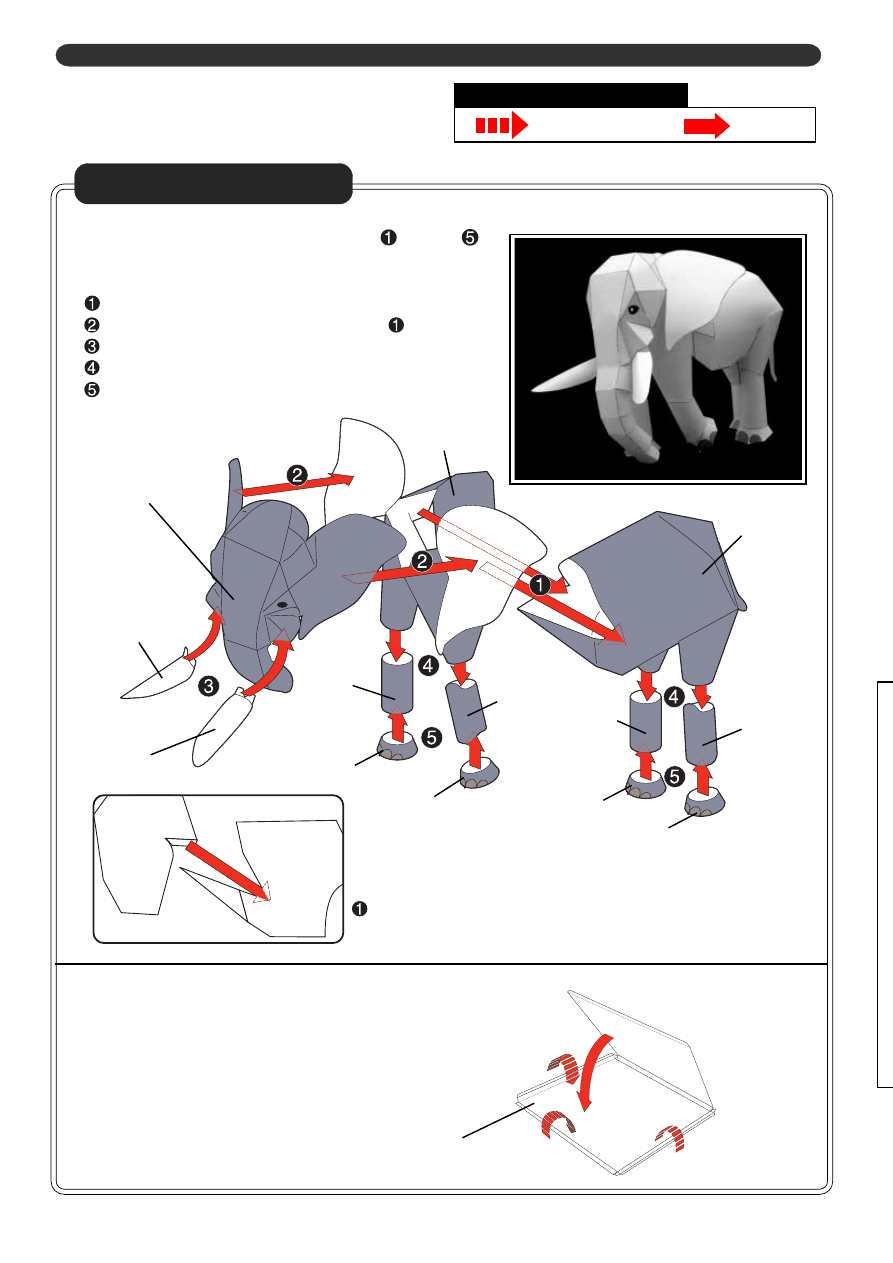
Instructions for Elephant
1. Head
Fold each relevant part according to the assembly symbols.
Reference photo
2. Shoulders
Fold each relevant part according to the assembly symbols.
Reference photo
- 4 -
8
10
13
4
6
6
1 0
4
8
7
5
1 1
9
5
7
9
11
3
Fold or Curve
Glue
Indication of Working Methods
Assembly
Please refer to page 2, "Basic working
method and markings," symbol chart to as-
semble each part.
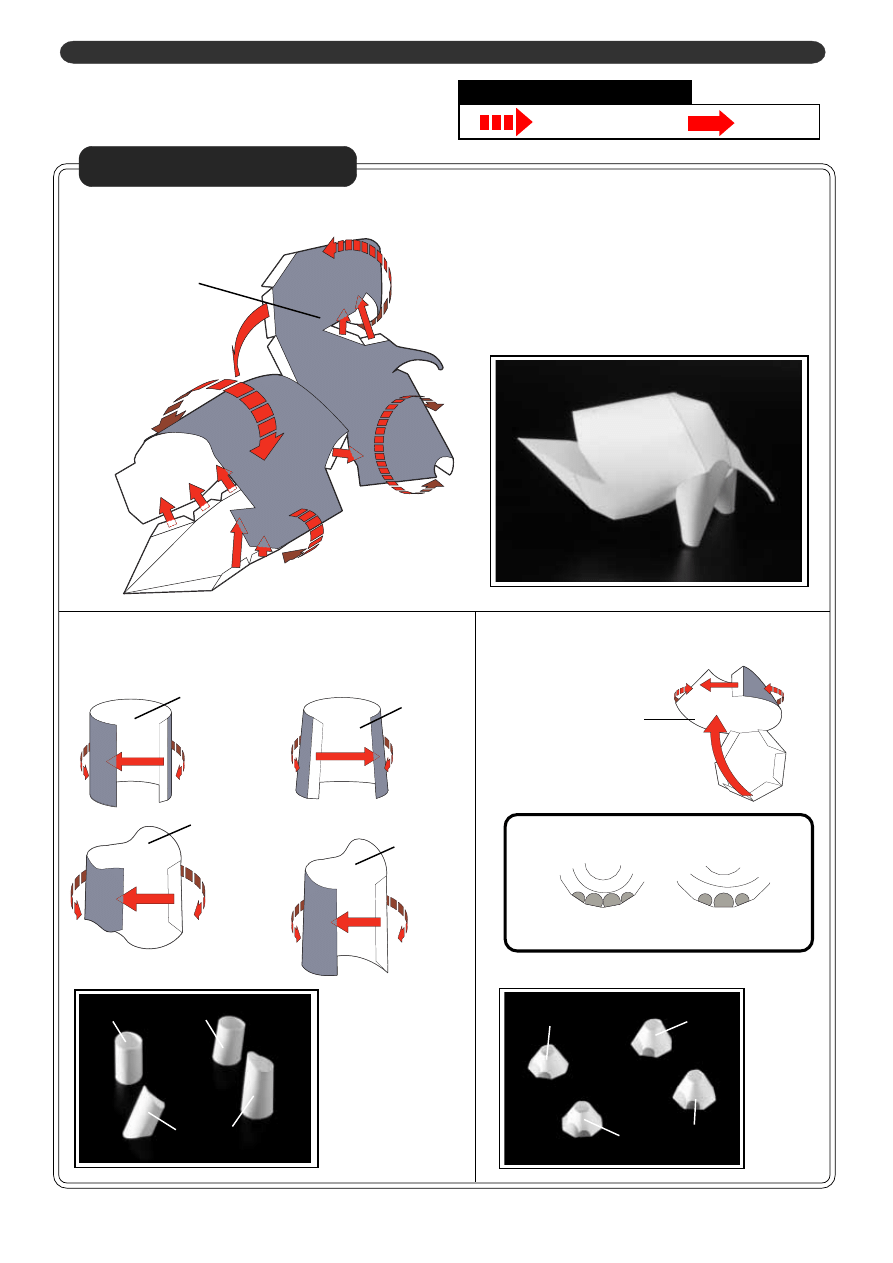
Instructions for Elephant
3. Body
Fold each relevant part according to the assembly symbols.
Reference photo
4. Legs
5. Feet
Fold each relevant part according to the assembly symbols.
Fold each relevant part according to the as-
sembly symbols.
Right hind leg
Right fore leg
Left hind leg
Left fore leg
Reference photo
Reference photo
Left fore leg
Right fore leg
Left hind leg
Right hind leg
Do not confuse the toenails of the fore
feet with those of the hind feet.
Four toenails for fore feet; Three toe-
nails for hind feet
- 5 -
3
2
5
7
9
11
8
10
4
6
3
Fold or Curve
Glue
Indication of Working Methods
Assembly
Please refer to page 2, "Basic working
method and markings," symbol chart to as-
semble each part.
Instructions for Elephant
Reference photo
6. Finish
Assemble according to steps through .
Procedure
Glue the shoulders to the body.
Glue the head to the part completed in
Glue the tusks (indicated as 2 and 3) to the head.
Glue each leg.
Complete assembly by gluing the feet to the legs.
Head
Shoulder
Body
Glue the shoulder part
to the body part.
Body
Shoulder
Pedestal
Pedestal
* Display the completed paper sculpture on the pedestal.
Assemble the platform by gluing together the indicated surfaces.
- 6 -
4
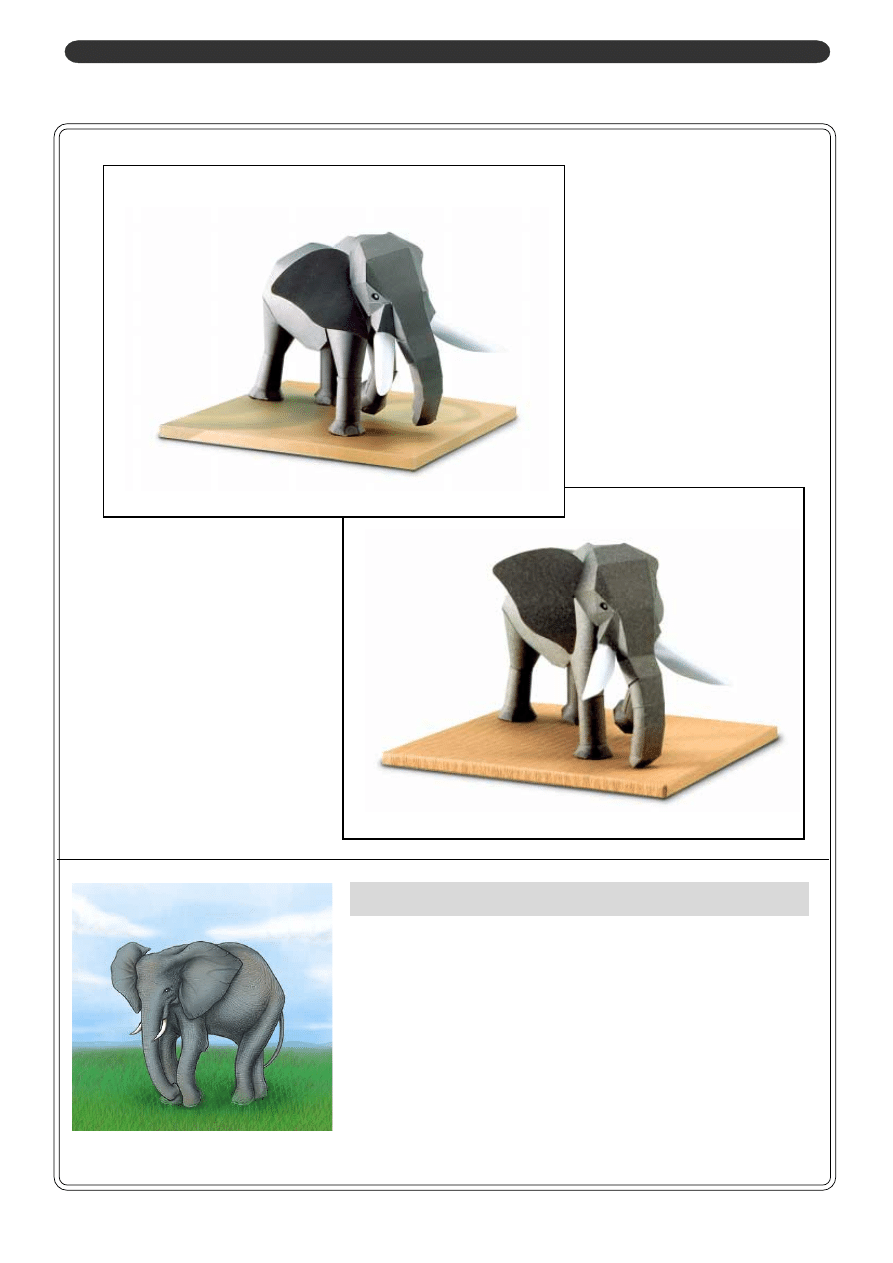
Completion
Here are pictures of the completed models.
Please refer to them for assembling and painting.
Uncolored African Elephant
Uncolored sculpture with special paper texture.
Rare Animals of the World - African Elephant
The African elephant, the largest living land mammal, inhabits
tropical forests and savannas of the African Continent, as indi-
cated by its name. The long trunk is used to communicate within
the herd as well as to tear off grass and draw water. The large
ears are frequently fanned in order to lower the animal's body
temperature. The elephant's decrease in number is ultimately the
result of ivory hunting. It is said that at the beginning of the 20th
century there were 10 million African elephants, but now there
are less than 500,000 and the number continues to decrease.
Colored African Elephant
Photo of realistically colored paper sculpture.
Wyszukiwarka
Podobne podstrony:
więcej podobnych podstron