Homework:
Simple State Machine – Traffic Light
Introduction
To practice using the state machine design pattern, you can create a simple program that
controls a single traffic light – switches the lights on and off in the well-known sequence:
red → red and yellow → green → yellow → red...
and so on.
Front Panel – User Interface
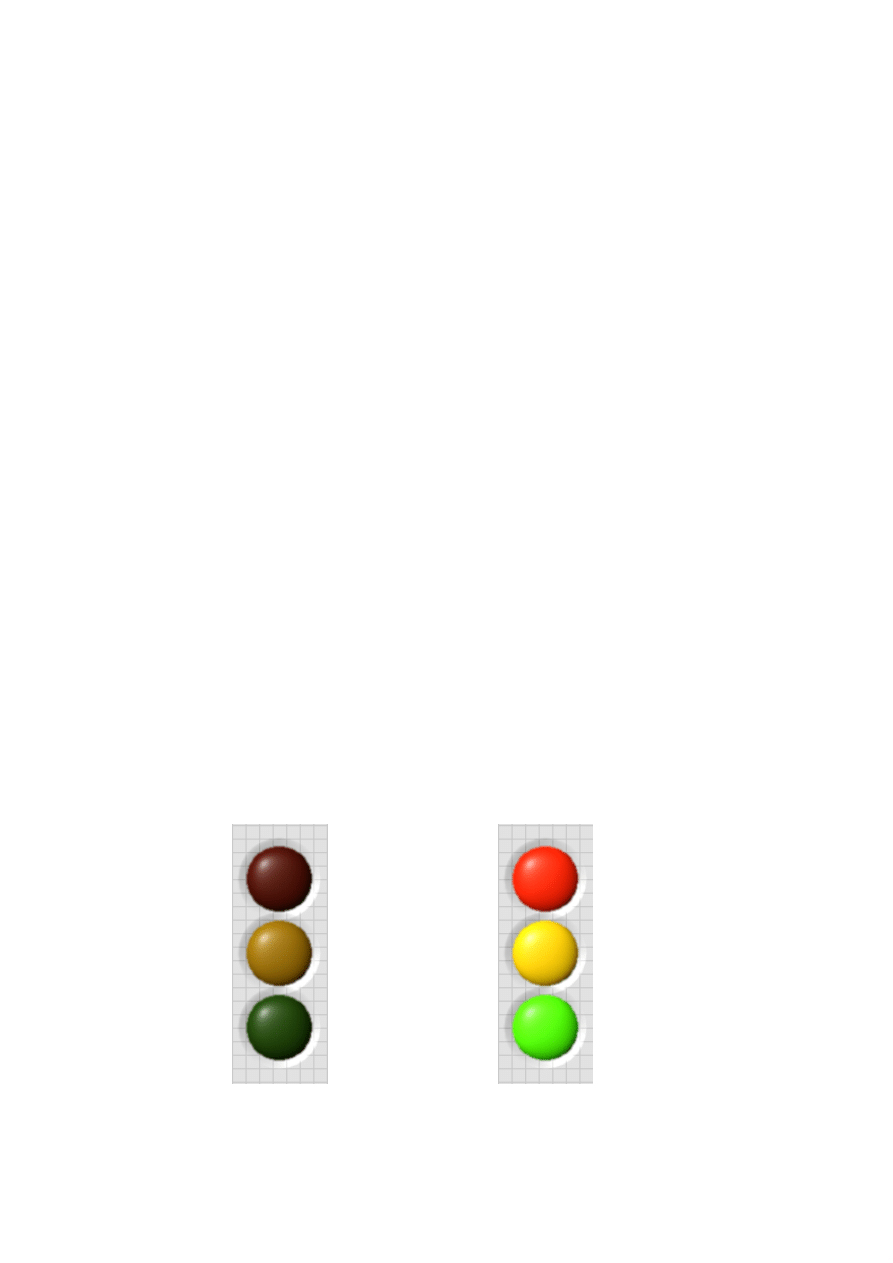
First, you need a traffic light – place three round LEDs on the front panel and set them the
right colours (for example, right-click an LED, go to Properties » Appearance tab and select
the desired colours). Next, to make the code easier to understand, change the labels of the
LEDs – for example, to Red, Yellow and Green. You can hide the labels from the front panel
by right-clicking an LED and unchecking the option Visible Items » Label. (You can select all
LEDs at once and change label visibility for all of them simultaneously – then you will not
need to repeat the process three times.)
When you finish, the traffic light should look similar to what is in the pictures:
LEDs off
LEDs on
Block Diagram – Application Code
On the block diagram, create a state machine. Let's consider which states are needed:
red light on
yellow light on
green light on
red and yellow lights on.
Each state should last a certain amount of time, and then the traffic light should switch to
the next state.
You could also add a separate fifth state – application stop. However, to keep the program
simple we are going to have only the above-mentioned four states, and the VI will be
stopped simply with a STOP button wired to the conditional terminal of the While Loop.
Now you can move on to writing the code for the state machine. For this, you need a While
Loop with a Case Structure inside, and something that you will wire to the Case Selector
terminal of the Case Structure (the one with the question mark '?'). This "something" might
be an integer and the program may move from state "1" to "2", from "2" to "3" and so on,
but that would not be very clear. You could also use strings and label your states with words
"Green", "Yellow" etc. – such approach results in much clearer code but you have to be very
careful with spelling. If you tell your program to go to "Yellw" state instead of "Yellow", it will
probably behave in a strange way and you will waste time debugging it. Thus, the best
option seems to be using an enum with four items – one for each state.
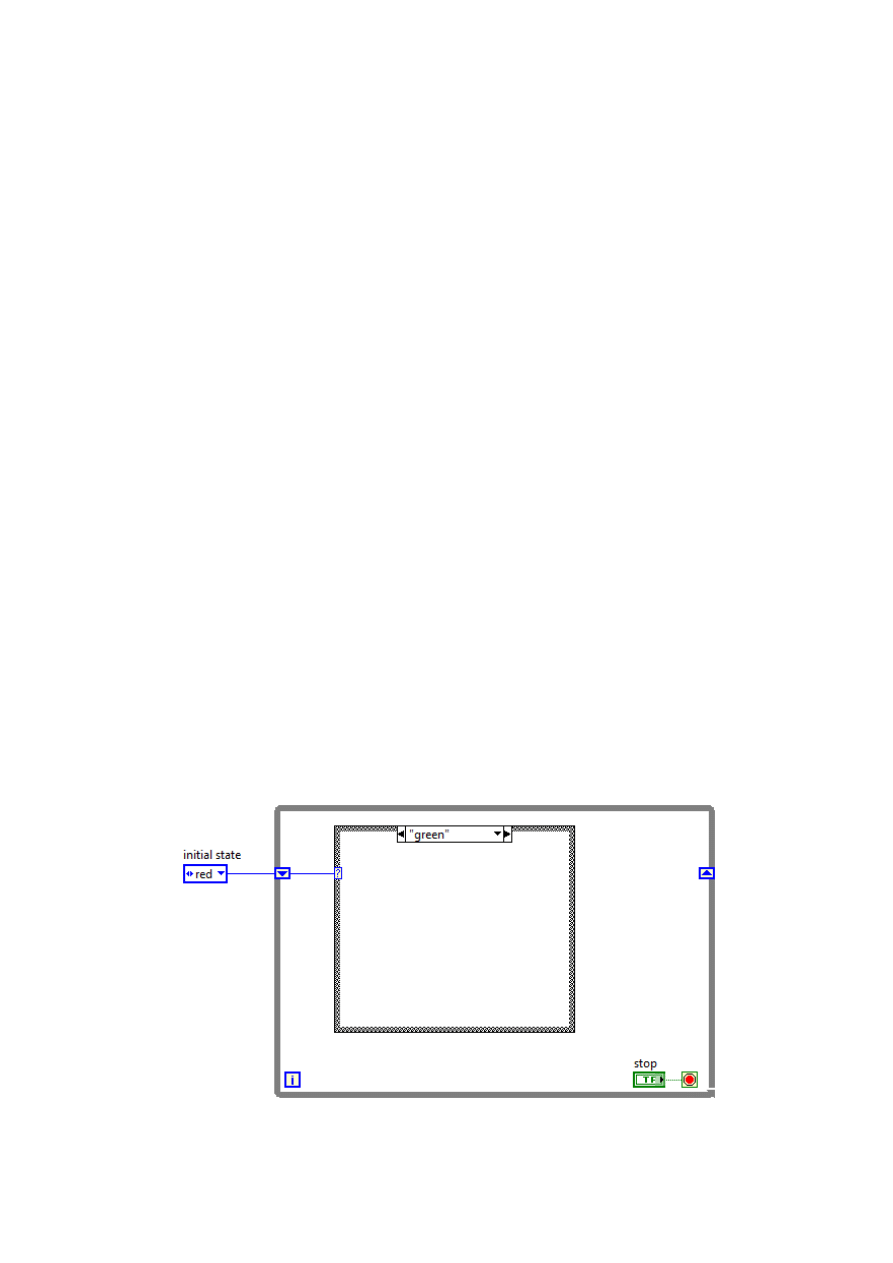
Create a shift register on the border of the While Loop and wire a constant of your enum
through the shift register to the Case Selector terminal. Set the value of the constant to the
state which you want to be the start state of the traffic light – for example, the red light:
According to what we have said about type definitions – it should come to your mind now to
make this enum a type definition. In each state of the state machine we have to tell the
program which state to go to next, so we need more enum constants and each of them has
to have the same item list as the "initial state" constant. In case we want to modify the
enum in the future, it is a good idea to save it as type definition: right-click the enum
constant that initializes the shift register and select Make Type Def., then right-click the
constant again, choose Open Type Def. and save it to a file.
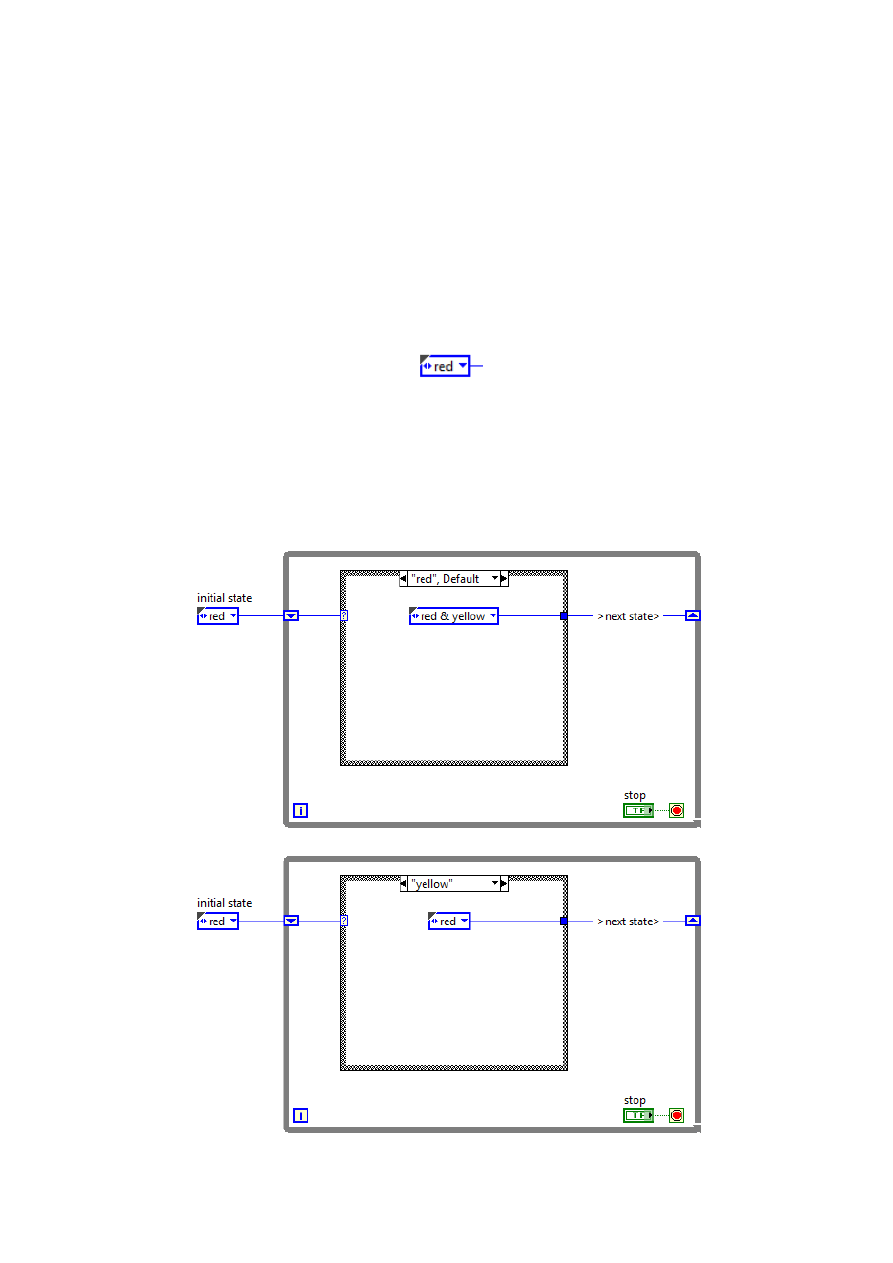
After you create a type definition, a triangular mark appears in the corner of the enum
constant:
Now you can define to which state to go from which. In our application this logic is quite
simple. Create a separate case of the Case Structure for each value of the enum (right-click
Case Structure border and select Add Case for Every Value); then, insert a constant (a copy
of the "red" enum constant) into each case and set the proper value in it. Wire these
constants through a tunnel on the Case Structure to the right-side part of the shift register:
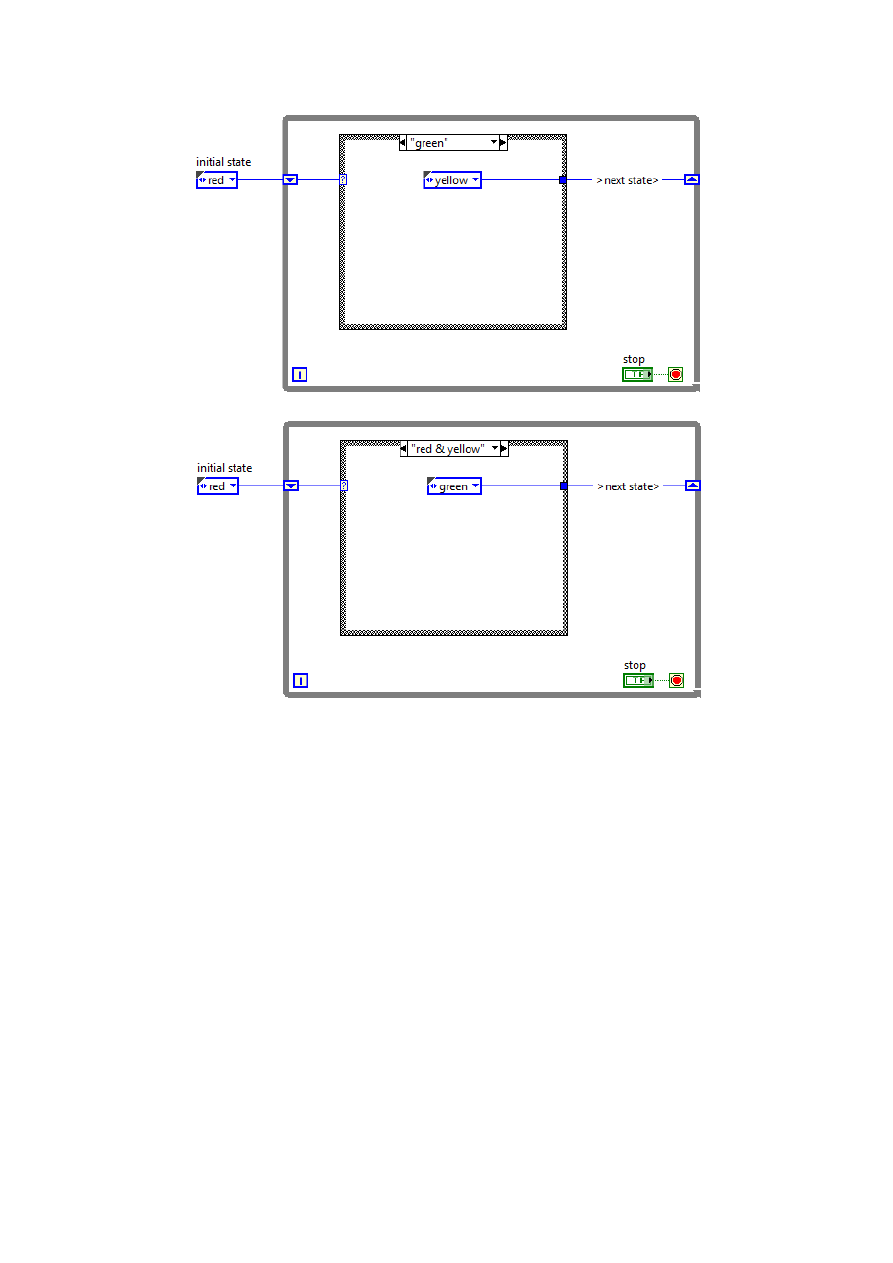
This way you created the whole logic of the architecture of the state machine – you defined
all state transitions. Now it is time to add the code which will define the actions performed
in each state.
We want every case of the Case Structure to switch certain lights on and off – thus, the LEDs'
terminals should be placed inside the loop, but outside of the Case Structure. From the
inside of each case, True and False values should only be sent through tunnels to the LEDs.
For example, in the state that turns the green light on it will look like this:
Other states should be completed in a similar way.
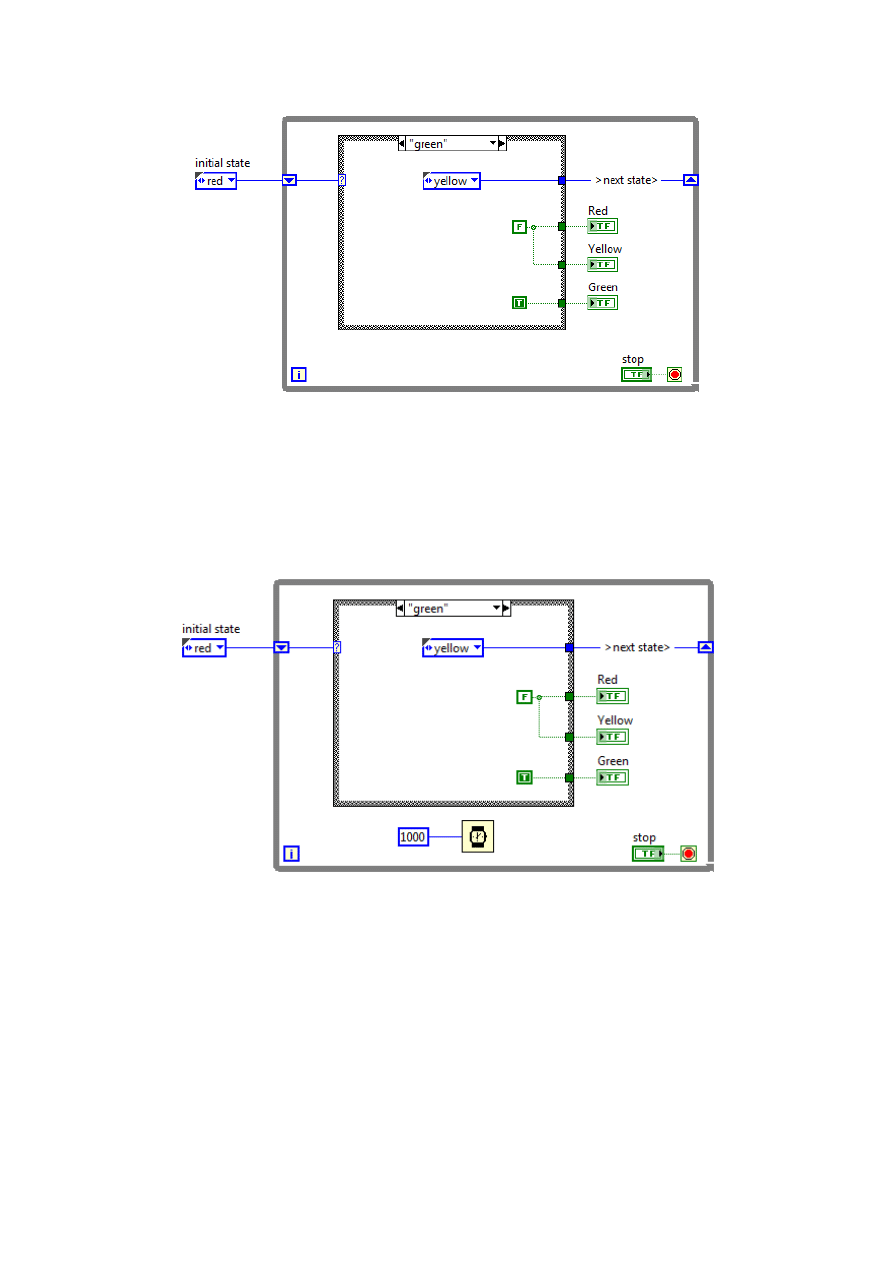
In the end, you need every light to be turned on long enough, that is – you need each state
to last a certain amount of time. You can use Wait function for it. The first option is to make
all states last equally long, and add a Wait function with the desired amount of milliseconds
wired to it outside the Case Structure:
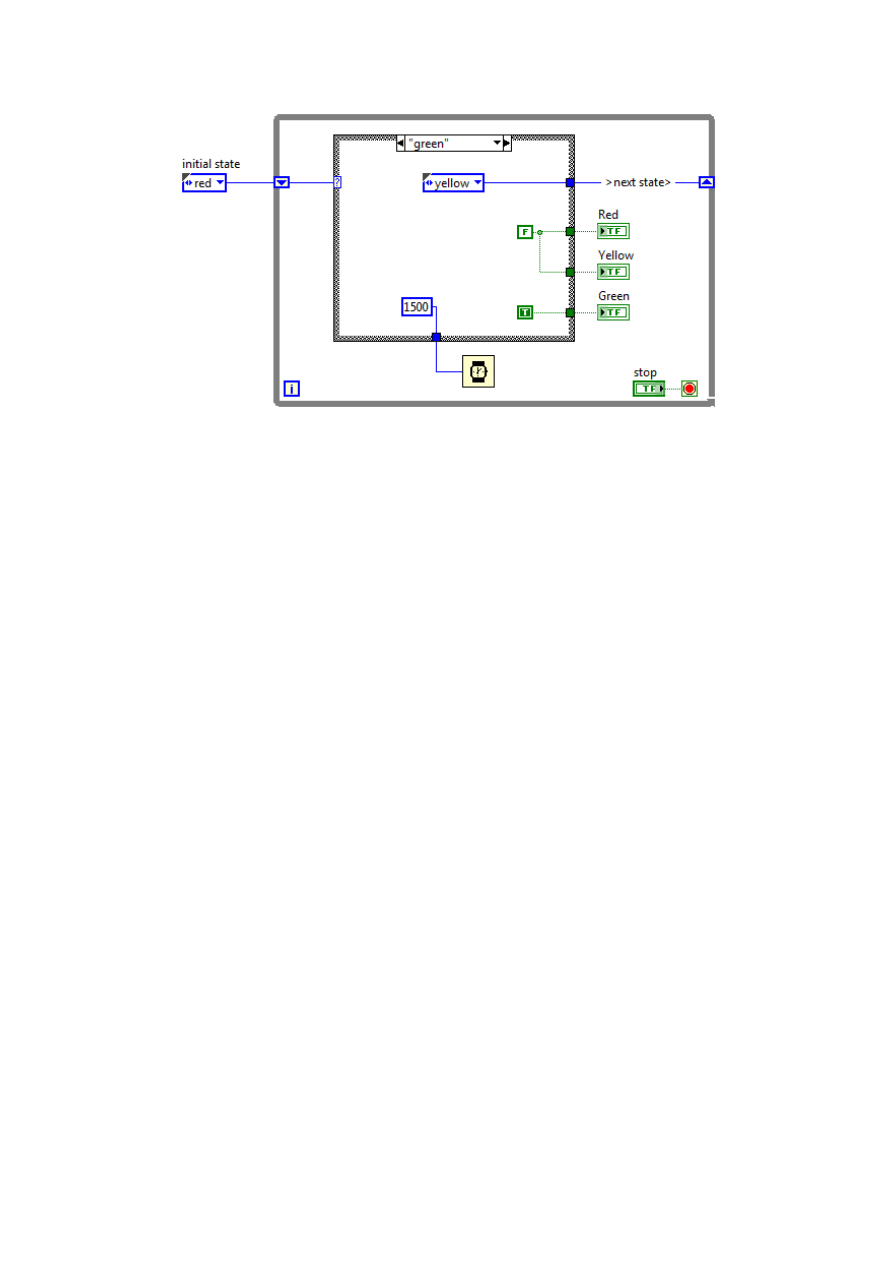
The second option, more similar to the real traffic lights, is to have the possibility to set
different time durations for different states. To accomplish this, wire a separate constant
with the amount of milliseconds from each state, through a tunnel, to the Wait function:
The program is finished – you can test it now!
End note
You will probably notice that sometimes you need to wait quite long for the VI to react to
your pressing the STOP button. This is because there is a high value of milliseconds wired to
the Wait function inside the loop. After you press the STOP button, you need to wait for the
current state to finish execution (that is, you need to wait for the given amount of
milliseconds to elapse) and only then LabVIEW reads the STOP control and stops the loop. To
make the program respond faster to pressing the STOP button, the state machine would
have to be written a bit differently to enable wiring a smaller constant to the Wait function;
this would make the VI more complicated, so we are not going to do this in this simple
program, which is perhaps your first state machine ever.
If you feel comfortable with the idea of state machines, you can try to make such a more
advanced (more responsive) version of the traffic light on your own. Good luck!
Wyszukiwarka
Podobne podstrony:
więcej podobnych podstron