155
MANTLE CLOCK
Copyright 2004 Martian Auctions
692
Copyright 2004 Martian Auctions
693
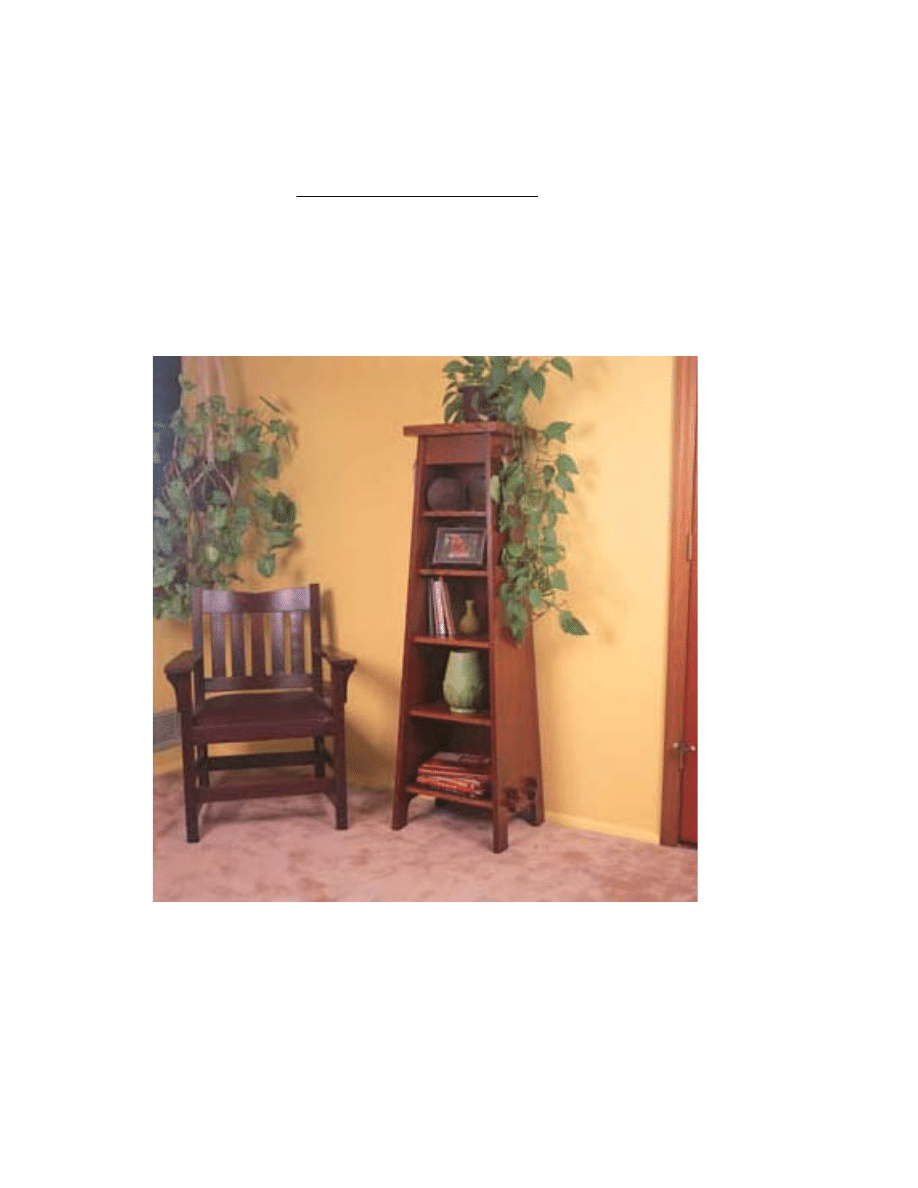
During the Arts & Crafts heyday at the turn of the 20th century there
were an extraordinary number of designs for bookcase and
magazine stands offered to the public as completed pieces and
construction plans. Most included simple designs and
straightforward construction.
Slabs • In keeping with the Arts & Crafts style of stout furniture, the
sides and shelves of this piece are called out as 7/8"-thick material.
You may find the design more economically feasible by changing
that to 3/4" material. Start by milling and matching the grain
patterns on the two side pieces. If possible, try and use only two
boards per side for the width. If this isn't possible, the trapezoidal
design will allow you to use two 7"-wide boards for the center of
each side, adding a 2" strip on the front and back edges of the
lower half, keeping the exposed glue lines to a minimum.
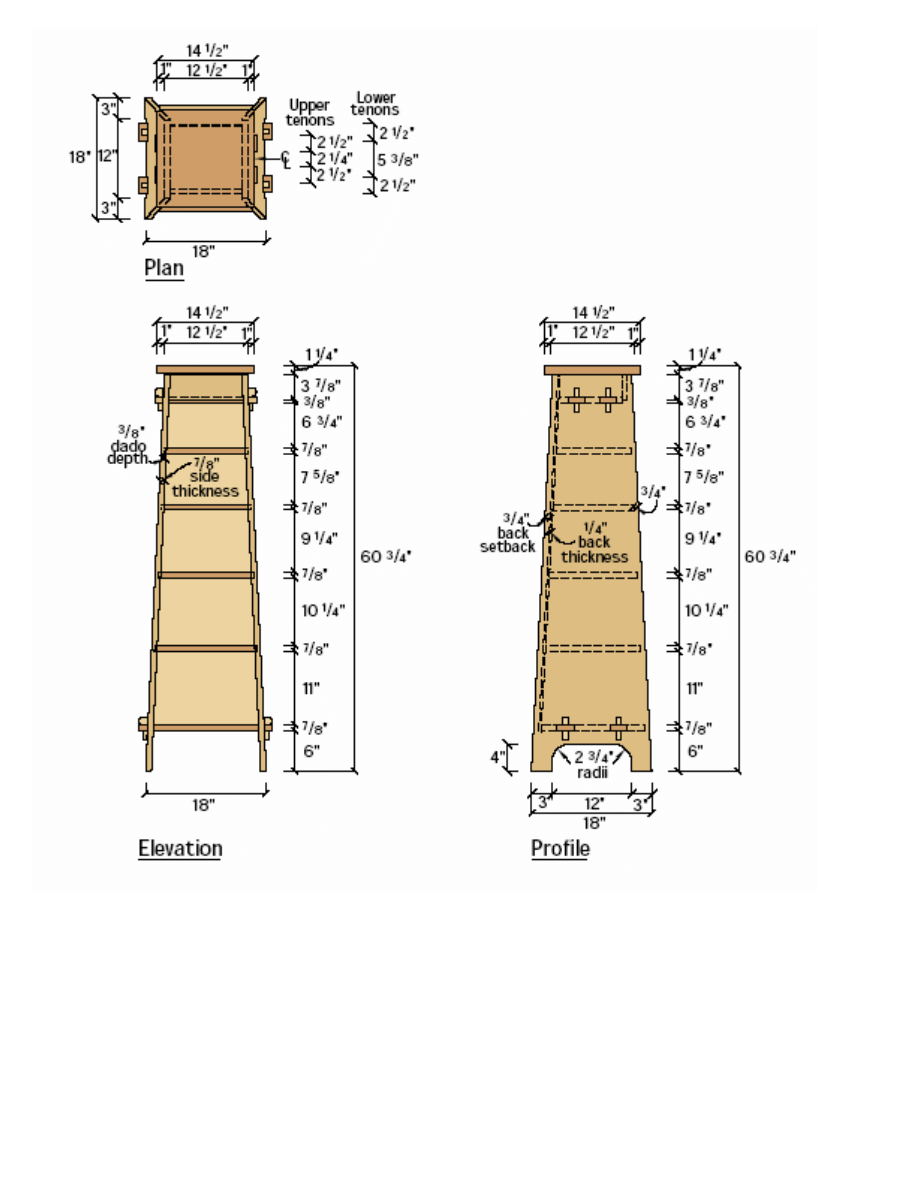
With the sides glued, squared up and sanded flat, mark the location
of the shelves as shown on the diagram. The top and bottom
shelves will have angled through-mortises cut into the sides, while
the other four shelves are captured between the sides in 3/8"-deep
stopped dadoes. To mark the start and stop locations of the
dadoes, draw the shape of the sides on the side blanks, then
measure in 3/4" from the front and back edges.
Cut the dadoes with a plunge router and a router guide. Even
though the sides of the stand are angled 3 degrees, the dadoes can
be cut at a 90-degree angle to the side leaving only a slight gap on
the underside of each shelf. If you prefer to eliminate the gap, a
wood strip can be used to tilt the router at a 3-degree angle. If you
opt for the angled dadoes, run a test piece or you may inadvertently
transfer your gap to the top of the shelf.
The through-mortises can also be cut using a router with the base
tilted to a 3-degree angle or marked and hand cut. In either case,
cut from the outside surface to keep any tearout to the inside of the
case. Use a scrap backing board to reduce the tearout even further.
Trapezoids & Shelves • With the dadoes and through-mortises
complete, crosscut the top and bottom edges of the sides at a 3-
degree angle, then use a band saw or a jigsaw and a plane to
shape the sides. Next, mark and cut the elongated half-oval at the
base of each side to form the legs. Lastly, mark the back edge of
each side for a 1/4" wide x 3/8" groove for the back. The groove
should be set in 1/2" from the back edge and start 6" up on the
sides, running through at the top.
Next cut the shelves to size. The four center shelves can be cut to
the sizes given in the Schedule of Materials, with all four edges cut
on a 3-degree angle. The top and bottom shelves are a little more
complicated. Each must have the through-tenons cut to size and
shape.
And the end of the shelf should be pared with a chisel on a 3-
degree angle to match the inside surface of the sides. Don't cut the
mortises for the wedges at this time. See the wedge diagram on the
next page.
Back & Drawer • This next step can be a little awkward, so if you
have a friend handy, give him or her a call. Dry-assemble the stand
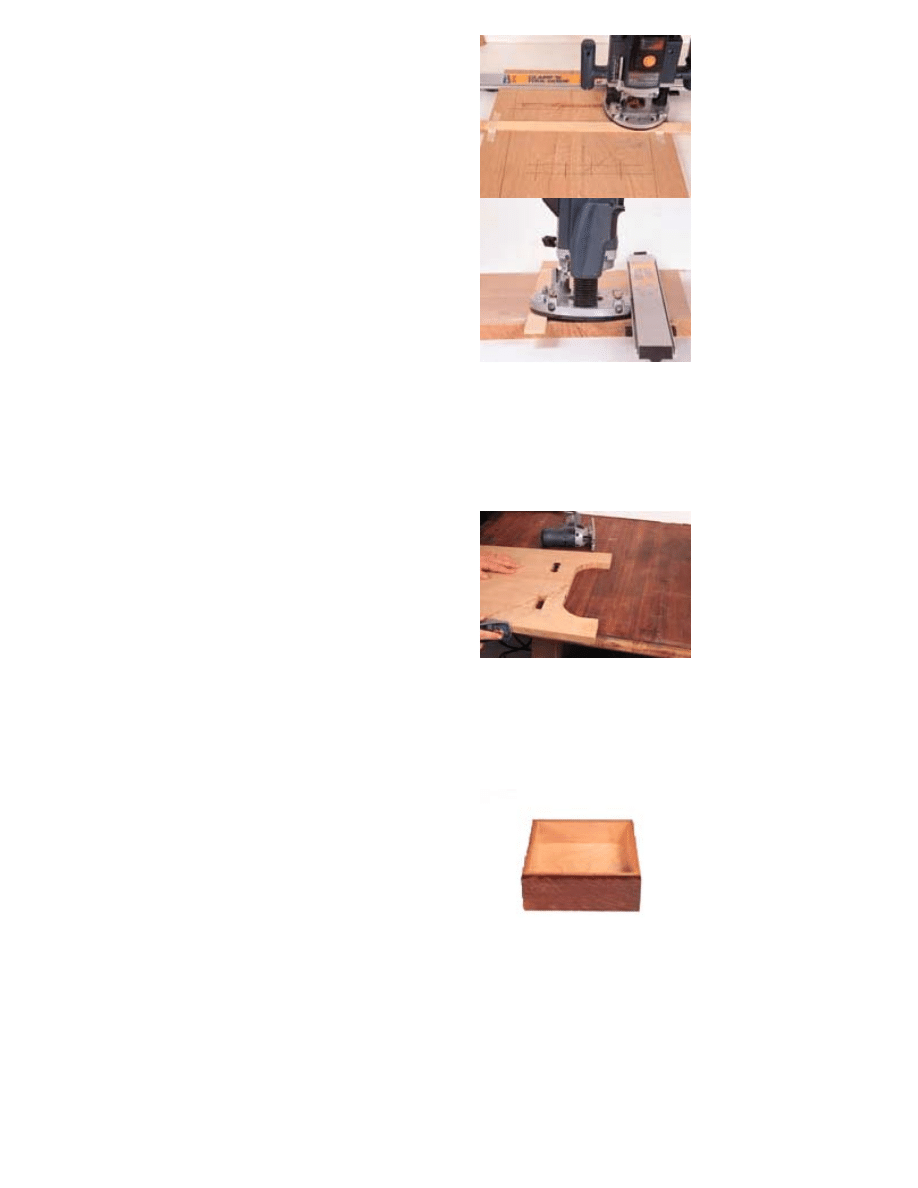
MILL THE SIDES • A 1/4"-thick strip of wood is
taped in place on the side slab to give a 3-degree
angle to the shelf dadoes and the through
mortises. Using a 1/2" straight router bit required
moving the set-up once for each dado to achieve
the 7/8" width necessary.
TAPERS EVERYWHERE • The sides are
tapered only after all the necessary milling in
the sides is completed. I used a jigsaw to cut
the sides to size, then smoothed up the edges
with a bench plane.
DRAWER • The drawer is made of 1/2" Baltic
birch plywood, and it uses tongue-and-groove
construction. A more complex joint could have
been used, but the drawer is unlikely to see any
heavy use and could be left out altogether.
Copyright 2004 Martian Auctions
694

by laying one side flat so the through-mortises hang over the edge
of the table. Place the shelves in their respective dadoes and insert
the through-tenons into the mortises. Then place the other side
over the tenons and insert the shelves. To hold everything in place,
use soft-jawed clamps across the width of the stand placed
underneath the through-tenons. This should pull the tenons and the
shelves into place. Check the fit and adjust as necessary.
With the stand still dry-assembled, measure for the trapezoidal
back, allowing as tight a fit in the back grooves as possible. The
bottom of the back will overlay the back edge of the bottom shelf
and be tacked in place to the shelf. The top of the back should be
flush to the top of the sides.
With the stand still dry-assembled, mark the location of the sides on
the top and bottom surfaces of the shelf tenons extending through
the sides. Then disassemble the stand and drill out or hand cut
through-mortises through each tenon to accept the wedges. Note
that the inside edge of the mortise should be 1/8" or so inside your
marks to allow the wedges to draw the stand up tight. The diagram
at right shows how the joint works. Cut the wedges a little
oversized, reassemble the stand and fit the wedges in place. Make
sure you mark the wedges so you'll be able to reassemble the
piece easily.
If you hadn't noticed, this stand includes a little drawer just below
the top. While not of a size to store a great many things, it's a good
place for hiding an extra set of keys. The drawer itself is of simple
box construction using tongue-and-groove joinery with a bottom
captured in a groove. The angled sides of the stand serve as
indexing runners to keep the drawer centered left-to-right. The
drawer face is cut to match the shape of the sides and overlaps the
top shelf, which serves as a drawer stop. Screw the face to the
drawer box from the inside.
Topping Things Off • The top is a simple slab of wood that is
attached to the sides by dowels. I carefully drilled dowel locations in
the tops of the assembled sides, I then used dowel centers placed
in the holes to locate the mating locations on the underside of the
top piece. With the top fit, disassemble the stand again and sand all
the pieces through 220 grit. As a finish for the piece I first applied a
coat of brown mahogany gel stain. When the stain was dry, I
applied a coat of clear lacquer, sanded and then applied a coat of
warm, brown glaze. After the glaze had dried overnight, I added two
more coats of lacquer. Assemble the stand as you did during the
dry fit, tapping the wedges in place to hold the stand tightly
together. If you plan on ever disassembling the piece, use a couple
of screws to attach the back to the lower shelf and to the two center
shelves for support. Then slip the top into place over the dowels. If
you won't be disassembling the piece, use brads to attach the back
and add some glue to the dowels to secure the top. PW
Schedule of Materials: Magazine Stand
No. Item
Dimensions
Material
1
Top
1-1/4" x 14-1/2" x 14-1/2"
White
Oak
2
Sides
7/8" x 18" x 59-1/2"
White
Oak
Copyright 2004 Martian Auctions
695

1
Bottom
Shelf
7/8" x 15-9/16" x 20"
White
Oak
1
Shelf
7/8" x 14-5/16" x 15-7/16"
White
Oak
1
Shelf
7/8" x 13-3/16" x 14-3/8"
White
Oak
1
Shelf
7/8" x 12-1/8" x 13-7/16"
White
Oak
1
Shelf
7/8" x 11-1/4" x 12-11/16"
White
Oak
1
Top Shelf
7/8" x 9-1/2" x 15-5/16"
White
Oak
8
Wedges
3/4" x 1-1/4" x 3-1/2"
White
Oak
1
Back
1/4" x 16" x 53-1/2"
White
Oak ply
1
False drw
front
3/4" x 3-7/8" x 10-9/16"
White
Oak
2
Drw sides 3/4" x 3" x 8"
Baltic
birch
2
Drw ends
3/4" x 3" x 9-1/4"
Baltic
birch
1
Drw bott
1/4" x 7-1/2" x 9-1/4"
Baltic
birch
Copyright 2004 Martian Auctions
696
Wyszukiwarka
Podobne podstrony:
Minature Mantle Clock
Homework Event Based State Machine Alarm Clock
Clock
rock around the clock
135 rock around the clock
Blockbuster, Clock On placement test
clock pcb 2
CLOCK GENES OF MAMMALIAN CELLS PRACTICAL IMPLICATIONS
Peripheral clock gene expression in CS mice with
clock pcb3
clock diag
Blaupunkt CR5WH Alarm Clock Radio instrukcja EN i PL
Five o clock
alarm clock
Evidence of an oscillating peripheral clock in an equine fib
Kreml Clock
Ten O clock Postman
więcej podobnych podstron