Citroen XM Series 2, 2.0 Turbo Manual RHD RP6785
Steering Gaiter Replacement (LH side)
BACKGROUND
Changing a steering gaiter sounds easy doesn’t it. Don’t you believe it!
Now’s the time to try gluing it back together.
ATTEMPT ONE
– DON’T BOTHER WITH THIS
The left hand gaiter is on the wrong side of the arm that attaches to the ram so
it’s not a case of removing the track rod end and sliding a new one on. I bought a
nice stretchy rubber one from Motorquip hoping to pull it over the ram arm. I got a
rubber wine bottle cork, just the right length, drilled a 1/2 “ hole in it and pushed it
over the threaded ram arm. Lubricating the cork and the gaiter with P80 (free
sample from
) I managed to pull the gaiter into place. Fitting
it onto the rack was even more difficult because you can’t get your hand in.
Eventually it was all on and cabled tied into place….. Until I put right lock on then
it pulled off. After a day playing around with jubilee clips, glue and circlips I gave
up and ordered another pair from the local Citroen specialist (3 time the price but
bound to be better). They turned out to be identical down to the mould number so
I didn’t bother trying.
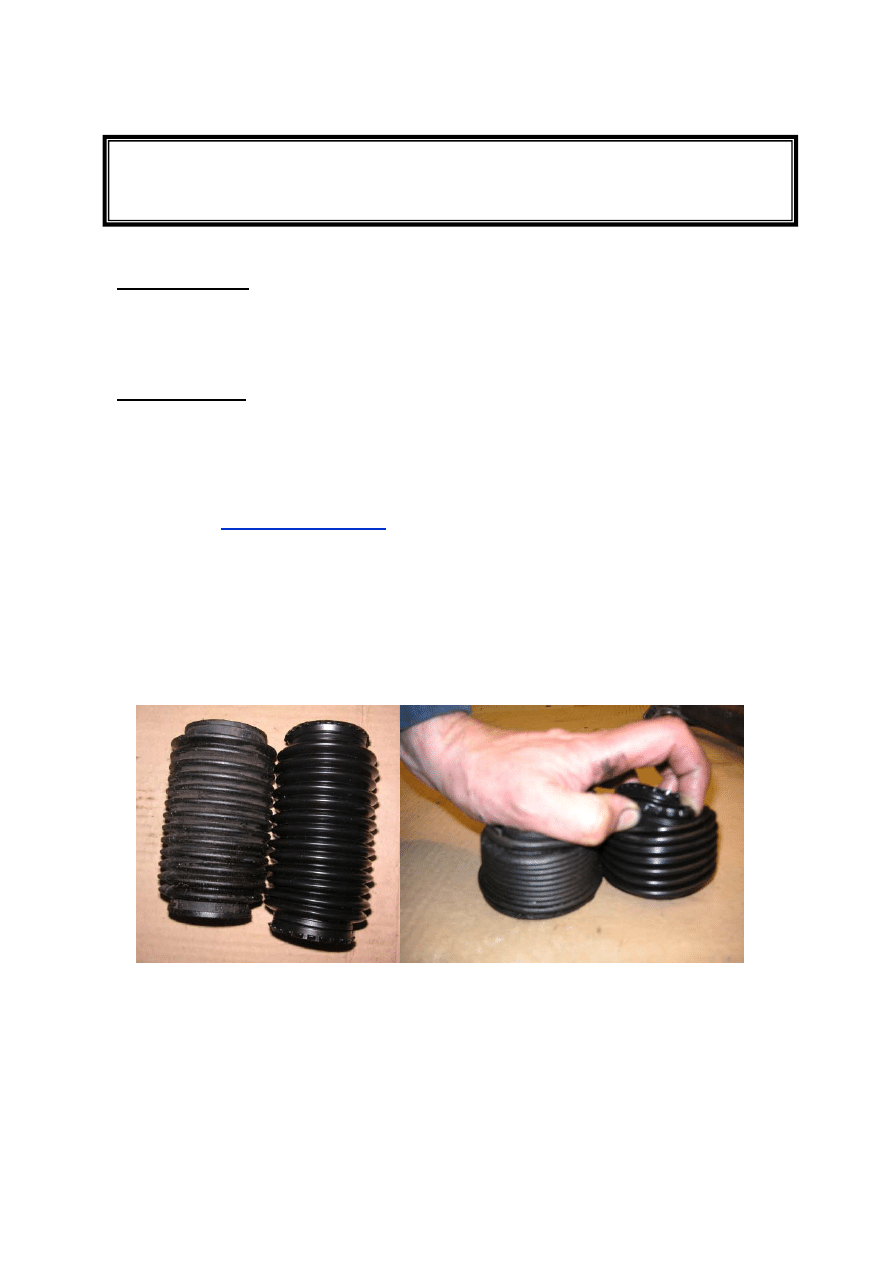
Aftermarket rubber gaiter (left) is too stiff and too short to stay on and also won’t
close up short enough. Genuine Citroen gaiter (right) is plastic, and has slightly
offset convolutions to allow it to close up short. It doesn’t need any clips to hold it
in place but can’t be stretched over the arm.
REMOVING THE RACK
If you’ve got to change this gaiter then there is only one option, remove the rack
assembly, take off the RH tie rod and the pinion and pull the rank through the
housing. Before you do this though buy the bits from Citroen and check them
carefully. There a two versions of tie rods, type A and B. Type A is 18mm and B
is 22mm. Citroen have no idea which is fitted to your car and don’t even know
what the dimension refers to. With hindsight it’s clearly the tie rod diameter
because I got the wrong ones. Fortunately the LH gaiter is the same and that’s
the only one I really needed.
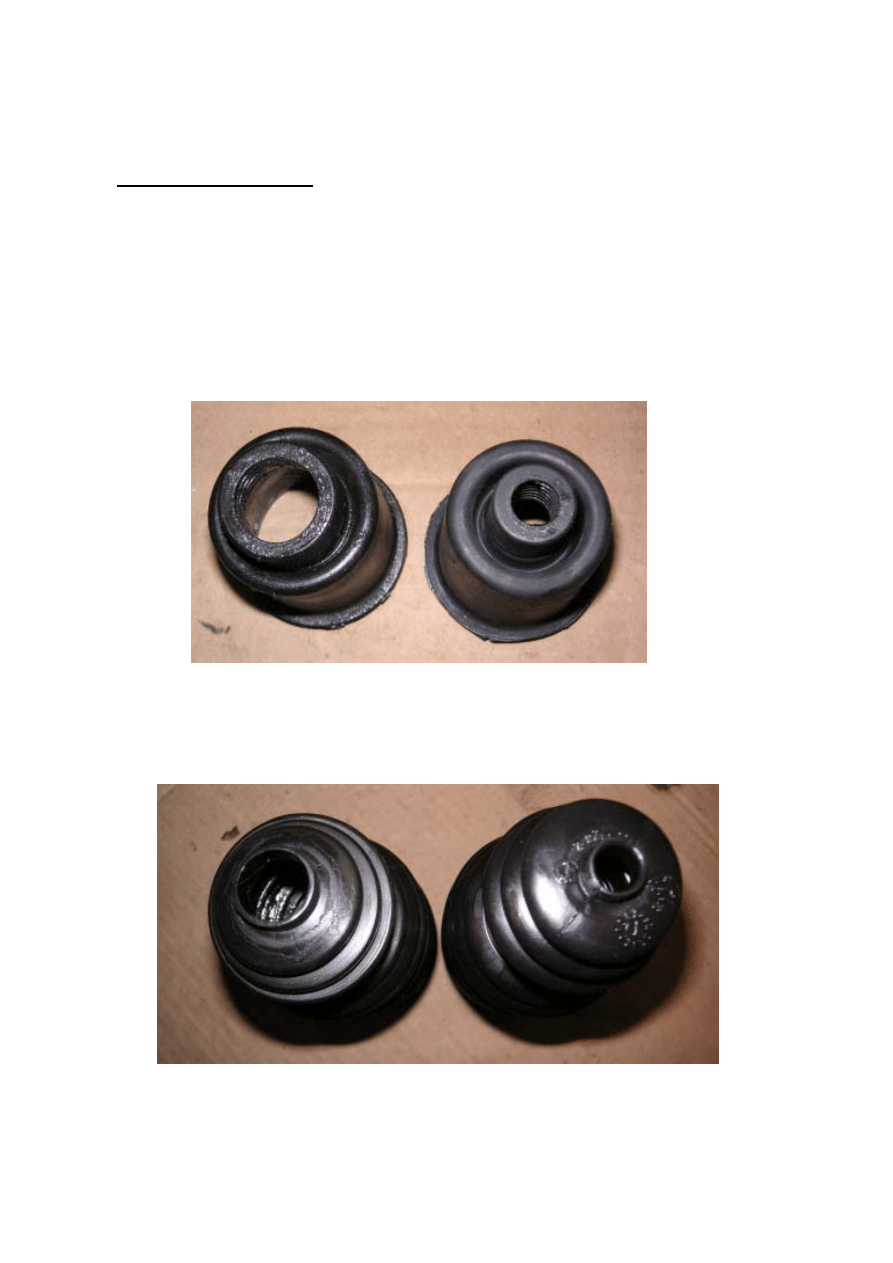
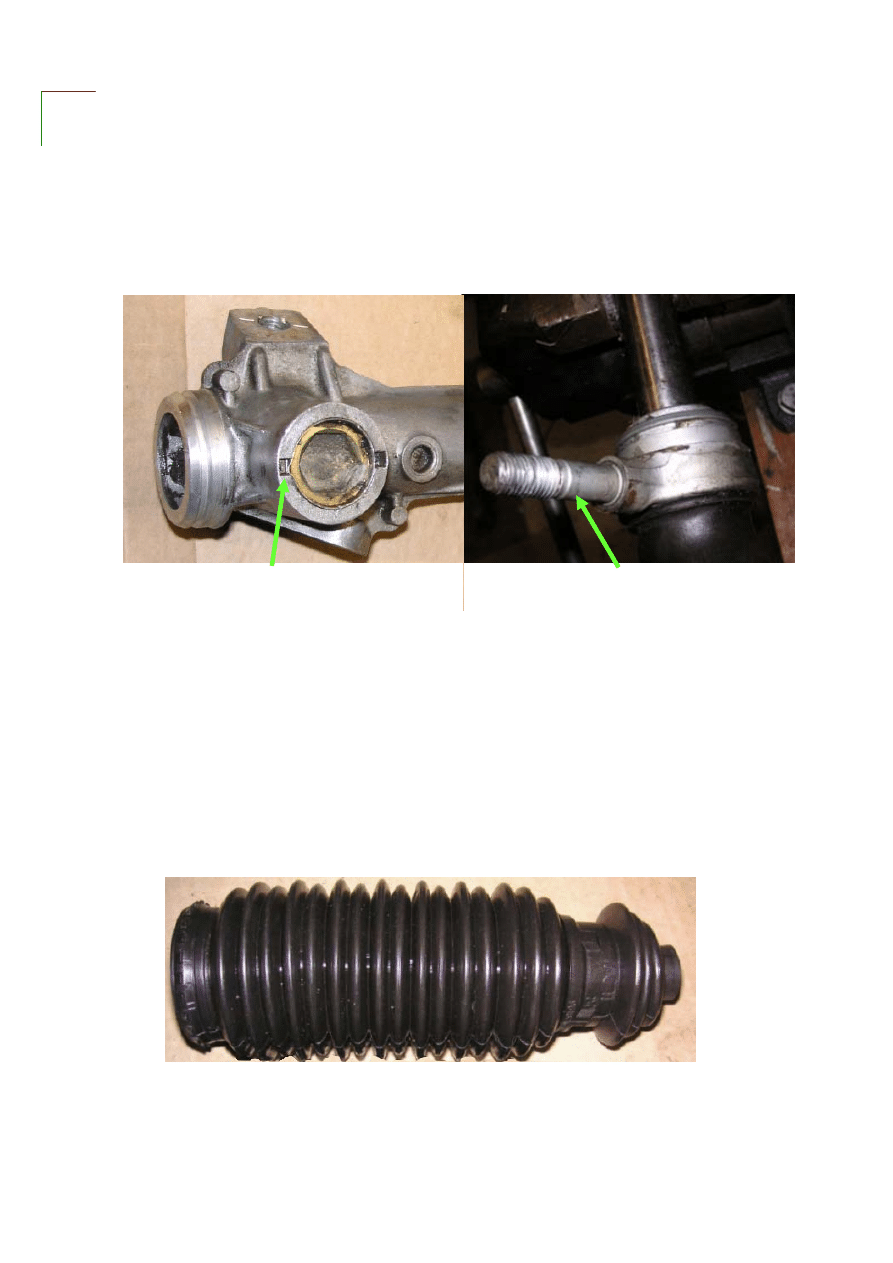
LH boot old (left) and new (right) I’m really not sure that one is diameter 22mm
and the other 18mm but since the old one was undamaged and the car was in
bits I put the old one back.
Same goes for the RH gaiter fortunately both of these can be replaced without
removing the rack assembly.
Removing the rack assembly is not well documented so here not what I did but
what I recommend:-
Don’t do anything in the footwell.
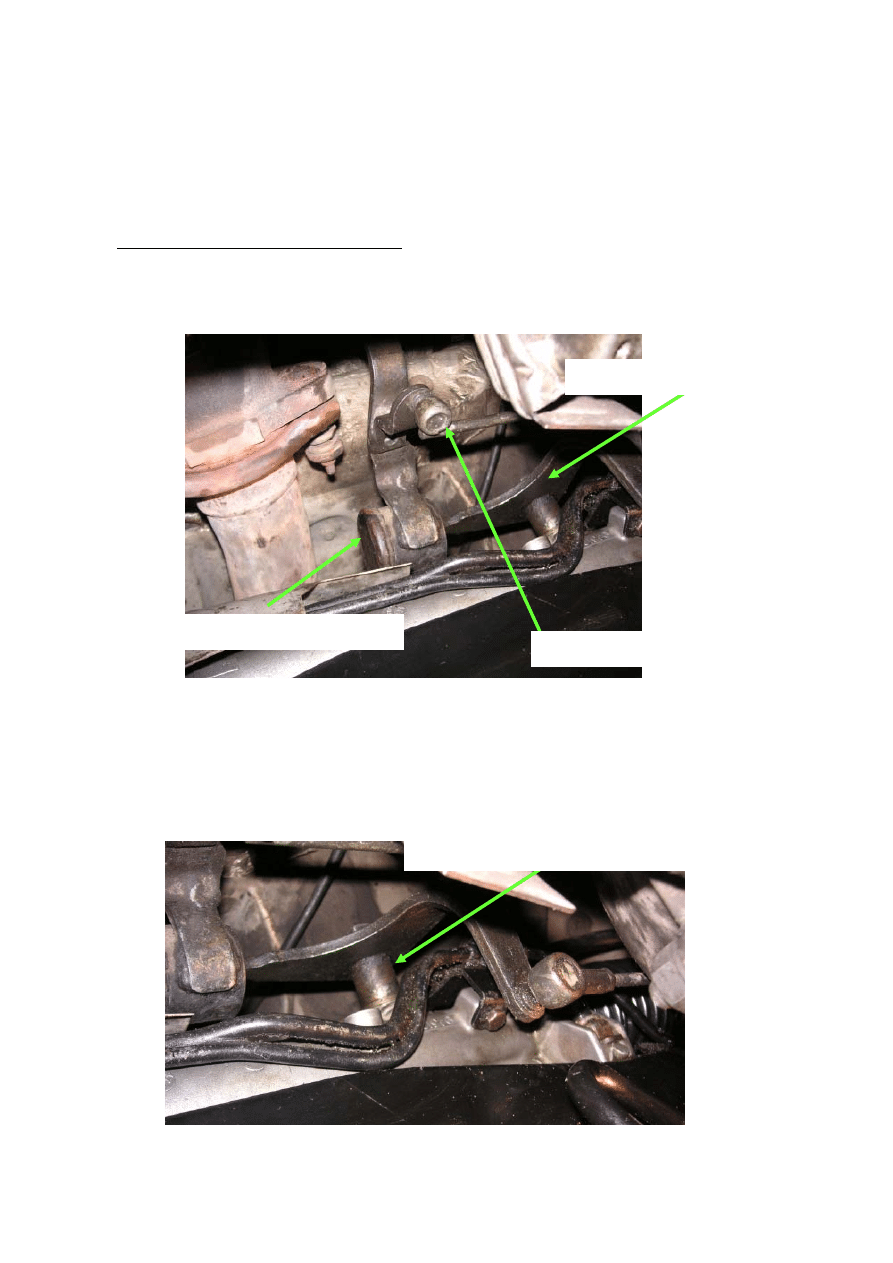
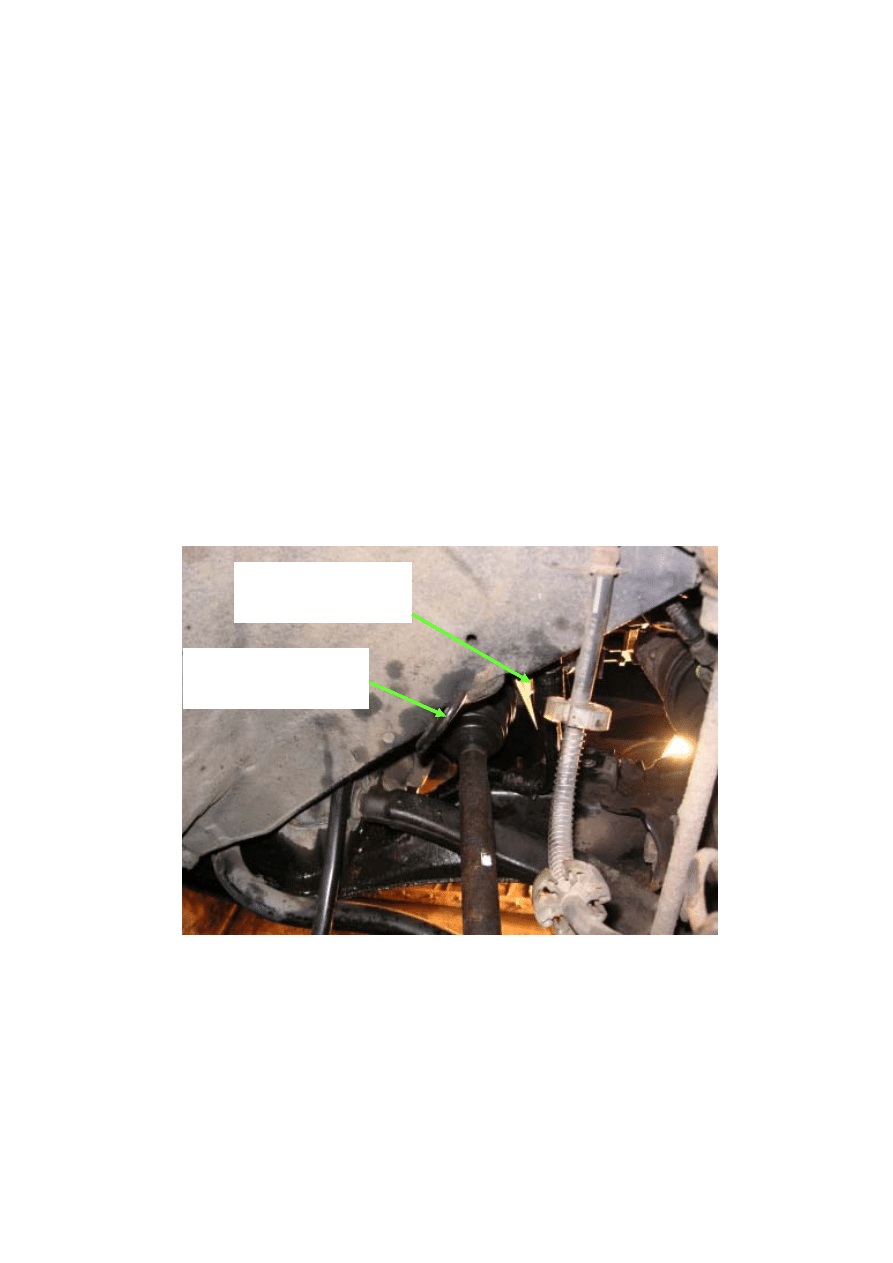
Under the car remove the lower ball joint from the gear selector rod by twisting it
with pliers.
This allows the selector rod socket to be moved off the rubber ball of the spider.
Remove the selector spider which is bolted into the top of the steering rack
assembly. It has a long M10 setscrew and a mushroom washer on top, a loose
bush through the middle and a thrust washer underneath before bolting into the
rack casting.
LOWER BALL JOINT
SELECTOR SPIDER
SELECTOR ROD SOCKET
SELECTOR SPIDER PIVOT
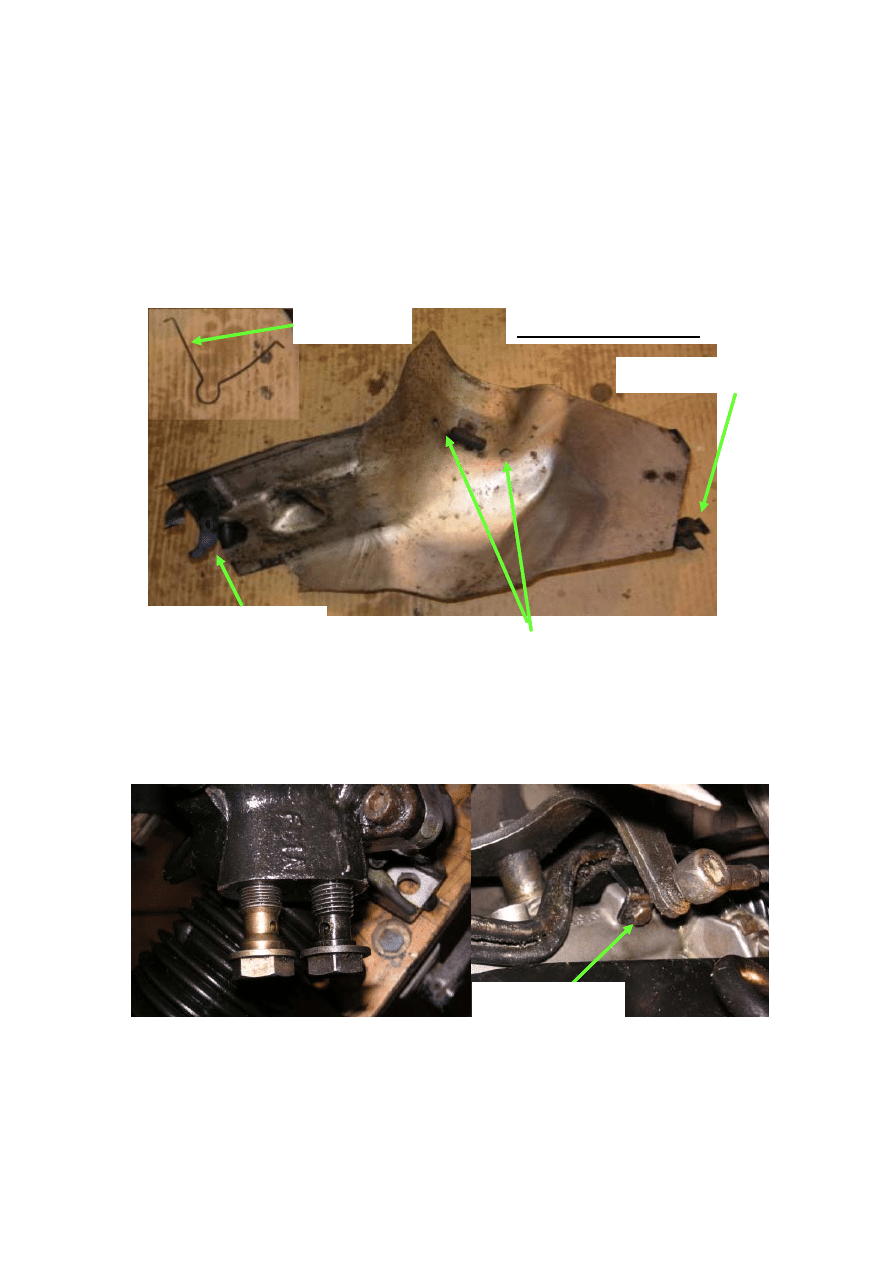
Now that’s out of the way the steering rack shield can be removed. This sits on
the rack and is held on with two spring omega clips and a separate spring round
the pinion housing. The spring round the pinion housing just has the ends of its
legs poking through 6mm holes in the cover. Push one in with a screwdriver and
the spring will flick off to be found later.
SPRING HOLES
SPRING
Ω CLIP FOR RAM
Ω CLIP FOR STAY
UNDERSIDE VIEW
Now remove the two banjo bolts that hold the hydraulic pipes into the pinion
housing. They are different and not interchangeable so don’t be concerned as
you remove them. You did depressurise the system didn’t you? If not get out from
under the car first!
PIPE CLAMP
Also remove the M6 bolt that holds the pipe clamp.
Next you need to remove the steering column flex joint.
You can’t get the rack out if you leave any of it in place so just undo the splined
clamp pinch bolt and leave the rubber bit intact on the column. Try and mark it if
you like but my attempt failed due to access and visibility and I had to move the
steering wheel afterwards anyway!
Now’s the time to remove the tie rod end ball joints. Easy if you’ve got a tool.
All that’s left to do is undo the two big bolts that hold the rack housing to the
subframe and remove the rack, if only…..
I’ve seen it suggested that removing the exhaust will help but I can’t see it myself,
the turbo would help but didn’t seem practical. I removed the RH park brake cable
and bent up the metal loop that guides it under the wheel arch. You also have to
remove the RH wheel arch stay that the rack shield and ABS plug are mounted
on. Removing the hydraulic pipe clamp doesn’t help.
After much cursing and a lot of help the rack assembly complete with tie rods and
ram attached can be manipulated out from the RH side of the car. It can
honestly…..
Don’t forget to collect up the penny washers shims with strange markings that the
rack sits on and the rectangular washers and square nut that bolt it down. Oh and
the spring from the tin cover if you haven’t already got it.
LEAVE BIG
PIPE IN PLACE
BEND UP PARK
CABLE LOOP
Disconnect the two pipes from the pinion housing. They are standard flares and
don’t require any rubber seals.
HOLD WITH GRIPS TO
REMOVE TIE ROD
DISASSEMBLY
Now the rack assembly is on the bench give it a good clean prior to stripping.
Pull back the RH gaiter to get access to the tie rod inner ball joint. Put the rack
assembly on full lock and clamp the rack in soft jaws. Mole grips on the ball joint
will remove the tie rod (RH thread). It wasn’t very tight.
PIPE UNIONS
Slacken and remove the two cap heads that hold the pinion housing in place. The
two flats on the pinion spline don’t reference the flexi joint so you don’t need to
mark it.
Remove the housing then pull the rack from the main housing. The rack is
preloaded behind the pinion but there is no need to disturb it.
Once the rack is out, clean and grease it and fit the new boot.
Push the rack back in the housing and refit the pinion housing. You might need a
hand to prise the rack against the preload spring to enable the pinion to engage
but it’s not difficult.
The pinion housing wasn’t sealed or gasketed but I put a smear of silicone on for
luck.
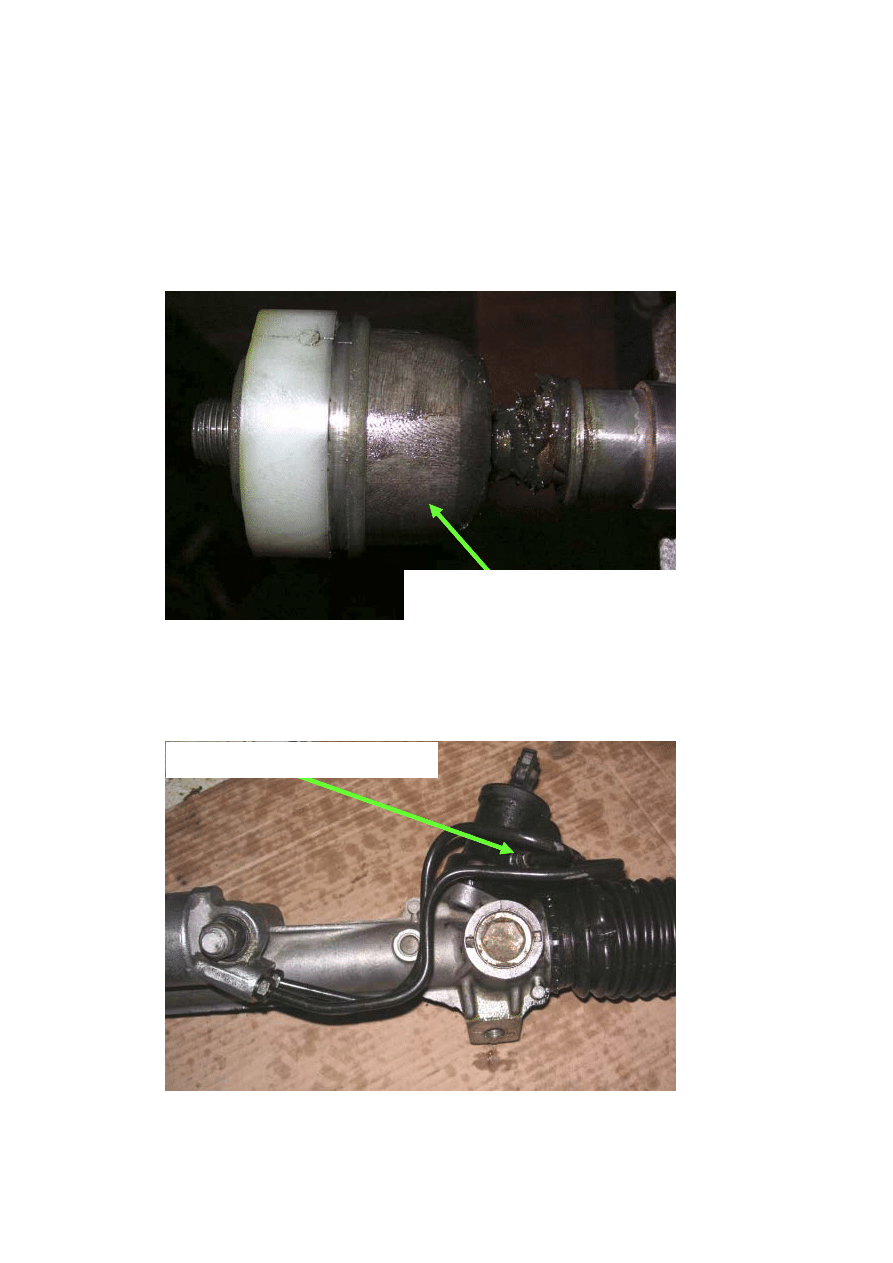
THE RAM ARM THAT
CAUSES ALL THE GRIEF
RACK PRELOAD IS
STAKED IN PLACE
The rest of the rebuild is simple. If you’ve got the correct boot and gaiter for the
tie rods it’s probably worth changing them now?
DESPITE APPEARANCES THE RH GAITER IS ONE PIECE.

RE-FITTING
To protect the LH gaiter wrap it in newspaper before putting the rack assembly
back in the car. It will need to be ripped off from the end though so don’t be
generous with the tape.
Make sure the clamp bracket that holds the feed and return pipes doesn’t rip into
the boot, it’s sharp. Maybe a small piece of cardboard will protect it?
Before bolting the rack back down the pinion spline needs engaging with the flex
coupling, here's where you should aim to get the steering wheel aligned, I failed.
After getting the rack assembly refitted and the pipes reconnected run the engine
and cycle the rack left to right to bleed it through. Holding it on full lock will apply
full pressure and check for sealing of the banjos which don’t have any copper
washers on. When you’re happy it’s leak free refit the rack shield before you refit
the gear selector spider.
The rest of the assembly is straightforward but for sure the park brake cable will
have come off the equaliser so that will be the final job underneath.
Unless you’ve been very lucky or careful, the first time you drive the car the
steering wheel will be out of alignment by one spline tooth. Moving it round is
easy but it does mean removing the airbag. Airbag removal is documented
elsewhere but basically this is what you do:
Open the drivers electric window and wind the seat back. (You want to be as far
away from the airbag as possible and you can’t move these with the battery
disconnected).
Disconnect the battery then go and make a cup of tea. (10 minutes I read
somewhere). On your return remove the two Torx bolts in the back of the airbag,
pull it forward and remove the connector. Put it somewhere safe….
Undo the big nut in the centre of the wheel then before removing it disconnect
the wires for the cable reel. I didn’t do this, the wheel came off with a jerk and the
reel exploded, it took a couple of hours to reassemble.
Move the wheel round and reassemble. Finally reconnect the battery then turn
the ignition on through the open window and check the airbag light. I’m sure it will
be fine but better be safe!
Peter Sturgess, July 2005
WARNING
This document, like most on the internet is unchecked. It could be complete
rubbish and may be dangerous or illegal. Acting on it without any understanding
of what you are doing would be foolish. Do it at you own risk……
Wyszukiwarka
Podobne podstrony:
Popular Mechanics Replacing a Bad Power Steering Pump
Popular Mechanics Replacing A Steering Rack
Advanced Polyphthalamide (PPA) Metal Replacement Trends
ARTICLE SUSPENSION STRUT FRONT REPLACE INSTALL
ALAN42 MULTI component side
17 steering system
50 Steering Column
50 Steering Column
Amon Amarth With Oden on Our Side
Kto,blokuje tą wiedzę Antenna To Replace?tteries And Provide Unlimited Free Energy For Electric?rs
Fitzgerald This Side of Paradise
NFS U2 Replace?r's
C 06 0 SteeringGearFailure
61 STEERING COLUMN SWITCHES
Popular Mechanics Replacing U Joints
preliminary side
C102968 0 SERVICE LOCAL STEERING
więcej podobnych podstron