33-0620
Removing and installing front-axle shafts
Preceding work:
Operation no. of operation texts and work units or standard
Removing and installing lower engine compartment lining
texts and flat rates
(61-0115)
Removing and installing wheel (40-0110)
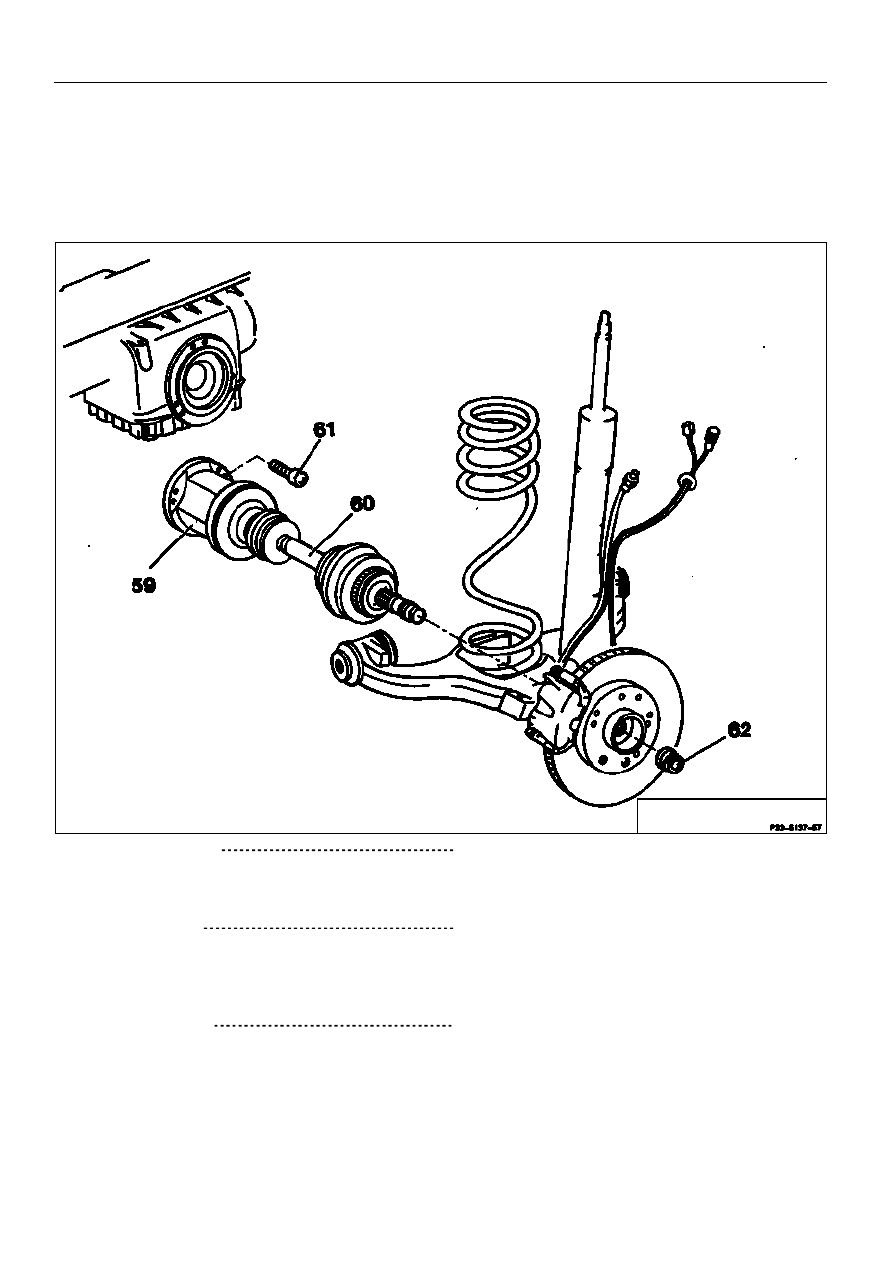
P33-5137-57
12-point collar nut (62)
unscrew, screw on. Replace12-point collar nut
and fasten, 200-240 Nm.
Wrench socket 30 mm
126 589 02 09 00
Torque wrench
001 589 74 21 00
Front-axle shaft (60)
unbolt, bolt on on the inside. Replace self-
locking hexagon socket bolts (61), 70 Nm
Flexible head wrench
117 589 01 07 00
Torque wrench
001 589 66 21 00
(Number 2).
Tripod inner joint (59)
fix with binding wire (Number 3).
Strona 1/4
© Daimler AG, 21.07.12, G/03/09 / ra334m1240620x / 0620 - Removal and installation of the front axle shafts Drive 4MATIC
Front-axle shaft (60)
remove, install.
Removal tool 201 589 00 61 00 or
Removal tool 140 589 00 61 00
(Numbers 4-6).
Check
all parts.
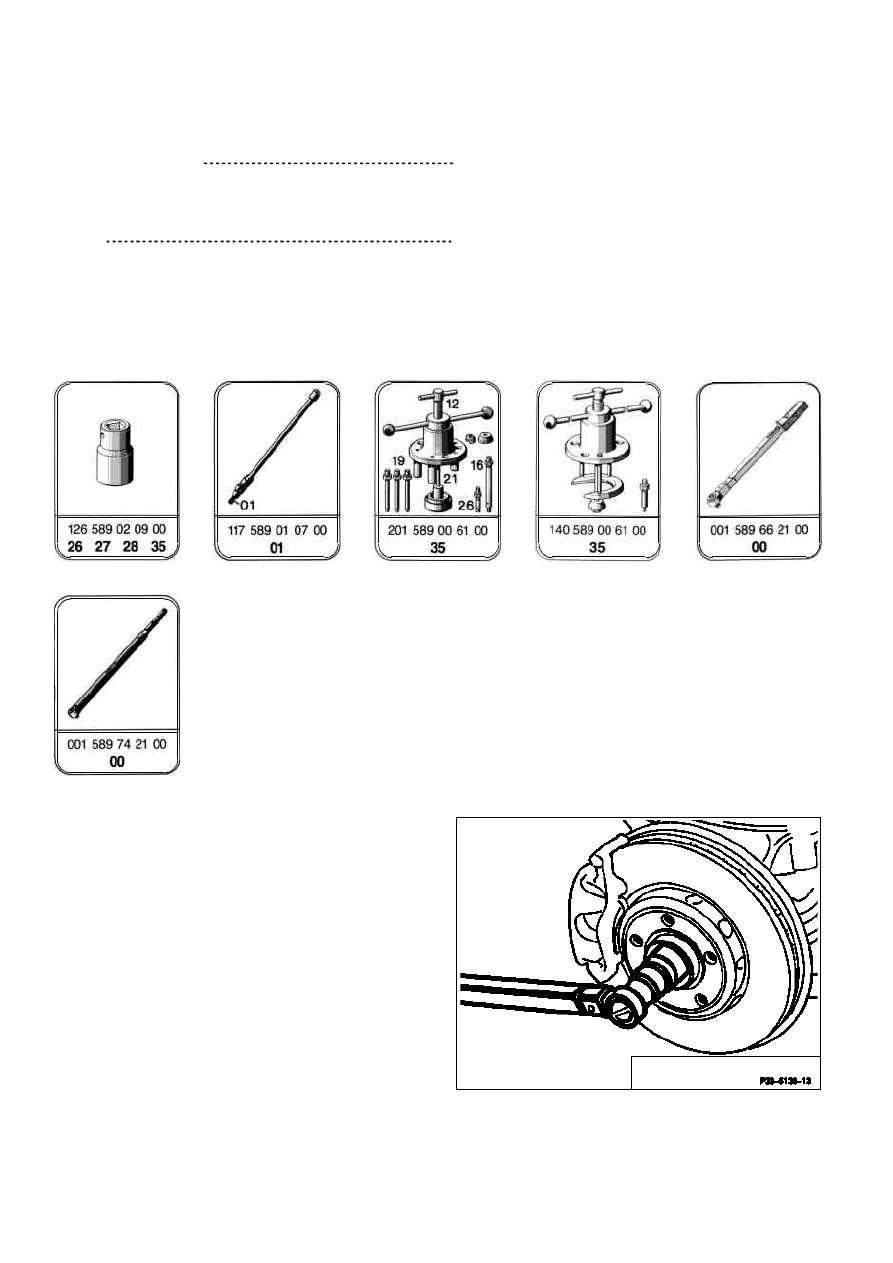
Special tools
1
Unscrew 12-point collar nut for fixing
front-axle shaft.
Wrench socket 30 mm 126 589 02 09 00,
torque wrench 001 589 74 21 00.
P33-5138-13
Strona 2/4
© Daimler AG, 21.07.12, G/03/09 / ra334m1240620x / 0620 - Removal and installation of the front axle shafts Drive 4MATIC
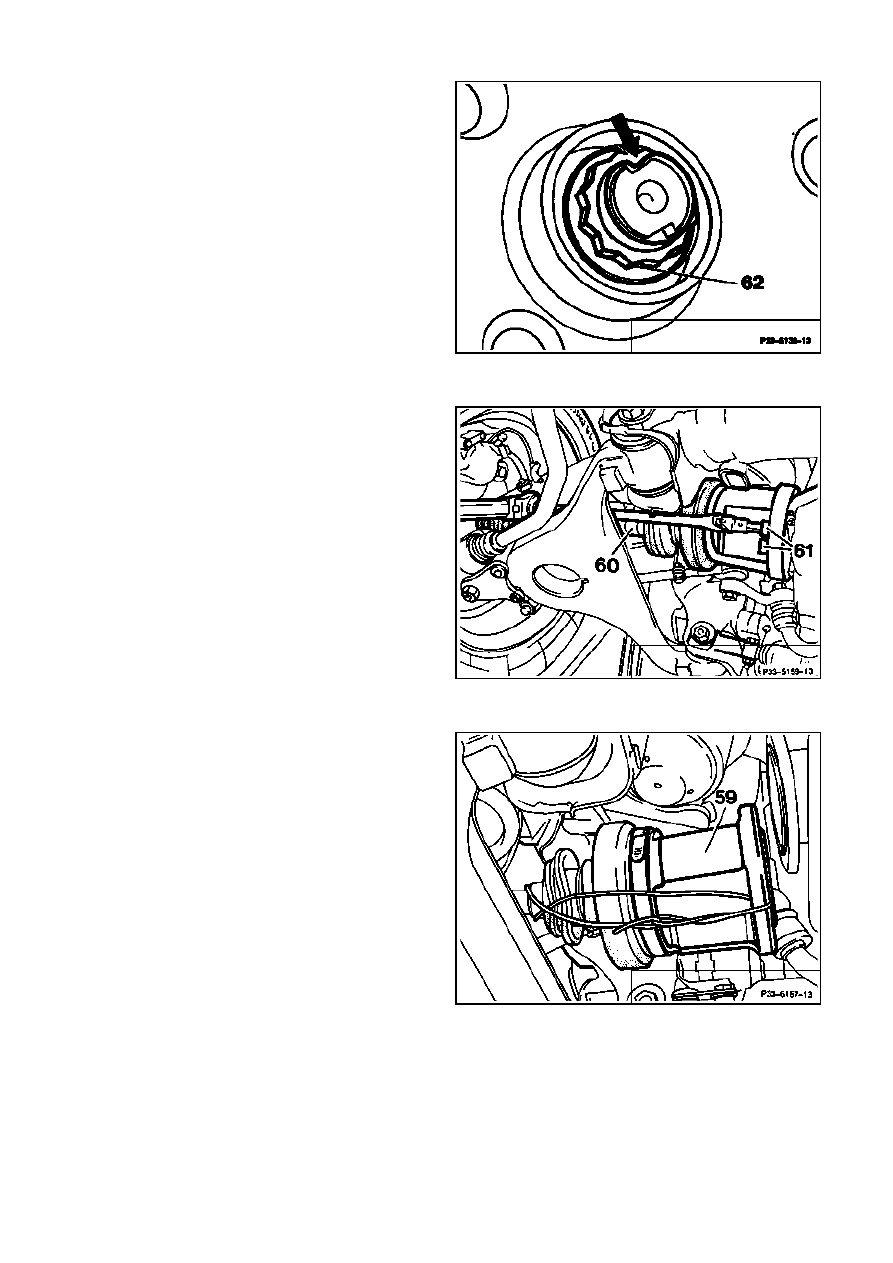
Installation note
Tighten new 12-point collar nut (62) and secure
in crimp collar (arrow).
Tightening torque 200-240 Nm.
Torque wrench 001 589 74 21 00.
P33-5139-13
2
Use flexible head wrench 117 589 01 07 00 to
unbolt front-axle shaft (60) at connecting
flange.
Installation note
Use new self-locking hexagon socket bolts (61).
Tightening torque 70 Nm.
Torque wrench 001 589 66 21 00.
P33-5159-13
3
Fix tripod inner joint (59) with binding wire in
pushed-in position.
4
Turn steering to the right to full lock.
P33-5157-13
Strona 3/4
© Daimler AG, 21.07.12, G/03/09 / ra334m1240620x / 0620 - Removal and installation of the front axle shafts Drive 4MATIC
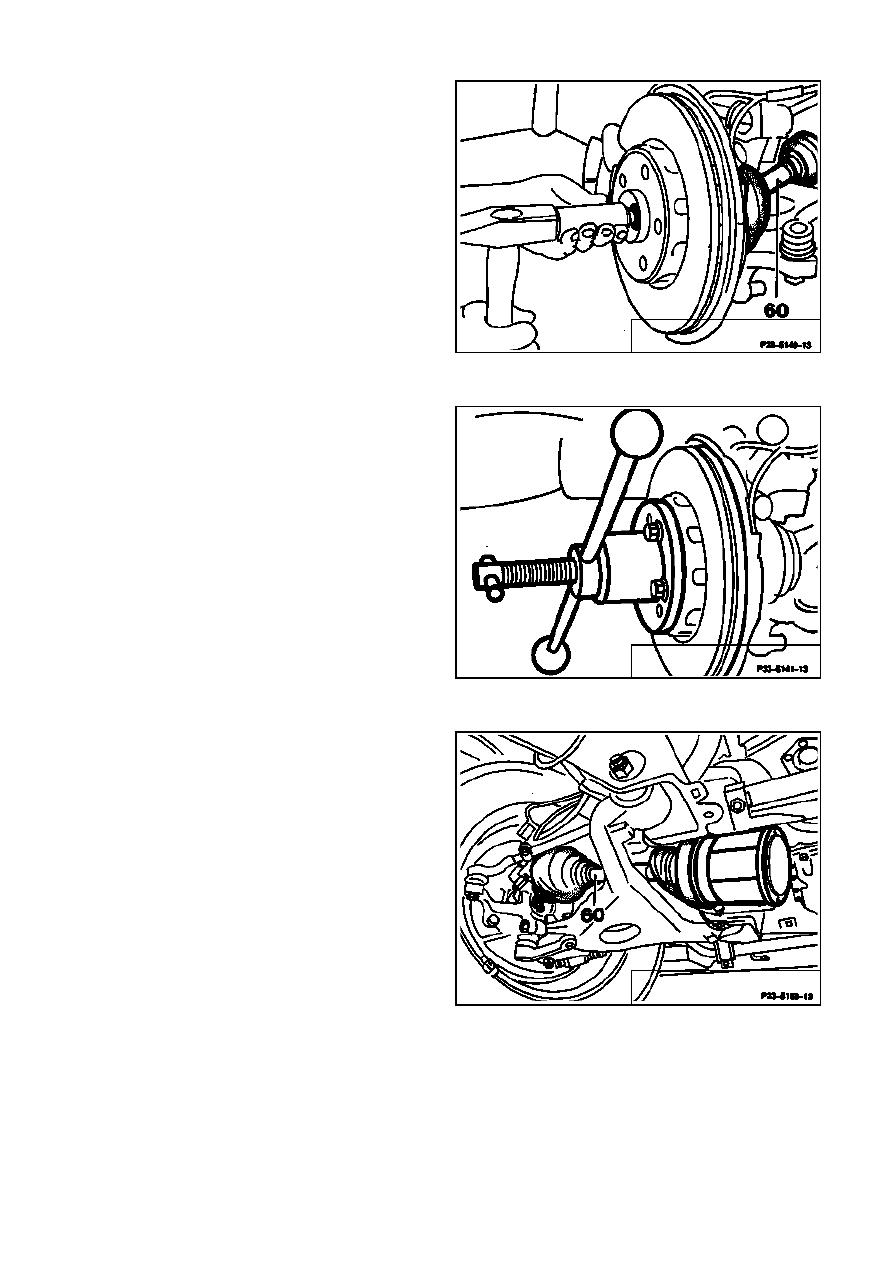
5
Detach front-axle shaft (60) from front-axle
shaft flange using brass drift punch.
M
Do not move the vehicle any more to avoid
damage to wheel bearings when front-axle shafts
are removed!
P33-5140-13
Note
If front axle shaft is tight on its seat press out
with removal tool 201 589 00 61 00 or 140 589 00
61 00.
P33- 5141-13
6
Drive front axle shaft (60) upwards behind
the connecting flange. At the same time pull
front axle shaft out of axle shaft flange and
remove, whilst compressing the wheel side.
M
When raising one side ensure that the vehicle
does not tip off the contact surface of hoist - risk
of accident!
Do not compress the front axle shaft excessively
in the axial direction, otherwise the end cover on
the tripod inner joint may become detached.
P33-5158-13
7
Check constant-velocity joint, rubber bellows
and end cover for leaks or damage, replace
if required.
60
Front axle shaft, left
8
Install in reverse sequence.
Strona 4/4
© Daimler AG, 21.07.12, G/03/09 / ra334m1240620x / 0620 - Removal and installation of the front axle shafts Drive 4MATIC
Wyszukiwarka
Podobne podstrony:
4 Demontaż klapy przedniego nawiewu
Citroen C5 Demontaż montaż Przedni stabilizator przechyłów
C5 X7 demontaż zderzaka przedniego
demontaż foteli przednich
DEMONTAŻ MONTAŻ PRZEDNIA TARCZA HAMULCA
Demontażmontaż Klocki przedniego hamulca(1)
Demontaz zderzaka przedniego id Nieznany
4 Demontaż klapy przedniego nawiewu
Demontaż montaż Przedni element nośny
Peugeot 508 demontaż montaż przednie nadkole
Bora demontaż zderzaka przedniego
demontaż zderzaka przedniego viki c Microsoft Office Word(1)
508 Demontaż zderzaka przedniego
[4matic] demontaż i montaż skrzyni rozdzielczej
Demontaz zderzaka przedniego i tylniego
Demontaż montaż Przednia osłona przeciwbłotna
więcej podobnych podstron