Project 18173EZ:
Parsons Table
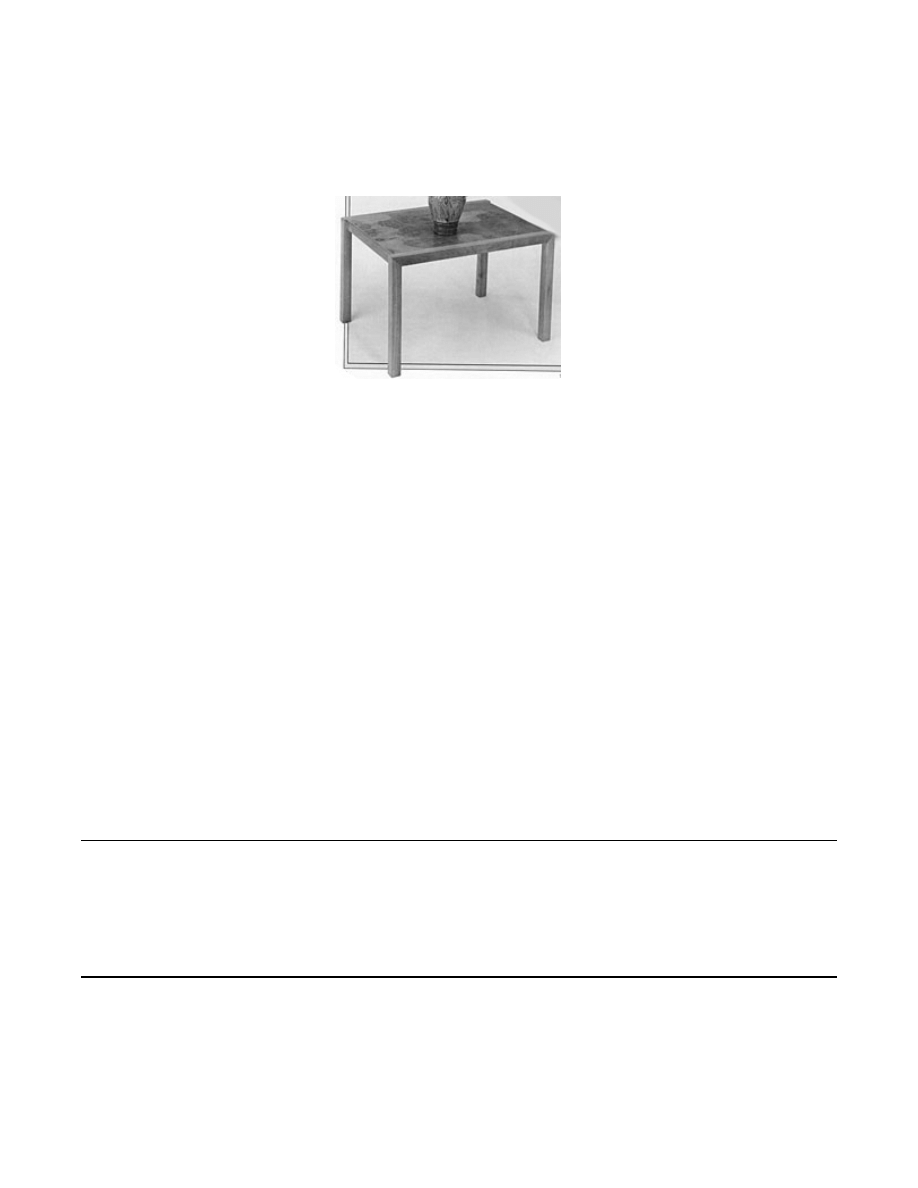
The term “Parsons table” refers to the simple, clean, unadorned table design that origi-
nated during the 1930s at the renowned Parsons School of Design in New York City. The
tables, which can be built from various materials and in many sizes, are both versatile
and elegant. Our table, crafted in whit oak and featuring an olive ash burl veneer top, is
very much in the classic Parsons style.
Parsons Table Materials List
Part
Description
Size
No. Req’d
A
Leg
1-3/4" x 1-3/4" x 20"
4
B
Rail
1-3/4" x 1-3/4" x 32"
2
C
Top
3/4" x 20-1/2" x 30-1/4"
1
D
Face Veneer
as needed
1
E
Reverse Veneer
as needed
1
F
Stretcher
3/4" x 1-3/4" x 20-1/2"
2
G
Cleat
1" x 1" x 29-1/2"
2
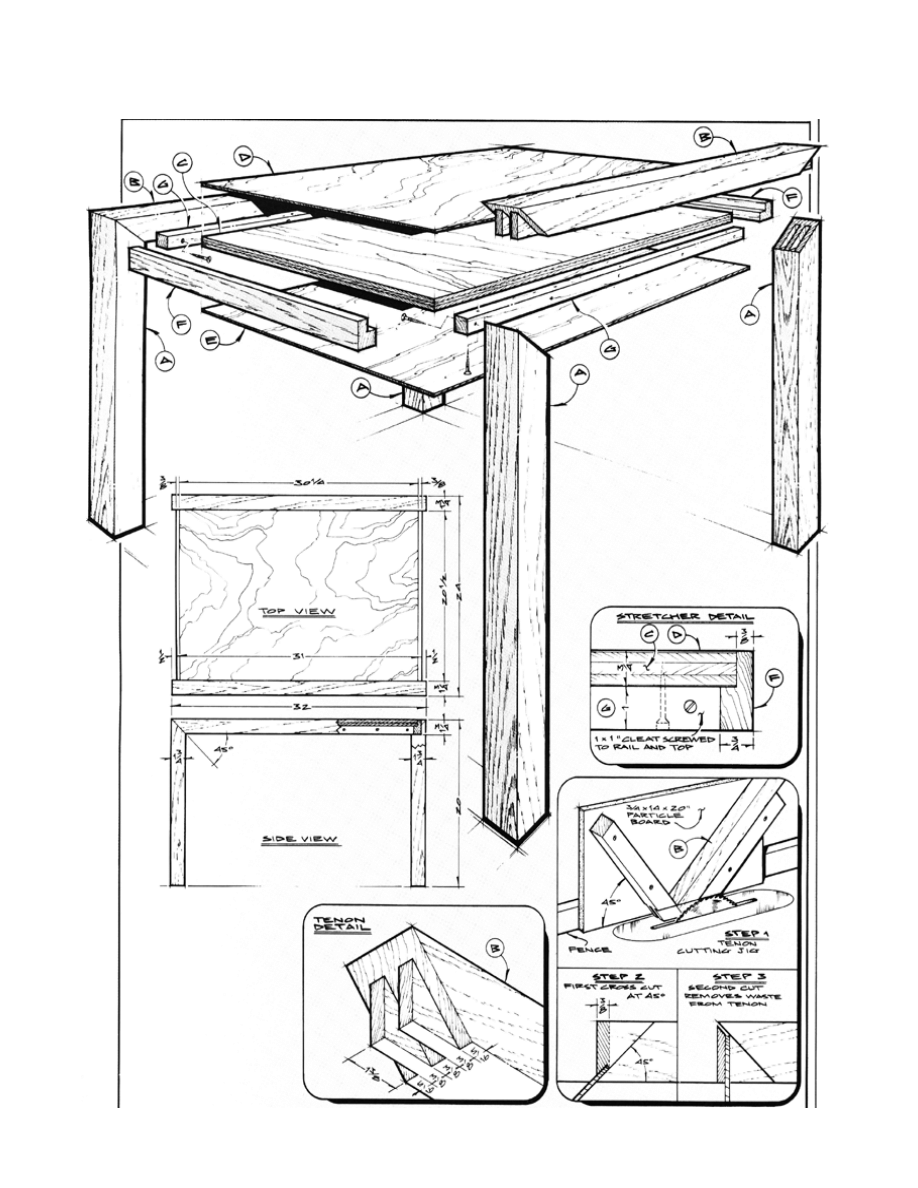
Parsons Table Complete Schematic

Parsons Table Step-by-Step Instructions
1. Cut the leg (A) and rail (B) stock.
2. Construct a simple tenon cutting jig from particleboard and 1-3/4" square hard-
wood for cutting the rail tenons (see tenon detail. NOTE: Make the jig so the rail
ends just touch the table saw surface when positioned in the jig.
3. Clamp the rails securely to the jig for safety.
4. Set the table saw blade height to be about 1-1/4".
5. Use three sets of cuts to establish the two tenons (see detail).
6. Set the table saw blade at 45 degrees.
7. Crosscut to a depth of 3/8" as shown in the detail.
8. Reset the table saw blade at 90 degrees.
9. Raise the blade to about 1-3/8".
10. Take care to insure that ONLY the waste is removed and crosscut to remove it (see
detail).
11. Miter the leg ends at 45 degrees.
12. Chisel the mortises to accept the rail tenons.
13. Glue and clamp the two leg/rail assemblies.
14. Allow the glue to dry.
15. Choose an attractive face veneer for visual impact, and any veneer for the reverse
side.
16. Lay up the face and reverse veneers (D and E) on both sides of the plywood top
(C). NOTE: If you start with a slightly oversized top and veneers, you can use the
table saw to conveniently trim the laid-up assembly to its final dimensions.
17. Use a 3" wide painter’s trim roller to spread glue to assemble the veneer to the top.
18. Choose the same material from which you made the legs and rails to make the
stretchers.
19. Cut and rabbet the stretchers (F).
20. Glue the stretchers to either side of the top (see stretcher detail).
21. Use the two cleats (G), glue, and countersunk screws to mount the top/stretcher
assembly to the leg/rail assemblies.
22. Final sand with 220-grit sandpaper.
23. Finish with two coats of lacquer.
These plans were originally published in Volume 10, Issue 3 of The Woodworker’s Jour-
nal (May/June 1986, pages 50-51)
Wyszukiwarka
Podobne podstrony:
Parsons Table
oak dining table
Coffee Table 1
table style2, ♥Dokumenty
table cellspacin5, ❀KODY RAMEK I INNE, Ramki
table border (2)
Foresight Resolution Table
Chess Table
multiplication table
Effic Table (Table 4(V18)
Drill Press Table
table styl4, MOJE RAMKI, RAMKI 2
table cellspacin9, MOJE RAMKI, RAMKI 2
Table
A picnic table is a project you?n buy all the material for and build in a?y
więcej podobnych podstron