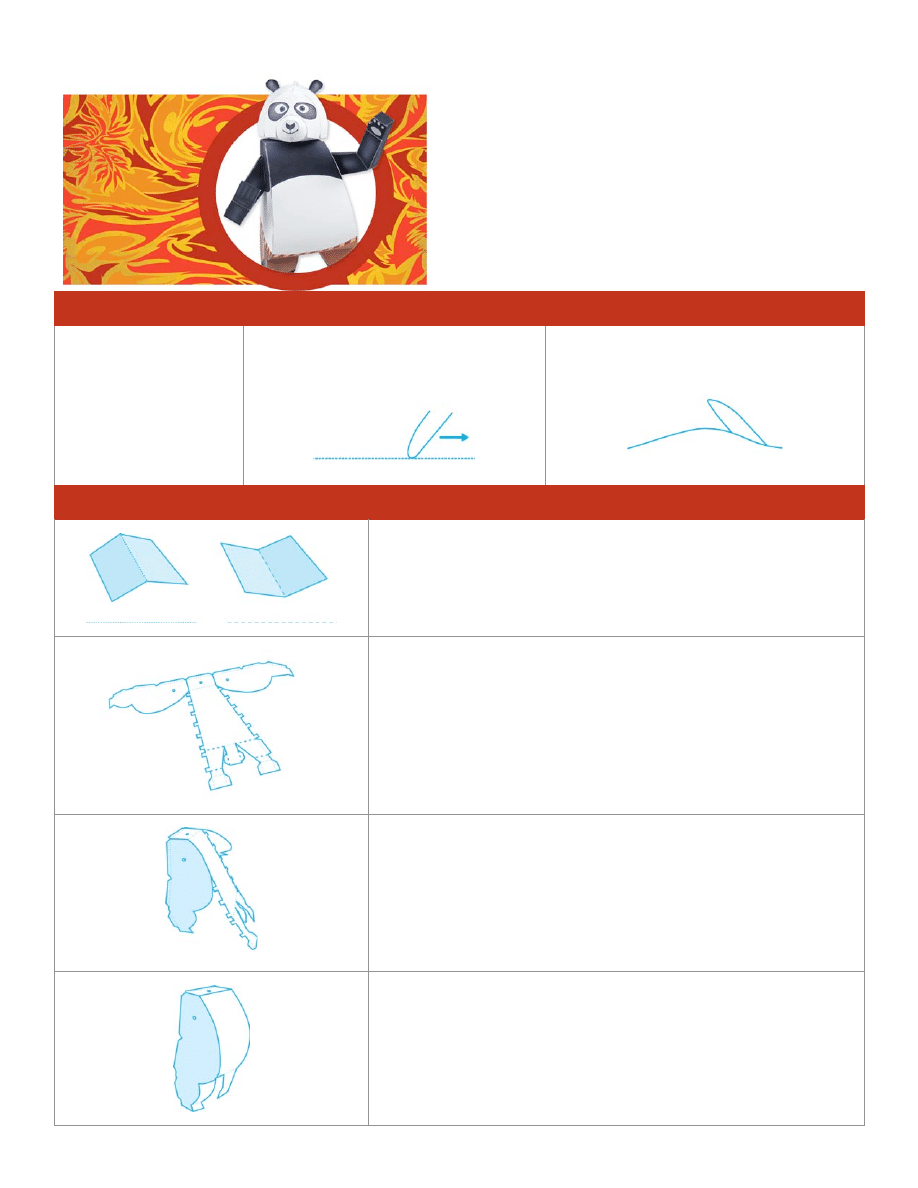
Kung Fu Panda ™ & © 2008 DreamWorks Animation L.L.C.
© 2008 Hewlett-Packard Company
hp.com/go/activitycenter
Kung Fu Panda™ 3-D Paper Character
Po
ASSEMBLY INSTRUCTIONS
Time to Complete: Approximately 60 minutes
Level: Difficult
GETTING STARTED
Materials:
• Metal-edged ruler
• Butter knife
• Scissors or X-ACTO knife
• Cutting mat (optional)
• Hole punch
• Multipurpose glue
• Pencil
• 3 brads
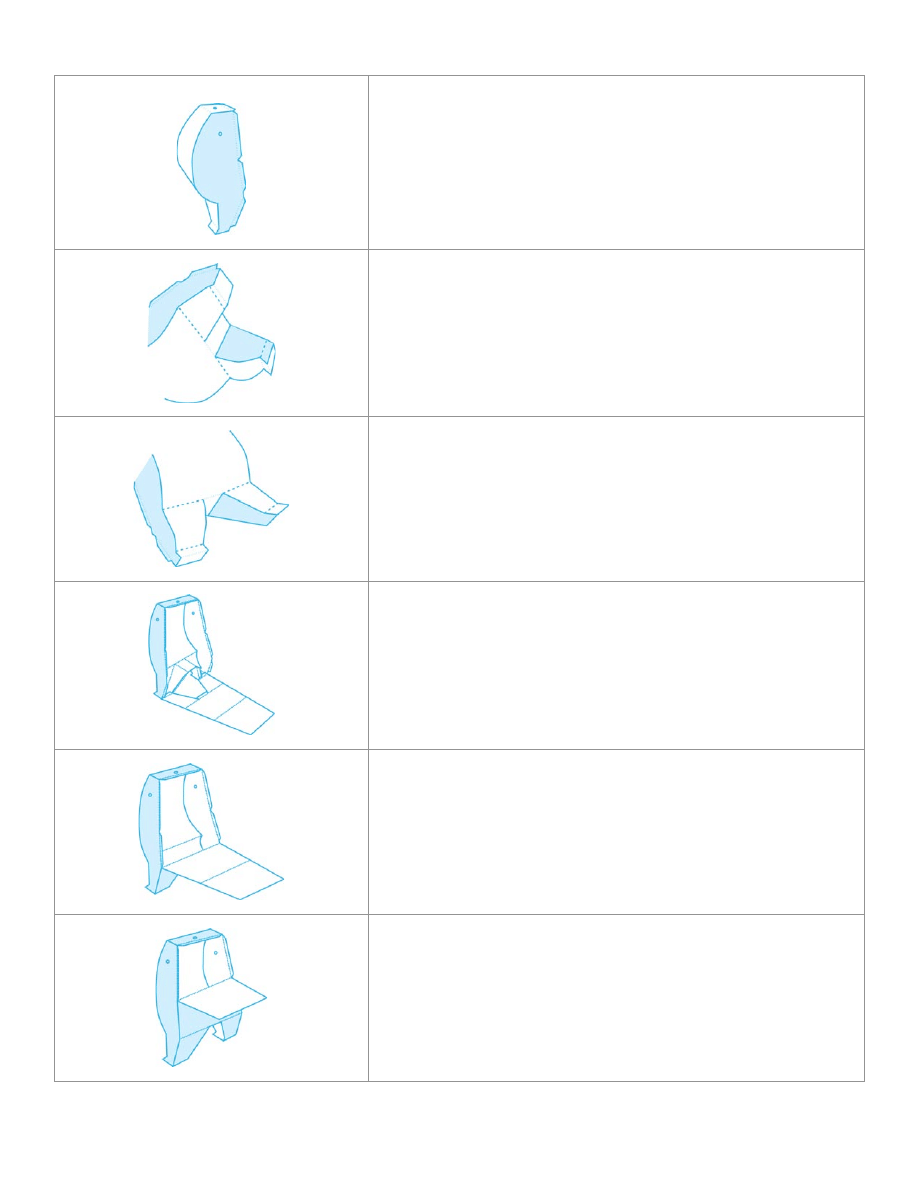
1. Score all the pieces: Using a ruler as a guide,
run the back side of a butter knife firmly along all
the dotted lines.
2. Using scissors or an X-ACTO knife and cutting mat,
cut out all pieces along the solid lines. Punch holes
where indicated on the arm and body.
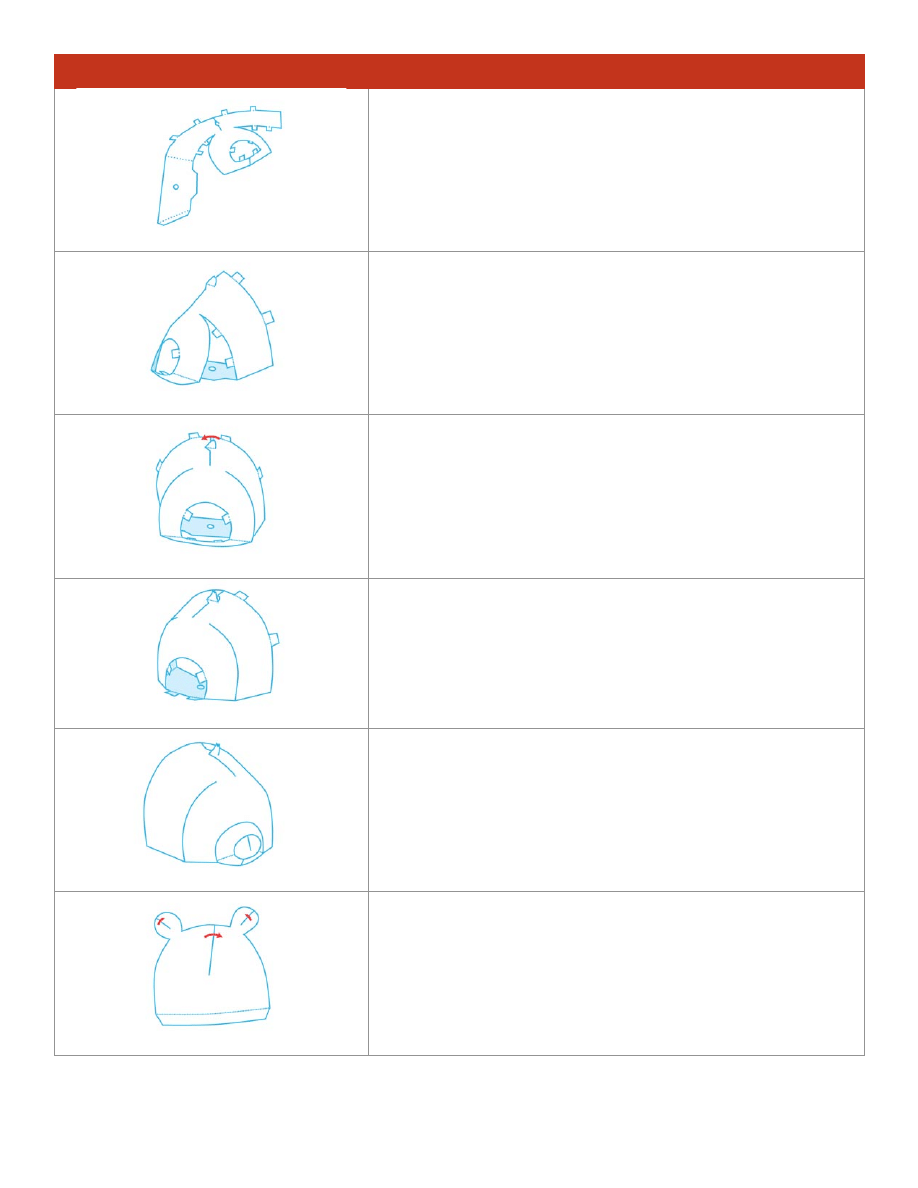
ASSEMBLE THE BODY
3. Fold dotted lines into mountain and valley folds as indicated on all pieces.
4. Glue the top of the right side piece (1) to the top of the front body piece (2). Repeat with
left body piece (3).
5. Gluing one tab at a time, attach the front body piece to the right side piece, curving the
paper as you work your way down.
6. Complete the right side.
Kung Fu Panda ™ & © 2008 DreamWorks Animation L.L.C.
© 2008 Hewlett-Packard Company
hp.com/go/activitycenter
7. Repeat on the left side.
8. Glue the right inner leg piece (4) to the right leg and middle panel of the front body
piece.
9. Repeat with left inner leg piece (5).
10. Begin attaching the body back piece (6) by gluing tabs at the feet.
11. Next, glue the back of legs to the tabs on body side pieces.
12. Proceed to glue the lower back in place (up to the dotted line). Leave the upper back
open for now.
Kung Fu Panda ™ & © 2008 DreamWorks Animation L.L.C.
© 2008 Hewlett-Packard Company
hp.com/go/activitycenter
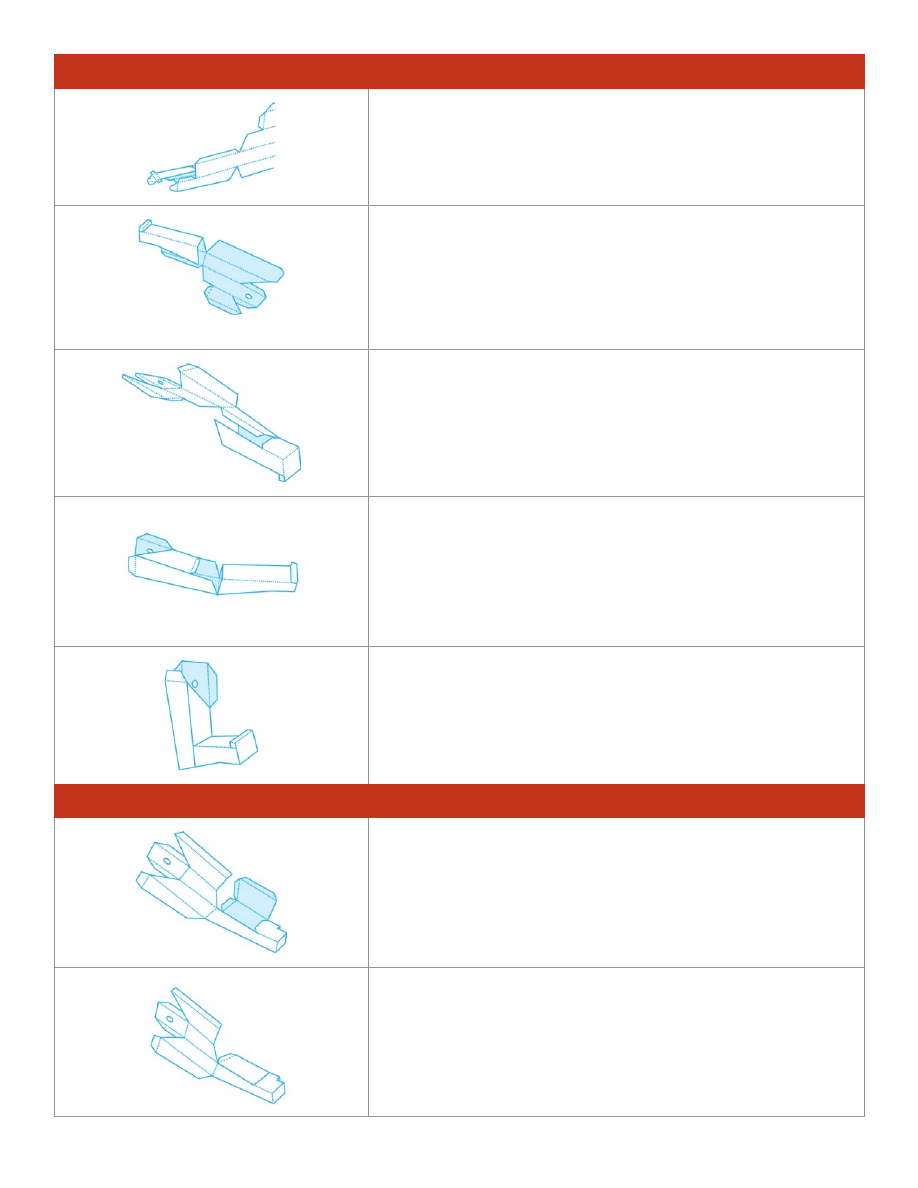
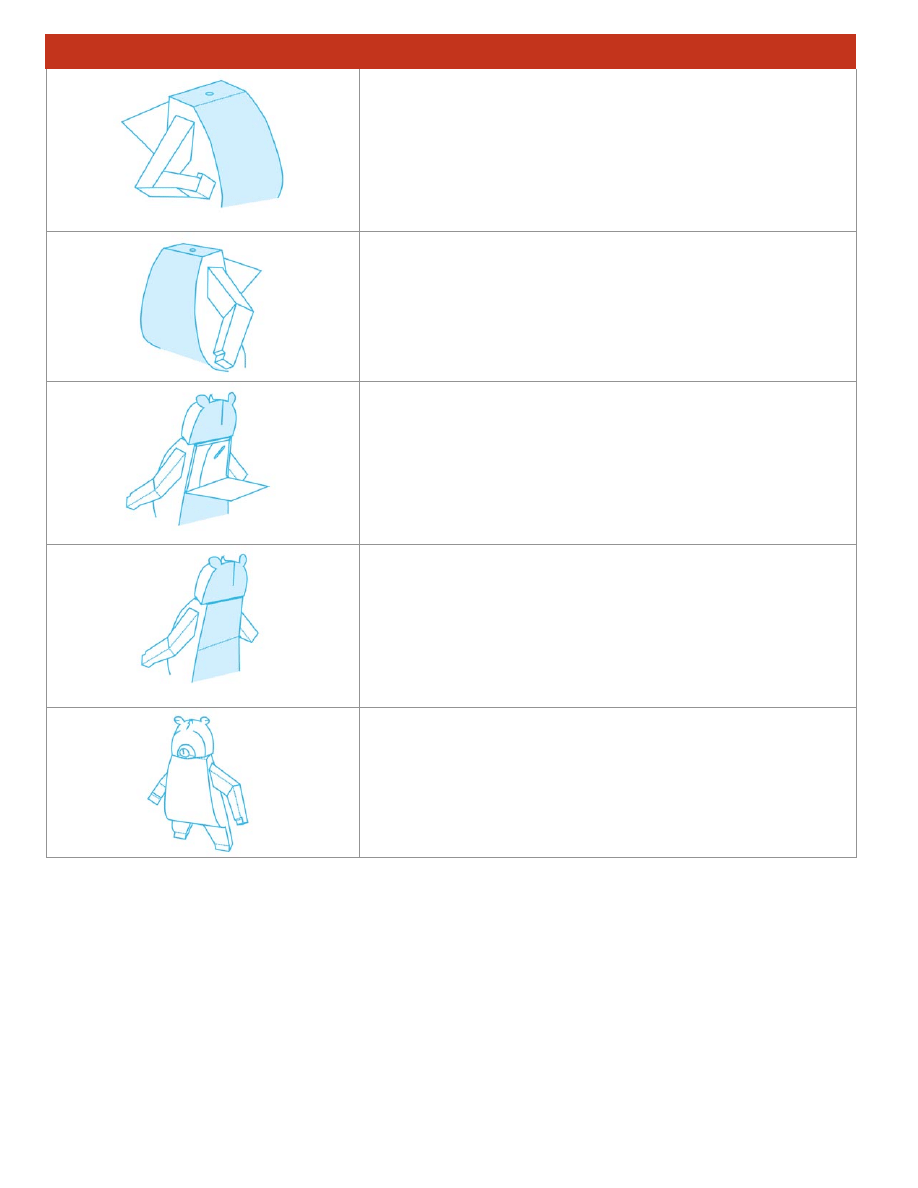
ASSEMBLE THE RIGHT ARM
13. Fold over the forearm (7) and glue tab A in place.
14. Apply glue to tabs B and C and fold in place. Apply additional glue to tab D and tuck
into the palm along with tabs E and F. You may find it helpful to apply pressure to the tabs
from the inside of the hand using a pencil or other long, slender object.
15. Complete the forearm by gluing tabs G and H in place.
16. Glue tab I in place to complete the upper arm. Leave top of arm piece open for now.
17. Apply glue to tab J, as well as the sides of the forearm on the white dots. Fold the
elbow, and secure in place.
ASSEMBLE THE LEFT ARM
18. Fold forearm (8) over and glue tabs A-D in place. You may find it helpful to apply
pressure to the tabs from the inside of the hand using a pencil or other long, slender
object.
19. Glue tab E in place to complete the forearm.
Kung Fu Panda ™ & © 2008 DreamWorks Animation L.L.C.
© 2008 Hewlett-Packard Company
hp.com/go/activitycenter
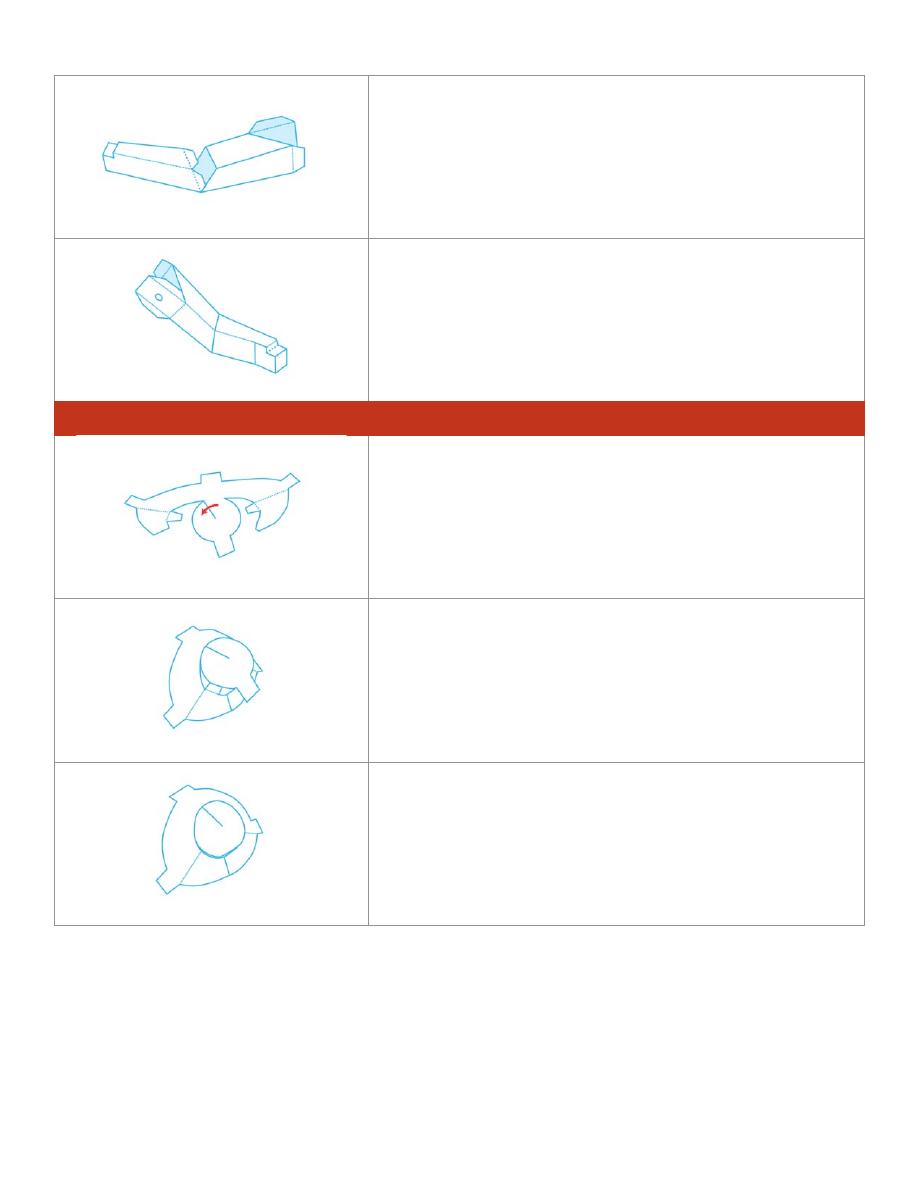
20. Fold over and glue tab G in place to complete the upper arm. Leave top of arm piece
open for now.
21. Bend at the elbow and glue tabs H-J to the inside of the upper arm.
ASSEMBLE THE SNOUT
22. Form the front of the snout (9) into a cone shape by pulling the right side of the nose
across tab A to dotted line and glue in place.
23. Curl tab B around under the opposite side and glue in place.
24. Tuck in tab C and glue.
Kung Fu Panda ™ & © 2008 DreamWorks Animation L.L.C.
© 2008 Hewlett-Packard Company
hp.com/go/activitycenter
ASSEMBLE THE HEAD
25. Curl tab A around and glue under the opposite side of head front (10).
26. Repeat with tab B.
27. Fold the tuft of hair upwards and glue tab C in place.
28. Pull chin tab under adjacent edge and glue in place.
Also, glue small tabs to back of face.
29. Insert the snout’s tabs into front of face piece and glue in place.
30. On the head back piece (11), fold top ear panels down and glue in place. Make slits in
ears so both layers of paper are cut. Tuck ear tabs under adjacent edges to meet dotted
lines and glue in place. Repeat with tab in middle of head to create a rounded shape.
Kung Fu Panda ™ & © 2008 DreamWorks Animation L.L.C.
© 2008 Hewlett-Packard Company
hp.com/go/activitycenter
FINISHING TOUCHES
31. To attach right arm to body, insert a brad through the holes in the upper arm and the
right side of the body, open the brackets and secure. Fold the three remaining arm tabs,
glue in place, and close up arm piece.
32. Repeat with left arm.
33. To attach the head to the body, insert a brad through the hole in bottom of head and
then through the top of body, open the brackets and secure. Fold the four remaining tabs,
glue in place, and close up the back of the head.
34. Apply glue to the three remaining tabs and close up the back of the body.
35. You’re done!
Wyszukiwarka
Podobne podstrony:
Kung Fu Panda 3D Paper Char Master Po inst
Kung Fu Panda 3D Paper Char Master Po
Kung Fu Panda 3D Paper Char Master Tigress inst
Kung Fu Panda 3D Paper Char Master Crane inst
Kung Fu Panda 3D Paper Char Master Viper inst
Kung Fu Panda 3D Paper Char Master Mantis inst
Kung Fu Panda 3D Paper Char Master Viper inst
Kung Fu Panda 3D Paper Char Master Mantis inst
Kung Fu Panda 3D Paper Char Master Tigress inst
Kung Fu Panda 3D Paper Char Master Crane
Kung Fu Panda 3D Paper Char Master Monkey
Kung Fu Panda 3D Paper Char Master Crane
Kung Fu Panda i głebsze przeslanie, zachomikowane(1)
więcej podobnych podstron