CLOSE
Classic Chessboard
Nothing you build will be examined as closely as a chessboard.
Building any kind of box can be a little challenging. Coving its sides can make it a
little more time-consuming. But making a chessboard lid out of 64 small square
blocks of wood so all the corners match up neatly can be totally overwhelming.
And trust me – nothing receives quite as much scrutiny as the top of a handmade
chessboard.
But there is no reason to be afraid of making a chessboard. All you need is some
basic woodworking experience, a well-tuned table saw and, most importantly, lots
of patience.
I tackle this project in four steps:
• First I prepare the wood.
• Next I make the chessboard, which will be inset in the box lid.
• Then I assemble the box.
• And finally I cut the lid off the box, install hinges and finish the piece.
As with any project, quality materials are important. For my chessboards, I use
walnut and maple, although any contrasting woods will do. Select wood that is
equally dry, and joint and plane it to thickness. As always, your wood must be
straight.
8 Strips = 64 Squares
A chessboard is made up of 64 square blocks. Thirty-two squares are dark and 32
are light. If the corners of the squares don't line up properly, the contrasting colors
will make any gaps extremely noticeable and the project will be ruined. The
prospect of accurately cutting and gluing together 64 blocks is daunting, so don't
do it. Instead, make the squares in strips.
First cut four strips of walnut and four strips of maple both 2" wide and carefully
edge-glue them together, keeping the ends aligned. When the glue has dried, true
up one end by crosscutting the assembled panel on your table saw.
Note: You don't want to move the table saw's fence to do this. Use an accurate
miter gauge or crosscut sled. Then, with the fence still set at 2", crosscut the panel
into 2"-wide strips again. Here are some secrets to successful square cutting:
• Make sure your table saw's blade is set at 90° to the table and your table saw's
fence is perfectly parallel to the blade.
• Don't move the table saw's fence between cuts.
• Use a blade stiffener to avoid any chance of blade flutter.
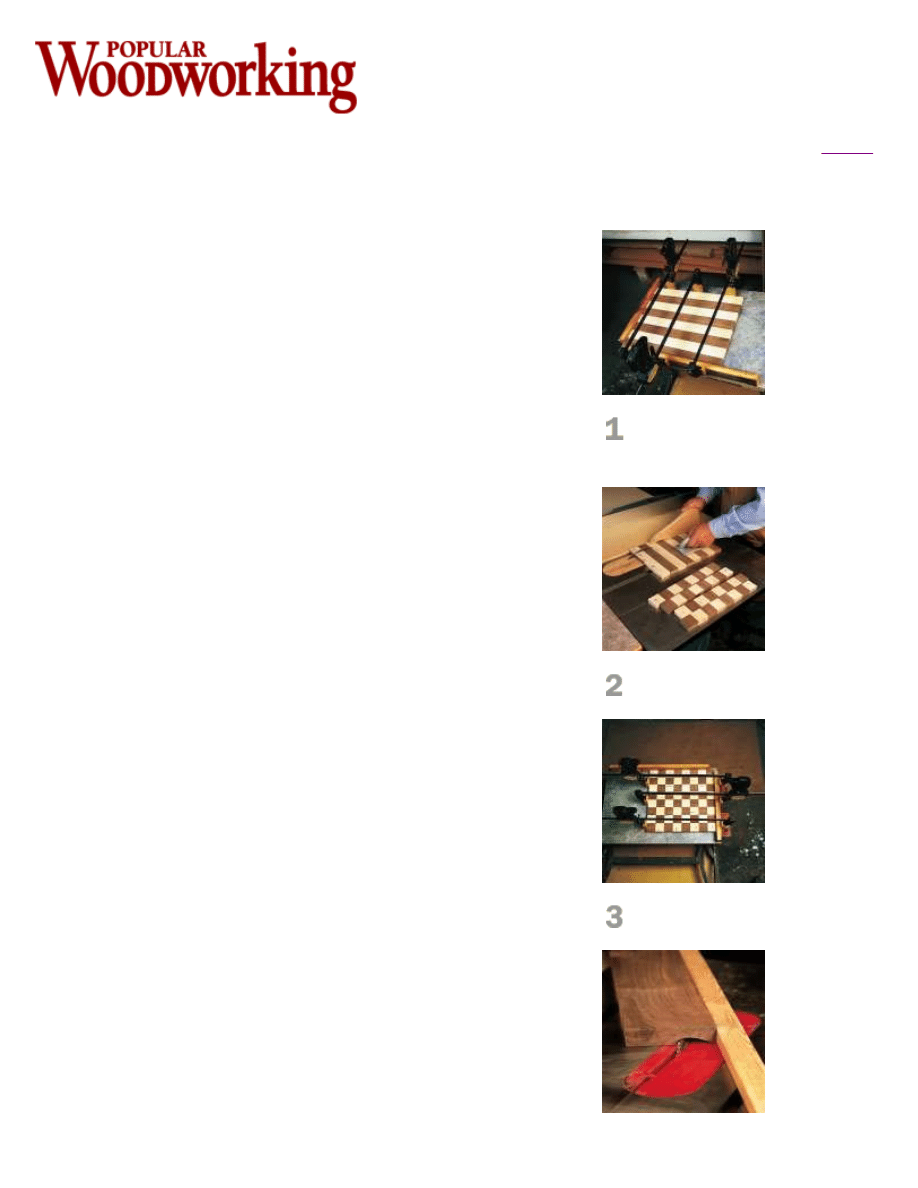
The first step in making a gap-free
chessboard top is to glue together eight
maple and walnut strips, alternating between the
species.
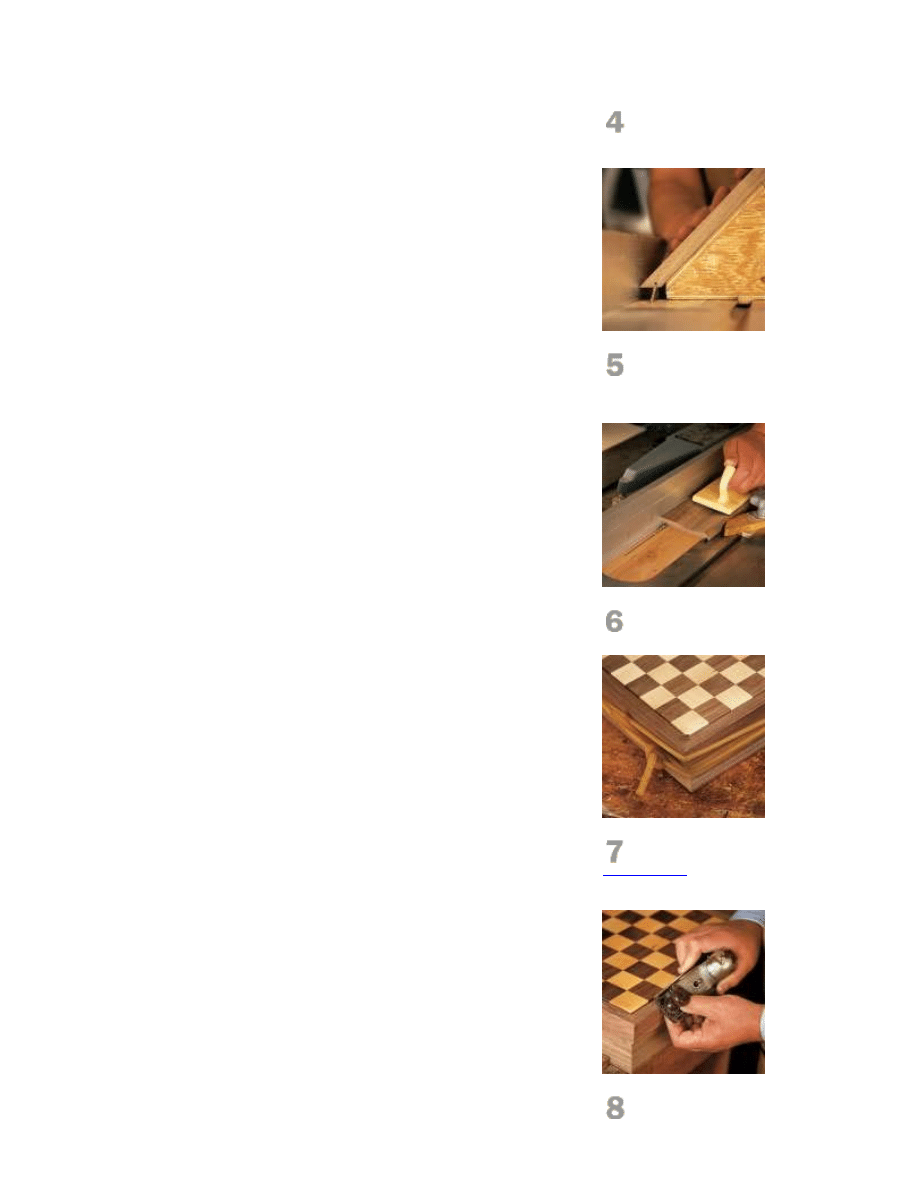
Next, you need to recut the maple and walnut
board into eight 2"-wide strips.
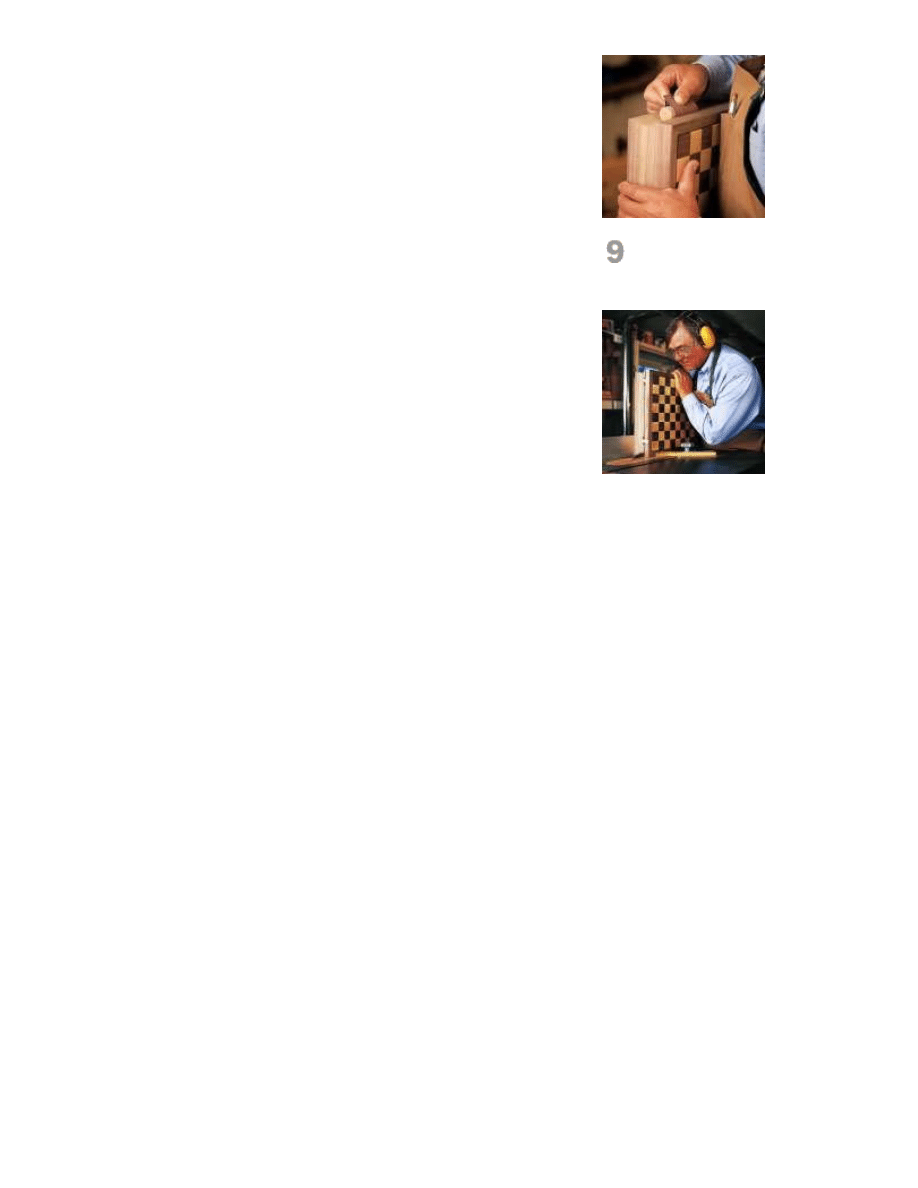
Then reglue the strips, alternating between
the species to form a chessboard.
Page 1 of 4
Popular Woodworking Magazine
6/18/2005
http://www.popularwoodworking.com/features/printable.asp?id=1333
• Keep the blade low to the work (one tooth above the wood is a good rule of
thumb).
• Try not to pause part of the way through a cut. This will produce a slightly wider
cut at that part, which would be very noticeable on a chessboard.
You now have eight strips of wood 2" wide. Rotate every other strip end for end
and glue them back together, as shown in photo 3. Make sure you glue the pieces
back together on a flat surface and use a jig similar to the one I used in the
picture.
After the glue has had time to cure, you can plane or sand all surfaces to remove
any irregularities. If you own a planer, unplug it. The grain of the blocks will be
running in different directions because of the construction method we used and
there is a good chance of some severe tear-out. For years I hand-planed and
scraped the surface smooth. These days I used a drum sander and it works just
fine.
Now cut the groove around the edges of the chessboard for the splines that
secure the board in the lid. This can be done by making a couple of passes on
your table saw with the blade set up to 1/4". Then plane a light chamfer around
the outside top surface of the board and sand in stages up to its final grit (I go to
#600-grit). The underside of the lid will be visible when opened, so make sure you
sand both sides.
Coving the Sides
I build the lid as part of the sides, then cut the lid free on the table saw. The box
has four sides of equal length with mitered corners. To reinforce the miter joints, I
use a spline, which adds a lot of strength and a subtle design element. I also like
to add a cove to the sides of the box.
Coving, an act that is easily achieved using your table saw, can be done prior to
building the box or after. I prefer doing it before, just in case a calamity of some
kind happens, destroying all of my work to that point.
The procedure is really quite simple. Basically, just pass the wood across the
blade at an angle and take very light cuts, maybe 1/16" at a time. I use an 80-
tooth blade because it produces a cleaner cut and leaves me with less scraping to
do afterwards. Less scraping is always a good thing.
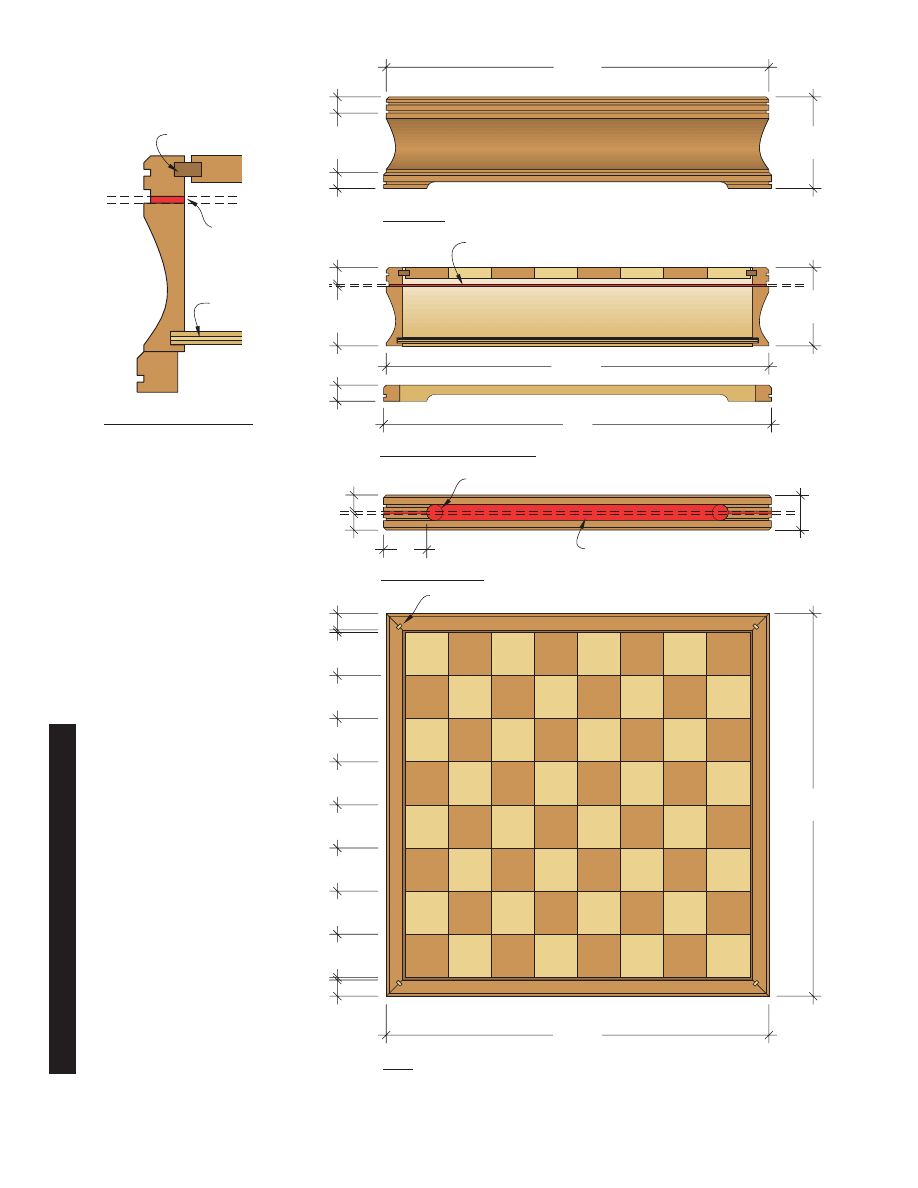
To make this cove, bevel the blade to 45°. This gives something approaching a
parabolic curve, but changing the angle of approach and the slope of the blade
can produce a variety of profiles.
Clamp a straight-edged board across the saw to act as a fence, then make
multiple passes. Sometimes if the workpiece is long and I'm alone, I'll clamp a
second board parallel to the first so the workpiece travels between the two, just to
keep things running smoothly. The pieces for this project will be more than four
feet long, so I recommend using the second guide.
As a safety precaution, always use proper push blocks when coving. It's a lot like
jointing: The workpiece needs to be held down over the blade, and that should
never be done by hand. Once you've raised the saw blade to the finished height
(about 3/8") the coving is complete.
Building the Box
Once the coving is done, cut the side pieces to rough length and then accurately
miter them. Next, using your table saw, cut 1/8"-thick x 1/8"-deep kerfs for the
splines in the mitered ends. Instead of angling the blade, I use a homemade sled.
Although I'm able to angle my blade, I find it to be very awkward.
A straight-edged board clamped across the
table saw acts as a fence when cutting the
cove.
On my first table saw the table tilted, rather
than the blade, so I made a sled to hold my
work at 45° instead of tilting the table. I still use my
sled, and here I'm using it to cut a kerf for a spline.
Here I'm cutting a groove in the coved side
pieces, which will hold the plywood bottom.
I use surgical tubing to clamp together the
sides after glue-up. The tubing (available from
Lee Valley Tools
, 800-871-8158) applies even
pressure to the joints.
Plane a light chamfer along the top edge of
the box so it matches the top edge of the
chessboard.
Page 2 of 4
Popular Woodworking Magazine
6/18/2005
http://www.popularwoodworking.com/features/printable.asp?id=1333
To deter tear-out, always back up the cut with a piece of scrap wood so that when
the blade exits the work it does so cleanly. These slots need to be kept fairly close
to the inside corner so they don't break through into the thinner area created by
the coving. To make the splines, rip a piece of walnut just less than 1/8" thick on
the table saw and crosscut them just less than 1/4" with a fine handsaw. The grain
on the splines must be perpendicular, not parallel, to the length, for additional
strength.
Now cut the 1/4" x 1/4" groove on the inside of the box sides for the bottom
plywood piece and the splines for the chessboard, which nest in the groove cut in
the edges of the chessboard. Don't glue these parts in. It's necessary to allow
some float, accommodating seasonal changes.
Next, sand all the inside faces of the box and apply masking tape to the inside
edges of the box sides to help gather any glue that squeezes out. Masking tape
with glue on it is easier to remove than hardened glue in the corners.
Then you can dry-assemble the box to ensure that everything fits properly. If it
does, glue up the piece on a nice, flat surface. My splines extended a little above
the top edge so I pared them off with a sharp chisel later. Never leave them below
the surface – it looks terrible.
Instead of clamps, I've found I get better results wrapping several passes of
surgical tubing around the box, as shown in photo 7. Surgical tubing can be
stretched tightly, applying pressure evenly to the joints. This is hard to do if you're
alone, so you may need to start with clamps. Once the box parts are positioned
properly, put the tubing on and remove the clamps.
After checking to make sure everything is square, let the box sit overnight. The
next day, clean up any squeezed-out glue at the joints then carefully cut around
the outside of the box to remove the lid, as seen at right. The edges of the box and lid will need a little cleanup, something
you can do with a sharp block plane.
Building the Base
In my opinion, this box looks more elegant on a base. I make a simple base using two pieces of 3/4" walnut, 1-5/8" wide and
1/4" longer than the sides. I miter the ends, then stick them back to back with double-sided tape.
On the center line, drill a 3/4"-diameter hole 2" from each end. Then cut through the center along the length. Using a band
saw or jigsaw, cut away the waste between the holes and clean this up using a block plane and rasp. This will yield four 3/4"
x 3/4" sides, which can be mitered and glued together to produce the base. This, in turn, can be glued to the bottom of the
chessboard.
I don't use a spline in the base's miters because with everything glued together, strength isn't an issue. Before doing the final
glue-up, plane a light chamfer along the top edge to match the one at the chessboard's top edge.
Also be sure you clean up the coved sides. I like to do this with handmade scrapers. I use old handsaw blades I get at
garage sales and cut them to fit the profile. A piece of sandpaper wrapped around a large dowel also will work.
Checkmate
When you play chess, your right-hand corner square must be white. I like to open the lid like a book so I put the hinges on a
side. This way both players can look into the box when it's opened to remove their chess pieces.
I mortise the hinges into the box and lid, slightly less than half the height of the hinge. Once the lid has been fitted, the
outside can be sanded and then the whole piece can be finished in whatever way you choose.
My wife lined the bottom of the box with some felt while I made dividers to separate the pieces. This isn't really necessary,
but it is a nice surprise when the lid is opened.
Once finished, take some time to sit down and challenge a friend to a good game of chess. PW
Although I use handmade scrapers to clean
up my coves, you can just as easily use a
piece of sandpaper wrapped around a large dowel,
as shown here.
Once the box is glued up, cut the lid using your
table saw as shown here. Note that I've taped
spacers in the kerf once the cut was made to keep
from pinching the blade as the top is cut free.
Page 3 of 4
Popular Woodworking Magazine
6/18/2005
http://www.popularwoodworking.com/features/printable.asp?id=1333

To make your own chess pieces, check out “Wooden Chess Pieces You Can Make” (Fox Chapel Publishing) by Diana
Thompson, available at
Woodworker's Book Club
.
Barry Black builds custom furniture in Red Deer, Alberta, Canada.
CLOSE
Page 4 of 4
Popular Woodworking Magazine
6/18/2005
http://www.popularwoodworking.com/features/printable.asp?id=1333
3
/
4
"
2
3
/
4
" box
1
/
8
" lid removal saw kerf
1
/
8
"
2
3
/
4
"
17
3
/
4
"
3
/
4
"
18"
3
5
/
8
"
3
/
4
" lid
3
/
4
" base
17
3
/
4
"
4
1
/
4
"
2"
1
5
/
8
"
3
/
4
"
3
/
4
"
1
/
8
" saw
kerf
3
/
4
" dia. hole
Remove waste (red area) with band saw or jigsaw
2"
17
3
/
4
"
3
/
4
"
1
/
8
"
2"
2"
2"
2"
2"
2"
2"
1
/
8
"
3
/
4
"
17
3
/
4
"
1
/
8
"x
1
/
4
" spline
1
/
8
" kerf
1
/
4
" plywood
1
/
4
"x
1
/
2
" spline
Half-size section detail
Elevation
Lid, box & base sections
Base stock plan
Plan
C
LA
SS
IC
CHE
SS
BO
A
RD
N
O
.
IT
EM
D
IM
EN
SI
O
N
S
(I
N
CH
ES
)
M
AT
ER
IA
L
T
W
L
❏
4
St
rip
s
9
⁄
16
2
17
*
M
ap
le
❏
4
St
rip
s
9
⁄
16
2
17
*
W
al
nu
t
❏
4
Ch
es
sb
oa
rd s
pl
in
es
1
⁄
4
1
⁄
2
17
W
al
nu
t
❏
4
Bo
x si
de
s
3
⁄
4
3
5
⁄
8
17
3
⁄
4
W
al
nu
t
❏
4
M
ite
r s
pl
in
es
1
⁄
8
1
⁄
4
3
5
⁄
8
W
al
nu
t
❏
1
Bo
tt
om
1
⁄
4
16
3
⁄
4
16
3
⁄
4
Pl
yw
oo
d
❏
2
Ba
se
3
⁄
4
1
5
⁄
8
18
W
al
nu
t
* T
he l
en
gt
h i
s c
or
re
ct
; t
he a
dd
iti
on
al i
nc
he
s n
ee
de
d f
or s
aw
ke
rf
.
Wyszukiwarka
Podobne podstrony:
Chessmen and Chess Board(1)
Chessmen and Chess Board(2)
Gilberg Crumbs from the Chess Board Anders Thulin (1890)
Chessmen and Chess Board(2)
Charles A Gilberg Crumbs from the Chess Board Nabu Press (2010)
Toy TIC TAC TOE BOARD
Cutting Board 1
ATM18 Relay Board
Toy Bobtail, Dokumenty Textowe, Koty, Rasy kotów
Heart Shaped Cheese Board
89SXX Project Board
Garret Water Carburator Plans For Water Powered Vehicles
HD44780 ATTINY13 BOARD TOP MIRROR
DIY Mortis Dreadmought Plans & Templates
Chess Table
Complete Circuit diagram and plans
Extra Sword Art Online Story pencil board
How to Install the Power Quality Teaching Toy
Basic Board Fence
więcej podobnych podstron