I
nlaid Picture Frame
OVERVIEW
Introduction
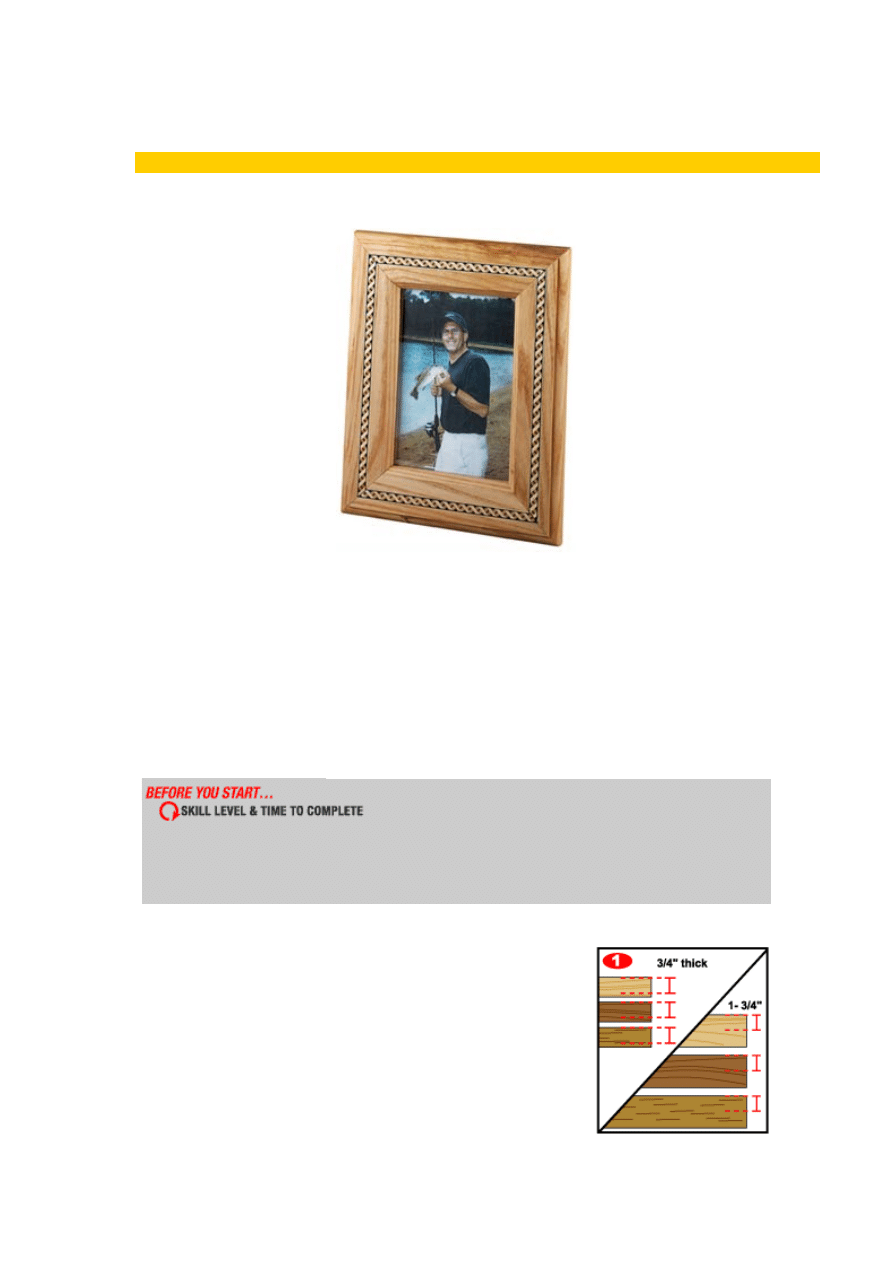
This is a great project to do if you have admired inlaid picture frames and would like to build your own. You
can also use a variety of router bits by constructing four different frames. I went to my local wood craft store
and bought wood, inlay, and a picture frame clamp for the final assembly. Before you begin, you should
make an assessment of the frame you want to build. Determine the size that’s best suited for the photos
you’d like to frame. Also, choose the best color and grain pattern to complement the photo, and the proper
bits to give the desired framing style. Lay out inlay channel and fix the dimensions, set-up your tools and go!
•
Beginner - about 3 hours
•
Intermediate - about 2 hours
•
Advanced - about 1 hour
STEPS
1.
Plane the zebrawood, ash, and oak to 3/4 inch thickness, and cut it to 1
3/4 inch width. Leave the pieces in 5-foot lengths, so that all passes
you later make with the router are uniform.
2.
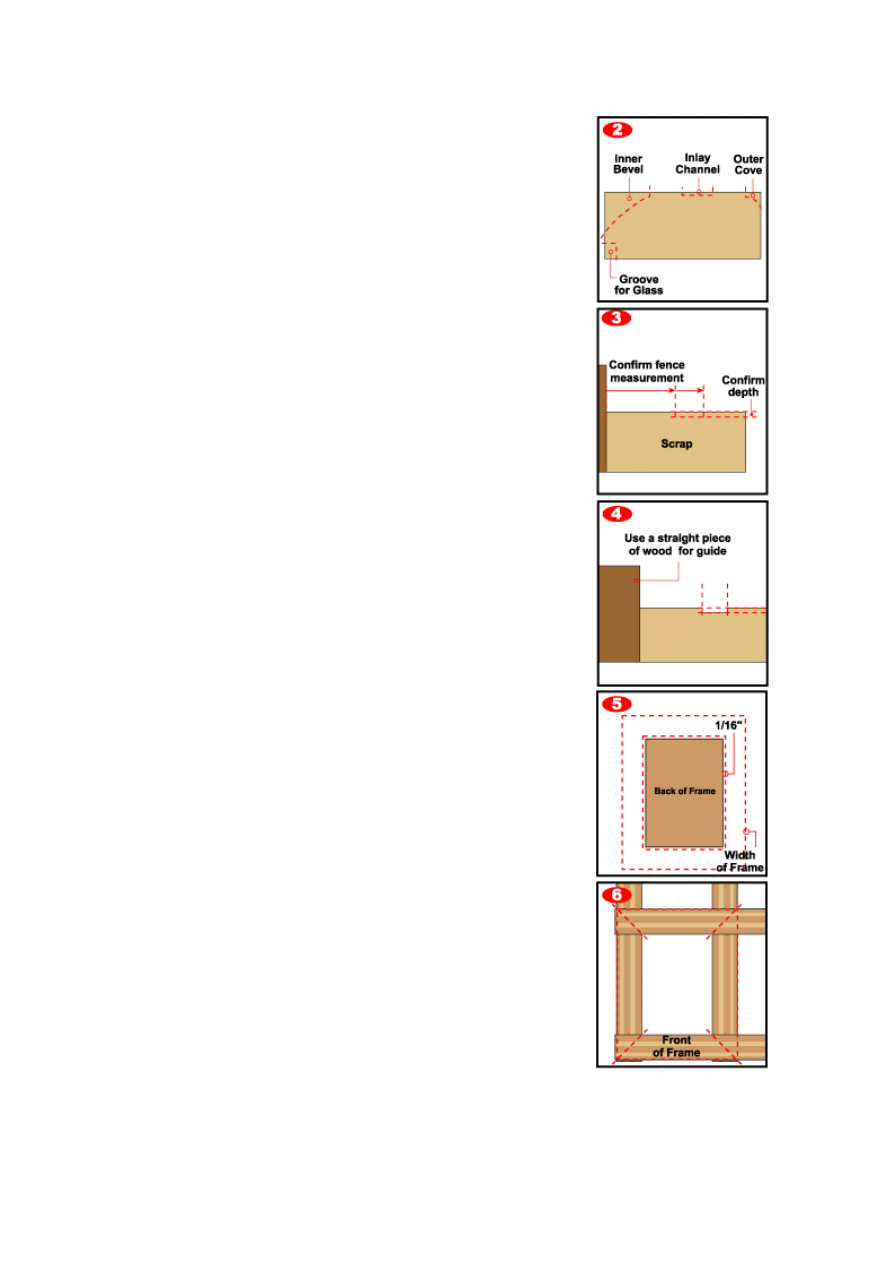
Next, rout the grooves for the glass, then the inner bevel, then the
inlay channel, and finally the outer cove.
3.
Through trial and error with scrap wood confirm the depth and fence
measurements. Be aware that because of the difference between the
ash and oak woods you will need to adjust the speed of the router and
the feed rate across the bit to keep the wood from burning.
4.
The most difficult cut is the groove needed for the inlay. Be sure to use
a straight piece of wood to guide the edge of the router for all your
cuts, so that your routs are perfectly straight. Attempting to free-hand
rout these channels will result in an unusable groove.
5.
Because the glass in our sample is 5 by 7, measure the back of the
frame adding a 1/16th inch each way to allow for the glass to fit easily.
Then add the width of the wood of the actual frame.
6.
Transfer the measurements to the front and draw lines for the miter
cut. Cut the miters with your compound miter saw. Then sand the
frame parts to make them smooth.
7.
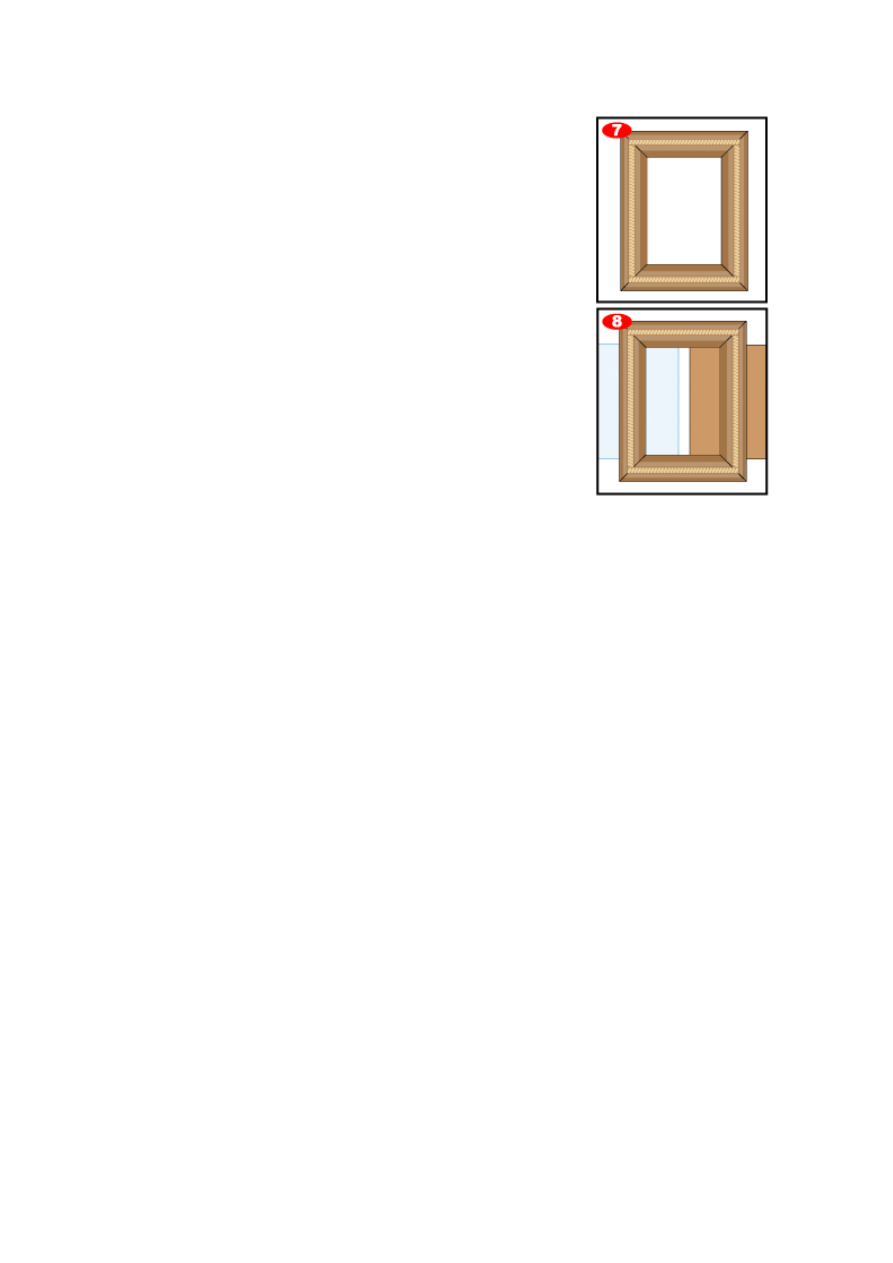
After gluing the joints, use bar clamps or framing clamps to clamp the
pieces together, making sure to keep the frame perfectly square and
the corners smooth and even. Once the glued frame is set measure for
the inlay and cut it with a razorblade making three to five passes. Fit
the inlay in the channel with slight pressure. If it does not quite fit,
make a couple shaving strokes with the edge of the razor blade until it
matches perfectly.
8.
Finish the frames with light oil stain, add the glass piece to the frame,
your photo and the backing, and you’re finished!
SHOP LIST
Materials List
1 inch thick Ash
1 inch thick Oak
1 inch thick Zebrawood
1/32 inch thick X 3/8 wide inlay
5 X 7 X 1/8 inch glass
3/8 wide flat base router bit
Glue
Tools List
Router
Router Bit Set
Table Saw
Palm Sander
Compound Miter Saw
C
lamps
Wyszukiwarka
Podobne podstrony:
Hobbies 1927 Picture frame with inlaid picture, Timber Hauling in New Zealand
Hobbies 1708 pair of inlaid pictures
Hobbies 1701 pair of inlaid pictures
Hobbies 1716 pair of inlaid pictures
Hobbies 1694 pair of inlaid pictures
Frame Picture frame
Frame picture frame Falling Leaves
Wykład12 Sieć z protokołem X 25 i Frame Relay
Wykład10a Sieć z protokołem X 25 i Frame Relay
Nokia Image Frame SU 7 PL Manual
cold frame inspekt na sadzonki
Technika Frame Relay jako metoda połączenia przedsiębiorstw do sieci WAN i do internetu, PREZENTACJA
cdm rule frame nowa jakosc tworzenia aplikacji trójwarstwowy
Multi Time Frame System
02 Frame Body Panels Exhaust System
Configuring Frame Relay
Photo Frame Genius v2, DO OBRÓBKI FOTEK
Jig For Frame And Panel Gluing
M39n Frame and Underbody
więcej podobnych podstron