
Wizard Hat
by
Adrienne Franklin
Pattern Level: Easy
Seam Allowance: 1/4” used throughout and has
been added. Press carefully step-by-step.
Materials Needed:
7/8-yard medium blue star print
1/2-yard polyester fleece
Polyester stuffing
Matching thread
Cutting
Enlarge hat pattern using a copier or other method until each of the
background squares measures 1”.
From star print cut:
1 hat and 1 hat lining (use pattern and place on fold of fabric when
cutting)
1 brim – 7 1/4”x 36”
From polyester fleece cut:
1 hat
Assembly
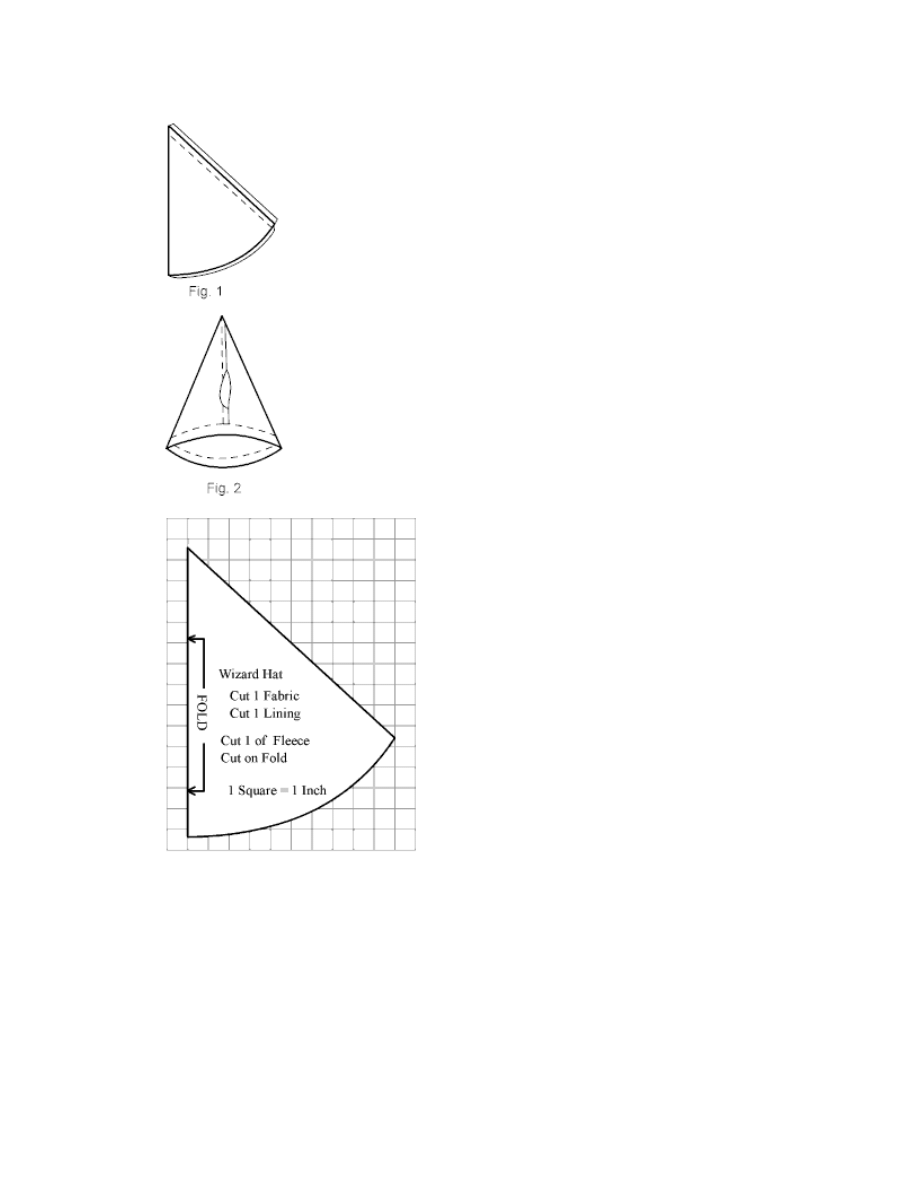
1)
Baste fleece to the wrong side of 1 hat piece close to
the edges. Fold hat in half wrong sides facing and
sew along straight edge. Fold lining piece in half and
sew along straight edge leaving an opening in the
seam for turning. See figure 1.
2)
Place hat inside lining, right sides facing, raw edges
and back seams aligned. Sew hat to lining along
bottom edge. See figure 2. Turn right side out
through opening in lining. Slipstitch lining closed.
3)
For brim, fold brim in half
lengthwise right sides facing. Sew
long edge, leaving ends open for
turning. Turn right side out. Stuff
firmly with stuffing. Place around
bottom of hat and adjust to fit by
stuffing one end of brim inside the
other until brim fits hat. Fold in
raw edge along outer brim section
and slipstitch closed. Slipstitch
brim to hat all the way around .

Wizard Cape
by
Adrienne Franklin
Size: Children’s one size fits most
Pattern Level: Easy
Seam Allowance: 1/4 “ seam allowance used throughout.
Materials Needed:
1 1/4 –yards Castle scenic print (will make a cape up to 40” long)
1 1/2 –yards 3/4” wide ribbon (optional)
Matching thread
Assembly
1) Measure your child from the base of the neck to the desired length of
the cape. Add 5” to this measurement and cut a piece of fabric this
length by the width of the fabric.
2) Cut off selvages of the fabric and narrow hem each side by turning
under 1/4” and then turning under 1/4” again to enclose the raw edges.
Stitch. Hem bottom edge in the same manner.
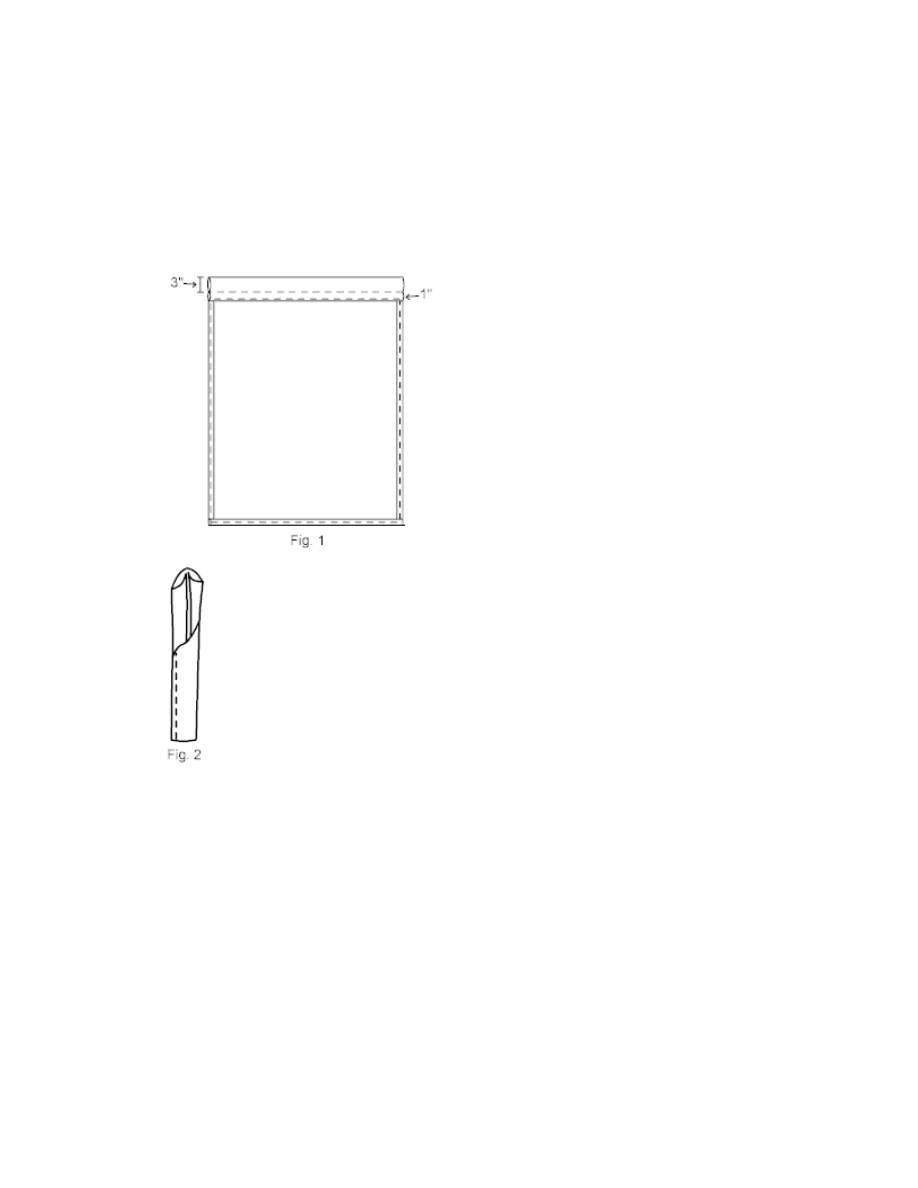
3)
To form top casing and collar,
fold over 4 1/2 “ along upper
edge, folding under 1/4”
along the raw edge. To make
a 1” casing, mark and stitch
3” from top folded edge. See
figure 1. Stitch along lower
folded edge.
4)
Tie: If using ribbon, insert ribbon into casing using a safety
pin as a guide. Trim ribbon ends on the diagonal to prevent
fraying. To make a tie using leftover fabric from the cape or
hat, cut or piece strips to equal a piece 3”x 54”. Fold strip in
half lengthwise, wrong sides facing and press. See figure2.
Open and fold in raw edges to meet center fold. Close and
stitch closed along both folded edges. Insert in casing using
a safety pin. Knot ends to prevent fraying.
While all possible care has been taken to ensure the accuracy of this pattern, we are not
responsible for printing errors or the way in which individual work varies.
©Cranston, a Division of ©Cranston Print Works Company
www.CranstonVillage.com
Wyszukiwarka
Podobne podstrony:
Crafts Costume Sewing angel & wings cosplay pattern
Zaaberry Baby Hat Pattern
(CRAFTS) Beading Bead Crochet Pattern
Sesame Street Elmo Inspired Baby Hat Crochet Pattern
Crafts Woodworking Magazine (Ebook) Shopnotes #150 Extra Oval Jewelry Box Lid Pattern
History Costume History Costume Design Viking Women
pirate hat 2
Pattern Peyote Little Mouse Amulet
JG RUST Patterns 9 15
canoe purse pattern2 flap1
Patterson Ch J Rodzicielstwo lesbijek i gejów
Pattern Peyote Tiny Ladybug Earrings
gingerbread patterns
Dietary Patterns Associated with Alzheimer’s Disease
mallard pond pattern
Pikachu Pattern
patterns
DIAGRAM 7 PATTERN TOI GYE Tul
więcej podobnych podstron