Introduction
As if Cyrodill and Oblivion weren't big enough.
Jump into the fantastical dimension of the Shivering Isles.
New enemies, new challenges, and new areas await the
adventurous. Join us as we walk you through the new
adventure and guide you to fresh sidequests.
In this The Elder Scrolls IV: The Shivering Isles
strategy guide, you'll find:
WALKTHROUGH // Complete Shivering Isles
walkthrough to guide you through the quest.
SIDEQUESTS // Info on where to find sidequests
and how you'll be rewarded.
Guide by: MrWhitefolks
This PDF Guide is property of IGN Entertainment. Any unlawful duplication or posting of this document without the consent of IGN Entertainment will result in legal
action.

Shivering Isles Walkthrough
Upon loading your save file, it will take around 48 IN GAME hours for Shivering Isles to open up for you. When this
happens you will be auto notified via a onscreen prompt letting you know that a mysterious door has opened up east of
Bravil out on the Niben Bay.
After arriving at the mysterious door you will note that there is a guard on watch, as well as a lone civilian. After chatting
up the guard about the this new sight, someone will emerge from doorway and go mad, attacking the guard (and you, if
you're not careful). Talk to guard again if you wish, and head on through the doorway.
You're greeted by Haskill, a bald fellow who seems to be the liaison of the Shivering Isles on behalf of Sheogorath (the
Daedric prince of madness; who runs the entire establishment). Sit in the chair and have a good talk with him to get all
the information you need in regards to this new world you are about to enter. When you're ready, let our new found
friend know and he'll open the gates to Shivering Isles in a most fantastical fashion.
Following the path before you, you should find into a town and an adjacent area (the gates of madness) wherein a giant
gate keeper is barring your way. You will immediately understand the severity of this gate keeper's presence as a small
group of adventurers will attempt to kill said monster. Long story short: It doesn't work. At the end of the day it's a pile of
dead guys, the gate keeper walks away, and you're set pondering how the hell you'll get past this abomination so you
can gain access to the realm of Shivering Isles.
Thankfully, there are two easy ways to get past this giant, hulking, and apparently invincible roadblock.
The first one is to search around for Jayred Ice-Veins and help him on his quest to rid the gate keeper. Doing so will
require you to pick a lock to the local graveyard, kill a few mutated skeleton-types, wherein Jayred will let you know he
as acquired the necessary pieces needed to construct Gate Keeper Bone Arrows. It'll take a few hours (in game), so you
can either wait them out or spend time exploring this new town and talking to it's residents. Once the allotted time has
passed, you can return to Jayred and you then team up to kill the gate keeper (he'll give you 20 arrows, while he himself
takes only 10). If you have archery skill, the Gate Keeper Bones come in handy and damage this monster fairly well. If
not, then you can wait for Jayred to fire a shot at the gate keeper, then fire off with whatever you have (spells, melee
strikes, etc). Soon enough the monster will fall and you will have the keys needed to enter the gates of madness, letting
you into the full realm of Shivering Isles.
The second option is based around a woman named Relmyna Veremin. Talking to her will reveal that she is the one
who helped create the gate keeper, and after a little chit-chat she will blow you off, but in doing so she drops the name
of Nanette Don. Of course you're going to want to have a nice sit down with Nanette and after a little persuasion (or
bribery) she'll reveal that Relmyna's own tears hurt the monster...and that she meets with him nightly around 12am. So
head out and wait for the meeting to take place, but be sure to stay close enough that you can hear some of the dialog
(don't get too close, or the gate keeper rushes you) and after the convo has happened, an in game prompt will alert you
that Relmyna has left a handkerchief full of her tears on the ground. Run up, snag the handkerchief and then haul ass
01
02
03
04
>>
A Door in Niben Bay
Through the Fringe of Madness

out of the gate keeper's range (upon picking it up, the game will prompt you with a note on how you squeezed the tears
into some bottles, allowing you to poison your blade/arrows if you decide to attack the gate keeper).
The tears themselves open up the monster to damage for a 120 second window. So all you really need to do is fire one
off, and then bomb on him with whatever attacks your character has (melee/arrows/magic/etc). This is a far easier route
than the one above, but using both the Gate Keeper Bone Arrows AND the poisoned tear bottles is the most applicable
route (as [MANS NAME] does damage of his own, while you get the added poison from the tears and whatever damage
you want to inflict).
Our bald liaison friend from earlier shows back up to inform you that Sheogorath has an important quest for you and that
it is of utmost importance that you meet with him. Obviously the more you talk with him, the more you learn about this
newfound world, so do so at your convenience. The only question left to you is "which door do I take?". The doors both
lead to the same world, it's just that going through a door grants you a new spell...so the real question is which spell do
you want?
Mania: Going though this door grants you the Blessing of Mania (Frenzy up to level 12 in 30ft, for 30sec on Target).
Dementia: Going through this door grants you the Blessing of Dementia (Demoralize up to level 12 in 30ft, for 10sec on
Target).
Ah, Xedilian. What a fine place to start off your adventure in the Shivering Isles. An old, run down, booby-trap filled
dungeon of sorts...all which you need to get up and running again for Sheogorath. This is a fairly simplistic quest, and as
long as you take your time you won't have a problem fighting off the enemies within. As you make your way through, you
will come across focus crystals (dropped by enemy Shaman's in the form of their staffs) that are needed to power
Xedilian, and in turn are needed for you to progress from one area of the dungeon to the next. Simply pick up a dead
shaman's staff and then place the focus crystal in their necessary Judgement Nexus' to open the way for the next part of
your dungeon crawling adventures.
As you make your way through the dungeon (it's ridiculously straight forward), you will finally activate the Resonator and
be granted access (via a teleport pad) to the upper areas of Xedilian. Upon entering here you will be greeted by
Xedilian's caretaker, Kiliban Nyrandil. He introduces you to the concept of Xedilian and how it works as a testing
ground/torture device built solely to get rid of pesky adventurers...and then you're given free reign to test it out as 3
adventurers have just walked into this 'mousetrap' of sorts. In each room you will be given the choice of pressing one of
two buttons. Each button represents either mania or dementia and in turn results in either one of the adventurers getting
whacked, or going insane. Take your time and have fun with this part of the quest, as the adventurers have quips and
remarks that are a pleasant listen when compared to all the snarling/guttural roars you've been dealing with throughout
this dungeon's lower levels. Also keep in mind that if you ever get confused as to what button does what, or what the
'style' of the room these adventures are about to face then by all means talk to Kiliban (the care taker of Xedilian). He'll
be more than happy to explain how each room works and what each button would do if pressed.
After taking out the final adventurer you will be presented with the reward for this quest: Dawnfang/Dustfang
This sword not only changes at timed intervals (from 6:00 AM to 6:00 PM you have Dawnfang, but from 6:00 PM to 6:00
AM you get to use Dustfang), has leveled magical properties (Dawnfang has fire damage while Dustfang grants you ice
damage) but it actually counts it's kills! Every time you strike down any living creature (summoned or otherwise, undead
included) with your newfound weapon it will notify you in the upper left corner of the screen (showing both a message
about it killing a monster and it's current kill count). Once you have killed any 12 things with either version of this weapon
it will transform into either Dawnfang Superior or Dustfang Superior (depending on the time of day, obviously) and offer
you an additional skill of Absorb Health (Dawnfang) or Absorb Magicka (Dustfang).
Head on over to the Recovery Chest and take any of the loot you want, which includes the expected gold, rings, lock
picks, repair hammers, and the Talisman of Abertment which has Detect Life, Feather, and Water Breathing
enchantments. Now that you're ready to leave, head to exit of the reception room and you'll be jumped by 3 Knights of
Order. Good thing you snagged that new sword eh? Cut them down anyway you see fit and go talk to Kiliban to get a
small nugget of opinionated information in regards to the things you've just killed. Now head back to Sheogorath (via
New Sheoth Palace fast travel) for a new skill (the ability to summon Haskill, our bald liaison fellow from the beginning of
this adventure in Shivering Isles) and alot of conversation that will eventually lead into our next quest.
01
02
03
04
>>
Choosing your entrance
A Better Mousetrap

This is a two part quest given to you in the hopes that you will learn about what makes the Shivering Isles work, and in
doing so you will meet the two political figureheads of the land. Both need your assistance in one way or another, both
quests are time consuming, fairly uneventful and you can't skip them if you plan on finishing the main quest so we better
just get to it.
Part 1: Addiction
Thadon (the Duke of Mania) has "lost" his Chalice of Reversal and needs you to get it back for him. Unfortunately he
has a hunch as to who took it, but he won't name names and instead sends you off on a hunt in the "House of
Dementia" to find out where it is. While it is true that Syl (the Duchess of Dementia)'s steward Kithlan does indeed know
where this item is located, so does Thadon's own steward, Wide-Eyes. Either way, you will be pointed in the direction of
Burrow and are tasked with killing anything in your path to return this chalice to it's rightful owner.
Once you reach Burrow you should be attacked (if you're near the tree stump) by a hulking insectoid monster known as
the Elytra. After ridding the action-rpg world of one more cliche bug monster you'll head for the entrance and note that it
won't let you in. Well, remember the discussion you had with Wide-Eye/Kithlan about Felldew, and how awesome/bad
for you it was? That was a little bit of foreshadowing in how to deal with your current situation, so go check the dead
Elytra and what did you find? Felldew. Eat it and the door to this dungeon will now let you in.
Now that you're inside, we need to discuss the severity of the situation: Felldew is a drug, as has been discussed earlier
with Kithlan and you need to keep eating it to ward off the negative effects of NOT eating it continuously. Now couple the
negative effects of coming off the drug via a loss of stats and attributes with the fact that this place is CRAWLING with
Elytra and you now have a semi-serious situation. Granted, as long as you check every single Elytra that you kill you
should be able to keep a steady supply of Felldew in your system...so let's hope that you can kill monsters and stay on
the move at a medium pace.
This dungeon, while long, is fairly straight forward. Keep checking your map as you progress towards the red marker,
and be sure to keep an eye out for traps as there are a few minuscule ones (mushroom-ish sponges on the floor can set
off spikes protruding from the walls, for example). Just keep pushing forward and taking out the Elytra as they show up
and you'll be fine. Personally, I pulled Elytra to me via arrows and then dispatched them as I retreated farther back, thus
keeping the noise from combat and my notoriety on the proverbial "down-low"...but if you have the skills to light up an
entire room with magic then by all means go for it.
When you finally reach The Sanctum, you'll notice it has been taken over by some very irritable junkies that are hooked
on Felldew. No need to worry, as with most junkies these guys are un-armored and fairly easy. Search the bodies for
Felldew drink, check the bookcases for some reading material, grab the Chalice (which cure's your addiction and any
stat issues you may have had due to Felldew withdrawl) and you're good to go. Head back to the halls of Mania to hand
Thadon back his precious chalice and you will be rewarded with nothing. Wasn't that awesome?
Part 2: The Lady of Paranoia
Syl (the Duchess of Dementia) is convinced that someone in the outer lying areas of Crucible is going to 'get her'. Thus
you have been given the title of Grand Inquisitor and are deemed with the responsibility of finding the culprits, yet you be
the one that is put on trial (Syl is notoriously known for her widespread paranoia). So, to make this extremely easy I will
list who to talk to, and in what order in a list-like format to make this dialog filled quest a quick and simple one (so you
don't have to walk around talking to every person in Crucible until you find your first clue, like I did).
01
02
03
04
>>
Understanding Madness

Head to the torture chamber (it's close to Syl's throne room) and get Herdir. He'll follow you and help you 'persuade' the
people you're investigating.
Raise Kithlan (Syl's steward)'s disposition to around 80 and he'll drop note that Anya Herrick has been acting odd and
nervous lately.
"Talk" to Anya, and then let Herdir work his magic. Soon enough Anya will drop the dime on Ma'zaddha (a local Khajit).
Have a sit down with the Ma'zaddha and you'll realize that you can't bribe/torture him enough to make him talk. You're
going to need proof.
Let Herdir give some of his 'lightning bolt love' to either Bhisha (local Khajit beggar) or Sickly Bernice (tavern owner) to
learn that Ma'zaddha has been seen having some secretive long walks with Nelrene, one of Syl's Dark Seducer guards.
Tail Ma'zaddha at night to get a heads up on his meeting with Nelrene, then confront Ma'zaddha about it. Promise him
solace (or not) and he'll get you the information you need by midnight of the following day.
When you go to meet Ma'zaddha at his home at midnight, you will find him dead. Take the key from his body and search
his upstairs for any evidence.
Confront Nelrene using the evidence you acquired at Ma'zaddha's home and she will point you in the direction of
Muurine.
Seek out Muurine (either at her house, or when she wanders around Crucible during the day) and talk to her using the
conspiracy chat option.
Return to Syl and let her know what has been going on, follow her to the torture chamber, watch what transpires and
collect your prize (the Ruin's Edge bow, which casts a random spell on target when an arrow hits).
Sheogorath needs you to go light the fires of Agnon, but the problem is that to get them lit you'll have to decide which
faction (Dark Seducers or Golden Saints) you will align yourself with to get the job done, as both factions are currently at
war over the honor of lighting the flame itself. Ironic, no?
Head out towards Cylarne, which is in the northwestern part of the Shivering Isles and get ready for another round of
'choose your own adventure' awesomeness. Upon arriving you will have the chance to meet the leaders of both the
Golden Saints and the Dark Seducers. Doing so lets you get a little insight to their battle plan, some opinionated disdain
of the other faction and you can offer your battle strategy as well. This quest has two paths, so I'll outline both of them
for you here so you can have a better understanding of what goes down depending on who you side with.
Helping the Dark Seducers:
If you decide to help the Seducers, this can be a quick and painless quest. The Seducers expect a full frontal assault
from the Saints, so if you want to help them defend their stronghold, this is a straight forward (albeit a little drawn out)
battle. While it is a bit of a time consumer, it could be the most beneficial for certain class types as it leads into alot of
long range play. Archers and Mages could have alot of fun with this battle option.
However, if you can convince the leader of the Saints to take an underground passage that leads to the rear entrance of
the Seducers' (known as the Underdeep) stronghold (by offering to scout for the Saints, this option becomes available),
then an ambush presents itself for a quick and decisive battle. Just have the Seducers move their main group of troops
to the Underdeep and then convince the Saints to attack via the Underdeep. When the Saints attack, the Seducers have
the proverbial 'high ground' and a full on ambush goes down, making the fight all the more quick and decisive.
Helping the Golden Saints:
Now you can help with the siege of the Seducers' main hall (it's a full frontal assault). While this does take more time
and is a fair bit more chaotic it's a good fun romp that should be a breath of fresh air after sneaking your way through
countless caves and dungeons. On the other hand a quicker and easier option is to scout the Underdeep wherein you'll
notice that only 5 to 6 Seducer guards are on watch. This allows you the benefit of having the Saints rush the
Underdeep en masse and take over the entire Seducer stronghold in a relatively short fashion.
01
02
03
04
>>
The Cold Flame of Agnon

Either way, once the side you've aligned with has won their respective leader will ignite the flame of Agnon for you and
you'll be prompted to carry the flame back for Sheogorath. How do you achieve this amazing feat of bringing back an
honored flame without an object to burn? Well, step into the flame and you BECOME the torch. Have no worries, as it
causes no damage to you and is actually pretty slick looking. Just fast travel back to New Sheoth and follow the way
point marker to the Sacellum Arden-Sul and you'll be presented with your final choice of this mission.
Two priests greet you upon entering the building, one from Mania and one from Dementia. Both offer praise to you if you
decide to light the torch in favor of their 'house', but they also offer you a full on bribe. This is the real meat and cheese,
if you will, that results in your decision and instead of forcing you to do trial and error to discover the benefits of each
'gift', I'm listing them here and their attributes to make your choice easier.
Choosing the House of Mania: This will net you the Raiment of ARden-Sul, a full body outfit that gives Fortify Willpower,
Resist Paralysis, Fortify Intelligence and some Shield enchantments.
Choosing the House of Dementia: Choose to light the torch for Dementia and you receive the Raiment of Intrigue, a full
body outfit with Fortify Speed, Fortify Security, Fortify Luck and Sneak enchantments.
Once you've made your decision, collect your bribe from your chosen priest and head towards the pews to meet with
Sheogorath. Chat with him a bit and you'll not only be praised for lighting the torch, but you will also be rewarded with a
new quest.
The choose your own adventure quests continue, as this mission gives you the option to take over the governing
position of either Mania or Dementia. To do so however, you'll need to dispatch the current residing Duke or Dutchess.
Now while this seems simplistic, it is a ritual after all and there are strict guidelines to follow. Talk to either of the priests
(you're still located in the Sacellum Arden-Sul) and they will inform you of the requirements for the upcoming 'physical
impeachment' of sorts.
Mania:
If you decide to take over the house of Mania, then you will need to talk to Wide-Eye, the Duke's steward. She shouldn't
be hard to find, as she roams around Thadon's throne room often, and can be found walking around in the gardens as
well. Boost her disposition via the mini-game or by bribery to get some more insight as to her (and the occupants of the
house of Mania's) daily routine. Unfortunately, she won't spill the beans about the Greenmote silo, so you'll need to use
her aforementioned routine against her. Wait until 12pm and follow Wide-Eye (in stealth mode, of course) around the
castle. Eventually she'll activate a switch that opens a secret passage into a the silo, but before you can enter an in-
game prompt pops up notifying you that you need to sneak in, steal some Greenmote, and do it all without being caught.
Hope you brought some detect life and stealth boosting items.
Following Wide-Eye will lead you to a HUGE pile of Greenmote. Interact with it to automatically take the needed dosage
required for the quest (just incase, take some more incase you happen to screw anything up, you won't have to worry
about sneaking around again) and then sneak your way out of the underground silo. Now, according to her routine chat,
Wide-Eye states that at every night dinner is at around 8pm, so you should head to the kitchen (sneaking if necessary
as the chef shows up from time to time) in the House of Mania and add the Greenmote as needed to both the plate of
food and the large wine bottle.
<<
05
06
07
08
The Ritual of Accession

After this it's just as simple as hanging out in Thadon's throne room until dinner is served. He'll eat and start reciting a
poem...but then clutches his chest and drops dead on the spot. All that's needed now is for you to activate his body
(don't forget to steal his crown, it's yours now after all), and head back to Arden-Sul. Drop the liquid you obtained off of
Thadon's body into the bowl and wait to be named the Duke/Duchess of Mania.
Dementia:
For this quest you'll need access to the House of Dementia's more inaccessible private quarters, and in turn you'll need
a key. Asking around points you in the direction of both Anya Herrick and Kithlan. Boost their disposition and you
become privy to some new options. Anya offers to distract Seducer guards, while Kithlan will offer up his key. This key
opens the door to Syl's private garden (said door is located in the Dementia throne room). Upon entering you'll be
throwing down with two Dark Seducer guards, but you shouldn't have much of a problem at all given your newfound
weapons from previous quests.
Head to Syl's private quarters and what's this? Syl's dead? Well, not quite. Kithlan will show up and inform you that this
is a decoy, which means Syl is on the run as she knows you're out to get her. To activate the hidden exit she took, look
for a bust of Sheogorath in the local area. After activating the hidden exit, climb down the ladder and get ready for more
excitement. Upon entering this new area, it looks to be quite empty. However, the statues lining the surrounding walls
will be lobbing projectiles at you shortly, so be ready to head to the northern east most part of the area to flip a switch
that turns them off. Search around the area and proceed through the door to your first major battle of this quest.
The next large area will be filled with a good chunk of Dark Seducer guards (including some archers) and you should
have a fun time destroying them. Continue onwards (being sure to pick the bodies for anything you might deem useful,
of course) and head through the next door. You'll continue down the stairs, fighting off more archers as you seemingly
run into a dead end. Well, not quite. Syl seems to favor the 'hidden switches for hidden doors' routine, so do some
searching and you'll find the exit and you're almost done. One last group of guards is awaiting you in this area, and
finally (after all this drama, I'm glad I originally went with the Thadon option of the quest) you'll confront Syl. While she is
pretty buff, you shouldn't have a problem with her at all and after the fight is over, activate her body, snag what you need
from her, head back to Arden-Sul and complete the quest to become the Duke/Duchess of Dementia.
Talking to Sheogorath results in his happy approval of your newfound status in the realm of the Shivering Isles, but
before he can finish applauding you someone bursts through the door. Depending on the last quest, this person will be
the Duke/Duchess that you DIDN'T kill. Sheogorath and the political figure have some words, then the aforementioned
party defects to the forces of Jyggalag and you're now in charge of helping the leftover forces in defending what's left of
the Fringe (the area you spent your first moments in the Isles adventuring).
Fast travel to the fringe and meet up with your new Lieutenant (depending on the previous quest, the defenders are
either Seducers or Saints) and get down to business with some chit-chat. The defenders do have a plan, however there
isn't much time for it as the next wave of Knights are inbound so you have to decide whether or not you want to set up
the tiny amount of troops yourself, or let your Lieutenant do it for you (I personally chose the latter). After the decision is
made, the first wave of Knights comes flooding in. Take them on how you want, but a good method (if it's available to
you) is to use any 'Heal Other' spell you may have to keep your small amount of troops in good health between waves.
After the Knights have been dealt with (be sure to pillage the hearts of fallen Knights, as you'll need them later) you will
be relegated to dealing with an odd power source coming from Xeddefen. If you can stop the source, then the Fringe will
be saved for now.
Upon arriving at Xeddefen you'll be greeted with a fairly large group of defending Knights and Priests. Deal with them in
whatever manner you normally do, snag the key from a priest's dead body and head inside.
This dungeon is very straight forward. You will be dealing with a ton of enemies in here, but the majority of them won't
even attack you if you stick to the shadows as they aren't running AT you, but towards the entrance to the fringe as they
are looking to pillage/destroy what's left. You can take them out if you wish (I did) as combat is always good for the
leveling up purpose, but if you intend on remaining sneaky, then by all means feel free to do so. Before you reach the
central area where the Obelisk is (you have been keeping the hearts of fallen Knights, haven't you?), you have a chance
to run into Shelden (the Redguard who was the self-proclaimed mayor in Passwall) and he needs your help in escaping
this dungeon.
Fair enough. Tell him to stay put while you sneak down to the great obelisk and throw down with the Knights of Order
(don't worry if a few Knights run past you, Sheldon can be knocked unconscious, but I've never seen him dead during
this mission). Approaching the Obelisk gives you the option to insert a Heart of Order, which will (when done enough
times) overpower the Obelisk and destroy it. Unfortunately every time you put in a Heart of Order, more Knights
appear...so this isn't going to be a breeze, but it is quite doable. After the Obelisk is destroyed, the entire area starts to
crumble and collapse on itself, so go snag Sheldon and haul ass.
<<
05
06
07
08
Retaking the Fringe

Be very careful, as now the entire dungeon is a trap. Falling debris can kill you VERY quickly, so step cautiously and
watch your surroundings. You will have to fight off a few remaining Knights, but it's nothing you can't handle as the
majority of the time they're injured by falling debris before you get to them (sometimes they are outright killed by it).
Continue heading towards the exit, and a gate will slam down separating you from Sheldon. No worries, as Sheldon is
completely able of finding his own way out (he will let you know this, trust me) and just head on to the exit yourself. Once
outside, head back to your Lieutenant and she will praise your return, even if it is the reason Xeddefen has completely
collapsed. Head through the Gate of Madness to enter the realm once more and fast travel to New Sheoth for another
chat (and mission opportunity) with Sheogorath.
Guess what? Sheogorath needs a Gatekeeper to keep the approaching Grey March from getting into his realm. The
only problem is that you killed the last one when you first entered the realm, remember? So off you're sent to meet up
with Relmyna to see if she'll be willing to help Sheogorath in the reconstruction of his beloved Gatekeeper. Head
towards Xaslem and delve inside. You will be attacked by undead, skinned hounds and other abominations to the flesh,
but there should be no worries as the majority of these monsters you've either already dealt with or will have no problem
defeating as you'll be well equipped (thanks to quest rewards).
Upon starting up your initial conversation with Relmyna, you should tread lightly and act respectful as that will get you
what you need alot faster (and without alot of drama). Soon enough she agrees to help you with your quest of rebuilding
the Gatekeeper, but she does need some specific items necessary for the project. Check your map and you'll note that
the Gardens of Flesh and Bone are now your new marked area to visit. Head there and get ready for some more
dungeon delving, as you'll be doing this for a bit while scouring for the components Relmyna needs to complete her new
baby boy. While it may seem that these will be hard to find, you're lucky enough to be given map markers for every
individual item that's needed, and they're all in this dungeon, so it won't take long for you to find and then collect them.
After retrieving the components, head back to Relmyna (a new way point marker shows up helping you leave the
dungeon without having to trek back up to the very top) and she'll walk you through the rebuilding process.
Depending on which political figure you overthrew during the Ritual of Accession quest, Sheogorath sends you off to
help with the homeland of either the Seducers (Pinnacle Rock) or Saints (Brellach). Luckily this quest is another very
straight forward kill everything and save the day type of job. Meet up with the current squad of either group at their
homeland, and head on into their respective area to rescue their leader (Staada, if you're helping the Saints and Dylora
if you're working with the Seducers). As you move throughout the dungeon you will be continually assaulted with Knights
of Order, but as before they don't pose much of a threat (and this time you have efficient back-up). Once you arrive at
the capture point, you'll be notified of a large chime which will also be aligned with a new way point marker. Whack it and
the resonating sound wave breaks the barrier and their once captive leader is now free!
The leader suggests that you work together in restoring the waters of the Wellspring, and in doing so head through the
door. Upon entering the next level of this area your group of Saints/Seducers drop dead, and it's up to you to restore the
Wellspring and take out the remaining Knights/Priests of Order. If you have any stealth at all, then you can easily sneak
around the large room containing the Wellspring and assassinate your enemies from behind. If not, then try to at least
pull them away from each other, so you're not forced to battle all of them at the same time. Once all of the Knights have
been destroyed, you'll notice some chimes in each corner of the room. Well, logic dictates that hitting all of them in a
quick manner would produce enough sound vibration to shatter the Obelisk barrier encasing the Wellspring, so that's
what you're going to do. Once this is accomplished, your fallen comrades come back to life, so talk to the leader to get
her thanks, a summon spell (Saints/Seducers, depending on who you were working with) and a set of armor
(Saints/Seducers, also depending on who you were working with). Head back to New Sheoth to talk with Sheogorath for
your next quest.
Rebuilding the Gatekeeper
The Helpless Army

Returning to Sheogorath results in the final time you'll get to see him, as Jyggalag is close enough to cause Sheogorath
to phase out of the realm completely. Before he leaves, he entrusts Haskill (our bald liaison friend) in helping you
reconstruct Sheogorath's symbol of power, his staff. To do so you'll first need to seek out the wisdom of [MAN'S NAME],
who is the only person in the entire Isles that knows how to go about the process of rebuilding the staff. Then you'll need
a branch from the Tree of Shades and an eye from Ciirta, who has seen much in her time living in the Shivering Isles.
You can choose to take on either part of this quest first, but for the sake of this guide we'll start with the tree branch and
save the eye retrieval for later.
First things first, you'll need to visit Dyus in Knifepoint Hollow to get the information needed to start your staff building
scavenger hunt. This area is fairly void of any lethal enemies and you're going to find him rather quickly, as the dungeon
layout is a fairly confined and short one. Once you find him you'll engage in a long and informative discussion about the
history of the realm, the area he's currently residing in, and the process that awaits you to rebuild Sheogorath's staff.
During this conversation you will be given way point markers for both of the items needed to complete this quest, so
check your map and let's get ready to rock.
Head to Milchar and get ready for some more standard dungeon delving. This is a fairly straight forward dungeon layout,
so there's no worries about getting lost. Just take your time and pick off each enemy as you see them and you'll be able
to blow through this without issue. There are ample amounts of free gear in this dungeon as well, so be sure to search
every major nook and cranny for free gear. Once you make your way to the tree, you will be attacked by a mirrored
version of yourself. Fighting your Doppelganger can prove to be difficult, as they are just as awesome as you are...but
with enough persistence you'll pull ahead and defeat your counterpart. Upon doing so, the tree grants you the right to
take a branch and you should check your fallen Doppelganger, as there is a weapon named Shadowrend (complete with
Damage Health and Weakness to Magic bonuses) you may get some use out of.
Now you're tasked with heading to the Howling Halls in an attempt to 'convince' Cirrta to give up one of her eyes. Now,
we all know that's not gonna happen so you're more likely going to have to retrieve it yourself. However, you're given the
option to be less 'hands on' than as per norm in the way you do it. After you make it a few rooms into the dungeon, you'll
run into a Khajit that you can talk to (without him attempting to attack you automatically) and after a bit of conversation
you get offered his help in return for some weapons (Apostle Daggers, more specifically). Luckily enough for you, there
should be a few dead Apostles in the previous rooms you can snag weapons from. Return to the Khajit, toss him the
weapons, and he'll run off to take out Ciirta with his group of fanatics. If, however, you don't want to deal with all of this
drama, just run through the dungeon killing Apostles as you head to whack Ciirta yourself. Either way, once your done
be sure to grab Ciirta's eye, her robe, and take her key as well (it allows you to open up the chest located at the foot of
her bed, which is filled with all kinds of goodies and loot).
Head back to Dyus in Knifepoint Hollow to have him assemble your new staff and once finished he'll point you in the
direction of Sheogorath's throne room. Head there to start the last section of the main quest.
Well, you were SUPPOSED to be able to activate that nifty fountain to imbue the power of Sheogorath into your new
staff...but the Greymarch has locked it up with Obelisk crystals and now you need to go stomp on them, release the
Obelisks from all the springs and ponds and save the day. Behind the throne is a door leading to the Fountainhead,
which is a winding, multi-tiered dungeon filled with Priests of Order and Obelisk sealed doors. However, a workaround is
<<
05
06
07
08
Symbols of Office
The Roots of Madness
provided to you in the form of Gnarls that can be found here (some are docile, while other enchanted ones are
aggressive), which will follow you around the dungeon, opening the Obelisk sealed doors for you.
Thank god for the map marker placement, as letting you know where each Obelisk obstructed oasis (try saying that 3
times fast) is makes this entire quest a breeze. Couple this with the fact that you're not dealing with any difficult enemies
at all and you have a recipe for a medium length dungeon full of free loot to steal. However, there is one major point of
note: It seems that either Syl or Thadon (depending on who you whacked earlier in the Ritual of Accession quest) is the
individual who lead the Greymarch down there to begin with...so be happy with the knowledge that you'll be able to deal
them some old fashioned Shivering Isles style justice before this mission is over.
Once you've been given the journal prompt that the entire dungeon is clear, head back to the throne room, use the water
in the Font to finish imbuing your new staff with the power of Sheogorath and get ready for the big boss battle you've
been waiting for!
As soon as you imbue the staff using the water from the Font, a commander from either the Gold Saints or Dark
Seducers will arrive, letting you know that the Greymarch is starting their final attack in the palace grounds. So make
sure you have all of your necessary weapons/items ready to go, and head out for the final battle. You'll have a fairly
large squad of Saints and Seducers backing you up on this one, so there's going to be more chaos than difficulty
involved in this battle. When you enter the palace grounds you'll be assaulted by a large force consisting of Knights and
Saints, so get to it. Continue fighting them off and use the acquired Hearts of Order to disable the Obelisks in your local
area. After this is completed, Jyggalag himself will appear (and he's HUGE) creating a shockwave that destroys any
leftover backup you had so be ready for a fairly epic one on one battle. Even though Jyg's size is gigantic, he's no more
difficult than any other leveled monster you'll face (he's actually easier than the Doppelganger you fought in the Tree of
Shades area earlier) and you should be able to whip the tar out of him without issue. After doing so, you'll be granted a
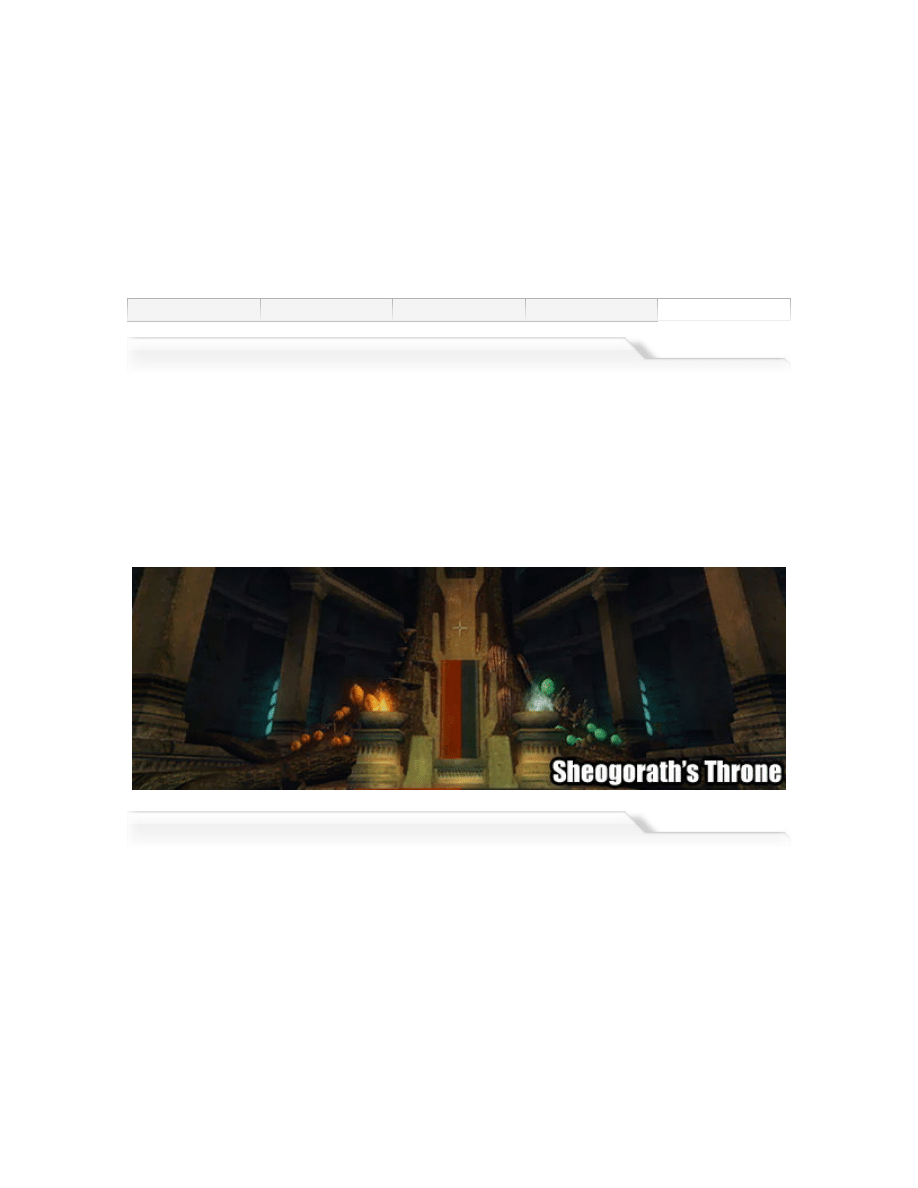
chunk of story and be awarded the title of Sheogorath, Daedric Prince of Madness.
Now your journal prompt pops up, letting you know it'd be in your best interest to see Haskill so head over to your
newfound throne room and have a chat with him. You'll discover that you are now granted a crazy amount of new
abilities and things to do:
Freebies:
The ability to request Saint/Seducer escorts A Manipulate Weather spell that allows you to change the weather in the
Isles, while enjoying a stat boost You can request entertainment in the form of a dancer A new spell called Sheogorath's
Protection which auto teleports you back to the throne room if you die while the spell is active The Court Healer now
resides in your throne room 24/7, and she will recharge your health for free at any time Jygallag's sword now sits on a
pedestal near the door that leads down to the Fountainhead area
New Duties:
As the ruler of the Shivering Isles, you have a duty to keep your people safe. Thus, if you decide to talk to Haskill about
your current "Duties", he'll inform you of any happening which need your current attention (monster attacks, fanatic
revolts, etc). You are also given a choice as to deal with the threat personally or to send some of your forces out to deal
with the problem...either way you MUST go to the area where the conflict is happening, or neither the monsters nor your
<<
05
06
07
08
The End of Order
The Prince of Madness

assaulting forces will appear (thus the conflict is never played out). After any conflict is resolved, the townsfolk send you
tribute in the form of monetary gain (500 if you send help or 1000 if you solve the problem in person).
Shivering Isles Sidequests
Since most side quests in the Shivering Isles are extremely easy, this section will outline where to get the quest, what
the quest is, where you can obtain the items/what you can do to finish the quest and finally, what reward (if any) is given.
Who: Sickly Bernice
Where: Sickly Bernice's Tavern (Crucible)
What: Bernice thinks she's going to die and she needs a cure. Follow her directions to Knotty Bramble and fight off the
Grummites to acquire a vial of Aquanostrum from a statue in the lower levels of the dungeon. It's a very straight forward
and simple quest with the only issue being how well you can handle the more aggressive Grummite Death Dealers.
Reward: Circlet of Verdure, an enchanted ring with a Health boost, Endurance boost, Resist Disease and Resist Poison
boost.
Who: Rumor mill/Earil
Where: Crucible
What: Brithaur is the local thief and Earil has tasked you with getting him to stop stealing by any means necessary. You
have the option to assassinate him or you can fill Brithaur's request and bring him 5 Flawless Pearls (don't worry, they
show up fairly often during the regular game and if you have some left over in Cyrodil you can pay him off quickly) to get
him to retire from his life of crime.
Reward: Gold.
Who: Ranarr-Jo and Kishashi
Where: Fellmoor
What: Two mildly insane Khajit's offer you a quest wherein you have to severely agitate their boss (Cindawe) by either
"rearranging" her home (which is done by sneaking in her house, and just smashing enough of her items laying around
that it gets very cluttered) or by outright killing her. Regardless of the route you take, you are also required to retrieve her
journal, so while some of you will just kill her to get through the quest without an issue...a select few may want to attempt
to pickpocket her after rearranging her house. Either way, once her life has been summarily disrupted return to the
Ranarr-Jo for your reward.
Reward: Ring of Mind Shielding, a magic ring with Reflect Spell and Resist Magic enchantments.
01
02
03
A Liquid Solution
Brithaur
Everything in Its Place

Who: Amiable Fanriene
Where: Bliss
What: Amiable is scared to death of walls. So scared that he actually wants to quit living in his house and would prefer
to sleep outside. Unfortunately, he doesn't know where to find a safe place to sleep outside and in turn, he needs your
help. Lucky for you, Uungar (a local vagrant in Bliss) has gotten tired of sleeping outside and is looking for a change of
pace. Boost Uungar's disposition and he'll offer to swap his spot on the streets with Amiable's nice house. Report back
to Amiable and let him know of the good news and you can pocket your reward.
Reward: Burst of Might Scroll, which grants a 100 point boost in the following skills for 5 seconds: Strength, Endurance
and Shield.
Who: Hirrus Clutumnus
Where: Crucible
What: Hirrus wants to die, but he is too afraid of the ramifications coupled with suicide. You are to kill him, preferably
making it look like an accident and you are to do so without him knowing about it. Any long range arrow can work just
fine, or you could wait for him to climb some stairs and give him some much needed "motivation" in the form of a well
timed shove.
Reward: Take the key from Hirrus' body to gain access to the jewelry box in his house, which nets you the Ring of
Happiness. This ring features Feather, Light, Water Walking and Fortify Personality bonuses.
Who: Rumor Mill (randomly pops after a certain amount of time spent in game), then after entering Vitharn you want to
talk to Cirion
Where: Vitharn
What: This is one of the more in depth story based side quests in Shivering Isles, so you definitely want to have enough
time offhand to play through this. You'll help these lost souls find piece by learning about the history of the area, helping
the guards in their eternal struggle against the fanatics, and finally giving these specters the ability to defend for
themselves and find solace. You will be doing a good amount of retrieval and searching through multiple areas, but the
end result is worth it and you'll have a huge feeling of accomplishment (and a really nice reward as well)
Reward: Cirion's Helmet, a well deserved helm complete with Block and Heavy Armor bonuses.
Who: Mirili Ulven
Where: Highcross
What: This is the massive MASSIVE ingredient/monster retrieval quest you've been hearing about from your friends.
Falling Awake
Final Resting
01
02
03
Ghosts of Vitharn
Taxonomy of Obsession

Mirili is preparing an encyclopedia of every natural ingredient and monster available in the Isles, and to she'll need your
help (she won't accept it at first, so bump up her disposition). Once she accepts your offer of assistance she gives you a
list of every item she needs. Luckily, alot of these items are REALLY easy to find so you won't have much problem
scouting them out. However, a few are rare and can only be found in Rendil Drarara's kitchen (from The Coming Storm
side quest), so be sure to stop by there as well. Each time you hand off 6 new ingredients, Mirili will offer you the chance
to tame and bring back a monster from the wild. Each retrieval nets gold, and not alot of it (especially if you've been
hoarding gold while playing through the main Cyrodil campaigns)...but for those out there that are total completists, this
quest should keep you busy for hours on end.
Reward: Gold.
Who: Cutter and Dumag gro-Bonk
Where: Cutter's Weapons (Crucible) and The Missing Pauldron (Bliss)
What: Talking to either of these blacksmiths results in the information about Amber and Madness Ore forging, wherein
both of these individuals can make weapons and armor out of the aforementioned items (both Amber and Madness Ore
are found on enemies such as Grummites and Gnarls, or while dungeon exploring). Finding Amber or Madness Ore
Matrixes allows the blacksmith to create enchanted weapons or armor for you as well.
Reward: Weapons and Armor from either the Amber (light armor) or Madness Ore (heavy armor) sets.
Who: Ahjazda (owner of Things Found)
Where: Crucible
What: Ahjazda needs you to acquire 3 items for her, as she is preparing for when "they" come to get her. Each item has
been marked on your map, so they won't be hard to find. One is located in the dungeon Milchar, one is located in the
Museum of Oddities, and the last one is found by bribing a local Bliss vagrant named Fimmion with sweet rolls (the rolls
are easily pinched via Rendil Drarara's kitchen).
Reward: Ahjazda's Paranoia, a spell which unleashes an insanely buff Frenzy spell which could come in quite handy.
Who: Big Head
Where: Bliss
What: This lowly Argonian has lost his fork. Ironically enough, the fork is a magical item that somehow keeps him
content with life. So, you're given a charm and forwarded to a resident in Crucible named Bolwing (who until now, spoke
in complete gibberish). Thanks to the charm you received from Big Head, you now understand Bolwing and are told
about a civil war of sorts between the Heretic and Zealots mage clans. After being informed of this, a new way point is
placed on your map for the Long Tooth Camp, so get ready for a good old fashioned chaotic beat down. Upon arriving
you'll be smack dab in the middle of conflict magicians so be prepared to throw down (don't worry, these mages don't
pose much of a threat) and after clearing out the last few survivors you can claim the fork and head back to Big Head for
your reward.
Reward: A conversation option for Alchemy, Blade, or Sneak which results in a permanent 1 point bonus to the stat you
decide to chat about.
Who: Bear-Arms
Where: Split
What: Every person living in this town has a twin. Unfortunately, nobody really enjoys having one and it's up to you to
pick sides (Mania or Dementia) and assassinate the unwanted twins of the faction you represent. You are paid in gold
per kill and it's a fairly straight forward quest, so just enjoy the time you get to spend whacking some innocent people
and collecting your bounty. Each kill you perform successfully is noted in an in game journal prompt so you should be
able to keep track of what's going on without any problems at all.
Reward: Gold.
The Antipodean Hammer
The Coming Storm
The Fork of Horripilation
01
02
03
The Great Divide

Who: Una Armina
Where: Museum of Oddities
What: This quest is more of a freeform job than anything else, as you're only rewarded in gold for random odd objects
you find. However, when you do find one you will be notified by a journal prompt so you will know when you find
something valuable. Personally, I just kept the items in my house(s) back in Cyrodil but to each his own, I guess.
Reward: Gold.
Who: Pyke
Where: Hale
What: Those dirty Grummites stole Pyke's jewelery, and it's up to you to retrieve it for him. He marks your map with the
location (if you don't already have it) of Fetid Grove. Head in, smack around some Grummites (or choose to be stealthy
and sneak around, that'll work too), snag the amulet and head back to Pyke when you're done looting the monsters. This
is another really REALLY easy fetch quest, so you should be able to blow through this in short order.
Reward: Thorn Shield, an enchanted shield complete with Reflect Spell and Fortify Block enchantments.
Who: Ushnar gro-Shadborgob
Where: Crucible
What: Ushnar is deathly afraid of Khajits, and it so happens that a Khajit vagrant has been following him around town all
day. Your task is to get rid of the Khajit by whatever means you deem necessary. You can kill him if you wish or you can
bribe him to leave. Either way, once he's gone Ushnar is insanely grateful and in turn awards you accordingly.
Reward: A skinned hound (Dog) companion.
Who: Tove the Unrestful
Where: Bliss
What: Tove is building one super sweet "skyboat" and he needs you to find him tongs and calipers. Lucky for you,
they're damn near everywhere in this game. He requires 100 items, so the easiest way to go about this is to just snag
every single one you find while playing the game normally. When you have enough, swing back by and drop them off to
make him happy and snag your reward.
Reward: Gold.
The Museum of Oddities
To Help a Hero
Ushnar's Terror
Work is Never Done
Wyszukiwarka
Podobne podstrony:
The Elder Scrolls IV Shivering Isles poradnik do gry
The Elder Scrolls IV Knights of the Nine poradnik do gry
The Elder Scrolls Online w 10 prostych krokach
The Elder Scrolls V Skyrim Dragonborn poradnik do gry
The Elder Scrolls III Trojca poradnik do gry
The Elder Scrolls III Przepowiednia poradnik do gry
Poradnik do gry The Elder Scrolls III Morrowind cz 1
Elder Scrolls V Skyrim Official Guides The Elder Scrolls V Skyrim Games Prima Games
The Elder Scrolls Online crafting
The Elder Scrolls Online klasy postaci
LECTURE 5 Christianity in the British Isles
LECTURE 5 HANDOUT Christianization of the British Isles
LECTURE 6 ATTACHMENT 1 Business entities in the British Isles
Grand Theft Auto IV The Lost and Damned
cape breton fiddlers welcome to the shetland isles the
(IV)The natural history of trunk list , its associated disability and the influence of McKenzie mana
więcej podobnych podstron