
Free Piston Stirling Engine Kit
Starting your engine
Once you have built your engine, place the engine on top of
a recently boiled cup of water (as shown on picture on the
left). Leave the engine for a minute in order for the cylinder
base to warm up. Then simply tap the counter weight.
Parts included with the kit
IMPORTANT NOTICE !
These low temperature differential Stirling engines require
only a small difference in the bottom and top plates to
operate. DO NOT place them on a high temperature heat
source (e.g. oil/wood burning stove, candle, Arga stove). If
you do, it will melt a number of parts on the Stirling engine. It
can be placed on top of a recently boiled cup of
water/tea/coffee but nothing hotter.
Adthree Publishing Co.,Ltd.
zip 164-0003
4-27-37 Higashinakano Nakano-ku
Tokyo Japan,
book@adthree.com
http://www.adthree.com
Assembling Your Stirling Engine
1. Take the power cylinder and push the
power piston/shaft through the centre. The
thread on the shaft should be protruding from
the thinnest part of the power cylinder. Make
sure the piston moves through easily. Check for
any debris in the power cylinder. Then remove
the power cylinder until later.
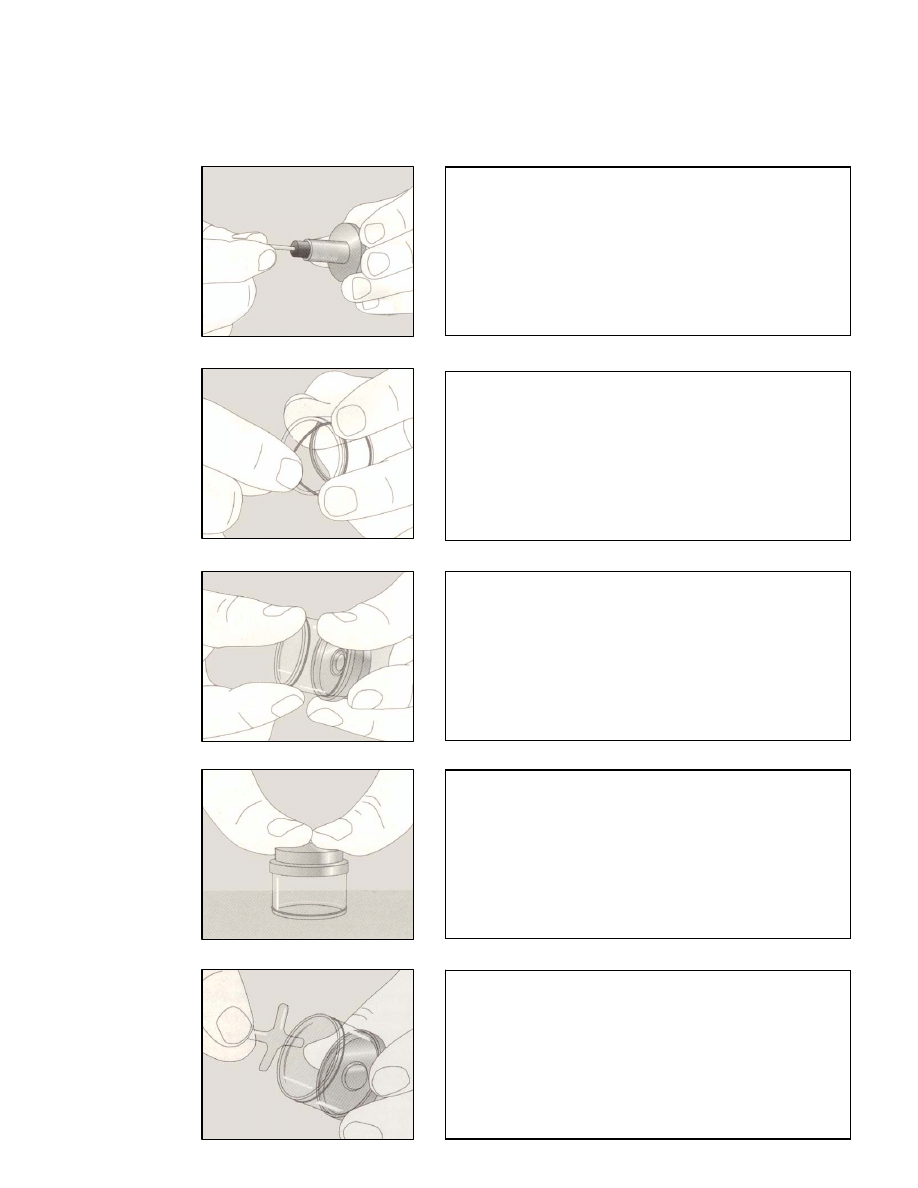
2. Take the displacer cylinder and add the
two ‘o’ rings as shown on the diagram. They
will be a tight fit.
3. Take the displacer cylinder and place
cylinder base at one of the ends.
4. Place them both on a solid surface and press
down hard so the cylinder base fits over the ‘o’
rings to create a good seal.
5. Take one of the lower springs and place in
the bottom of the displacer cylinder.
6. Take the power cylinder and push onto the
top of displacer cylinder.
7. Add the cylinder nut onto the thread. Make
sure there is a 3mm gap of thread below the
nut.
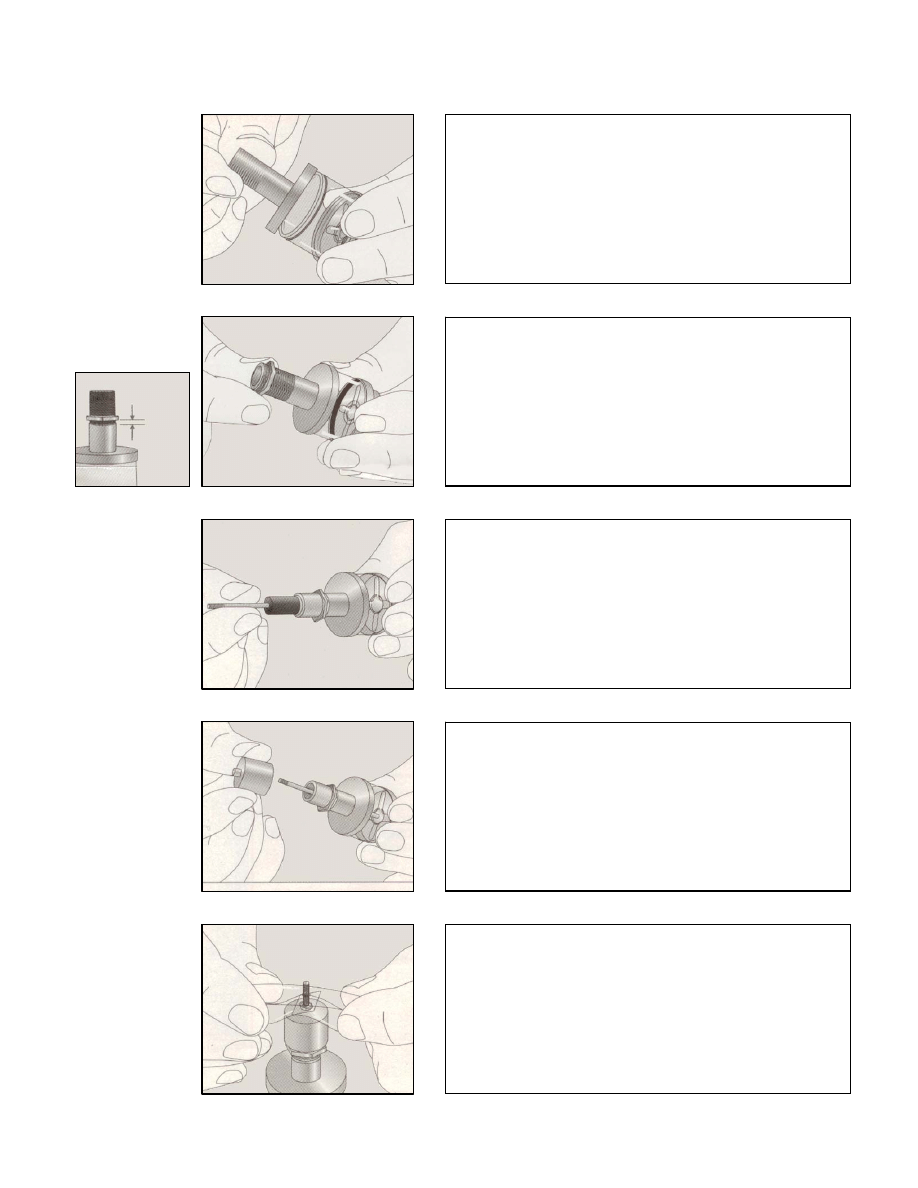
8. Take the power cylinder and push the
power piston/shaft through the centre. The
thread on the shaft should be protruding from
the thinnest part of the power cylinder (shown
on the left of the diagram).
9. Take the cylinder cap and screw it on to
the power cylinder. Make sure it is on tight and
the nut does not move (there should still be a
3mm gap of thread below the nut).
10. Take the upper spring; fold it over the top
of the power piston/shaft as shown in the
diagram.
11. Screw the piston nut onto the power
piston/shaft. Make sure there is a 1mm gap of
thread below the nut.
12. Screw the counter weight onto the power
piston/shaft. Make sure there is a 1mm gap of
thread below the nut. Make sure it is on tight
and the nut does not move (there should still be
a 1mm gap of thread below the nut).
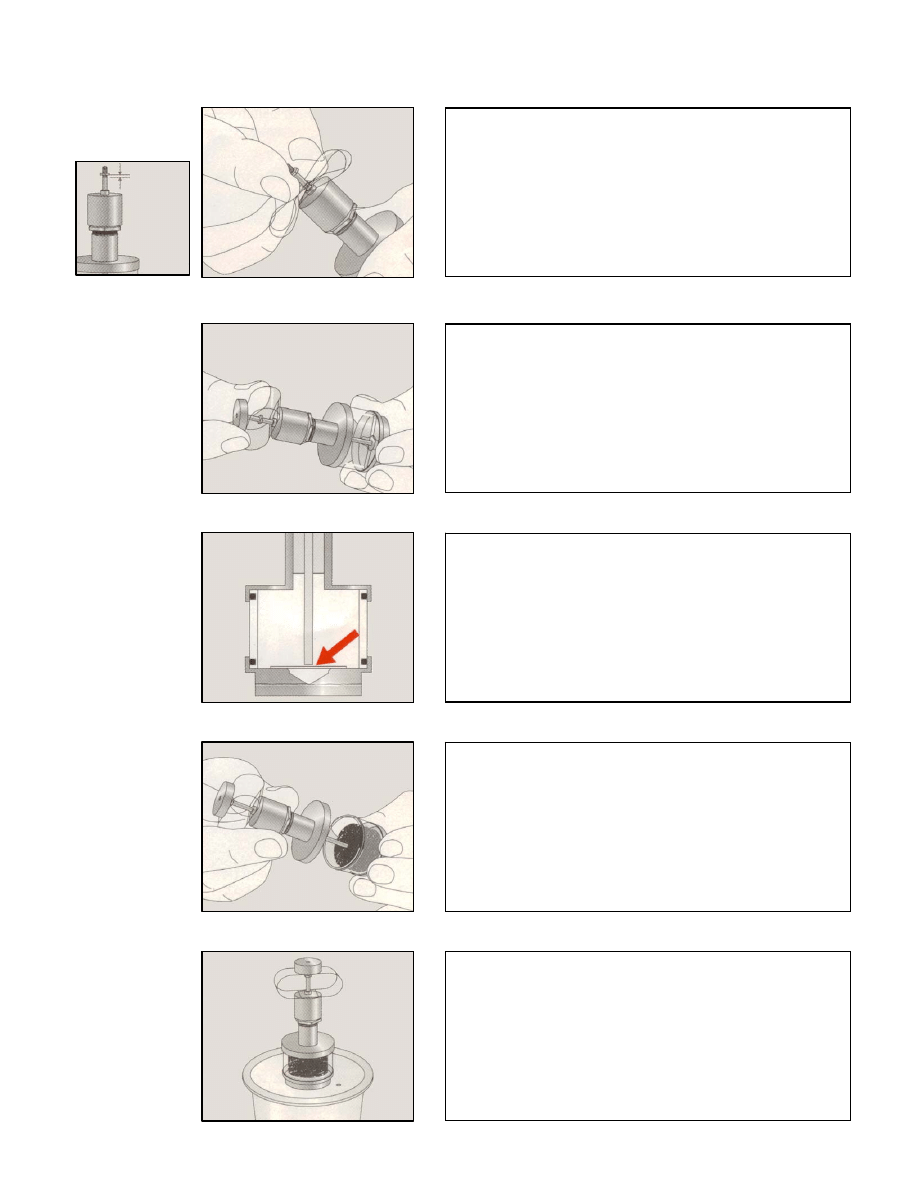
13. The end of the power piston/shaft should
just touch or be just above the lower spring. If
it is not, adjust the nuts according.
14. Take off the power cylinder and insert the
displacer piston. It SHOULD NOT be glued or
fixed in anyway. This is a free piston.
15. Put the power cylinder back on the
displacer cylinder. Prepare a cup of freshly
boiled water. Place the cup/mug cover on the
cup/mug. Then place the finished Stirling
engine onto of the cover. Wait a minute and
gently tap the counter weight.
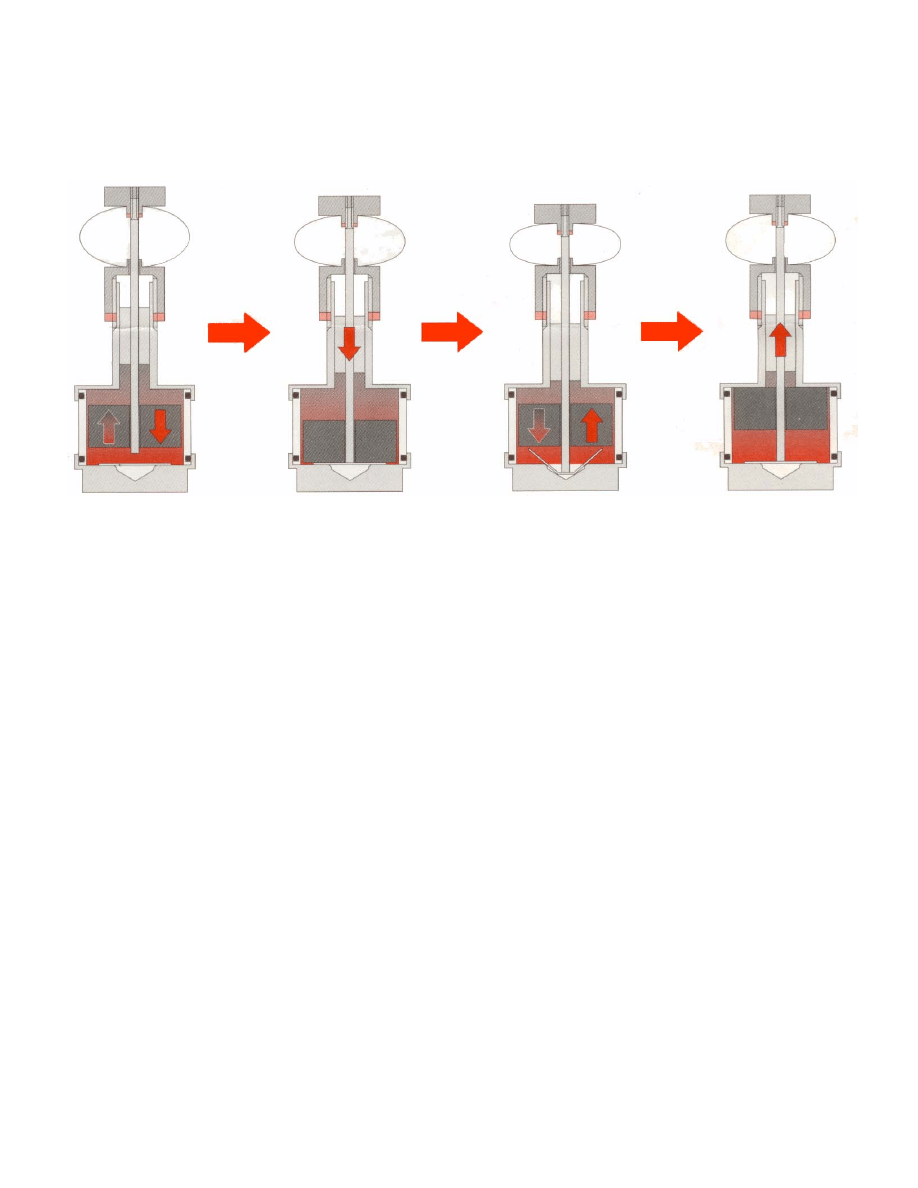
How the Stirling Engine Works
Cooling Phase (Far left) – The displacer piston (large piston) is begins to drop.
The air in the Stirling engine is beginning to cool ready for the contraction phase.
Contraction Phase (Second from left) – The Cooling phase has just finished.
The overall temperature of the air inside the Stirling engine has dropped and
hence the internal air pressure is dropping. The power piston (small piston) is
being pulled down by this pressure drop. The displacer piston (large piston) is
now at the bottom and the cooling has reached its peek.
Heating Phase (Second from right) – The displacer piston (large piston) is has
been pushed up by the spring. The air under the displacer piston begins to heat
up.
Expansion Phase (Far right) – The overall temperature of the air inside the
Stirling engine has increased and so has the air pressure. The air is expanding
and the power piston is being pushed up. The displacer piston (large piston) is
now at the top, heating is at its peek. The cycle will repeat until the difference in
temperature between the top and bottom plates are too small.
Wyszukiwarka
Podobne podstrony:
Free piston stirling machine having a co
free piston stirling manual(1)
Free piston stirling machine having a co
Two Cylinder Stirling Engine
Low Temperature Differential Stirling Engines(Lots Of Good References In The End)Bushendorf
Coffee Cup Stirling Engine Instructions
Performance optimization of Stirling engines
Buid A Can Stirling Engine
ANALYSIS OF STIRLING ENGINE PERFORMANCE
An experimental study on the development of a b type Stirling engine
(make) Stirling Engines Diy
Two low temperature Stirling engines, WSZYSTKO O ENERGII I ENERGETYCE, SILNIK STIRLINGA, WIADMOŚCI
Design and performance optimization of GPU 3 Stirling engines
Stirling Engines DIY(2)
(make) Stirling Engines Diy
Roelf Meijer Co Gen System With Stirling Engine Patent (#5074114 1991)
więcej podobnych podstron