Saturday Mechanic - Dealing With Dents
By John Decker
Photography by Michael Heiko
Published in the January 2006 issue.
It's a busy day at the home center, and you've managed to pick up that last bit of plumbing before the crowds close in. Then
you see it. A baseball-size dent in the right front fender. And it's no coincidence that the dent is exactly the same height as
the lumber cart hovering in the next parking stall--right where it came to rest after bouncing off your car.
Next stop, the body shop, where the estimator says it will cost exactly $493 to fix. Since this is only $7 shy of your insurance
deductible, you'll be footing the entire bill. Or, you can fix the dent yourself.
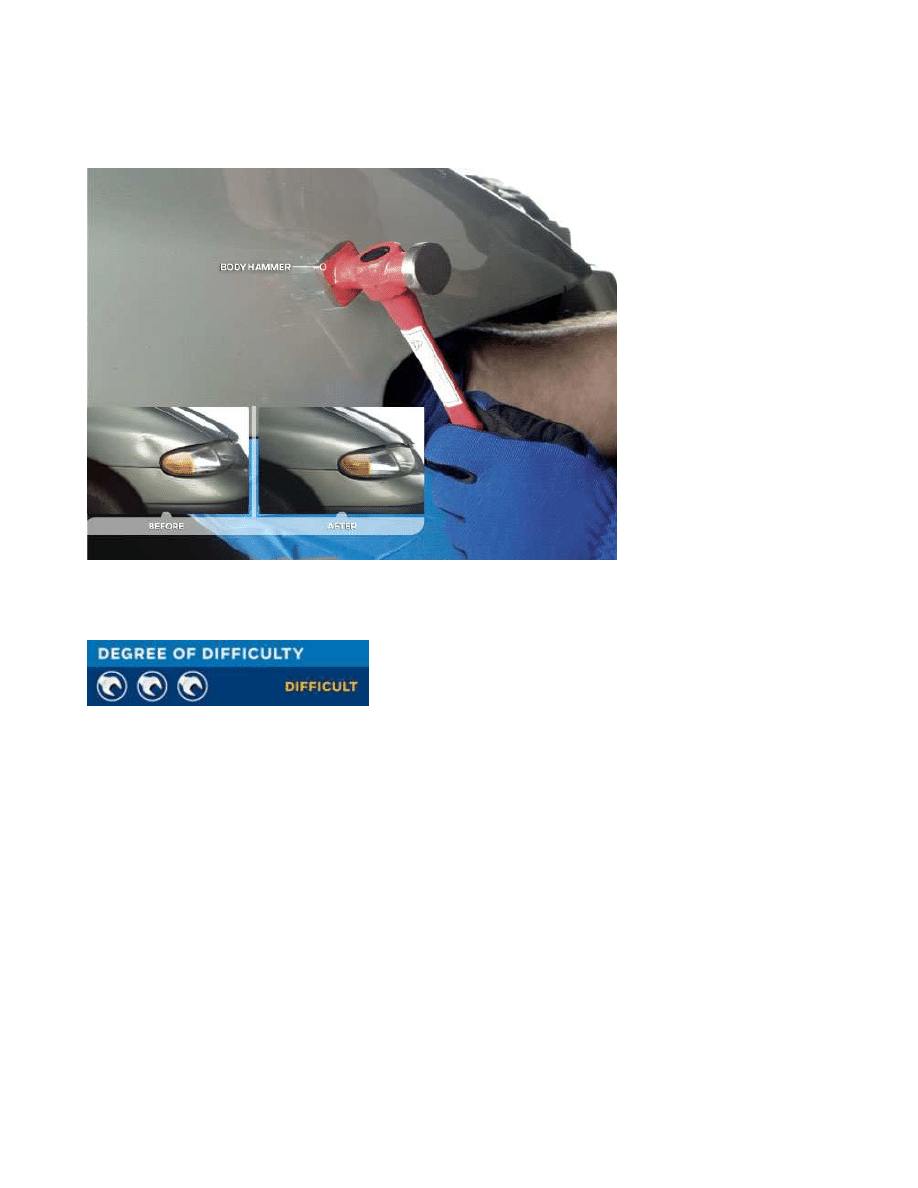
It takes basic but purposeful tools to do bodywork. You'll need a body hammer and dolly to bump out the dent. Body
hammers come in a variety of shapes, and you'll need an assortment of them. Don't use any old hammer in your toolbox.
Dollies are really small anvils with various shaped surfaces that you hammer the dented metal against to restore its shape.
You'll also need a sander with a 36-grit disc to remove paint and rough up the damaged area, a putty knife and body filler
squeegees for applying filler, a bodyworking file (commonly called a cheese grater) for leveling partially hardened filler, a
stroke sander for smoothing the filler, and an air compressor and a spray gun for applying primer/surfacer and paint. You'll
also need a buffer or polisher to shine up the paint.
Thanks to today's body repair materials--better paints, improved fillers and two-part primer/surfacers--bodywork and painting
has never been easier. Modern basecoat and clearcoat paints are surprisingly easy to apply. Sure, a dustfree spray booth is
great to have, but you'd be surprised at how many body shops produce flawless work without one. Wetsanding the paint with
1500-grit sandpaper and machine buffing can produce a mirrorlike finish.
Page 1
2
3
Next »
Reader Comments
1. RE: Saturday Mechanic - Dealing With Dents
Website: www.performancewebmarketing.com
Click to enlarge
Hammering out dents is done from both the inside and the outside of a panel. You'll
need a body hammer and a dolly intended for panel-beating.
NULL.
Page 1 of 6
Popular Mechanics
10/13/2007
http://www.popularmechanics.com/how_to_central/automotive/2104327.html?do=print
Having recently found myself agonizing over a hideous dent, I turned to a professional PDR (paintless dent removal)
expert. $150 dollars and an hour half the dent became barely visible (I know it is there, but few would notice). It just
may deserve a look.
SECRETS TO A GREAT BODY
To remove a dent, you'll need to gain access to the back side of the body panel. Do this by removing items like headlight
buckets, inner fenders, door panels and interior trim. Once you have access, place a dolly on the outside of the dent and
then hammer on the inside of the dent, striking the metal against the dolly. The key here is to go slowly and work around the
circumference of the dent, banging it out until it lies just below the undamaged area. After the dent is out, put the dolly on the
inside of the dent, then tap the area surrounding the outside of the dent to knock in any high spots.
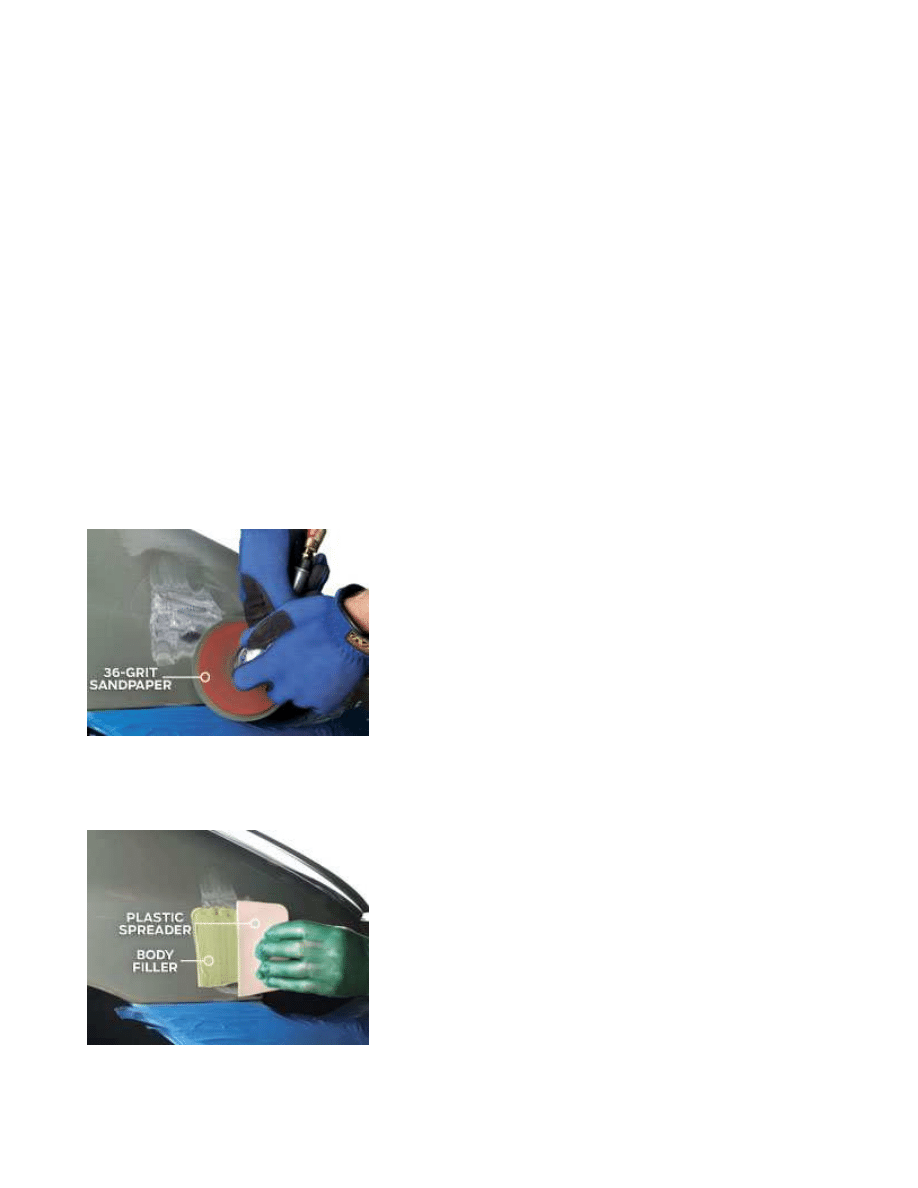
When you're sure all the sheetmetal is just slightly below the surface of the surrounding area, use a disc sander with 36-grit
paper to remove all paint and primer from the dent and surrounding area. This will give the body filler a rough surface (called
tooth) to hang on to once it has hardened. After thoroughly mixing the filler with hardener, smooth it on the damaged area
with a plastic filler applicator.
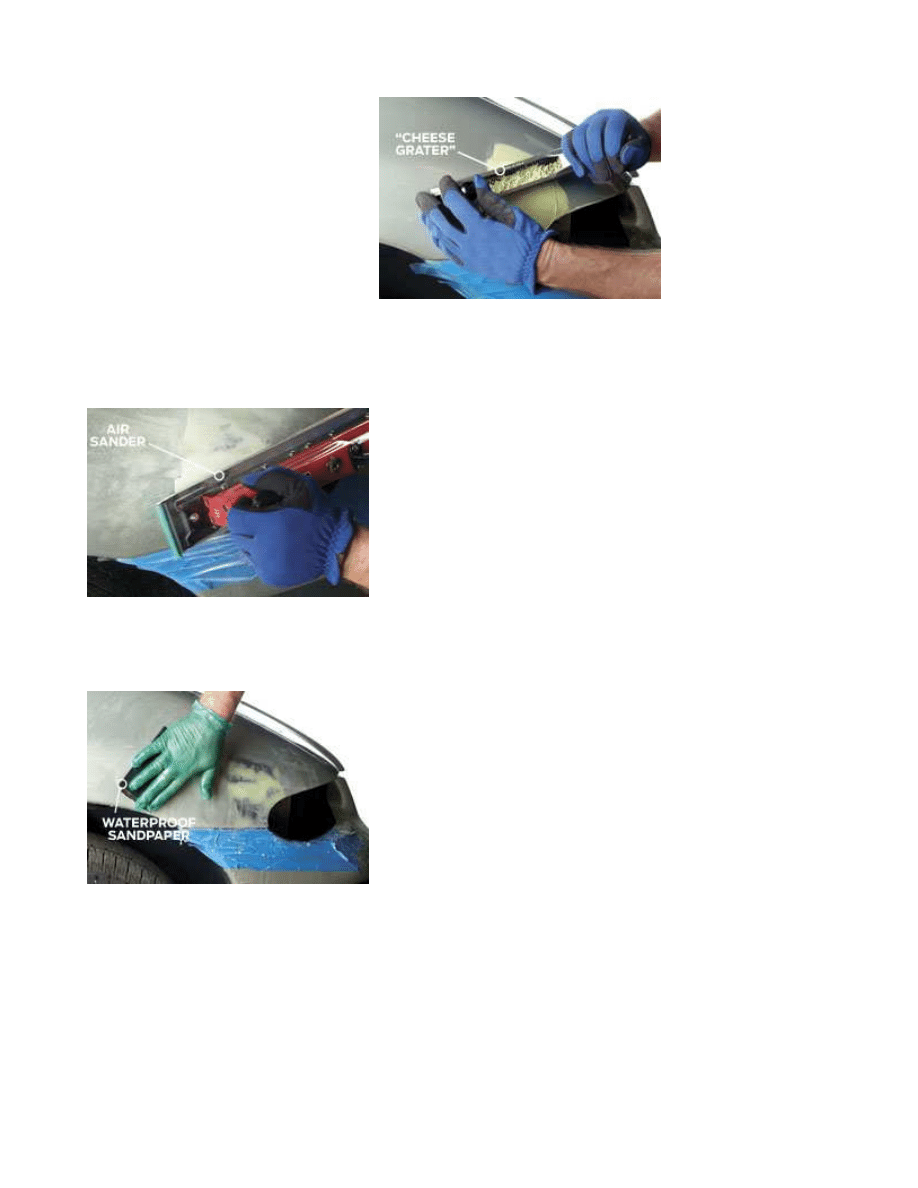
The filler semihardens in 10 to 15 minutes to the consistency of cheddar cheese. At this point it's easy to smooth with a body
file. Use the file to knock the filler down so it is slightly higher than the finished repair will be. After about 15 to 30 minutes,
the filler becomes hard.
At this point you can use a hand or air-powered stroke sander with 80-grit paper to bring the filler down to the level of the
body. If you see any bright, shiny metal spots in or around the filler, those areas are high. Use the pointed (pick) end of a
body hammer to tap them in slightly, then refill and resand.
PRIMER/SURFACERS
Before the repaired area can be painted, scratches, pits and waves must be completely removed or they'll show up as
reflections. A primer/surfacer forms a thick layer of material over the area, which is then sanded down to make the repair
smooth and level.
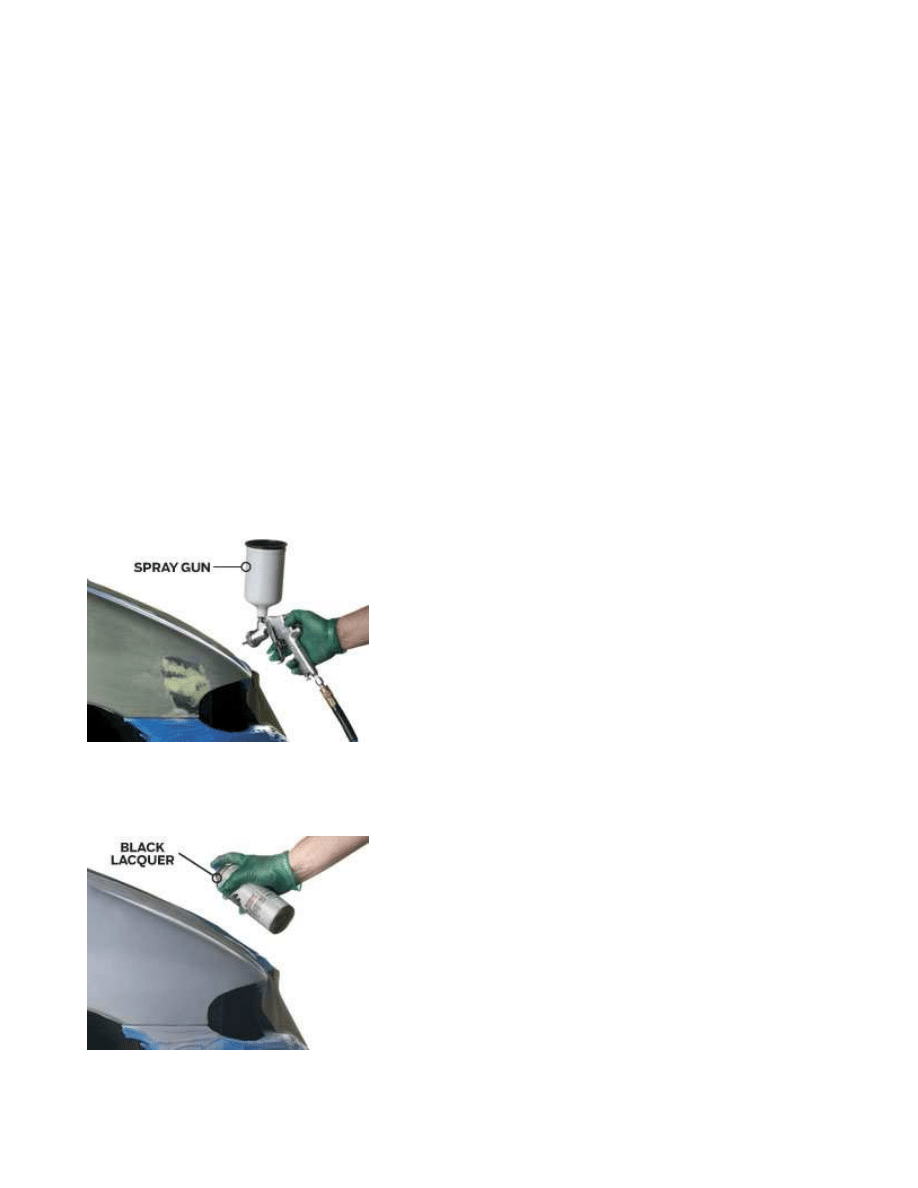
Two-part primer/surfacers, consisting of the primer and a hardening agent, allow a thick layer to be applied over the repair in
only one or two coats. After a half-hour of drying the primer is ready for sanding. But before you sand, apply a light mist of
black lacquer from a spray can over the repaired area. This contrast coating will reveal imperfections that will disappear as
you sand.
Click to enlarge
Grind off the old paint with a sander and
coarse (36-grit) paper to give the plastic filler a
"toothy" surface to stick to.
Click to enlarge
Spread plastic body filler over the bumped-
out area with a plastic spreader in a thin layer
Page 2 of 6
Popular Mechanics
10/13/2007
http://www.popularmechanics.com/how_to_central/automotive/2104327.html?do=print
« Previous
Page
1
2
3
Next »
Reader Comments
1. RE: Saturday Mechanic - Dealing With Dents
Website: www.performancewebmarketing.com
Having recently found myself agonizing over a hideous dent, I turned to a professional PDR (paintless dent removal)
that overlaps the repaired area. It will cure in 10
minutes or so, depending on the temperature in
the shop.
Click to enlarge
Carve the partially cured filler with a cheese-
grater tool to remove high spots before the
plastic fully cures and gets too hard. You may
need a second thin coat.
Click to enlarge
Sand the filler with 80-grit paper on a straight-
line air sander or a long rubber block to achieve
a smooth finish that follows the original contour.
Click to enlarge
Wetsand the repaired area with successively
finer waterproof sandpaper to remove any
imperfections.
Page 3 of 6
Popular Mechanics
10/13/2007
http://www.popularmechanics.com/how_to_central/automotive/2104327.html?do=print
expert. $150 dollars and an hour half the dent became barely visible (I know it is there, but few would notice). It just
may deserve a look.
Warning! Before applying any primer or paint, be sure to wear a respirator rated for organic solvents. Make sure there is
adequate ventilation, and also make sure that pilot lights and other flame sources in the general area are turned off.
To sand, use a rubber sanding block and 400-grit waterproof sandpaper. The trick is to sand lightly while frequently dipping
the paper in a bucket of water to keep it clean. When all of the black contrast coat has disappeared, the repaired area is
finished.
PERFECTION
Before painting, you have to decide whether you're going to paint just the damaged spot or the whole panel.
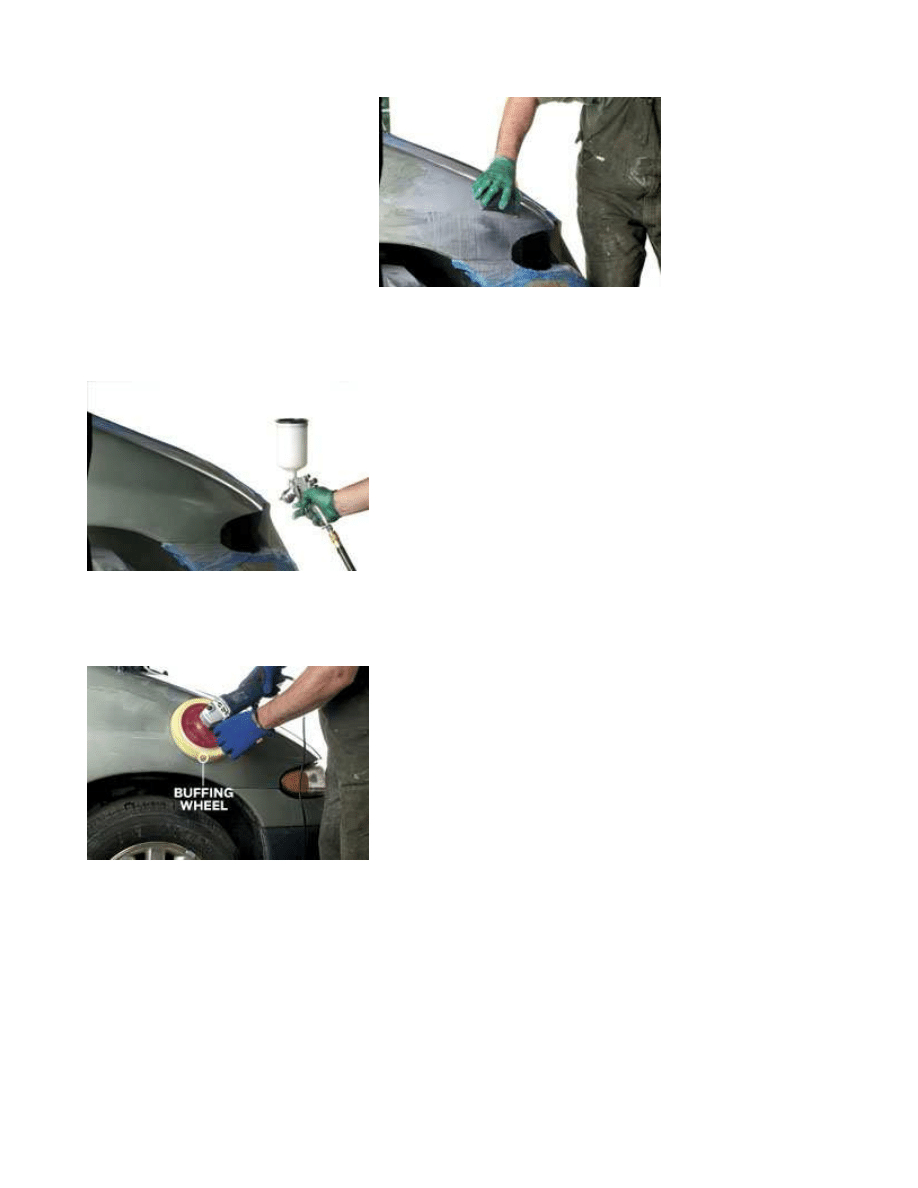
In either case, you'll need to clean and prepare the surface surrounding the repair to accept paint. Begin by wiping the entire
panel with a solvent-based wax remover. Next, wetsand the area to be painted with 600-grit waterproof sandpaper. If you're
going to blend the paint into the original paint, make sure to sand an area larger than the area where you will be applying the
paint. Thoroughly rinse the area, let it dry and then wipe again with wax remover.
Mask off adjacent panels, then cover nearby wheels and major portions of the car with painter's plastic sheeting to shield it
from overspray.
Mix the basecoat with the appropriate amount and type of solvent according to the maker's instructions. Before spraying,
gently wipe the area to be painted with a tack rag, then spray the panel or repaired area. If you are blending, apply only
enough basecoat to cover the repaired area, then taper off as you move away from the repair.
After the basecoat has dried thoroughly, you'll notice its finish is quite dull. This is so the clearcoat will adhere tightly. Do not
sand the basecoat before applying the clearcoat. After mixing the clearcoat with hardener, according to the manufacturer's
instructions, apply a medium wet coat and let it flash dry 5 minutes or so before applying a second coat. After letting the
clearcoat dry for an hour, remove all masking tape. Then wait one day before polishing.
SPIT AND POLISH
Chances are the finish already looks pretty good. But to make it flawless, it pays to colorsand and polish the entire repair.
We used 1500-grit sandpaper to flatten the finish, followed by rubbing compound to remove the scratches left by the
sandpaper. We finished up with polishing compound to make the finish flawless. After polishing, wait one month to apply
wax.
Click to enlarge
Spray primer over the repair to provide
adhesion to bare metal and to hide any
imperfections.
Click to enlarge
Lightly coat the primer with a dusting of black
Page 4 of 6
Popular Mechanics
10/13/2007
http://www.popularmechanics.com/how_to_central/automotive/2104327.html?do=print
« Previous
Page
1
2
3
lacquer to help visualize high and low spots as
you continue wetsanding.
Click to enlarge
Wetsand again to remove imperfections,
including sanding scratches. There should be
no bare metal showing.
Click to enlarge
Spray the color basecoat in two coats a few
minutes apart, followed by the clearcoat. Don't
sand in between.
Click to enlarge
After it dries, you can sand out tiny
imperfections and dust with 1500-grit paper,
and buff the surface to high gloss.
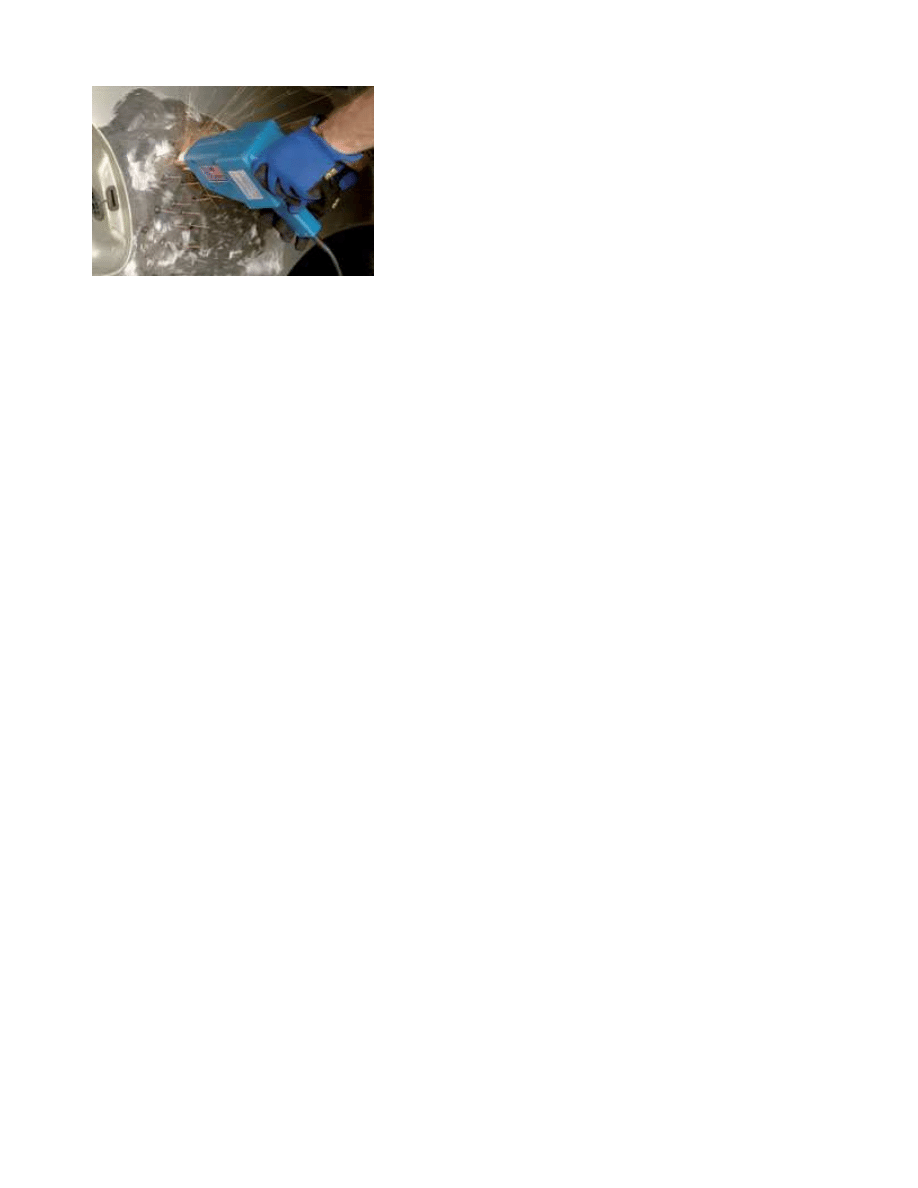
Can't Bang It? Pull It
When you can't get to the back side of a dent to bang it out, pull it out.
We used to drill holes in the panel and use a slide hammer, which
required welding up the holes afterward, which in turn made the metal
warp from heat.
Page 5 of 6
Popular Mechanics
10/13/2007
http://www.popularmechanics.com/how_to_central/automotive/2104327.html?do=print
Reader Comments
1. RE: Saturday Mechanic - Dealing With Dents
Website: www.performancewebmarketing.com
Having recently found myself agonizing over a hideous dent, I turned to a professional PDR (paintless dent removal)
expert. $150 dollars and an hour half the dent became barely visible (I know it is there, but few would notice). It just
may deserve a look.
Click to Enlarge
A newer and less invasive technique is to use a stud welder. It works by
electrically spot welding 2mm-dia. copper-plated studs to the body
surface. A slide hammer firmly grasps each stud and after a couple of
sharp raps, the dent is out. Then, you twist off the studs and grind the
surface flat. These welders cost about $250 to $300, and are sold at
auto parts stores that carry body and paint supplies.
Page 6 of 6
Popular Mechanics
10/13/2007
http://www.popularmechanics.com/how_to_central/automotive/2104327.html?do=print
Wyszukiwarka
Podobne podstrony:
Popular Mechanics Suspension Repair And Maintenance
DIY Combination Solar Water and Nieznany
Automotive Collision Repair Library Resources 2009
DIY Combination Solar Water and Nieznany
zestaw 311 popularne slowa z sufiksami less i free less and free suffixes common words
VAGLinks com DIY Testing a Bosch Diverter Valve
THE POPULAR LIFE make people like, respect and befriend yo
w thep18 Debug It! Find, Repair, and Prevent Bugs in Your Code
Popular Mechanics Diagnosing And Repairing Wheel Vibration
KNFilters com How To Clean And Oil A KnN Performance Filter DIY
Popular Mechanics Repairing Power Antennas
Popular Mechanics Fixing Hood And Trunk Latches
Popular Mechanics Finding And Fixing Water And Air Leaks
firma Com repairrrrrrrrrrkk
1 high and popular culture
więcej podobnych podstron