
1
COMMAND
TM
R
ULES OF
P
LAY
S
O
F
T
W
A
R
E
MICROPLAY
TM

2
Tandy, Atari, Apple and Macintosh, IBM, Commodore 64 and Amiga are registered trademarks of Tandy Corporation,
Atari Inc., Apple Computers Inc., International Business Machines Inc., and Commodore Business Machines Inc.
C
OMMAND
HQ
Copyright © 1990 MicroProse Software™
180 Lakefront Drive, Hunt Valley, MD 21030
(301) 771-1151
MicroPlay Software™ is a division of MicroProse Software, Inc.™
COMMAND HQ, the name and stylized logo, Trademark 1990 by
MicroProse Software™.
All rights reserved.
This book may not be reproduced in whole or in part, by mimeograph or
any other means without permission, with the exception of quoting brief
passages for the purposes of reviews.
Printing: 9 8 7 6 5 4 3 2 1
™

3
C
ONTENTS
I
NTRODUCTION
...................................... 4
1. T
UTORIAL
.......................................... 5
Familiarization ...................................................... 5
Combat Techniques Training ................................ 7
Reactive Techniques ........................................... 11
2. G
AME
C
ONTROLS
............................ 15
Starting a War ..................................................... 15
Looking Around the War Room ......................... 18
3. S
PECIAL
F
UNCTIONS
........................ 33
Game Aids ........................................................... 33
Saving Games ..................................................... 36
Layouts ................................................................ 37
Game Films ......................................................... 38
4. A
DVICE
& H
INTS
............................. 39
General Strategy .................................................. 39
General Tactics ................................................... 41
5. A
RMS AND
A
RMIES
........................... 47
World War I ........................................................ 47
World War II ....................................................... 54
World War III ...................................................... 67
C
REDITS AND
N
OTICES
......................... 71
Credits ................................................................. 71
Copyright Notice ................................................. 72
Warranty Information ......................................... 72

4
The commander strides into the darkened
room, the glowing wall map and computer CRTs
providing most of the ambient light. “What’s the
situation?” he barks out.
“Two enemy mechanized armies are closing
on Paris,” the adjutant states. “Two infantry armies
are following up. Our troops in the area have
taken heavy losses from ground-based air strikes.”
“What’s the status of the convoy?”
“On its way. We’ve lost one transport to
enemy submarine activity, but the rest slipped
through. Under standard evasive procedures, it
should arrive in seven days.”
The commander contemplates the situation,
the armies and ships like miniature glowworms as
they crawl across the map of the world, deciding
the fate of continents.
“I want air strikes here, and here,” he says,
pointing. “Bring up a tank army here and open a
gap in the enemy flank with a combined paratroop
assault. Our destroyer fleet has to pull out of the
Mediterranean and comb the Atlantic. Belay eva-
sive action — I want the convoy full steam ahead
for Europe. Now what’s the situation with our
Pacific fleet?”
You are that commander, directing the
armed forces of entire nations, deploying ground,
sea, and air troops to bring about the accomplish-
ment of your plans and the ultimate defeat of your
enemy. In any war, in any era, on any side, the
decisions that shape the course of history are
made in the Command HQ.
Learning
the
Game
This Manual provides a tutorial for begin-
ning players, detailed operating instructions, and
a wide variety of historical and strategic back-
ground. It is applicable to all computer systems.
The Technical Supplement gives specific
instructions for loading and/or installing the simu-
lation for your computer. It also provides a com-
plete reference of all the graphics and keys used in
the game.
There are three ways to learn to play Com-
mand HQ.
Tutorial Method: If you like step-by-step
guidance while learning a game, turn to the “Tu-
torial” (pages 5-14) and follow the instructions.
The tutorial, although long, introduces you to all
the salient points of the game.
Note: We recommend the tutorial method
unless you are already familiar with games of
strategic combat on a grand scale. Other products
based on “the art of war” may not prepare you for
the number of options available in Command
HQ.
Study Method: You can study the game
controls and operating instructions of the game,
as detailed in the “Game Controls” section (pages
15-32). If you’re still confused, try things out with
the tutorial (pages 5-14).
Try and See Method: You can just dive in
and try things out, referring to this manual and the
Technical Supplement as necessary. In this case
we strongly suggest that you have a mouse or
joystick interface available for easy access to the
pull-down menus.
Warning: This method, usually the most popu-
lar, can lead to confusion and frustration because
Command HQ is a real-time simulation; while
you’re learning how to play the game, things will
be happening all around you!
I
NTRODUCTION
What
This
Game
Contains
How to Start
5
F
AMILIARIZATION
Before you take command of the combined
world forces of your national alliance, it’s a good
idea to practice on some set-piece situations to
learn about controls and tactics. There are two
tutorial games included with Command HQ to
help introduce you to the game controls.
Before you begin, locate the Pause key; you’ll
want to be able to pause the simulation while you
refer to the manual.
Install: See the Technical Supplement for
information on how to install Command HQ on
floppy disks or onto a hard disk.
Hardware Options: In some versions, after
loading the game you’ll see questions about your
computer hardware. If you’re unsure of the an-
swers, or wish to automate this process, see the
Technical Supplement.
Main Options: After the title screens you’ll
find yourself at the Main Options menu. Select
“Resume Saved War” to begin the first tutorial.
Load Game: Choose “Tutorial One” to begin
learning Command HQ.
You begin in control of the blue forces, with
a full view of the world situation. The top section
of the screen shows the current status of the game.
The tutorial begins in Pause mode to give you
time to look around.
The map is a terrain representation of the
world. Types of terrain include sea, plains, forest,
jungle, desert, and mountains. The colors for
terrain types vary according to your computer’s
graphics capabilities — see the technical supple-
ment for details.
1. T
UTORIALS
Where
You
Start
Starting
Options

6
The map also shows the location of all major
cities, bases, and oil fields in the world. Normally,
cities and bases are black squares and oil fields are
small “+” signs (see the technical supplement).
The object of any scenario of Command HQ is to
capture all of the Capital Cities on the map. Oil
is important in some eras, to keep the machinery
of war and commerce running.
The four screens below the map are called
Monitors One through Four, numbered from left
to right. Each serves several functions during the
course of the game.
Monitor One initially shows you your oil
status, in games that use oil. In the tutorial, you
will soon notice that your oil situation is critical:
your income of oil is less than your total outflow,
and your reserves are dropping (the word “oil”
flashes red to warn you of this). The subject of the
first tutorial is a blue attack on the red oil fields of
the Middle East.
Monitor Two initially shows the flag of the
city currently under the cursor (in this case, Wash-
ington, D.C.).
Monitor Three initially shows the general
location of your major capital city. Depending on
the scenario, there may be other friendly capitals
that you must also protect.
Monitor Four depicts the type of terrain the
cursor is currently over.
For compatibility across a wide variety
of computers and control mechanisms, stan-
dard terms are used throughout this manual.
See the Technical Supplement and Com-
mand Summary Card to interpret each for
your computer.
Controller: A two-dimensional control
device, normally a joystick, mouse, or four-
directional cursor keys.
Selector #1: The first (left) button on a
joystick or mouse. On the keyboard it is
always the Return or Enter key.
Selector #2: The second (right) button
on a joystick or mouse. On the keyboard it is
always the Space Bar.
Keys: Each key is referred to by an
italicized name, which is shown on the Com-
mand Summary Card.
Terminology

7
C
OMBAT
T
ECHNIQUES
T
RAINING
Each unit represents an army, fleet, or air
wing composed of many thousand soldiers and
vehicles. Each unit actually occupies only the
center of its icon on the screen, but different types
of units have different combat ranges, giving
them different “effective sizes.”
Types of units in this tutorial include air,
infantry, tank, cruiser, and carrier.
All units except air units have several com-
mon features:
Type Icon: Each unit type is recognizable by
the icon in the center of the unit. A summary of
icon types appears in the Technical Supplement.
Strength Bar: A unit is at full strength when
the band of color at the bottom extends all the way
across the unit. As the unit takes damage in
combat, the bar recedes. A unit with no color bar
showing is very near destruction.
Background Color: A land unit has a distinc-
tive background color, usually white (see the
Technical Supplement). A sea unit has a different
background color, usually blue. When a land unit
boards transports and becomes a sea unit, its
background color goes from white to blue to note
the change.
Infantry Entrenchment: Infantry armies can
“entrench,” making them much harder to kill. An
entrenched infantry has an additional color bar
above its strength bar (usually green). If this bar is
not there, the infantry is not entrenched, and is
therefore more vulnerable.
Time to launch an attack! Press the pause key
to take the game off pause mode, position the
cursor over the blue cruiser unit, and press Selec-
tor #1. You’ll see the message “Setting Unit
Destination” at the top of the screen.
Now move the cursor so that it is adjacent,
without overlapping, to the red cruiser, and press
Selector #1 again.
In this tutorial we’ll concentrate on the basic
game controls and the elements of war: once you
know how to maneuver and fight, you’ve learned
75 per cent of Command HQ.
In a real game of Command HQ, the theater
of war can range from a single area like Hawaii to
the whole world. Part of the challenge is knowing
which theaters deserve your attention, and which
can be left to follow commands previously given.
For this tutorial, we’ll concentrate on the
Middle East. Your first step is to take a close-up
look at the action.
Use the Controller to position the cursor
below the two red units in the Middle East, and
press Zoom. Note that in the zoom view, the oil
fields look like little black circles instead of crosses.
If your zoom box does not fill the whole screen,
press Resize Zoom Window until the zoom box is
at its largest. You see your blue forces poised for
an attack on a red position.
Move the cursor around and note the various
types of terrain on the map. To see the terrain
underneath the units, press Show Terrain. This
also shows which side owns the cities and which
side owns the oil fields.
As you can see from the arrangement of the
blue forces, a combat unit is as large as nine map
positions (three squares by three squares) — thus,
units can overlap other units in tight formation. If
you want to get a good look at a unit that is
obscured by another, put the cursor over it and
watch Monitor Four.
The Field of Battle
The
Combat
Units
Simple
Moving
and
Fighting
8
Put the cursor over the blue cruiser again, and
a new message appears: “Unit Path.” Watch for a
moment, and the flickering image will follow the
unit’s new path of movement. Also note that in
Monitor Four, the unit has a message appearing
with it, “Moving,” to let you know that that unit
currently has a destination.
When the opposing units are close enough to
each other, they begin to fight. Hold the cursor
over one or the other unit; two new icons appear
in Monitor Four. The small burst symbol denotes
that the unit has been hit by enemy fire; the white
arrow shows the directional facing of the unit,
pointing out (in general terms) with which enemy
the unit is engaged.
As the battle progresses, both units’ strength
bars begin to dwindle. When one unit runs out of
strength, it is destroyed. If your cruiser is de-
stroyed, you’ll have to bring up the carrier to
finish off the enemy.
Select the carrier by positioning the cursor
over it and pressing Selector #1. Give it a destina-
tion, but this time leave one space between the
carrier unit and the enemy cruiser. Carriers have
a longer range than cruisers, and you’ll be able to
bombard the enemy without taking any return fire
at them.
As the carrier moves, you’ll see two red
infantry appear on the coast of India. These units
were always there, but you had no friendly units
close enough to see them. As your air unit (aboard
the carrier) gets closer, the units appear. See the
discussion of “Hidden Units,” pages 12-13.
Now take a look at your oil situation. All your
reserves are gone by now (or soon will be) and a
small bar has appeared in your “out” column. This
shows how much oil you need, as opposed to the
solid bar that shows how much you have. Time to
do something about the oil.
If things move too slowly for you,
press Increase Game Speed. You can push
it all the way up to speed 6, but this moves
very fast and makes it hard to keep track of
what’s going on when many units are
moving and fighting at the same time.
If things are going too fast for you,
press Reduce Game Speed to slow the
action down. You can go all the way down
to speed 0 in which nothing moves (but
you can still give orders) as a kind of
alternative pause. When you’re ready with
all your orders, increase the speed again.
Game Speed
Select the topmost infantry unit in the cluster
around Jerusalem. Select the topmost Iranian oil
field as its destination (if you are not sure which
one is Iranian, hold the cursor over the different oil
fields for a moment, and eventually you’ll see the
red, white, and green Iranian flag appear).
Once the first unit has been given a destina-
tion, select the next infantry unit down and give it
a destination next to but not overlapping the red
infantry unit guarding the oil field in Kuwait.
As the two infantry units move, notice that
their strength bars go down. This is due to attri-
tion. Units that cross hostile types of terrain
(desert, polar, and jungle) lose part of their strength
each round until they leave that terrain. Also
notice that once the unit begins to move, it loses its
“entrenchment” indication.
At some point, your unit will capture the oil
field in Iran (an animation appears in Monitor
Two). This helps the oil situation, but doesn’t
solve it. You still need that Kuwaiti field, but the
Combat Options
Goals
Attrition

9
designated unit is too weak to attack, due to
attrition losses. You can also see that land units do
not fight when next to each other the way the
cruisers did. They have shorter ranges than cruis-
ers, and must overlap to fight.
See how the friendly unit that captured the oil
field begins to repair its losses! Units in friendly
cities, bases, and oil fields regain part of their
strength each round until they are fully repaired.
Send the weakened unit to that oil field for repairs.
Be careful, though — if you give it a direct
movement order, its path will take it into combat
with the red infantry. First move it due north.
When it arrives, give it new orders to move east to
the oil field. Note that the unit’s losses cease at
some point. Under normal circumstances, a unit
cannot be killed by terrain attrition.
You’ll quickly find that two units cannot
occupy the same position. Move the unit on the oil
field one space to the south (into the plains, where
it won’t suffer from attrition). This allows the
weakened unit to enter the oil field and repair.
Now let’s experiment with some advanced
movement. Select one of the tank armies and give
it a direct destination of an unguarded Saudi
Arabian oil field.
The first thing you notice is that the tank
moves pretty fast. Depending on the type of ter-
rain, tanks move up to twice as fast as infantry.
As the tank closes with the enemy infantry,
they begin to fight — but the tank keeps moving!
This is called an overrun and is one of the most
valuable abilities of tanks: they can move
“through” enemy infantry (taking losses) and
seize objectives in the rear. Once the tank reaches
the oil field, it will stop and begin to repair.
Now try the same thing with an infantry unit,
and see how the infantry becomes pinned in
combat (once it’s engaged, hold the cursor over
the unit to see the message). Being pinned means
the unit cannot move until the combat is over, or
until the unit is given fresh movement orders. See
“Movement,” pages 21-22. In general, infantry
are far less mobile in combat than tanks.
Meanwhile, send the tank to capture the last
unguarded oil field, and watch the oil reserves
begin to rise.
Now for some advanced forms of combat.
Select one of the tank armies at sea (note that they
are transports, as denoted by the color back-
ground) and give it a destination atop the south-
ernmost red infantry in India. Attacking from the
sea in this way is called a marine assault. The
tank, although it can still defeat the infantry, takes
heavy losses. Watch as the tank background turns
white to show it has reached the coast.
One way to lessen losses against coastal de-
fenders is to soften them up with navy guns.
Move the carrier to just off the coast of Bombay,
and watch as it begins to bombard the red infantry.
Meanwhile, let’s get ready to attack the red infan-
try in Kuwait.
We have two infantry nearby to make the
attack, and they could probably take the position,
but with heavy losses. We can make things easier
with air strikes and a paradrop.
Press Show Air Power, and find the two air
wings stationed in Jerusalem. Select one. The
message “Designating Air Mission” appears. Place
the airplane-shaped cursor over the red infantry
defending the Kuwait oil field, and press Selector
#1. (Note how the naval bombardment at Bombay
continues as you do this.)
Pinning
Repairs
Marine
Assaults
Advanced Combat
Navy
Guns
Air
Strikes
Advanced Movement
Overruns

10
While the tank moves, press Show Air Power
and select the air unit on board the carrier. Notice
the enemy air unit in Bombay. Once the airplane-
shaped cursor appears, press Show Air Power
again and place the cursor over the enemy air unit.
This will cause a dogfight between the two air
units. Depending on how lucky you are, a plane
may be shot down, or both planes may go gray.
Either way, you’ve taken the enemy air power out
of the action for a while.
Try to coordinate your air attack with the
arrival of your tank. In a real game, negating your
opponent’s air unit can be vitally important.
Now watch as the tank moves into the city. Do
you see it take damage even after the enemy unit
is destroyed? This is because enemy cities have a
small militia which defends them from conquest.
This militia is not very potent, but it can kill a
weakened unit trying to capture a city.
Once you’ve captured Bombay, press Show
Air Power again and note that the enemy air unit
was destroyed when you took the city. Capturing
the air strip is the most certain way of destroying
enemy air units.
You’ve now learned most of the controls you
need to play Command HQ. Try experimenting
with various combat tactics on the remaining red
unit. Try air strikes, bombardment, tank overruns,
and flanking attacks with paradrops. If you give a
command that doesn’t seem to be working prop-
erly (for example, you might find yourself stuck
with an airplane-shaped cursor), press the Escape
key to abort the command and place yourself back
in the main simulation. If you’ve gotten yourself
in deep, you may need to press the Escape key
multiple times.
When you’re ready, press Restart to return to
the Main Options menu.
Air strikes can be unsuccessful, due to ground-
based defenses. If your air strike fails, press Speed
Up a few times until the air unit is available once
more, then press Speed Down and attack the same
target again.
A successful air strike costs the defender half
his current strength. Quickly, before he begins to
repair, attack with your nearby infantry. To at-
tack, all you have to do is move your unit so the
two icons overlap. As combat is joined, place the
cursor over the defending red unit. You’ll see the
enemy infantry “turn to face” the attacker, as
designated by the arrow that appears in Monitor
Fouron your screen.
Since the enemy unit is facing north, a flank
attack from the west will do additional damage,
but sending a unit from Jerusalem overland will
be slow, and the unit will suffer attrition.
Instead, let’s do an airdrop. Press Show Air
Power again and select an available air unit (un-
available air units are shown in gray, see pages 24-
26). When the “Designating Air Mission” mes-
sage appears, select a nearby infantry unit (tanks
cannot be paradropped). Now a new message
appears: “Designating Air Transport.” Place the
cursor so that it overlaps the enemy, and press
Selector #1. The infantry will be dropped in that
space. Your unit’s strength is reduced by parad-
ropping because it must leave its all of its heavy
equipment behind.
Once the enemy is defeated, don’t forget to
move one of the units onto the oil field, and send
the other elsewhere for repairs. A traffic jam may
result in the north; see if you can get everybody to
a safe destination (units may move through each
other, though they may not stop to occupy the
same space at the same time).
Time to capture Bombay. The enemy unit
there is weakened by the bombardment, so select
your remaining tank at sea and land it on the coast
of India. Once it’s there, send it into the city.
Ending
the
Battle
City
Conquest
Airdrops
Dogfights

11
R
EACTIVE
T
ECHNIQUES
Now check your oil situation. You can see
that your income and outflow are about equal.
Watch your reserves during the course of the
battle to see if you are having any problems.
You can also check on your opponent’s oil
situation (spies and reports keep you abreast of his
condition). Select the Alternate Function for
Monitor One, and you’ll see a similar readout for
your enemy’s oil. He looks like he’s doing about
as well as you are.
You can check on how many resource centers
you own (cities, oil fields and bases), how many
units you have, and your income. First select the
Alternate Function for Monitor Two, and you’ll
see a comparison of resources owned by you and
your opponent. As you can see, you have a slightly
greater number of cities and oil fields. In a long
war, you would probably win. In the tutorial
situation, though, you have very little time.
You can also find out your overall strength.
Press Buy Units. Later we’ll discuss actually pur-
chasing new units; for now, look under the
COUNT column and see how many of each type
of unit you currently have on the board. The
KNOWN column shows how many of each unit
you have seen on your opponent’s side. At the
start of the tutorial, you see none of your oppo-
nent’s units. As you progress, call up the Buy
Units menu and see how the KNOWN numbers
change now.
Press Buy Units again to remove the menu.
You can also find your relative income by
selecting the Alternate Function for Monitor Four.
You’ll see your own income in Billions per Round
(yours is 1.35), and how many billions you cur-
rently have available to use for purchasing units.
Press the key again, and you’ll see your oppo-
nent’s income. His available funds are always
hidden from you.
In this tutorial, the enemy troops will be
moving. Although there is no “artificial intelli-
gence,” you’ll get an idea of what it’s like to play
in real time, against an opponent who is changing
the conditions on the battlefield.
You’ll probably want to use Pause frequently
in this tutorial. We suggest you read a few para-
graphs, play, pause, read a few more paragraphs,
play, etc.
To begin the second tutorial, return to the
Main Options menu, either by pressing Restart
Game at the end of the last tutorial, or by begin-
ning the game again.
When you get the Main Options menu, select
“Resume Saved War,” and choose “Tutorial Two.”
The game begins in Pause mode.
The purpose of this tutorial is to give you an
idea of how the game is played against a live
opponent. There are red units out there, moving,
but you can’t see them at the start.
You begin with a large convoy headed for
Europe, with the purpose of establishing a beach-
head and retaking the captured continent. This is
similar to actions that could occur late in a World
War III scenario.
Press Show Ownership to see what’s been
happening in the war so far. As you can see, the red
army has conquered all of Europe and Asia (ex-
cept South Korea), and a small part of Africa and
the Middle East. They still hold Havana.
Press Show Ownership again to toggle this
mode off.
Oil
Strengths
The Situation
Pause
Key
Getting
Started
Show
Owner

12
Hidden Enemies
At this point your opponent is probably get-
ting impatient, so press Pause and begin the game.
In a real game against another player, you can let
your opponent know that you’re ready by pressing
Pause — but the game won’t start until you both
have pressed it.
Now press Speed Down until the “Speed 0”
message appears at the top of the screen. In this
mode, you can give your units orders and conduct
air strikes, but no movement or fighting takes
place. The game does not “progress.” You will
play most games at speed 3 or 4, but speed 0 is
useful for giving lots of orders at the start of a
game, or as a way for two players to play at the
same computer (for more details about this, see
page 35).
For now, give your orders at speed 0. Your
objective is to land your convoy in Europe. Give
your transports and cruisers destinations in either
Spain, the west coast of France, or England (or
any combination you wish).
You can keep track of which units have al-
ready received orders by holding the cursor over
the unit for a moment. The unit icon that appears
in Monitor Four will have the “Moving” message
printed above it if the unit has already received the
orders it needs.
Once you’ve given orders to all your units,
press the Show Destinations key and watch as
each unit’s path is outlined. Using this key, you
can get an overall sense of where you’ve ordered
units to go at any time during a war. If you notice
a unit has no movement line, check to see if
you’ve given it movement orders. This key works
in zoom mode as well.
You can find an individual unit’s movement
orders by holding the cursor over that unit for a
second or two. The unit’s path appears as a blink-
ing cursor moving across the map. You can only
see the first three moves of an enemy unit.
Getting Moving
Now get your convoy moving by pressing
Speed Up three times. When you’re at speed 3,
you’ll see your ships start to move across the
screen. As enemy troops appear you can adjust
destinations on the move, to attack the enemy or
to avoid him. For now, keep reading.
Each type of unit has a scanning range. As
your convoy moves toward Europe, enemy units
will appear when they are within radar scanning
distance of your units.
Your best recon units are your air units. Their
scanning range is very large, as long as the plane
is active (not being used for a mission, or recov-
ering from a mission). If you use all your air units,
enemy troops may disappear from the screen until
your air units are ready again.
Radar and air recon happen automatically.
Your observation satellite shows you all enemy
units within its radius (except submarines, which
remain hidden). By moving the satellite, you can
get very good reconnaissance on enemy posi-
tions. The down side is that moving the satellite
uses fuel, and eventually it will fall from orbit (see
page 29). In the tutorial there’s no need to worry
about that, so let’s get some reconnaissance.
Press Satellite. You’ll see your satellite (in
blue) over the Atlantic, warning you of enemy
fleets in the area. The red satellite is over Europe,
where you’re hoping to invade.
Select your satellite and give it a destination
over Europe. It will begin to move, and as it does
you’ll see any enemy troops (except subs) within
its observation radius. Press Satellite again to
remove the global picture.
Submarines are always hidden from air and
satellite scanning, and stationary subs can’t be
spotted on radar. The only way to find an enemy
sub is if it moves within radar range of one of your
units, enters one of your cities’ dock areas, or if
Initial
Orders
Radar
and Air
Recon
Satellite
Recon
Sub
Recon
Movement
Paths
Move
Out!

13
Satellite
Combat
one of your units runs into it. Transports are
fragile when facing subs, so watch out for enemy
sub activity in the Atlantic!
Since your units are hidden as well, it’s im-
portant to know which of your troops the enemy
can and can’t see. Your radar detectors and ECM
capabilities make it easy for you to find out which
of your units are hidden and which are not.
Press Toggle Show-Who; the message “Show
Common” appears at the top of the screen. So far,
your convoy should be well hidden from the
red army.
When your convoy is halfway across the
Atlantic (about round 7-10), you may want to
pause. It’s time to knock that enemy satellite out
of the sky before it gives away your invasion
plans. Press Satellite and then Buy Units. Select a
Satellite Killer. This is a satellite that can be set to
explode at a certain point in space, destroying any
nearby recon satellites.
The cursor becomes a selection point, asking
you where to target the killer satellite. Select a
destination very close to the red satellite. Make
sure your own recon satellite isn’t too close to the
kill point or it will be destroyed too! If necessary,
move it away.
You’ll see the satellite killer appear over the
central U.S. It moves quickly across the globe to
kill any satellites in its radius of effect; it will go
off only when it reaches the designated destina-
tion. If your opponent moves his satellite, you’ll
have to give your killer a new destination.
For now, get back to the war by pressing
Satellite again.
Whenever your units engage for the first time,
or you spot an enemy, or a unit is destroyed, a
crisis message appears at the bottom of the screen,
and an animation may appear in Monitor Two. At
the same time, Monitor Three shows the area of
the world in which the crisis is taking place.
Put the cursor in Monitor Three and press
Zoom, and you will zoom to that area of the world
map showing more detail.
When enemies appear, fight them as quickly
and as economically as possible. Keep the follow-
ing tactics in mind.
Attack Ranges: Subs have short attack ranges.
Carriers have long ranges. Use your weapon types
to their best advantage.
Engagement: An enemy can only fire at one
of your units at a time. Once he’s engaged with
one of your strong units, you can attack with your
weak units without fear of loss (but make sure
your timing is right!).
Air Strikes: Practice with air strikes, and
remember that you can find out when an air unit
will be ready by selecting the unready icon.
Enemy Movement: You can determine the
short-term destination of an enemy by holding the
cursor over the enemy unit.
At some point you’ll see the message that a
recon satellite has been killed. Press Satellite to
see what the situation is. If your satellite is still
alive, try moving it to a different spot (select the
satellite, then select the destination) to see what’s
going on in another part of the world.
When you’ve taken care of the defending sea
units, it’s time for a landing. To demonstrate the
power of nuclear weapons, we’ll start our inva-
sion with a nuclear strike.
Press Buy Units and select “Use Nukes.” Now
the cursor becomes a targeting device. Pick a spot
and select. Try to place the strike so as to affect the
maximum number of enemy units (just south of
Madrid is a good choice). Be careful! Nuclear
weapons have a large radius of effect (they can
wipe out a whole city), so keep friendly troops
away from ground zero.
What
the
Enemy
Sees
The Invasion
Crisis
Messages
Deploying
Nukes
The
Satellite
Killer
Explodes
Combat
Tactics

14
Your use of nukes will also cause some cities
on the board to change allegiance. Press Show
Ownership after the nuke is dropped to see which
of your cities have become neutral. It is also
possible for neutral cities to join the other side
after a nuke.
Foreign Aid is used mostly in the pre-game
and cease-fire portions of Command HQ. How-
ever, foreign aid can be used even during war,
where it represents direct shipments of money and
personnel, diplomatic missions, support for rebel
factions, and propaganda and subversion.
To use foreign aid, press Buy Units and select
Foreign Aid. The cursor becomes a selector, as
with nukes, but the target must be a city. Try
giving foreign aid to Birmingham. You’ll have to
do it several times (after a few gifts the city
becomes neutral, then it joins your side). Then
press Show Ownership to see what effects your
foreign aid designations had.
Press Buy Units and select the type of unit you
wish to build (try a tank). Now you must place that
unit in one of your cities or bases.
When placing a unit, each friendly city is
highlighted with a colored box. The box is green
if the city is available for building, yellow if the
city will soon be available, and red if the city will
not be available for a long time. You can find out
when an unavailable city will be ready by placing
the cursor over the city and pressing Selector #1.
A message will appear telling you in what round
the city will be ready. Compare this to the round
counter in Monitor Three.
Try building several units and placing them in
various areas on the map.
You can experiment with various tactics and
moves, as in the first tutorial. When you’re ready,
press Restart to return to the main menu.
Buying
New
Units
Foreign
Aid
Mopping
Up
15
2. G
AME
C
ONTROLS
Command HQ offers you a lot of choices
when you first start up the game. To make a
choice, use the Controller to scroll through the
menus. Press Selector #1 to make a choice.
At other points in the rules you will be told to
select a unit or area of the screen. The cursor is
moved via the Controller. When the cursor is in
the desired area, use Selector #1 to select.
First you may be asked questions about your
computer hardware. See the Technical Supple-
ment for information.
Terminology
Selecting
Hardware
Options
S
TARTING A
W
AR
For compatibility across a wide variety of computers and
control mechanisms, standard terms are used throughout this
manual. See the Technical Supplement and Command Sum-
mary Card to interpret each for your computer.
Controller: A two-dimensional control device, normally
a joystick, mouse, or four-directional cursor keys.
Selector #1: The first (left) button on a joystick or mouse.
On the keyboard it is always the Return or Enter key.
Selector #2: The second (right) button on a joystick or
mouse. On the keyboard it is always the Space Bar.
Keys: Each key is referred to by an italicized name, which
is shown on the Command Summary Card.

16
1918: This game begins late in World War
One, after the fall of Czarist Russia. The German
forces must be remobilized for an all-out assault
on the western front, and the German fleet must
escape into the Atlantic to prevent the arrival of
American reinforcements.
1918 is a good scenario to play for your first
game of Command HQ. It uses only infantry,
cruisers, and subs, and limits the scope of the
battlefield. It is also an interesting operational
problem in its own right.
1942: This game begins with American in-
volvement in World War Two. The German forces
have invaded Russia and are in a race to take
Moscow before the Allies begin their D-Day
invasion. Meanwhile the Japanese have conquered
the Philippines and may be heading for Hawaii.
This scenario adds air power and carriers, and
enlarges the scope of the war to cover the
entire world.
1986: A hypothetical World War Three be-
tween the Warsaw Pact and NATO, as envisioned
several years ago. This scenario adds nukes, for-
eign aid, satellites, intelligence scans (see page
29), and cease-fires. Oil becomes a consideration
in this global war.
2023: This scenario uses all rules from 1986,
but presents each side with a balanced but ran-
domly selected mix of cities and oil fields. It
postulates a World War Three-style war further
into the future, when national alliances and super-
power status have changed. The random selection
process allows for millions of possible starting
setups. No starting forces are given in this sce-
nario; instead, players are allowed to build their
armies from a large pool of money.
????: A far-future scenario postulating a frag-
mented Earth of city-states. You are one powerful
overlord who begins a program of world conquest
based from your own capital. Your opponent’s
forces and possessions are hidden from you, so
you must first find his capital before you can win!
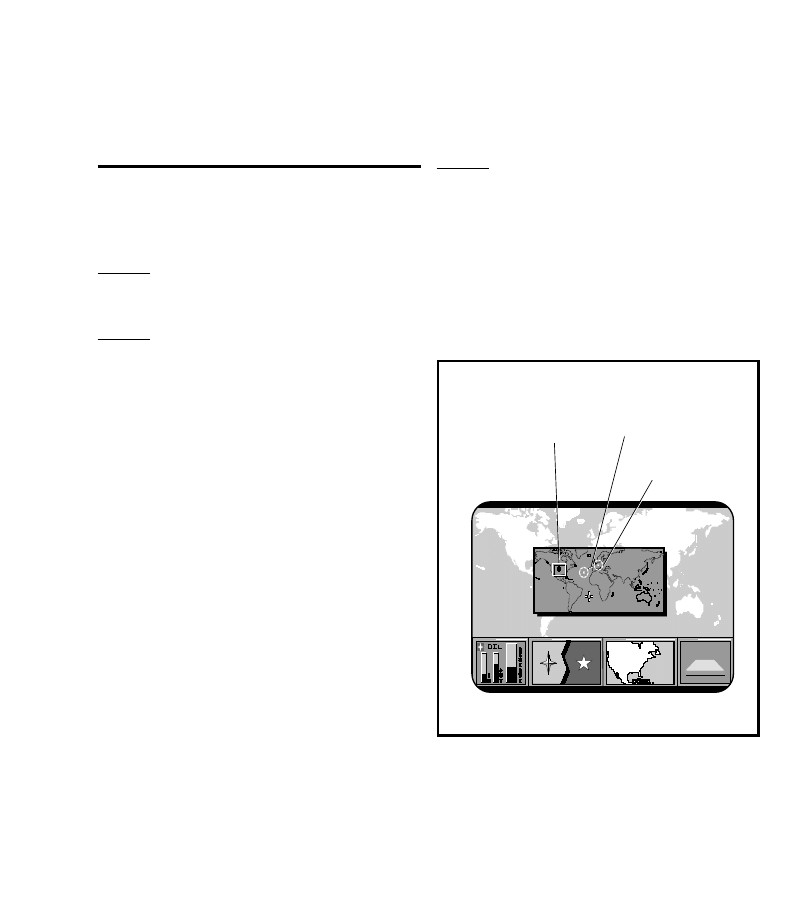
Start a New War: This begins a new game of
Command HQ. You are then given a choice of
opponents, communications methods, and eras in
which to fight.
Resume a Saved War: This restarts a saved
war. The game will begin using the same parame-
ters under which it was saved (e.g., a two-person
saved war cannot be restarted as a solo game).
Layout Armies: This is a special option used
to create personalized layouts for “1986” wars
only. See page 37.
Load a Film: This selects a previously
saved “War Film” (see page 38 ), and loads it
into memory.
Watch a Film: This runs the War Film cur-
rently residing in memory. To watch a different
film, it must first be loaded.
Save a Film: This saves the War Film of the
war just fought into a file of saved films. If a film
is not saved, it is lost as soon as a new war is fought
(see page 38).
When you select “Start a New War”, you are
then given a choice of opponents. You can play
another human being (via cable link or modem),
or a Computer Opponent. “None” is a special,
non-active computer opponent, to be used for
practice, or when two players want to play at the
same computer.
If you choose to play another human, you
may be offered several choices as to the type of
connection you have, including Com options
and modem models. Consult the Technical Manual
if you are unsure as to the meaning of any of
the options.
Once you have chosen your opponent (and
established a connection if playing via cable or
modem), you are offered a choice of crisis situ-
ations in various eras of world history (and fu-
ture). If playing against a human opponent, one
player is chosen at random to select the crisis
option to be played.
Main
Options
Opponent
Options
Connect
Options
Crisis
Options

17
The cities and oil fields are distributed randomly
(as is your capital) providing millions of different
game situations.
In two-player games, the player who did not
choose the scenario gets to choose which side he
will play. In all cases, when choosing sides, you
may play either red or blue. The red forces control
the Axis armies in 1918 and 1942, and the Warsaw
Pact in 1986. 2023 and ???? are balanced setups,
so color choice is irrelevant in these scenarios.
If you are playing 1986, you have the choice
of using the standard opening layout, or a custom
layout you have created with the “Lay Out Ar-
mies” option (see page 37). Select the layout you
wish to use.
For all scenarios, you are allowed to adjust
the amount of money with which your opponent
begins the game. This can be useful as a
handicapping device.
Side
Options
Layout
Options
Starting
Money

18
Game Screens
Status
Bar
In addition, when you select a unit to move,
Monitor One shows the unit and any pertinent
status messages.
Monitor Two automatically displays the na-
tional flag for any city, base or oil field over which
the cursor is held. In addition, it displays anima-
tions whenever a crisis message appears (see
below).
Selecting the Alternate Function for Monitor
Two displays a city/base/oil comparison graph,
including the number of each that you hold.
Monitor Three is the crisis monitor. It begins
the game displaying the area around your national
capital, and shifts view throughout the game when-
ever a crisis message appears (see below). Press
Zoom to Monitor Three to focus the game map
in on the crisis area. You can also do this by
pressing Zoom when the cursor is in Monitor
Three .
Selecting the Alternate Function for Monitor
Three converts the crisis window to Show Own-
ership Mode (see page 32).
Monitor Four displays the type of terrain and
occupying unit, if any, in the map space over
which the cursor is placed. Units sometimes have
status messages accompanying them (see page
23). In some scenarios, the owner of the terrain is
also displayed.
Selecting the Alternate Function for Monitor
Four shows your current income in Billions per
Round (BPR), and your current cash reserve.
Pressing the key a second time shows your oppo-
nent’s BPR; his cash reserve is always kept secret.
L
OOKING
A
ROUND THE
W
AR
R
OOM
At the top of the screen is a mode status bar.
The modes and messages are self-explanatory,
and appear as reminders (for example, when in
Airplane Mode the message “Airplanes” appears
in the mode status bar).
The map is a terrain representation of the
world. Types of terrain include ocean, lake,
plains, forest, jungle, desert, polar, and moun-
tains. The colors for terrain types vary according
to your computer’s graphics capabilities—see the
Technical Supplement.
The map also shows the locations of all major
capitals, cities, bases, and oil fields in the world.
Typically, cities and bases are black squares and
oil fields are small “+” signs (see the Technical
Supplement).The object of any scenario of Com-
mand HQ is to capture all of the capitals on the
map. Oil is important in some scenarios,to keep
the machinery of war and commerce running.
Zoom: You can zoom in on any area of the
map by holding the cursor over that area and
pressing Zoom. This shows the terrain in more
detail, and shows combat units at full size. Press
Resize Zoom Window to toggle through small,
larger, and full-screen zoom windows.
Press Scrolling Zoom and move the Control-
ler to alter the zoom position a little bit at a time.
To zoom in on a distant area, press Zoom to
unzoom, reposition the cursor, and zoom again.
The four screens below the map are called
Monitors One through Four. Each serves several
functions during the course of the game.
Monitor One shows you your oil status, in
games that use oil. Selecting the Alternate Func-
tion for Monitor One displays your opponent’s oil
situation. See page 27 for more about oil.
The Map
The
Monitors
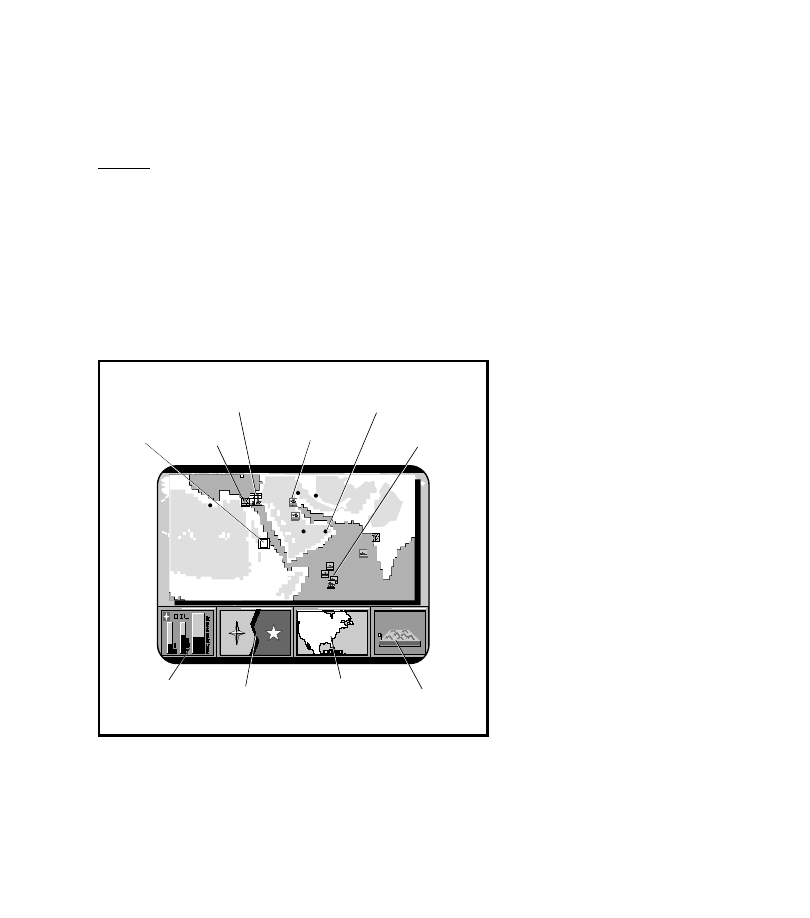
19
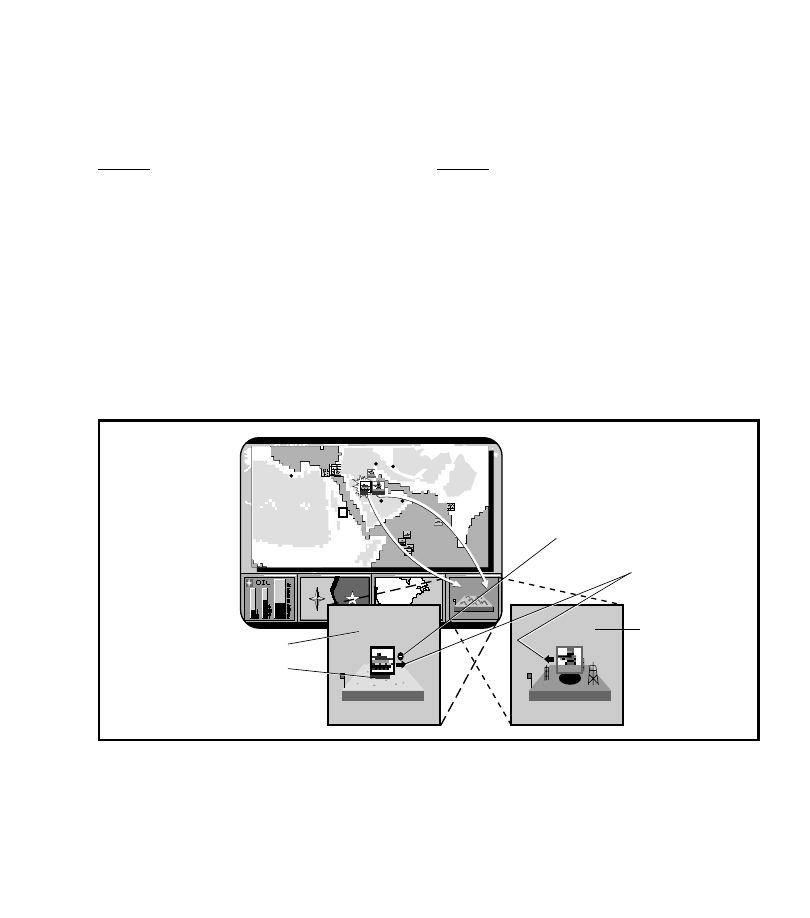
R
E
S
E
R
V
E
O
U
T
I
N
M O U N T A I N
Cursor
Red Troops
City
Oilfield
Sea Units
Monitor One
(Oil)
Monitor Three
(Capital Areas &
Round Counter)
Monitor Two
(Emblems)
Monitor Four
(Terrain/Units)
The Middle East Theater
Blue Troops
Below the monitors is a space for game mes-
sages. These include crisis messages such as “En-
emy threatening Hiroshima” or “Enemy sub spot-
ted in the North Atlantic,” messages typed and
sent by the opponent, announcements of capture
(“We liberated an oil field in Oman”) and results
of air missions.
You can set the level at which “threat” mes-
sages will be received (see “Menu Commands”
below). Level 0 gives no threat messages, level 1
gives warning only of serious threats, level 2 gives
warning of all threats, and level 3 gives all warn-
ings and announces the spotting of enemy units. It
is suggested that level 3 be used until you become
proficient at the game.
You can review previous messages on this
line by pressing Previous Message. The buffer
stores about 30 messages.
The
Message
Bar

20
Combat Units
Your
Units
Unit Diagrams
You can see your units as small icons (check
the Technical Supplement for exact shape and
color) when looking at the full map. You can
see a closeup in Monitor Four of any unit the
cursor is over. The closeup also appears in the
zoom windows, and in Monitor One when the
unit is selected.
Each unit represents an army, fleet, or air
wing of up to several thousand soldiers and ve-
hicles. Types of units include air, infantry, tank,
cruiser, carrier and submarine. All units except air
units have several common features:
Type Icon: Each unit type is recognizable
from the icon in the center of the unit. A summary
of icons appears in the Technical Supplement.
Strength Bar: A unit is at full strength when
the band of color at the bottom extends all the way
across the unit. As the unit takes damage in
combat, the bar recedes. A unit with no color bar
showing is very near destruction.
Background Color: A land unit has a distinc-
tive background color, usually white (see the
Technical Supplement). A sea unit has a different
background color, usually blue. When a land unit
boards transports and becomes a sea unit, its
background color alters from white to blue to note
the change.
Infantry Entrenchment: Infantry armies can
“entrench,” making them much harder to kill. An
entrenched infantry has an additional color bar
above its strength bar (usually green). If this bar is
not there, the infantry is not entrenched, and is
therefore more vulnerable.
Enemy units are hidden from sight until they
enter the scanning radius of one of your units.
Scanning radius ranges from very large (for active
air units) to very small (moving submarines). An
enemy unit remains hidden (does not appear on
the screen) until it is scanned.
Your recon satellite scans everything in its
radius (see page 29).
Submarines do not appear in the scan radius
of enemy units. Subs are only revealed when
they attack, or move into the fire range of an
enemy unit.
Enemy
Units
Strength Bar
Entrenchment Bar
Unit Symbol
Infantry Unit
Tank Unit
Sub Unit
Cruiser Unit
Carrier Unit
Air Unit
Satellite Unit
Satellite Killer Unit
Nuke Unit
Foreign Aid Unit
Intel Scan Unit
21
Movement
Movement
Orders
To order a unit to move, first select it. The
cursor changes shape, the selected unit flashes,
and its icon appears in Monitor One. Move the
cursor to the desired destination and press Selec-
tor #1. If the destination is illegal for that unit, a
warning sounds and a message is displayed in the
status bar.
Once movement orders are given, the unit
will begin moving towards the destination with-
out further commands. Infantry that are ordered
to move lose their entrenchment benefit (see page
22). A unit moves in a straight line over land, but
if a land unit’s path of movement lies across the
water, it will “board transports” and begin to
move along the sea routes. Naval units cannot
cross land.
All sea units (except transports, which are
slightly slower) move at the same rate of speed.
Land units move more slowly than sea units, and
infantry moves more slowly than tanks. Speed is
also dependent upon the type of terrain the unit
passes through.
Some types of terrain cause attrition. Attri-
tion causes a unit’s strength to drop each round
that the unit is in that terrain; strength cannot go
below 20 per cent of maximum due to attrition
(except in a nuclear wasteland).
Some types of terrain provide better opportu-
nities for defense. A unit on one of these spaces
suffers less damage in combat.
Speed,
Terrain,
and
Attrition
The following table is a summary of move-
ment, defense, and attrition effects of each type
of terrain.
When you select a unit and then select a
destination, the unit will move to that spot and
await further orders. It will go to that destination
regardless of the presence of attrition-causing
terrain, enemy units, or any other factor. Be sure
to keep an eye on your units as they move to make
sure you still want them to go where you told
them to go!
Showing a Destination: To see a unit’s
destination you can either press Show Desti-
nations or hold the cursor over the unit in ques-
tion. Pressing the key shows the target and travel
path for all your units. It is useful for getting an
overall idea of where your troops are going.
Holding the cursor over a unit shows only that
unit’s path and destination. This is sometimes a
little easier to see.
Terrain Effects
Routes
and
Goals
*These types of terrain allow friendly units to repair when resting in them.
†These types of terrain cause attrition only to enemy units.
Movement
Speed
Defense
Attrition
Base*
Full
Yes
Yes†
Capital
Full
Yes
Yes†
City*
Full
Yes
Yes†
Desert
Full
No
Yes
Dock*
Full Sea
No
Yes†
Forest
Slowed
No
No
Jungle
Slowed
No
Yes
Lake
Full Sea
No
Yes
Mountain
Slowed
Yes
No
Ocean
Full Sea
No
No
Oil Field
Full
No
No
Plains
Full
No
No
Polar
Slowed
No
Yes
Wasteland
Full
No
Yes

22
Sea Routes: Land units can board transports
and become sea units. When they do this, they
will begin to follow the sea routes, which are
sometimes tortuous-looking but are usually faster.
Note that the sea lanes are standard paths, and are
not always the most efficient. Be sure to check a
sea unit’s path when navigating near islands (such
as England, Japan, and Borneo) to make sure the
sea unit isn’t taking the long way around.
An infantry unit that does not move or engage
in combat (offensive or defensive) can “entrench;”
this represents anything from true trenches to
improved positions and the preparation of kill
zones. When an infantry is entrenched, a color bar
appears above its normal strength bar; this bar
disappears if the unit is ordered to move, but once
entrenched an infantry remains entrenched even
if engaged in combat.
Entrenched infantry suffer significantly less
damage from all types of ground and sea attack.
To move air power, first press Show Air
Power to view all planes. Then select the plane
you wish to move. Finally, select its destination
(this must be within the larger circle visible on the
world map). The air unit is immediately trans-
ferred to its new location, and becomes unready.
Air units may only be transferred to cities, bases,
and aircraft carriers.
An air unit may transport an infantry unit to
any land location (except enemy cities) via a
paradrop. To perform a paradrop, first press
Show Air Power and select an air unit. Then select
a non-moving infantry unit within three spaces of
that air unit.
The infantry may be paradropped within the
small air mission circle. Conducting paradrops in
the presence of enemy air power is a risky thing.
Infantry lose strength from the act of paradrop-
ping due to the fact that they must leave behind
their heavy equipment.
If the air unit transporting the infantry targets
a friendly city, the “paradrop” becomes an air
transport, and both the air unit and the infantry
unit are moved to the new location.
A typical infantry army represents 300,000 to
500,000 troops, with artillery, trucks, and heli-
copters. A typical tank army represents 100,000
to 300,000 troops, with artillery, armored
personnel carriers, attack helicopters, and 1,000
to 3,000 tanks.
When two opposing land units’ icons over-
lap, they engage in combat. To order a unit to
attack, simply give it a destination that overlaps
the location of an enemy unit.
Infantry are fairly fragile and deal out small
amounts of damage; entrenched infantry are en-
hanced defensively, but do no extra damage.
Tanks are overall best on offense and defense, but
cost twice as much as infantry.
When a unit engages in combat, it causes
damage to a single enemy unit once every other
round. The unit remains targeted on the chosen
enemy until one of them is destroyed or moves
away, or until a different enemy unit moves
closer, at which point it will be targeted. A second
friendly unit added to the combat inflicts damage
on the enemy, but takes none itself.
When units engage, they take on a “facing;”
that is, one of their four sides is considered the
“front” of the unit (the side nearest the targeted
enemy). If the unit is then attacked from the flanks
or rear, it takes additional damage.
When fighting, a burst symbol appears in
Monitor Four when the unit shown takes damage.
When a unit attacks or is attacked, some of its
movement ability is lost. Units that are heavily
engaged can become “pinned” and lose the ability
to move until enough time has passed, or until you
re-order them to a destination.
Land Combat
Combat
Tactics
Paradrops
Infantry
Dug - in
Moving
Air
Power
23
Combat Symbology
Land units can capture enemy cities, bases,
and oil fields. Oil fields have no defense, and
become part of a side’s territory when a unit from
that side occupies the field. The field remains on
that side (even if the unit leaves the field) until an
enemy unit occupies it.
Cities and bases have intrinsic defenses
against invasion, but a city alone cannot with-
stand attack from a full-strength combat unit.
Once a unit is given the destination of any
location in an enemy city, it will attempt to seize
the central portion of that city until given orders
to leave the city entirely.
If the unit reaches the center of the city
without being destroyed, that city is “liberated”
and joins the attacker’s side. The city remains on
that side (even if all combat units leave) until an
enemy unit occupies the central space of the city.
Combat
Against
Cities,
Bases,
and Oil
Fields
When a unit takes damage, its strength bar is
shortened to show the approximate percentage of
strength it has left. When this bar is completely
gone, the unit is very near destruction. When a
unit takes a hit that inflicts more damage than it
can absorb, the unit is destroyed; you’ll hear a
warning sound and see an appropriate animation.
A unit can recover strength by remaining in a
friendly city, base, or oil field. Sea units can
recover only in the dock spaces of a city. Each
round the unit is in such a space, it recovers some
of its lost strength, its strength bar gets longer, and
the message “Repairs” appears above the unit in
Monitor Four.
Units can never be repaired beyond their
starting maximum.
Unit
Strength
and
Repair
R
E
S
E
R
V
E
O
U
T
I
N
M O U N T A I N
MOVING
D E S E R T
O I L F I E L D
PINNED
Reduced Strength Bar
Status Message
Hit Indicator
Facing Arrows
Status Message
Monitor Four (when
Cursor is on Tank
Unit Symbol)
Monitor Four (when
Cursor is on Infantry
Unit Symbol)

24
Sea Combat
Air Power
A typical sea unit represents an entire fleet of
ships and its support units. A carrier represents 3-
10 carriers each with about 100 aircraft, plus 40-
50 support ships. A sub represents 50-100 subs. A
cruiser represents 10-20 cruisers and battleships,
with 100 or so support ships (destroyers, frigates,
PT boats, etc.).
In general, sea units follow the same rules as
land units as far as targeting enemies, facing, and
taking and receiving combat damage. Sea units’
combat ranges are usually larger than those of
land units, but the procedures are the same.
Sea units that engage in combat do not suffer
a loss of mobility; sea units are never “pinned.” In
addition, there is no “flanking” at sea.
Submarines are hidden as long as they do
not move; if they move, they can be spotted by
a stationary enemy, and attacked normally. Once
spotted, they can be seen at normal scan range.
Otherwise, they attack and are attacked only
when within two spaces of the enemy.
Land units that move out to sea become
“transports” with extremely limited ranges and
combat power.
A typical air unit consists of 1000-1500 air-
craft, including 100-200 heavy bombers, 100-
300 transports, 200-400 fighters, 100-300 strike
aircraft, and 100-200 miscellaneous aircraft, such
as electronic warfare and reconnaissance planes.
An air unit based from a carrier represents propor-
tionately fewer planes. This is partly because
carrier crews are expert at getting multiple mis-
sions out of their planes, and partly because a
carrier craft cannot perform paradrop missions
(and thus has no transports).
To enter Airplane mode and view air units,
press Show Air Power. In the world view, each air
unit is visible in its base, city, or aircraft carrier
(see the Technical Supplement for details). Ac-
tive air units are distinguished from inactive,
usually by color.
All air units are either active or inactive.
Active air units can be given missions when in
Airplane mode. Giving an active air unit a mis-
sion causes it to become inactive for eight rounds
after the mission is completed.
An active air unit can also become inactive if
an enemy air unit performs a mission within ten
spaces, as the unit must scramble to perform
Combat Air Patrol (CAP). This is called the CAP
radius of the unit. CAP is performed automati-
cally. Air units rendered inactive by performing
CAP are made inactive for only four rounds.
Inactive air units can still perform CAP, but
at reduced effectiveness. An inactive unit per-
forming CAP has its amount of inactive time
increased by four rounds. Inactive units can per-
form no other type of mission.
Selecting an inactive air unit causes a mes-
sage to be displayed that tells what round the air
unit will become active.
All active air units automatically carry out
reconnaissance flights over the surrounding
area, exposing all enemy units (except subma-
rines) to view. Inactive aircraft do not perform
reconnaissance flights, so using an air unit
might cause some enemy units to disappear from
your view during the air unit’s subsequent
period of inactivity.
Active
vs.
Inactive
Air
Units
Air
Recon
Sea
Combat
differs
from
Land
Combat

25
Air units that are based on carriers may not
perform paradrops.
Air Strike: To perform an air strike, select an
enemy unit (land or air) as the destination. If the
target is a land unit, then half its remaining strength
is lost to the air strike. If the target is a sea unit,
then a constant amount of its strength is lost.
Thus, sea units can be destroyed by three air
strikes, but land units can take six strikes.
Bombing: If you select an unoccupied en-
emy city, base, or oil field space as the destina-
tion, then that target will be “bombed.” Bombing
deducts resources from the opponent — money
if the target is a city or base, oil if the target is an
oil field. In addition, a city or base will be unable
to produce new units for five (additional) rounds
(see page 28).
All air missions except “transfer” have a
chance of failure, regardless of the presence of
enemy air units. This chance is increased when
attacking enemy cruisers or carriers, and is also
increased the closer the mission is carried out to
an enemy air unit (active enemies are more deadly
than inactive) on Combat Air Patrol. Air units
perform CAP automatically. An air unit that fails
a mission might become unready, or it might be
shot down.
If you attempt an air mission (except transfer)
within ten spaces of an enemy air unit, there is a
chance your mission will be intercepted and the
two air units will “dogfight.” This may result in
the enemy being shot down and the mission
succeeding, in an aborted mission, or in your
plane being shot down. Inactive enemies are less
likely to intercept.
Note that the chance of your mission being
intercepted rises as you perform the mission closer
to enemy aircraft, but that the resulting dogfights
are always an even battle.
To have an air unit perform a mission,
select that air unit while in Airplane mode. Two
circles appear around the unit. The smaller is the
“restricted air radius” in which most missions
must be performed. The larger is the “maximum
air radius.” This radius is used for unloaded air
transfers only.
Loaded/Unloaded Air Transfer: To per-
form an unloaded air transfer, select a friendly
city, base, or aircraft carrier within the “maxi-
mum air radius” (the larger circle) of the air unit.
The air unit will move to the new destination and
become unready (air units can transfer directly
from the city they are in to another location in the
same city).
Air units can also transfer friendly infantry.
Infantry must be within three spaces of the air
unit’s start point, and be entrenched, in order to be
the subject of an air transfer. If you select such a
friendly infantry unit as the air unit’s destination,
you may then select a friendly city or base within
the “restricted air radius” (the smaller circle) of
the air unit. The air unit and the infantry are both
transferred to the new destination; the air unit
becomes unready.
Air units based on carriers cannot perform
loaded transfers, as they have no transport craft as
part of their wing.
Paradrop: If an infantry is selected as above,
selecting a destination anywhere within the
small circle other than a friendly city or base
executes a paradrop. In a paradrop, the following
restrictions apply:
1) The target must be on land, and may not be
directly on an enemy city or unit.
2) The air unit remains at its original base and
becomes unready.
3) The dropped infantry suffers a minor com-
bat loss.
Air
Missions
CAP/Air
Defense
26
Air Missions
An air unit has been selected after pressing
Show Air Power. If Selector #1 is pressed while
the cursor is over an enemy unit, an airstrike
will be performed. If Selector #1 is pressed with
the cursor over a friendly entrenched infantry
within three spaces, a paradrop / air transfer will
be designated.
R
E
S
E
R
V
E
O
U
T
I
N
O C E A N
J E R U S A L E M
R e s t r i c t e d
Air Zone
Cursor
Enemy Infantry
(Cursor here to perform
airstrike)
Friendly Infantry
(Cursor here to load
for paradrop)

27
Economics and Oil
An oil shortage can cause your units to stop
moving, your planes to be unable to fly, and your
cities to stop producing income. An imbalance in
your “oil budget” is signalled when the word OIL
in Monitor One flashes red. When your reserves
are exhausted, you will begin to see messages
indicating the effects of the crunch. The red bar
above the “Out” oil column indicates how much
oil you would be using if you had enough for all
your units and cities.
Cities and bases use a great deal of oil. Air-
planes use more oil than land units. Land units
that are not in motion use very little oil. Ships use
no oil, partly because many of the ships repre-
sented are nuclear-powered, but also because oil
used by ports takes into account naval refueling
and maintenance.
Although it sometimes seems like war is an
end in and of itself, the true purpose of war is
usually to seize economic objectives. In Com-
mand HQ there are two types of economy that
drive the machinery of conflict: money and oil.
Each round, each of your cities produces 50
million dollars in income; this money is used to
purchase new units and, depending upon the sce-
nario, to pay for a variety of useful effects such as
nuclear weapons and intelligence scans. By se-
lecting the Alternate Function for Monitor Four,
you can display not only your current money
supply (in whole billions), but your income in
billions per round (not rounded). Press the key
again to see your opponent’s income. The oppo-
nent’s available funds are secret.
All things being equal, the nation with more
cash will eventually win the game. Thus, you
must conquer cities to gain an economic edge.
Once you can outspend your opponent, you can
produce more troops than he can, and the final
victory is just a matter of time.
Or so it seems. In the 1986 and later scenarios,
however, oil becomes a major consideration. You
can have economic might and still lose if your oil
situation is not taken care of.
Oilfields produce oil. You can keep track
of your current oil situation in Monitor One.
This displays the amount of oil you are
currently using (“Out”), compared to the amount
of oil you are currently producing (“In”). By
selecting the Alternate Function, you can toggle
back and forth between your own oil situation and
your opponent’s situation.
Cities &
Cash
Oilfields

28
R
E
S
E
R
V
E
O
U
T
I
N
O C E A N
S AT L K I L L E R
U S E N U K E S
F O R E I G N A I D
I N T E L S C A N
M O N E Y - 9 ( B I L L I O N )
T Y P E C O U N T K N O W N
6 2 1 0
5 0 2 0
0 0 1 0
1 1 1 0
1 0 2 0
3 0 2 0
1 1 1 0
5
1 0
1 0
1 0
To purchase new units, press Buy Units. This
brings down a menu showing all units available
for purchase in the game. The next two columns
list the numbers of each unit type which you
possess (“Count”), and the number of enemy units
that are visible (“Known”). Your opponent is
likely to possess more units than those listed —
the number given includes only those units cur-
rently visible to you.
The last column lists the cost per unit of
purchasing the indicated item, in billions. To
purchase a new unit, highlight your choice with
the Controller and select the icon with Selector
#1. The money is instantly subtracted from your
funds and the production screen vanishes. You are
then asked to place the new unit.
Placing
New
Purchases
Production Screen
Number of Each Type
You Have
Unit Costs
Total Funds Available
Number of Each Type
Enemy has Revealed
Production
General Placement Rules: Once you have
produced a unit, you must place it. In the
“Placing New Units” mode, every city and base
you own is highlighted on the map (see the
Technical Supplement).
Land units and aircraft may be placed in any
friendly city or base. Ships may be placed only on
docks. Thus, if all your ports have been con-
quered, you cannot produce new ships.
Readiness: Each time a city or base
produces a unit, that city and several surround-
ing cities become unready, much in the same way
as air units. The amount of time a city is unready
is proportional to the cost of the unit built in or
near it, and the number of friendly cities (and
especially capitals) nearby.
When you are placing your purchase, ready
cities are highlighted in one way, unready in
another; in some versions, cities that are almost
ready are highlighted in a third color — see the
Technical Supplement for details.
If you attempt to place a new unit in an
unready city, a message appears in the mode bar,
telling you in what round the city will be ready.
Placing Non - Unit Purchases: See pages
29, 30, and 31 for placement of satellites and
nukes, and the use of foreign aid and
intelligence scans.
Escape: If you escape before placing the
purchased unit, the funds are returned to you.
29
Satellites
R
E
S
E
R
V
E
O
U
T
I
N
O C E A N
Satellites
Satellite killers are used to knock reconnais-
sance satellites out of orbit. Satellite killers are
purchased as any other unit; to place a satellite
killer, select a destination on the satellite map.
The satellite killer begins over your home capital
and moves quickly to the selected destination.
Once a satellite killer reaches its selected
destination, it explodes, destroying all satellites
within its kill radius (about six spaces on the world
map). If your opponent moves his satellite, you’ll
have to give your satellite killer a new destination
to avoid detonating in empty space.
In the 1986 and 2023 scenarios, satellites and
satellite killers are available for purchase. To
view existing satellites, press Show Satellites. A
small insert box appears, showing the locations of
all satellites on both sides.
Each satellite has a reconnaissance radius,
shown as a circle surrounding that satellite on the
satellite map. Within this radius, all enemy units
are exposed except submarines.
Satellites can be purchased like any other
unit. To place a new satellite or move an existing
satellite, select the satellite and then select a new
destination, as with other units. Satellites move
much faster than ground and sea units.
Each time a satellite is moved, it uses up a
little of its booster fuel. While “satellite sweeps”
are an effective way to keep track of your oppo-
nent’s forces, they will ultimately knock your
satellite out of the sky.
Satellite
Recon
Buying
and
Moving
Satellites
Satellite
Killers
Satellite
Killer
S c a n n i n g
Radius
Observation
Satellites

30
neutral if part of the offending alliance, or shifting
to the enemy if already neutral.
The number of cities that switch is partly
random, and partly determined by civilian casual-
ties (represented by destruction of cities) and
friendly casualties caused by the nuke. Also, the
first side to use nukes suffers an additional penalty
in this regard.
Production Reduction: After a certain num-
ber of nukes have been dropped, the overall del-
eterious effect on the Earth’s biosphere begins to
be felt. All city production is reduced by 25 per
cent or more when this occurs.
Nuclear Winter: When the ash and haze
from too many nuclear explosions threatens to
bring about a new ice age, a warning sign appears
with the dropping of each nuke. With each new
nuke, there is a chance that true nuclear winter will
occur, and the game will be a loss for both sides.
Foreign Aid enables you to sway the loyalty
of other nations, causing hostile ones to become
neutral, or neutral ones to become allied. To use it,
choose the Foreign Aid icon from the Purchase
Units menu, then select a city within the nation
you wish to sway. It may take more than one use
of foreign aid to gain a nation’s services — the
more cities it has, the more it will take to sway it.
Cities within an opponent’s home country can
never be the target of foreign aid.
Your opponent can give foreign aid to the
same targets you do, thus negating your efforts,
but only large countries make it known that they
have received foreign aid. You may be able to gain
a smaller ally without interference.
Once a nation switches to your side, however,
your opponent might try to sway it back. Garrison
its cities quickly to avoid this.
Violating Neutrality: Foreign aid can be
used even during wartime, where it represents aid
to insurgents, partisans, and other disruptive forces
Nuclear Warfare
In the 1986 and 2023 scenarios, you have the
option of deploying nuclear weapons. Nuclear
weapons are launched from indetectable ballistic-
missile submarines (i.e. they are not represented
by specific units in the game). They can be tar-
geted against any location except national capitals
and locations very near to such capitals, which are
protected by SDI/ABM networks.
Nuclear weapons can be “bought” like any
other unit, by selecting from the Purchase Units
menu. Once bought, a nuclear strike is used once.
A nuclear strike costs 10 billion dollars. Once
purchased, the nuke is deployed by selecting a
location on the map.
Restrictions: Capitals are protected by SDI/
ABM, so nukes cannot be used within a certain
distance of any capital. In addition, your missile
crews will refuse to target a nuke in your home
country (even if it’s been invaded).
Finally, there is the “three-nuke” restriction:
your missile crews will only fire three more nu-
clear weapons than your opponent has used. Thus,
if you fire three strikes, you may use no more until
your opponent uses one.
Kill Zone: A nuclear strike destroys all units
and all terrain within three spaces of ground zero.
This includes all land units, sea units, air units,
cities, bases, and oil fields. Only satellites and
satellite killers are unaffected by the nuclear strike.
Wasteland: After a nuclear explosion, all
land area covered by the blast radius is converted
to wasteland, including cities, bases, and oil fields.
Wasteland is radioactive, and causes ex-
treme attrition that can destroy a unit. Don’t
enter wasteland!
Diplomatic Effects: World opinion is heav-
ily against the use of nuclear weapons. Therefore,
whenever a nuke is used, some number of cities in
the world will shift their alliance, either becoming
Diplomatic Warfare
Buying
and
Using
Nukes
Effects
of Nukes
Foreign
Aid

31
within a conquered nation, or continued diplo-
matic efforts on a neutral. If the enemy captures a
city within a neutral country, the remainder of that
nation can be swayed to your side with only
minimal foreign aid efforts.
At the start of the 1986 and 2023 scenarios,
and at any time during those scenarios that both
players agree, peacetime conditions prevail. At
the start of the game, this is called the cold
war. During a war, it is called a cease-fire. In
either case, several special rules are in effect
during peacetime.
Duration: Peace lasts for a pre-set amount of
time, depending upon the scenario. A counter in
Monitor One tells you how much time remains in
mandatory peace; after that, either player can start
the war by pressing Begin Hostilities/Cease Fire.
Unit Transfers and Production: During
peacetime, units may be transferred from one
location in the world to another, instantly. Simply
select the unit once, then select its new location.
This does not cause air units to become unready.
Units may be produced normally, but need
not be placed in cities; units may not be produced
in or transferred to neutral or enemy territory
(foreign aid can be especially important during
peacetime). Producing units does not cause cities
to become unready during peacetime.
Starting Destinations: A unit can be given a
destination to which it will start to move the
moment war begins. To give a unit a destination,
select it twice, then select its destination. Destina-
tions do not have to be within friendly territory.
Air missions cannot be predetermined.
Oil and Economy: Regardless of the number
of cities or units, a side does not use or generate oil
during peacetime. Cash, however, still accumu-
lates, and at an accelerated rate.
Intelligence Scans (Spies): During peace-
time, the opposing player’s troops are “invisible.”
This is mainly due to the difference in time scale:
his troops exist, but where they will be stationed
in time of war is top secret. The Intel Scan
represents the use of spies, and can give you an
idea of his plans (i.e. his disposition of troops
during war).
When you select Intel Scan from the Purchase
Units menu, the world map shades over. A single
bar runs across the screen, beneath which all units
are revealed — including your opponents’.
Your opponent receives a message that you
are performing an Intel Scan, so be aware that his
dispositions might be changing even as the scan is
taking place.
Peace
32
Menu Command Summary
Following is a summary of all commands
that are available across the hidden menu bar
at the top of the screen. To access the menus,
move the Controller into the Mode Bar; the menu
bar appears. Use the Controller to move from
menu choice to menu choice; use Selector #1 to
enact a command.
Enacting these changes the menu bar to the
Game Functions menu; see page 34 for how to use
these commands.
Use this command to scroll between
warning message levels. Level three warns of all
threats to friendly cities, and of enemy units
spotted; level two warns of threats only; level one
warns of only “serious” threats; level zero gives
no warning messages.
Enacting this command during peacetime al-
lows you to begin hostilities, but only after the
mandatory time has elapsed. Enacting this com-
mand during wartime allows you to ask for a
cease-fire, or to resign. Your opponent must agree
to your proposed cease-fire, or the war continues.
Use this command to examine terrain features
and ownership of cities and oil fields. When in
Terrain Mode, all units are removed from the
board. Enacting this command again returns the
game to War Room mode.
Options
Menu
Message
Level
War
Status
Show
Terrain
Use this command to examine all known air
units on the map. While in Airplane Mode, air
units can be given missions.
In Chat Mode, you can communicate with
your opponent. After enacting this command,
simply type whatever message you wish to send.
It will automatically appear (as you type it) on
your opponent’s message bar at the bottom of his
screen. If he replies, his messages will be dis-
played for you.
To exit Chat Mode, enact this command or
press Selector #1.
When this command is enacted, the Purchase
Units menu appears. To exit this mode, press
Escape or the ‘ key or toggle Buy Units again.
This command turns the world view into an
ownership view. It shows which side controls all
cities, bases, and oil fields, and also shows all
units. In addition, national boundaries of friendly
countries are outlined, to help you in placing units
during peacetime.
In Destination Mode, each unit’s path is shown
as a line on the screen (this works in zoom as well).
While large numbers of units’ destinations are
hard to distinguish, this command is useful for
getting an overall idea of where you’ve ordered
everyone to go.
When this command is enacted, the satellite
map appears, showing the location of all satellites
and satellite killers. Satellites and killers may be
given destinations on this screen (only).
Show Air
Power
Chat
Buy
Units
Show
Owner
Show
Paths
Satellite
Mode

33
To define a macro, zoom to the area you wish
to program. Center the zoom box in an area you
like, size it to your preference, and set up the
background the way you wish (such as Show Air
Units or Show Ownership). Then press Program
Screen Macro.
This information is saved throughout the game,
and between games. To return to that exact zoom
location and window size, simply press the Execute
Macro key corresponding to the ID of the macro
you defined. For example, in IBM systems you
would press the ALT key plus a number to define
the macro. From then on, pressing that number
alone would send you to the pre-set window
location and size.
The following commands are all available to
help you customize and speed up your game. Due
to the real-time nature of the war, these can be
quite useful.
By pressing Zoom to Monitor Three you can
move quickly to crisis spots, but sometimes that’s
not enough. Often, a war is broken up into distinct
theaters, and you need to be able to scroll through
them on a regular basis. You can do this with
programmable screen macros, which are a method
of storing specific zoom locations in memory.
G
AME
A
IDS
Screen Macros
Defining
Macros
3. S
PECIAL
F
UNCTIONS

34
The first four macro IDs are already pro-
grammed into the game, but can be overwritten.
They zoom to Europe, the Middle East, Japan, and
North America.
To return to the screen position you had
before executing the macro, press Undo Macro.
To alter the zoom area of a macro, simply re-
define it.
These commands deal with the input devices
supported by Command HQ. They allow you
further to fine-tune the play of the game, making
it faster and more efficient.
If you use a joystick or mouse, having to let go
and use the keyboard can sometimes be frustrat-
ing. Therefore, as many commands as possible
have been placed on the menu bar for easy access.
However, there may be a command you use par-
ticularly often to which you would like especially
free access. You can get this by programming
Selector #2.
To do this, press Program Selector#2 and
Selector #2. Then press the key whose function
you want Selector #2 to enact. This “macro”
will be saved from game to game and session
to session.
These commands allow you to adjust the
sensitivity and reactions of the keyboard, joystick,
and mouse.
Keyboard: Press Calibrate Keyboard to
change the speed and sensitivity at which the
Controller keys move the cursor. High sensitivity
moves the cursor fairly quickly, and adjusts its
position one space for every tap of the Controller.
Low sensitivity moves the cursor very slowly,
even when the Controller is held down.
In addition, you can decide if you want the
cursor to pop into the center of any windows you
create by setting “Move Cursor” on. With “Move
Cursor” off, your cursor will not move to these
windows upon opening.
To set the sensitivity bar or to toggle “Move
Cursor,” place the Controller over the level of
sensitivity you want, or in the “Move Cursor”
box, and press Selector #1.
Mouse: You can do the same thing with the
mouse by pressing Calibrate Mouse. Using the
mouse selectors, choose your level of sensitiv-
ity and whether or not you want the cursor to
pop automatically to the middle of any windows
you open.
Joystick: The joystick moves at a constant
speed; Calibrate Joystick should be pressed with
the joystick centered. This command only re-
calibrates the joystick.
Restart/Quit: Press Restart to return to
the Main Options menu. Press Quit to exit
Command HQ.
Pause: Press Pause to halt the game. In a two-
player game, only one player need press Pause to
pause the game. Both players must “unpause” in
order for the game to begin again. The message
“Opponent Waiting” appears if your opponent
has unpaused but you have not; “Waiting for
Opponent” appears if you have unpaused but he
has not.
Volume Control: Press Volume On/Off to
toggle the sound on or off.
Speed: By pressing Speed Up or Speed Down,
you can alter the game from speed 6 down through
speed 0. Speed 6 moves extremely fast, and is best
for watching films and speeding through periods
of little activity (which are relatively rare). Speed
1 moves extremely slowly, and is useful at the
beginning of a large battle before all units have
I/O Commands
Other Commands
Undoing
Macros
Program
Selector
#2
Calibration
Commands

35
received orders. In a normal two-player game,
you and your opponent should agree beforehand
as to what speed you wish to stay at. High speeds
put time pressure on you and your opponent, if
you wish that to be a factor in the game.
At speed 0, game-time does not pass at all. It
is similar to a pause, but units can still be given
orders, and air strikes can still be carried out.
Speed 0 is useful for playing two-player games at
a single machine.
Command HQ is a game of hidden movement
and surprise maneuvering; “can he see me?” is an
important part of the strategy and tactics.
During a game, you see your own units, and
any enemy units within scanning range. By press-
ing Toggle Show-Who, you can switch to “Show
Common” mode, which displays only those en-
emy units in scanning range — and only those of
your units that are in the scanning range of an
enemy! Using this, you can sometimes tell if one
of your subs has been spotted, or if your surprise
attack is really a surprise.
During a film (replay), you can toggle between
four different views: Show Red, Show Blue, Show
Common, and Show Both. Show Red and Show
Blue show all the units of the selected side, and
those units of the other side that are within scan-
ning range. Show Common is the same as in a
game. Show Both shows all units of both sides.
In addition to changing who is seen, you can
actually switch sides during a game. To do this,
press Switch Sides. This only works in a solo game
or a game against “no opponent.”
Switching sides can be especially useful when
playing a game with two players at one machine.
To do this:
1) Select “No Opponent” in the Opponent
Options screen.
2) When the game begins, set to speed 0
before unpausing.
3) The player whose side is showing gives
orders to any or all of his units. Since air strikes are
actually resolved at Speed 0, you may wish to
limit the number of air strikes (but not air transports)
a player is allowed to perform in each “turn” at the
computer — a limit of two is fair.
4) Push Toggle Show-Who until “Show Com-
mon” appears, and press Switch Sides.
5) That player leaves the machine, and the
other player sits, agrees to switch sides, and toggles
Show-Who to show his side. Then he gives orders.
After giving orders, he can toggle back to
“Show Common” and speed up the game for an
agreed-upon number of rounds (four rounds is
fair) so both sides can watch, or he can stay with
his own view and speed up for an agreed-upon
number of rounds. At the end of those rounds
Show Who
Games
and
Films
Change
Sides

36
S
AVING
G
AMES
repeat steps 2-5.
During the course of a game, you may want to
stop and save the game to play at a future time, or
you may want to have a record of the game before
you continue playing.
To save a game, press Save Game. A menu
appears for both players, listing the current saved
games. Select the title you wish to overwrite
(“Untitled” is a new space for saved games) and
use the backspace and letter keys to type a name
for your saved game. When saving a two-player
game, both players must save the game, but they
don't have to save the game under the same name.
Once saved, to resume the game then or at any
other time, select “Resume Saved War” from the
Main Options menu, and select the game you wish
to resume. If both players have selected the same

37
L
AYOUTS
game, it restarts at the moment it was saved.
In the 1986 scenarios only, you can create a
“custom layout” to pit against the computer
opponent, or your friends’ custom layouts. To
create a custom layout, select “Lay Out Armies”
from the Main Options menu.
This puts you in a special version of the pre-
game setup, in which you can move your units
freely within friendly territory, give units
destinations, and buy new units with your starting
funds — but you cannot use intel scans or foreign
aid, and you do not accrue money.
Once you have set up your units in a config-
uration you like, press the Save Setup key and give
your setup a name as in “Saved Games” above.
To select this setup, play a 1986 scenario. The
game will ask you if you want to use the standard
setup, or one of your own. Choose the second
option to access the Saved Layout Menu and
select the one you want. The game will open with

38
G
AME
F
ILMS
your units in your preset configuration.
After each game, a special replay (called a
“film”) is available for viewing. To see a replay of
your game, go to the Main Options menu and
select “Watch a Film.” You’ll see the previous
war replayed. While watching, you can zoom and
get other information, but you cannot “play” the
film (but see below).
Saving a Film: If you like a particular war
enough to keep a permanent record of it, go to the
Main Options menu and select “Save a Film,”
then give this film a name as in Saved Games and
Saved Layouts above.
Load a Film: To view one of your saved
films, select “Load a Film” from the Main Options
menu, and select the film you wish to see. This
film will be loaded into memory. Then select
“Watch a Film” to see the replay.
During a film, you can bring the computer
opponent in at any time and turn the film into a
solo game by pressing Film to Game. This begins
the game with the setup currently available for the
film. You’ll play the side that was currently being
played at that machine. This can be a good way to
see where you went wrong.
You can turn this solo game into a two-player
game by pressing Solo to Two-Player. You’ll
have to transfer a saved version of this file to your
opponent in order to start the two-player game
(although, if your opponent has a saved game of
the same era that is longer than yours, he can start
that and the synchronization process will default
to your game).
Films to
Games

39
G
ENERAL
S
TRATEGY
The first thing to consider with general
strategy is to have one. Having no overall battle
plan — simply striking at targets of opportunity
— will lead you into a muddle of constantly
changing priorities, and a concerted effort by
your opponent can catch you off guard and over-
whelm you.
Remember to be flexible in your plans. If it
appears that a campaign is not going well, aban-
don it or send it additional resources. Don’t throw
away an army that cannot win simply because “it
was the plan.”
Patience is a virtue that cannot be given
enough praise. If you don’t have the local force to
take a city, for instance, and your nearest city
won’t be available for building for ten rounds …
wait. Throwing away armies on a risky attack will
only weaken your overall situation. If in ten rounds
your opponent has gotten stronger, then at least
that strength is not being used to harrass you
elsewhere. Tying forces up can be as effective as
destroying them.
As you move from theater to theater, ask
yourself: is this theater worth fighting over?
What am I trying to gain? Do I need more re-
sources? What is the priority of this theater over
other theaters?
Don’t stagnate. If you find yourself in a
situation where neither side seems to be doing
much of anything (recovering from a large battle,
for instance), see if there is anything you can do to
break the deadlock. A good chess player knows
about pinning, protecting, and counter-threats. (If
you know such a player, ask him.) Can you attack
4. A
DVICE
& H
INTS

40
another nearby target such that the forces opposing
you must choose which to defend? Can you bring
up additional reinforcements to counterattack a
weakened foe? Can you open up a whole new
theater for your opponent to worry about?
In summary, having a strategy is important
because it allows you to allocate resources quickly
and decisively. A few extra units can usually turn
the tide of battle, and a sound strategy will help
you use all your resources to their utmost.

41
G
ENERAL
T
ACTICS
Aircraft
Naval Tactics
The Big
Guns
area in order to transfer an air unit from one front
to the other (this is especially true in 1942 for the
Red player). If all else fails, build a carrier to
transport your air to where it is really needed.
Bombing is useful when assaulting a single
city. When a city is bombed, production is delayed.
If your timing is good (or you have two air units
available) you can suppress the city long enough
to take it without a fight, or at least without
reinforcements popping up just as you are about to
occupy it.
Don’t overlook paradrops. They are risky,
but in certain situations (equal forces and an
attacking enemy) having even one unit in the
opponent’s rear can swing things your way,
destroying two or more of the enemy before he
can react effectively. Paradrops are best used
sparingly, but don’t forget their existence. Also,
paradrops are a good way to take a city surrounded
by attrition-causing terrain, since you can avoid
some of it by flying over.
Sea units, unlike land units, have differing
attack ranges. Try to use this to your advantage; if
your opponent is not paying attention, pulling
back your cruiser when it meets his sub can be
devastating: the longer range of the cruiser allows
it to sink the sub without suffering any return fire.
Ditto for carriers, which can stand off and sink
even cruisers if the cruiser does not pursue properly.
Conversely, if you are on the losing end of a
“range contest,” either get out immediately (and
suffer the long range fire as you leave) or bull
ahead right into the enemy’s throat. Otherwise
he’ll stand off and sink you.
A single air strike can often decide a battle
in favor of your side. Concentrated air power is
one of the most potent forces in the game. How-
ever, air units are fragile and hard to replace, and
by war’s end they tend to wear away to nothing.
An entire war can be decided by the loss of a
handful of air units.
Don’t squander your air. Don’t try to run
missions near active enemy air units, or you run a
huge risk of being shot down. Instead, first gain air
superiority in dogfights by bombing or striking
targets within three spaces of the enemy air.
Strike first. Hit at his air before he hits at you.
It’s a fifty-fifty shot on who gets shot down, and
if you succeed you get the added benefit of the
bomb or strike. Even if nobody is shot down, you
can run missions when all the local enemy air is
unready. It’s still risky, but not complete folly.
Even if you are shot down, at least their aircraft
will be unready for a while and you will be safe
from retaliatory attacks.
You can destroy sea units with air strikes,
but it’s almost impossible to do so with land units.
For land units, strike only when the loss of strength
will be decisive in a battle and when the land unit
is at a fairly high strength — the stronger the unit,
the more it will lose. Sea units far from home are
worth striking any time. Once damaged, the sea
unit is more vulnerable to your own sea power.
Don’t be afraid to transfer an air unit. It
puts the planes out of action, but that’s better than
keeping them in an unimportant theater, striking
at targets that make no difference. To this end,
check your routes. You may find that you need to
capture a particular city or a city in a particular

42
Flank the enemy. Position counts — check
the enemy unit’s engagement arrow, and attack
from a different angle. That attacker deals out
extra damage. This is what makes paradrops so
deadly, dropped in the enemy’s rear.
Don’t over-engage. Two land units fight
when their icons overlap. There’s no need to go
deeper into enemy territory — you might end up
engaged with additional enemies who will be
giving you damage and taking none in return.
Also, if you start losing the fight, it is harder to
disengage if you are in too deep.
Exhort your troops. A pinned unit can be
unpinned by reiterating its movement orders.
Sometimes you can save a unit’s life this way,
extricating it from a losing battle just in time. It
may take several new orders to succeed, though.
Know the strengths of different units in
different terrain. Can a tank defeat an entrenched
infantry in the open? In a city? Can a weakened
infantry take an unoccupied city? Once you learn
the usual victor in a variety of situations, you will
be better able to judge your relative strength in an
impending battle. (The answers are: Yes, No,
Usually not.)
The tactics for land units also apply somewhat
to sea units, although “line” battles are rare at sea.
In the modern scenarios, you should remember
to utilize your new weapons to greatest effective-
ness. Don’t forget about satellites and nukes.
Keep your eyes open! Don’t let a killer satellite
get launched without moving your satellite! And
try launching a killer of your own occasionally.
Satellite “sweeps” can be very effective —
and can reveal a secret invasion fleet moving in on
your capital! Use them sparingly, though, because
moving the satellite uses up its fuel. When things
seem static, try a sweep. You might (not) be
surprised by what you find.
Never, never, never send unescorted trans-
ports into an unknown sea. A single enemy sub
can sink a dozen transports without working up a
sweat. Three or four submarines spaced
strategically can blockade the entire Atlantic.
When you send out transports for a naval invasion,
send carriers or cruisers just ahead of them to clear
the way, and have them stop occasionally to scan
for moving subs. If your warships encounter enemy
vessels, stop or reroute the transports immediately,
lest they continue sailing blindly into a raging
naval battle.
Combined arms use of naval power to bombard
coastal defenders can be a devastating tactic. A
defender who is otherwise unkillable can be
reduced to 20 per cent of his strength and is then
easy prey for land attack. This takes time, but
patience is the key. Meanwhile, beware enemy
vessels appearing from nowhere to lift the seige.
Try to protect your bombarding units with other
sea vessels nearby.
Moving subs are pretty much like any other
sea unit — worse in fact, since they can’t bombard,
and have a shorter range than other sea units.
Motionless subs are your secret weapon.
Use Show Who to see who can see your sub.
Move it if you have to, but don’t move within
scanning range of an enemy or you’ll be spotted.
Instead, use the cursor to find out the general
direction they’re heading and try to cut them off.
This can be especially deadly against transports.
Overload the enemy. Never use one unit
where two will do; he can only engage one of your
troops at a time, and the other dishes out punish-
ment and takes none in return.
Land Tactics
Satellites and Nukes
Naval
Invasions
Navy
Guns
Subs
Satellites

43
Nukes are a basic exercise in economy: they
cost 10 to wield, and lose income permanently in
the form of cities that leave your side. Most games
last 200-300 rounds, so losing even three cities
can cost you as much as 45 billion over the long
run. Are you destroying 55 billion worth of the
enemy (or saving as many cities as you’ll lose)? If
not, maybe it’s not worth it.
In general, you can cut down on the ill will
from a nuke by avoiding cities and not killing any
of your own units (always a good idea). Otherwise
you could see seven or more cities leaving your
alliance! Avoiding first use is also a good idea.
To defend against nukes, try not to leave your
troops too bunched together. Since you need to
group up for effective attacks, this can be a problem.
Still, you can avoid being too obvious a target by
spreading out an immense invasion fleet, or
refraining from putting three or more airplanes in
a single city. Remember that you get a nuclear
umbrella when on your opponent’s home country
or when quite close to anyone’s capital. Also, if
you have the nerves to let your opponent bomb
you three times without replying, you are safe
from nukes for the rest of the game.
In scenarios that use oil, it is the most important
factor in the game — until you have enough, at
which point it becomes completely unimportant.
The first thing to do is secure enough oil to
keep going. This could involve foreign aid for
nearby bases (see below) since you can’t build
new units on oil fields. It could also mean heavy
garrisons of threatened areas.
You can’t run a war without oil. Once you’ve
got it, defend it, and get on with other things. More
oil fields could be useful if your army (or your city
holdings) increases greatly in size, but unless you
feel that’s likely, stop when you have enough.
Foreign Aid is also a question of economy: is
it worth getting these cities for the cost? A single
city could produce 15 billion during the course of
the game — but if it’s captured halfway through,
you’ve lost money.
On the other hand, a base to build units near
threatened oil fields is a must. Balance the value
of the city strategically with its vulnerability and
economic value before spending for foreign aid.
But if your opponent spends, you should try to
block him. You never know what he might have
in mind!
A cash reserve is a wonderful thing. It’s like
having a mobile army reserve that can appear
anywhere in the world.
On the other hand, cities can be put out of
commission for a long time by building, and you
might not be able to build in an area where you
need reinforcements. If only you had built else-
where earlier, and shipped the reinforcement to
that front!
In general, shipping units to the front is fraught
with dangers: enemy subs, attacks in other areas,
attrition — all take their toll. Unless you’re
absolutely sure an area is or will become a hot
spot, a cash reserve is the better idea.
But it’s vital that you know when your cities
will be ready to produce. Select Buy Units and
check the readiness numbers of unready cities in
vital areas, and store that number in your memory
(then Escape build mode without actually pur-
chasing the unit). As soon as that round comes up,
drop what you’re doing and go produce that unit.
Another tactic is to produce a unit in a city that
is already under seige. As soon as the enemy is
well and truly engaged (where it will be difficult
for him to retreat, and he’s already taken attrition
loss) pop the unit in. This may involve buying the
unit and holding it “in hand” until just the right
moment, but it can be worth it.
Economic Tactics
Oil
Nukes
Foreign
Aid
Building
Units

44
Don’t just produce defensively. Build tanks
for offensives, planes to counter enemy air power,
and sea units to control shipping lanes. It takes
combined arms to win a war, not just a preponder-
ance of infantry!
Don’t ignore “Carrier Engaged” warning
messages. This can sometimes mean that an en-
emy sub, not yet spotted, has been detected some-
where in the area. It’s probably about to attack!
Reverse course!
You can bombard from the sea more effec-
tively but suffer damage in return by moving
closer to land units (within one space). As a last
push, this can be valuable — but it is costly. A ship
can be sunk quickly by coastal fire.
Watch the sea lanes. Without your help
navigating through treacherous waters (moving
slowly, a few spaces at a time), ships will take the
“safe” routes when navigating near islands. This
could mean going the long way around, often in
the exact opposite direction you expect.
Watch for the first hit. In sea battles
especially, where units have even strengths (there
is no terrain and entrenchment to complicate
matters) whoever gets the first hit will usually
win. Although there is no guarantee, it is probably
better to retreat if you take the first hit rather than
risk the 3-1 chance of a loss.
Don’t believe everything you don’t see.
Don’t launch an invasion just because you don’t
see any defenders. You may run into hidden subs
or land units just out of scanning range. Try using
air reconnaissance or a sub to spot the enemy
presence before moving in. Satellite reconnais-
sance can be good, too, but if the enemy looks at
his satellite map, he may wonder why you moved
your satellite over there.
Keep a sense of perspective. Of course, all of
the preceding hints are wonderful things to know
— but most of them involve careful attention to
detail. As the game passes you by, you’ll find that
some theaters get left to their own devices, while
you concentrate on others. And when you return
to a theater, you can sometimes be surprised by
what you find there! Try to move around and give
equal attention to important places — and even an
occasional check of the minor theaters can reap
big rewards!
Paris is the key to the game, so don’t let it be
taken by a sneaky attack. Get reinforcements into
France as quickly as possible, and don’t
unentrench unless absolutely necessary. You
must withstand the initial onslaught, and staying
entrenched in the cities is a good way to do it.
Get the convoy over as quickly as possible,
but look diligently for enemy subs. Stop your
cruiser occasionally to scan for moving subs, and
try to follow the cruiser with the transports. Even
so, you’ll probably lose one unit. Just try not to
lose more. And don’t neglect those other units
scattered around. They may look far away, but
their timely arrival can mean turning the tide near
war’s end.
An early strike at Paris looks tempting, but
don’t do it. It’s tough to succeed, and failure
involves the loss of many units (it’s what the
Germans did historically, and look where it got
them). Better to wait for all your strength to arrive.
But the Allies have more income than you —
so you can’t wait forever. Your advantage is a
local preponderance of strength and quicker
response time in building. He must often build in
Miscellaneous
World War I
The
Allies
The
Central
Powers

45
distant corners of the world, then ship the troops
to Europe. Use that to your advantage by nipping
at his units, turning his flanks, and generally
harassing him until you’re ready for the grand
assault — and hunt down that Atlantic convoy!
Without the American soldiers, the Allies are in
big trouble! Also, get your subs out of the North
Sea (you may need to engage his fleet in a sea
battle to escape his blockade) and out there to lurk
for his incoming transports, most of which won’t
be escorted!
Time and income are on your side, if you can
avoid losing too soon. Yours is a defensive war at
first, until your scattered forces can join together
in one or two areas. The strategic question is,
which areas?
The Australian fleet can move to Pearl Harbor
and face the Japanese navy, or it can sail up the
Suez and join the attack on Europe. Your British
forces can try for an early landing in Europe, or
wait for the Atlantic convoy to arrive. And how
heavily you defend the Suez partly depends on
your plans for the Australians.
Russia is probably the key to the game. A
good defense there will buy you the time you need
to mobilize and win. A quick defeat means a
powerful Germany that wheels to face D-Day
with overwhelming strength.
You’ve got a lot of force, but a lot of fronts to
fight on. Taking Russia is useful, and ultimately
necessary, but a losing battle there means a losing
war. Sometimes switching your troops west and
not making a big push in Russia until after Britain
falls can be tempting, but so can attacking Russia
quickly and trying for a quick strike at Moscow.
The Japanese are your ultimate ace in the
hole. The Germans are beleaguered, but the
Japanese are strong and have lots of options. The
west coast of the U.S. beckons, as does Australia
and even Europe. Watch your air lanes!
Transferring planes between your two fronts can
be difficult unless you take Pearl Harbor or Diego
Garcia. Capturing Pearl Harbor is enticing and
will help in an invasion of the U.S., but can be
extremely difficult.
Do not be overconfident, just because you
have many more cities than your opponent. It
takes some time before your larger money supply
can take its toll. In the meantime, you’re facing
overwhelming forces on several fronts.
Balance is especially important: oil is vital,
but taking Havana can forestall a possible nuisance
raid on the US that could turn into a full-scale
invasion. Taking new cities slows your opponent
and gives you income, but you’ll need to defend
your city clusters as well as attack his.
Speaking of clusters — don’t. A clump of
units is a prime target for a nuke. Spread out a bit,
try to slow your opponent as you build and ship,
and strike for oil and key targets. If the Warsaw
Pact groups for a mass attack, nuke it quickly! The
time you buy and the defensive units you save are
usually worth the cost in cities changing hands.
You start out at a significant strategic
disadvantage. You have two-thirds the oil of
NATO, and only a third the cities. You have a
larger army, equal air power, and an inferior navy.
Fortunately, in the initial stages of the game,
ground strength is more important than naval
strength. Your army surpasses NATO’s so much
that you can attack successfully in several
directions at once.
One of your top priorities is to capture
significant amounts of oil before your oil reserve
is used up. Thus, you must invade the Middle East
and take the oil fields there in the opening stages
of the game (or launch a worldwide effort to
capture several other fields elsewhere).
World War II
The
Allies
World War III
NATO
The Axis
The
Warsaw
Pact

46
You need to neutralize the huge NATO
superiority in cities as well. The two easiest targets
are Western Europe, which boasts 8 cities, and
Japan and Korea, which have 6 cities. If you can
capture the Far East as well as Europe, the strategic
balance will tilt in your favor. Note also that
capturing the bulk of the world’s oil cancels out
the income of many of NATO’s cities.
Capturing Western Europe simply requires
competent use of your overwhelming ground
forces, with a little air support. Capturing England
is more difficult than the continent, but should be
attempted unless NATO sea strength cannot be
overcome with air power or your own local naval
forces. Watch out for nukes! Don’t bunch up!
World War IV is very much like World War
III, except that the strategic situation is more fluid.
Some things to keep in mind:
1) Use foreign aid to establish bases to protect
oil fields.
2) Be aware of the enemy invading neutrals
during the war. You can give foreign aid to the
remaining cities in that nation, and usually get
them on your side with less effort than it would
normally take.
3) Don’t hold too much of your money in
reserve, or you’ll be unable to use all your wealth
due to cities being unready.
4) Launch some recon satellites to keep an eye
on your enemy.
5) Choose whether you wish to spend your
money on getting lots of cities, or on a huge army.
Building an army and then capturing lots of cities
may appeal, but remember that if you start without
many cities, it will prove difficult to build new
armies, as your production capacity will rapidly
be used up.
This is an unusual game and it requires unusual
tactics. Start slow, because you’ll quickly need
oil. Don’t take more than a city or two until you’ve
got several oil fields.
Use geometric expansion to your best benefit:
don’t let one unit take seven cities in a row when
building another unit would let you take them in
half the time. Speed is of the essence!
Once you’ve got a good base (an income of
1.4 or so is the best you could ever hope for), build
sea units to catch transports and to scan for enemy
cities. Don’t forget carriers and air power! They’re
expensive, but nothing’s better for reconnais-
sance, and they can provide needed air strikes at
key moments.
Keep in mind that every city site on the board
looks like a neutral city until you’ve explored.
Scan before you attack! If your oil situation is bad,
don’t go after bases. And watch for the enemy
capital! That’s how you win the game.
2023
????

47
5. A
RMS AND
A
RMIES
W
ORLD
W
AR
O
NE
By 1914, the nations of Europe had been
engaged in an arms race for several decades. In an
attempt to become more secure, they formed
patterns of alliance. England, France, and Russia
composed one bloc, the Triple Entente. Germany,
Austria-Hungary, and Italy made up the Triple
Alliance, later known as the Central Powers. Both
alliances agreed within themselves that if any
member of their alliance went to war, all would go
to war on their behalf.
The leaders of all nations believed that war
was inevitable (though no one particularly desired
it). All worked to avoid an international incident
which would “force” them into war. As part of the
preparations for war, all sides formed mass ar-
mies, the biggest formed in the history of man-
kind. All nations made carefully-plotted battle plans
combined with stupidly rigid deployment doctrines
intimately tied to railway schedules.
On June 28, 1914, a Serbian nationalist shot and
killed the Archduke of Sarajevo, heir to the throne of
Austria-Hungary. His bullet killed ten million people.
War was, at last, precipitated.
Austria-Hungary declared war on Serbia, with
whom they had been unfriendly for some time.
Russia, wishing to protect its Slavic brothers,
and hoping to make some headway at the expense of
the Austrians, declared war on Austria-Hungary, and
mobilized its army.
Germany was concerned at the Russian mobili-
zation. In order to protect its defenseless eastern
frontiers, Germany was forced to mobilize its armies
as well and, in support of Austria-Hungary, declared

48
war on Russia. However, the German war plan
always assumed that Germany would be forced to
fight a war on two fronts, vs. France and Russia
simultaneously. As it happens, the Germany war
plan was primarily directed towards the French,
so when the Germans called up their army, a
gigantic hammerblow of German soldiery was
aimed directly at Paris.
France, naturally enough, was forced to mo-
bilize its own army in order to defend against the
oncoming German might.
Britain, not the target of anyone’s mobiliza-
tion, could afford to keep its head. A quick letter
was sent to the German national leaders telling
them that Britain guaranteed Belgium’s neutral-
ity. If Germany invaded Belgium, Britain would
enter the war. Germany’s war plan necessitated
the invasion of Belgium. Inflexible and incompe-
tent, the Germans invaded Belgium on schedule,
and Britain entered the war.
Italy, of all the major nations of Europe,
temporarily remained neutral.
Just before war was joined, Kaiser Wilhelm
of Germany got cold feet. He turned to his gener-
als and asked if the armies could be stopped for
one last round of negotiations in hopes of a peace-
ful solution. The generals sternly replied that once
the trains were on their way, they could not be
halted, that combat was inevitable. “Nothing could
be done.”
It is clear from an objective study of the war’s
origins that the progress into armed conflict fol-
lowed a long and complex path that could have
been derailed at any point. The war started be-
cause, at each juncture, it was easier to let matters
deteriorate than to attempt a repair of relations. In
essence, what we have is an example of middle
management gone frighteningly wrong. The rail-
way schedules and mobilization plans were all
under the control of bureaucrats and lower-eche-
lon military officers. None of them had the author-
ity or gumption to change or pause the plans. Not
one top world leader was capable of making a
decisive, bold decision. No one stopped the war
for them. They failed in the irresponsibilities as
national leaders, in effect betraying their
nations. On their heads is the destruction of an
entire generation.
The origins of World War II are easier to
understand. Clear villains stand out — Hitler and
a handful of Japanese militarists. But World War
I’s origins display no such obvious criminals,
only mediocrity wearing the trappings of power.
Once the war had begun, on one side were
ranged the Allies, consisting of Britain, France,
and Russia. On the other side were the Central
Powers, Austria-Hungary and Germany.
French military doctrine held that Attack was
all-powerful. When the war started, their soldiers
therefore went immediately onto the offensive
and suffered terrible casualties as they charged
into heavy machine gun fire. Within a few weeks,
the French learned the error of their ways —
boldness misused could not overcome technology.
The German plan consisted basically of send-
ing millions of men through Belgium in a great
wheeling movement aimed ultimately at Paris.
The French were taken by surprise by this
movement, as their army was all up on the
Franco-German border, attempting to invade
Germany directly (and being massacred by the
stiff German defense).
The Germans came frighteningly close to
conquering France. At the Battle of the Marne, the
French barely managed to scrape together a mot-
ley conglomeration of reserves, and threw their
troops into a desperate counterattack. At one
point, every taxicab in Paris was used by the
government to ferry soldiers to the front. The
French held on, and now it was the Germans’ turn
to be slaughtered. Defeated, the Germans can-
celled their final attack and pulled back.
The Western Front in 1914
49
was called out of retirement to put his plans into
action. The Russian forces advanced in two ar-
mies. In August, 1914, at the Battle of Tan-
nenburg, Hindenburg pulled his troops away from
one Russian army and used them to attack and
surround the other. The attack was such a re-
sounding success that General Samsonov (in
charge of the Russian troops) committed suicide.
Hindenburg and his able assistant Ludendorff
switched their troops back to face the other Rus-
sian army by September and defeated it in the
Battle of the Masurian Lakes, driving the Rus-
sians back for many miles.
Russia never really recovered from these de-
feats. For the rest of the war, the Russian Army
was short of cannons and machine guns, as a direct
result of the huge quantities of both captured by
the Germans in the first two months of the war.
In 1915, the Germans went onto the defensive
in the West, transferring most of their armies East
in an attempt to destroy Russia. The Western
Allies engaged in periodic futile assaults against
the German lines, gaining no land, but succeeding
in losing 1,600,000 men over the course of the
year ( compared to a German loss of 600,000
in the West).
One of the most significant events of the year
was the introduction of gas warfare, by the
Germans. Much of the Allies’ attention went
toward a southern offensive at Gallipoli, in
Turkey (see page 52).
In Russia, the Germans and Austrians em-
barked on a gigantic offensive, which took nearly
the entire year but pushed back the Russians 300
miles, conquering all of Poland and costing the
The Most Important
Battle of World War I
Had the French lost the Battle of the
Marne, the Germans would have captured
Paris and forced France into surrender, just
as they had done 43 years earlier (in the
Franco-Prussian War) and as they did again
26 years later (in World War II). This would
certainly have won the war for Germany.
The Germany of 1914 was more power-
ful vis-a-vis her foes than was the Germany
of 1939. Imperial Russia proved a feebler
foe than did the Soviet Union. The 1914
German High Seas Fleet was much larger
than Hitler’s Kriegsmarine and was compa-
rable to the British Royal Navy in fighting
strength.
Then ensued the famous “Race to the Sea,” in
which both sides shoved their trench lines frantic-
ally north in an attempt to outflank the other side.
The “Race” ended in a tie.
There the line stood, stretching from the En-
glish Channel to Switzerland. Millions of troops
glared at one another over no-mans-land. The
infamous trench war had begun. For the next three
years, both sides would periodically throw their
armies into huge offensives, slaughtering mil-
lions of men to no advantage.
As the war started, the Russians rolled into
eastern Germany with an enormous army. The
Germans were thinly spread, as most of their
army had been sent to the West. However, they
had the benefit of one man’s expertise: General
Hindenburg. Before the war, General Hindenburg
spent two decades closely examining the areas in
which a Russian attack would be likely to come,
and figuring all the possible German responses to
such an attack. When the war came, Hindenburg
The
Eastern
Front in
1914
1915
German U-boat (Circa 1917)
50
Russians 2,000,000 casualties, of which about
half were prisoners. The Germans and Austrians
lost well over 1,000,000 men.
To sum up, 1915 was a year of almost unmiti-
gated failure for the Allies. The attacks in France
and Gallipoli made no progress. The Russians
were on the retreat and taking terrible losses. The
Allies had been forced out of Serbia. Matters were
rosy indeed for the Central Powers.
In 1916, the Germans moved their armies
back from the East, and attacked the French at
Verdun. During this “battle,” which lasted 9
months, the Germans tried to bleed the French
armies white by continual action, believing that
the French would run out of manpower and their
lines would crack at last. The French held heroi-
cally against flamethrowers, superior artillery,
poison gas, and vast numbers of Germans. The
French slogan at Verdun became their battle cry
for the rest of the war; “Ils ne passeront pas!”
(“They shall not pass!”)
In June 1916, at the Somme, British General
Haig threw his army into an attack that became
one of the greatest defeats ever suffered by British
arms. On the first day alone, 60,000 troops be-
came casualties — with 20,000 dead (for com-
parison, the month-long Battle of the Bulge cost
the Allies 60,000 men — including only 7,000
dead). The Battle of the Somme lasted nearly five
months and cost the Allies 600,000 (mainly Brit-
ish) casualties. The Allied gains consisted of 8
miles of land.
By 1916, the Russians had recovered from
much of the losses suffered in 1914, and launched
the Brusilov Offensive against Austria-Hungary.
This attack pushed deep into Hungary and almost
knocked Austria-Hungary out of the war. At the
height of the Brusilov Offensive, Rumania joined
the war on the Allied side, hoping to get a share
of the winnings.
Part of the reason for this Russian offensive
was that the other Allies had begged for it, hoping
that, thus distracted, the Germans would turn their
attention away from the Western Front and Ver-
dun. In this, they were successful. The Germans
withdrew many troops from the West, and man-
aged both to stop the Russian attack and to force
Rumania’s surrender.
With the end of the Brusilov Offensive, the
Russians were exhausted. Their nation began to
fall into anarchy.
1917 Mutiny!
In April, the French Army launched yet
another in the long series of failed Allied
offensives. But this one ended differently.
When it became clear to the French soldiers
— the poilus — that this was just another
desperate and hopeless assault against Ger-
man machine gun fire, they mutinied. Nearly
two-thirds of the French Army showed the
good sense to refuse to obey their officers in
any more doomed assaults.
In Command HQ, losses are represented
abstractly. The lowering of a unit’s strength
may represent any of a number of things —
actual destruction of personnel and equip-
ment; lowered morale; or loss of supplies. In
game terms, the French armies of 1917 were
reduced almost to destruction as a result of
constant combat. The fact that this reduction
in combat strength was due to mutiny rather
than casualties is immaterial.
As another example: when an airdrop is
made in WWII or later scenarios, the infan-
try loses 25% of its strength. This is not from
losses, but because much of the army’s
heavy equipment cannot be paradropped
and must therefore be left behind.
1916
51
some time, as the U.S. had a comparatively min-
uscule army and would require many months to
build, train, and ship over a significant number of
combat ready troops.
However, the war at sea became much easier
for the British, for the U.S. fleet began escorting
British convoys in May of 1917.
In 1915, both sides sought an Italian alliance.
The Germans attempted to convince Austria-Hun-
gary to offer Italy some land as a reward for
joining the Central Powers. The Austrians, under-
standably reluctant, dragged their feet and were
beaten to the punch by the Allies, who readily
promised Austrian land to the Italians. Essen-
tially, the Italians put themselves up for auction
and the Allies offered the most.
The Italian front was short in length, reaching
merely from the Swiss border to the Adriatic
ocean. Almost its entire length lay through the
Alps, so the hapless soldiers fighting there were
plagued as much by the handicaps of mountain
warfare as they were by enemy action. Ava-
lanches, some caused by cannon fire, are known
to have killed tens of thousands of troops.
Though bloody offensives cost many lives in
1915 and 1916, the war in Italy was indecisive
until the Battle of Caporetto in October 1917, in
which a combined German/Austrian offensive
gained 50 miles of ground and captured or killed
over 300,000 Italians for a loss of a mere 20-
30,000 Central Powers troops. The following
June, the Austrians attacked again, but in the
Battle of Piave, the Italians were able to halt the
attack and throw it back with heavy casualties. In
October, the Italians attacked. In this attack, the
Battle of Vittorio Veneto, the Italians broke through
the enemy lines and exploited the gap in classic
fashion. 300,000 Austrians surrendered and more
were killed or wounded. On November 3, Austria-
Hungary surrendered, primarily as a result of the
Italian action.
In 1917, the Germans went on the defensive
on both the Western and the Eastern fronts, though
they did help the Austrians launch a highly suc-
cessful attack in Italy (see below). In the West,
they pulled back 20 miles from their overextended
front to the Hindenburg Line, which could be held
by fewer troops, giving them a larger reserve.
The political events of the year were of great
interest. The French Army, after yet another of-
fensive and yet another failure, mutinied and most
units refused to fight.
After years of nearly unbroken German suc-
cesses against the Russians, the Russian govern-
ment fell in March. The revolutionary govern-
ment stayed in the war for several months, but
their one abortive offensive (under their finest
general, Brusilov) was only a partial success, and
the Germans continued to advance. In December,
the Russians surrendered. The Germans were
now free to devote all their attention to the West.
They quickly occupied the Ukraine and other key
points inside Russia and began pulling their troops
from the Eastern front to the West.
Another significant political occurrence was
America’s entry into the war. The U.S. had been
driven almost frantic by German diplomatic blun-
ders (such as an attempt to bribe Mexico to attack
the U.S.A. from behind) and by the practice of
unrestrained submarine warfare, which killed thou-
sands of innocent American citizens. President
Wilson finally responded by declaring war on
Germany on April 6, 1917. The American pres-
ence would not make itself known in strength for
French 75mm Field Gun
1917
The
Italian
Front,
1915 to
1918

52
Turkey joined the war on October 29, 1914, a
major diplomatic coup for the Central Powers.
The war against Turkey was fought on three
fronts.
The least active front was in the Caucasus,
where a Russian army faced a Turkish one. After
a few disastrous offensives, the Turks decided
that offensive actions in the mountains were un-
wise, and pretty much let that front stagnate for the
rest of the war.
Ultimately, the most important front was that
of the Near East, where British armies fought
Turkish armies throughout the desert. After nu-
merous offensives and counter-offensives, the
British captured Jerusalem in December of 1917,
and achieved a major victory over the Turks in
September 1918 at the Battle of Megiddo, in
which over 75,000 prisoners were captured for a
loss of only 6,000 British.
The most spectacular front was clearly Gal-
lipoli. In 1915, Winston Churchill prevailed upon
the British leaders to send a force to attempt a
naval invasion of the Dardanelles, where they
could capture Istanbul and force the narrow straits
there. Once the straits had been captured, the
British and French could send supplies and troops
to Russia, thus making up for the terrible losses
Russia had suffered in 1914, and perhaps keeping
Russia in the war. In return, the vast Russian
wheat fields of the Ukraine could be used to feed
the Western Allies (whose civilian populations
were suffering severely).
The Gallipoli landing took place on April 25,
and was mismanaged from the start. Before the
campaign even started, the British assumed that
the Turks would be pushovers; as it happened, the
Turks were tenacious and aggressive — the equals
or betters of the British. For two months before the
intended landing, British ships bombarded Turkish
shore defenses. The major effect of this was to
alert the Turks to the fact that a landing was
imminent. Thus, they strengthened their defenses
enormously, and brought in 60,000 troops to
defend the place. The landing was initially planned
for March 25, but when the ships neared their
attack zones, it was discovered that the soldiers
were in different ships from those carrying the
guns and ammunition — so the whole expedition
had to go back to Egypt so that the ships could be
reloaded, with the soldiers pre-armed with guns
and ammo before landing on the enemy beach-
head! Once ashore, the British commander stayed
aboard his ship, directing the action by remote
control, as it were. Thus, his concept of the battle
rarely bore any resemblance to the actual situation.
On the other hand, the enemy commanders
(German General von Sanders and Turkish Gen-
eral Mustafa Kemal) proved themselves to be
both aggressive and brilliant. They won despite
having fought under severe handicaps; not only
were their lines constantly bombarded by Allied
ships, but they were outnumbered for the entire
battle. In January, 1916, the Allies withdrew their
troops in a flawless evacuation — the one well-
planned action of the entire campaign.
At the start of 1918, all sides were reduced by
the previous three years of war. The Germans had
received a new lease on life by defeating Russia
— they only had one major front left to deal with.
On the other hand, the American troops would
soon be arriving to bolster the weary French and
British. The Germans decided that they needed a
quick success before the American strength could
Vickers Machine gun
The
Turkish
Front,
1914 to
1918

53
come into play.
In March, the Germans launched their offen-
sive. Their goal was to split a hole in the center of
the Allied armies, push the northern Allied wing
against the sea and destroy it, then take Paris. This
offensive was a striking success, by the standards
of WWI. At a cost of a little over 200,000 men, the
Germans advanced over 40 miles in three weeks.
When the first offensive bogged down, the Ger-
mans immediately launched a second, aimed just
south of the first. This second advanced 10 miles
in 8 days, costing each side 100,000 men. On May
27, a third offensive started, and again began
penetrating the Allied lines.
The Allies, desperate at the German gains,
threw the newly-arriving Americans into the
breach. The new troops, despite their green nature,
performed credibly against veteran German shock
troops, and raised Allied morale by their successes.
At the end of the third German drive, they had
pushed over 20 miles into the Allied lines. They
followed up this push with two more offensives,
but by the end of July, the German leader, Luden-
dorff, realized that his attacks had failed, and
pulled back. Since April, the Germans had lost
over 500,000 men. Though Allied losses had been
greater, American soldiers were now starting to
arrive at a rate of over 250,000 a month.
The German offensives had been tactical suc-
cesses. The Allies took heavy losses, and lost
much ground. However, these same offensives
were strategic failures. None of the land the Ger-
mans captured was vital to the Allies, and no
breakthrough was accomplished.
In July, the Allies began their own offensives.
The first of these, aimed at taking back the land
lost in the German spring attack, was spearheaded
by American units, and was so ferocious as to
cancel a planned German sixth drive. On August
8, “the Black Day of the German Army,” a second
offensive began. This attack cost the Germans
100,000 casualties, including 30,000 prisoners.
The Allies lost only 40,000. The German strategic
situation had gotten so bad that they were forced
to retire to their final defensive position, the
Hindenburg Line.
Things went from bad to worse for the Ger-
mans, as the Allies advanced from victory to
victory. At the end of October, revolution raged
throughout Germany. The Kaiser fled to Holland,
and the new German government quickly negoti-
ated a surrender with their former foes. The seeds
World War I U.S. "Dough Boy"
The
Western
Front,
1918
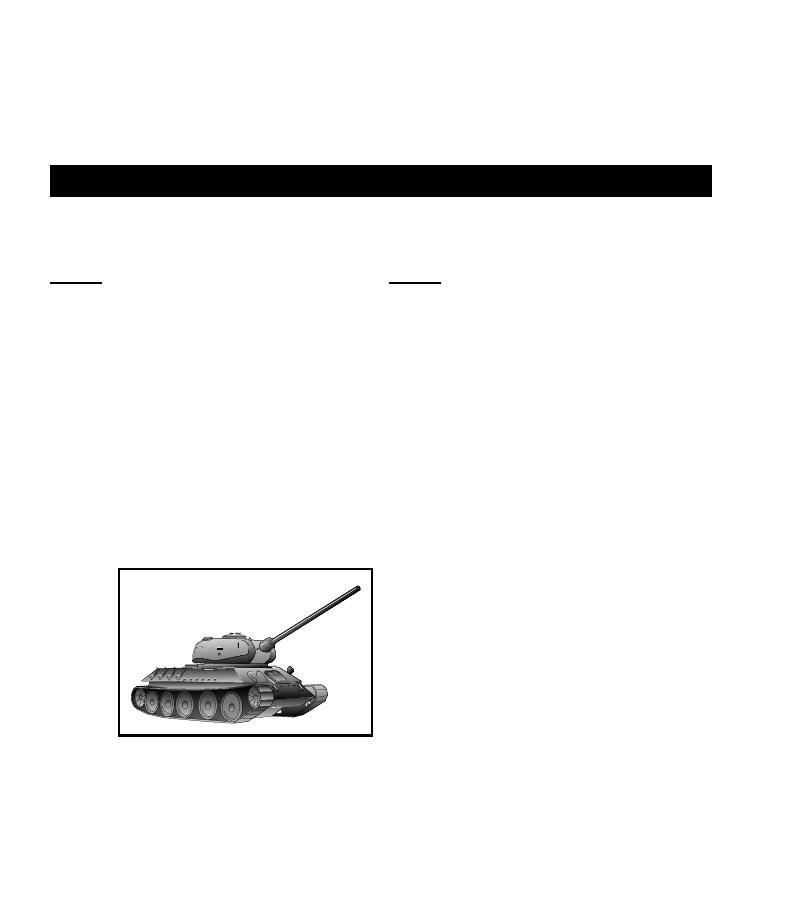
54
W
ORLD
W
AR
T
WO
of the Second World War were thus sown.
The biggest change between WWI and WWII
was the development of practical war machines in
the forms of tanks and aircraft. While both had
been used to effect during WWI, they had changed
greatly by WWII.
Tanks in 1918 were enormous slab-sided con-
traptions easily knocked out by field guns. They
had 10-18 man crews, but their top speed was no
faster than a walking man. They were designed to
cross trenches and defeat machine-gun fire.
By 1943, the tanks were completely different.
They carried high-velocity cannon which could
pierce up to four inches of armor plate, could
cruise at 25-30 miles per hour, had five-man
crews, and came equipped with radios. In addi-
tion, a variety of other armored vehicles had been
invented to accompany the tanks into battle. All
armies created tracked self-propelled guns, so
that artillery support could keep up with the tanks’
advance. All armies had invented mechanized
infantry (called panzergrenadiers by the Ger-
mans) mounted in trucks or armored half-tracks,
which gave the tanks infantry support. This was
necessary because of the evolution of hand-held
antitank weapons such as bazookas. As Germany
began to lose the war, she produced a bewildering
variety of turretless antitank vehicles. These, while
inferior to tanks, were cheap to produce, and
nearly as effective as tanks when used in a purely
defensive role.
The aircraft of WWII were also greatly en-
hanced from their WWI counterparts. In WWI,
aircraft were effectively an adjunct to the infantry.
They served by dropping small bombs, strafing
the trenches, and acting as artillery spotters. Their
role in the war was not exactly negligible, but
what effect such weapons possessed has been
factored in to the land units’ strength in the game.
In WWII, the air forces were arms of combat
in their own rights. They proved decisive at sea,
and of great importance on land. The Western
Allies had air superiority over the Germans for the
latter part of the war, and this gave them a clear
edge in land combat. It helped end the Battle of the
Bulge, and devastated German reinforcements
attempting to join the battle in Normandy. On the
Eastern front, the effects of air superiority were
less pronounced. The front was so huge that
neither side could claim a clear superiority for
most of the war.
Going into the war, most military thinkers
believed that aircraft would be the most fearsome
weapon of modern times. The general attitude
towards strategic bombing rivaled the modern
fears of nuclear warfare. Many observers stated
that heavy bomber strikes would flatten cities,
devastate industry, and win wars single-handedly.
We now know that these theories were exaggerated
(except at sea, where air power was truly decisive).
Soviet T-34 Tank
Tanks
Aircraft
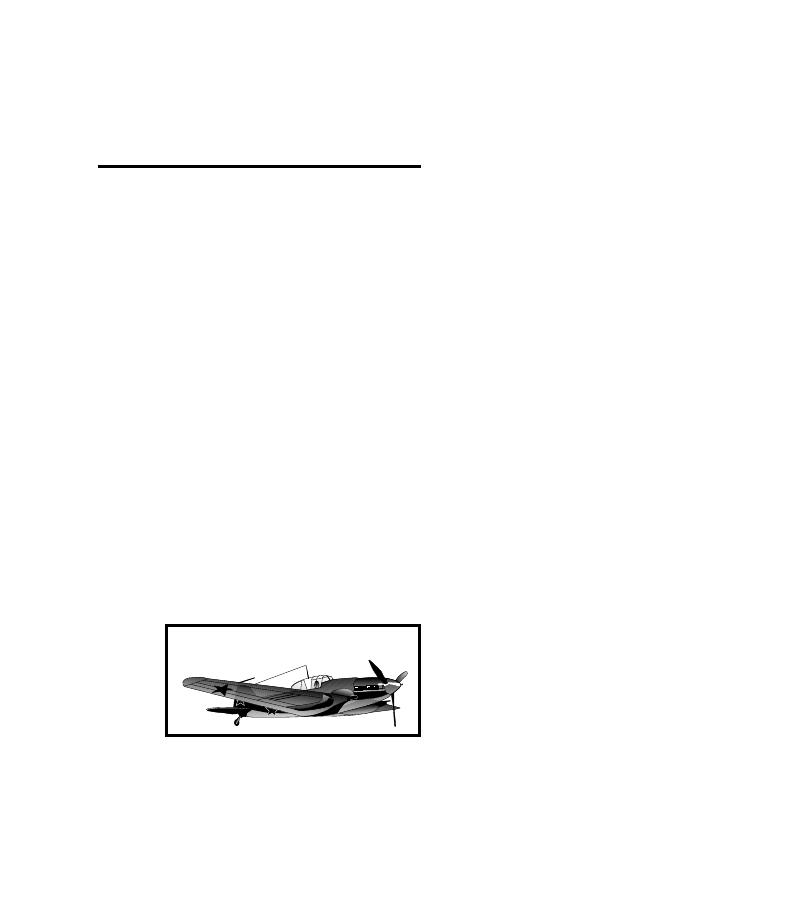
55
Hitler then put another agenda into action. He
began to take an interest in the herrenvolk, con-
sisting of all people of Germanic stock not living
in Germany. This was a different matter, since it
involved sovereign nations.
His first target was Austria, which his troops
openly marched into and seized in 1938. After-
wards, a puppet election was held in which 98% of
the populace seemed to favor the Nazi conquest.
Hitler’s next target was Czechoslovakia. The
mountainous border of Czechoslovakia and Ger-
many was known as the Sudetenland, and was
largely ethnic German. Hitler demanded that it be
handed over to the German reich. Czechoslova-
kia, rightly fearing that the loss of their border
mountains would leave them helpless against a
German attack, mobilized their army and pre-
pared for war, bolstered by the knowledge that
Britain, France, and Russia had all guaranteed her
territorial integrity. The British Prime Minister,
Neville Chamberlain, met personally with Hitler,
who told him, “This (the Sudetenland) is my last
territorial demand in Europe.” Chamberlain, ter-
rified of another World War, agreed to sacrifice
Czechoslovakia to appease Hitler.
Within weeks, Hitler occupied the rest of
Czechoslovakia. It was now obvious that Hitler
was not playing fair. Chamberlain was one of the
old-style politicians, of the ilk that had started and
fought World War I. He saw the world in shades
of gray, and viewed diplomacy as a matter of give
and take. He thought that, because Britain had
traded Czechoslovakia, it was now Germany’s
turn to make a gesture of appeasement. But Hitler,
a much keener man, saw the world in black and
white. He viewed diplomacy as a matter of win-
ning or losing.
Chamberlain realized that, in trusting Hitler,
he had seriously weakened Britain’s position in a
future war — now Hitler had not only Germany’s
resources, but Czechoslovakia’s as well. The mili-
tary resources of Czechoslovakia greatly enhanced
German power: to get an idea of the benefit
The origin of World War II must be sought in
the end of World War I. The same dense diplomats
that had blundered into the First World War were
in charge of their respective nations at the end of
the War. At least, this is true for the Allied victors;
the Central Powers’ governments had mostly been
overthrown by internal revolution in late 1918 and
were in no condition to bargain.
The terms of the Versailles treaty which ended
World War One were especially obnoxious. The
Allies inflicted upon the defeated Germans suffi-
cient penalties to make them feel resentful and
unhappy. However, they did not inflict sufficient
penalties to actually prevent a German resur-
gence. This would have been possible — Austria-
Hungary was dismembered and bits were divided
up among no less than six other nations. Turkey
was reduced to a stump of its former self. But
Germany remained nearly intact, and seething
with vengeance.
Once Hitler came to power, he gradually
rolled back all of the provisions of the Versailles
treaty. He reoccupied the Rhineland, which had
been made a demilitarized zone. He rebuilt the
German army, navy, and created an air force, the
Luftwaffe. He canceled all remaining payment on
the supposed “war debt” that Germany owed to
its victors. These feats were not particularly auda-
cious. By this time, twenty years after World
War I, the Allies themselves felt that the treaty
was unjust. Thus, the Allies acquiesced in the
treaty’s demise.
The
Origins
of World
War II
History of World War II
Soviet "Shturmovik"
Ground Attack Aircraft

56
gained, over 50% of the medium tanks produced
for Germany in 1939 were Czech models.
Germany’s early victories may not have been
possible without Czech resources, factories, and
expertise.
In essence, Chamberlain had betrayed Britain
through his own naivete. A broken man, he re-
mained in power only a short while thereafter. His
successor, Winston Churchill, proved able to match
Hitler bombast for bombast, cunning for cunning.
Now that Hitler had proven his perfidy in
Czechoslovakia, the Western Allies (Britain and
France) became firm. They knew they must not
give in again, and gave Poland (Hitler’s obvious
next target) numerous assurances that they would
go to war on its behalf if necessary. They also
warned Hitler (they thought) clearly of the danger
he faced if he attempted another “Czechoslovakia.”
On the other hand, while still playing the
diplomat’s game in the previous year, the British
and French had made identical claims with
regards to Czechoslovakia. Hitler not
unreasonably assumed that the Allied claims of
support for Poland were as untrue as they had
been for Czechoslovakia.
Hitler thought he had found out the thought-
processes of the Allied diplomats: they would
bluster until he pushed very hard, then give in. In
reality, he had not discovered the Allied thought-
processes, he had altered them. The Allies had
decided that they must now be firm to the end, yet
they had no way of communicating this fact to
Hitler. Because they had played the diplomat’s
game in the past, Hitler had no way of telling that
the Allies were now actually telling the truth.
Who was responsible for the Second World
War? Ultimately, if it were not for Hitler’s territo-
rial greed, there may have been no war. However,
the failure of Allied diplomacy also led to the war.
If wise and thoughtful men had been in charge of
the free nations before the war, the war may have
been prevented.
The war with Japan was probably less avoid-
able, as stopping it was almost wholly based on
internal Japanese politics. American and British
diplomacy could do little to alter whether or not
war would begin.
The Japanese felt that it was their destiny to
dominate all of Eastern Asia. Their obvious rival
was the Soviet Union — the only other Asian
power with force to match Japan. The Japanese
had watched World War I with keen interest, and
saw that Germany’s defeat was based on the
economic strength of her enemies. Because the
Allies in World War I had had greater resources,
they were able to overwhelm Germany in the end.
To ensure that Japan would not fall prey to the
same fate, they decided to occupy Korea and
China. In this way, the Japanese generals argued,
they would have enough economic backing to win
a future war.
The Chinese fought back against the Japanese
occupation. After a few years, the Japanese began
importing large quantities of oil and steel, mainly
from America, this time to win the war against
China. The Americans, concerned about Japanese
expansionism, gave the Japanese an ultimatum:
they must stop the war against China or America
would cut off all supplies to Japan. Now, in order
to prosecute the China war, the Japanese felt
forced to fight the Americans — the Americans,
if attacked, would obviously still cut off Japan’s
supplies, but once at war, the Japanese could
conquer the Philippines, Indonesia, and Southeast
Asia, and thus gain the oil and steel needed with-
out American imports.
Note the chaos into which Japanese internal
policy had fallen by this time; they feared Russia,
so attacked China. To keep up the war against
China, they attacked America. In the end, the
irony is quite amazing. In order to ensure that they
would not have to fight a war in which they would
be inferior economically, they waged a war against
the United States — a nation with sixteen times as
much economic might as Imperial Japan!
57
If Imperial Japan had had a strong intelligent
leader, perhaps she would have seen the folly of
this course of action. But Japan was ruled by
a cabal of militarists, none of whom held
supreme power.
Between the wars, creative generals from
every major nation saw the possibilities of tanks
used en masse. America had General George
Patton. France had De Gaulle. Britain had B. F. C.
Fuller. The Soviet Union boasted perhaps the
most brilliant of all these pro-tank generals, Mar-
shal Tukhachevsky. But all this foresight bore
little fruit.
America’s army was too small to create a
tank strike force.
In France, De Gaulle’s superiors dispersed
their tank forces, scattering them amongst the
infantry divisions in “penny packet” style.
In Russia, vast quantities of tanks were built,
but senile cavalry aficionados on the Soviet Gen-
eral Staff prevented them from being used effec-
tively. The brilliant Marshal Tukhachevsky was
executed on the basis of forged letters created by
German agents.
The British actually accepted Fuller’s theo-
ries, but they had too few tanks to put the theories
into practice. Moreover, what tanks they did pos-
sess were completely unsuitable for the new style
of warfare. Many British tanks were armed only
with machine guns. Those that had cannons could
not fire explosive shells and so were useless
against infantry. Finally, approximately half of all
British tanks were so-called Infantry Tanks, with
maximum speeds of only 8 mph!
Only Germany both understood and applied
the principle of armored shock tactics. Heinz
Guderian created the Panzer concept: massed
tanks used to knock holes in the enemy lines in
conjunction with tactical air power. Through these
holes, long lines of infantry poured into the en-
emy’s rear area. Confused, surrounded, and
stunned by the rapid pace of the new type of war
(which later became known as the blitzkrieg) the
enemy would be annihilated. It all looked good on
paper. But would it work?
It worked better than its most strident advo-
cates had dared to imagine.
In September, 1939, Germany invaded Po-
land. Poland’s troops were well-equipped, with
indigenous designs for both tanks and aircraft.
The Poles hoped that their prepared defenses and
national valor would hold off the German long
enough for the British and French to come to
their aid.
Poland, unprepared for blitzkrieg warfare,
was conquered in three weeks. This was the
shortest major campaign in the history of war-
Two Wars in One
The fighting of 1939-1941 was com-
pletely different from that of 1943-1945. At
first, only Germany knew the secret of the
blitzkrieg. By the late war, every nation had
learned similar techniques, and had defenses
against it. Thus the successes of 1939-1941
were no longer possible. Germany’s attempts
to repeat the blitzkrieg in later years (such as
at Kursk, 1943 and at the Battle of the Bulge,
1944) ended in bloody disaster.
WWII in Command HQ starts in 1942,
after Germany’s early victories, but before
the Allies had turned the tide. The war still
hangs in the balance.
The
Blitzkrieg,
1939 to
1941
Seeds
of the
Blitzkrieg
German MG-34 Light Machine Gun
58
The campaign lasted six weeks.
The Allied forces were split in half, and then
wiped out, just like the German military texts had
promised. It is clear that the French loss was not due
to any moral vacuum possessed by the French — if
Britain had not been an island, the Germans would
certainly have overrun them as well. As evidence that
the French knew how to fight: partway through the
campaign, the Italians attacked in the south, hoping
to get a part of the spoils. The Italians outnumbered
the defending French mountain troops, but failed
utterly to overcome them. In the end, the Italians
managed to kill only eight (8) of the French troops,
while suffering over 5000 casualties themselves!
This combat action ranks among the great feats of
arms of the century, but is nearly unknown because
it was overshadowed by the German conquest in
the north.
By the end of August, Nazi Germany and its
allies controlled the entire continent, except for Rus-
sia and Britain. Hitler first considered invading Great
Britain, but his navy was very weak (the smallest of
any great power). Even by adding in the Italian fleet,
Germany could not seriously threaten British mas-
tery of the seas. In order to get a good-sized invasion
force across the English Channel, Hitler needed to
use the Luftwaffe to destroy or drive away the British
fleet. Before the Luftwaffe could do this, British air
strength had to be eliminated. In the subsequent air
conflict, now known as the Battle of Britain, the
Royal Air Force held its own. Because of this, the
Nazis could not safely invade Britain.
The blitzkrieg had been stopped for the first time.
Unbeatable on land, it was blocked by a 26-mile strip
of salt water. If Hitler had been able to get his army
across the Channel, the Wehrmacht would have
speedily occupied Britain. The British had lost al-
most all their equipment at Dunkirk, and manpower
was running short. It was a narrow escape, and
Britain’s Spitfire pilots of 1940 deserve all the praise
they have received. But the Royal Navy was the
fare.
In the spring of 1940, the Germans occupied
Norway and Denmark in a combined land-sea
invasion. No tanks were involved, but the sudden-
ness of the onslaught brought blitzkrieg-like suc-
cess. Both nations fell in two weeks, though a few
troops held out in the far north for few more days.
Now, the Wehrmacht faced the British, French,
Dutch, and Belgian Armies. Before, the Germans
had possessed numerical superiority (outnumber-
ing the Poles 3 to 1). The assembled Allies,
massed behind the Maginot Line on the Franco-
German border, had more (and better!) tanks than
the Germans. They possessed more soldiers than
the Germans, and even more artillery. Their air
forces were nearly equal in both numbers and
quality to the Luftwaffe. The lightning victories
could not continue, thought the Allies. This time,
the Germans would be stopped.
The Fall of France
In “game” terms, the Allies of 1940 did
not realize that the German panzer units
were a new type of unit. Instead, they “saw”
them as half-strength infantry (since a tank
unit has about 1/2 as many men as an infan-
try unit).
The Germans attacked through Belgium,
around the north end of the fortified Magi-
not Line. The Allies, seeing that they had as
many troops and as many tanks as the Ger-
mans (though their tanks were not massed
into tank divisions), immediately advanced
into Belgium to meet them. Caught on the
move by the unexpected speed of the Ger-
man tank units, they either disintegrated
before the onslaught or pulled into all-out
retreat. But retreat proved a faulty option,
too — the oncoming tanks were faster than
retreating infantry.

59
slipped through their fingers. By October the
Germans had occupied an area larger than the rest
of Occupied Europe combined. But most of Rus-
sia still lay to the east. It went on and on.
The Germans could not destroy the Russian
army before the first frost. They surrounded
Leningrad, captured the Ukraine, and were at the
gates of Moscow when winter fell. The panzers
were immobilized in mud and ice. The Luftwaffe
was grounded by bad weather. The blitzkrieg
could not continue. (In Command HQ terms, the
units were low in strength, and needed to with-
draw to friendly cities to recuperate.)
Once the tanks and aircraft were withdrawn
from the fight, the campaign’s outcome was left in
the hands of the infantry. Now the Soviet soldiers
could come to grips man-to-man, with no modern
technical gadgets to obfuscate the fight. In that
struggle, the Russians devastated the German
army. The Russians launched attacks in weather
which left German sentries frozen rock-solid.
When necessary, they charged through heavy
machine gun fire, arms linked, to capture German
strongpoints. They were skilled at infiltration and
ambush. The German army held on, barely, but
was never the same.
The blitzkrieg had been stopped for the sec-
ond time, this time on land. The world took note
— perhaps the German technique was not invin-
cible. The Russian generals and soldiers had
learned from the summer disasters. Stalin exe-
cuted the generals that had had Tukhachevsky
murdered. New generals and officers were pro-
moted on the basis of effectiveness, rather than
political reliability. The Red Army was reorgan-
ized from the ground up.
The next summer, the Germans went back on
the offensive. Because of their losses of the previ-
ous winter, they could no longer attack every-
where at once, as they had done in 1941. Hitler
selected Stalingrad and the Caucasus for his ob-
jectives. At first, everything went well. The Rus-
direct cause of Hitler’s failure to invade.
Stopped at sea, the Germans moved on south-
ern Europe in May of 1941. It took two weeks to
conquer Yugoslavia. Another two weeks saw
Greece fall. The other Balkan nations joined the
German Axis with pathetic eagerness. The blitz-
krieg once again proved its worth.
The true blitzkrieg consisted of brief, rela-
tively bloodless campaigns, each lasting about a
month. Between campaigns, the army would rest
and refit.
Then Hitler invaded Russia.
Russia possessed the largest army and air
force in the world. Hitler’s general staff estimated
the campaign against Russia would last three
months — a generous estimate, since it assumed
that the Soviets would last twice as long as anyone
else had ever done. In June, 1941, the panzers
rolled in like clockwork. In the first three months.
the Russians lost 15,000 tanks and their entire air
force. Over a million Russian soldiers were cap-
tured. The German advance was the fastest it had
ever been; faster than Poland, faster than France.
In October 1941, Hitler announced that the
U.S.S.R. had fallen, like the eight countries previ-
ously conquered by Nazi might. Only the mop-
ping up remained.
Russia was immense. The panzers advanced
at record-breaking speed, but the rest of the army
could not keep up. With increasing frequency, the
tanks were forced to stop and wait while the
railroads were repaired, the infantry caught up,
and the air force was able to relocate its bases.
Despite the rapid advance, the steppes never
seemed to stop. As the Germans advanced, they
became spread more and more thinly. Their pan-
zers surrounded huge pockets of Soviet troops,
but thousands of “surrounded” Russians simply
walked out of their encirclement and headed East
to reform into new units. The more the Germans
tried to tighten their grip, the more Russians
“It was
too
cold.”
—
G e r m a n
p o s t w a r
excuse
“It was
too big.”
—
G e r m a n
p o s t w a r
excuse
Russia
1941 to
1945
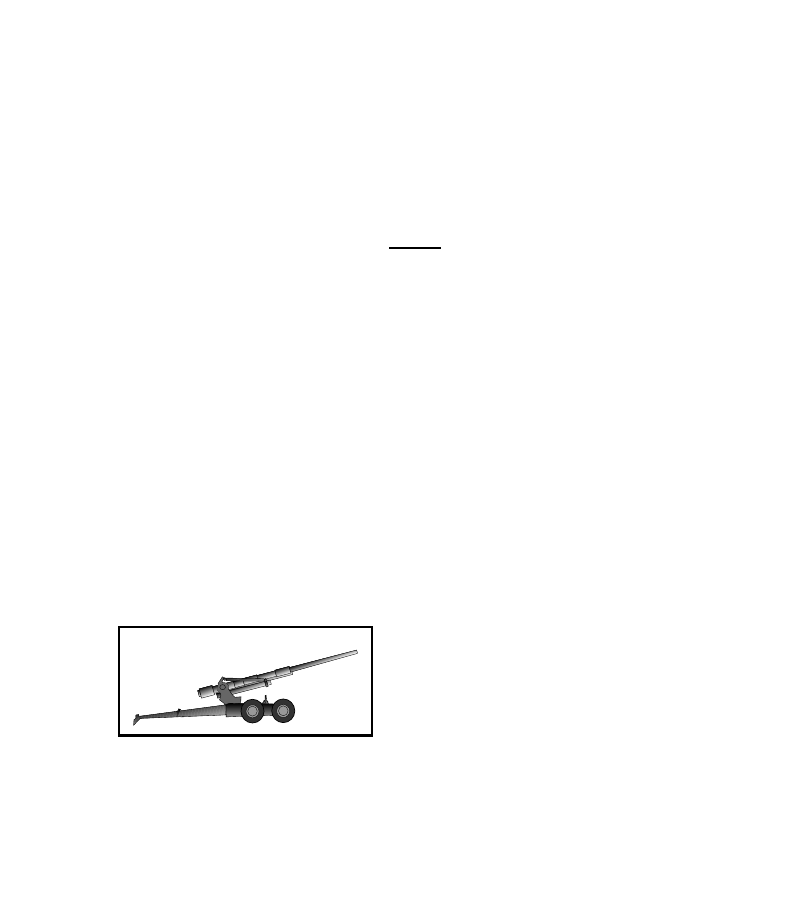
60
sians were once more killed or surrounded in
droves. The panzers once more dominated the
battlefield. The German army arrived at Stalin-
grad in August.
Once in Stalingrad, the tank-aircraft blitz-
krieg stalled. The Nazis shelled and bombed the
city, but that only created more rubble for the
defenders to hide in. The Russians had to be
rooted out house by house. As before, when met
on even ground, the Russians proved too tough for
the German “supermen.” German losses esca-
lated. The Germans heavily reinforced the city,
hoping to overwhelm the Russian defenders.
September passed. October passed. The Ger-
mans kept pouring troops into Stalingrad. In No-
vember, the Russians launched a huge offensive,
but not in Stalingrad. Instead, massed tanks at-
tacked the weakened German flanks, miles from
Stalingrad. The city, packed with German soldi-
ery, was besieged.
The Russian plan was a masterpiece of misdi-
rection. The Germans, pinned down in Stalingrad,
had put so many forces into the city that their
flanks were completely undefended. Stalingrad’s
capture left a hole hundreds of miles wide in the
German southern flank. With one audacious stroke,
the strategic equation had completely changed.
Before Stalingrad’s encirclement, the Germans
were a vast horde, heavily armed and well-
equipped. After the encirclement, the German
Army Group South was a paltry collection of ad
hoc battle groups, desperately struggling to stem
the tide of the Soviet onslaught. By the end of
March, 1943, the Germans and their allies had lost
well over a million men.
Once more, the blitzkrieg had failed. This
time, it had been turned upon itself. The Germans
had plunged blindly forward into the jaws of the
Russian trap. The Russians had taken the measure
of the blitzkrieg.
By 1943, the Germans’ faith in their panzer
tactics had been shaken. Nonetheless, the Ger-
mans prepared for yet another summer offensive.
The site chosen was Kursk. If they could punch
through and surround the exposed Russians at this
site (much as the Russians had pinched off the
Germans at Stalingrad the year before), they would
win a mighty victory.
When the Germans attacked, the Russians
were ready. The panzers plunged into a nightmare
of minefields and concealed anti-tank guns. The
German air force engaged the Russians in a huge
air battle which permanently cost the Germans
their air superiority. The panzers, unsupported by
air power, encountered the Russian tank forces at
Prochorovka the largest tank battle of all time.
The Germans lost 400 tanks in a single day. Once
the German attack was exhausted, the Russians
launched a counterattack that pushed the front
back by 300 miles.
The battle of Kursk was the blitzkrieg ’s death
knell. The blitzkrieg had been met head on and
stopped cold. Total German casualties at Kursk
actually exceeded those lost at Stalingrad. The
German army never again launched a serious
offensive on the Eastern Front.
In 1944, the Russians launched the summer
offensive, not the Germans. This Russian offen-
sive was recorded in history as the Destruction of
Army Group Center. Not only were hundreds of
thousands of Germans captured or killed, but the
entirety of Army Group North was cut off in
Estonia. It remained surrounded for the rest of the
war, incapable of taking any action. The soldiers
of Army Group North may as well have been
“There
were too
damn
many of
them.”
—
G e r m a n
p o s t w a r
excuse
U.S. "Long Tom" 155mm Gun
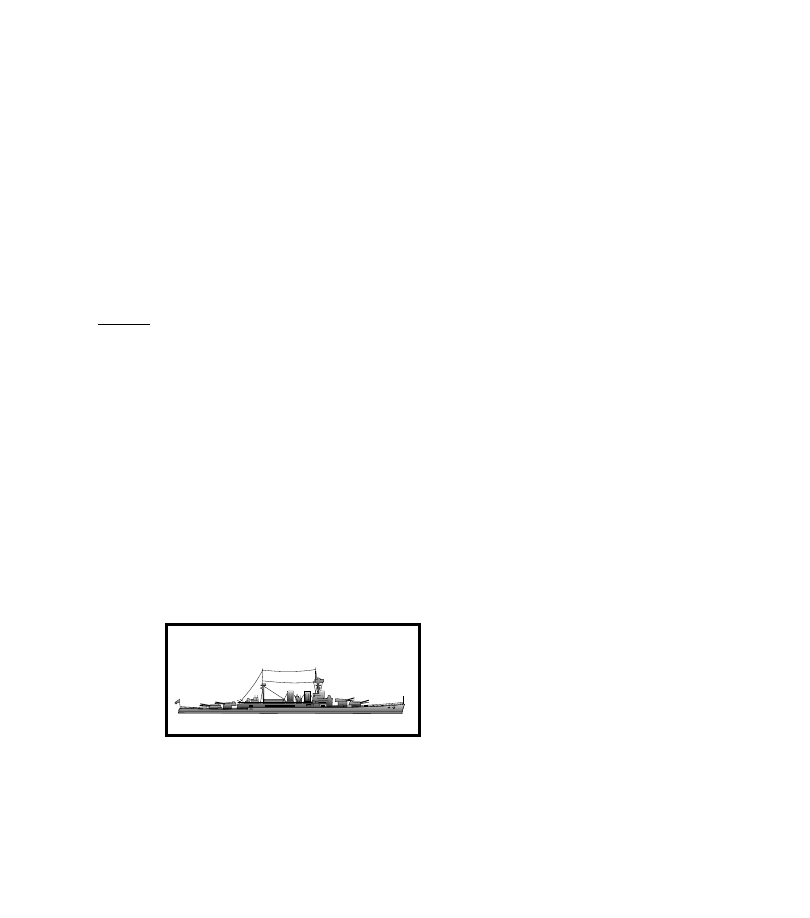
61
prisoners for all the good they could do.
In 1945, the Russians launched the final of-
fensive of the war in Europe: the Battle of Berlin.
After several weeks of devastating city fighting in
which 300,000 Russians and untold Germans fell
in battle, Berlin was captured, and Germany was
knocked out of the war. Ironically, the Soviet
general whose army captured Berlin was Marshal
Chuikov — the same man who had commanded at
Stalingrad. At the capture, Marshal Chuikov was
operating under the command of Marshal Zhukov,
who had been the commander at Moscow in 1941.
After France’s fall, the western “Allies” (which
consisted only of Britain and its Commonwealth)
fought only in North Africa for three years. The
seesaw campaign that took place there was con-
sidered a sideshow by the German High Com-
mand, understandably obsessed with Russia. But
to the British it was deadly serious, and they
fought bitterly to retain control over Cairo and the
Suez Canal.
The war in North Africa started when the
Italians invaded Egypt with an enormous, largely
infantry, army. The mechanized British ran
roughshod over the Italians, capturing or killing
100,000 Italians with a force of only 10,000
British. For the first time, the new armored tactics
had been used by a non-German army. Hitler sent
General Rommel and three divisions to take the
measure of the British, and the war went back and
forth for two years. The Germans were
handicapped in this war by their lack of supply.
The British could fall back on Cairo to keep their
The
Western
Front,
1941 to
1945
army going, but the Germans had no such secure
base. In the end, the British defeated the Germans’
attacks and pushed them steadily westward. In
late 1942, the Americans landed in Morocco and
began advancing eastward.
By the end of 1942, the Axis troops were
holed up in Tunisia, surrounded by the British and
Americans. At this late date, the German general
staff foolishly decided to begin pumping troops
into North Africa. The new troops arrived in
strength just in time to be taken prisoner. Nearly
150,000 Germans and Italians were lost in the
final battle of North Africa.
In 1943, the Allies invaded Italy. German
troops, with assistance from the ever-dwindling
Italian fascists, continued to hold the peninsula.
The Western Allies flung assault after assault
against the German lines, and the Germans re-
sponded by slowly retreating. The Allies made
one serious attempt to turn the German line, at
Anzio, when they made a naval landing behind the
front line. The troops at Anzio were pinned down
and never really went anywhere.
In retrospect, the Italian campaign may have
been a German victory — the Allies took heavier
casualties than the Axis, and the slow advance up
the peninsula gained the Allies nothing strategic
except for Rome. The German line in Italy did not
crumble until spring 1945, when Allied tanks
came pushing in from France.
In Britain, the Allies mustered their armies,
patiently waiting until they possessed an over-
whelming force. In June, 1944, they launched
their fleet across the English Channel in the larg-
est amphibious invasion of all time. The well-
entrenched Germans were taken by surprise, but
nearly beat back the invasion fleet anyway. After
a few months of slow attrition in the Normandy
fields, the Allies broke out and swiftly liberated
the rest of France. By the end of August, battle
lines had formed along the Rhine, where the
HMS Hood, British Battleship
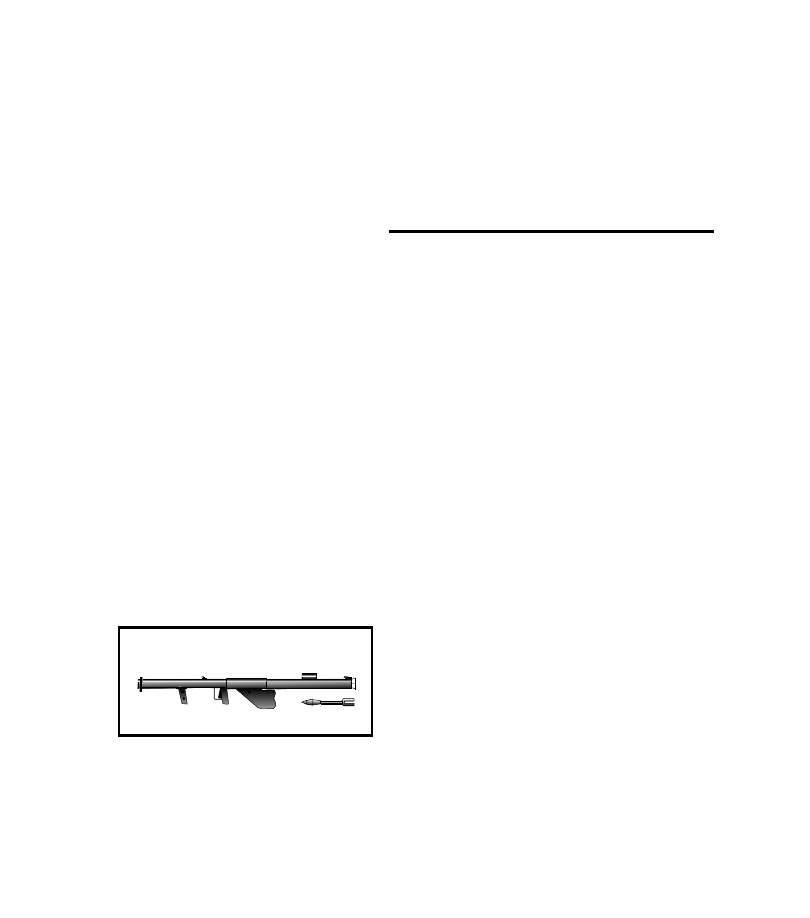
62
Germans were to hold out for six months.
The first Allied attempt to break the German
line occurred in Holland, where the Allies launched
the biggest airborne drop of all time in Operation
Market-Garden, at Arnhem. Unfortunately, this
operation proved a failure, as the paratroops were
mopped up by the German panzers.
In December, the Germans had mustered a
significant panzer reserve and had to choose what
to do with it. The general staff cautiously wanted
to keep it in reserve. Hitler correctly pointed out
that Germany could not win the war by defensive
actions alone, and insisted on an attack. Germany
was fighting on three fronts: France, Italy, and
Russia. Italy was out of the question — nothing
decisive could be determined there. Russia was
the front of greatest interest, but the front was so
vast that a local German victory would hardly be
noticed in the general press. France was the obvi-
ous place. If the panzers could break through the
Allied lines and get to the sea, the British and
Americans could be split. Perhaps they could be
forced back significantly, even knocked out of
France. Perhaps.
The ensuing attack was called the Battle of the
Bulge. A thousand German tanks pushed through
the thinly-held American lines, at the same place
where they had pushed through the French lines in
1940. The American infantry held firm enough to
critically slow the German advance. Then a
counterattack by General Patton wiped out most
of the attacking force. Hitler’s last gamble had
failed. A similar attack next month against the
Russians, in Hungary, was hardly noticed by the
Soviet commanders.
In early March, the Americans finally broke
through the German lines, and ran wild through
Germany, as the Russians fought through Berlin
house by house. The war was over in Europe.
The Japanese began open war with China in
1937. In 1941, American hostility to the Japanese
had grown to such a point that the Japanese felt
that they needed to defeat the U.S.A. in war before
they could continue their Asian conquests. The
Japanese started off with a pre-emptive strike —
the infamous air assault on Pearl Harbor, which
cost the U.S.A. much of its surface fleet. The
Japanese followed this initial coup by occupying
the Philippines and threatening the rest of the
Pacific basin.
The Japanese conquest of Singapore and the
Philippines was one of the great feats of military
history. Their army was outnumbered by the de-
fenders (the British outnumbered the Japanese by
2 to 1 in Malaya), they had little or no armor, and
they had no definite technological superiority
over the British and Americans.
In Malaya, the Japanese advanced with in-
credible speed. They ignored their supply lines
and marched their infantry rapidly around the
flanks of the British. Before the British knew what
was happening, they were surrounded. The Japa-
nese held complete air superiority, harassing the
British and bombing their fleeing columns. A
British task force containing a battleship and battle
cruiser was sent to contest the sea with the Japa-
nese, but both ships were sunk by air strikes before
ever sighting an enemy ship. When the Japanese
broke into Singapore itself, they headed right for
the city’s water supply. When that was captured,
the defenders surrendered unconditionally. The
total casualties for the campaign were 10,000
The War Against Japan
The
Pacific
War:
1941 and
early
1942
U.S. Rocket Launcher "Bazooka"

63
In both Malaya and the Philippines, the Japa-
nese won by ignoring their own supplies, and
sending their troops to infiltrate through or force-
march around the Allied lines. The British and
Americans, more dependent upon supplies, were
forced to retreat, and in the retreat, thousands
were captured or killed by the Japanese.
In retrospect, such an offensive tactic seems
risky. Could it not backfire? The case of Port
Moresby, New Guinea would seem to indicate so.
In this campaign, the Japanese landed on the north
shore of New Guinea, and marched over the
middle of the island (without supplies, as usual),
in an attempt to steal a march on the defenders
(who were composed of both Australians and
Americans) and occupy Port Moresby before the
enemy could react. The defenders were ready for
them, and managed to defeat the Japanese. The
Japanese casualties in battle were hardly exces-
sive, but now they had to retreat back to their
home base to regroup and resupply, since they
had depended on the capture of Port Moresby to
recover themselves.
Then the real ordeal started for the Japanese.
On the trip back over the New Guinea mountains,
the Japanese suffered cruelly from their lack of
supplies. They were harassed all along the way by
the Australians, who were aided by native guides
(who hated the Japanese). By the time the Japa-
nese got back to their base at Buna-Gona, almost
all their expeditionary force had been destroyed.
In the naval Battle of the Coral Sea, the
Japanese were stopped, but not seriously defeated.
They regrouped their forces, and sailed their fleet
towards Midway. A Japanese naval victory there
would threaten Pearl Harbor, and remove one of
the last Pacific bases the Allies possessed. The
outnumbered American fleet went on the attack,
and was not spotted by the Japanese until it was
too late. The Americans struck by air while the
Japanese and 140,000 British (mostly prisoners).
In the Philippines, the Japanese did likewise.
With air superiority and uncontested control of
the sea, their infantry once more force-marched
around the American/Filipino defenders while
infiltrators snuck right through the middle of the
U.S. lines. The Japanese also made several small
naval landings to outflank the defenders. Part of
the mistake made by the U.S. was their original
defensive plans, which assumed that the U.S. fleet
based in Pearl Harbor would be able to come to
their aid and drive away the Japanese fleet if need
be. With the Pearl Harbor flotilla mostly on the
bottom of the sea, that plan was void.
The
Pacific
War:
late 1942
to 1943
The
Japanese
Gamble
The Island Battles
Most Americans have heard of the many
vicious island fights that took place as the
Americans drove back the Japanese. Places
such as Guadalcanal, Tarawa, Iwo Jima, and
Okinawa have been enshrined into Ameri-
can military history. Although these battles
were important, none of these fights were
large enough to actually take place at Com-
mand HQ scale (in which a single infantry
unit represents well over 100,000 soldiers).
Instead, most of the Pacific war during these
years is best portrayed by naval battles.
U.S. Hellcat Fighter
64
Japanese aircraft were still looking for the U.S.
Fleet. Four Japanese carriers were sunk, and the
rest of their fleet pulled back in dismay. The
American fleet had become the equal of the
Japanese.
After Midway, the Japanese went over to the
defensive. Though their fleet was still the equal of
the Americans, it was clearly time for Japan to
hold onto its gains, and to let the Americans make
the next move. The next move came at Guadalca-
nal. This battle has become well-known in Ameri-
can military lore; it was the first time in World
War II that American troops met enemy troops
face-to-face. The land battle was long and hard,
and the Marines fought heroically, ending in a
total American victory. However, this battle was
really decided offshore, in naval battles.
At Guadalcanal, the Japanese sent in their
fleet again and again to bring in reinforcements to
the island, to shell the airfield, and, most impor-
tantly, to intercept the American fleet and destroy
it. The naval fighting was so heavy that the water
just offshore of Guadalcanal became known as
Ironbottom Sound, in tribute to the many ships
that littered the sea floor there.
The Japanese won some victories; in one, the
Battle of Savo Island, the Japanese sank 4 cruisers
and 1 destroyer for no losses (though one of the
Japanese cruisers was sunk by an American sub
on its way back from the battle). The Americans
won some battles, such as the Naval Battle of
Guadalcanal, which was truly an epic action — at
the end of the first day’s action, the Americans had
fought so fiercely that every American ship but
one had been damaged! The high point of the last
day’s fighting occurred when the American battle-
ship Washington singlehandedly engaged no less
than 14 Japanese warships (consisting of a battle-
ship, 4 cruisers, and 9 destroyers). The Washing-
ton sank the Japanese flagship and a destroyer and
forced the rest of the Japanese fleet into retreat.
Most of the actions off Guadalcanal were indeci-
sive, such as the Battle of Santa Cruz, in which the
each side lost one carrier, and damaged one other.
The sea battles for Guadalcanal are almost
unparalleled in the history of war. For six months,
the two fleets met again and again in almost every
possible combination of naval action — night
surface battles, destroyer vs. destroyer actions,
submarine ambushes, carrier strikes, even lines of
battleships. In the end, the Japanese were forced
to withdraw. They had failed to achieve a deci-
sive victory at any point, and the increasing
American numbers were now giving them
The Most Successful
Submarine Campaign
One of the least-known campaigns of
World War II is the American submarine
campaign waged against the Japanese. With-
out a doubt, this was the most successful use
of subs ever wrought. 1943 and most of 1944
saw the Americans keep up a savage subma-
rine war that devastated the Japanese mer-
chant marine. By 1945, Japanese shipping
was completely destroyed — American subs
even surfaced to fire their deck guns at sam-
pans in attempts to totally cleanse the sea of
all Japanese vessels. By late summer, the
home islands were actually on the brink of
starvation.
U.S. "Gato class" Submarine
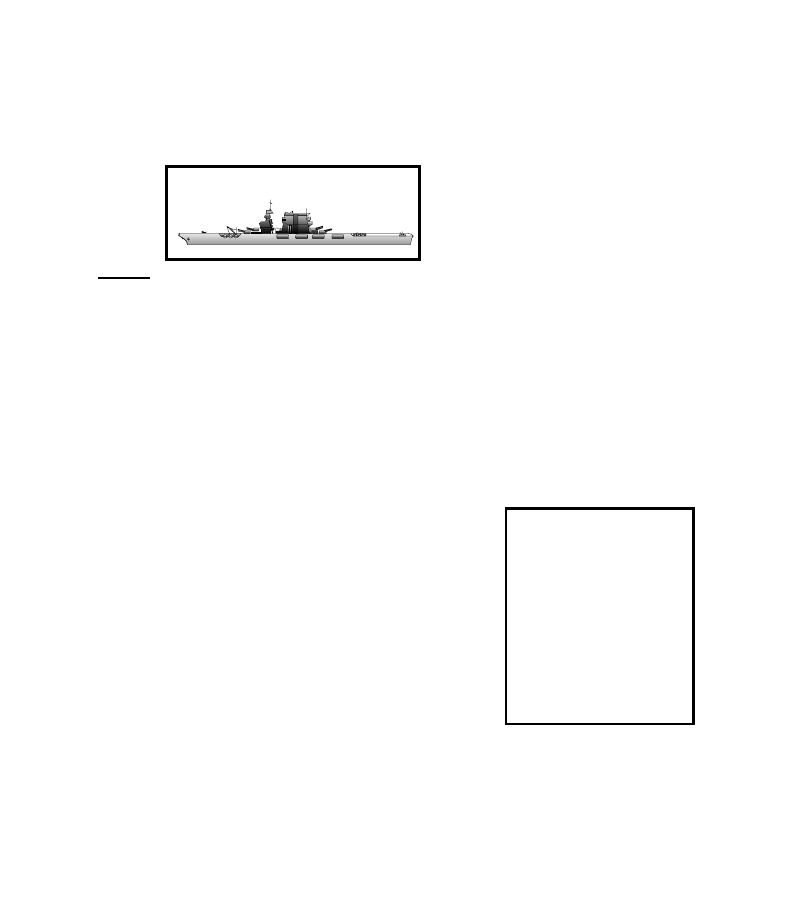
65
airplanes. The Japanese attackers boasted only
four big carriers, with a meager 116 planes be-
tween them (legacy of the Marianas Turkey Shoot).
During the course of the battle, all the effective
Japanese air strikes were carried out from land
bases. American subs started the action by dog-
ging the Japanese fleet, and occasionally picking
off a straggler. The initial American air strike,
against which the Japanese had no defense, cost
the Japanese a super battleship. After taking their
lumps from subs and air attack, the Japanese
finally engaged the American surface fleet. In that
encounter, known as the Battle of Surigao Strait,
the Americans “crossed the T” of the Japanese
battle line and sank half of the Japanese fleet. The
next day, the other half of the Japanese fleet,
consisting of four battleships, six cruisers, and 10
destroyers, caught six American carriers, accom-
panied only by seven destroyers. The Americans
fled posthaste, but in their retreat harassed the
Imperial fleet unmercifully. They lost one carrier
and three destroyers, but just as the Japanese
prepared to close their grip, they lost their nerve,
and pulled back. With the dawn, the Americans
were able to unleash their immense air power, and
command of the seas.
In June, 1944, the Americans invaded Saipan,
a stepping-stone to the Philippines. The Japanese
sent a large fleet (with 9 carriers) to intercept and
destroy the Americans. The two fleets were com-
parable in size, though the Americans had an edge
in air power. The Japanese fleet, however, blun-
dered into American subs, which sank the two
largest Japanese carriers. In the ensuing air battles,
the Japanese lost two more carriers and were
forced to pull back, having inflicted negligible
damage on the Americans. This battle counts as a
huge American victory — comparable to the
victory at Midway — because of the immense
numbers of Japanese aircraft destroyed in the air
battles. The Japanese lost 411 planes and 460
crewmen. The Americans lost 130 planes and
around 70 crewmen. The Japanese naval air arm
had effectively been destroyed, never to return.
This battle was later termed The Marianas “Tur-
key Shoot,” after the astounding American suc-
cess here.
After this striking success, the Americans
sent a battle fleet to reoccupy the Philippines. The
Japanese met the Americans with their Combined
Fleet, in an attempt to force the U.S. Fleet away
from the landing areas. This led to the largest
naval battle of all time. The Japanese fleet was still
a fearsome force, with two super battleships (the
biggest ever built), five other battleships, and 16
cruisers. The American gun-armed fleet had 12
battleships and seven heavy cruisers (approxi-
mate parity to the Japanese). However, the U.S.
fleet also had eight big carriers, eight light carri-
ers, and 16(!) escort carriers, with over 1000
The
Pacific
War:
1944 to
1945
USS Saratoga, Aircraft Carrier
World War II U.S. "G.I."

66
almost the whole of the Japanese fleet was sunk.
Of the entire gigantic Japanese fleet that had
come to contest for the Philippines, only two
battleships and two light cruisers escaped to fight
again. The Japanese had lost all four of their
carriers, three battleships, 10 cruisers, and 11
destroyers, as well as 500 aircraft (mostly land-
based). In return, they had sunk three small Ameri-
can carriers (one by kamikazes) and three destroy-
ers. The Americans lost over 200 aircraft.
With the battle of Surigao Straits, the Japa-
nese fleet was essentially no more. Though they
still had a few ships, their entire combined fleet
was no longer able to stand up to any single U.S.
task force. The outcome of the Pacific War could
no longer be in doubt.
The Americans steadily moved in on Japan,
and by mid-1945 had begun to prepare for the
invasion of the Japanese home islands. General
MacArthur estimated that the capture of Japan
would cost 1,000,000 American casualties.
President Truman, hoping to avoid such a
catastrophic battle, dropped the first atomic bombs
on Hiroshima and Nagasaki. Japan, of course,
surrendered (“resigned the game”) before the
invasion could take place. The first Atomic war
had been fought.
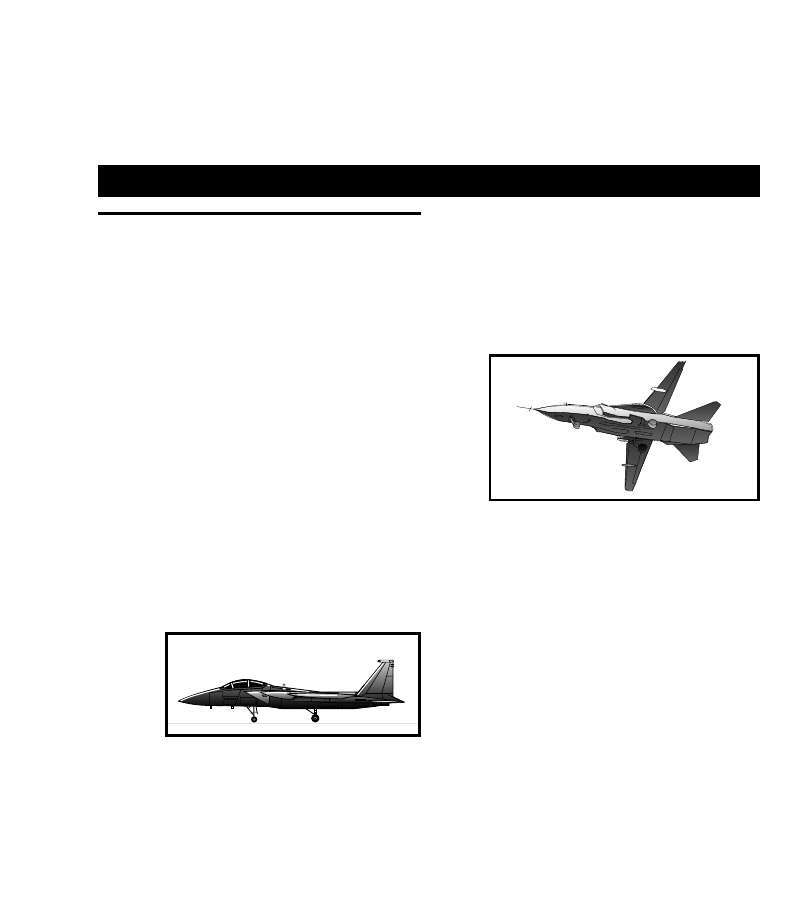
67
W
ORLD
W
AR
T
HREE
carrier is bigger than any battleship ever launched
and able to deliver inconceivably more firepower.
All soldiers in a modern infantry squad are armed
with fully-automatic weapons, giving them firepower
equivalent to a whole platoon of WWII soldiery. In
World War II, most soldiers walked to the front line.
Now, everybody rides in trucks or armored carriers.
Even the tradition-bound Marine Corps plans to
make naval landings via over-the-horizon attacks
flying their troops in with helicopters.
Modern Technology
In addition to these enormous changes in the
basic weapons of war, new weapons have been
added. The helicopter gunship, the smart bomb, and
the spy satellite are examples of weapons unavail-
able in previous wars that will be an integral part of
a major modern war.
So how does all this firepower change the nature
of warfare? The fact is, nobody knows. We know that
the new weapons are enormously destructive. It is
possible that some traditional weapon will now prove
itself to be totally useless, much as cavalry proved in
WWI. Almost every weapon system has been ac-
cused of obsolescence at some time in the last twenty
years. The hand-held Stinger missile gets a kill about
once every three shots — has the Stinger made strike
aircraft obsolete? It is now possible to lay a minefield
on the site of your choice with an artillery barrage —
More than any other factor, technology has
driven military thinking since the Second World
War. While military technology has actually pro-
gressed comparatively slowly since WWII, those
changes have been accumulating for years.
The best all-around tank of WWII was the 40-
ton Panther tank, produced by the Germans. Its
cannon fired a 12-lb shell, it had a maximum
speed of 30 mph, and three inches of frontal
armor. The best all-around tank of the 1980s is
probably the 65-ton U.S. M1A1 Abrams. Its can-
non fires a 40-lbs shell, and it has a maximum
speed of well over 40 mph, plus approximately
15(!) inches of frontal armor. In addition, changes
have occurred in quality as well as quantity. The
armor of most modern tanks is a specially-built
composite generally considered to be at least
twice as resistant to penetration as the old-fash-
ioned tempered steel. All modern tanks have
night-sights permitting them to fight in the deep-
est darkness. Some new tanks are equipped with
automatic loaders, dramatically increasing the
rate of fire.
A modern jet fighter is as big as a WWII
strategic bomber and can knock down targets
from miles away. Modern submarines can stay
underwater for literally years, move as fast as the
fastest surface ships, and fight with wire-guided
torpedoes or cruise missiles. A modern nuclear
“War is
progres-
sive.”
—
G e n e r a l
Ulysses S.
Grant
U.S. F-15 Strike Eagle
Air Superiority Fighter
Soviet Su-24
Deep Strike Aircraft
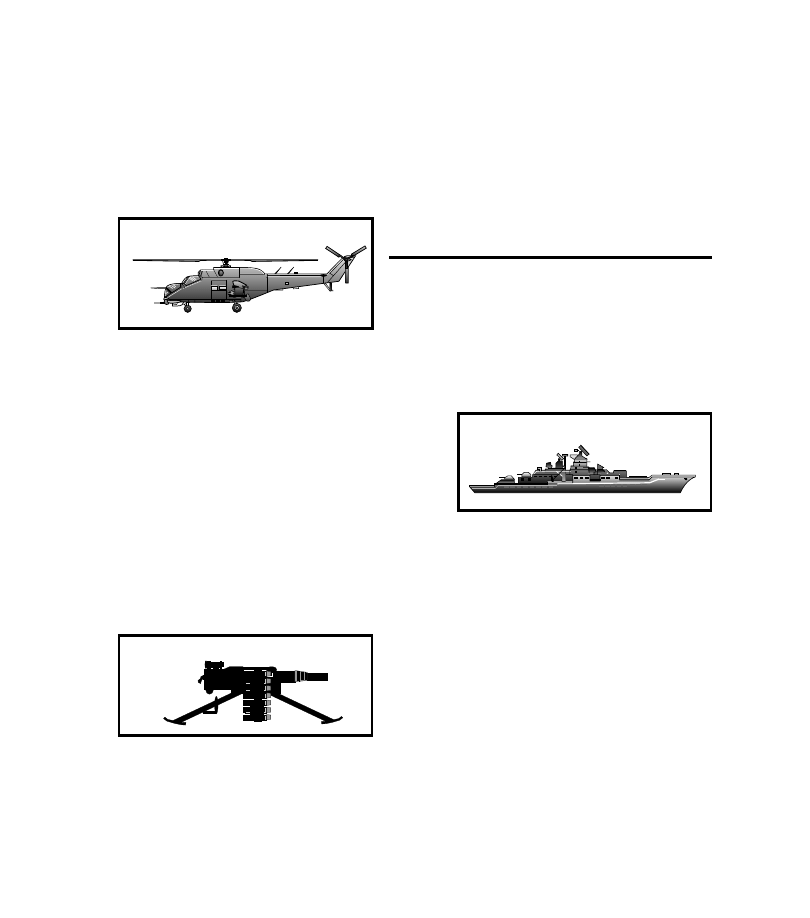
68
does this make tanks obsolete? Most military
thinkers say no, but they were wrong before WWI
and WWII. Why should they be correct now?
Another distinct characteristic of modern
weapons is that they are hugely expensive. The
thermal night sights mounted on every American
tank cost nearly a million dollars each! That same
tank uses 2 1/2 gallons of gasoline per mile! An
attack carrier costs well over a billion dollars. The
light machine guns used by American infantry
squads cost over $5000 each. The fact that every
soldier has an automatic weapon also means that
every soldier expends enormous amounts of am-
munition. Every soldier is now carried in a vehicle
— and those vehicles require lots of fuel.
Perhaps the next war will be a frightful dead-
lock reminiscent of the First World War, in which
anyone daring to show himself is instantly de-
stroyed. Perhaps the next war will be of lightning
speed, finished in a matter of weeks. Perhaps it
will be a war without front lines, in which all
communications are cut by electronic warfare,
and deep-probing air strikes, airmobile troops,
and tank thrusts will be everywhere at once.
World War III did not happen because, when
crises occurred, world leaders displayed acumen
superior to that of the glorified bureaucrats ruling
in 1914. In the Korean War, President Truman
fired the extremely popular (and militarily suc-
cessful) General MacArthur rather than permit
the war to spread to China and thence to Russia. In
the 1962 Cuban Missile Crisis, Krushchev backed
down rather than cause a war. A disinterested
third-party observer may have concluded that
Krushchev was within his rights in sending mis-
siles to Cuba and “should not” have backed down
— after all, the U.S. still has missiles in Turkey,
even closer to the Soviet border than Cuba is to
Florida — but the fact remains that a potential
world war was averted by Krushchev’s actions.
Soviet Mi-24 "Hind" Attack Helicopter
Politics
Command HQ does not pretend to know the
answer to these questions. We have chosen to
accept the most commonly-proposed military theo-
ries of today to simulate a supposed Third World
War. These theories hold that modern war is much
like WWII, only “more so.”
In many ways, the World War III era (from
the 1950s to the beginning of Glasnost) resembled
World War I more than World War II. Just as in
1914, the world until recently was divided into
huge power blocs. Just as in 1914, a huge arms
race drained the treasuries of all participants. Just
as in 1914, it was widely believed that war was
“inevitable,” though no nation particularly saw
any benefit to such a war.
SS Kirov, Guided Missile Cruiser
Soviet "Plamya" Belt-fed Grenade
Launcher
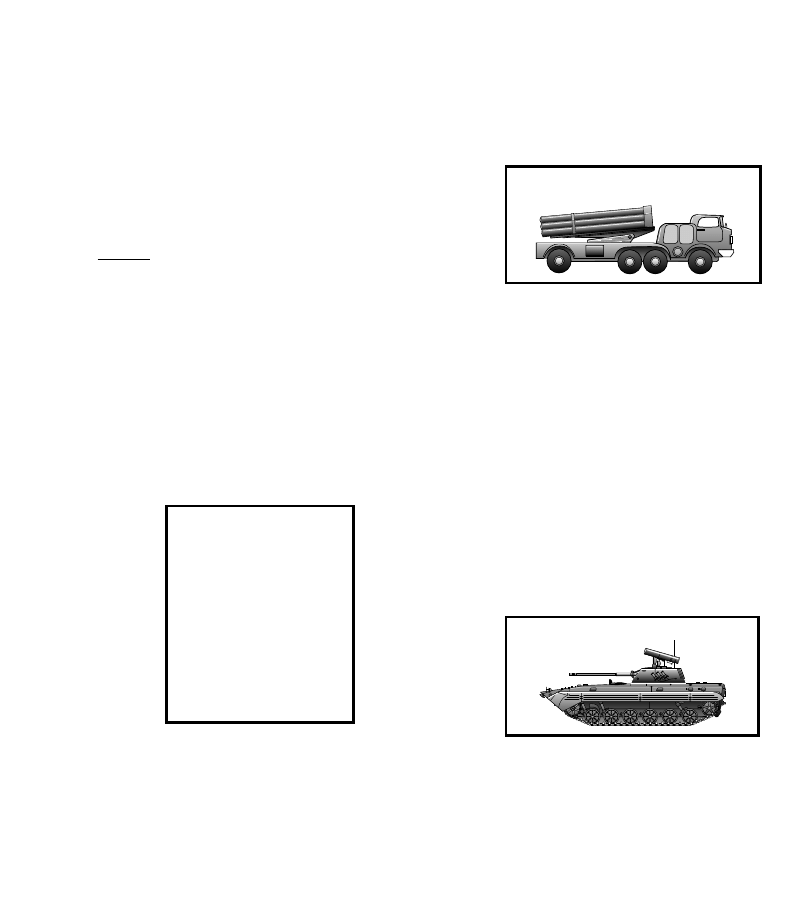
69
With the recent developments in the Commu-
nist bloc, it has become apparent that the “World
War III” thought to be imminent from 1950 to
1988 will never occur. If another World War
befalls us, it will be under conditions and situ-
ations very different from those holding true in
1986.
Among certain military enthusiasts, the prac-
tice of sneering at Soviet military potential has
been common. Their armed forces are belittled
because their troops are unskilled, their weapons
crude and unreliable, and their technology back-
wards.
The seeming lack of professionalism among
Soviet soldiers is a fact. Their soldiers are, in
general, less skilled at their jobs than Americans.
But Soviet soldiers are draftees, while Americans
are a volunteer, long-term army. Buried within the
Soviet army are as many regular non-draftee
soldiers and officers as in the American army;
they are just masked by the many conscripts with
whom they serve. Remember that in a world war,
the U.S. would speedily bring back the draft, and
our army too would be full of unskilled, confused
would-be soldiers.
World War III
Soviet Army Regular
Those
Dumb
Soviets
Soviet Self Propelled Rocket
Artillery System
Soviet military training is aimed at eliminat-
ing the flaws inherent in their personnel. They are
taught to obey rigidly and without question. Be-
cause of this, a Soviet army can make large
movements with a speed and precision impos-
sible to Western armies. On the other hand, this
leads to inflexibility as the army will make few or
no decisions on its own — the commanders must
decide everything.
The backwardness of Soviet technology is
partly true, and partly illusory. All American
tanks possess thermal night sights. No Soviet tank
possesses such a sight (they use the more primi-
tive infrared system). But we know for a fact that
the Soviets possess quite advanced thermal sights
— they have chosen not to place them on their
tanks for a reason. For the cost of two thermal
sights, they can build a whole tank, and they
believe that the slight decrease in quality is made
up for by a 50% increase in quantity. Russian
aircraft are much less reliable than American, but
they can be serviced much more quickly, on
primitive front-line airstrips.
Soviet BMP-2 Armored Personnel Carrier
70
Which approach to warfare is superior? It is
hard to say. Certainly an American soldier is
better-fed and better-paid than a Soviet one. But
he costs much more to train, and his morale and
courage is probably no better. It is just as well that
we may never find out which side would win.
Equally popular among some military circles
is the bashing of the American military. Our
weapons are mocked because of their high costs,
our soldiers are thought to be lazy and cowardly,
and our equipment is accused of unreliability,
spending more time broken down than in
working order.
American soldiers have been thought to be
tactically clumsy and cowardly in other wars. In
WWII, Hitler called them “the Italians of the
Western Alliance,” comparing American combat
ability to the dismal showing made by the Italian
army in that war. Because of this belief, he launched
the Battle of the Bulge against Americans, think-
ing the U.S. Army would crumble easily. History
bears testimony to his error. The Japanese could
have told him — they had already faced Ameri-
cans on a large scale and learned to respect them.
In Korea, Americans proved their ability to go up
against dogged, near-fanatical enemies and win,
even though vastly outnumbered. In Vietnam,
American soldiers were victorious over North
Vietnamese and Viet Cong troops in almost every
large combat action that took place. Though Viet-
nam was lost, that was largely a result of poor
generalship, not a failing of the troops themselves.
American soldiers are sometimes accused of
cowardice because of their willingness to rely on
artillery to do the hard work. This results from the
fact that American artillery is the best in the world.
U.S. Artillery is numerous, very responsive, and
extremely flexible. Their superiority is not tech-
nological (though they are of high quality), but is
based on the fact that almost any officer, any-
where in the chain of command, can call down a
barrage almost at need.
American weapons are indeed costly, but not
more so than those of most other nations. The
Japanese just finished building the Type 90 tank,
which costs $8.5 million each — three times as
much as the American M1 Abrams which is, by
any standard, superior to the Type 90. A single
Stinger missile costs $50,000, but can knock
down aircraft costing $10-20 million and more.
The reliability of American weapons is actu-
ally increasing. In 1965, the U.S. navy flew the
Phantom F4 fighter-bomber. Now, we fly the F/
A-18 attack fighter which takes less fuel, flies
longer without needing a maintenance check, and
has a longer expected life span. Similar features
are true of most American weapons, with a few
glaring exceptions.
Those
Dumb
Americans
World War III
U.S. Infantryman
U.S. M1A1 Abrams Main Battle Tank
Wyszukiwarka
Podobne podstrony:
wazna sciaga- analiza the best of, analiza żywności
the best of 2004 www prezentacje org
The Best of Kuttner 1 Henry Kuttner(1)
The Best of Robert Bloch Robert Bloch(1)
The Best of Judith Merril Judith Merril(1)
The Best of Isaac Asimov Isaac Asimov(1)
Newsletter The best of Odjechani com pl PDF
Frederik Pohl The best of Frederik Pohl
The Best of Murray Leinster (US Murray Leinster(1)
The best of Amish cooking traditional and contemporary recipes adapted from the kitchens and pantrie
Hal Clement The Best of Hal Clement
Sinead O Connor [So Far The Best Of] [UK] [IMPORT] [AAC] [320kbps] [CBR] [CodeTempest] [DESCRIPTION
Brzechczyn, Krzysztof Unsuccessful Conquest and Successful Subordination A Contribution to the Theo
The Best of Lester del Rey Lester del Rey(1)
Van Vogt, AE The Best of AE van Vogt
więcej podobnych podstron