The ultimate picnic table
For the intermediate woodworker, a patio table that's rugged
and refined
S
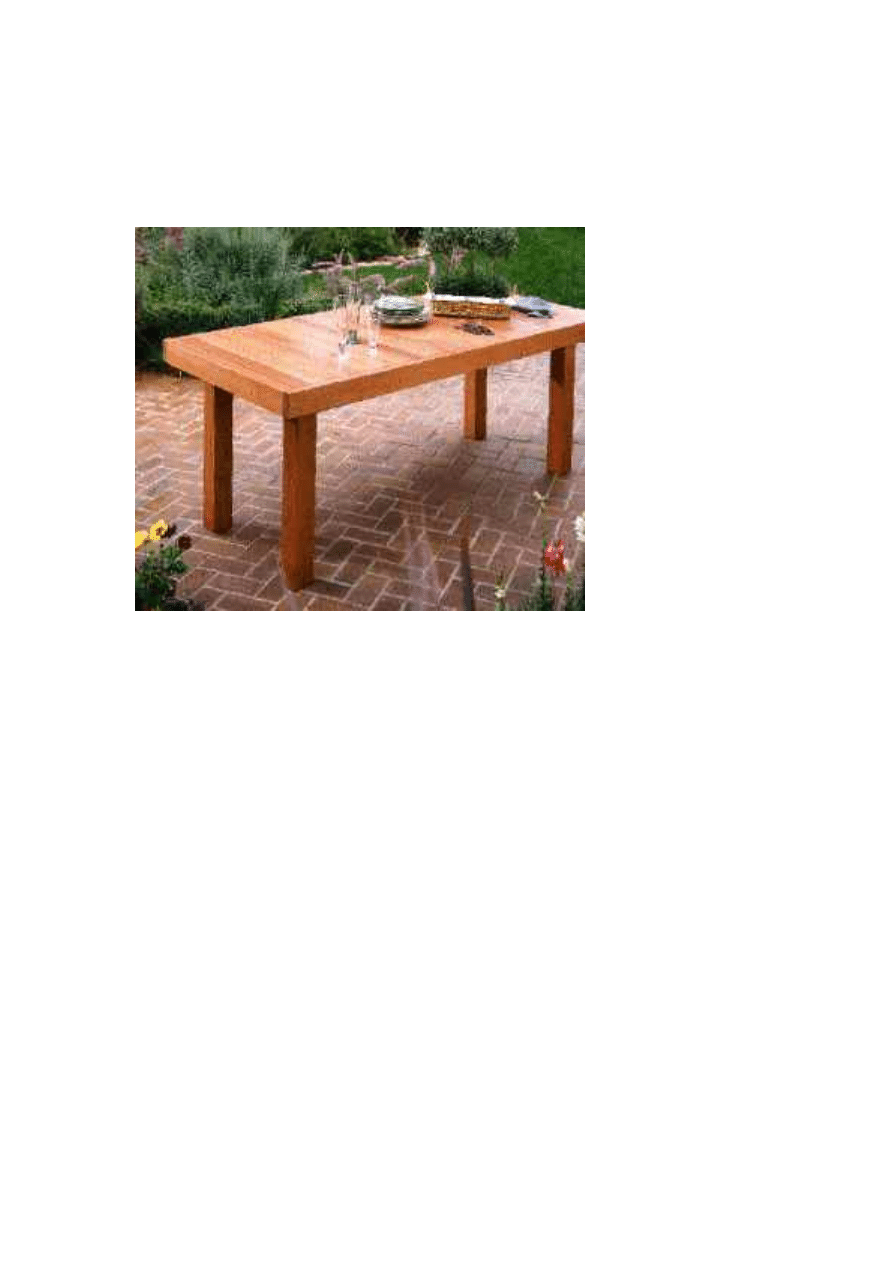
ome decks are built like furniture, but here's a picnic table that's built like an
elegant deck. I wanted no nails or screws to mar the surface of the alternating
1-by-3s and 1-by-4s that pattern the tabletop, so I secured the top boards
from below with screws running through a supporting ledger. The only hint of
metal connectors is a circle of copper that shows near each end of the 2-by-
4s that frame the top. They're actually flush-mounted copper-pipe end caps
masking the lag screws that join the perimeter frame.
The table shown above measures 36 inches wide by 75
3
/
8
inches long and
comfortably seats eight people. I built the picnic table with redwood, but you
can substitute fir, cedar, teak, or mahogany. My materials cost about $230.
Notes: All connections are simple butt joints. The wood is standard-dimension
lumber. Only the 2-by-6s used for the base connecting the legs were ripped
down to 4
1
/
4
inches wide. (If you don't have a table saw, have the lumberyard
cut the two boards for you.) All other cuts are square and can be made with a
handsaw or a circular saw.

MATERIALS
*Six 6-foot 1-by-3s
*Six 6-foot 1-by-4s
*Two 10-foot 2-by-2s
*Two 10-foot 2-by-4s
*Two 8-foot 2-by-6s
*One 10-foot 4-by-4
*One sheet
1
/
16
-inch cardboard
*Two dozen 2
1
/
2
-inch deck screws
*100 1
3
/
4
-inch deck screws
*Wood glue
*One dozen
5
/
16
- by 4-inch hex bolts
*One dozen
5
/
16
-inch hex nuts
*Two dozen
5
/
16
-inch washers
*Four
1
/
4
- by 3-inch lag screws
*Four
1
/
4
-inch washers
*Eight 1-inch copper-pipe end caps
*Epoxy
*1 quart satin-finish water-base sealer
TOOLS
*Tape measure and pencil
*Circular saw
*Matte knife
*Combination square
*Framing square
*Bar clamp
*Two socket wrench sets
*Electric drill
*
1
/
8
- and
3
/
8
-inch drill bits
*1-inch paddle bit
*Electric sander
*Medium-grit sandpaper
*2-inch paintbrush
The ultimate picnic table
DIRECTIONS
The table has three parts: a top, a frame, and a
base. You build the top upside down and use its
finished inside dimensions to determine the size
of the base. First, cut 11 33-inch lengths from the
1-by-3s,12 from the 1-by-4s, and one from each
of the 2-by-4s. Then cut four 29
1
/
2
-inch-long 4-by-
4 legs. Also, trim cardboard into 1-inch squares
to space the tabletop boards.
1. Lay
the two
33-inch
2-by-4s
on
edge
and
alternat
e 12 1-
by-4s and 11 1-by-3s flat
between them. Insert
cardboard spacers between
boards to determine the
tabletop's length.
2. Butt
each
remaini
ng 2-
by-4
against
one
end of
the
assembled boards, and on
the 2-by-4's inside face, mark
both the thickness of the 1-
by-4s and 1-by-3s and the
overall length of the tabletop.

Cut side 2-by-4s to the length
marked.
3.
Measur
e
distanc
e
betwee
n 2-by-
4 end
pieces
and cut two 2-by-2 ledgers to
measure 1/4 inch less.
Center and align each 2-by-2
on line marking tabletop's
thickness on each 2-by-4
side piece; secure with five
21/2-inch deck screws.
er
4. Butt
2-by-4
side
pieces
over 2-
by-4
end
pieces.
Center and drill pilot holes
through sides into ends with
1/8-inch drill bit. Switch to 1-
inch paddle bit and drill 7/8-
inch-deep holes into sides.
Assemble frame using glue
and lag screws with washers.
5.
Carefull
y lower
frame
over
the 1-
by-4s
and 1-
by-3s with cardboard spacers
still in place. It should be a
tight fit. Add a pair of spacers
between frame and first
board at each end.
6. Draw
a line
down
the
cent
of each
2-by-2
ledger.
Using line as a guide,
position and drill two 13/4-
inch deck screws through 2-
by-2 and into back of each
top board, keeping screws
about 1/4 inch in from sides
of top boards.
7. Cut
two 2-
by-2
end
ledgers
to fit
snugly
betwee
n side
ledgers
, and
screw
to
inside
faces of the end 2-by-4s with
three 21/2-inch screws.
Measure width and length
between the end and side
ledgers, then subtract 1/4
inch from each for
dimensions of base. Cut
frame sides and ends from
ripped-down 2-by-6s.
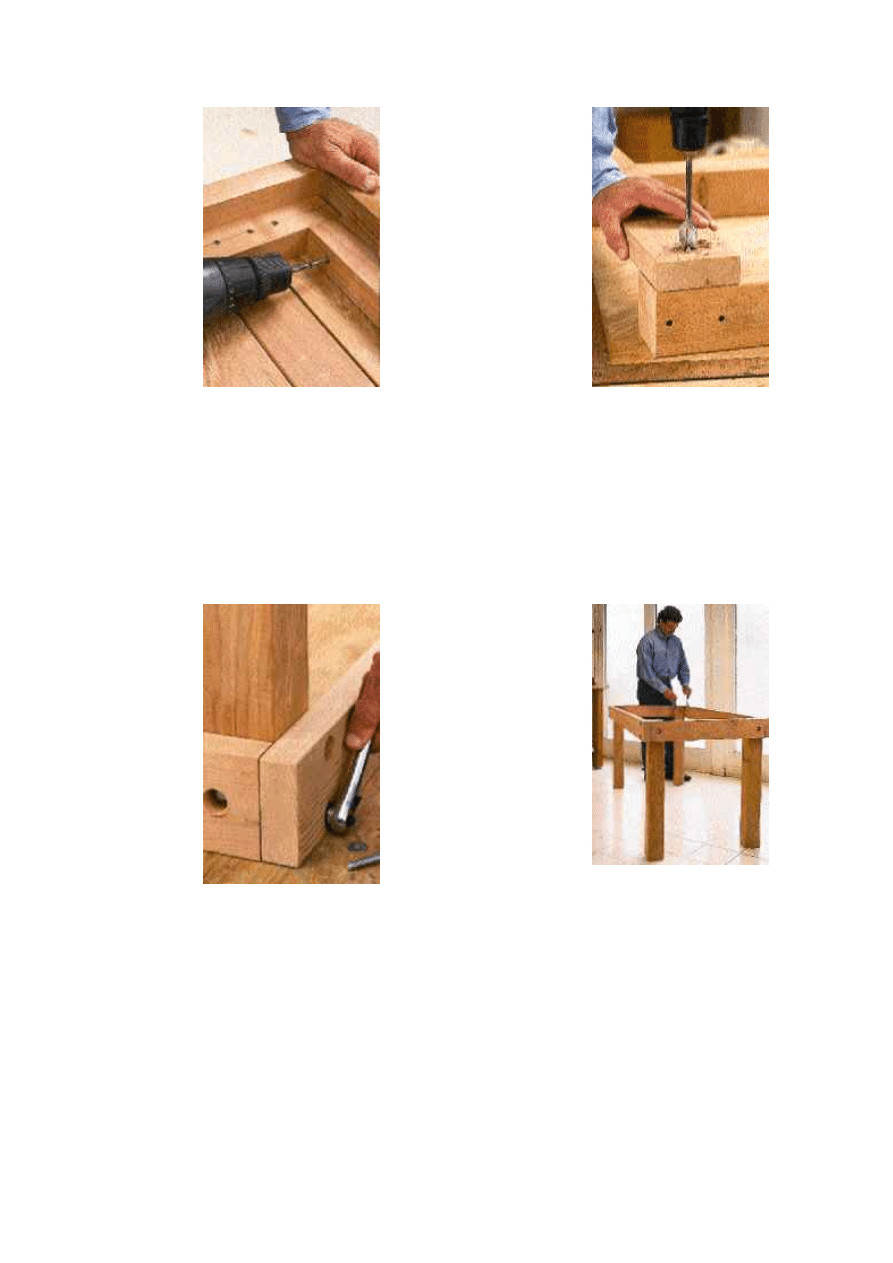
8.
Overlay
one
end
piece
flush
with
tops
and
sides o
a pai
of legs.
Cente
and,
using a 3/8-inch bit, drill holes
through the end piece and
each leg. Switch to1-inch
paddle bit (shown in photo)
and use these holes as
guides to drill a 7/8-inch-deep
hole in each leg back and in
the outside face of the end
piece. Repeat for opposite
end.
f
r
r
ng
ck
for
n
10. Use
frami
square
to
che
corners
and
legs
square
ness,
then
tighte
nuts
and bolts with socket
wrenches and let glue dry
overnight.
9.
Repeat
steps
for
base
sides,
aligning
sides
flush
with leg
tops
and
outside
faces
of the end boards before
drilling a pair of holes
centered over leg and 3/4
inch from edges of each side
board. Loosely assemble
base upside down with glue,
hex bolts, nuts, and washers.
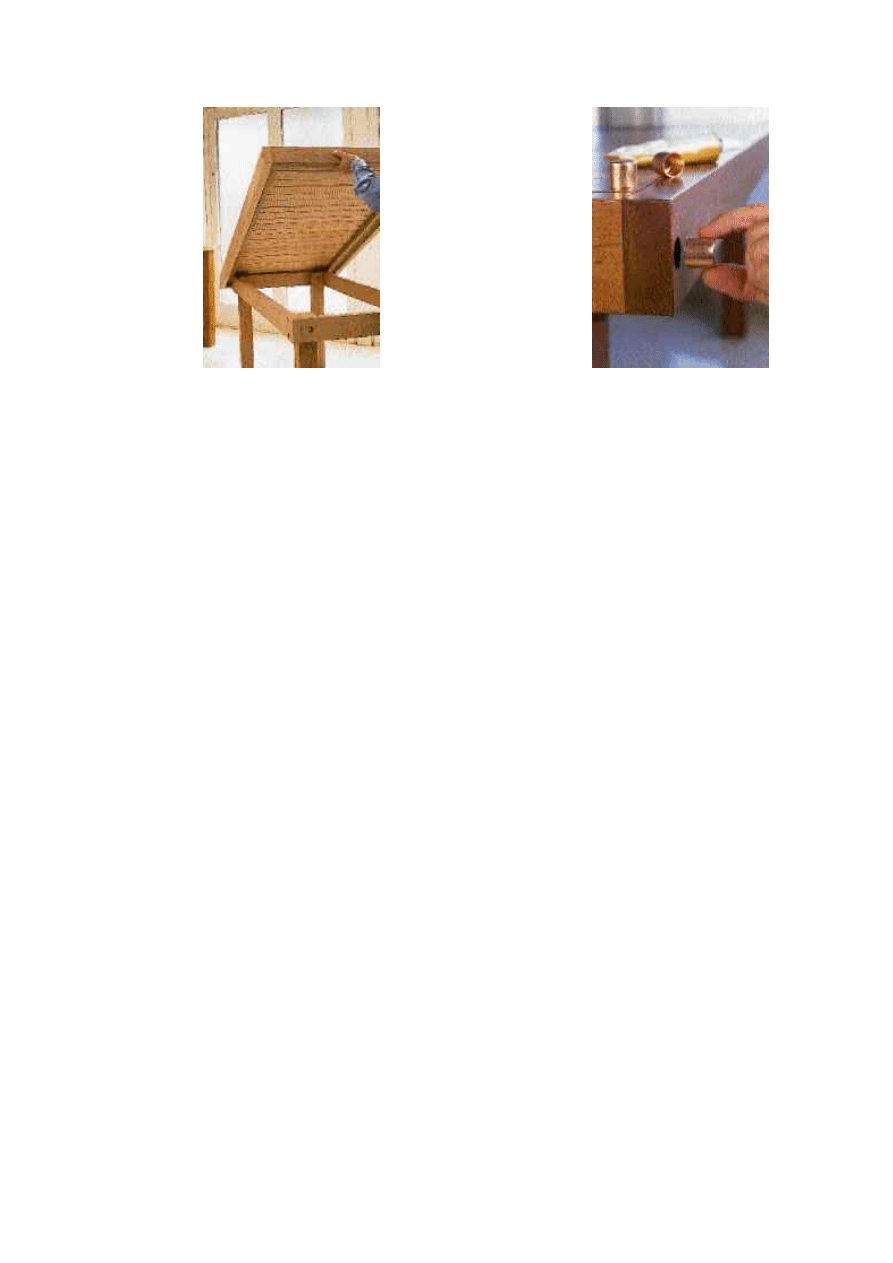
11.
Lower
top
onto
base to
check
fit, then
remove
and
sand
and
seal
each
part separately. Lightly sand
after each of three coats of
sealer.
12.
Attach
top to
base
with
21/2-
inch
screws
running
through
inside
faces
of base
sides and into tabletop side
ledgers. Epoxy copper caps
in exposed holes.
Document Outline
Wyszukiwarka
Podobne podstrony:
A picnic table is a project you?n buy all the material for and build in a?y
Picnic Table 2
Picnic Table(2)
picnic table
Picnic Table 1
Table Traditional 6 Foot Picnic Table (with wheels)
Table Picnic Table 2
Picnic Table
Table Picnic Table and Benches
Picnic Table(2)
Table Picnic Table (Part 1)
oak dining table
Coffee Table 1
table style2, ♥Dokumenty
więcej podobnych podstron