Raised Panel Door Tools and Techniques - Rockler.com
http://www.rockler.com/articles/display_article.cfm?story_id=103
1 of 4
20/02/2007 4:56 PM
Store Locations
|
Quick Order
|
My Account
|
Wish List
CART
0 Item
Order by phone: 1-800-279-4441 code AF078
SEARCH:
Welcome, Guest.
Other Woodworking
Projects Articles
Build Your Own
Entertainment Center
Buying Ready Made
Cabinetry
Update Your Cabinetry
Painting Your Cabinets
See More
Article Categories
Adhesives, Sanding and
Finishing
Hardware
Tools
Woodworking Projects
Home
Articles
Raised Panel Door Tools and Techniques
Page 1 of 2
Raised Panel Door Tools and Techniques
Raised panel doors have long been a hallmark of fine cabinetry.
Unfortunately, many hobbyists and weekend woodworkers think that raised
panel door construction techniques are strictly the territory of experts and
professionals. In fact, that's not the case at all. Below, we'll take a look at
some of the tools and techniques that make building impressive, classic raised
panel doors a process that anyone with a few basic woodworking skills can
enjoy.
And to show you just how easy the process can be, on page two of the
article, we'll walk you through the steps involved in making an
arched-top raised panel door. When you're ready to get started making your
own frame and panel doors, you'll find all of the best-quality door
making tools, equipment and supplies at Rockler Woodworking and
Hardware.
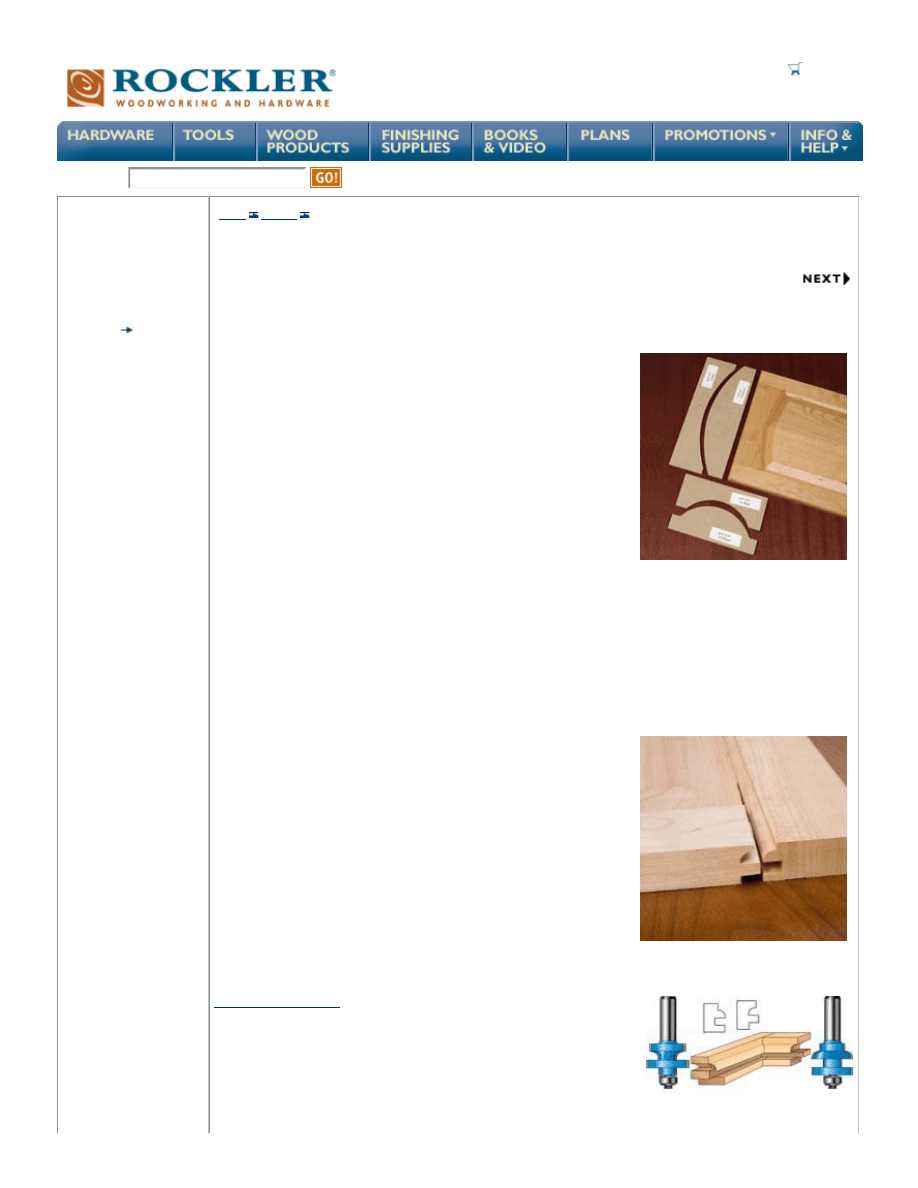
How Raised Panel Doors "Work"
Raised panel doors are an example of frame and panel construction, a method developed hundreds of years ago to
combat the effects of moisture on solid wood used in cabinetry and furniture making. In a frame and panel construction,
a large panel is fitted into a groove in the interior edge of a more dimensionally stable frame made of narrow strips of
wood. The panel is sized slightly smaller than actual dimension that the grooved frame will accommodate, and simply
rests in the groove without being physically attached to the frame. Since the panel is given a little "room to move" and
isn't physically attached to the frame, it is free to expand and contract with seasonal changes in humidity without
affecting the stable shape and size of the frame.
Tools for Fast, Accurate Frames
For any frame and panel construction project, the first and most
important task is to mill the parts of a sturdy, flat and square frame. There are
a number of ways to accomplish this, and a variety of joinery methods
that can be used for the all-important joints of the frame. For frame and panel
cabinet doors, where joint stresses are usually light to moderate, the most
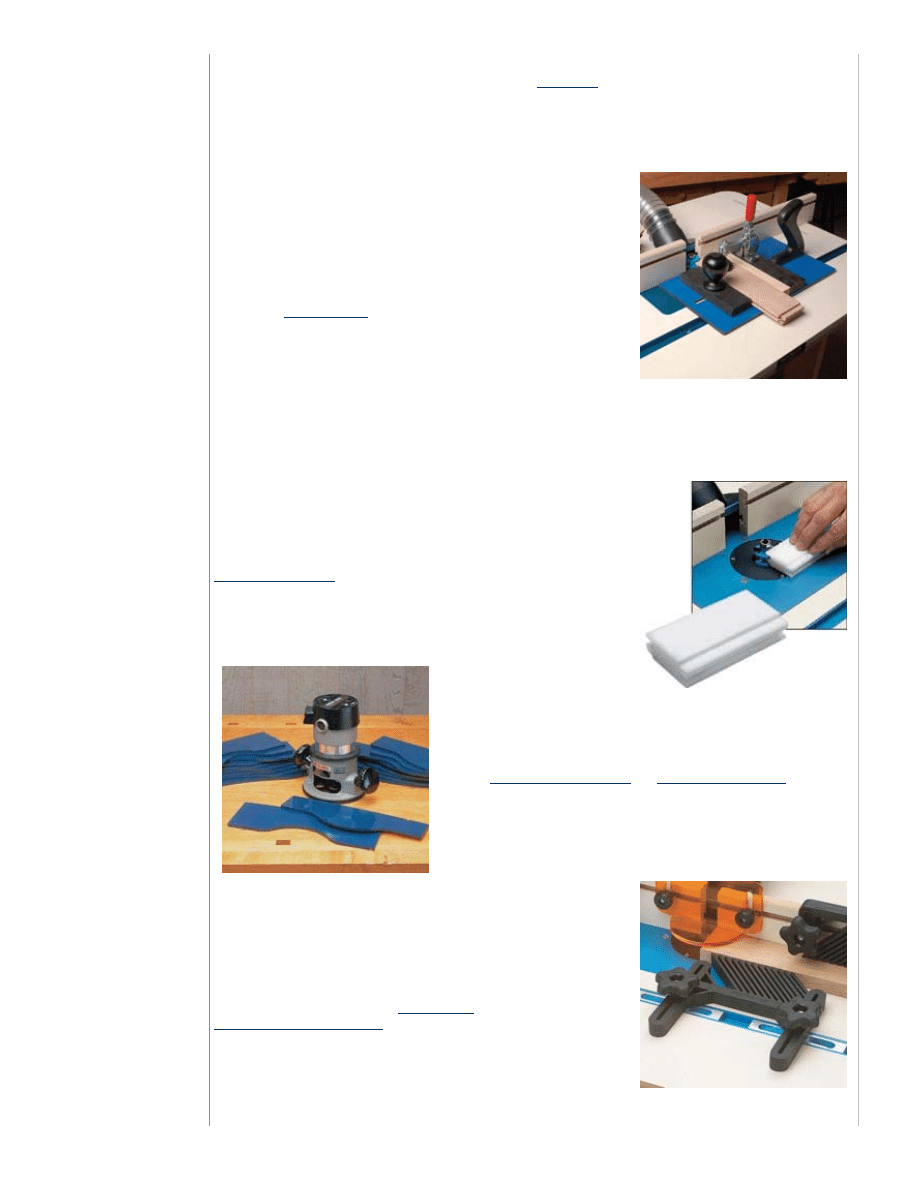
popular choice is the fast and easy-to-master "cope and stick" method.
In cope and stick joinery, the frame is held together by a joint between the
edge of the "stiles" (the vertical members of the frame) and the ends of
the "rails" (the horizontal members of the frame). The "sticking" - the panel
groove and the decorative profile on the interior edge of the frame - is
matched by a special cut in the end of the rail called a "cope."
To complete the joint, the two matching profiles are simply glued and
clamped together. The strength of the joint relies on a near-perfect match
between the cope and the sticking, which is achieved by using router bits designed especially for the purpose.
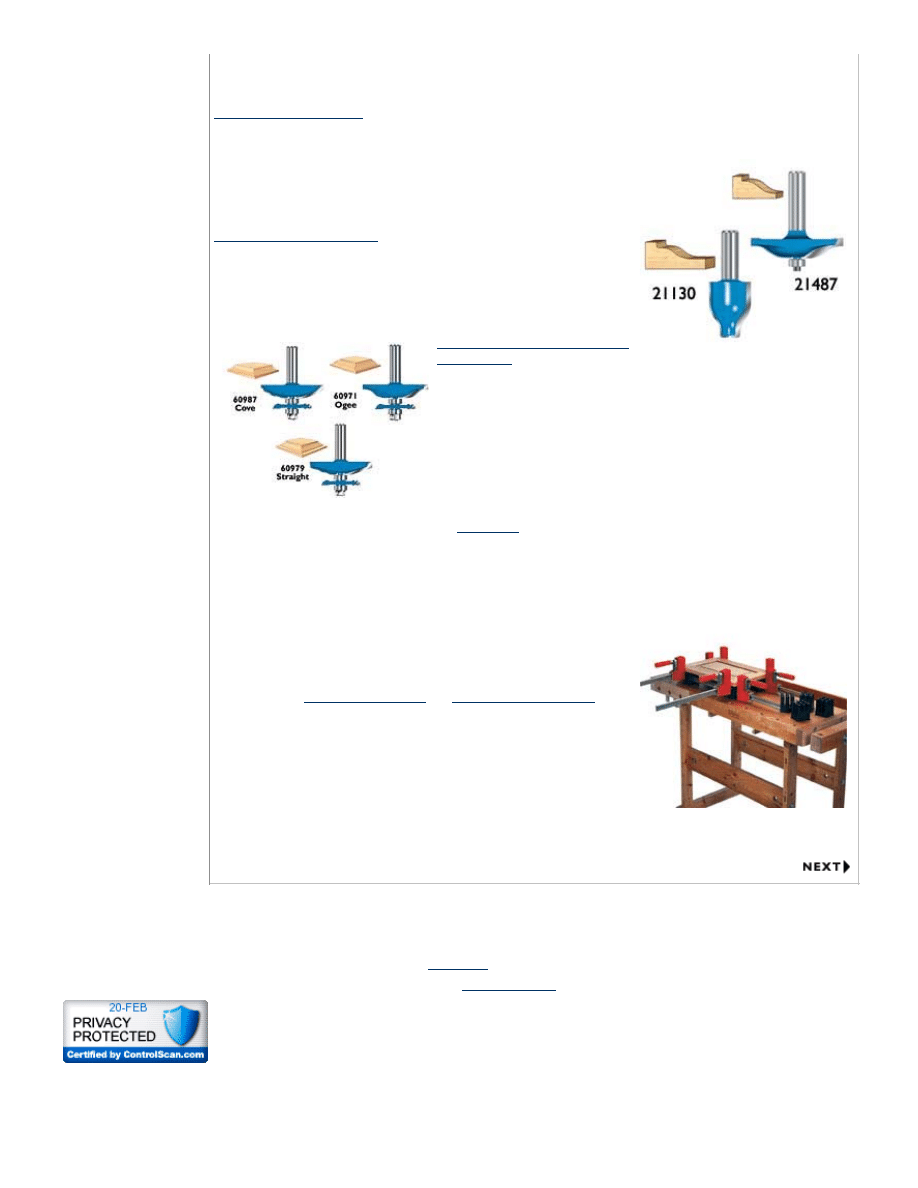
Stile and Rail Router Bits
Stile and rail router bits
are available in a variety of designs and
configurations. The "matched set" of stile and rail bits is among the most
popular and easy to use. The sets are comprised of two router bits that are
"matched" to produce an exact fit between the sticking profile and
cope. Matched sets of stile and rail router bits are available in a variety of
profiles, including ogee, bead edge, round edge and traditional. The most
important consideration, however, is to look for a bit set that's manufactured to
precision standards with cutters machined from quality carbide.
Keyword or Item Number
Raised Panel Door Tools and Techniques - Rockler.com
http://www.rockler.com/articles/display_article.cfm?story_id=103
2 of 4
20/02/2007 4:56 PM
Stile and rail router bits are designed to be used strictly on a
router table
. The performance of the bits, in fact, depends
to a large degree on the quality of the router table and on the availability of a few key accessories. To produce the
perfectly square and level router cuts required in cope and stick joinery, the table needs, at minimum, to be flat, well
supported, have a straight and reliable fence, and an accurate miter gauge. Beyond that, a few related pieces of
equipment can go a long way in making the process smooth and successful:
The Rockler Rail Coping Jig
Getting a cope cut that's square and consistent in height over the length of the
cut is extremely important. Using a miter gauge to cope rails is an option,
but care should be taken. A miter gauge set at an angle that's even slightly off
90 degrees will cause incorrectly cut rail ends and make square, close-fitting
joints virtually impossible. And if the rails aren't kept perfectly flat on the
surface of the router table, the result is a cope that's out of level or at the
wrong height. The result is a joint that's twisted or isn't flush.
The Rockler
Rail Coping Jig
really helps out, both in producing a square cut
and in keeping the rail flat during the cut. The jig is pre-set at a 90 degree
angle - you'd really have to try to make a cope that isn't square. The jig
clamps the rail securely in place (with the flip of a lever) so there's no chance
that the stock will wander backwards out of the cut during the operation.
With the rail clamped flat against the surface of the jig, getting a cut that's
perfectly level and at exactly the right height is just a matter of keeping the jig flat against the surface of the table
during the cut, an operation that the jig's ergonomic, "hand-plane" design makes easy and natural. The replaceable
hardwood backer completes the package by virtually eliminating the problem of tear-out when the coping bit exits the
cut.
Router Bit Set Up Jigs
Setting the height of the stile and rail bits is a crucial step. A good set of stile
and rail bits makes perfectly matching cuts, and there's no opportunity to
"fudge" the joint in one direction or another once the cuts are made. If the
height of the sticking profile bit and the coping aren't set correctly, the
surfaces of the stiles and rails won't be flush when joint is assembled. Rockler
Router Bit Set-Up Jigs
make setting the height of stile and rail bits almost
impossible to get wrong. Each set up jig is cut at the optimum height
with exactly matching sticking and cope profiles. You just adjust the height
of the bit until it matches the profile of the jig and you're ready to start
cutting.
Cathedral and Arched Door
Templates
Cathedral and arched-top doors are
the "top of the line" when it comes to raised panel doors. But many
intermediate woodworkers consider them out of their league. The truth is,
making doors with curved top rails and panels is no more difficult than
making any other type of door - provided you have the right equipment.
Rockler's
Cathedral Door Templates
and
Arched Door Templates
make
cutting perfectly shaped arched rails and cathedral style rails and panel quick
and easy. Each set comes with matched rail and panel templates that cover a
range of common cabinet door widths.
Feather Boards
Keeping the stock flat against the surface of the router table and up tight
against the router table fence while cutting the sticking profile is of primary
importance. "Feather boards" apply gentle even pressure on the stock while
you are making sticking profile cuts, leaving you free to concentrate on
moving the stiles and rails through the cut at the slow, even rate necessary to
produce a clean edge. Feather boards are nothing new - they've been around
for a very long time. But certain improvements over the years have made
them easier to use and set up. The
feather boards
available as an accessory for
Rockler Router Table Packages
, for example, are designed to attach and
adjust to the perfect position in a few seconds.
Perfect Panels
In many ways making the panel is the least challenging part of raised panel
door construction. The panel is really just a passenger in the door frame, and
doesn't really contribute to the structural strength of the door. The main challenge in the panel-making process is to
Raised Panel Door Tools and Techniques - Rockler.com
http://www.rockler.com/articles/display_article.cfm?story_id=103
3 of 4
20/02/2007 4:56 PM
Find a Store
Sign up for our Email
New Product Ideas
Affiliate Program
Woodworking Blog
Learn
About Rockler
Careers
Customer Service
Contact Us
FAQs
create a smooth edge profile that's exactly the right thickness to fit snugly in the panel groove. To do that, you need a
quality raised panel router bit. Here, you have a few options:
Vertical Raised Panel Bits
Vertical raised panel bits are a good option for smaller router / router table set-ups. Because the panel is run vertically
along the router table fence, the bit has a small cut radius compared to a horizontal bit. The small cut diameter of the bit
makes it a safer tool for routers under 1-1/2 HP, and routers with no speed
adjustment feature. These bits will cut a perfectly smooth profile and a panel
that fits the panel groove perfectly, although they may take a little more
practice to set up than some other types of panel-raising bits.
Horizontal Raised Panel Bits
Horizontal raised panel bits have the added feature of a pilot bearing to guide
the router cut along the edge of the panel. This is a necessary feature for
arched and cathedral style door-making. Horizontal bits require a more
powerful router and slower operating speeds because of their large cut
diameter.
Horizontal Raised Panel Bits with
Back Cutters
This is as good as raised panel router bits get. The back cutter on these router
bits rabbets the back edge of the panel, which makes for a perfect
panel-to-groove fit every time. The back cutter also allows you to use stock
for the panel that is the same thickness as the frame stock, while still placing
the panel on the same plane as the surface of the frame.
Space Balls Stop Panel Rattle
"Panel Rattle" happens when changes in humidity cause a door panel to
shrink down to loose fit in the panel groove.
Space Balls
are 1/4'' diameter rubber balls designed to be installed in the
panel groove before glue-up. The compressed rubber expands and contracts along with seasonal changes in humidity,
keeping door panels centered and rattle-free year round.
Assembly Tips for Flat Doors
You have your perfectly machined stiles and rails ready to go. The panel
profile is perfectly smooth and fits in the groove just right. You're home free,
right? Not exactly. Assembly can be the make-or-break point of the
entire process. For a door to end up flat, it has to be glued up flat - it's that
simple. For the glue-up procedure, a perfectly flat surface is essential. But
even if your workbench is dead-on flat, it won't matter unless your clamps
follow through.
Bessy K-Body Clamps
and
Rockler Sure-Foot Clamps
are
both designed to stay upright and to maintain the consistent
work-surface-to-clamp-surface distance that keeps your doors flat during
assembly.
Putting Theory into Practice
Now that you have an idea of the tools and techniques that go into successful
raised panel door construction, the next step is to see them in practice. That's
what we'll do on the next page, where we'll go through the steps in making an
arched-top raised panel door.
"Online response was excellent and the item arrived much sooner than I had expected. I'm very pleased with the quality of sevice from
Rockler."
- Customer Comment - 07/08/2005
See more...
Rockler Partner Link:
Return to Bench Notes
ALSO VISIT:

Raised Panel Door Tools and Techniques - Rockler.com
http://www.rockler.com/articles/display_article.cfm?story_id=103
4 of 4
20/02/2007 4:56 PM
Copyright
© 2007, Rockler Companies, Inc. This is a
Secure
Shopping Site
web2
Raised Panel Door Tools and Techniques - Rockler.com
http://www.rockler.com/articles/display_article.cfm?story_id=104
1 of 5
20/02/2007 4:58 PM
Store Locations
|
Quick Order
|
My Account
|
Wish List
CART
0 Item
Order by phone: 1-800-279-4441 code AF078
For a more in-depth look at frame and
panel construction, we recommend
Bill Hylton's
Frame and Panel Magic
Don't like math? The
Woodshop
Calculator
will do it for you. This
affordable software system does all of
SEARCH:
Welcome, Guest.
Other Woodworking
Projects Articles
Build Your Own
Entertainment Center
Buying Ready Made
Cabinetry
Update Your Cabinetry
Painting Your Cabinets
See More
Article Categories
Adhesives, Sanding and
Finishing
Hardware
Tools
Woodworking Projects
Home
Articles
Raised Panel Door Tools and Techniques
Page 2 of 2
Raised Panel Door Tools and Techniques
Part II - An Arched-Top Raised Panel Door in Ten Steps
Below, we'll go through the steps involved in making an arched-top raised
panel door. As you'll see, with the right tools and equipment, the process is
actually fairly simple and straightforward. Woodworkers with intermediate
skills and some experience using a router table will have no trouble mastering
the techniques in a short time.
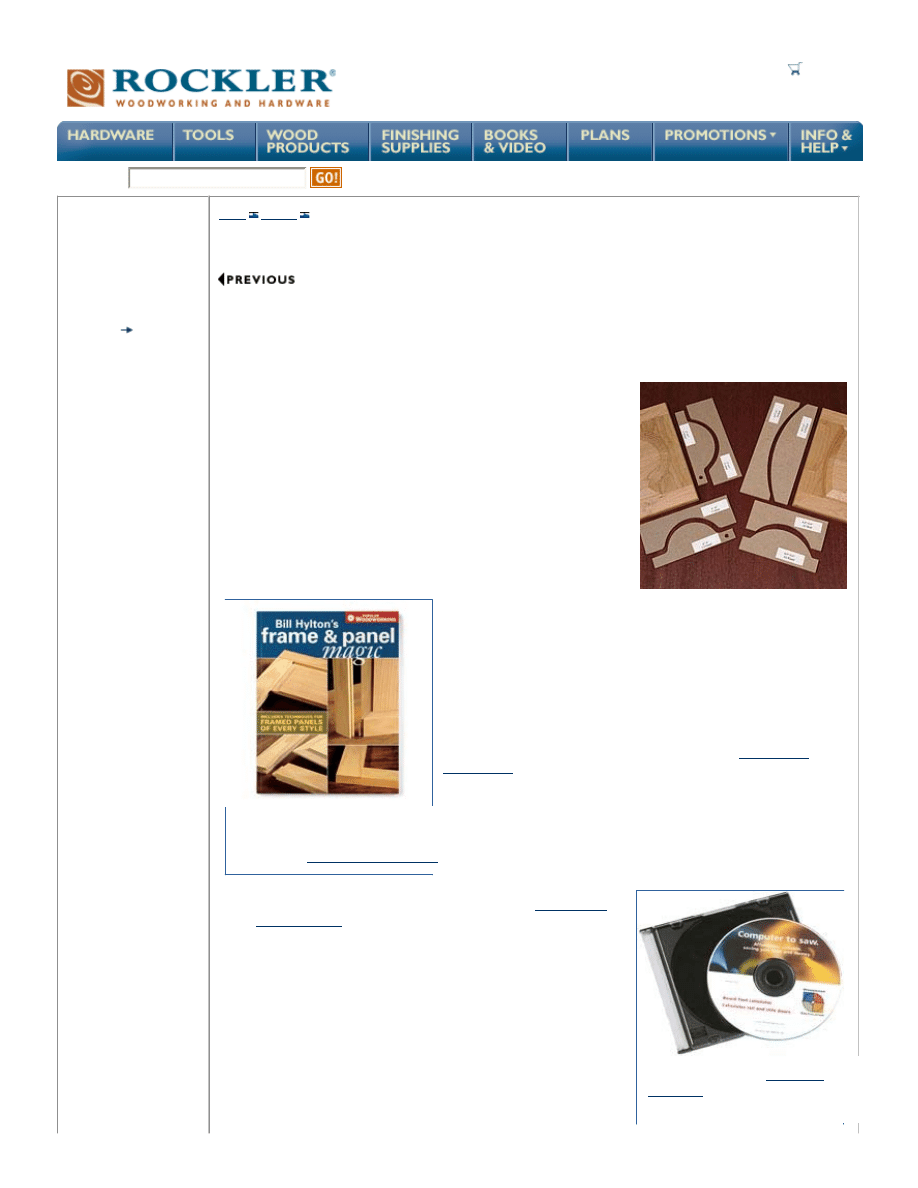
Step 1 - Selecting and Preparing the Stock
The first step in making a frame and panel door is to select and prepare the
stock. This step is important. The squareness and flatness of the finished door
will depend in a large part on the quality of the stock selected. In selecting the
stock for our door, we sorted through several pieces of cherry hardwood
before selecting a few pieces that appeared flat, free of twists and relatively
straight-grained.
It's a good idea to prepare and
mill more stock than you are actually planning to use. You'll usually want to
do a few test cuts along the way, and there is always the possibility of
making a mistake. Weighed against the time it would take to back up and
repeat a step after making a mistake, cutting a few extra pieces of stock is
worth the added effort.
After selecting the stock, cut the stiles and bottom rail to a width (2-1/4'' is
fairly common). Next, cut the blank for the arched top rail. You'll want
to cut the blank 1/16'' wider than its finished width to leave yourself a little
room for final trimming. Use the rail template from the
Arched Door
Template Set
as a guide when determining how wide the blank should be.
At this point, you can cut the stiles to a length of 1 or 2 inches longer than
their finished size - you'll trim them to their exact length later on. Prepare the
stock for the panel at this point also. You may also need to edge glue two or
more pieces of stock together to come up with a piece that's both wide
enough for the panel and as flat as possible.
Note: If you are planning to trim
the edges of the finished door, or finish them with a
Custom Door
Edge Router Bit
, you'll want to add 1/16'' or so to the width of the
stiles and rails. Remember also that you will be trimming this off
when you finish assembling the door. You need to leave the
extra width out of your calculations for the length of the rails.
Step 2 - Calculating the Length of the Rails
Once you have the bottom rail and the blank for the top rail cut to width, you
can begin preparing for the cope cut by calculating the length of the rails.
This can be a little tricky. To determine the length of the rails, you need to
subtract the combined width of the two stiles from the overall width of the
door, and then add back in the depth of the panel groove (to account for the
overlap between the panel groove and the coped end of the rail). Here is a
formula for calculating the length of the rails:
Keyword or Item Number
Raised Panel Door Tools and Techniques - Rockler.com
http://www.rockler.com/articles/display_article.cfm?story_id=104
2 of 5
20/02/2007 4:58 PM
the calculations necessary for frame
and panel door construction.
Rail Length =
Door Width
-
Width of stiles x 2
+ Panel Groove Depth x 2
Most stile and rail bits (including the
Rockler Stile and Rail Bit Set
used here) cut a 3/8'' deep panel groove. Using the
Rockler bit set, for a door to be 18'' wide when it's finished, with a 2-1/4'' finished stile width, the rail length should be:
Rail Length =
18''
-
4-1/2''
+
3/4''
14-1/4''
Step 3 - Setting the Coping Bit Height
With the bottom rail and the blank for the arched top rail cut to length, you're ready to set up to cope the ends of the
rails. Setting the coping bit to the correct height is important. The match between the height settings of the stile and
rail bits will determine whether the stiles and rails meet flush with one another.
The Rockler
Router Bit Set-Up Jig
makes setting the bit height easy. The jig
has the sticking profile cut at optimum height into one of its sides, and the
matching cope cut into the other. You just raise the bit until it fits into the jigs
cope profile and the bit is set at the optimum height. When it comes time to
cut the sticking profile, simply repeat the procedure using the sticking profile
on the other side of the jig.
Step 4 - Cutting the Copes
Getting a cope cut that's square and as close to perfectly level as possible is
crucial. The cut has to be square if the parts of the frame are to fit together
correctly, and it needs to be level (consistent in height over the length of the
cut) to insure that the door will lay flat and that the stiles and rails will meet
flush with one another.
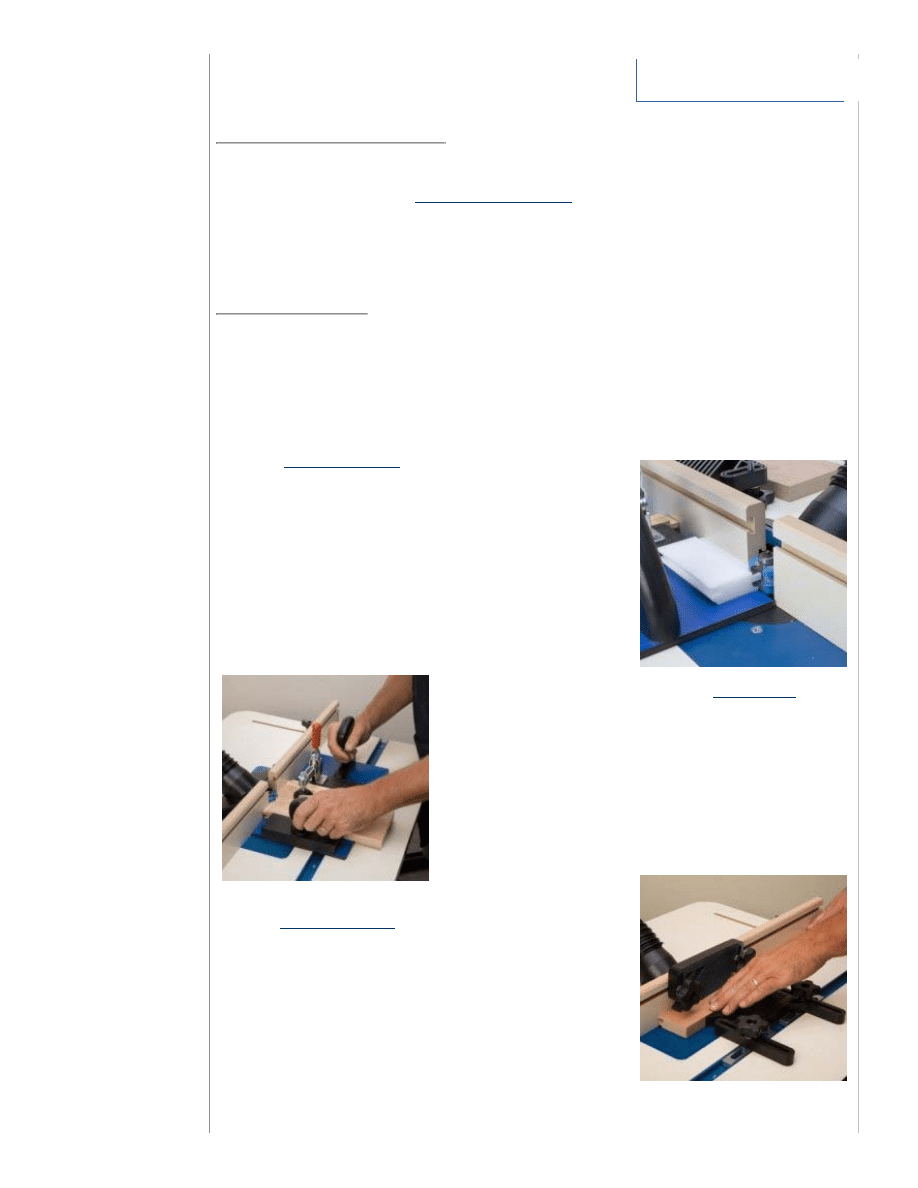
To make coping the rails easier, and
to insure our coping accuracy, we used the Rockler
Rail Coping Jig
. The jig's
backer is set to make a perfectly square cut. The jig is also designed to keep
the end of the rail level with the coping bit during the cut. Just butt both the
edge of the jig and the end of the rail up against the fence and clamp the rail
in against the hardwood backer. The backer (included with the jig) prevents
"tearout" that would otherwise happen when the rail exits the cut. When we
have one coped, we just flip the rail around and do the other side.
Note: When making the second cope cut on each rail, be sure to turn the rail
around end for end - don't flip it over. It is surprisingly easy to forget that
both cope cuts have to be made with the same side of the rail facing up.
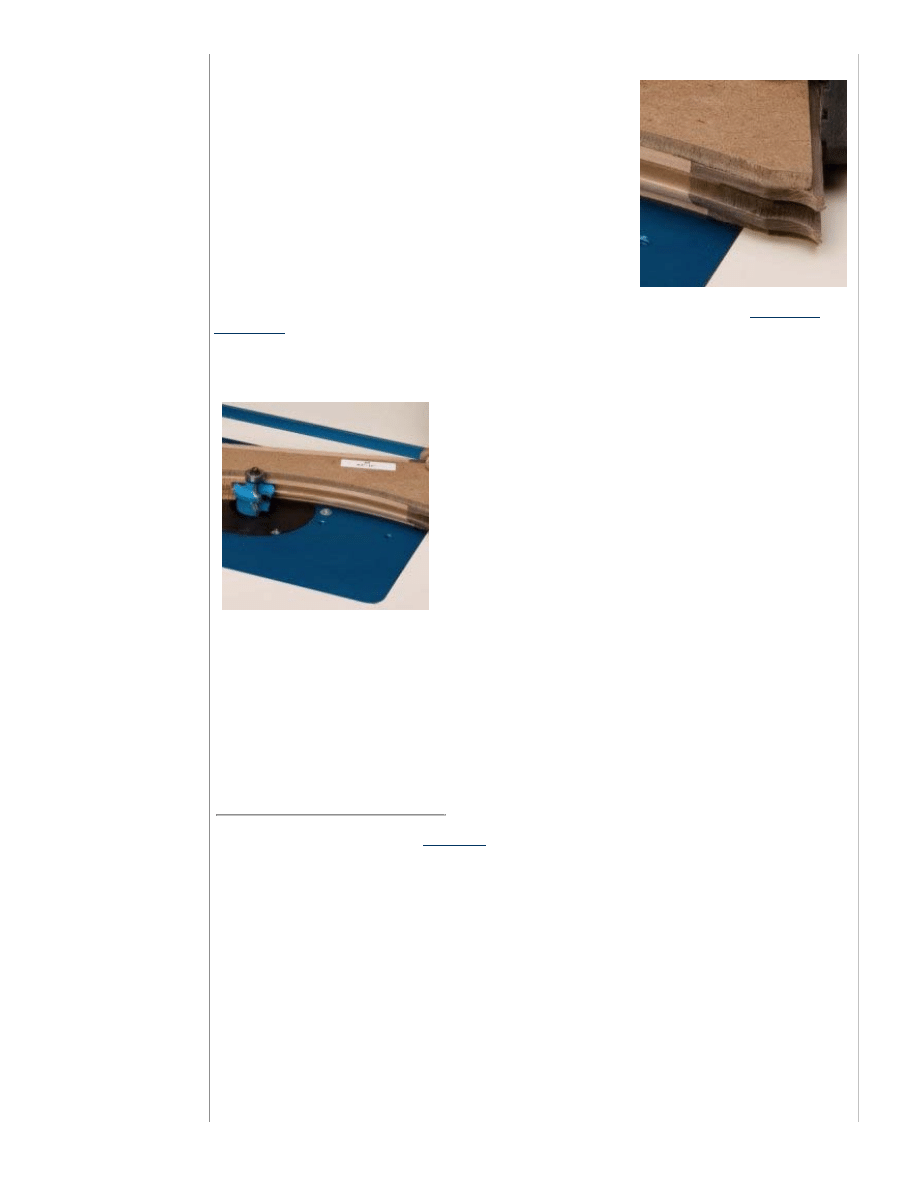
Step 5 - Cutting the Sticking
Profile
Next, set the height of the sticking profile bit - again, we recommend using
the Rockler
Router Bit Set-Up Jig
. For the straight-line profile cuts on the
stiles and bottom rail, position the fence so that the profile cut will end up on
the very edge of the stock. Use a straightedge to line the stile bit's pilot
bearing up with the surface of the fence. Since the sticking profile and groove
are cut along the length of the grain, tearout at the end of the cut is not a
concern. Just feed the stock at a moderate rate, and make sure that it's kept in
firm contact with the fence and the surface of the router table over the entire
length of the cut.
Once you have the fence set up, run all of the straight edges - the two stiles
and the bottom rail. While you're at it, put a profile on a couple of extra
pieces. You'll use them in the next step.
Raised Panel Door Tools and Techniques - Rockler.com
http://www.rockler.com/articles/display_article.cfm?story_id=104
3 of 5
20/02/2007 4:58 PM
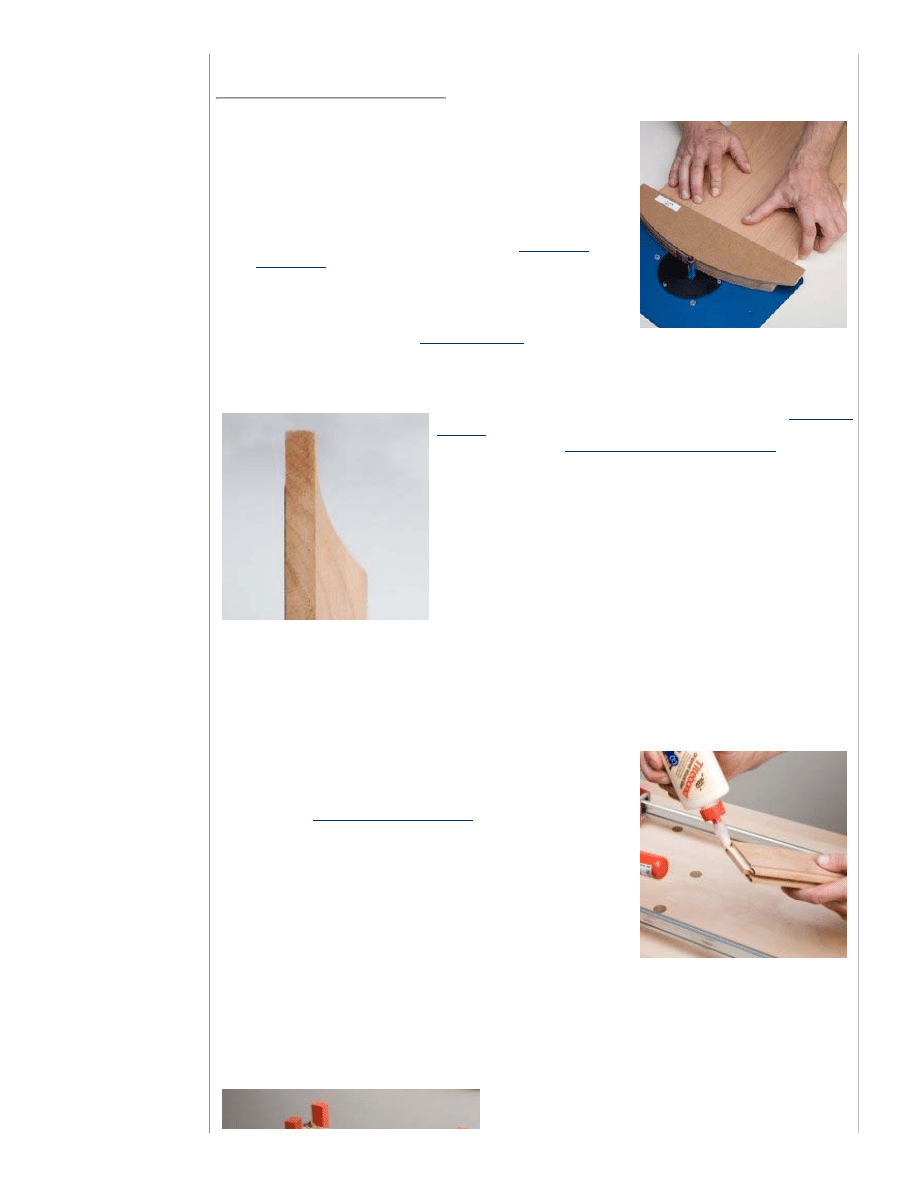
Step 6 - Cutting and Milling the Arched Top Rail
Now you're ready to cut the arch in the top rail. Here's a trick that will make
the process safer and much easier: Fit "temporary stiles" (short pieces of
stock milled with the sticking profile) into the end of the blank and clamp the
three pieces together with a lightweight bar clamp. The purpose of the
temporary stiles is to provide a place to start the profile cut.
Skipping this part means that you would have to start the cut on the very tip
of the arch and run the risk of the bit catching hold of the corner of the rail,
which would at the very least damage the corner or coped end of the rail.
Apart from being potentially dangerous, having this happen is an unpleasant
surprise that turns a perfectly good arched rail into a piece of scrap. The
temporary stiles also protect the fragile end of the arch from breaking
off when you exit the sticking profile cut.
With the three pieces clamped together, mark off the arc, using the rail template that comes with the
Arched Door
Template Set
(be sure to choose the rail template that has the correct width range for the door you are making) and
rough-cut the shape 1/16'' oversized with a band saw. To make the sticking cut in the arched top rail, attach the pattern
to the blank with double-sided tape. The template will guide the router bit's pilot bearing, so you want to make sure that
it's secure and won't slip during the cut.
Note: With the temporary stiles clamped securely in place, and the pattern
attached securely to the top of the rail, cutting the top rail sticking profile is
usually a smooth procedure, but also requires extra care. Starting a router cut
in the middle of an edge can cause the bit to climb (pull the stock in the
opposite direction from the intended cut direction). Be sure to ease into the
cut slowly, hold on to the rail/temporary stile firmly, and keep your fingers
well away from the path of the bit. If you have limited experience using a
router and router table, making a few test cuts on a piece of scrap to get the
feel of the procedure would be a good idea.
Step 7 - Cutting the Panel to Width
The first question to ask yourself when figuring the width of a solid wood
panel is "how's the weather?" In other words, you'll need to factor in how the
humidity level in your shop while you are making the panel is affecting the
stock. If you are working in a northern climate in the dead of winter in an
un-humidified shop, the wood you are about to make into a panel is probably about as dry as it's likely to get. In that
case, you'll need to reduce the width of the panel by 1/8'' for every 12'' of width to allow for expansion when the
humidity is high. The width of a fully moisture-expanded panel should still be 1/16'' less than the length of the door's
rails to provide a little assembly clearance.
The formula for the width of a door panel is:
Panel Width =
Rail Length (from tip to tip)
- Expansion Allowance
- 1/16'' Assembly Clearance
Note: If you're planning to use
Space Balls
to keep the panel centered and to forestall any possibility of "panel
rattle," increase the assembly clearance for both the width and height of the panel from 1/16'' to 1/4'' total (1/8''
for each side).
It was a sultry summer day when we cut the parts for our door, so we assumed that our stock was about as loaded up
with moisture as it was likely to get. We just subtracted 1/16'' from the total length of our rails to find the width of the
panel.
Step 8 - Cutting the Panel to Height
Since wood expands far more across the grain than lengthwise along the grain, the height of the panel can be made just
1/16'' smaller (for assembly clearance) than the actual dimension of the available space inside the panel groove. If
you are making an arched top door, the width of the top rail, of course, varies. Using the width of the rail at its
narrowest point (midpoint between the two ends) will allow you to determine the height of the panel at its tallest point:
Panel Height =
Door Height
- Top Rail Width (at the center)
- Bottom Rail Width
Raised Panel Door Tools and Techniques - Rockler.com
http://www.rockler.com/articles/display_article.cfm?story_id=104
4 of 5
20/02/2007 4:58 PM
- 1/16'' Assembly Clearance
+ Panel Groove Depth x 2
When you've calculated the height of the panel at its tallest point, and the
panel blank is cut to its finished width, you are ready to mark and cut the
curved top of the panel. Use the panel template to mark off the shape of the
arched top of the panel. Be sure that the template is square with the edge of
the panel, and that it's placed so that you'll end up - after rough-cutting the
arch - with a piece that's 1/4'' or so longer than the finished panel height
you've calculated.
Note: Be sure to use the panel template from the
Arched Door
Template Set
that corresponds to the rail template you used in Step 6!
The rail templates are clearly marked to help make this easy.
When rough-cutting the panel, keep the band saw's blade well on the scrap
side of the line - you'll use the line again when you attach the template to the
panel in order to trim it smooth with a
flush trim router bit
. When you
have the arch trimmed smooth, simply measure down the panel along the center line from top to bottom to mark off the
panel height you've calculated. Crosscut off the excess to finish sizing the panel.
Step 9 - Cutting the Panel Profile
With the panel cut to size, you're ready to profile the panel with a
raised panel
router bit
. Having decided on a cove profile for the edge of the panel, we cut
our panel profile with a
cove profile horizontal panel raising bit
. The bit we
used was equipped with a "back cutter," meaning that it makes a cut in the
back of the panel as well as the front. There are two advantages to using this
type of bit: Simply raising and lowering the height of the bit allows you to
quickly and easily place the raised field of the panel anywhere you'd like in
relation to the front surface of the frame. The back cutter also insures that the
panel edge will be exactly the right thickness to fit snugly into the panel
groove.
We decided to have the surface of our panel protrude up past the surface of
the frame by as much as possible, but we set the bit height so that the back
cutter would take off 1/32'' of material to insure that the edge of the panel
would be exactly the right thickness for the panel groove.
To cut the panel profile, set the raised panel bit at the desired height and use the bit's pilot bearing to carefully guide
the curved top of the panel through the cut. Be sure to grip the panel firmly and keep it pressed tight against the
surface of the router table at all times. Then, for a little added support while cutting the straight sides of the panel, set
the fence in line with the panel bit's pilot bearing as you did with the sticking profile bit in Step 5. Use the fence as a
guide while you cut the straight sides of the panel, beginning with the bottom edge.
Step 10 - Assembly
Assembling the door is a fairly straightforward process, but there are a few
thing to watch out for. Most importantly, the surface you're working on
when gluing-up the door should be as close to perfectly flat as possible.
Here, we used the
Bessy K-Body Clamp System
, which is designed to help
keep parts flat and square during glue-ups.
We recommend cutting the stiles to their exact finished length (plus any
extra width you've added to the rails for trimming) before assembly. That
allows you to take advantage of the clamp system's K-P Blocks. The K-P
blocks make it possible to arrange clamps for four-sided clamping, and
allowed us to use the length-wise clamps to align the top and bottom ends of
the stiles with the top and bottom edges of the rails.
It's a good idea to "dry-fit" the parts before applying the glue, just to make
sure that everything fits together correctly, and that you have the procedure down. When you're satisfied with the fit of
all of the door's parts, apply a judicious amount of glue to the ends of the rails and assemble the door. Gently clamp the
parts together (you don't need a lot of clamping pressure - just look for a tight fit between the stiles and rails). It is
extremely important to press the door down flat against the surface of the clamps while tightening them down. When
the clamps are tightened, check the door for flatness with a straightedge or level. If the door is out of flat, loosen the
clamps, press the door down flat against them and re-tighten them.
Finally, wipe off any excess glue and check the squareness of the
door by measuring diagonally cross-corners in both directions. If the
rails have been cut and coped square, the door should clamp up
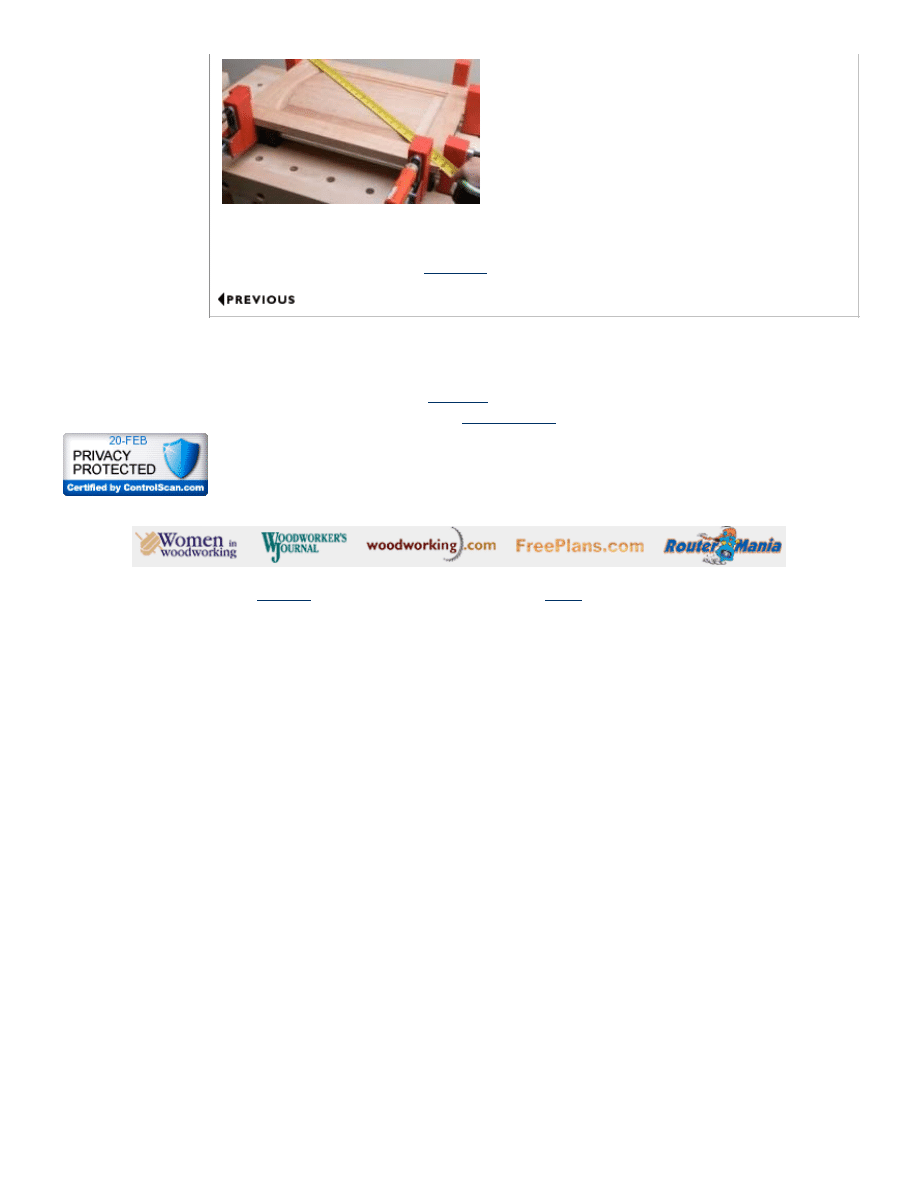
Raised Panel Door Tools and Techniques - Rockler.com
http://www.rockler.com/articles/display_article.cfm?story_id=104
5 of 5
20/02/2007 4:58 PM
Find a Store
Sign up for our Email
New Product Ideas
Affiliate Program
Woodworking Blog
Learn
About Rockler
Careers
Customer Service
Contact Us
FAQs
square almost "automatically." But it's a good idea to check
anyway.
If the cross-corner measurements don't match, the door is out of
square. Loosen the clamps slightly and apply a clamp across the two
corners that have the longest corner-to-corner measuremen. Slowly
tighten the diagonal clamp while monitoring the opposite
corner-to-corner measurement. When the difference between the
two measurements is equalized, re-tighten the clamps and check
again for flatness.
Follow the glue manufacturer's instructions for clamping time. After unclamping the door, trim the edges of the door as
needed, or finish them with a Custom Door Edge Router Bit. In most cases, you'll just need to give the door a light
sanding before finishing with a quality
wood finish
.
"Just wanted to say that I always get superb help and treatment when I visit the store. I also get great service when I order on line.
Thanks To All The Rockler Crew! "
- Customer Comment - 12/16/2005
See more...
Rockler Partner Link:
Return to Bench Notes
ALSO VISIT:
Copyright
© 2007, Rockler Companies, Inc. This is a
Secure
Shopping Site
web1
Document Outline
- Cabinets - Raised Panel Door Tools and Techniques 1 .pdf
- Cabinets - Raised Panel Door Tools and Techniques 2 .pdf
Wyszukiwarka
Podobne podstrony:
Developing Usability Tools And Techniques For Designing And Testing Web Sites
Virus Verification and Removal Tools and Techniques
Wiley Training Needs Assessment Methods, Tools, and Techniques
Flash on English for Mechanics, Electronics and Technical Assistance
Mathematical and technical opti Nieznany
Martial Arts Ninjutsu Weapons And Techniques
Flash on English for Mechanics, Electronics and Technical Assistance
99 Best Blogging Tools and Resources
12 FOREX Tools and Trading Systems
Flash on English for Mechanics, Electronics and Technical Assistance
w gloc60 Tips and Techniques to Pass the PMP® Exam
[EBOOK] How to Make Wine at Home Tips and Techniques
DoD Scientific and Technical Information Program
Trade profiles Introduction and technical notes 2017
Ritual Theory and Technique by Colin Low
Free Anti Virus Tips and Techniques
Dictionary of Weightlifting, Bodybuilding, and Exercise Terms and Techniques
więcej podobnych podstron