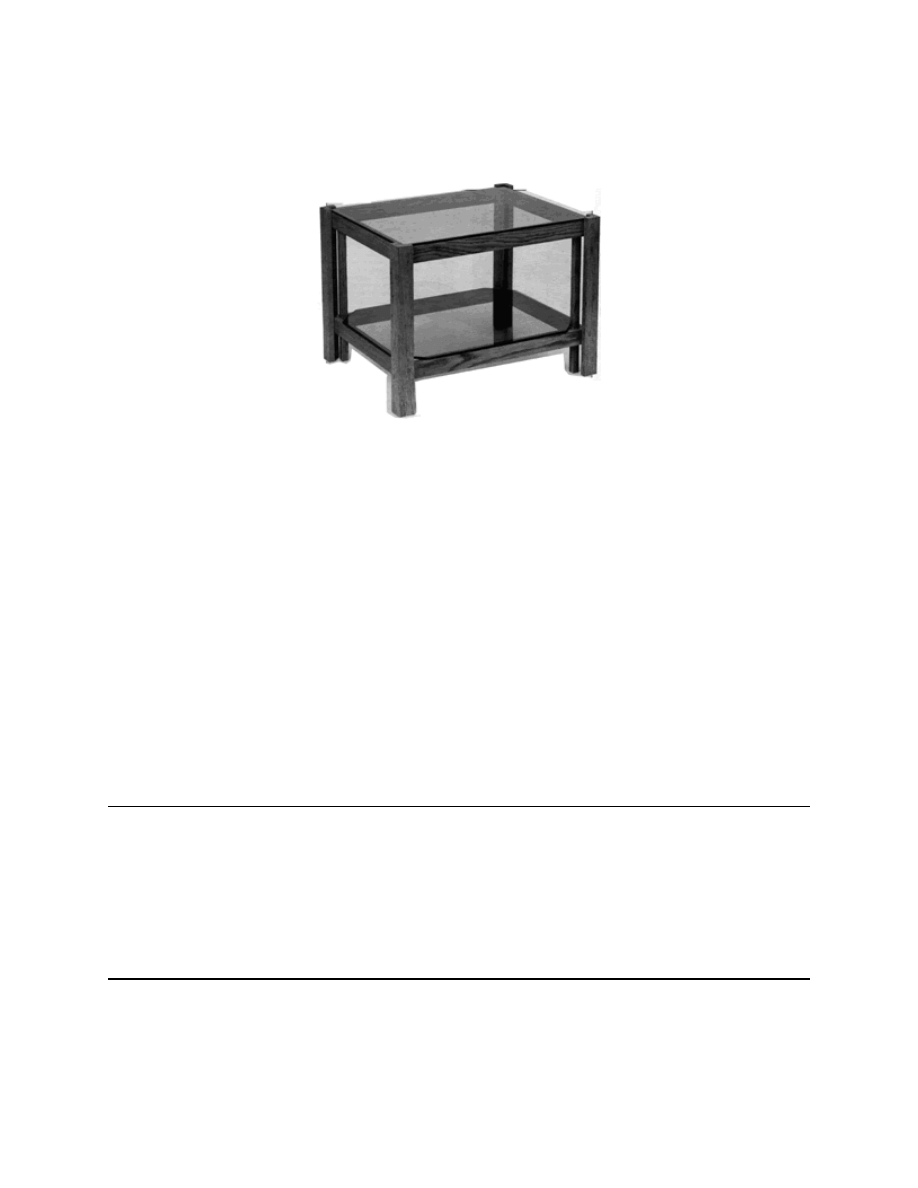
Project 17876EZ:
Oak and Glass End Table
Good proportions plus the handsome look of oak and glass combine to give this
relatively simple piece a great deal of appeal. And even though the joinery is
basic, the table is very sturdy so you can expect it to provide many years of ser-
vice. Its simplicity makes it a good weekend project, one that even beginners can
tackle with confidence.
Oak and Glass End Table Materials List
Part
Description
Size
No. Req’d
A
Leg
5/8" x 1-1/2" x 15-1/2"
8
B
Long Stretcher
5/8" x 1-1/2" x 20-1/4"
4
C
Short Stretcher
5/8" x 1-1/2" x 15-3/4"
4
D
Post
5/8" x 5/8" x 14-5/8"
4
E
Flat Head Wood Screw
1-1/4" x #8
16
F
Wood Plug
3/8" dia. x 1/4" long
16
G
Bottom Glass
1/4" x 15-3/4" x 20-1/4"
1
H
Top Glass
1/4" x 15-3/4" x 20-1/4"
1
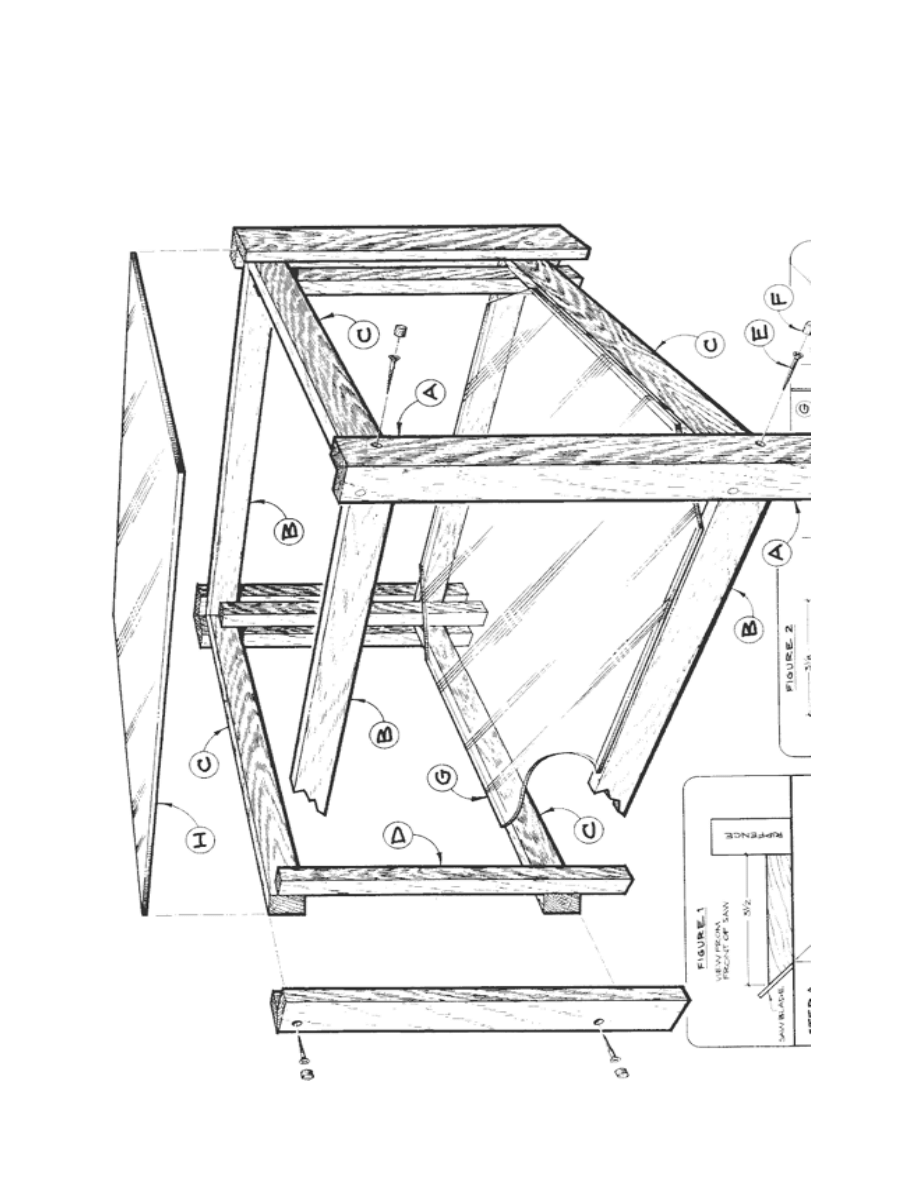
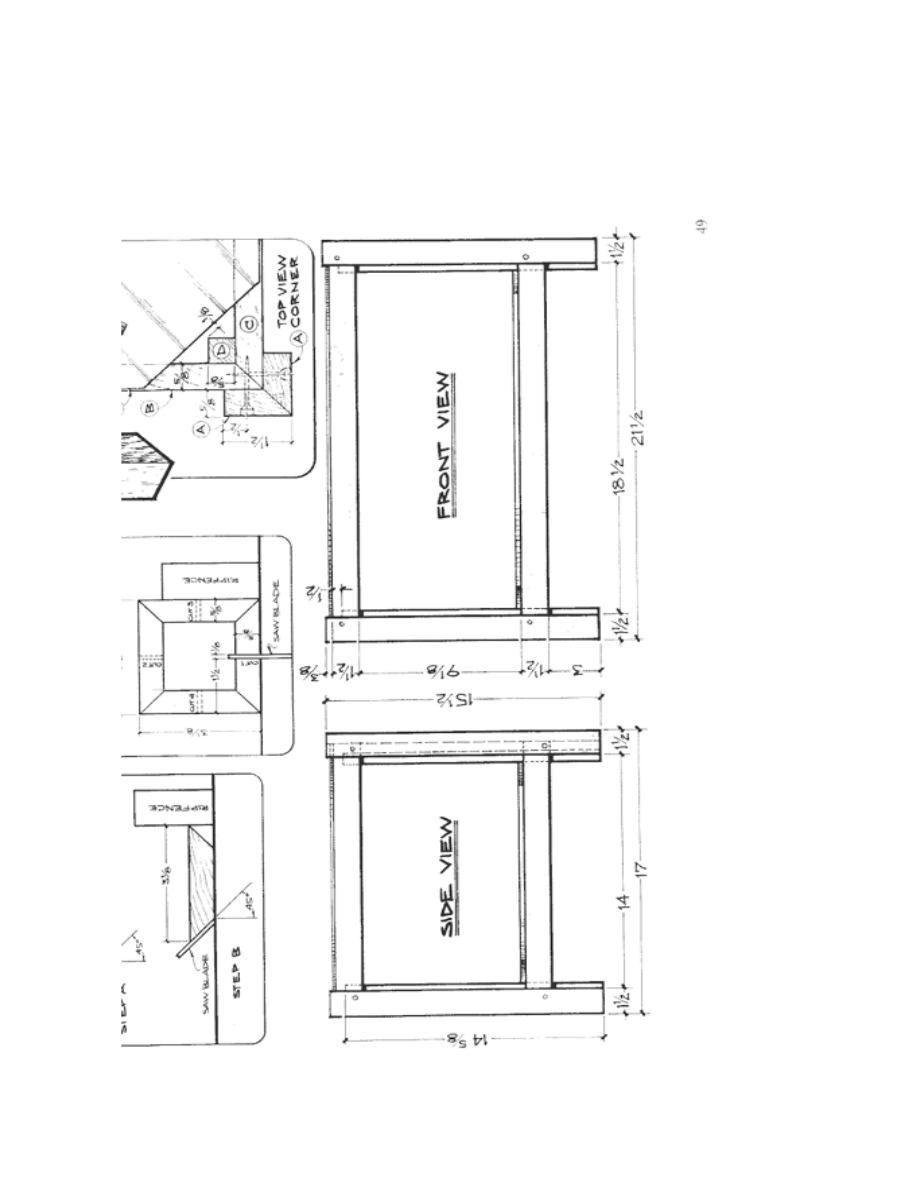
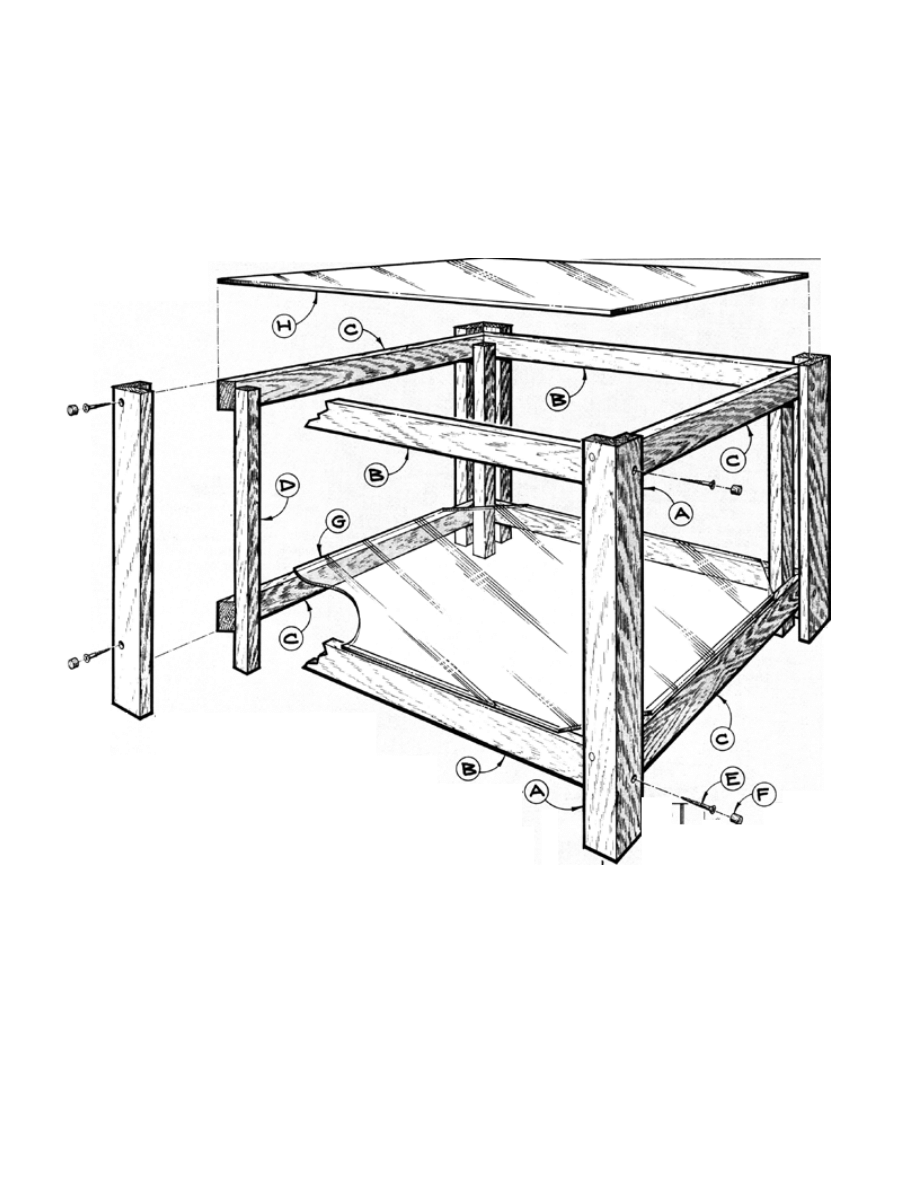
Oak and Glass End Table Complete
Schematic
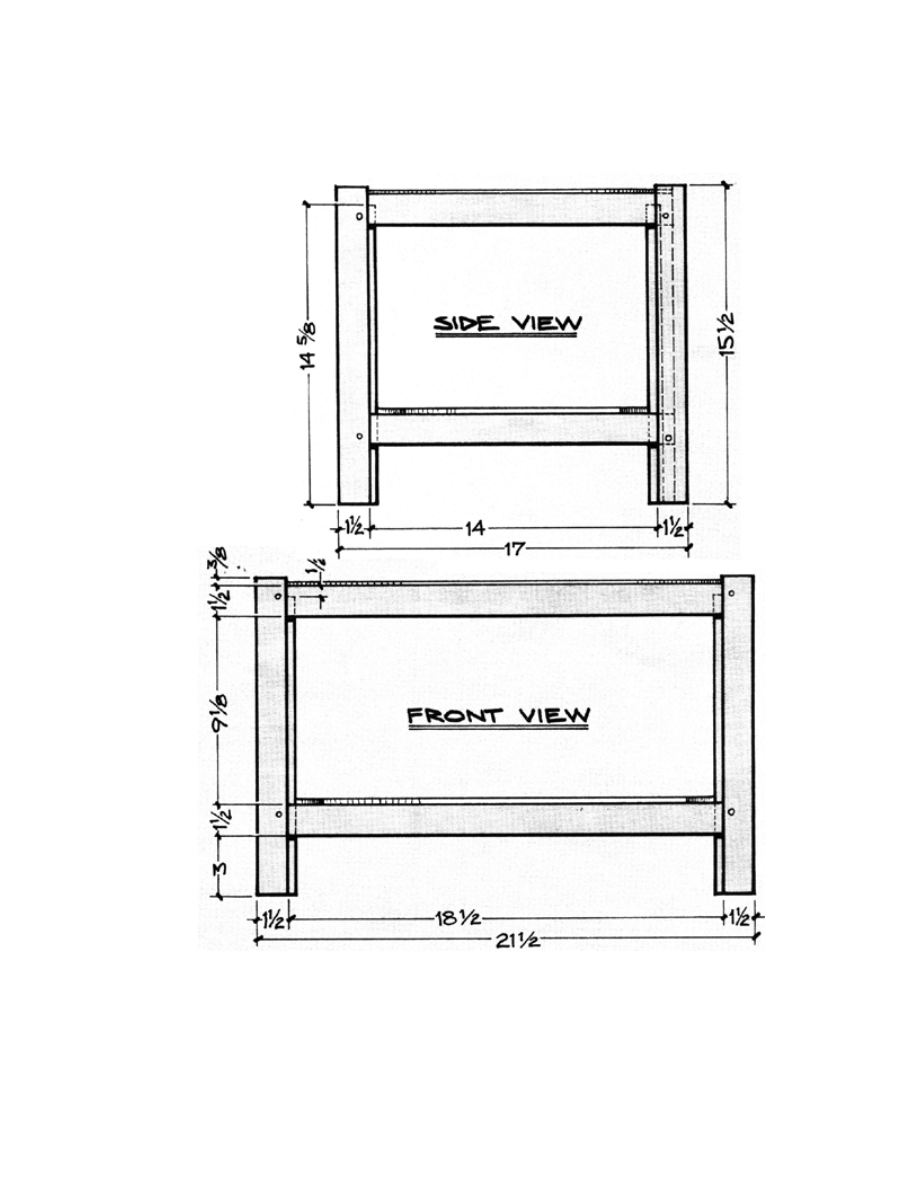

Oak and Glass End Table Step-by-Step
Instructions
1. Cut four pieces of 5/8" stock to 3-1/2" wide by 16" long (Parts A).
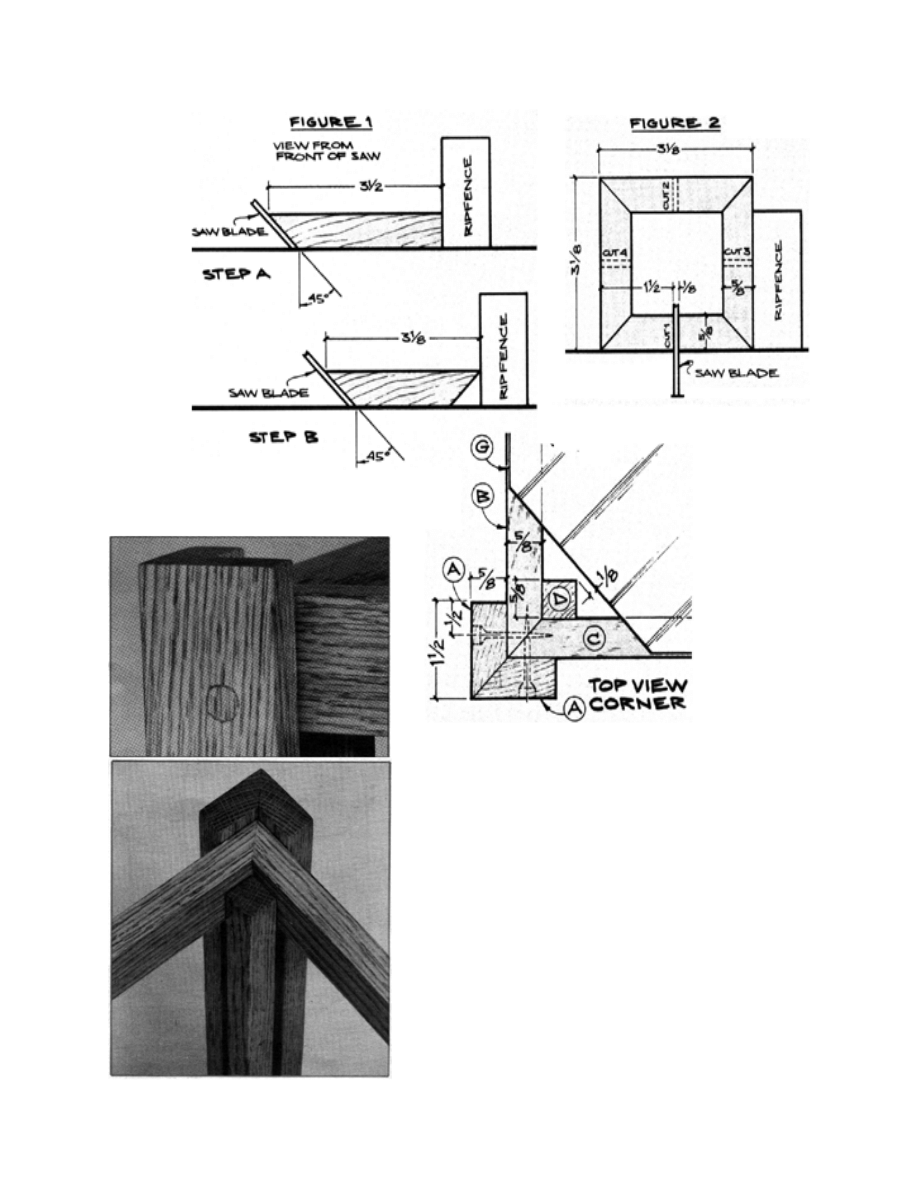
2. Set the table saw to a 45-degree angle and locate the rip fence as shown in
Figure 1. NOTE: The saw blade must be exactly at 45 degrees because
even a small error adds up to a noticeable gap when the four joints are
assembled. To check the accuracy of your saw blade angle, first make a test
square from scrap stock. Rip four pieces as described below (the length
need only be about 6 in.), then dry assemble using elastic bands to hold the
four sides together. The joints should meet perfectly; if not, adjust the blade
angle and try again.
3. Miter one edge (step A).
4. Turn the stock and miter the other edge (step B).
5. Use glue to attach each mitered surface.
6. Apply three web clamps (one at each end and in the middle) until the glue is
thoroughly dry.
7. Set the rip fence of the table saw to cut the stock exactly down the middle.
8. Raise the saw blade to 3/4" high.
9. Hold the stock firmly against the rip fence and make cut number one as
shown in fig. 2.
10. Turn the stock over and make cut number 2.
11. Use the rip fence set in the same position to split each of the pieces down
the middle.
12. Cut Parts B and C to the dimensions required. NOTE: Cut each piece
slightly longer than necessary.
13. Use the table saw to cut a 45-degree miter on each end, cutting them to the
correct length.
14. Apply one coat of glue to each mitered end and allow it to soak in.
15. Apply a second coat of glue and attach the four pieces.
16. Use web clamps to hold the pieces together until thoroughly dry. NOTE:
Check for square ness of the frame and make adjustments if necessary
before the glue dries.
17. Apply glue to the corners of the frame.
18. Use two 1-1/4" long by #8 flat head wood screws (Parts E) to attach the legs
to the frame. NOTE: Each screw should be counter bored and covered
with wood plugs (Parts F).
19. Cut Parts D to size.

20. Use glue to attach Parts D as shown.
21. Sand the entire piece.
22. Apply two coats of a good penetrating oil.
23. Have a glass shop cut Parts G and H to size, making sure the edges are
polished smooth. NOTE: The corners of Part G must be cut to fit inside
the posts (Parts D).
These plans were originally published in Volume 8, Issue 3 of The Woodworker’s
Journal (Jan/Feb 1984, pages 48-49).
Wyszukiwarka
Podobne podstrony:
oak dining table
Cherry End Table
Oak Dining Table
Oak Dining Table
End Table 1
End Table 2
oak dining table
Table Queen Anne Living Room Tables (Coffee, End)
Table Victorian Occasional Table (Glass Top)
Glass Top Table
Coffee Table 1
table style2, ♥Dokumenty
table cellspacin5, ❀KODY RAMEK I INNE, Ramki
table border (2)
więcej podobnych podstron