9000 VNR
Audio & Navigation
System
05/2001 en
Draft Version 13

9000 VNR
Audio & Navigation System
System Keycode
RADIO KEYCODE
AFFIX CD CHANGER CRIN LABEL HERE
AFFIX RADIO KEYCODE/SERIAL NUMBER
LABEL HERE
DEALER STAMP
© Copyright in Great Britain, May 2001

This card will be extremely useful if your Ford
Audio System is stolen.
Use the space provided to record the details of
your own vehicle’s Keycode security number.
Then detach the Keycode card and keep it in
your wallet or purse.
Leave the rest of this card at home with your
other vehicle documents.
Complete and detach this perforated card and
keep it in a safe place – but not in your vehicle.
Always lock your vehicle and hide valuable items
away from prying eyes.
Anti-theft systems to protect your vehicle can be
obtained from your local Ford Dealer.
If your vehicle is broken into, notify the police
immediately. Do not touch anything until you are
advised to do so.

Contents
Useful information
System security
3
Radio reception
7
Quick reference
8
Basic operating instructions
9
Operating Instructions
Navigation
11
Getting started
14
Detailed information
19
Obtaining new CD-ROMs
30
Traffic Messaging Channel
31
Integrated Mobile Phone
36
Telematics
40
Radio operation
45
CD & CD changer operation
57
Safety information and precautions
64
The magnetic field produced by fitting Ford loudspeakers in locations other than those
approved by Ford or fitting other makes of loudspeaker, especially high powered models,
may adversely affect seat belt operation. It is recommended that you approach your Ford
Dealer for guidance before making any such changes.
The illustrations, technical information and data contained in this publication, to our best
knowledge, were correct at the time of going to print. The right to change prices,
specifications, equipment and maintenance instructions at any time, without notice, is
reserved as part of our policy of continuous development and improvement.
No part of this publication may be reproduced, stored in a retrieval system or transmitted
in any form, electronic, mechanical, photocopying, recording, translating or other means
without prior permission of Ford Motor Company Limited.
No liability can be accepted for any inaccuracies or omissions in this publication, although
every possible care has been taken to make it as complete and accurate as possible.
Issued by: Service Publications, Ford Motor Company Limited,
Eagle Way, Brentwood, Essex, CM13 3BW.
© Copyright in Great Britain. May 2001
Order Code: CG3389en 05/2001
Printed in England by Elanders Hindson Ltd, Newcastle upon Tyne.
This publication is printed on totally chlorine-free (TCF) paper and board i.e., material
that has been bleached without the use of chlorine gas or chlorine based chemicals.
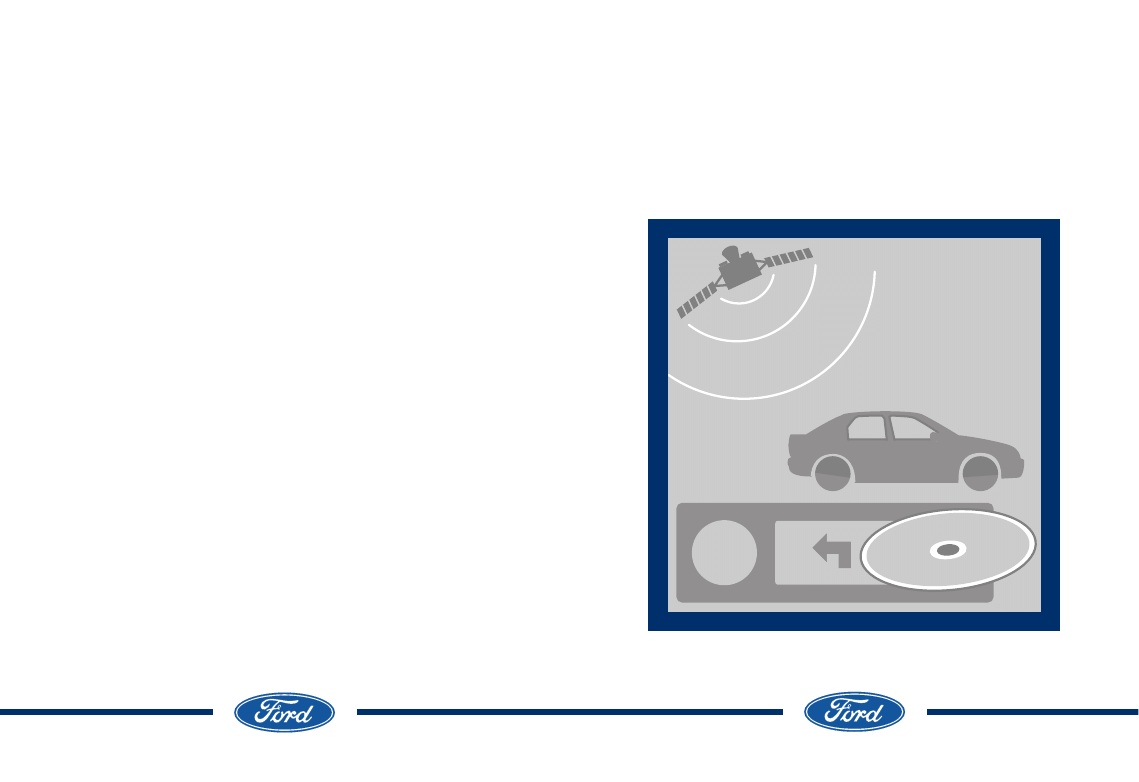
The Navigation System provides you with information designed
to help you to reach your destination quickly and safely.
For reasons of safety, the driver should programme the system only
when the vehicle is stationary.
The Navigation System is not a substitute for your personal judgment.
Route suggestions should not supercede local traffic regulations or
safe driving practises.
!

System security
ANTI-THEFT PROTECTION PANEL
. . . . . . . . . . . . . . . . . . . . . . . 3
Replacement panels . . . . . . . . . . . . . . . . . . . . . . . . . . . . . . . . . . . 3
KEYCODE SECURITY
. . . . . . . . . . . . . . . . . . . . . . . . . . . . . . . . . 4
Recording the keycode . . . . . . . . . . . . . . . . . . . . . . . . . . . . . . . . . 4
To enter the Keycode . . . . . . . . . . . . . . . . . . . . . . . . . . . . . . . . . . 4
If an incorrect number is entered
. . . . . . . . . . . . . . . . . . . . . . . . 5
VEHICLE IDENTIFICATION NUMBER (VID) . . . . . . . . . . . . . . . . . . 5
To enter or alter this code . . . . . . . . . . . . . . . . . . . . . . . . . . . . . . . 6
2
System security
3
ANTI-THEFT PROTECTION PANEL
To deter would-be-thieves, Ford audio units
have a removable front panel without which the
unit will not work.
Slide the security release button down and
remove the front panel. To reposition the panel,
insert the bottom edge first then the top edge
until the retaining latch is engaged.
Replacement Panels
Your Ford Dealer will require the following if
you need to order a replacement panel:
1. Your name and address.
2. The Vehicle Identification Number (visible in
the corner of the windscreen).
3. The audio unit type (e.g. 9000 VNR).
4. Proof of identification (e.g. Driver’s Licence,
Identity Card).
5. A vehicle invoice (if the audio unit was
installed in the vehicle prior to delivery) or a
parts invoice if the audio unit was purchased
separately from the vehicle, or an appropriate
vehicle registration document.

4
KEYCODE SECURITY
If the battery is disconnected or the radio is
removed from a vehicle, the audio unit will
not work.
Ford audio systems incorporate a unique
Keycode security number which must be
entered before the unit will operate again.
Recording the Keycode
When you take delivery of your vehicle,
the Keycode should be noted on the Keycode
card at the front of this guide. Detach the
card and keep it in a safe place, but not inside
the vehicle.
If you lose the Keycode, contact your dealer
and supply details of your audio unit along with
some proof of identity. Your dealer will then
obtain the correct code from Ford Motor
Company Limited.
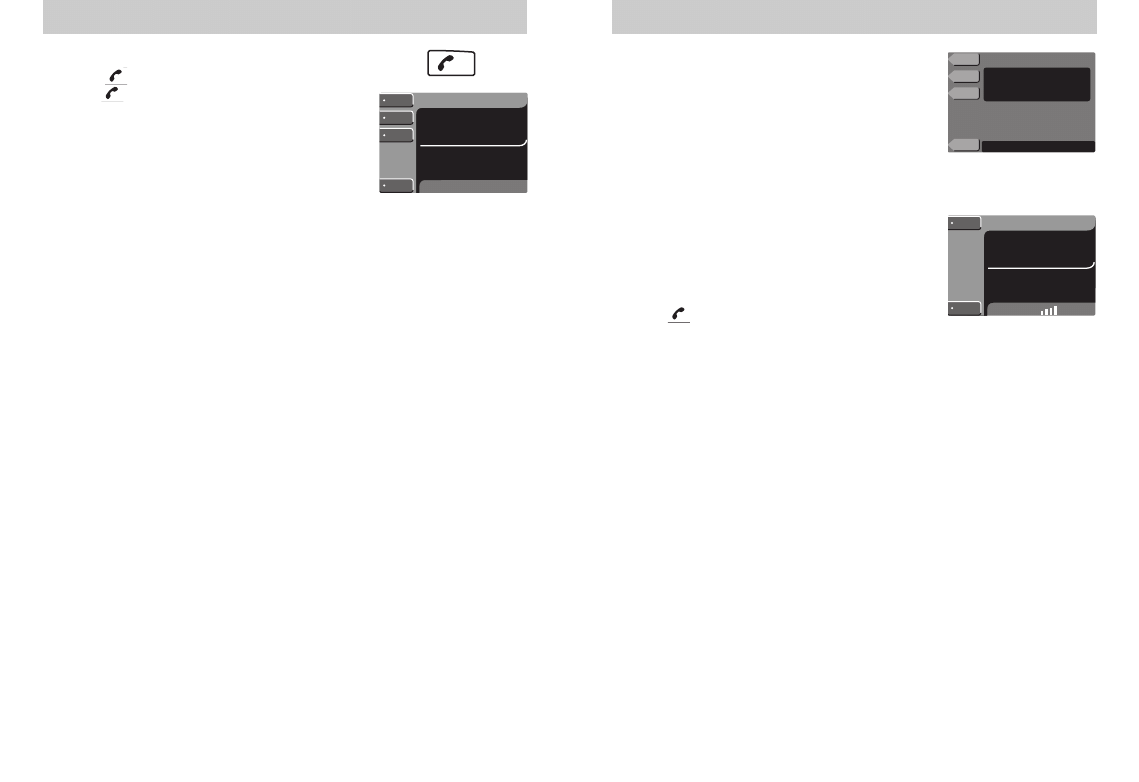
To enter a Keycode
If you switch on the audio unit and four empty
windows appear in the display, you must enter a
Keycode before the unit is operational.
An on-screen display provides instructions on
how to enter your code. Use the station preset
buttons. Press 1 repeatedly until the correct
first digit is shown in the display.
Then press preset buttons 2, 3 and 4 in the
same way until the complete correct Keycode
is shown.
Press the button alongside the on-screen
‘DONE’ display to enter the Keycode.
The audio unit will then operate.
System security
DONE
VID: 1234567890123456
Keycode
Enter keycode using
preset numbers 1-4
Try: 1
5
System security
If an incorrect number is entered
Ford audio units accept up to TEN Keycode
entry attempts. A numeral in the display shows
the number of attempts made.
• If an incorrect number is entered, the display
reverts to four empty windows again and
another entry attempt may be made.
• If ‘Incorrect code’ and ‘WAIT 30’ appears,
wait until the time counts down to zero.
When four empty windows are displayed, try
to enter the Keycode.
• If ‘Incorrect code, keycode locked after 10
tries’ appears, the unit is permanently
inoperative. Contact your local Ford dealer
for help and advice.
VEHICLE IDENTIFICATION NUMBER (VID)
If an audio unit is stolen and then recovered, it
can be very difficult to trace the original owner.
Every vehicle has a unique Vehicle
Identification number. If this number has been
entered into the audio unit’s memory, it will
help the police to trace its owner.
The number appears in the unit’s display
whenever power is restored. For the location
of this number on your vehicle, please refer to
your Owner’s Guide.
VID: 1234567890123456
Keycode
Incorrect code
Try: 1
1 2 3 4
See your Ford Dealer.
Keycode
Incorrect code
Key code locked
after 10 tries.

System security
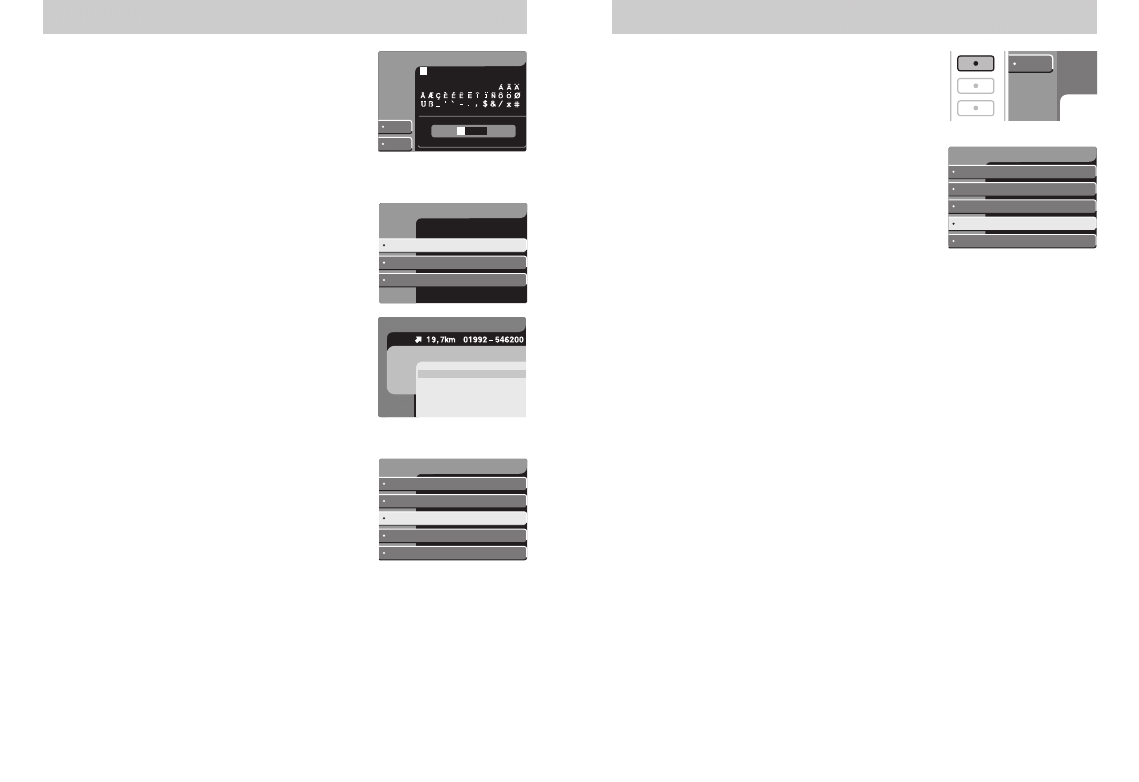
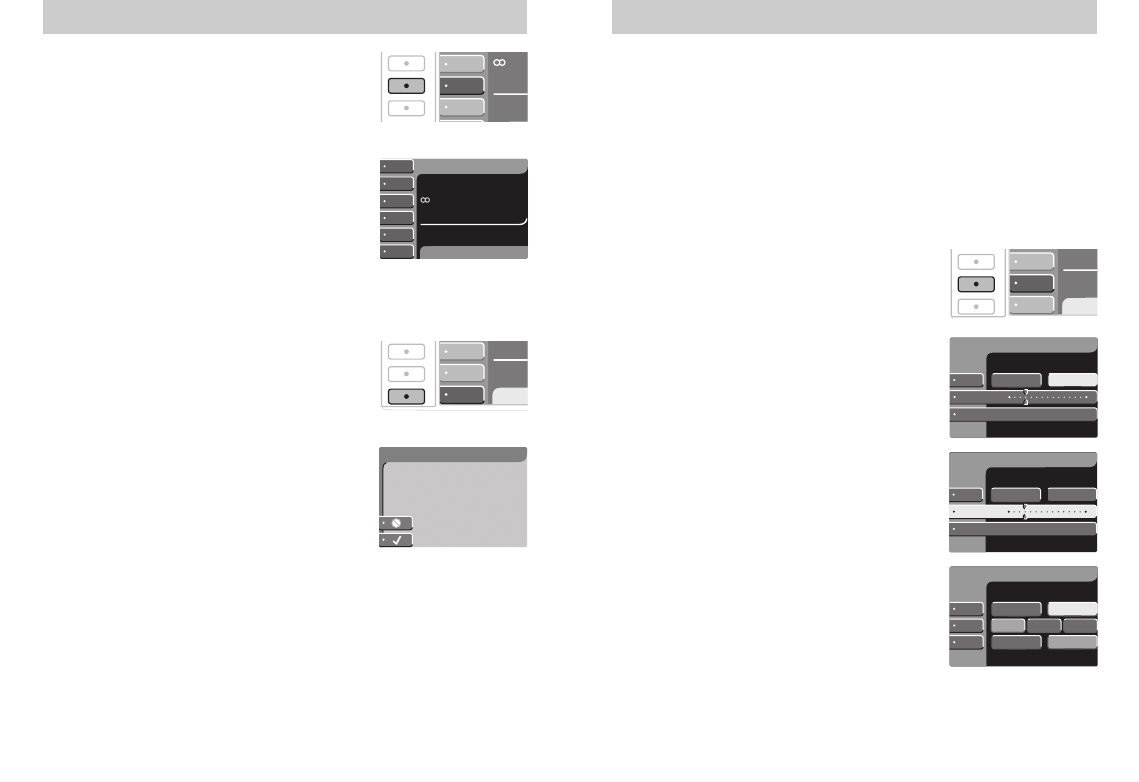
To enter or alter this code
Select the button alongside ‘AUDIO’, then the
button alongside ‘MORE’.
Use the control switch to select ‘Vehicle
Identification’.
• To enter or alter a Vehicle Identification
Number, first enter the Keycode, see page 4.
• The audio unit goes quiet and the display
shows either a previously entered vehicle
identification number or ‘VID:’.
• Use the control switch to select or change
characters as required. A total of 16
characters can be displayed.
• Press the button alongside ‘DONE’ to confirm
your selection.
Vehicle Identification
DONE
DEL
A B C D E F G H I J K L M N O
$ & / [ ]
P Q R S T U V W X Y Z Space
1 2 3 4 5 6 7 8 9 0 ' - . , :
Vehicle Identification
Vehicle ID set to
VID: 1234567890123456
Radio reception
The following tips will help you gain the
best reception from your high quality
Ford audio system.
To gain the best reception, always tune to the
strongest station signal available.
AM (MEDIUM/LONG WAVE) RECEPTION
Under most conditions, strong MW and LW
signals provide stable sound quality and little
signal disturbance.
However, at night, atmospheric conditions
may sometimes lead to interference from
foreign stations.
FM RECEPTION
The FM waveband offers higher quality sound
reception, but signal strength can be subject to
interference caused by:
• The limited range of some transmitters.
• Reception distortion as signals reflect off
local buildings and other objects.
• Signal ‘dead spots’ where reception is
obstructed or restricted.
6
7
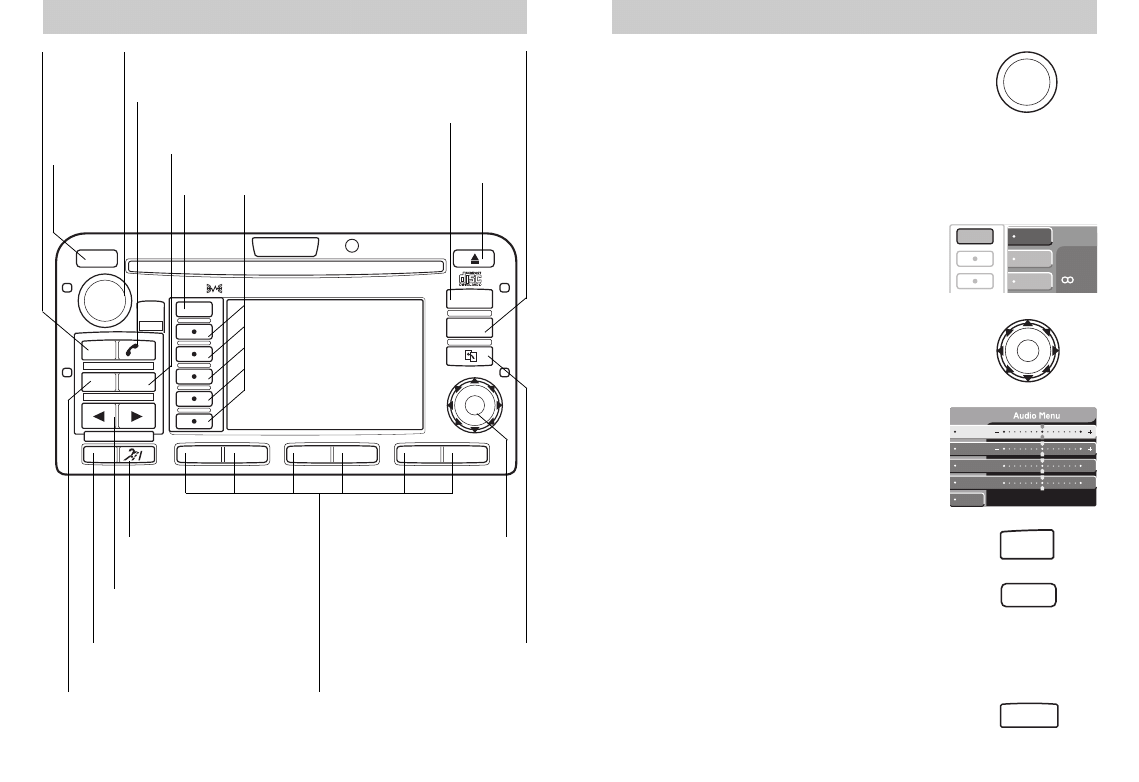
Quick reference
On/Off and
Volume control
CD
control
Waveband
selector
Phone mode
selection
Traffic
information
Traffic Message
Channel*
Seek tuning controls/
CD track selection
‘Home’ location preset
button
Current position
display selector
Menu
button
On-screen
display buttons
Station preset
buttons
CD
eject
Navigation
system
selector
Undo/Back
button
Control switch/
Enter button
*TMC broadcasts are only available in certain countries.
1
2
3
4
5
6
AM/FM
VOL
ON/OFF
CD
TMC
NAV
MAP
HOME
MENU
9000
VNR
CD CHANGER COMPATIBLE
TA
ENTER
Map screen
selection
NAV
CD
AM/FM
VOL
ON/OFF
Basic operating instructions
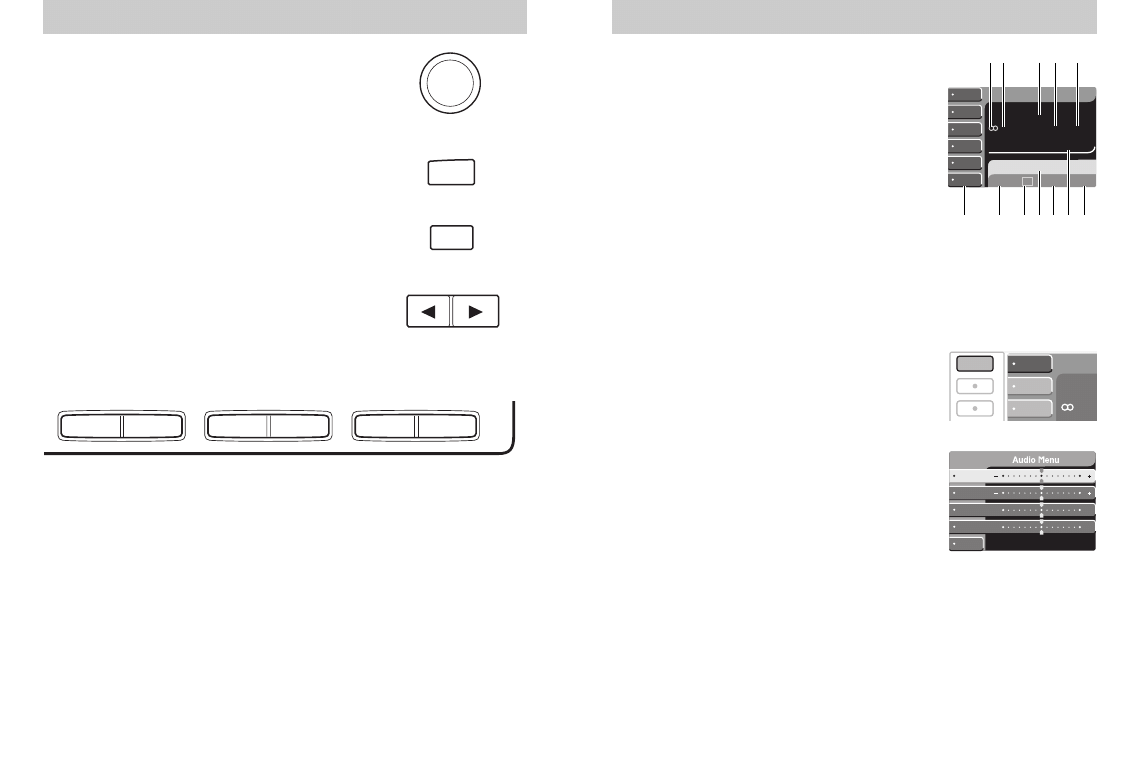
ON/OFF AND VOLUME
Press for on/off. This button can also operate
the unit for up to one hour with the ignition key
removed. The radio automatically switches off
after one hour.
Use the rotary control to adjust volume levels.
An on-screen display shows the level selected.
To adjust the volume level of voice prompts,
see page 24.
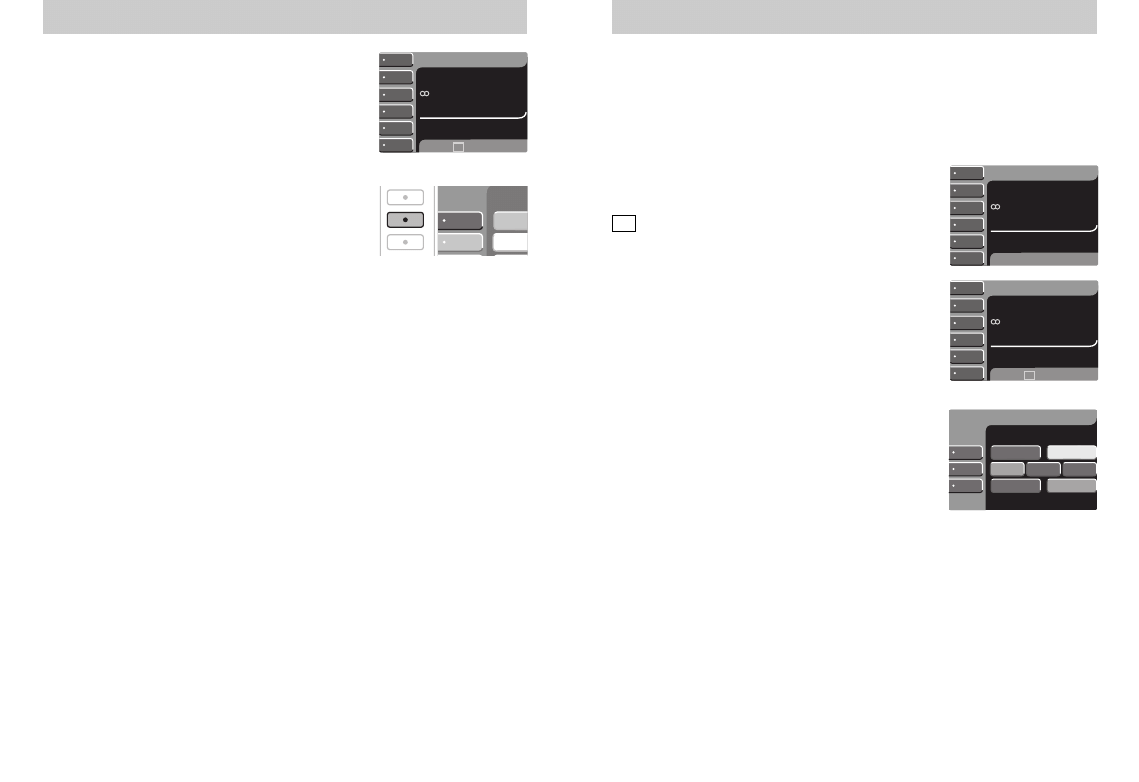
AUDIO SETTINGS
Select the MENU button alongside the on-screen
‘AUDIO’ display.
Then use the control switch to make a selection
and to adjust bass, treble, balance (left to right)
or fade (rear to front).
For ‘MORE’ features, refer to:
• ‘CLIP’ - see page 48.
• ‘AVC’ - see page 48.
• ‘Vehicle Identification’ - see page 5.
• ‘Display settings’ - see page 49.
The display reverts to normal after a few
seconds.
AM/FM
Press AM/FM for radio reception.
CD
• With a navigation disc inserted, press CD to
select playback from the CD changer.
• If a navigation disc is not inserted, press CD
once to select single disc playback or twice
for playback from the CD changer.
NAV
Press NAV to select the navigation system
during radio or CD playback.
TREB
BASS
BAL
L
R
R
F
MORE..
FADE
MENU
MENU
MAN
SCAN
AUDIO
ja
PR
1
ENTER
8
9

PHONE
Press to enter phone mode and to mute
radio reception or CD playback.
SCREEN DISPLAYS
If the navigation system is activated during
radio reception or CD playback, audio output
continues but route guidance screens appear in
the display.
During radio reception
• Press AM/FM to restore a radio display.
• Press CD for CD playback and a CD display.
During CD playback
• Press CD to restore a CD display.
• Press AM/FM for radio reception and a
radio display.
Route guidance continues uninterrupted and
the display reverts to a route navigation screen
once again, to show the next manoeuvre on the
route selected.
AUTOMATIC SCREEN DISPLAY CHANGES
With the navigation system operating and radio
reception selected, press
to locate the next
station down or up the selected waveband,
without interrupting route guidance. A radio
display appears automatically, then reverts to a
route guidance screen to show the next
manoeuvre on the route selected.
With the navigation system operating and CD
playback selected, press to select the
previous or next track, without interrupting
route guidance. A CD display appears
automatically, then reverts to a route guidance
screen showing the next manoeuvre as and
when it is required.
Basic operating instructions
▲
▲
▲
▲
Navigation
NAVIGATION
PRINCIPLES OF OPERATION . . . . . . . . . . . . . . . . . . . . . . . . . . . .12
What is a Global Positioning System . . . . . . . . . . . . . . . . . . . . . .12
GETTING STARTED . . . . . . . . . . . . . . . . . . . . . . . . . . . . . . . . . . . .14
CD CARE AND MAINTENANCE . . . . . . . . . . . . . . . . . . . . . . . . . .14
GENERAL INFORMATION . . . . . . . . . . . . . . . . . . . . . . . . . . . . . . .14
Please Drive Safely . . . . . . . . . . . . . . . . . . . . . . . . . . . . . . . . . . . . .15
To select navigation mode . . . . . . . . . . . . . . . . . . . . . . . . . . . . . . .15
Selecting a destination . . . . . . . . . . . . . . . . . . . . . . . . . . . . . . . . . .15
Spell or list the destination required . . . . . . . . . . . . . . . . . . . . . . . .16
Selecting route criteria . . . . . . . . . . . . . . . . . . . . . . . . . . . . . . . . . .16
Route calculation . . . . . . . . . . . . . . . . . . . . . . . . . . . . . . . . . . . . . .17
Map or Guide route displays . . . . . . . . . . . . . . . . . . . . . . . . . . . . . .17
Using the current position button . . . . . . . . . . . . . . . . . . . . . . . . . .18
Using the HOME button . . . . . . . . . . . . . . . . . . . . . . . . . . . . . . . . .18
During a journey
. . . . . . . . . . . . . . . . . . . . . . . . . . . . . . . . . . . . . 18
DETAILED INFORMATION . . . . . . . . . . . . . . . . . . . . . . . . . . . . . .19
SELECTING A DESTINATION . . . . . . . . . . . . . . . . . . . . . . . . . . . .19
Address/Intersection . . . . . . . . . . . . . . . . . . . . . . . . . . . . . . . . . . . .19
Point of Interest (POI) . . . . . . . . . . . . . . . . . . . . . . . . . . . . . . . . . . .19
Previous Destination . . . . . . . . . . . . . . . . . . . . . . . . . . . . . . . . . . . .20
Deleting a previous destination . . . . . . . . . . . . . . . . . . . . . . . . . . . .21
Address Book . . . . . . . . . . . . . . . . . . . . . . . . . . . . . . . . . . . . . . . . .21
Adding, deleting or editing the Address Book
. . . . . . . . . . . . . . . . 21
SELECTING ROUTE CRITERIA . . . . . . . . . . . . . . . . . . . . . . . . . . 22
DISPLAY SCREENS
Route calculation . . . . . . . . . . . . . . . . . . . . . . . . . . . . . . . . . . . . . . 23
Please proceed . . . . . . . . . . . . . . . . . . . . . . . . . . . . . . . . . . . . . . . 23
Guide display . . . . . . . . . . . . . . . . . . . . . . . . . . . . . . . . . . . . . . . . 24
Trueview . . . . . . . . . . . . . . . . . . . . . . . . . . . . . . . . . . . . . . . . . . . . 24
Map display . . . . . . . . . . . . . . . . . . . . . . . . . . . . . . . . . . . . . . . . . . 25
Current location . . . . . . . . . . . . . . . . . . . . . . . . . . . . . . . . . . . . . . . 25
Arrival
. . . . . . . . . . . . . . . . . . . . . . . . . . . . . . . . . . . . . . . . . . . . 26
10
11

Navigation
DETOURS, INTERRUPTIONS & ROUTE CHANGES . . . . . . . . . . 26
Detour options . . . . . . . . . . . . . . . . . . . . . . . . . . . . . . . . . . . . . . . . 26
Route interruptions . . . . . . . . . . . . . . . . . . . . . . . . . . . . . . . . . . . . 27
Route changes or cancellations
. . . . . . . . . . . . . . . . . . . . . . . . . . 27
OPTION MENU . . . . . . . . . . . . . . . . . . . . . . . . . . . . . . . . . . . . . . . 28
Navigation Preferences . . . . . . . . . . . . . . . . . . . . . . . . . . . . . . . . . 28
Language . . . . . . . . . . . . . . . . . . . . . . . . . . . . . . . . . . . . . . . . . . . 28
System Information . . . . . . . . . . . . . . . . . . . . . . . . . . . . . . . . . . . . 28
Vehicle Position
. . . . . . . . . . . . . . . . . . . . . . . . . . . . . . . . . . . . . 29
OBTAINING NEW CD-ROMS . . . . . . . . . . . . . . . . . . . . . . . . . . . . 30
Navigation
PRINCIPLES OF OPERATION
By using satellites, road maps stored on a
computer disc (CD-ROM) and a Global
Positioning System receiver, the navigation
system can direct the driver to the required
destination. Directions are in the form of verbal
instructions and pictograms in the display.
Verbal instructions will override other audio
playback e.g. radio.
What is a Global Positioning System?
A Global Positioning System (GPS) makes it
possible to determine any position on land,
water or in the air. With the help of satellites
which orbit the Earth, the navigation system
can determine the vehicle’s current position.
These satellites transmit position and time
signals which can be received in the car.
If your vehicle leaves the road network on the
CD-ROM, GPS will locate your actual position.
12
13

CD CARE AND MAINTENANCE
For best possible results, make sure the
navigation CD is clean and in good condition.
GENERAL INFORMATION
Navigation information is presented as a series
of menus in the display. Select the item that is
required and follow the instructions given.
The following pages provide basic information
for using satellite navigation. More detailed
information to help you use all of the features
available on the navigation system is
described later.
For road safety reasons information
should only be entered when the
vehicle is stationary.
!
Observe highway code restrictions!
Do not take any risks. If you are unable
to make a U-turn, continue your journey.
The navigation system will recalculate your
route to get you back to an appropriate road
to your destination.
!
The route guidance navigation system
in your audio unit will not function
unless a mapping programme CD-ROM is
inserted into the single disc player. It is
possible to eject this disc and to replace it
with another CD, but it is recommended that
a CD changer be used if playback from a
standard music CD is required.
!
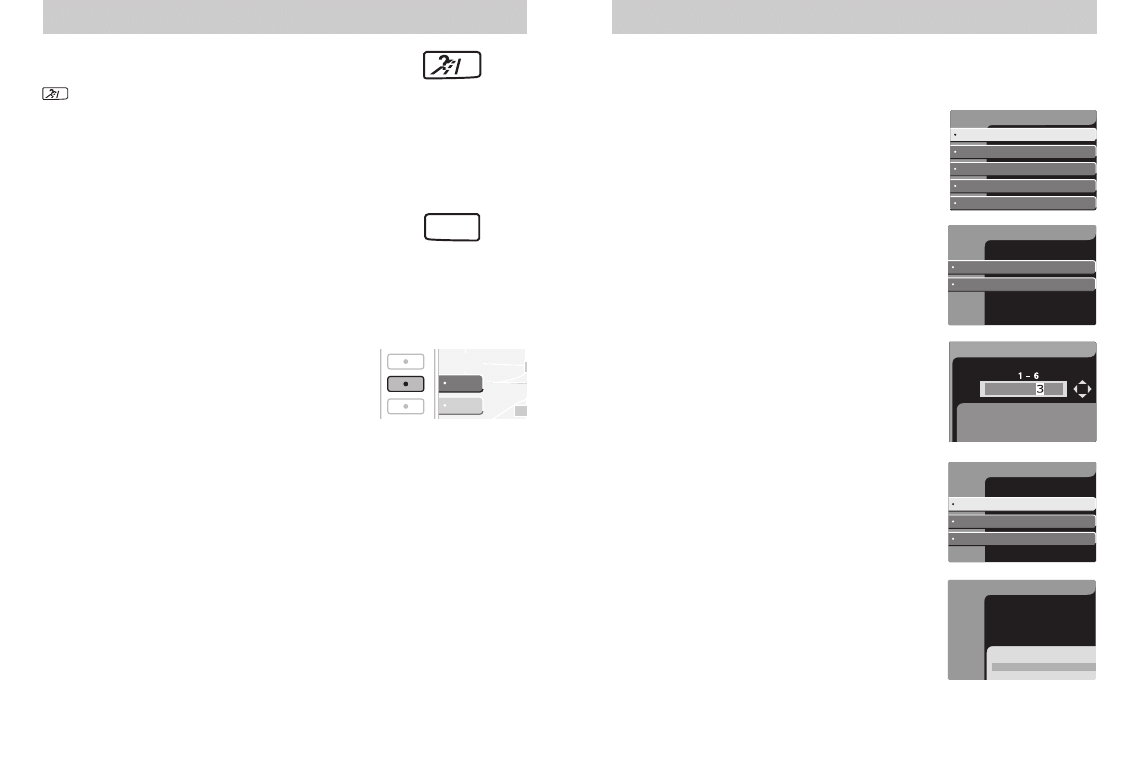
Getting started
Getting started
‘Please drive safely’
If this screen appears, press the button
alongside the on-screen flag display to select
the language required (see page 28). Press
the button alongside ‘ACCEPT’ to continue.
To select navigation mode
Press NAV to access the navigation system menu.
When viewing a menu:
• Use the control switch/Enter to highlight an
item in the display.
• Press the control switch/Enter to make your
selection.
If you select the wrong item, press the
undo/back button to return to the previous
screen, or press ‘MENU’ to return to the main
navigation menu and start again.
Selecting a destination
From the main navigation system menu, use the
buttons alongside the on-screen menu or
control switch to select from the following
options:
• ‘Address/Intersection’ – To select a destination
based on a known street address or
intersection.
• ‘Point of Interest’ – To select a destination
that is a point of interest location. For
example, an airport, restaurant or hospital.
• ‘Previous Destination’ – To select a
destination from among the last thirty
entered destinations.
• ‘Address Book’ – To select a destination from
previously stored entries.
• ‘Option Menu’ – See page 28.
Note
: ‘Address/Intersection’ and ‘Point of
Interest’ destination selections are not available
while the vehicle is in motion.
Navigation Menu
Previous Destination
Point of Interest
Address Book
Option Menu
Address/Intersection
NAV
ENTER
This unit gives guidance only.
Safe and lawful vehicle use is
the driver's responsibility.
PLEASE DRIVE SAFELY
ACCEPT
14
15
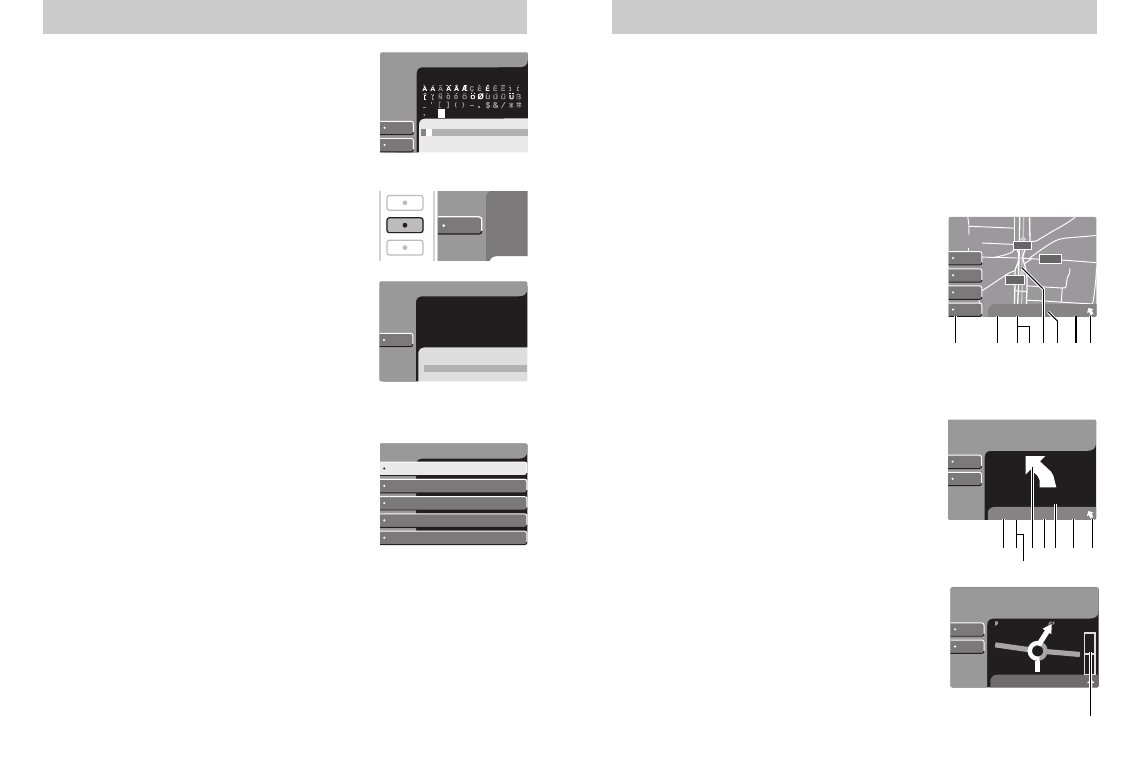
Spell or list the destination required
Having made a selection from the main
navigation system menu, there are two ways to
choose the destination:
• Spell mode – A keyboard display enables you
to spell out a town/city, a street or a point of
interest using the control switch. A highlight
bar moves automatically to search for your
destination.
• After each letter is highlighted, press the
control switch/Enter button to make your
selection.
Press the button alongside ‘DELETE’ to move
back to previously selected characters.
• To confirm your destination, press the button
alongside ‘LIST’ and the control switch to
enter it.
• List mode – This refers to a list of locations.
Scroll through and enter a selection using the
control switch. The list covers towns/cities,
streets or points of interest and a highlight bar
indicates the line selected.
Selecting route criteria
Having selected the destination required, use the
control switch to select from the following route
criteria options:
• ‘Shortest Time Route’.
• ‘Shortest Distance’.
• ‘Avoid Toll Roads’.
• ‘Avoid Major Roads’.
• ‘Use Major Roads’.
Select Route Criteria
Avoid Toll Roads
Shortest Distance
Shortest Time Route
Avoid Major Roads
Use Major Roads
Select Street
LIST
DELETE
1
1
DE MAYO, CALLE
SEAX WAY
1
LARGO DUANO
A B C D E F G H I J K L M
N O P Q R S T U V W X Y Z
0
1
2 3 4 5 6 7 8 9
Select Town/City
ABERBARGOED
COUNTY: NOORD-BRABA
LONDON
'S-HERTOGENBOSCH+
'S-HERTOGENBOSCH
NAME
Getting started
DELETE
Getting started
Route calculation
When the route criteria selection has been made
and entered, the navigation system
automatically calculates a route to the
destination required.
Once calculated, this route appears on the
display screen and a voice prompt provides a
first route direction instruction once driving
has commenced.
Map or Guide route displays
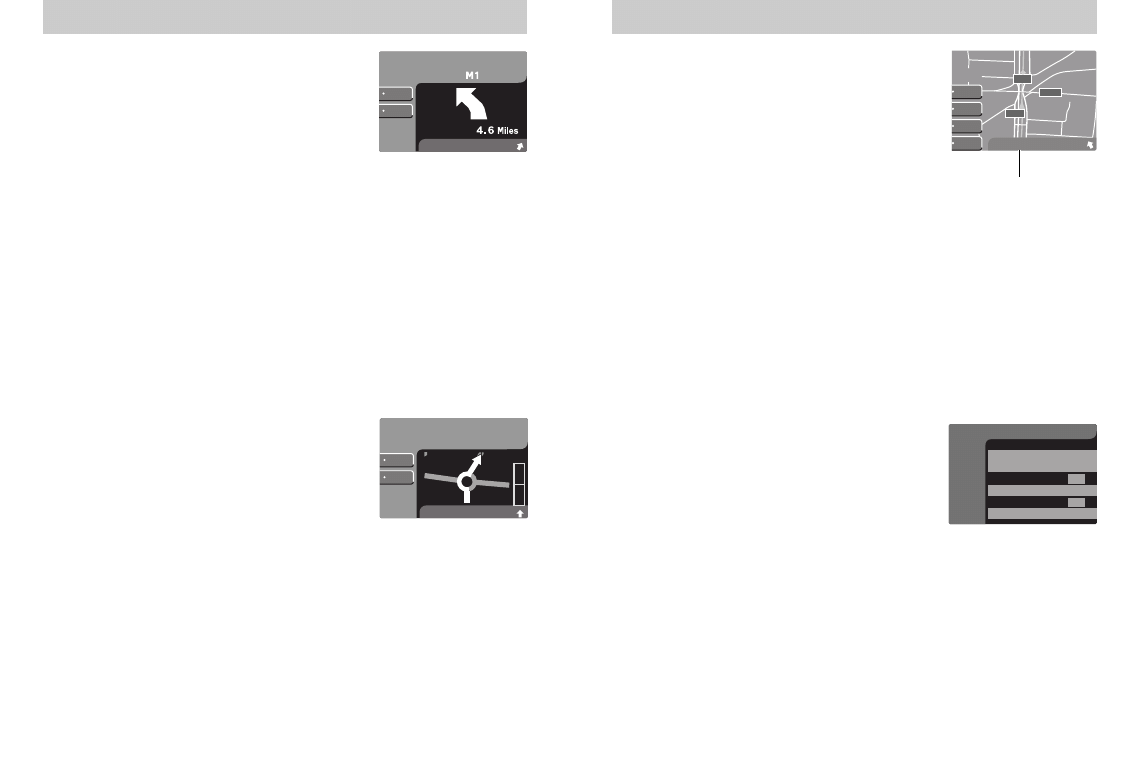
Press ‘MAP’ to select a map screen. The details
in this display are as follows:
(1) Selects map scale (ZOOM).
(2) TMC – see page 31.
(3) Current directional heading.
(3A) Signal strength – see page 25.
(4) Current position of your vehicle.
(5) Estimated time to desination.
(6) Distance to final destination.
(7) Direction of travel.
Press NAV to select a guide display. The details
in this display are as follows:
(1) TMC – see page 31.
(2) Current directional heading.
(2A) Signal strength – see page 25.
(3) Next directional change.
(4) Estimated time to destination.
(5) Distance to directional change.
(6) Distance to final destination.
(7) Direction of final destination.
(8) Counts down distance to next junction.
15
L A N D Y
A1
D20
N1
DETOUR
VOICE
PAN
ZOOM
TMC
W
74,8km
0:50
M25
DETOUR
VOICE
Take:
Ahead
TMC
W
73,6km
0:49
3,6
km
1
45 6 7
2
A
WEST MAYNE
DETOUR
VOICE
Turn onto:
E
2.5ml
0.0
8
2
4
1
6
5
7
3A
3
16
17
Using the current position button
With the navigation system selected, press the
button to identify the exact current
position of the vehicle. A display provides the
details.
Using the HOME button
With the navigation system selected, press and
hold ‘HOME’ to set the vehicle’s current
position in the navigation system memory.
Pressing ‘HOME’ again provides a quick way to
select the shortest time route back to the same
location as stored previously.
During a journey
• To repeat the last voice instruction, press the
button alongside ‘VOICE’.
• To detour from the route selected,
see page 26.
• To stop over during route guidance,
see page 27.
• To cancel route guidance, see page 27.
• To alter a map scale or review other system
options, see page 28.
Getting started
HOME
L A N D
N1
DETOUR
VOICE
Detailed information
Town/City Name
Street Name
Address/Intersection
Available Range:
Enter Address Number
SEAX WAY
BASILDON,
ESSEX
Select PO
I
By Name
By Category
By Category & Name
Select PO
I Category
AIRFIELD
AIRPORT
AMUSEMENT PARK
BORDER CROSSING
The following pages describe in detail how to
use your navigation system.
SELECTING A DESTINATION
Address/Intersection
Use the control switch to select
‘Address/Intersection’. Two options are
available:
• ‘Town/City Name’ – Use the control switch to
select this option if you know the town or
city name.
• ‘Street Name’ – Use the control switch to
select this option if you know the street
address but are uncertain of the city.
Make your selection and the following options
are available:
- ‘Address Range’ – select the number of the
destination you require.
- ‘Intersection’ – select the intersection nearest
to the destination required.
Note
: Selecting ‘Street Name’ first is often the
quickest way to find a location.
Point of Interest (POI)
This destination option enables you to specify a
particular place, like an airport or petrol station,
when you do not have an address or location.
Use the control switch to select ‘Point of
Interest’. Three options are available:
• ‘By Category’ – Lists POIs by category e.g.
airports, petrol stations etc. Use the control
switch to make a selection.
Navigation Menu
Previous Destination
Point of Interest
Address Book
Option Menu
Address/Intersection
18
19
• ‘By Name’ - A keyboard display enables you
to spell out and enter the name of your
point of interest using the control switch.
Note
: A slight time delay will occur if large
numbers of letter options are available.
• ‘By Category & Name’ – Lists the categories,
then enables you to spell out the name of
your destination.
Having made a selection, three further options
are then displayed:
• ‘Show All’ – Lists entries in alphabetical
order e.g. to find a restaurant by name.
• ‘Sort by Distance’ – Lists the closest POI
entries e.g. to find the nearest car repair
centre.
• ‘Within a Town/City’ – Lists entries for a
specific city in alphabetical order e.g. to find
a supermarket in an unfamiliar location.
Note
: Certain categories may not be available
in some areas and POIs may not all be listed.
Up to date information also depends upon using
the latest CD-ROM available.
Previous destination
The last thirty destinations entered into the
navigation system are automatically stored in
the system’s memory.
Use the control switch to select ‘Previous
Destination’ and the stored address of each of
these destinations appears in the display.
‘Previous Origin’ – The location where the
vehicle last started off from is also stored here,
and is updated every time the vehicle completes
a journey.
Use the control switch to make a selection.
Select Listing Preference
Sort by Distance
Show All
Within a Town/City
AIRFIELD
ELSTREE AERODROME
BIGGIN HILL AIRPORT
LONDON BIGGIN HILL A
PANSHANGER AERODROM
NORTH WEALD AIRFIELD
NORTH WEALD, ESSEX
MERLIN WAY
NORTHOLT AERODROME
Navigation Menu
Previous Destination
Point of Interest
Address Book
Option Menu
Address/Intersection
Detailed information
Enter POI Name
CLEAR
DEL
A
B C D E F G H I J K L M
N O P Q R S T U V W X Y Z
0 1 2 3 4 5 6 7 8 9
Detailed information
Deleting a Previous Destination
Use the control switch to select the destination
no longer required, then press the button
alongside ‘DELETE’. A confirmation screen
appears before the deletion is made.
Address Book
This is a convenient way to store up to thirty
frequently visited destinations in alphabetical
order.
Use the control switch to select ‘Address Book’
and stored addresses appear in the display.
Use the control switch to make a selection.
If no entries exist, an empty address book
screen is shown.
Adding, deleting or editing the Address Book
Select ‘Address Book’. Press the button
alongside ‘DELETE’, ‘ADD’ or ‘EDIT’ to delete,
add, or edit addresses as required.
‘Name the Entry’ provides an opportunity to
change the name of an address book entry.
Navigation Menu
Previous Destination
Point of Interest
Address Book
Option Menu
Address/Intersection
BASIL
DELETE
20
21

SELECTING ROUTE CRITERIA
Once you have selected a destination, use the
control switch to select your route criteria.
The following options are available:
• ‘Shortest Time Route’ - Provides a route
that minimises driving time and takes
account of criteria such as speed limits,
number of turns etc.
• ‘Shortest Distance’ – Provides a route to the
destination that is the shortest distance from
the current location.
• ‘Avoid Toll Roads’ – Provides a route that
avoids toll roads where possible.
• ‘Avoid Major Roads’ – Provides a route that
avoids major roads where possible.
• ‘Use Major Roads’ – Provides a route that
makes full use of major roads.
Select Route Criteria
Avoid Toll Roads
Shortest Distance
Shortest Time Route
Avoid Major Roads
Use Major Roads
Detailed information
Detailed information
DISPLAY SCREENS
‘Route calculation’
This screen appears for a few seconds while the
navigation system is calculating a route.
‘Please Proceed’
When a route calculation is complete,
‘Please Proceed’ is displayed with a map of the
route shown in pink.
Major roadways are in blue, other streets in
white and a pink/yellow triangle indicates your
vehicle location and heading. An arrow at the
foot of the screen points to your destination.
The following display functions are available.
• ‘PLAN’ – Press the button alongside this on-
screen display and use the control switch to
scroll through your entire route. This is only
available before starting the journey.
• ‘PAN’ – Press the button alongside this on-
screen display and use the control switch to
pan up or down, left or right, along the route
selected. (This feature is not available while
the vehicle is in motion.)
• ‘ZOOM’ – Press the button alongside this on-
screen display and use the control switch to
adjust the area covered on the map.
The zoom level is shown at the foot of
the screen.
A52
TMC
E
Please Proceed
ZOOM
PLAN
PAN
0.2 M1
0.3 M1
6.9 M1
Total Distance:
150
.
7
mi
From: EASTGATE
Planned Route
150
.
7
mi
150
.
7
mi
A52
GPS
SW
ZOOM
DETOUR
VOICE
PAN
Set Map Scale
1 8
9,4km
0:09
Calculating a Route to:
LONDON/ M 4/ ENGLAND
M4
LONDON
2 %
22
23
Guide display
Once your vehicle is on the highlighted route,
this screen automatically appears, showing the
next turn. Use the control switch to scroll
through the next manoeuvres of the planned
route ahead.
Voice prompts direct you as you continue on
the route. To switch voice prompts off, see
page 28.
The voice volume level may also be adjusted by
using the volume control while a voice prompt
is in progress. The volume is automatically
adjusted to compensate for engine and road
speed noise.
The following display functions are available:
• ‘VOICE’ – Repeats the last voice prompt.
• ‘DETOUR’ – Selects a detour.
The Guide Display screens and voice prompts
are continually updated to correspond with
your progress to the destination.
Trueview
As you approach an intersection, the ‘Guide
Display’ screen changes automatically to a
close-up (‘Trueview’) of the junction.
The following display functions are available:
• ‘VOICE’ – Repeats the last voice prompt.
• ‘DETOUR’ – Selects a detour.
‘Trueview’ automatically returns to a ‘Guide
Display’ screen once a turn has been completed.
WEST MAYNE
DETOUR
VOICE
Turn onto:
2.5ml
0.0
TMC E
0:38
DETOUR
VOICE
Take :
Ahead
TMC
E
148.3mi
Detailed information
Detailed information
Map display
(1) Depending on the landscape along your
route (e.g. mountains, high buildings, tunnels
etc), the current directional heading at the foot
of the screen might change colour to indicate
reduced signal strength.
• Green – A clear GPS signal is being received.
• Yellow – The GPS signal is partially blocked.
• Red – The GPS signal is unavailable and may
be temporarily blocked.
Note
: The navigation system does not
require a constant GPS signal to maintain
route guidance.
The following on-screen display functions are
available:
• ‘VOICE’ – Repeats the last voice prompt.
• ‘DETOUR’ – Selects a detour.
• ‘ZOOM’ – Adjusts the area covered on the
map displayed.
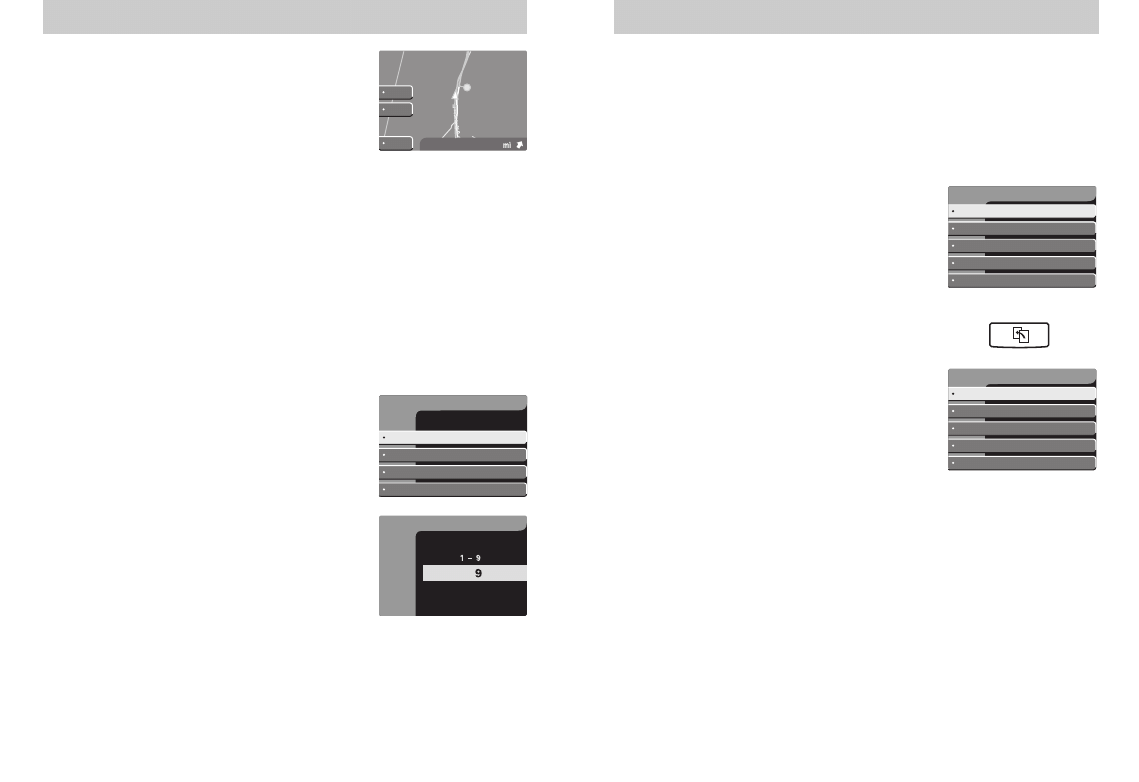
‘Current Location’
Select the ‘Current Location’ screen by pressing
the current position display button whilst in
navigation mode.
Your current location and the name/distance to
the next/last intersection are displayed.
Press NAV or MAP to return to a guide or map
display.
Current Location
Street Town/City County
Next Intersection
Prior Intersection
CADISHEAD WAY
SOUTHFIELDS AVE
ECCLES
,
LANCASHIRE
A57
1.4 mi
0.0 mi
L A N D Y
A1
D20
N1
DETOUR
VOICE
PAN
ZOOM
TMC
W
74,8km
0:50
1
24
25
‘Arrival’
When you approach your destination, it is
shown on the ‘Map Display’ screen with a
circular pink/yellow icon.
When you arrive, the name and address of your
destination is displayed.
DETOURS, INTERRUPTIONS AND ROUTE
CHANGES
If you encounter road construction, unexpected
traffic or undesirable roads, the navigation
system can quickly re-calculate the most
efficient detour to your selected destination.
Detour options
With the ‘Guide Display’, ‘Trueview’ or ‘Map
Display’ screens selected, press the button
alongside ‘DETOUR’.
Use the control switch to select and enter your
new route criteria.
The following options are available:
• ‘Avoid Current Road’ – Updates your route to
avoid the road you are currently on.
• ‘Avoid Next Road’ – Updates your route to
avoid the next road planned on your journey.
• ‘Detour (x) Miles’ – Provides a detour from
your planned journey for a certain distance.
Use the control switch to select how much
of your planned route you wish to avoid.
The range available is based on the length of
your original route.
• ‘Avoid Specific Road’ – Use the control
switch to avoid a specific road on your
planned route.
Select Detour Criteria
Avoid Next Road
Avoid Current Road
Detour X miles
Avoid Specific Road
Enter Detour miles
Available Detour miles
DETOUR
VOICE
1.3
ZOOM
TMC
S
0:38
Detailed information
Detailed information
Route interruptions
If you leave your route temporarily (e.g. to stop
for petrol) and switch the ignition key off after
reactivating the Navigation System, the option
to continue route guidance will be displayed
when the ignition key is turned on again. Use
the control switch to select from one of the
following options:
• ‘Continue’ – The navigation system displays
the ‘Select Route Criteria’ screen -
see page 22.
• ‘Discontinue’ – This will return you to
the main menu.
If the ignition key is NOT turned off, simply
continue along the highlighted route.
Route changes or cancellations
To cancel or alter your route, press the
undo/back button and then select ‘Cancel
Guidance’ or your new route criteria.
To enter a new destination, press MENU to
select the main menu screen.
Select Route Method
Shortest Distance
Shortest Time Route
Avoid Toll Roads
Avoid Major Roads
Cancel Guidance
Select Route Criteria
Avoid Toll Roads
Shortest Distance
Shortest Time Route
Avoid Major Roads
Use Major Roads
26
27

OPTION MENU
You may want to adjust or check the available
navigation system options.
From the main menu, press the button
alongside ‘Option Menu’ to select one of the
following options:
‘Navigation Preferences’
Use the control switch to access and enter the
following options:
• ‘Zoom’ – Select from a range of map display
scales.
• ‘Map’ – With ‘Heading Up’ your direction of
travel is towards the top of the screen.
With ‘North Up’ North will always remain at
the top of the screen.
• ‘Voice’ – Select on or off.
• ‘Units’ – Select miles or kilometres.
‘Language’
Use the control switch to select and enter the
voice and text language required from the
options available. This section process will take
around one minute to complete.
‘System Information’
Identifies the navigation software and the
database in use.
Miles
Heading Up
Off
Kilometers
North Up
On
Navigation Preferences
ZOOM
MAP
UNITS
VOICE
Language
ENGLISH
DEUTSCH
Option Menu
Language
Navigation Preferences
System Information
Vehicle Position
Detailed information
Detailed information
‘Vehicle Position’
Use the control switch to access and enter the
following options:
• ‘Position Adjustment’ – Select this to display
a map showing your vehicle’s current position.
• ‘Set Current Position’ – Select this to reset
the current location of the vehicle. Define the
new location just as you would select a
destination.
Set Vehicle Position
Set Current Location
Position Adjustment
28
29

For more information on the types of CD-ROM
available and to obtain updated CD-ROMs,
contact the following:
Country
Toll free number
Austria (A)
(+43) 800 1823 5322
Belgium (B)
(+32) 800 1823 5322
Denmark (DK)
(+45) 800 1823 5322
Spain (E)
(+34) 800 1823 5322
Sweden (S)
(+46) 800 1823 5322
Switzerland (CH)
(+41) 800 1823 5322
Netherlands (NL)
(+31) 800 1823 5322
Great Britain (GB)
(+44) 800 1823 5322
France (F)
(+33) 800 914 478
Germany (D)
(+49) 800 181 6065
Italy (I)
(+39) 800 781 145
Portugal (P)
(+35) 31 555 384 245
If toll free numbers are not available, use
(+) 31 555 384 245 or fax (+) 31 555 433 947
Note
:
Navigation system CD-ROMs are not available from Ford Dealers.
Obtaining new CD-ROMS
Traffic Messaging Channel
Traffic Messaging Channel
. . . . . . . . . . . . . . . . . . . . . . . . . . . . 32
Selecting the Traffic Messaging Channel . . . . . . . . . . . . . . . . . . 32
Types of message available . . . . . . . . . . . . . . . . . . . . . . . . . . . . 33
Traffic Messaging . . . . . . . . . . . . . . . . . . . . . . . . . . . . . . . . . . . . 34
The area covered by TMC . . . . . . . . . . . . . . . . . . . . . . . . . . . . . . 35
To switch off TMC . . . . . . . . . . . . . . . . . . . . . . . . . . . . . . . . . . . . 35
30
31
TRAFFIC MESSAGING CHANNEL (TMC)
In countries where the system is operational,
Traffic Messaging can interact with your audio
unit when a navigational CD-ROM is inserted.
Once activated, TMC automatically provides
details about driving or road conditions
that may affect the route ahead.
This enables a driver to select a detour to
avoid identified problems.
Selecting the Traffic Messaging Channel
With a navigation CD inserted, press TMC to
switch on Traffic Messaging.
If it is available, ‘TMC’ appears at the foot of the
screen.
• A green ‘TMC’ icon indicates indicates the
function is switched on and a traffic
messaging signal is being received.
• A red ‘TMC’ icon shows that the system is
turned on, but no signal is being received.
• Traffic messaging is not operational in some
countries and, if it is switched on but not
available, the ‘TMC’ icon will not appear.
TMC
Traffic Messaging Channel
86
DETOUR
VOICE
TMC
E
1/8mi 24.3mi
ZOOM
MARK
LIST
TMC is not available
on Navigation CD
"IBERIAN PENNINSULA"
TMC Not Available
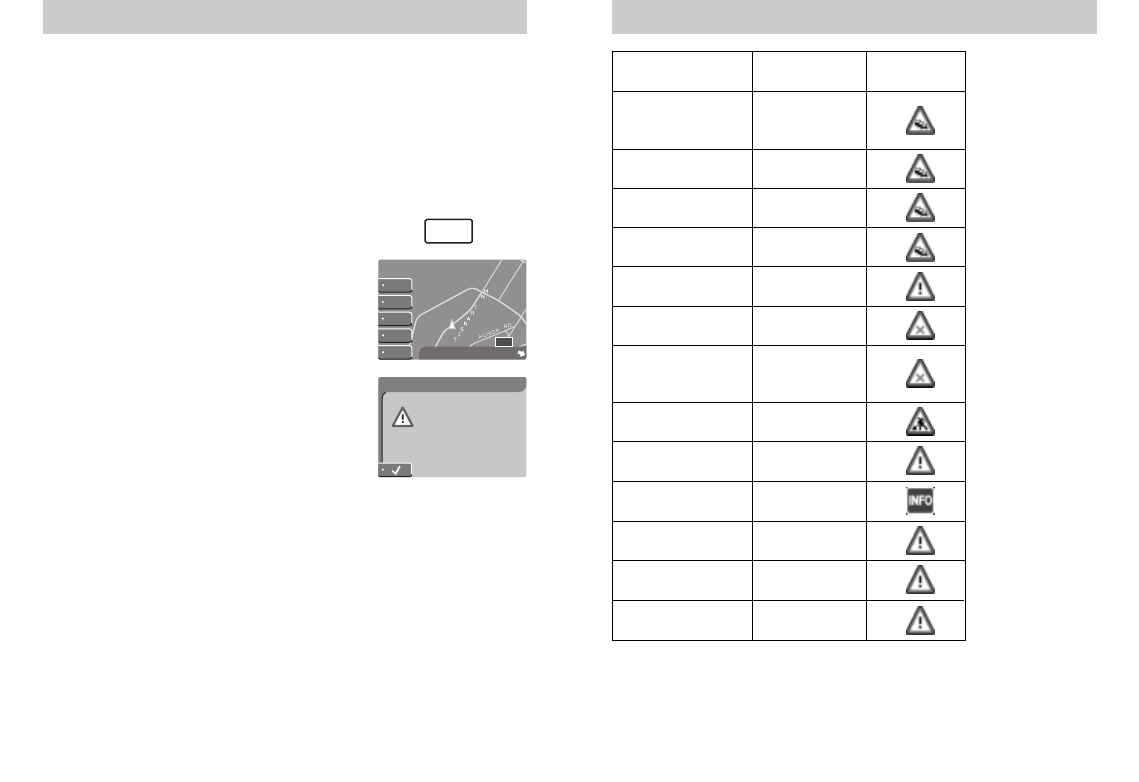
Traffic Messaging Channel
Type of traffic
message received
Stationary/heavy
traffic or a traffic
problem
Queuing traffic
Delays/obstructions
Accident
Incident/Dangerous
situation
Road closed
Restriction
Roadworks
Security alert
Major event
Snow
Ice/High wind
Poor visibility
Voice prompt
message
Heavy traffic
Ahead
Queuing traffic
Ahead
Delays Ahead
Accident Ahead
Dangerous
situation Ahead
Closed Ahead
Lane
restriction
Ahead
Roadworks
Ahead
Security alert
Ahead
Major event
Ahead
Snowfall Ahead
Dangerous
situation Ahead
Reduced
visibility Ahead
Map display
icons
32
33

Traffic messaging
• If the message is received when a map display
screen is selected, warning icons like those
shown opposite appear with red circles
alongside the section of roadway affected.
• If the traffic message affects a planned route,
press the button alongside ‘DETOUR’ to select
new route criteria.
Traffic Messaging Channel
86
DETAIL
VOICE
TMC
E
1/8mi 24.3mi
ZOOM
MARK
LIST
Traffic Messaging Channel
The area covered by TMC
With a route selected, your audio unit receives
and displays/announces all traffic messages that
affect the planned route ahead.
If a route is not selected, the audio unit receives
and stores traffic messages from an area
surrounding the vehicle’s current location and
the route ahead.
To switch off TMC
Press TMC.
TMC
34
35

USING AN INTEGRATED PHONE SYSTEM
. . . . . . . . . . . . . . . . 37
PHONE MODE . . . . . . . . . . . . . . . . . . . . . . . . . . . . . . . . . . . . . . . 38
On screen button displays . . . . . . . . . . . . . . . . . . . . . . . . . . . . . 38
Phone list . . . . . . . . . . . . . . . . . . . . . . . . . . . . . . . . . . . . . . . . . . . 38
Adding, deleting or editing the phone list . . . . . . . . . . . . . . . . . . 38
To make an outgoing call . . . . . . . . . . . . . . . . . . . . . . . . . . . . . . 39
Receiving an incoming call
. . . . . . . . . . . . . . . . . . . . . . . . . . . . 39
Local network calls and roaming . . . . . . . . . . . . . . . . . . . . . . . . 39
Integrated mobile phone
Integrated mobile phone
USING AN INTEGRATED PHONE SYSTEM
This audio unit may be linked to a fully
integrated mobile phone system, which mutes
radio reception and CD playback during all
incoming and outgoing calls.
Please note that this is only available on certain
dedicated Ford mobile phones. Please contact
your Ford dealer for more information.
When your mobile phone is connected to the
unit, phone calls are heard through the audio
speakers. Phone controls and certain phone
information appear on the audio screen display
and some controls may be used for phone
system functions.
(For specific phone operating instructions,
refer to your handset user guide.)
This system is designed to allow safe
Handsfree communications whilst on
the move. We strongly recommend that you
do not use digit dial or portable handset
operations whilst the vehicle is in motion.
We would also recommend that you set the
Auto Answer feature on your portable
phone. Please note that it is illegal in most
countries to use a stand alone portable
phone whilst in charge of a vehicle and
severe penalties may apply.
!
36
37
Integrated mobile phone
PHONE MODE
Press the button to select the phone screen.
Pressing again will exit the phone mode.
Pressing either ‘AM/FM’ or ‘CD’ will also exit
the phone mode and return directly to the
selected audio mode.
On screen button displays
AUDIO – Accesses the phone audio menu to
allow adjustment of bass, treble,
balance and fade specifically for the
phone audio.
PREV
– Scrolls backwards through the
phone list.
NEXT
– Scrolls forward through the phone
list.
SEND
– Calls the selected phone number
from the phone list.
END
– Terminates the current phone call.
ACCEPT – Answers an incoming calls.
Phone list
The phone list shows names and numbers
stored on the portable handset.
The display will show the name and number for
each memory location selected. The memory
location is indicated beneath the name or
number. Other displays showing signal strength
or service availability may also be shown.
Adding, deleting or editing the phone list
This is done in the normal way directly on the
portable handset, not via the audio unit. Please
refer to the portable handset's operating
instructions.
AUDIO
PREV
NEXT
SEND
0:07
3
Phone
MARK EDELSTO
Integrated mobile phone
To make an outgoing call
Select the desired name and number from the
phone list using the ‘PREV’ or ‘NEXT’ buttons.
• Press ‘SEND’ to initiate the call.
• Press ‘END’ to terminate the call.
The call duration is shown in the display.
Receiving an incoming call
An incoming call will wake-up the audio unit if
it is turned off, as long as the ignition key is in
and turned to the ON position. Radio or CD
playback will be interrupted for the duration of
the incoming call.
• Press ‘ACCEPT’ to answer the incoming call.
• Press to ignore the call and cancel
phone mode.
Local network calls and roaming
In some countries where a home network is
unavailable, calls may be routed through a local
network. ‘ROM’ will appear with the signal
strength in the display and higher charges may
apply.
AUDIO
END
3
Phone
0:07
1509 611088
Phone
MARK EDELSTO
SEND
NEXT
PREV
AUDIO
3
38
39

PRINCIPLES OF OPERATION . . . . . . . . . . . . . . . . . . . . . . . . . . . 41
EMERGENCY CALLS – ‘SOS’ . . . . . . . . . . . . . . . . . . . . . . . . . . . 41
Air bag feature . . . . . . . . . . . . . . . . . . . . . . . . . . . . . . . . . . . . . . . 41
INFORMATION (i) – OPERATOR . . . . . . . . . . . . . . . . . . . . . . . . . 41
TRAFFIC INFORMATION – TRAFFIC . . . . . . . . . . . . . . . . . . . . . . 42
TELEPHONY –
☎
. . . . . . . . . . . . . . . . . . . . . . . . . . . . . . . . . . . . 42
Making an outgoing call . . . . . . . . . . . . . . . . . . . . . . . . . . . . . . . 42
Safety . . . . . . . . . . . . . . . . . . . . . . . . . . . . . . . . . . . . . . . . . . . . . . 42
Security
. . . . . . . . . . . . . . . . . . . . . . . . . . . . . . . . . . . . . . . . . . . 42
GENERAL INFORMATION . . . . . . . . . . . . . . . . . . . . . . . . . . . . . . 43
Selecting the Telematics main menu
. . . . . . . . . . . . . . . . . . . . 43
On-screen button displays
. . . . . . . . . . . . . . . . . . . . . . . . . . . . 43
Telematics calls
. . . . . . . . . . . . . . . . . . . . . . . . . . . . . . . . . . . . 44
International emergency call – 112
. . . . . . . . . . . . . . . . . . . . . . 44
Receiving an incoming call . . . . . . . . . . . . . . . . . . . . . . . . . . . . . 44
Telematics
Telematics
PRINCIPLES OF OPERATION
Telematics is an information service that
connects your vehicle to a service provider via
the Global System for Mobile communication
(GSM). Features that can be available include:
EMERGENCY CALLS – ‘SOS’
This will make a call to an operator, who can
assist with the emergency services such as
Police or Ambulance. Using Global Positioning
System (satellite) and GSM your vehicle
position is supplied to the operator
automatically. This will enable help to reach
you quicker.
Air bag feature
In the event of an accident that activates the air
bag, an emergency call is automatically made.
INFORMATION (i) – ‘OPERATOR’
This will make a call to an operator who can
assist with, for example, roadside assistance.
Using Global Positioning System (satellite) and
GSM your vehicle’s position is supplied to the
operator automatically. This will enable help to
reach you quicker.
The operator can also assist with information
regarding hotels, the nearest Police station,
fuel station, car parking etc. Also available is
traffic information in your vicinity, on particular
roads or between your current location and any
destination. Alternatively, route advice based on
current traffic conditions can be given, as also
can detailed verbal route instructions to any
address.
Contact your service provider for further details.
40
41

TRAFFIC INFORMATION (T>>>) – ‘TRAFFIC’
This provides automated traffic information
relative to the vehicle’s current position.
The radius of coverage may depend upon the
amount of information available.
For traffic relating to other more specific areas,
contact the operator using the ‘i’ button.
TELEPHONY – ‘
☎
’
Making an outgoing call
This allows you to make an outgoing call, via
the operator service. Select this feature, then
follow the operator’s instructions as required.
Safety
Security
Your personal details are not held within the
Telematics unit: all details are held by the
service provider. This means that in the unlikely
event that the Telematics unit is stolen, no one
will have access to your personal details.
Telematics
In the interest of road safety, the
system should not be used in a way
that could interfere with the driver’s control
of the vehicle.
!
All Telematics features, including SOS,
are subject to the same constraints as
mobile phone connections and therefore
connection may not always be possible.
!
Telematics
GENERAL INFORMATION
The Telematics System uses an integrated GSM
mobile phone system to give special
information and emergency features. Utilising a
built in GPS receiver the system can
automatically advise a service provider of your
vehicle's position.
Selecting the Telematics main menu
• Press the button to select the
Telematics main menu.
• Pressing again will exit the
Telematics main menu.
• Pressing either ‘AM/FM’ or ‘CD’ will also exit
the Telematics main menu and return directly
to the selected audio mode.
On-Screen button displays
AUDIO:
Accesses the phone audio menu to
allow adjustment of bass, treble,
balance and fade specifically for the
phone audio.
SOS:
Selects and calls the operator
assisted SOS service.
(i):
Selects and calls the operator
assisted Information service.
T>>> :
Selects and calls the automated
Traffic service.
☎
:
Selects and calls the operator
assisted Phone service.
SEND:
Calls the selected service.
END:
Terminates the current phone call.
ACCEPT: Answers an incoming call.
SOS
AUDIO
SEND
T
P r e s s a g a i n t o c o n f i r m .
1
Phone
MARK EDELSTO
42
43

Telematics calls
Pressing ‘SOS’, ‘( i )’, ‘T>>>’ or ‘
☎
’ will initially
highlight the selected button and prompt for a
confirmation. If left, the highlight will disappear
after a few seconds.
Press either the same highlighted button or the
‘SEND’ button to confirm and make the call to
the service. This double press feature helps to
prevent accidental calls to emergency services.
Press ‘END’ to terminate the call.
The call duration is shown in the display.
International emergency calls – 112
The international emergency number 112 can be
dialled directly by pressing the audio unit's
preset keys in sequence (1 – 1 – 2).
Press ‘END’ to terminate the call.
Receiving an incoming call
• Press ‘ACCEPT’ to answer the incoming call.
• Press ‘END’ to terminate the call.
• Press to ignore the incoming call if
you do not wish to answer it.
Telematics
SOS
AUDIO
SEND
T
P r e s s a g a i n t o c o n f i r m .
1
Phone
MARK EDELSTO
0:07
SOS
AUDIO
SEND
T
1
Phone
SOS
Radio Operation
ON/OFF AND VOLUME
. . . . . . . . . . . . . . . . . . . . . . . . . . . . . . . 46
SELECTING A WAVEBAND
. . . . . . . . . . . . . . . . . . . . . . . . . . . . 46
TRAFFIC INFORMATION
. . . . . . . . . . . . . . . . . . . . . . . . . . . . . . 46
SEEK TUNING
. . . . . . . . . . . . . . . . . . . . . . . . . . . . . . . . . . . . . . 46
STATION PRESETS
. . . . . . . . . . . . . . . . . . . . . . . . . . . . . . . . . . 46
STEREO INDICATOR
. . . . . . . . . . . . . . . . . . . . . . . . . . . . . . . . . 46
SCREEN DISPLAY . . . . . . . . . . . . . . . . . . . . . . . . . . . . . . . . . . . . 47
AUDIO MENU . . . . . . . . . . . . . . . . . . . . . . . . . . . . . . . . . . . . . . . . 47
Audio settings . . . . . . . . . . . . . . . . . . . . . . . . . . . . . . . . . . . . . . . 47
More settings . . . . . . . . . . . . . . . . . . . . . . . . . . . . . . . . . . . . . . . . 48
Clip detect . . . . . . . . . . . . . . . . . . . . . . . . . . . . . . . . . . . . . . . . . . 48
Automatic volume control (AVC) . . . . . . . . . . . . . . . . . . . . . . . . . 48
Vehicle identification . . . . . . . . . . . . . . . . . . . . . . . . . . . . . . . . . . 48
Display settings . . . . . . . . . . . . . . . . . . . . . . . . . . . . . . . . . . . . . . 49
SCAN TUNING
. . . . . . . . . . . . . . . . . . . . . . . . . . . . . . . . . . . . . 49
MANUAL TUNING
. . . . . . . . . . . . . . . . . . . . . . . . . . . . . . . . . . . 49
PROGRAMME TYPE (PTY) SELECTION
. . . . . . . . . . . . . . . . . . 49
Selecting programme types . . . . . . . . . . . . . . . . . . . . . . . . . . . . 50
AUTOSTORE
. . . . . . . . . . . . . . . . . . . . . . . . . . . . . . . . . . . . . . . 50
RADIO DATA SYSTEM (RDS)
. . . . . . . . . . . . . . . . . . . . . . . . . . . 51
RDS screen displays . . . . . . . . . . . . . . . . . . . . . . . . . . . . . . . . . . 51
Station name displays . . . . . . . . . . . . . . . . . . . . . . . . . . . . . . . . . 52
Traffic information (TA) . . . . . . . . . . . . . . . . . . . . . . . . . . . . . . . . 52
RDS-EON
. . . . . . . . . . . . . . . . . . . . . . . . . . . . . . . . . . . . . . . . . 53
Traffic programme . . . . . . . . . . . . . . . . . . . . . . . . . . . . . . . . . . . . 53
Local or distant traffic . . . . . . . . . . . . . . . . . . . . . . . . . . . . . . . . . 53
To alter traffic announcement volume levels . . . . . . . . . . . . . . . 54
To end a traffic announcement . . . . . . . . . . . . . . . . . . . . . . . . . . 54
ALTERNATIVE FREQUENCIES (AF)
. . . . . . . . . . . . . . . . . . . . . . 54
Selecting AF Auto, Off or MAN . . . . . . . . . . . . . . . . . . . . . . . . . . 54
CLOCK AND DATE DISPLAYS
. . . . . . . . . . . . . . . . . . . . . . . . . . 56
12 or 24hr displays . . . . . . . . . . . . . . . . . . . . . . . . . . . . . . . . . . . 57
NEWS
. . . . . . . . . . . . . . . . . . . . . . . . . . . . . . . . . . . . . . . . . . . . 57
44
45
Radio operation
ON/OFF AND VOLUME
See page 9.
SELECTING A WAVEBAND
Press AM/FM repeatedly to select the AM (LW
and MW), FM1, FM 2 or FM-AST wavebands.
TRAFFIC INFORMATION
Activates Traffic Announcements when tuned to
an RDS traffic station. See page 52.
SEEK TUNING
During radio reception, press the or
buttons to locate the next station down or up
the waveband selected.
STATION PRESETS
Select a waveband and tune to the station
required. To store that station, press and hold
one of the preset buttons. The radio goes quiet
momentarily before sound is restored to
confirm the selected station has been stored.
24 preset stations can be stored – six on each
of the AM (LW and MW), FM1, FM2 and
FM AST bands.
STEREO INDICATOR
This shows whenever a stereo signal is
received. See page 46.
AM/FM
TA
1
2
3
4
5
6
VOL
ON/OFF
▲
▲
Radio operation
SCREEN DISPLAY
(1) Stereo indicator.
(2) Preset selected.
(3) RDS Station name.
(4) Station frequency.
(5) Waveband selected.
(6) On-screen button displays.
(7) TMC. See page 31.
(8) Traffic station selected.
(9) Volume level (or other briefly displayed
text messages).
(10) NEWS – when selected. See page 56.
(11) PTY selected.
(12) Local or distant traffic selection.
AUDIO MENU
Press the button alongside ‘AUDIO’ to access
the Audio Menu.
Audio settings
See page 9.
TREB
BASS
BAL
L
R
R
F
MORE..
FADE
MAN
SCAN
AUDIO
PTY
AST
RDS
Radio
1
PR6
FM1
Pop Music
Volume: 7
98.8
TP
TMC
NEWS
TA-D
6
8
bk
bm
7
bl
4
9
12
5
3
MENU
MENU
MAN
SCAN
AUDIO
ja
PR
1
46
47

Radio operation
More settings
Having selected the Audio Menu, press the
button alongside ‘MORE’ and use the control
switch to select one of the following options:
Clip detect
Use the control switch or
to select ‘CLIP
ON’ or ‘OFF’.
With the feature activated, the audio unit
automatically detects sound distortion and
reduces the unit’s volume level until the
distortion has been eliminated. This means that
when the volume control is adjusted with the
‘CLIP’ function switched on, there may not be
an increase in sound.
Automatic volume control (AVC)
Use the control switch to select and adjust
settings from ‘AVC None’ to ‘Maximum’.
When selected, Automatic Volume Control
increases or decreases the audio unit’s volume
level to compensate for engine and road speed
noise. The higher the level selected the greater
the compensation. The display shows the level
selected.
The display reverts to normal after a few
seconds.
Vehicle identification
Refer to System Security, page 5.
Audio Menu
AVC
Vehicle Identification
Display Settings
None
On
Off
Max
CLIP
Audio Menu
AVC
Vehicle Identification
Display Settings
None
On
Off
Max
CLIP
Audio Menu
AVC
Vehicle Identification
Display Settings
None
On
Off
Max
CLIP
▲
▲
BAL
L
R
MORE..
FADE
Radio operation
Display settings
Use the control switch to select one of the
following options:
‘Mode’ – ‘auto’ (automatic), day or night display
settings.
‘Brightness’ – Provides manual adjustment for
screen brightness.
‘Turn display off’ – Select to turn the display off.
Press any button to turn the display back
on again.
SCAN TUNING
Select the button alongside ‘SCAN’ for
scan tuning.
Each station on the waveband selected is
played for a few seconds in turn. Press the
‘SCAN’ button again to continue listening to
a selected station.
MANUAL TUNING
Select the button alongside the on-screen ‘MAN’
display to tune manually and use the
buttons for adjustment.
PROGRAMME TYPE (PTY) SELECTION
Some FM stations transmit programme type
codes which the audio unit can use to locate
different stations transmitting programmes
of a certain type.
Display Settings
BRIGHTNESS
Turn Display Off
Auto
Day
Night
MODE
Audio Menu
AVC
Vehicle Identification
Display Settings
None
On
Off
Max
CLIP
▲
▲
MAN
SCAN
PTY
ja
PR
1
O
MENU
MAN
SCAN
AUDIO
ja
PR
1
48
49
Radio operation
Selecting programme types
Select the button alongside the on-screen ‘PTY’
display to access a list of the programme types
available, e.g ‘News’, ‘Current Affairs’.
Previously selected PTYs are displayed at the
top of the list.
Use the control switch to make a selection and
the audio unit will search for the next available
station with the same PTY.
If a station transmitting the type of programme
selected cannot be found, ‘Not Found’ is
displayed and the radio returns to the original
station.
Radio stations can also transmit emergency
information ‘ALARM’. However, this programme
type cannot be selected manually.
AUTOSTORE
AutoStore selects six strong FM signals and
stores them on the preset buttons. Select the
button alongside the on-screen ‘AST’ display to
access AutoStore. A confirmation screen
appears before AST is activated.
The changing station frequencies are shown in
the display while the unit tunes through the FM
waveband. Sound is restored from preset 1 and
the display shows the station selected.
MAN
SCAN
AUDIO
PTY
AST
RDS
jazz fm
PR
1
FM-AST
Other Music
102.2
TP
TA - D
Autostore
Pressing AST replaces your
AST presets.
No. Do not change.
Yes. Create new presets.
MAN
PTY
RDS
j
PR
1
O
PTY
AST
RDS
O
Radio operation
RADIO DATA SYSTEM (RDS)
Audio units equipped with Radio Data System
(RDS) or Radio Data System – Enhanced Other
Network (RDS-EON) decoders pick up special
signals transmitted on the FM waveband when
tuned to some stations.
These provide additional features such as the
name of the radio station selected or traffic
information that automatically interrupts
normal broadcasts. However, some features
may not be available from all radio stations.
RDS screen displays
To activate RDS, select the button alongside
‘RDS’. Then use the control switch to make a
selection from the following options:
• ‘NEWS ON’/‘NEWS OFF’ – Select this option
and use the control switch to switch news
announcements on or off (see page 56).
• ‘TA VOL’ – Select this option and use the
control switch to adjust the traffic
announcement volume levels.
• ‘RDS Settings’ – Select this option and use
the control switch for the following options:
‘TA Local’ or ‘Distant’ (see page 53).
‘AF auto’, ‘Manual’ or ‘Off’ (see page 55).
‘12 or 24 hour Clock’ (see page 56).
RDS Menu
TA VOL
8
RDS Settings
On
THU
OCT
12
15:29
Off
NEWS
RDS Menu
TA VOL
8
RDS Settings
On
THU
OCT
12
15:29
Off
NEWS
RDS Settings
AF
Local
Distant
12hr
24hr
TA
CLOCK
THU
OCT
12
15:29
Auto
Off
Man
PTY
AST
RDS
O
50
51
Radio operation
Station name displays
The audio unit will display a selected station’s
name, when the information is broadcast
using RDS.
Traffic information (TA)
Press the TA button to select traffic information
broadcast from certain stations which will
automatically interrupt radio or CD playback at
a preset volume level.
• When it is broadcast, traffic information
automatically interrupts normal radio or CD
playback and ‘TRAFFIC’ appears in the
display.
• Traffic interrupts at a preset minimum level,
unless a higher volume has been previously
selected for normal listening.
• If the unit is not tuned to a station
transmitting traffic information when TA is
pressed, it will search for one. If nothing is
found, ‘TP Not Found’ is displayed.
• If a traffic station signal weakens, ‘TP’ will
change from to green to red in the display.
Press to find another traffic station.
If this happens during CD playback or with
the radio volume set to zero, the unit will
retune automatically to another traffic station
after four minutes.
• If a non traffic station is selected or recalled
using a preset button, the audio unit will
remain on that station unless:
– TA is turned off, then on again.
– The volume control is set to zero.
After four minutes the audio unit will retune
to another traffic station.
MAN
SCAN
AUDIO
PTY
AST
RDS
BBC R3
PR5
FM-AST
Serious Classics
91.3
TP
TA - D
▲
▲
AF
Loc
TA
THU
Auto
Radio operation
RDS-EON
RDS-EON automatically connects certain radio
stations so that traffic information broadcast
from one station may be received while listening
to another. These stations will only receive
traffic announcements from linked stations.
Traffic programme
‘TP’ will appear in the display when tuned to a
station that broadcasts traffic information.
TP appears when tuned to an RDS-EON station.
Local or distant traffic
In some areas, RDS-EON traffic announcements
may become excessive.
Select the button alongside ‘RDS’. Then use
the control switch to select ‘RDS Settings’
and choose:
• ‘TA Local’ or ‘Distant’ – With ‘Local’
selected, traffic interrupts are limited to
those from close by. ‘Distant’ will allow the
audio unit to accept information from a
wider area.
MAN
SCAN
AUDIO
PTY
AST
RDS
jazz fm
PR
1
FM-AST
Other Music
102.2
TP
TA - D
MAN
SCAN
AUDIO
PTY
AST
RDS
BBC R3
PR5
FM-AST
Serious Classics
91.3
TP
TA - D
RDS Settings
AF
Local
Distant
12hr
24hr
TA
CLOCK
THU
OCT
12
15:29
Auto
Off
Man
RDS Settings
AF
Local
Distant
12hr
24hr
TA
CLOCK
THU
OCT
12
15:29
Auto
Off
Man
52
53
Radio operation
To alter traffic announcement volume levels
Select the button alongside the on-screen ‘RDS’
display and use the control switch to make your
selection.
To end a traffic announcement
• When a traffic announcement ends, the audio
unit returns to normal sound operation.
• During a traffic announcement, press ‘TA’ to
end the message, or press it at any other time
to switch off the feature.
ALTERNATIVE FREQUENCIES (AF)
Some radio stations broadcast on different
frequencies in different parts of the country. If a
station’s signal weakens the audio unit retunes
to a stronger, alternative signal, if one exists.
To ensure that the audio unit is tuned to the
same station, it checks a programme
identification (PI) code.
TA
PTY
AST
RDS
O
Radio operation
Selecting ‘AF Auto’, ‘Off’ or ‘Man’
Select the button alongside RDS, then use
the control switch to select ‘RDS Settings’
and choose:
• ‘AF-Auto’ – With these options selected, the
unit mutes while it checks its list of alternative
frequencies and, if necessary, searches once
across the waveband for a genuine alternative
frequency. It will restore radio reception when
it finds one or, if one is not found, the unit
returns to the original stored frequency and on
certain units, ‘Not Found’ is displayed. In this
mode, the unit continually evaluates the
signal’s condition and if a better signal
becomes available, the unit will switch to that
alternative.
• ‘AF-Off’ – With this option selected, the
original stored frequency remains selected.
With the function switched off, ‘AF-Off’ will
be displayed every time the unit is turned on.
• ‘AF-Man’ – With this option selected, the unit
mutes while it checks its list of alternative
frequencies and, if necessary, searches once
across the waveband for a genuine alternative
frequency. It will restore radio reception when
it finds one or, if one is not found, the unit
returns to the original stored frequency and
‘Not Found’ is displayed.
RDS Settings
AF
Local
Distant
12hr
24hr
TA
CLOCK
THU
OCT
12
15:29
Auto
Off
Man
54
55

Radio operation
CLOCK AND DATE DISPLAYS
Providing your unit is tuned to an RDS
broadcast station (and receiving an adequate
signal), a clock and date will be displayed.
Apart from 12 or 24 hr displays (see below),
these cannot be adjusted manually.
‘12 hr’ or ‘24 hr’ displays
Press the button alongside ‘RDS’, then use the
control switch to select ‘RDS Settings’ and
choose ‘12 hr’ or ‘24 hr’.
NEWS
News broadcast from certain stations will
automatically interrupt radio or CD playback at
a preset volume level.
Select the button alongside ‘RDS’, then use the
control switch for ‘NEWS On’ or ‘NEWS Off’.
‘NEWS’ appears in the display when selected.
Volume adjustments are linked with traffic
announcement volume levels.
Press and hold ‘PTY’ for Quick Select News.
RDS Settings
AF
Local
Distant
12hr
24hr
TA
CLOCK
THU
OCT
12
15:29
Auto
Off
Man
RDS Menu
TA VOL
8
RDS Settings
On
THU
OCT
12
15:29
Off
NEWS
CD/CD changer operation
CD CHANGER
. . . . . . . . . . . . . . . . . . . . . . . . . . . . . . . . . . . . . . 58
Loading the disc magazine . . . . . . . . . . . . . . . . . . . . . . . . . . . . . 58
To eject a disc . . . . . . . . . . . . . . . . . . . . . . . . . . . . . . . . . . . . . . . 59
To insert the magazine . . . . . . . . . . . . . . . . . . . . . . . . . . . . . . . . 59
CD PLAYBACK
Single CD playback . . . . . . . . . . . . . . . . . . . . . . . . . . . . . . . . . . . 59
CD changer playback
With a navigation CD inserted . . . . . . . . . . . . . . . . . . . . . . . . . . . 59
With an audio CD inserted . . . . . . . . . . . . . . . . . . . . . . . . . . . . . 60
SCREEN DISPLAY . . . . . . . . . . . . . . . . . . . . . . . . . . . . . . . . . . . . 61
Audio menu . . . . . . . . . . . . . . . . . . . . . . . . . . . . . . . . . . . . . . . . . 61
Audio settings . . . . . . . . . . . . . . . . . . . . . . . . . . . . . . . . . . . . . . . 61
More settings . . . . . . . . . . . . . . . . . . . . . . . . . . . . . . . . . . . . . . . . 61
Fast forward/reverse . . . . . . . . . . . . . . . . . . . . . . . . . . . . . . . . . . 61
TRACK SELECTION . . . . . . . . . . . . . . . . . . . . . . . . . . . . . . . . . . . 61
SCAN TRACK SELECTION . . . . . . . . . . . . . . . . . . . . . . . . . . . . . 61
SHUFFLE TRACK SELECTION . . . . . . . . . . . . . . . . . . . . . . . . . . 62
COMPRESSION . . . . . . . . . . . . . . . . . . . . . . . . . . . . . . . . . . . . . . 62
TO END CD PLAYBACK
With an audio CD inserted . . . . . . . . . . . . . . . . . . . . . . . . . . . . . 62
With a CD changer . . . . . . . . . . . . . . . . . . . . . . . . . . . . . . . . . . . 62
CD PLAYBACK WITH NAVIGATION SYSTEM SELECTED . . . . . . 62
CD EJECT . . . . . . . . . . . . . . . . . . . . . . . . . . . . . . . . . . . . . . . . . . 63
CD CARE AND MAINTENANCE . . . . . . . . . . . . . . . . . . . . . . . . . . 63
CD ERROR CODES . . . . . . . . . . . . . . . . . . . . . . . . . . . . . . . . . . . 63
56
57
CD/CD changer operation
CD CHANGER
Please refer to your Owner’s Guide for the exact
location of the CD changer.
Loading the disc magazine
The CD changer magazine takes up to six discs,
numbered 1 to 6 starting from the bottom.
To load a disc:
• Push the CD changer unit door, press the
eject button and remove the magazine.
• Insert individual discs, label side up, into
each tray until they click into a held position.
• Do not insert more than one disc into each
position.
The route guidance navigation system
in your audio unit will not function
unless a mapping programme CD-ROM is
inserted into the single disc player.
It is possible to eject this disc and to replace
it with another CD, but it is recommended
that a CD changer be used if playback from
a standard music CD is required.
!
Your audio unit is designed to play
commercially pressed 12 cm audio
compact discs only. Due to technical
incompatibility, certain recordable compact
discs may not function correctly and re-
recordable compact discs will NOT play
when used in Ford CD players. Irregular
shaped CDs and CDs with a scratch
protection film attached should not be
inserted into the CD player. Please contact
your dealer for further information.
!
KEEP DOOR CLOSED
COINS OR FOREIGN OBJECTS
WILL D
AMAGE CD CHANGER
AND V
OID W
ARRANTY
CD/CD changer operation
To eject a disc
Pull forward the lever on the side of the
magazine, which corresponds with the disc to
be ejected. The disc and tray will move forward
ready for removal.
To insert the magazine
An arrow on the magazine shows how to insert
it into the CD changer. Ensure all the disc trays
are clicked back into position before inserting
the magazine, which also clicks into position
when ready for use.
Keep the disc changer door closed at all times,
except when inserting the magazine.
CD PLAYBACK
Single CD playback
Remove the navigation CD from the unit
(if loaded), then insert a single CD into the
entry slot.
CD playback starts automatically and interrupts
radio reception. ‘CD’ appears in the display.
Press the ‘CD’ button once to start playback
from a single CD already in the audio unit.
CD changer playback
With a navigation CD inserted in the audio
unit
Press the CD button for CD changer playback.
AUDIO
SCAN
COMP
SHUF
Track 1
0:15
TP
TA - L
NEWS
CD
58
59
CD/CD changer operation
With an audio CD inserted in the audio unit
Press the CD button twice or, during single CD
playback, any preset button for CD changer
playback.
• If the CD changer is empty, the magazine is
missing or incorrectly inserted, ‘NO DISC’ or
‘NO DISCS’ appears in the display when CD
playback is selected.
• If the CD selected is missing, ‘NO DISC’ is
displayed and the unit selects the next
available disc. The audio unit remembers
which discs are available, so it will not
select a disc that it knows to be missing.
Instead, ‘NO DISC’ appears in the display and
the current disc remains selected.
• If a selected disc is damaged or upside down,
‘CHECK DISCS’ and the disc number are
displayed. The unit then selects the next
available disc.
During normal operations, CDs and tracks are
played sequentially in ascending order.
Playback continues at track one if the end of a
disc is reached and with CD changer playback,
disc one will follow disc six.
The display indicates elapsed track time. If the
track is longer than the display allows, the first
digit flashes while the rest of the numeral
returns to zero and starts counting.
AUDIO
SCAN
COMP
SHUF
Track 1
0:35
Disc 6
TP
TA - L
NEWS
CD
CD/CD changer operation
SCREEN DISPLAY
(1) Track selected.
(2) Elapsed time.
(3) Disc selected (in CD Changer).
(4) Volume level.
(5) On-screen button displays.
Audio menu
Press menu to access the Audio Menu.
Audio settings
See page 60.
More settings
See page 60.
Fast forward/reverse
During CD playback press and hold the button
alongside the on-screen or display to
search forwards or backwards across the tracks
on the disc.
TRACK SELECTION
Press or to select the next or previous
tracks.
SCAN TRACK SELECTION
Select the button alongside ‘SCAN’ and each
track on the CD is played for a few seconds
in turn. Press again to continue listening to
a track.
AUDIO
SCAN
COMP
SHUF
Track 1
0:35
Disc 6
TP
TA - L
NEWS
CD
2
5
3
1
▲
▲ ▲
▲
▲
▲
MENU
MENU
AUDIO
Tr
0
SCAN
Tr
0
SCAN
SHUF
0
60
61
CD/CD changer operation
SHUFFLE TRACK SELECTION
Select the button alongside ‘SHUF’ for
‘Shuffle on’ or ‘Shuffle off’. With ‘Shuffle on’
selected, tracks will be played in a random
sequence until this button is pressed again.
If you are playing a CD from the CD Changer,
the audio unit will play all the tracks on the disc
selected, then move onto other discs and play
the tracks on those in random sequence.
COMPRESSION
Select the button alongside ‘COMP’ for
‘Compression on’ or ‘Compression off’. With
‘Compression on’ selected, quieter music is
boosted and louder music lowered to minimise
repeated volume adjustments.
TO END CD PLAYBACK
With an audio CD inserted in the audio unit
Press the ‘AM/FM’ button to restore radio
reception without ejecting the disc.
If reselected, the CD will start from wherever
playback was last interrupted.
With a CD changer
Press the ‘AM/FM’ button to restore radio
reception or press the CD button to play a
single CD already in the audio unit.
CD PLAYBACK WITH NAVIGATION SYSTEM
SELECTED
See page 10.
AM/FM
NAV
SCAN
COMP
SHUF
SCAN
COMP
SHUF
CD/CD changer operation
CD EJECT (SINGLE CD ONLY)
• During CD playback, press the ‘ ’ button to
eject a CD.
• When ejected, the disc is held ready for
removal.
CD CARE AND MAINTENANCE
For best possible sound quality, use CDs that
are clean and in good condition.
CD ERROR CODES
CD error messages may be shown in the audio
unit display to indicate possible errors with the
CD player. Follow the on-screen instructions or,
if a problem persists, contact your Ford dealer.
▲
62
63

Safety information and precautions
The safety advice screen is displayed each time
the navigation system is turned on as a
reminder to make use of the system’s
navigational aids in a safe manner.
Make sure you are familiar with the system’s
features and know how to operate it.
The following guidelines are important:
• Do not turn the ignition key or start the
engine while the software is updating.
• Do not apply pressure to the display screen.
• The navigation system is not a substitute for
your personal judgement.
• Route suggestions should not supersede local
traffic regulations or safe driving practices.
• Do not follow route suggestions if they direct
you to perform an unsafe or illegal
manoeuvre, would place you in an unsafe
situation, or would route you into an area
that you consider unsafe.
• Drivers should not rely on screen displays
while their vehicle is in motion. Let the voice
guide you. If viewing is necessary, pull off the
road to a safe location.
• Do not use the navigation system to locate
emergency services.
• For road safety reasons the driver should
programme the system only when the vehicle
is stationary. Certain functions will therefore
not operate whilst the vehicle is in motion.
Please read and follow the stated
safety precautions. Failure to do so may
increase your risk of collision and personal
injury. Ford Motor Company Limited shall
not be liable for any damages of any type
arising from the fitment of this system.
!
This unit gives guidance only.
Safe and lawful vehicle use is
the driver's responsibility.
PLEASE DRIVE SAFELY
ACCEPT
Safety information and precautions
• Be careful not to spill liquids of any kind
onto the unit.
• Do not spray cleaning fluid directly onto the
unit; instead spray onto a soft cloth and
gently wipe the unit. Only recommended
cleaning products should be used.
• The map database CD-ROM does not reflect
road detours, closures or construction; road
characteristics such as rough road surface,
slope or grade, weight or height restrictions,
etc., temporary traffic congestion, weather
conditions or similar factors.
• To use the system as effectively and safely as
possible, obtain up-to-date map database
CD-ROMs whenever they become available.
• Set the volume level so that you can hear
instructions clearly.
• Do not disassemble or modify the system as
this may lead to damage. If a problem occurs,
stop using the system immediately and
contact your Ford Dealer.
64
65
Wyszukiwarka
Podobne podstrony:
Instruction 106B Trousers EN
OVERMAX CamRoad 6 1 Instrukcja Obsługi PL EN CZ SK RO HU EE
Budzik Versa wielkość karty kredytowej instrukcja EN
instrukcja bad makro wg pn en iso
Instrukcja obslugi EN
Bestway Zamek Dmuchany PL EN Instrukcja
Honda CB 750 Seven Fifty Instrukcja EN
Blaupunkt CR5WH Alarm Clock Radio instrukcja EN i PL
Instrukcja Obslugi Audi A4 S4 Cabriolet en
instrukcja obslugi do Nokia CR 115 EN
pn en+iso+9000+2001+ +systemy+zarz%b9dzania+jako%9cci%b9+ +podstawy+i+terminologia 6ITFR2U3OUC6VGFP2
LTSpice instrukcja EN
Instrukcja PSR S970S770 Firmware Installation EN
Budzik Versa wielkość karty kredytowej instrukcja EN
instrukcja bad makro wg pn en iso
Instrukcja obslugi EN
Instrukcja obslugi do Nokia BH 108 EN
więcej podobnych podstron