How to Do Viking Chain Knitting
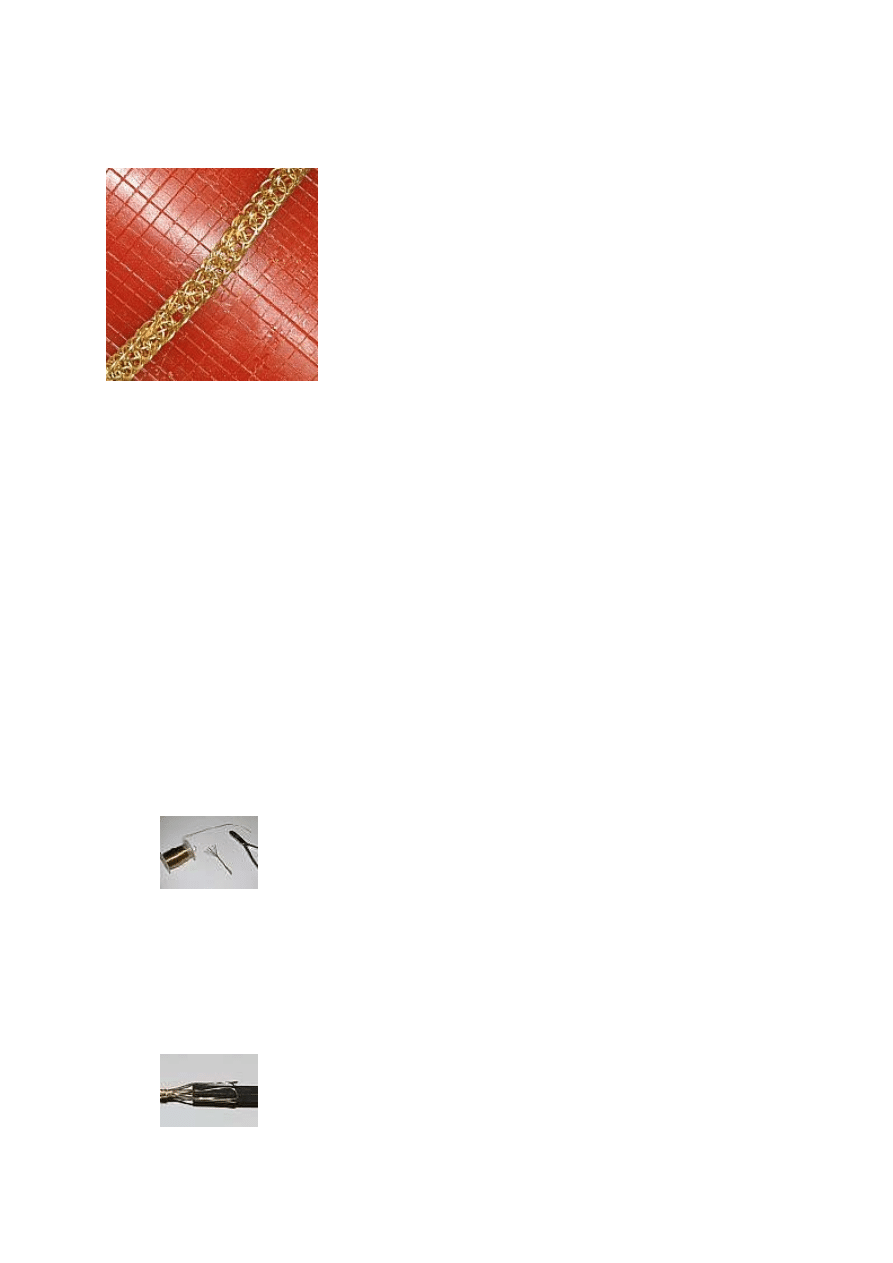
Viking Chain Knitting
Also known as trichinopoly, this technique creates chain work that can be either lacy or dense,
depending on the number of loops woven into in each round. The method is simple to learn,
but takes a little practice to master. And yes, the Vikings really did this!
Difficulty: Moderately Easy
Instructions
Things You'll Need:
•
Fine gauge wire
•
Wire cutters
•
Wooden dowel, Allen wrench or mandrel
•
Needle nose pliers
•
Spare piece of wood
•
Power drill with various bits
•
Jewelry findings (optional)
1.
Step 1
Make three or more loops, each a few inches deep, with about a foot of your wire.
Wrap the bundle a few times near the base and then again closer to the working end,
about an inch below the tip of the loops. This won't actually be part of the finished
chain, so don't worry too much about looks.
2.
Step 2
You'll work from the starter loops down.
Fit the loops around the end of your dowel or mandrel. Using an Allen wrench gives
you the benefits of the angles to work around, but you can cut a small notch at the top
of a dowel to help pass the working wire around the loops you'll be making.
3.
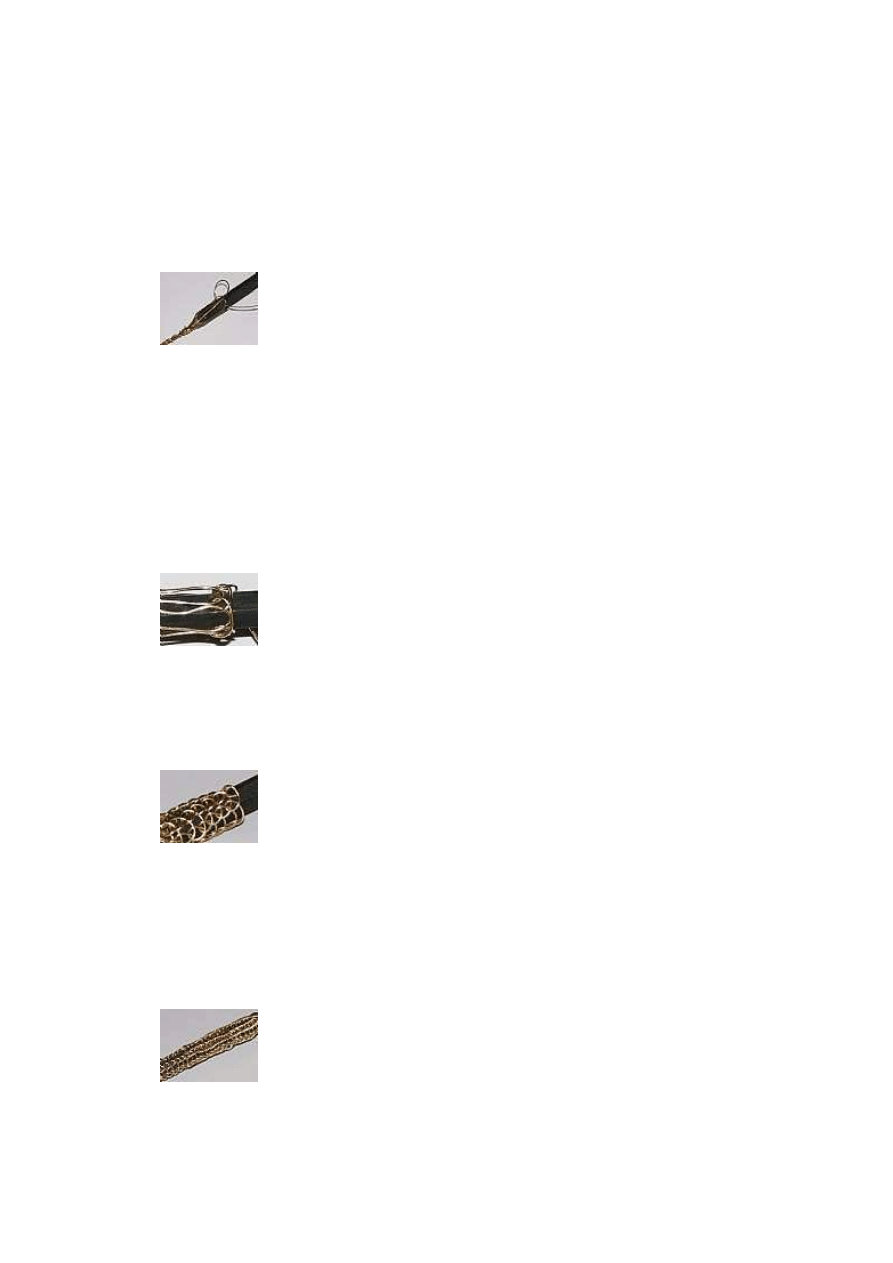
Step 3
The first loop requires a bit of maneuvering.
Anchor a new piece of wire--your working wire--to the base, and then make your first
loop. The working wire will follow down the side of one of the starter loops, curve
under where two loops rest side-by-side, behind the sides of the two starter loops and
then out and down again to the right, making a counter-clockwise e-loop. Pull it
snugly, but leave enough space to work around.
4.
Step 4
Continue to "knit" these e-loops, working to the right, joining each of the starter loops
together until you come back to the beginning.
5.
Step 5
On the next row, using the same method, bring your next loop behind the crossed
wires that formed the bottom of the first loop you made. This is how you will continue
to build your chain, loop by loop, shifting the growing length of chain up the dowel,
wrench or mandrel as necessary.
6.
Step 6
Single, double and triple weaving, left to right.

To make a more dense chain you can bring your loop behind the second cross up (for
double weave) or even the third (for triple weave) for a very sturdy chain. Keep in
mind that the denser the chain, the less flexible it will be.
7.
Step 7
The new wire hooks in behind the last loop. Tuck any loose ends in as necessary.
At the end of your working wire, clip it just after the last loop completed, tucking the
cut edge inside the chain. Make a small hook in a new piece of wire and draw the
straight end behind that last loop, securing the hook around that loop. Continue
weaving as before.
8.
Step 8
Weave the length you think you will need but know that you'll gain a few inches once
the chain is drawn out.
9.
Step 9
The draw plate doesn't have to be pretty, just functional.
Make a draw plate by drilling several holes in decreasing sizes about an inch apart in
your piece of hardwood.
10.
Step 10
The draw plate smooths out the knitted chain.
Starting with the largest hole, pull your chain through the hole once or twice, then
work your way down through each smaller hole until your chain has increased in
length, evened out in texture and becomes more flexible.
11.
Step 11

Decorative end caps are a quick way to make a chain look polished.
To prepare the chain for use, clip and remove the starter loops and extend the end of
the wire out to make loops, hooks or feed through a decorative end cap to hide the not-
so-pretty ends.
Tips & Warnings
•
To save your fingers, pull the wire through with the needle nose pliers, just be careful
not to kink up the wire.
•
Another use for the needle nose pliers is to tidy up your loops from time to time.
Gently squeeze along the rows to straighten them and keep the spaces open to slip the
working wire through.
•
To avoid injury, wear protective gear (gloves and eye protection, especially) while
working with the power drill.
Wyszukiwarka
Podobne podstrony:
how to do mb sd c4 self test
Grep how to do
lesson plan how to do it
How To do Macro Insect Photography (10p)
How to Do Your Dissertation in Geography
How To Do VSCOcam Effects in Photoshop
Free How to do TIG Welding Guide
How to do TarotCards
Grep how to do
Do It Yourself How To Make Hash Oil
Do we really know how to promote?mocracy
How to use make and do in English
więcej podobnych podstron