
2.7t Pressure Test
Home Pressure Test
Audi 2.7t
Greg Treantos
gtreanto@gmail.com

2.7t Pressure Test
Introduction and Theory
The Audi 2.7 turbo engine has been around for some time
now. As the engine ages the hoses connecting the turbo
pluming can develop leaks. The goal of this document is to
supplement AWE Tuning's 2.7t pressure test document
in finding charge pressure leaks.
An understanding of the 2.7t plumbing can help in
diagnosing any leaks. The picture below is from the 2.7t
study guide
air path.
The light blue signifies atmospheric air. Damaged turbos,
premature oil breakdown and premature engine wear will
result if you have leaks in the atmospheric air path.
However a leak here will not cause boost problems.
Illustration 1: 2.7t Study Guide Page 22

2.7t Pressure Test
The red path is compressed air leaving the turbos before
the intercoolers. Air density is increased by cooling and
thats the job of the intercoolers. By cooling the air you
increase the air's density which increases the engines
volumetric efficiency. The dark blue path represents this
dense air as it enters the intake manifold.
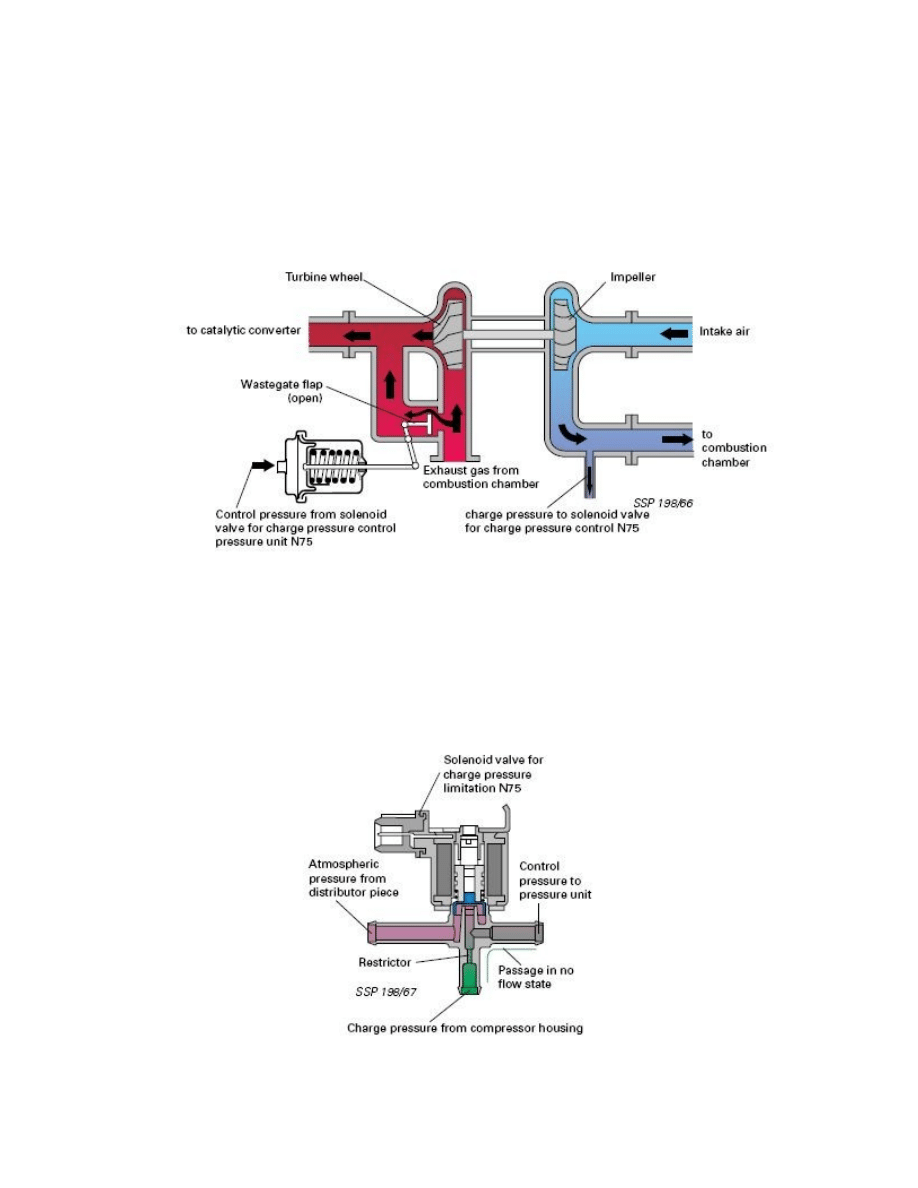
Another important path is the lines going to the N75 Charge
pressure control valve. The picture below shows this air
path.
The charge pressure line has two purposes. First these
lines equalize the charge pressure between the left and
right turbos. Second is to allow the N75 valve regulate the
compressed or charged air.
The control pressure line also has two purposes. First the
line equalizes pressure between the left and right
wastegate control valve. Second is to allow the N75 valve
to regulate the wastegates.
Illustration 2: 2.7t Study Guide Page 26
2.7t Pressure Test
Leaks in the charge pressure path, charge pressure line, or
the control pressure line will cause boost problems.
Below is a logical diagram of the 2.7t turbo.
The N75 valve when deactivated (normal state) allows charge
pressure air to act on the wastegate actuator. This is
important to know when pressure testing.
Below is a diagram of the N75 valve.
Illustration 3: 2.7t Study Guide Page 27
Illustration 4: 2.7t Study Guide Page 27
2.7t Pressure Test
Pressure Testing
How do you know when to pressure test? Check engine light,
soft engine code (engine code without check engine light),
or the cars performance.
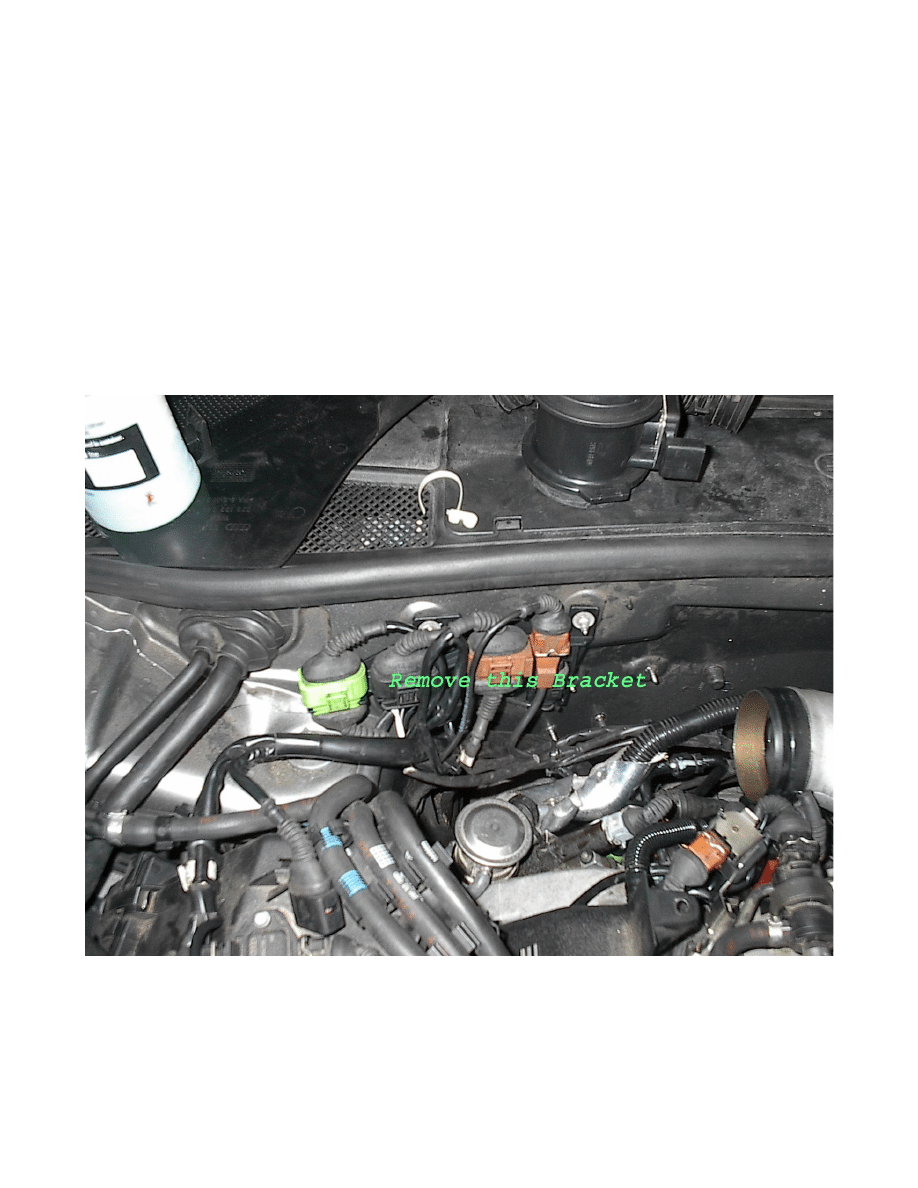
When setting up the pressure test your should remove the
bracket holding the O2 sensor connectors. When pressurizing
the air path, the pressure cap might blow off. This can
break the connector bracket.
Illustration 5: O2 Sensor Bracket
2.7t Pressure Test
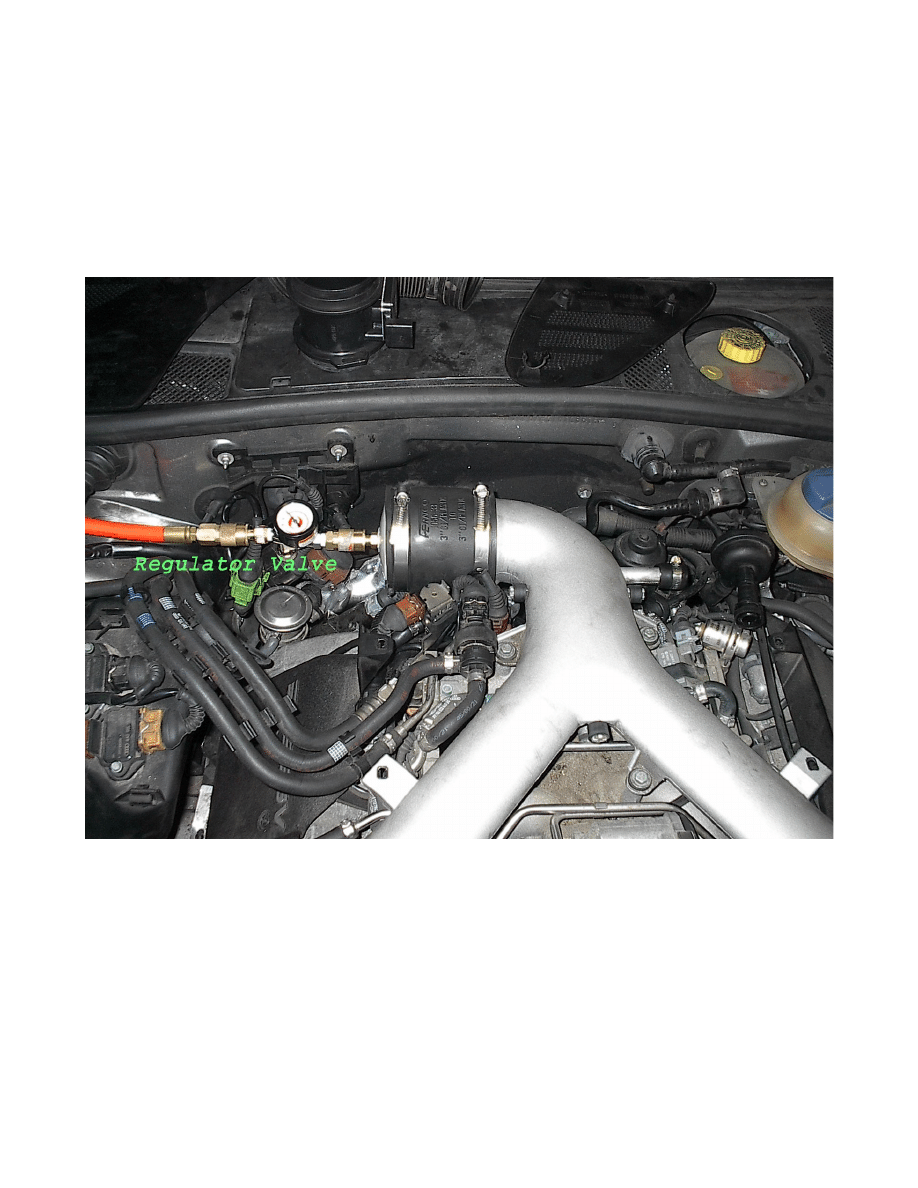
To aid in leak detection add a regulating valve to the AWE
test setup. A paint sprayer regulating valve found at Lowes
or Home Depot works well. The valve is approx. $13.00.
Note: If you look hard you can see a broken O2 sensor
bracket.
As the air path fills there is constant air noise. This
makes it difficult to pin point leaks. By shutting off the
air supply via the regulating valve, when the pressure gage
reads 5-7 psi, helps in leak detection.
Illustration 6: Test Rig with Regulator
2.7t Pressure Test
Common failure points are the throttle body boot (TBB),
hoses connected to the N75 valve and the intercoolers hose
caps.
You can divide and conquer to find difficult leaks. Here
are a couple of suggestions.
If you detect an air leak in the back of, or under the
engine, remove the N75 valve and test the control pressure
and charge pressure lines.
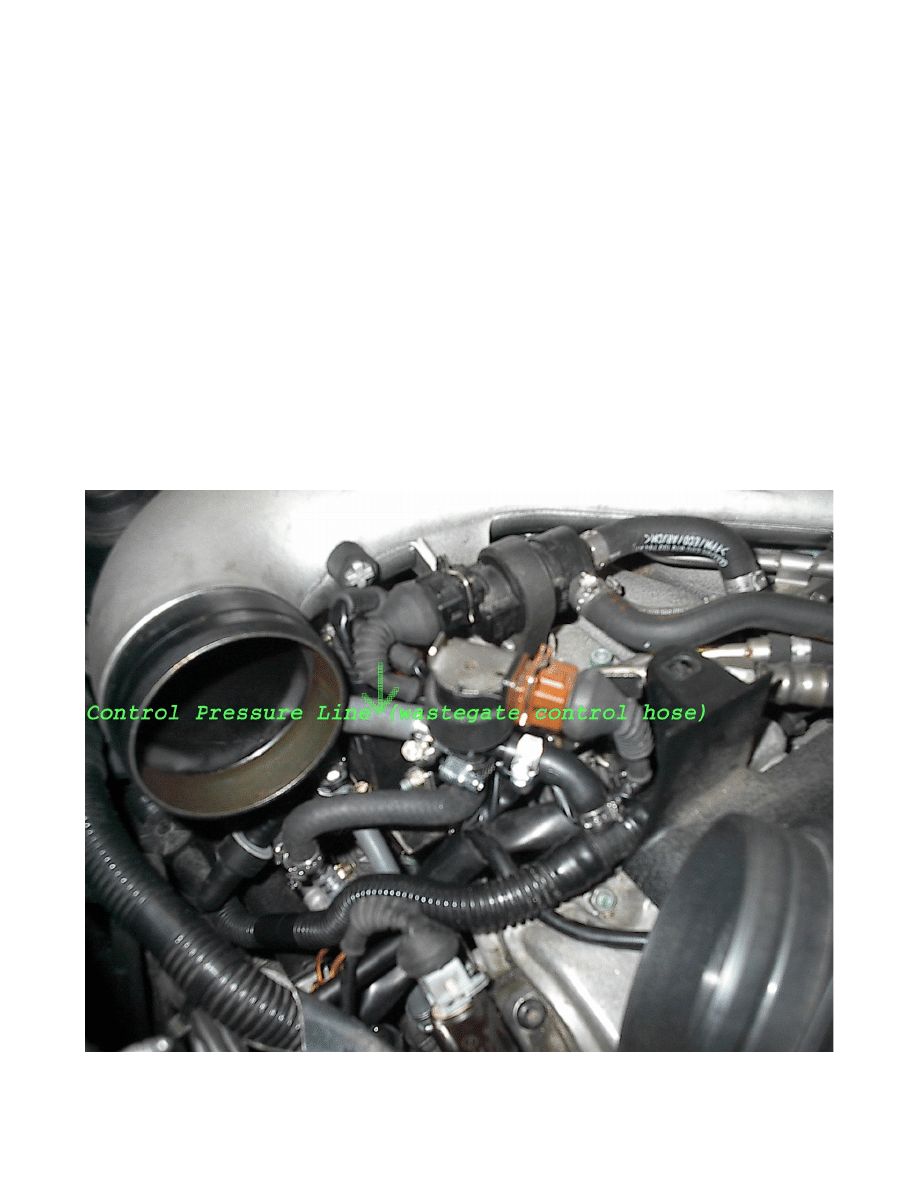
The control pressure line(wastegate control)can be checked
by using a hand vacuum pump. If the line cannot hold vacuum
run air into the line an listen for leaks.
Illustration 7: Control Pressure Line (Wastegate Control)
2.7t Pressure Test
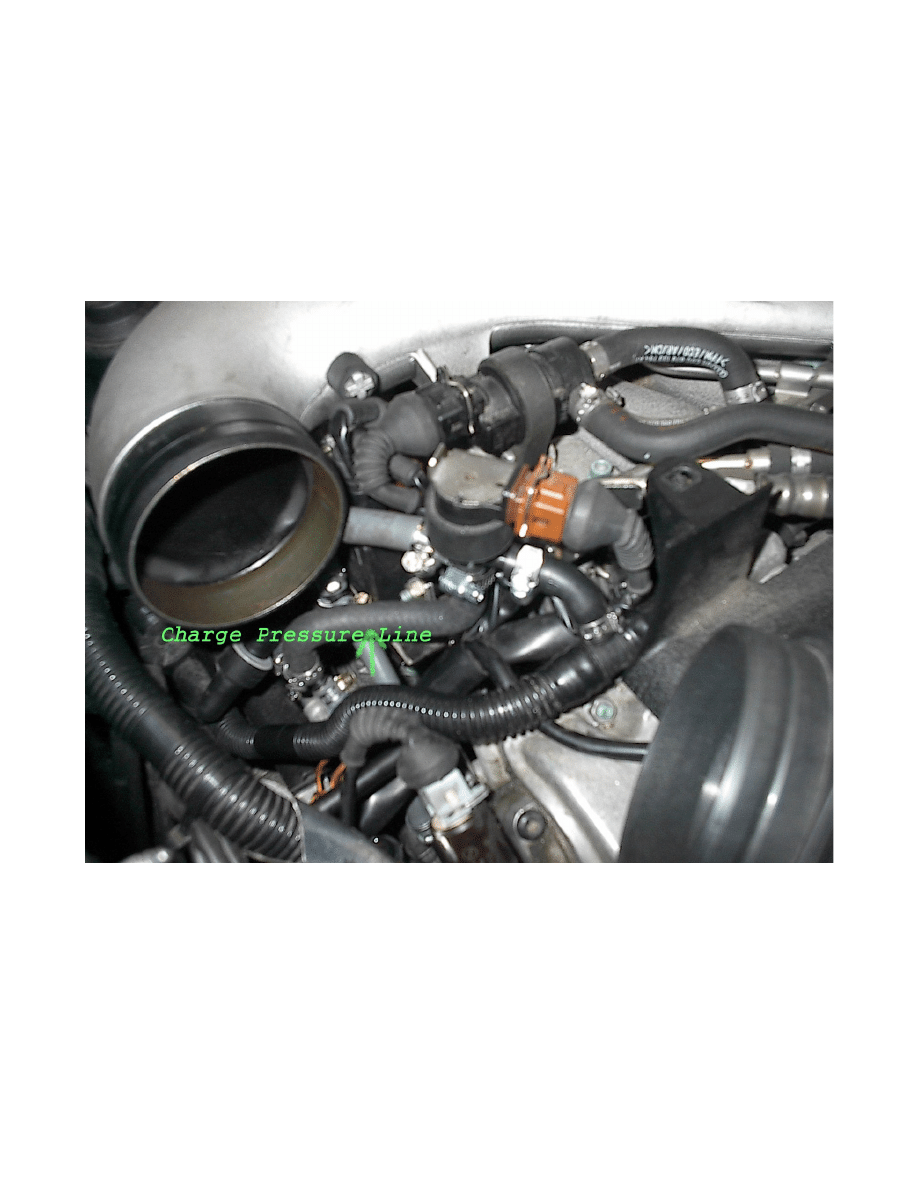
The charge pressure line is more difficult. This line
connects to the turbo and is part of the charge pressure
path. However you can pinch off each side of the Y
connector, joining the two charge pressure lines, to
isolate leaks in this area.
Illustration 8: Charge Pressure Line
2.7t Pressure Test
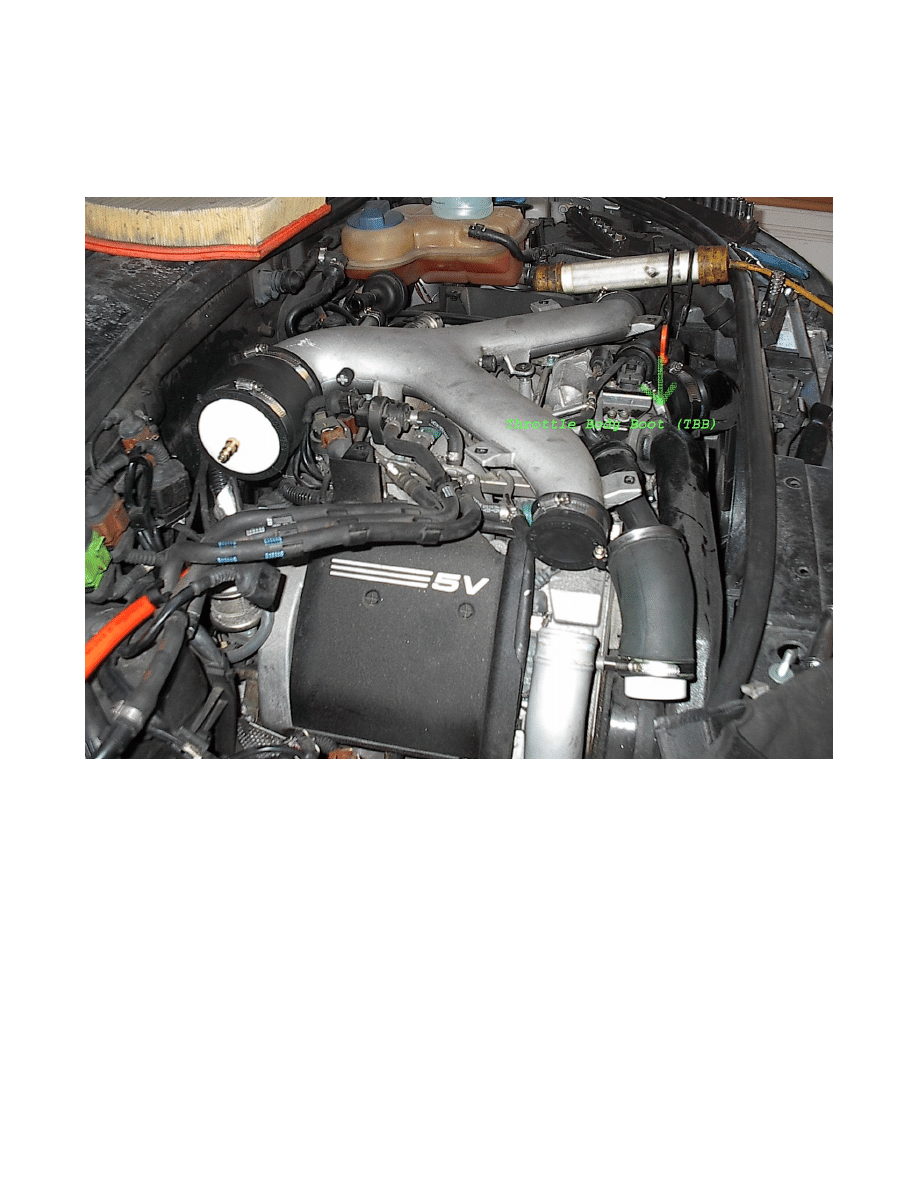
If you hear a leak in the front of the engine check the
Throttle Body Boot. This is a very common failure point.
2.7t Pressure Test
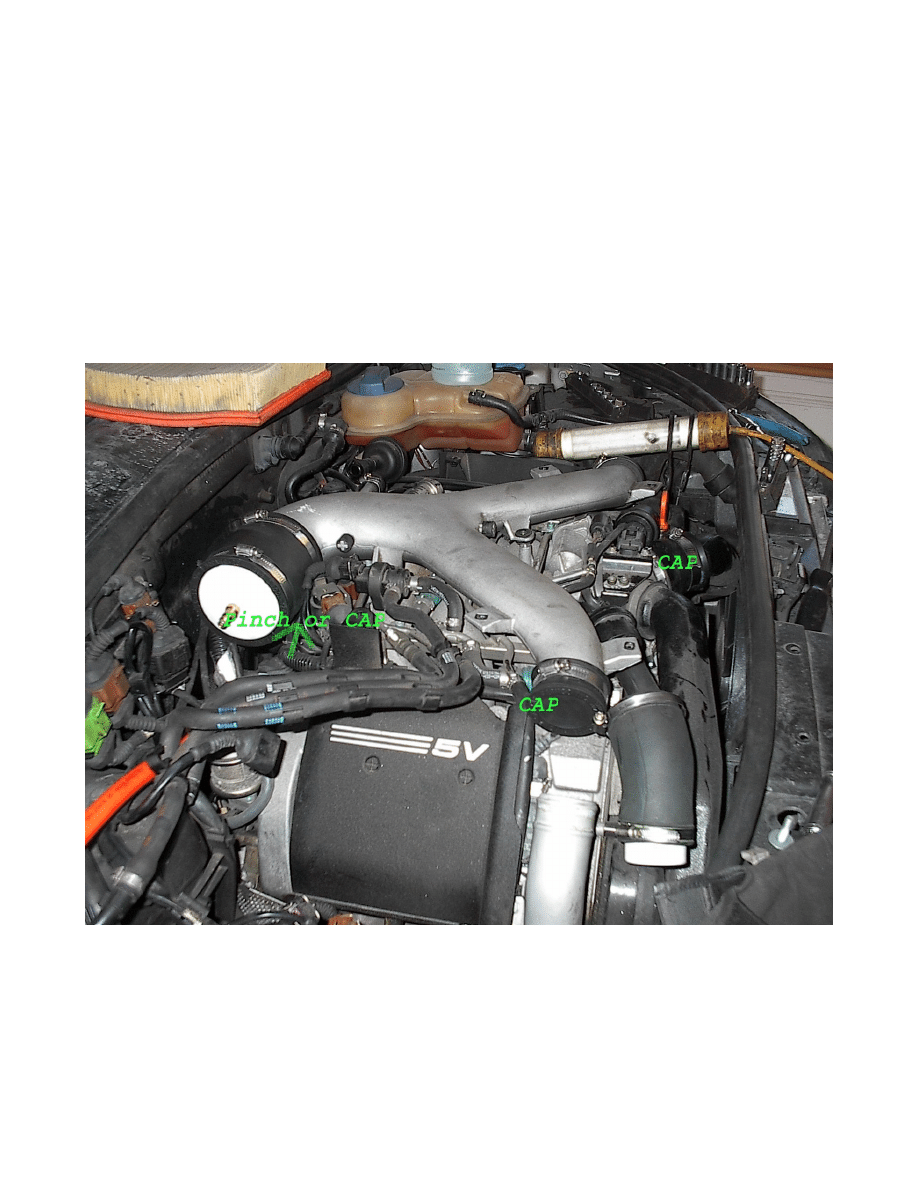
Finally, if needed, you can isolate the driver side and
passenger side air paths. This example tests the driver
side air path.
First pinch off the drivers side charge pressure hose. You
can use a small c-clamp or a bolt. Cap the passenger side
intake Y pipe. Use a 2 ½” rubber pipe cap from Lowes or
Home Depot. Finally cap the drivers side intake pipe to the
TBB, using another 2 ½” rubber cap.

2.7t Pressure Test
In conclusion, this document is a supplement to the AWE
2.7t pressure test guide. Hopefully the information
presented here will help anyone find leaks in the 2.7t
boost air path. Good luck and happy testing
Wyszukiwarka
Podobne podstrony:
AllRoadFAQ com Audi C5 2 7T 402 AirLoweringMod[1]
AllRoadFAQ com Audi C5 2 7T 402 AirLoweringMod[1]
BentleyPublishers com Audi C5 OBD Diagnostics
Audiworld com A6 C5 RS6 Grill on 2 7T
Fourtitude com Audi A6 C5 Brake Information PartNumbers
BentleyPublishers com Audi A6 C5 Service Reset
BentleyPublishers com Audi A6 C5 4 2L Secondary Air Injection Maintenance
BentleyPublishers com Audi A6 C5 Sunroof drain cleaning
AudiForums com Audi A6 C5 IceLink iPod Install
Audiworld com A6 C5 RS6 Grill on 2 7T
AudiWorld com Audi A6 C5 Boor Blade Installation DIY
Audizine com Audi A6 C5 2 8 30V Throttle Body Cleaning DIY
Audi BarryStuff com Audi RS6 C5 Sirius XM Satellite Radio DIY Install
BentleyPublishers com Audi A6 C5 4 2L Secondary Air Injection Maintenance
2 7T Pressure Tester
więcej podobnych podstron