25
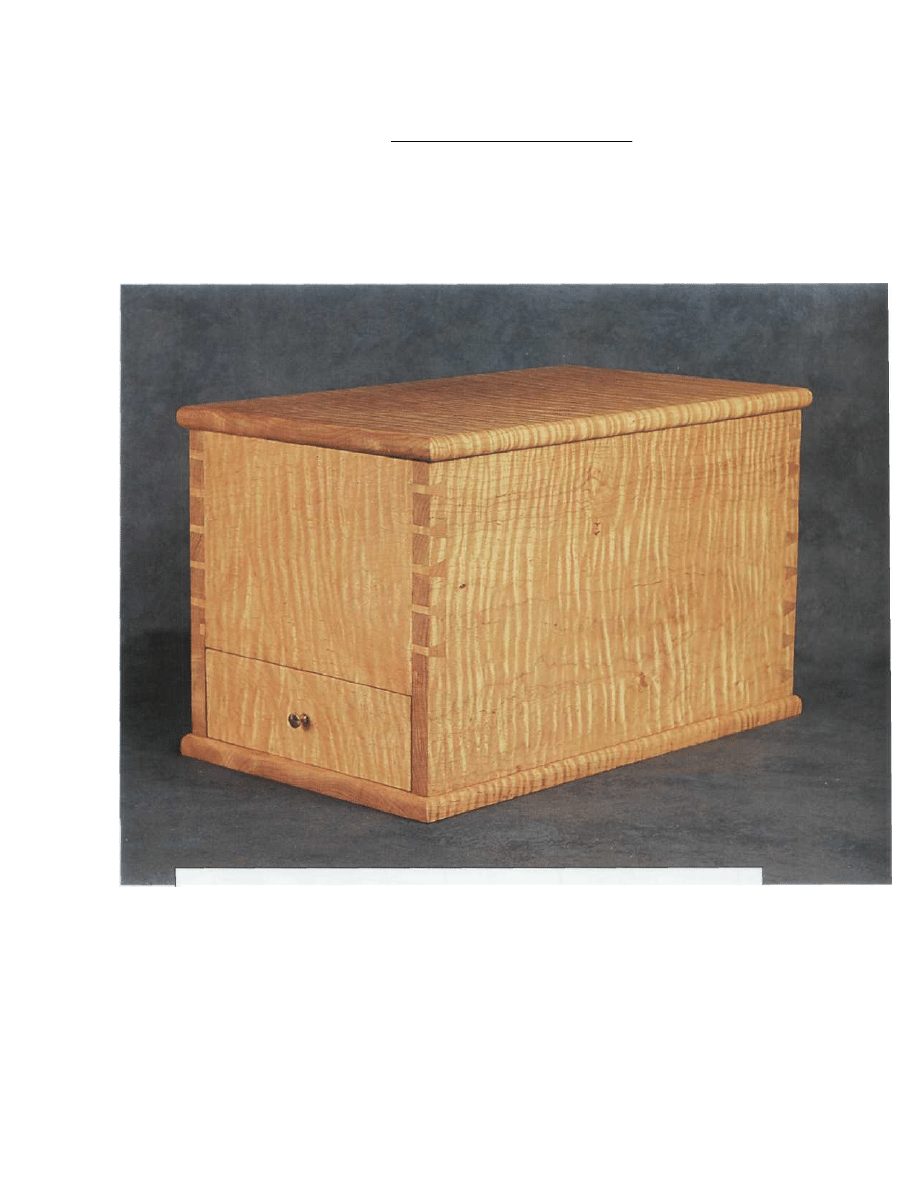
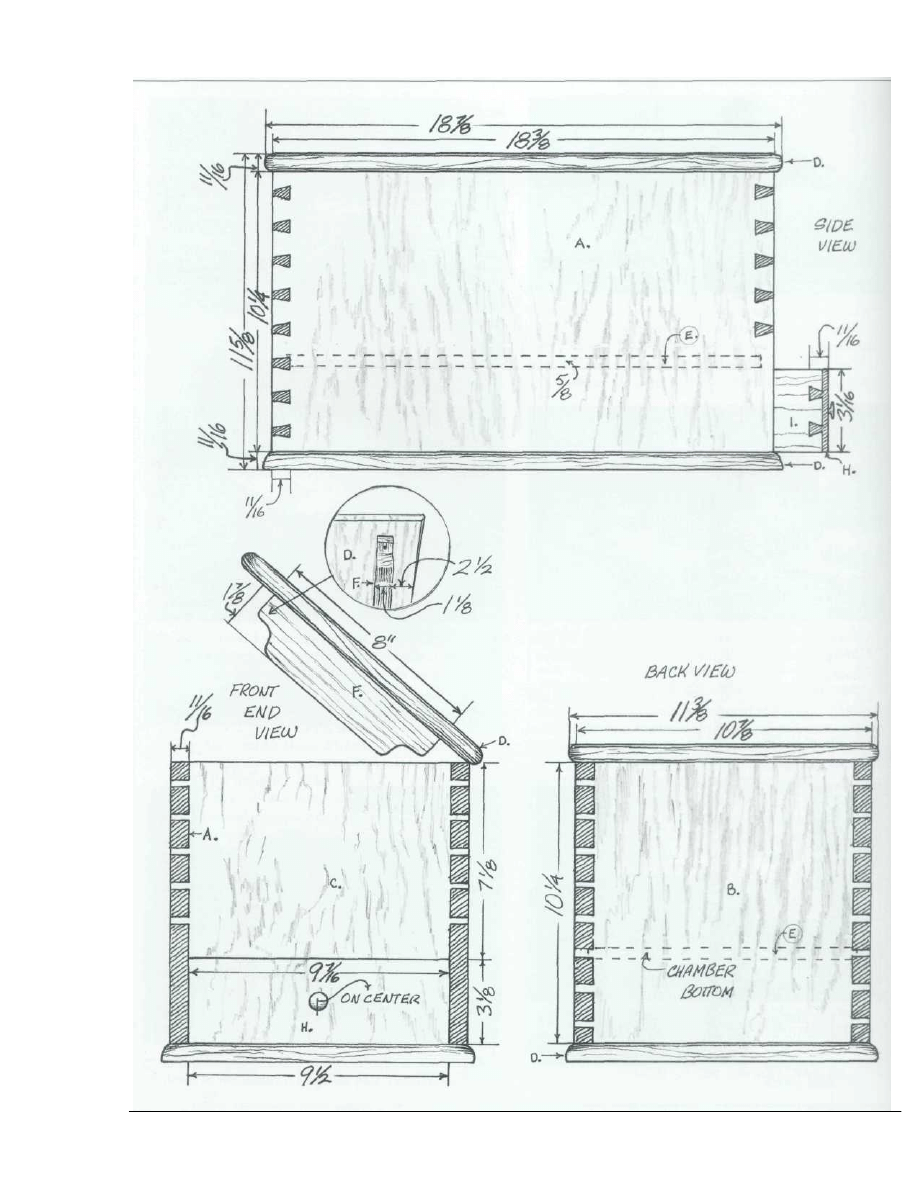
DOCUMENT CHEST
Curly Maple, White Pine
Copyright 2004 Martian Auctions
100
MAKING THE
DOCUMENT CHEST
After the stock has been thicknessed, ripped to width, and
cut to length, plough a 1/4" X
3
/8" groove on the inside faces
of the front, back and two ends. This groove will receive
the raised panel that will separate the upper storage chamber
from the drawer compartment.
Then cut through dovetails for the four corners of the
case (this process is detailed in the sidebar below). Glue
the joints and assemble the case around the raised panel
that separates its two sections.
Shape the moulded edge on the top and bottom of the
lid and on the top side of the chest's bottom. Fasten the
bottom to the case with ten 1 1/2" no. 10 wood screws.
These pass through oversized holes drilled in the bottom to
allow tor seasonal expansion and contraction across its
width.
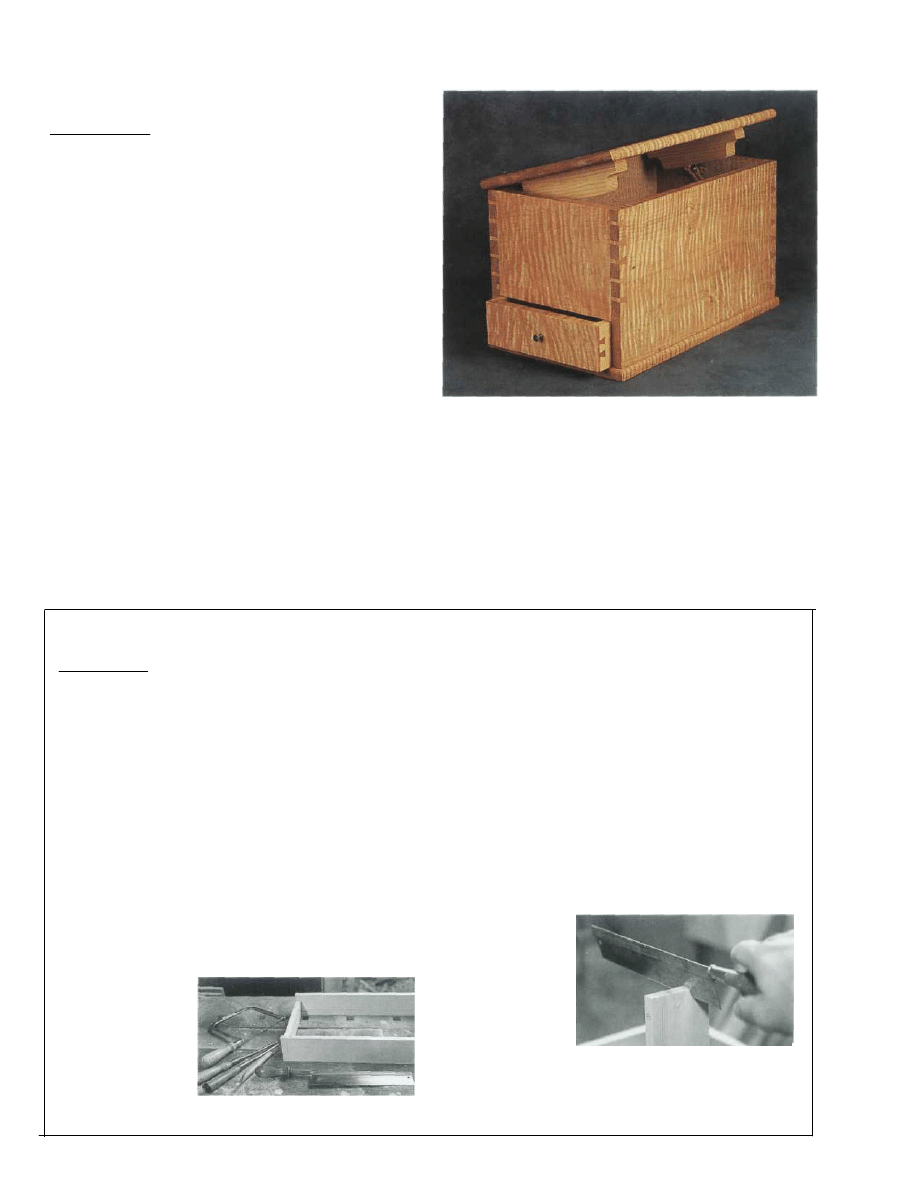
Although the Shaker original didn't have them, I in-
stalled a pair of sturdy ash cleats on the underside of the
lid to prevent it from cupping—a problem I encountered
the first time I built one of these chests.
Build the drawer next (see the sidebar below) with
through dovetails at the rear and half-blind dovetails at the
front. Slide the drawer bottom into its groove and tack it
up into the drawer back. Then fit the length of the com-
pleted drawer by planing thickness from a pair of softwood
strips tacked to the back side of the drawer.
Complete the chest by finishing the wood and installing
the hardware.
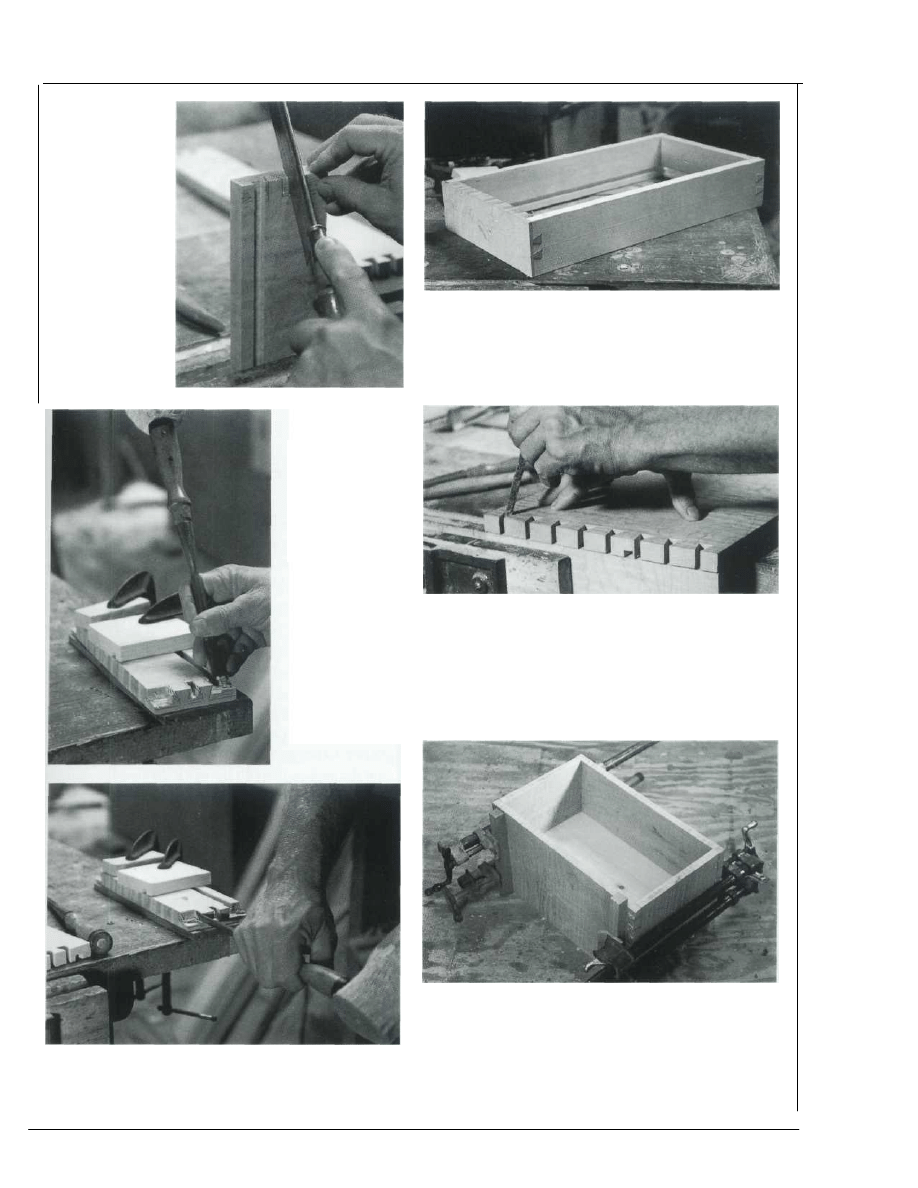
CUTTING DOVETAILS
BY HAND
There's something soothing about the process of cutting
dovetails by hand. The shop is quiet. The air is clean,
carrying no load of machine-generated dust. There is
the sense that this is what woodworking is supposed to
be: calm, unhurried, not driven by the frantic scream
and whine of power tools. This is woodworking stripped
of the efficient unpleasantness of technology, reduced
to the application of sharp tools to beautiful material.
Even though the case must be made first, the following
discussion of hand-cut dovetails will begin with
drawer construction because, unlike the case, the drawer
requires the creation of both through and half-blind
dovetails.
The process begins
with careful stock
preparation. After the
parts have been
dimensioned, cut the
grooves into which the
drawer bottom will
slide. Establish base-
lines for every pin and tail (the pins are those parts of the
dovetail joint that fit between the tails). Score these lines
across the grain with either a marking gauge or a sharp knife.
In the case of the through dovetails (those on the back of the
drawer), lines should be placed a distance from the end that
is 1/16" more than the thickness of the stock to which the
piece is being joined. Since, in this case, the drawer sides and
back are 1/2" thick, the baselines will be set 9/16" from the
ends of the drawer sides and back. Placement of the
baselines on the front end of the drawer sides is handled a
little differently because these joints will be half-blind
dovetails. Because the drawer front is 11/16"
thick, set the
baselines on the front ends of the drawer sides 1/2" from the
end. This leaves 3/16" of drawer-front material covering the
ends of the dovetails on the front ends of the drawer sides.
Cut the tails first.
After deciding on
their widths, use
pencil lines (drawn
with the aid of a try
square) to mark the
end grain of the
drawer side. These
lines indicate the
widths of the gaps between the widest parts of the tails.
At this point, you can mark the actual angles of the tails
1
2
Copyright 2004 Martian Auctions
101
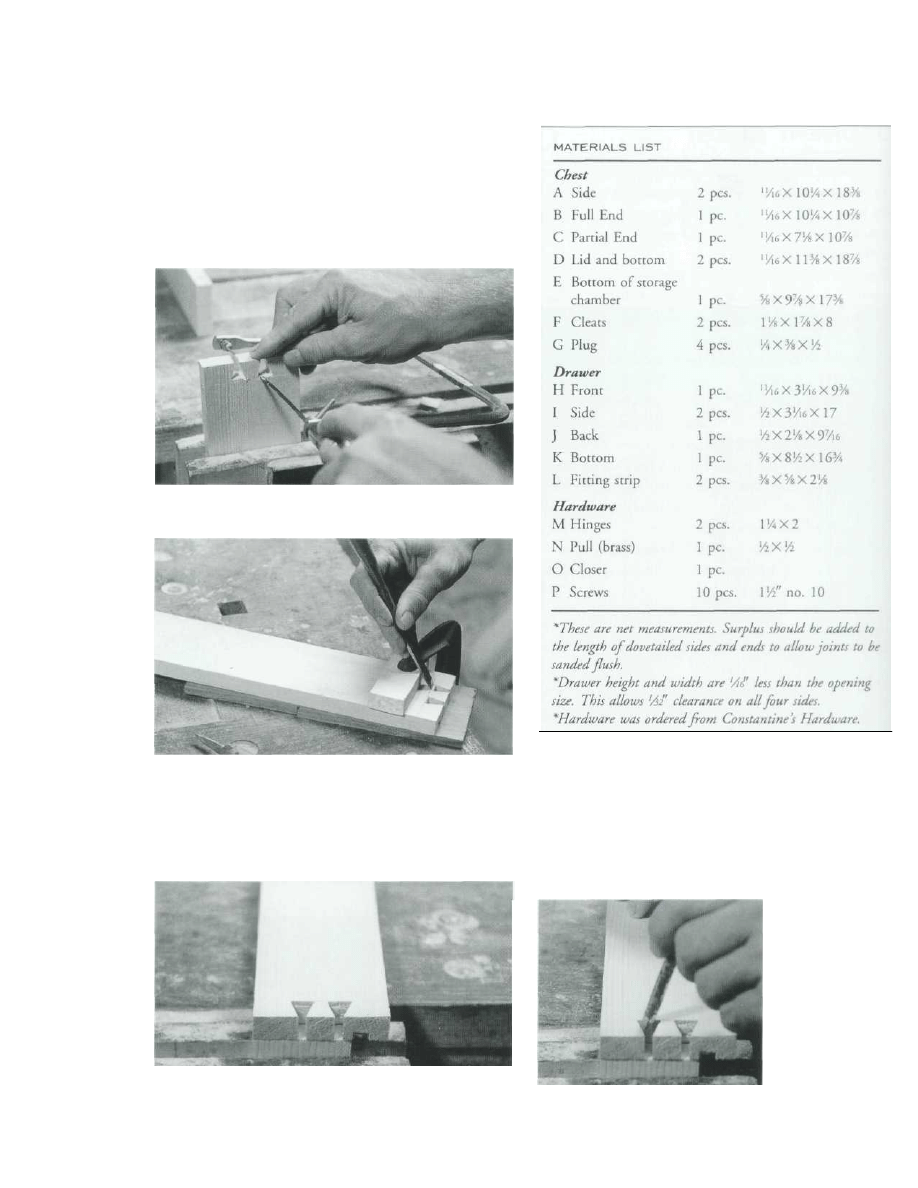
with the aid of a dovetail gauge. I chose to cut these freehand
because the slight variances of angles and tail-widths provide
incontrovertible proof of the piece's handmade origin.
With a fine-toothed backsaw, make cuts from the lines
squared across the end grain down to the baseline established
for the tails.
With a coping saw, remove the bulk of the waste. Don't
approach the scored baseline too closely.
4
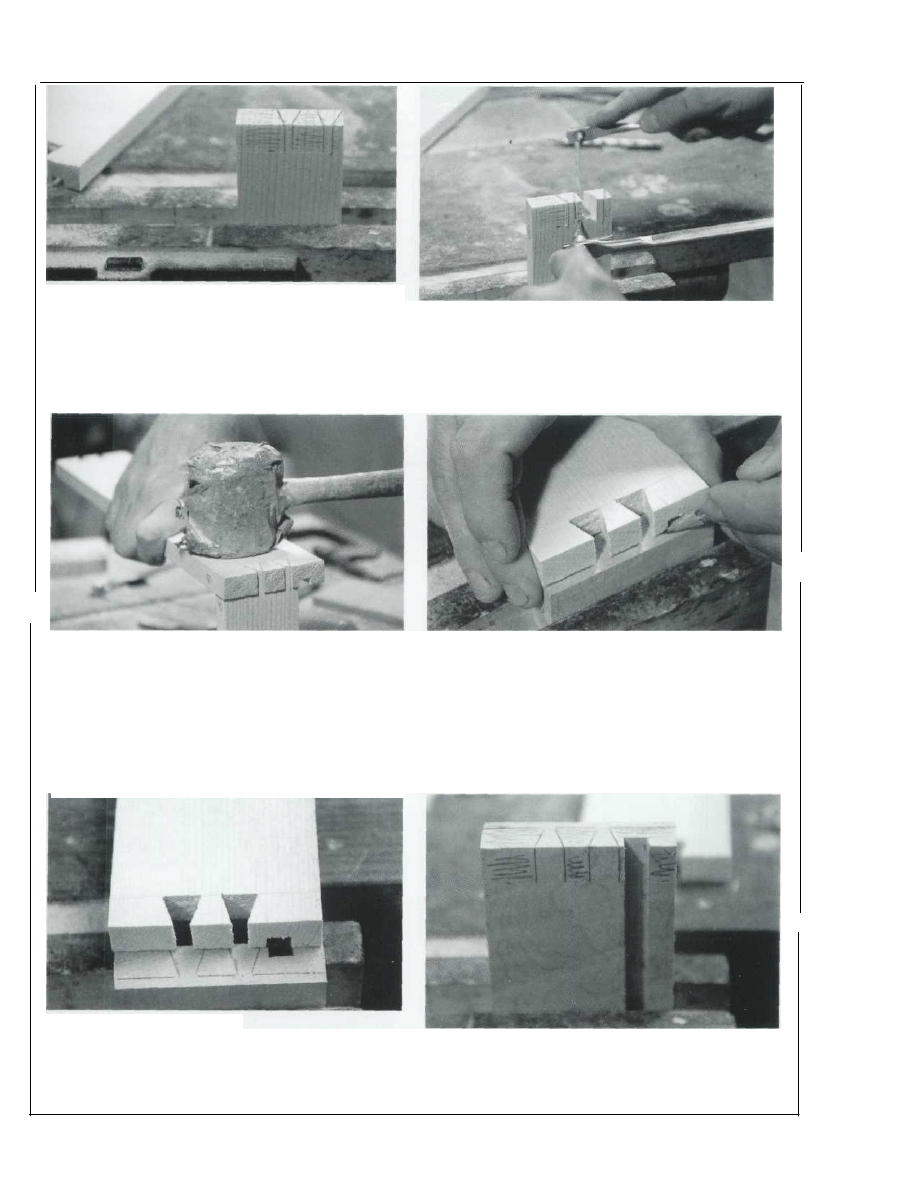
Then, use a paring chisel driven by a wooden mallet to
cut away the remaining waste. The scored baseline serves to
position the tip of the chisel.
In order to avoid breaking out chips on the back side of
the piece, flip over the drawer side from time to time, working
toward the middle from one side, then the other.
When the gaps between the tails have been cut and pared
down to the baseline, mark the pins. Position the pin
stock (in this case the back of the drawer) in a vise so that
its end is just above the level of the bench top. Position the
tails that were just cut above the end grain on the drawer
back. Take care to align the baseline between the tails directly
above the inside face of the drawer back.
(Because the drawer bottom must slide underneath the
back of the drawer, the width of the back extends only from
the top of the drawer side to the top of the groove.)
6
With a sharp
pencil (you may need
to whittle the tip of
the pencil to a smaller
diameter so that it
can work its way
into the gaps
between tails), mark
the limits of the pins
on the end grain of
the drawer back.
3
5
Copyright 2004 Martian Auctions
102
7
Using a try square, extend those lines from the end of
the drawer back to the scored baseline for the pins. These
lines identify the waste that is to be removed.
With a fine-toothed backsaw set just to the waste side of
each line, cut the pin walls down as far as the baseline.
8
With a coping saw, remove the bulk of the waste between
the pins. As with the gaps between the tails, cut away the
remaining waste between the pins with a sharp chisel. Again,
use the scored baseline to position the tip of the chisel.
Shaving some of the pin walls may be necessary, but once
fitting is accomplished, the joint can be dry-assembled
(without glue).
White pine is a very soft wood, so a joint that might not
fit perfectly can still be brought together. Hardwood, however,
requires more fine-tuning of the pins with a paring chisel.
Too much force applied to the fitting of a dovetailed joint
can result in a split drawer side.
10
The half-blind dovetails (so named because the joint
doesn't show from the front) used at the front of the
drawer are a bit more complicated to cut.
Again, the process begins by cutting the tails. Then lay
these across the end grain of the drawer front, and mark the
perimeter of each tail on the drawer front.
11
The marking can be
seen more clearly here.
12
With a try square, extend the lines from the end of
the drawer front to the scored baseline. Scribbling
indicates waste.
9
Copyright 2004 Martian Auctions
103
Copyright 2004 Martian Auctions
104
13
With a
backsaw
positioned just to the
waste side of each
line and held at about
a 45° angle, define
the sides of each pin
by a saw kerf that con-
nects the baseline on
the back of the
drawer front with the
line drawn on the
end grain indicating
the forward limit of
the tails.
Carefully (to avoid splitting the drawer front), shape
the sides of the pins with the chisel.
The dry-assembled drawer shows through dovetails at
the back and half-blind dovetails at the front.
17
The procedure for dovetailing the sides of the case is
the same as that used for the back of the drawer with two
important differences: First, because of the board widths, there
will be many more pins and tails, making joint fitting more
time-consuming. Second, because the joint components are
hardwood, they must be fit more carefully. Forcing a
hardwood joint nearly always results in split stock.
18
Assemble the case around the bottom of the storage
chamber. The edges of this bottom are housed in the groove
on the inside faces of the four sides of the chest.
Clamping blocks permit the pressure to be exerted behind
the pins. This allows the pins to protrude 1/16". After the glue
has cured and the clamps have been removed, sand this excess
away, making the ends of the pins flush with the sides of the
case.
15
14
Then clamp
the drawer front to
the bench with its
inside face up.
Cut away the waste
with a mallet and
chisel.
16
Copyright 2004 Martian Auctions
105
Wyszukiwarka
Podobne podstrony:
Document 4
Document
Autograss documentation
Document (10)
document (2)
Document (51)
C DOCUME~1 GERICOM USTAWI~1 Temp plugtmp 1 plugin lokalizacja przejsc problemy i dobre praktyki rkur
2012 11 22 Document 001
alcatel support document for cable system in cuba
Document 0
Eisenhower Briefing Document, 18 November 1952
document (7)
document (20)
Documentation
ZAPROSZENIE, Documents, IP Zielona gora, mat inf
Podsumowanie pracy Zespołu Informacji Publicznej i Współpracy z innymi za rok 2015, Documents, ip, s
r00-0-spr-spr, ## Documents ##, Debian GNU Linux
New Microsoft Word Document (2)
więcej podobnych podstron