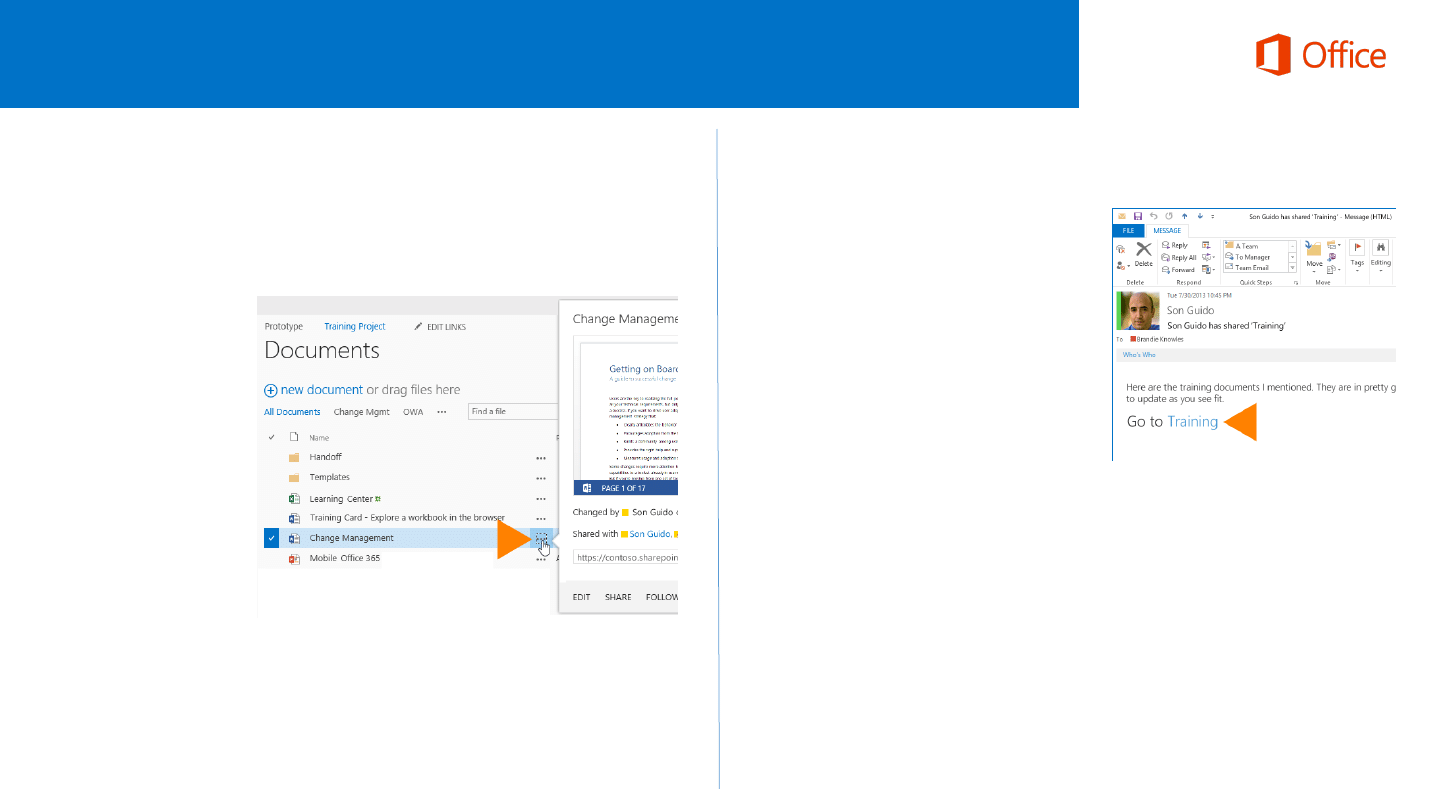
Share a document
1. Click the ellipses (...) next to the document to open the document’s callout and then
click Share.
Store and share documents
Quick Start Guide
Edit documents that are shared with you
2. In the Share window,
enter the name of each
person you want to
invite to share the
document. As you type
each name, SharePoint
searches the address
book for matches and
lists options. When you
see the name you want,
click it to add it to the
invitation list.
3. Select the permission you want to grant invitees from the drop-down menu. You
can change the permission for any person later.
4. If you want, type a message to be sent to all invitees in an email. The email
includes a link to the shared document.
5. If you do not want to send an email, click Show Options, and then uncheck Send
an email invitation.
Review a document that someone has shared
with you
1. Click the document link in the email you received informing you that a co-worker
has shared a document with you.
2. Review or edit the read-only document and save any work in a separate file.
3. Send a link to the file in an email message to the document owner and any other
coauthors.
If you’re granted edit permissions, you can edit the document. If you don’t have edit
permissions, save your notes and edits to a separate file, and send a link to the
document to the document owner and any others who are collaborating with you.
1. Click the document link in the email you
received informing you that a co-worker
has shared a document with you.
2. If you have edit permission, check out
the document if that’s required—and
then edit the document in Word,
PowerPoint, or another Office program.
If you don’t have edit permission, you won’t
be able to edit it. Instead, you can review
and save any edits separately.
3. Click File > Save to save your changes.
See the edit history of a document in
OneDrive for Business
1. Click OneDrive in the header at the top of any SharePoint site in your
organization.
Find libraries you’ve synced on your computer
If you sync your OneDrive to your computer, you can always find it quickly as follows:
1. Click the OneDrive for Business taskbar icon.
2. Click Open your OneDrive folder.
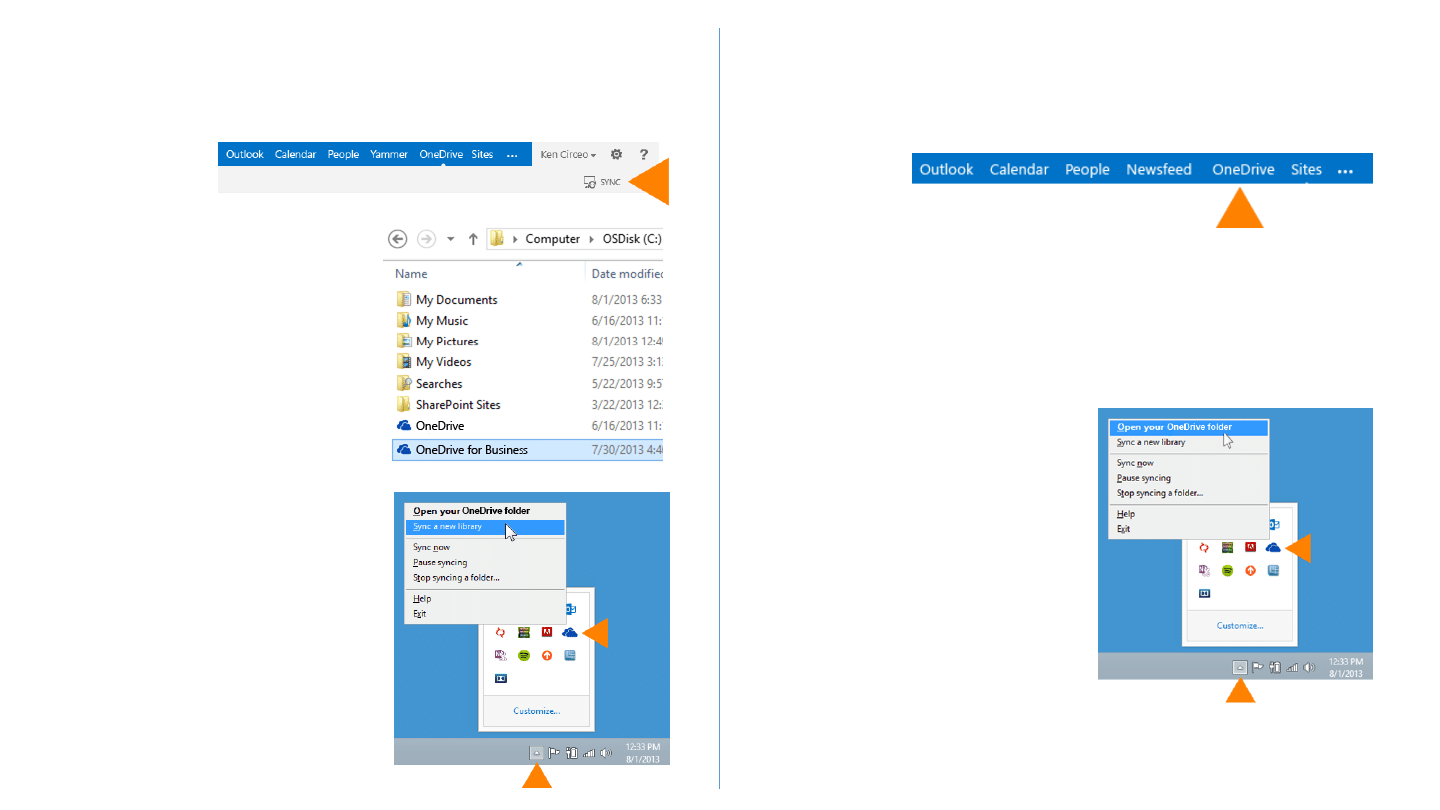
Sync a library to your computer
1. Go to your OneDrive and then click the SYNC button. This opens the Sync Library
wizard, and automatically recognizes the name and web address of your
OneDrive library.
2. Click Sync Now to start syncing your
OneDrive. Click Show my files in the
dialog box to open your synced
OneDrive folder in Windows Explorer. It’s
listed in your Favorites in a folder named
OneDrive for Business.
You can also start the Sync Library wizard
from the OneDrive for Business menu in
your Windows notification area.
If you have yet to sync any SharePoint
libraries to your computer, the Sync Library
wizard automatically prompts you to sync
your OneDrive, and references the Web
address of your OneDrive. If you want to
sync a different library, you can click Sync a
different library instead and then enter the
Web address of the SharePoint library you
want to sync.
If you’ve already synced your OneDrive, the
Sync Library wizard prompts you to specify
the address of the library you want to sync.
2. Click the ellipsis (…) to the right of the document. The callout window displays the
name of the person who last changed the document and the date of the change.
Send email to people you’re sharing a
document with
You can quickly address an email to everyone you’re sharing a document with. You
might do this if there are details about the document you want them to know about,
or if you want to remind them that you’ve shared the document with them.
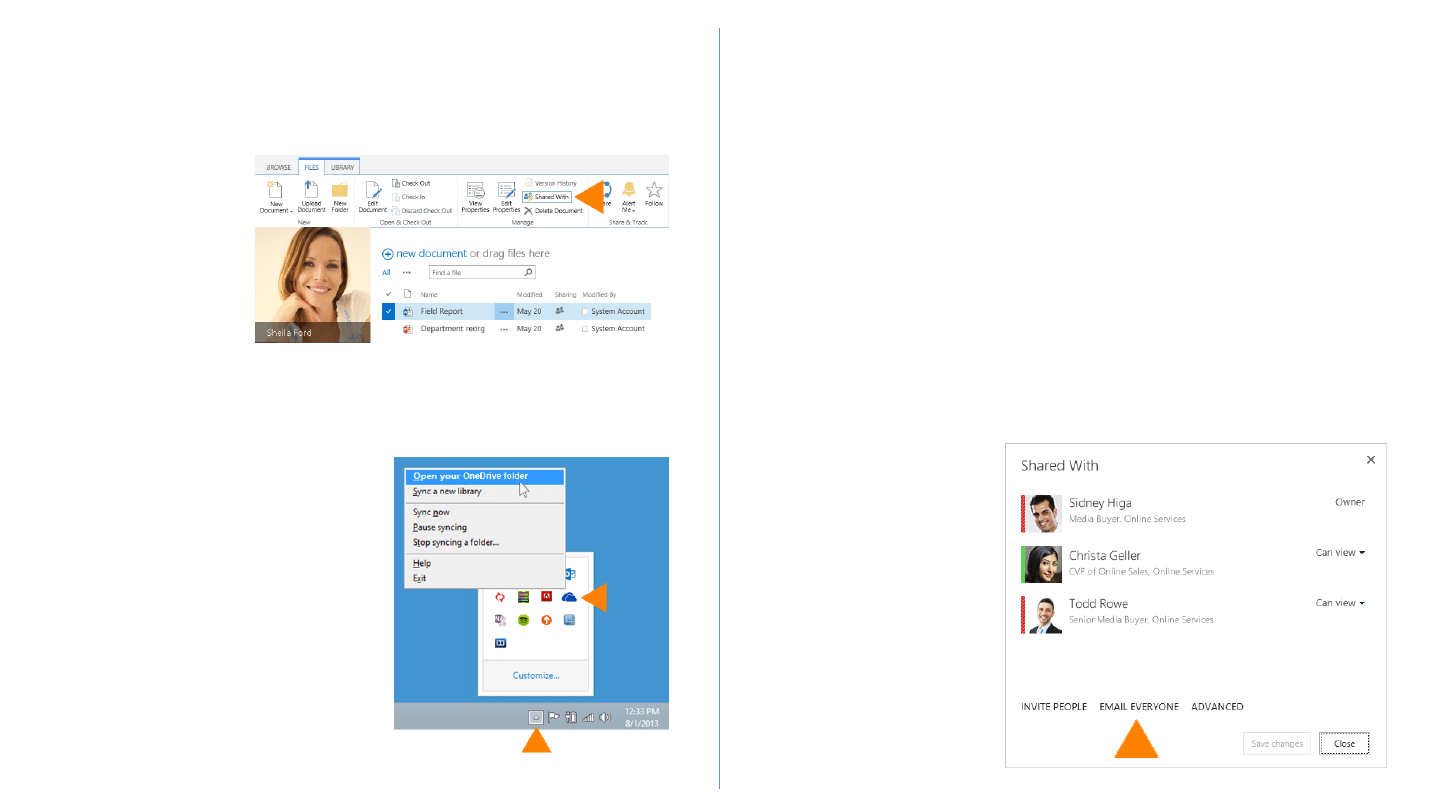
1. Select the document you’re interested in, and then click Files > Shared With.
2. In the Shared With window, click Email Everyone.
Change permissions of people you’ve shared
a document with
See who you’re sharing a document with
1. Select a document and click Files > Shared With.
2. The Shared With window lists all the people currently sharing this document and
their permission status.
Stop sharing a document or folder
1. Select the document or folder you want to stop sharing, and then click Files >
Shared With.
2. In the Shared With window, click the drop-down arrow next to the person you
want to stop sharing with, and then click Stop sharing.
3. The Shared With
dialog box lists who’s
sharing a document.
3. If prompted, click Allow
in the Security Warning
dialog box to allow
SharePoint to open your
email program.
4. Compose and send the
email from your email
program.
If you sync your OneDrive to your computer,
you can always find it quickly as follows:
1. Click the OneDrive for Business taskbar
icon.
2. Click Open your OneDrive folder.
3. Select the document or folder, and then
click Files > Shared With.
4. In the Shared With window, click the drop-
down arrow next to the person whose
permissions you want to change, and click
the permission you want to assign.
Wyszukiwarka
Podobne podstrony:
AF104114265 en us quick start guide lists
AF104114273 en us quick start guide create a team site
Red Hat Storage 2 0 Quick Start Guide en US
Red Hat Storage 2 1 Quick Start Guide en US
Parallels Desktop Mac Quick Start Guide
Quick Start Guide
Smart Box NVR Series Quick Start Guide V1 0 0
Quick Start Guide
50064982 MD80210 quick start guide PL
PAP4055DUO V1 0 Quick Start Guide PL
OUTLOOK 2016 QUICK START GUIDE
Quick Start Guide
quick start guide v2 1
Ultimate Comment Scraper Quick Start Guide
Parallels Desktop for Mac Quick Start Guide
Calibre Quick Start Guide John Schember
A Quick Start Guide to Monitor Profiling with Lprof
PAP4020DUO V1 0 Quick Start Guide PL
więcej podobnych podstron