
BEACH CHAIR Part 1
Made of lightweight cedar, these beach chairs fold for easy
transport
Portable beach chairs are perfect for this summer’s trips to the shore. If
camping is more your thing, they’re also handy for sitting around the campfire
while roasting marshmallows. The chairs are made of lightweight cedar, they
fold up flat for convenient storage and their easy-to-build design means you
can make a few this weekend and still have time to relax in them when they’re
done.
Lines in the Sand
I used a technique called “pattern routing” to
make identical pairs of the curved backrest and
seat supports. It’s a useful procedure whenever a
project calls for perfect copies of irregular-shaped
parts. To begin, prepare full-sized templates by
transferring the backrest and seat support
shapes onto 1/4" Baltic birch plywood or medium-
density fibreboard (MDF). You can easily
complete the elongated curved sections by
tracing along a thin strip of wood, flexed to form
the required shape. The expanded profiles don’t
have to be identical to the plan versions, but they
should be as close as possible. After marking the
locations of the pivot bolts, cut out the patterns
and sand the edges to smooth out any bumps or
indentations. Every imperfection left on your
patterns will be repeated faithfully on the workpieces you make.
Choose Your Weapons
Arrange the patterns on 3/4"-thick cedar boards to
find a layout that makes the most efficient use of
your material. Avoid knots and other flaws that can
weaken the pieces. Trace around the edge of the
patterns with a pencil, then cut out the parts, leaving
approximately 1/16" of waste material around the
edge. A bandsaw is the best tool for this task, but a
scrollsaw or jigsaw also gets the job done. Next,
reposition the templates on the blanks and tack
them in place with three or four finishing nails. Go
ahead and install one of the finishing nails at the
pivot bolt location to mark the spot for the hole you’ll
drill later. Leave the nail heads slightly proud of the
surface for easy removal; you’ll take them out after
routing is complete.
Install a bearing-guided flush trim bit in a table-
mounted router and adjust the height so the bearing
runs directly against the edge of the pattern. Using
the templates as your guide, run the edges of the
parts over the bit, trimming the waste material as
you go. If tearout or splintering occurs, try correcting
the problem by slowing down the feed rate and
taking the cut in several shallow passes. When both
pairs of supports are done, drill a 1/4"-dia. hole at
the marked locations (the places where those
finishing nails were located) to receive the pivot
bolts. Avoid tearout when drilling by using a piece of
scrap underneath as a backer board.
Lightweight cedar and
compact design make these
chairs a pleasure to take
a
long to the beach
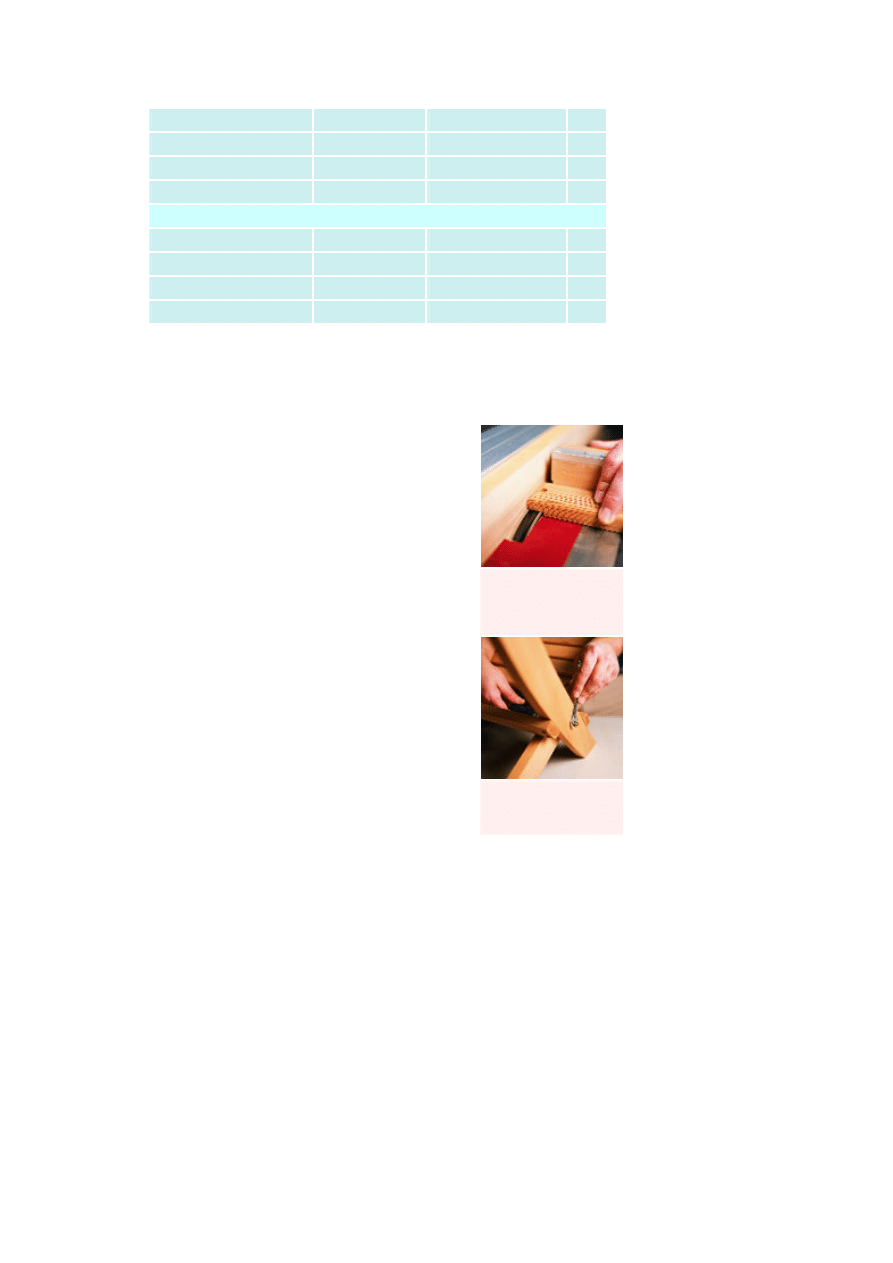
Trace your pieces onto
cedar from your template.
Be as space-efficient as
possible. Cut out each of
the pieces with a
bandsaw. A scrollsaw or
jigsaw also does the job.
A spindle sander removes
any tool marks and
cre
ates a splinterless seat
You Will Need
Part
Material
Size
Qty.
Backrest supports
cedar
3/4" x 6" x 42"
2
Seat supports
cedar
3/4" x 3" x 28"
2
Seat slats
cedar
3/4" x 2" x 12 1/4"
5
Backrest slats
cedar
3/4" x 2" x 14"
7
Curved backseat slat
cedar
3/4" x 2 1/2" x 14"
1
Cross braces
cedar
3/4" x 2" x 14"
2
Hardware
Pivot bolts
brass
1/4" -dia. x 2"
2
Washers
brass
1/4" -dia.
8
Cap nuts
brass
1/4" -dia.
2
Screws
stainless steel
#8, 1"
30
BEACH CHAIR
(part 2)
Cut the Slats
Turn your attention to the slats for the seat and
backrest. Begin by cutting out blanks for these parts
from 3/4" cedar. It’s a good idea to prepare a few
extra slats to use as test pieces, or just in case you
blow an important cut later. Leave the blank for the
wider curved slat at the top of the backrest square
for now.
The ends of the slats are notched to fit over the
edge of the supports. I made these 1/8"-deep x 3/4"-
wide rabbets using my mitre gauge to guide the
parts over a dado blade installed in my tablesaw. A
sacrificial board clamped to the fence and
positioned flush against one side of the blade serves
as a positive stop to determine rabbet widths. Use
the spare blanks, prepared earlier, to fine-tune this
setup before you go to town on the parts destined
for the project.
With the rabbets done, complete the curved
profile on the top seat slat. To create the arc, trace
along the edge of a flexed strip of wood, then cut out
the profile with a bandsaw or scrollsaw. Sand to
remove any tool marks before rounding over the
edges on the top face of all of the slats using a
bearing-guided 1/4"-rad. bit in a table-mounted
router.
Put it All Together
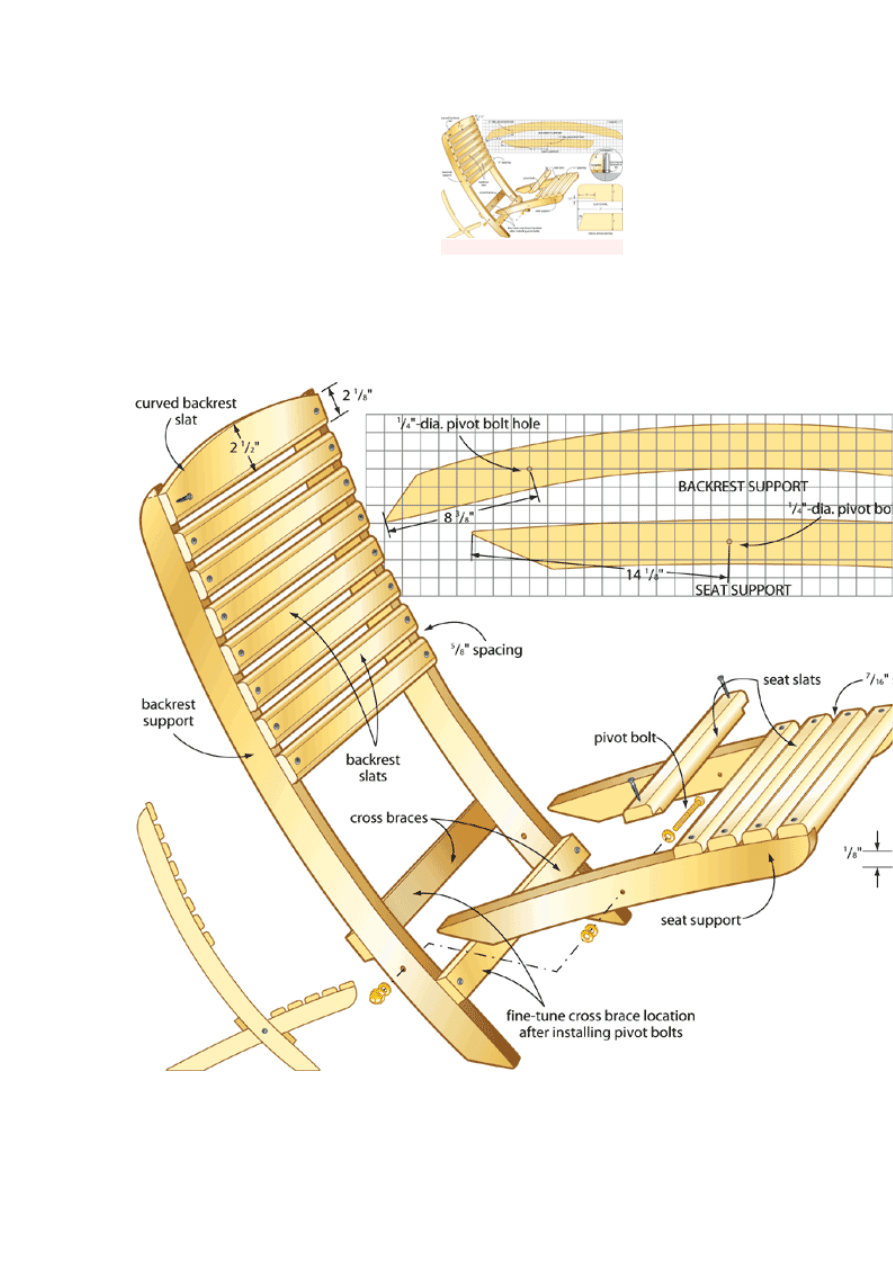
Using the arrangement of brass bolts, washers and cap nuts shown in the
plans, attach the seat supports to the backrests. Now you’re ready to install the
slats using weatherproof glue and one inch stainless-steel #8 pan-head
screws. The approximate spacing for the slats is shown in the plans. Just be
sure your arrangement allows the end of the seat to clear the bottom backrest
slat when the chair is folded. Predrill for screws, countersinking the heads 3/8"
deep to accommodate tapered wooden plugs. I cut my own plugs from scrap
using a drillpress cutter. Before you move on to the next step, take a minute to
sand the tips of the backrest supports to conform to the curved profile on the
top slat.
The cross braces are located on the front and rear sides of the backrest
assembly. They will support the seat when someone is relaxing on it. Notice
that the plans show one edge of each brace is bevelled 20º to approximate the
slope of the seat supports. With the chair unfolded, and the bottom of the legs
sitting flat on your bench, hold the braces in place and mark their position. This
is much easier to accomplish with an extra pair of hands, so don’t be a lone
hero. Now, fold the chair and install the braces at the marked locations using
glue, screws and tapered wooden plugs, as before. Make sure the bevelled
edges are oriented in the proper direction.
Cut slat rabbets on your
tablesaw with a dado
blade. Clamp a stop strip
to your saw fence to
control rabbet widths.
Install the brass bolts,
washers and cap nuts to
join the seat supports to
t
he backrest.
Almost Beach Time
Unfold the chair and test it while you consider
your finishing options. Cedar stands up well
to wet conditions with no finish at all. It will
weather to a light grey over time, and some
cracking may occur. I chose to wipe on a
couple of coats of Circa 1850 Tung’n Teak
oil. This is my favourite finish for outdoor
projects because it has provided good
protection over the years and it is easy to
apply. I will give the chairs a fresh coat at the beginning of each season to
keep the wood looking great.
Before you put these chairs in the trunk of your car and head on down to
the beach, be sure to label the routing templates and put them in a safe place.
Trust me, once you’re spotted in public with these chairs, you’ll need to get
our hands on the patterns again
.
y
CLICK ABOVE TO ENLARGE
Wyszukiwarka
Podobne podstrony:
Adirondack rocking chair krzesla
Anniversary Chair krzesla
Adirondack rocking chair krzesla
Anniversary Chair krzesla
Beach Chair (1)
Morris Chair
Palm Beach Perfect FINAL
Krzesło
projekt produkt krzeslo biurowe
beach cloze2
desery, Diety, South Beach, Przepisy
kurczak, Diety, South Beach, Przepisy
projekt produkt krzeslo biurowe
KRZESŁO
Metody aktywizacji w grupach, Puste krzesło
LEKCJA OTWARTA 23.05.05, ZAŁ. 5. ODPOWIEDZI DO GORĄCEGO KRZESŁA
Jak zrobić krzesło origami
więcej podobnych podstron