53874 Instr 7
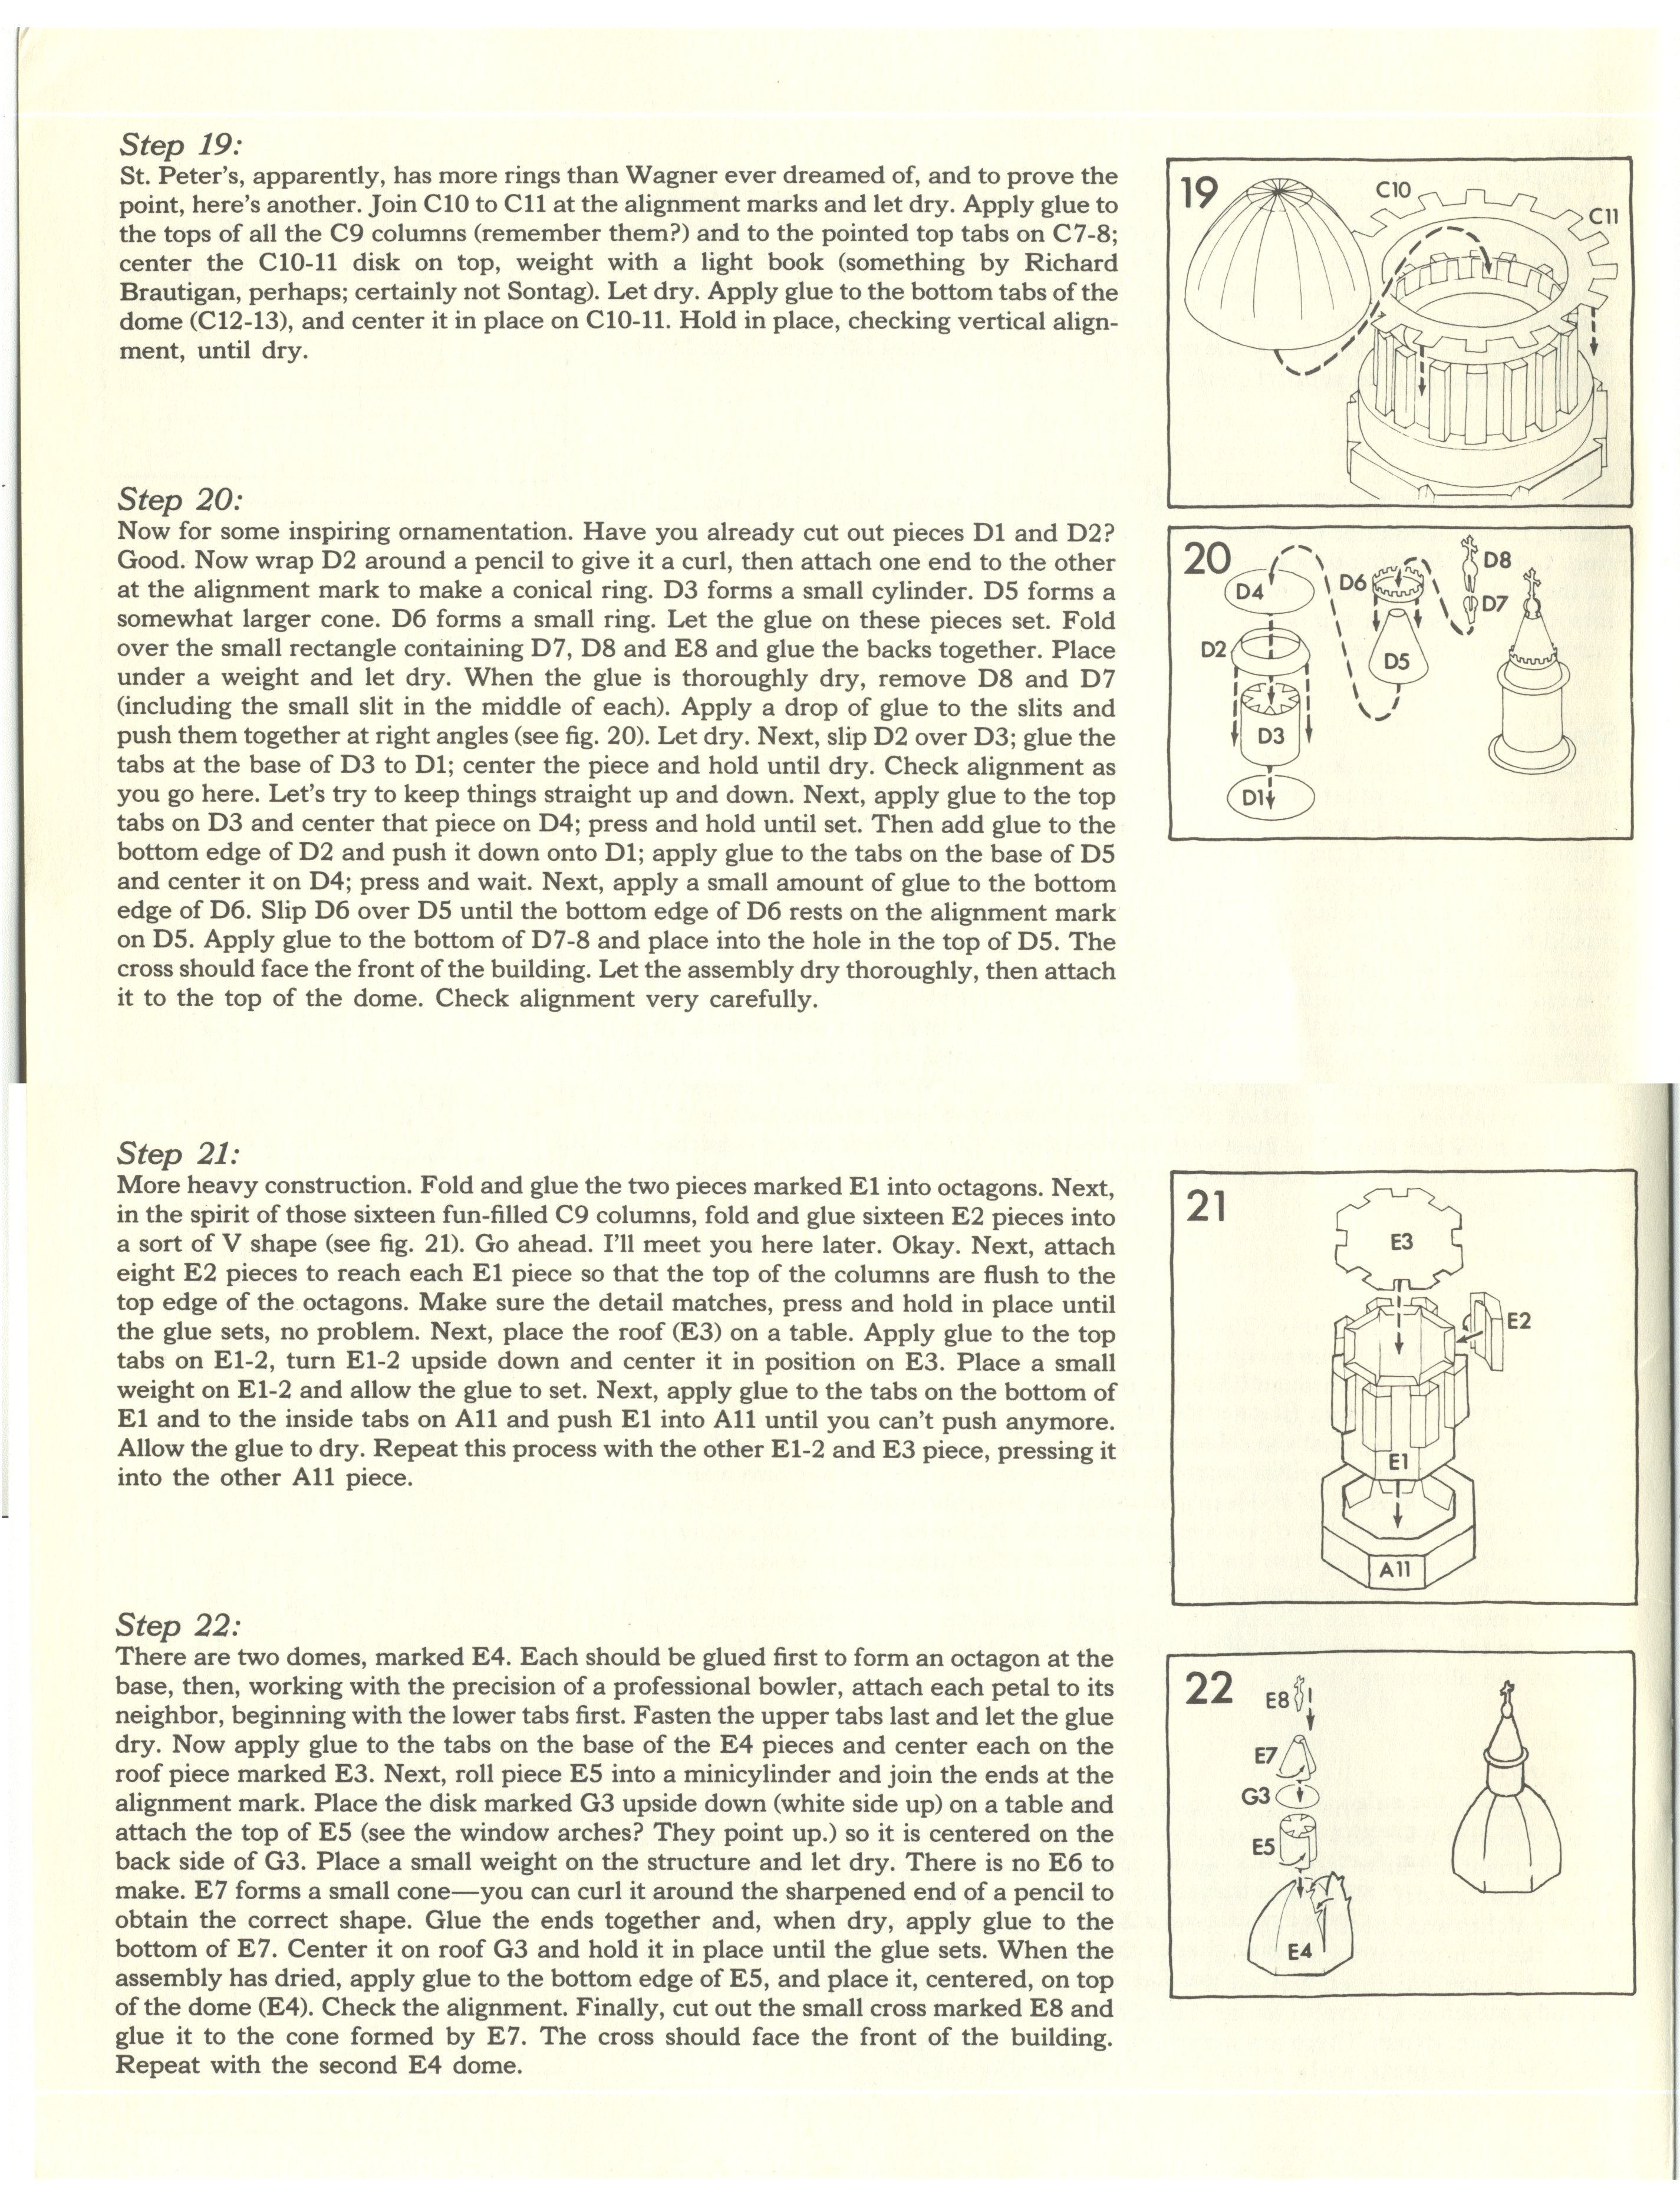
Step 19:
St. Peter’s, apparently, has morę rings than Wagner ever dreamed of, and to prove the point, here’s another. Join CIO to Cli at the alignment marks and let dry. Apply glue to the tops of all the C9 columns (remember them?) and to the pointed top tabs on C7-8; center the C10-11 disk on top, weight with a light book (something by Richard Brautigan, perhaps; certainly not Sontag). Let dry. Apply glue to the bottom tabs of the dome (C12-13), and center it in place on C10-11. Hołd in place, checking vertical alignment, until dry.
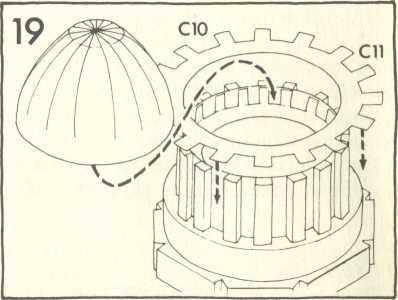
Step 20:
Now for some inspiring ornamentation. Have you already cut out pieces Dl and D2? Good. Now wrap D2 around a pencil to give it a curl, then attach one end to the other at the alignment mark to make a conical ring. D3 forms a smali cylinder. D5 forms a somewhat larger cone. D6 forms a smali ring. Let the glue on these pieces set. Fold over the smali rectangle containing D7, D8 and E8 and glue the backs together. Place under a weight and let dry. When the glue is thoroughly dry, remove D8 and D7 (including the smali slit in the middle of each). Apply a drop of glue to the slits and push them together at right angles (see fig. 20). Let dry. Next, slip D2 over D3; glue the tabs at the base of D3 to Dl; center the piece and hołd until dry. Check alignment as you go here. Let’s try to keep things straight up and down. Next, apply glue to the top tabs on D3 and center that piece on D4; press and hołd until set. Then add glue to the bottom edge of D2 and push it down onto Dl; apply glue to the tabs on the base of D5 and center it on D4; press and wait. Next, apply a smali amount of glue to the bottom edge of D6. Slip D6 over D5 until the bottom edge of D6 rests on the alignment mark on D5. Apply glue to the bottom of D7-8 and place into the hole in the top of D5. The cross should face the front of the building. Let the assembly dry thoroughly, then attach it to the top of the dome. Check alignment very carefully.
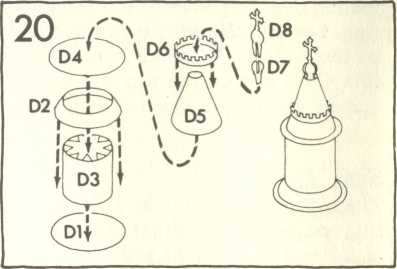
Step 21:
Morę heavy construction. Fold and glue the two pieces marked El into octagons. Next, in the spirit of those sixteen fun-filled C9 columns, fold and glue sixteen E2 pieces into a sort of V shape (see fig. 21). Go ahead. I’ll meet you here later. Okay. Next, attach eight E2 pieces to reach each El piece so that the top of the columns are flush to the top edge of the octagons. Make surę the detail matches, press and hołd in place until the glue sets, no problem. Next, place the roof (E3) on a table. Apply glue to the top tabs on El-2, tum El-2 upside down and center it in position on E3. Place a smali weight on El-2 and allow the glue to set. Next, apply glue to the tabs on the bottom of El and to the inside tabs on All and push El into All until you can’t push anymore. Allow the glue to dry. Repeat this process with the other El-2 and E3 piece, pressing it into the other All piece.
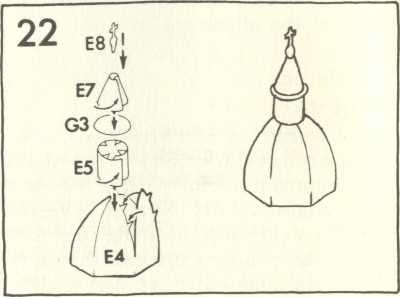
Step 22:
There are two domes, marked E4. Each should be glued first to form an octagon at the base, then, working with the precision of a professional bowler, attach each petal to its neighbor, beginning with the lower tabs first. Fasten the upper tabs last and let the glue dry. Now apply glue to the tabs on the base of the E4 pieces and center each on the roof piece marked E3. Next, roli piece E5 into a minicylinder and join the ends at the alignment mark. Place the disk marked G3 upside down (white side up) on a table and attach the top of E5 (see the window arches? They point up.) so it is centered on the back side of G3. Place a smali weight on the structure and let dry. There is no E6 to make. E7 forms a smali cone—you can curl it around the sharpened end of a pencil to obtain the correct shape. Glue the ends together and, when dry, apply glue to the bottom of E7. Center it on roof G3 and hołd it in place until the glue sets. When the assembly has dried, apply glue to the bottom edge of E5, and place it, centered, on top of the dome (E4). Check the alignment. Finally, cut out the smali cross marked E8 and glue it to the cone formed by E7. The cross should face the front of the building. Repeat with the second E4 dome.
Wyszukiwarka
Podobne podstrony:
milo 01 19 REGULAR KXF.RCI5F. NO. II G»a«ral Ex*rcu« lor tho Bark and L*f■ I.ojd the kcttlc bdl with
Instr 6 Step 14: If the glue has dried completely, turn the model upside down and install support pi
Instr 4 Step 6: Examine piece A13 carefully. Enigmatic, no? Now examine the assembly illustration (f
Introduction INTRODUCTION The Basilica of St. Peter is one of the most important eccle-siastical bui
jff 106 ARM LOCKS FOR GROUND WORK Second Arm Lock - Straight Arm Lock Step One: Throw completed, Tli
m3375 A French tapestry madę around 1460 illustrates The Life of St Peter. Heavily armoured&nbs
11377 Instr 8 Step 23: There are five smali roof pieces marked FI; fold them as indicated and attach
image003 The unthinkable has comc to pass: Peter Pan has grown up! Attorney-at-law Peter Banning liv
image004 The unthinkable has come to pass: Peter Pan has grown up! Attorney-at-law Peter Banning llv
vAct1207Dore St PeterDeliveredFromPrison St. Peter Delivered From Prison Doró Bibie lllustrations •
więcej podobnych podstron