®
N
ORIKO
H
ANDBAG
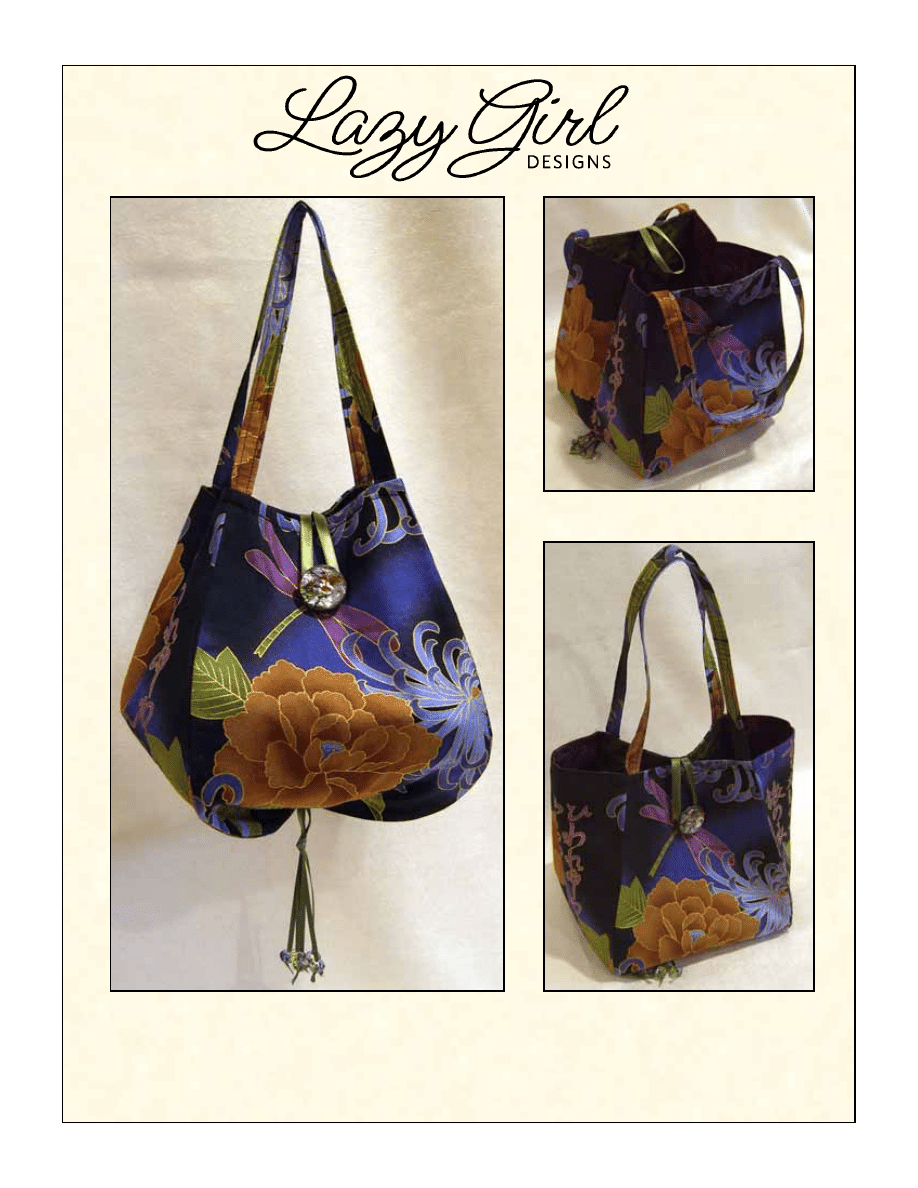
This delicate bag, both graceful and whimsical, provides wonderful opportunities to
showcase your favorite fabric. Size approximately 6” x 9” x 6”
www.LazyGirlDesigns.com
Handles
1.
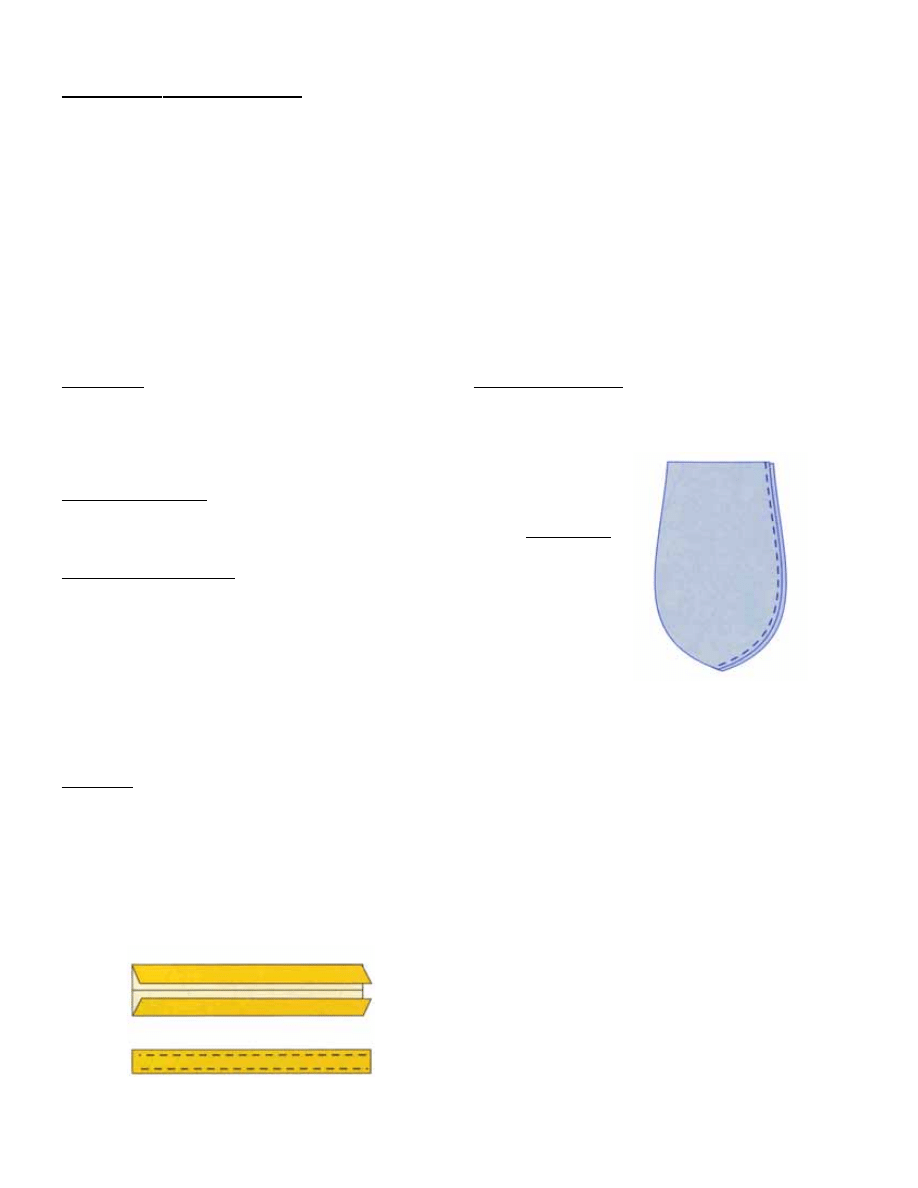
Make two handles: Fold each handle in half with
wrong sides together, match long edges and press the
fold. Open the strip, match the the long edges to the
center fold line, and press. Re-fold on the original fold.
Press once again for a finished width of approximately
1/2”. Topstitch through all layers, close to each edge
for a clean, finished look. Trim both edges of your handles
for a final length of approximately 14”.
Cover and Lining
2.
Layer two cover pieces right sides together,
matching all edges, pin one side edge and stitch. Make
two. Repeat for the lining pieces. You should have four
pairs.
3.
Press the seam allowances in one direction for
the cover and in the other direction for the lining. To
press the curved part of the seams, fold the layered pairs
so the wrong sides of the fabrics are together, conceal-
ing the seam allowance. Reach between the layers and run
your finger, or a point turner, along the seam to gently
push it all the way out.
4.
Have one cover pair right side out and the other
one wrong side out. Hold one pair upside down by the
point at the bottom. Separate the layers with your other
hand and it should look a little like a hood from a hooded
sweatshirt. Hold the other cover pair the same way, and
then gently tuck one inside the other, with right sides
together. Match the seam at the point and pin. Then
match the rest of the raw side edges and pin. Leave the
top edges alone.
5.
Stitch along one side edge from the top edge
toward the point at the bottom and stop with your needle
in the down position at the end of one side. The needle
should be in the stitching line of the first side seam, at
the bottom point. Lift the presser foot, pivot to align for
the final side seam, lower the presser foot and stitch.
Press the new seam allowances.
N
ORIKO
H
ANDBAG
By Joan Hawley, Lazy Girl Designs
Noriko, as her name suggests, is a ‘child of principle’ or, in our case, a bag of principle. Noriko uses the principle of a
single pattern piece for all sides of the bag. This lightweight bag, both graceful and whimsical, provides wonderful oppor-
tunities to showcase your favorite fabric.
One pattern piece makes each of the four panels of this unique teardrop bag. The gentle curve at the base of the bag
offers a stable base and a graceful silhouette when full. The two side panels can be tucked in toward the center of the
bag when not in use, allowing the bag to close flat for storage or safe keeping. We have matched our beautiful fabrics
with ribbon, beads and a button to finish the look.
Note: This design does not use batting or interfacing. Two layers of fabric create a graceful bag with a beautiful drape
and femininity.
Make 2 Handles
Supplies:
1/2 yard (min 40-45” width) cover fabric
1/3 yard (min 40-45” width) lining fabric
One 1” button for front closure
1/4 yard of ribbon (1/4” or 3/8” width) for button loop
Optional Tassel:
One yard of 1/8” wide ribbon or other fiber
6 decorative beads or buttons
Cutting and Notes:
- Use a 1/4” seam allowance for all piecing.
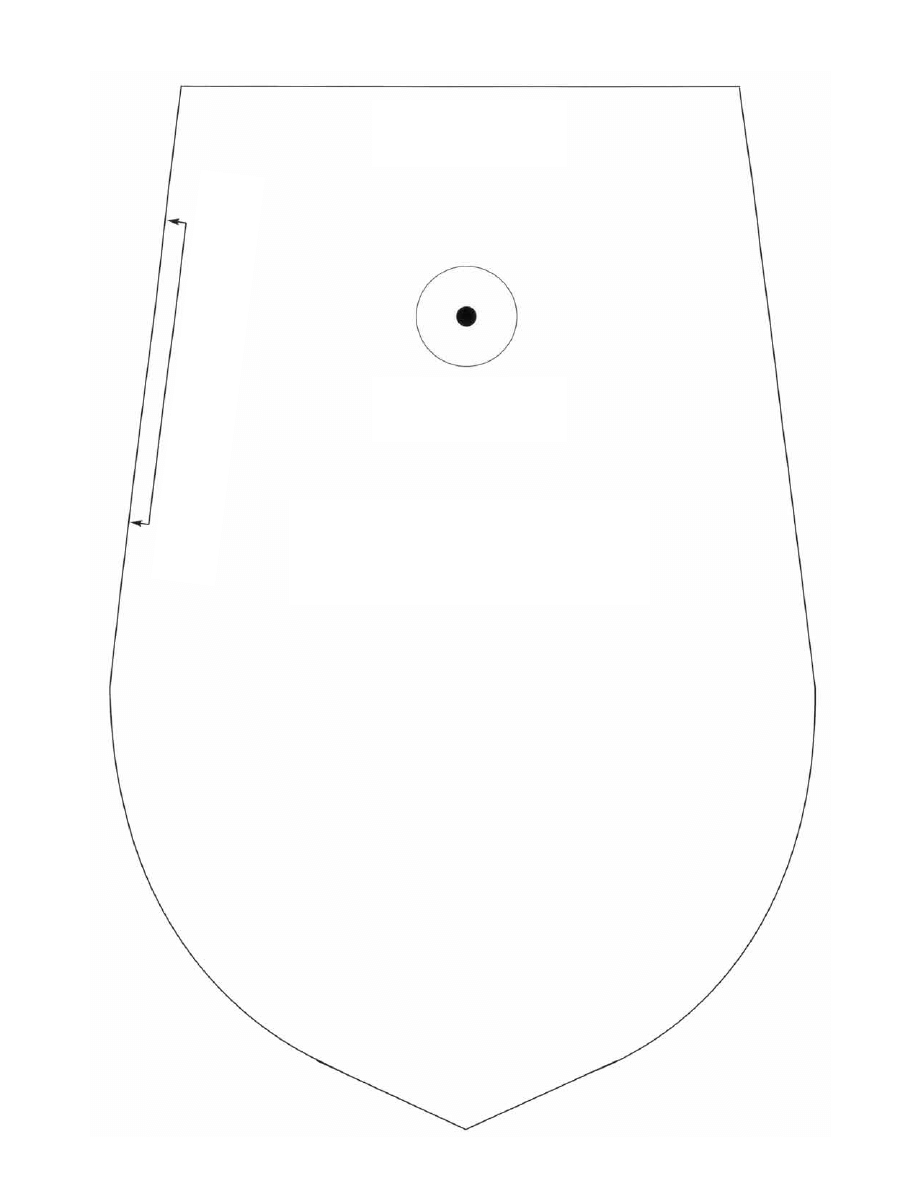
- Pattern piece on page 4 is full-sized.
- Use the pattern to cut four each from the cover fabric
and the lining fabric. Two pieces of each fabric will be the
front and back panels of the bag, and two pieces will be
the side panels.
- Cut two handle pieces at 2” x 15”.
Make 4 pairs
(2 Cover units
and 2 Lining
units)
2
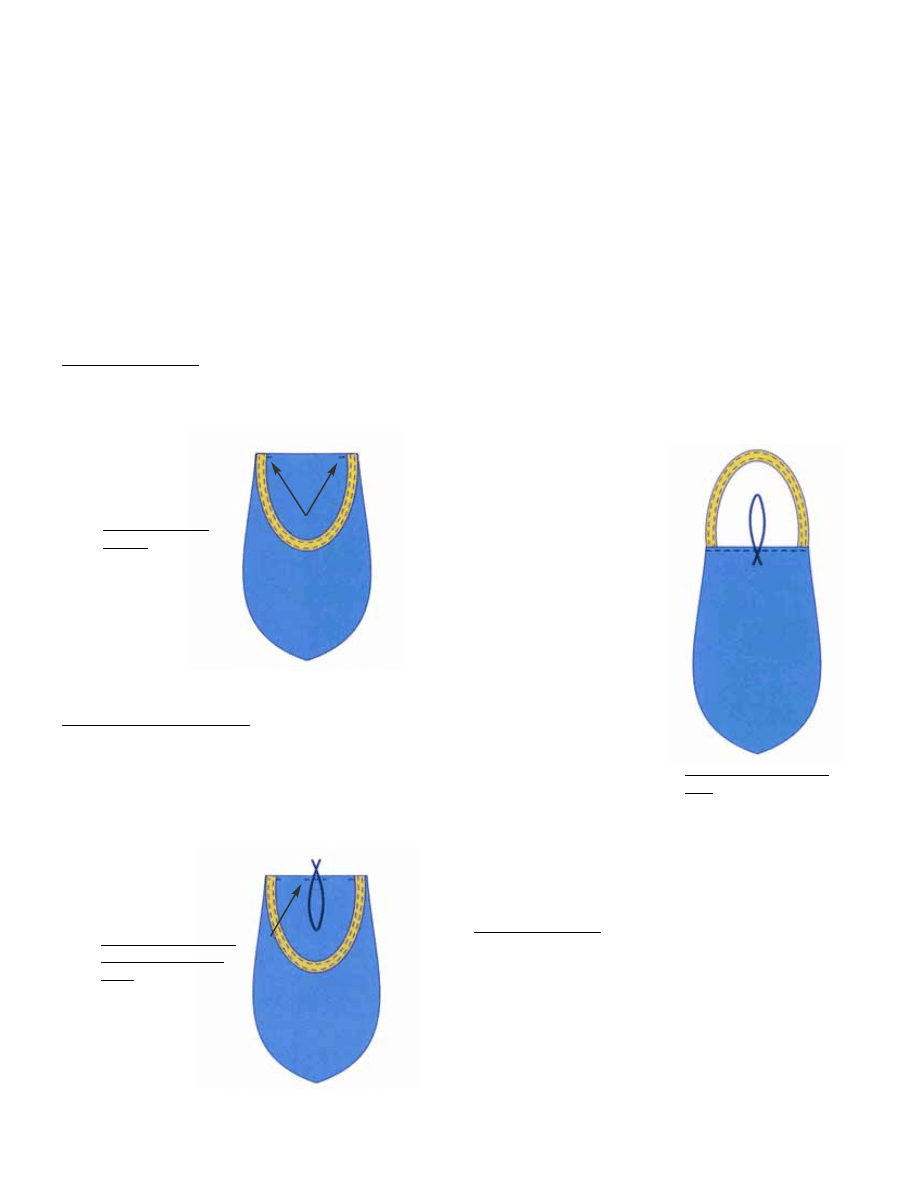
Front cover with
handle:
Secure ends of
handle to front
cover piece.
Back cover with han-
dle and ribbon clo-
sure.
Secure ends of handle
and closure to back
cover piece.
6.
Do the same for the lining pairs. To turn the bag
right side out later in the project, leave a 3” opening
where shown on the pattern piece for the final seam on
the lining only. After pressing the new seam allowances,
trim away a bit of the seam allowance on the lining to
reduce bulk in the finished project.
7.
With the cover right sides out, push the side pan-
els in toward the center of the bag so the bag lays flat.
The front and back panels should match at the edges and
the two side panels should be folded in half, disappearing
into the bag. Once all the layers are nicely arranged and
laying flat, press the cover. Arrange the lining the same
way, but keep the wrong sides out. Press down the mid-
dle of the lining to set the folds for the side panels.
Attach Handles
8.
Match the raw edges of your handles to the top
edge of the front and back cover pieces as shown. Be
sure not to twist the handles. Stitch close to the top
edge of the bag to secure.
Button Loop Closure
9.
Fold the button loop ribbon in half, and make a
mark 2 1/2” from the fold. Cross the tail of the ribbon at
the 2 1/2” mark. Place the ribbon, right sides together
with the back panel of the bag, placing the folded portion
on the bag and the tails off the bag, matching the 2 1/2”
mark at the top edge of the back panel. Stitch close to
the top edge of the bag to secure.
10.
Place the cover inside the lining, right sides
together. Be sure to tuck in the handles and the folded
end of the ribbon between the cover and lining. Match
the cover and lining at the top edges and all four sides
seams. Remember, the side panels have a pressed fold
down the center. Be sure the side panels are aligned
before stitching.
11.
Carefully stitch the top edge around the whole
project, through all layers. Backstitch to secure at the
handle ends and ribbon as you sew.
12.
Press before turning: Grab the cover only, at the
bottom points, and pull it out of the lining so that you can
see the wrong sides of all fabrics. Gently finger press
the seam allowance at the top edge of the bag toward
the lining fabric.
13.
Reach in through the opening at the side seam on
the lining and turn the project right sides out.
14.
Leave the opening open for now.
15.
Tuck the lining into the cover so your project
resembles the finished bag. Manage the new seam so it
rests at the top edge of the bag. Carefully press just
the top edge.
16.
Topstitch around the
top edge of the bag,
through all layers. Use the
same distance as you did for
the handle topstitching.
17.
Reach in through the
lining opening and place a
small scrap of fabric behind
the cover where you will sew
the button. The center of
the button should be approxi-
mately 2” from the top edge
of the bag. Stitch the but-
ton to the bag.
18.
Add optional embell-
ishments to the point of the
bag at this time. See
instructions for tassel below.
19.
Pull the lining out of
the bag enough to stitch the
opening closed.
20.
Arrange the lining
and cover so their seams nestle into each other at the
curves of the bag toward the bottom. Tuck the side pan-
els in toward the center again and press one last time.
Make a Tassel
Cut three 12” lengths of 1/8” ribbon. Hold all three
pieces together and fold in half, matching ends. Tie a knot
just below the fold to make a small loop. Feed each rib-
bon end through a bead and tie a knot near the end of
the ribbon to secure. Trim the extra ribbon length for a
clean edge. To attach to bag, feed needle and thread
through the small loop above the knot and fold near the
top. Do not puncture the ribbon with the needle.
Topstitch top edge of
bag: Stitch around top
edge of bag.
3
© J
OAN
H
AWLEY
, L
AZY
G
IRL
D
ESIGNS
2008...A
LL
R
IGHTS
R
ESERVED
. Lazy Girl Designs grants permission for this pat-
tern to be copied and shared in whole, but not in part.
Lazy Girl Designs grants permission for this pattern to be
used for classes, kits, and teaching, free of charge to the
end user. Lazy Girl Designs shall have no liability with
respect to loss or damage caused directly or indirectly by
the information contained in this document. Items made
from this pattern are protected by the federal copyright
law and may not be made for sale.
4
Noriko Handbag Pattern Piece
Cut 4 from cover fabric.
Cut 4 from lining fabric.
Button Placement
Top edge of bag.
Leave 3” opening on one bag lining seam.
Wyszukiwarka
Podobne podstrony:
History Costume History Costume Design Viking Women
MAKIJAŻ PIN UP GIRL
Flower Girl
Eurocode 5 EN 1995 1 1 Design Of Timber Structures Part 1 1 General Rules
[Instrukcja] GDOT Design Policy Manual Chapter 8 Roundabouts (USA)
100108 nmea 0183 sentences not recommended for new designs
journal design
A New Hybrid Transmission designed for FWD Sports Utility Vehicles
Programming Designs
DesignSem1
Language Curriculum Design
[5] Root Locus Design
How Do You Design
Kartridże atramentowe Hewlett Packard DesignJet 500
PCB Design Tutorial
CEI 61400 22 Wind turbine generator systems Required Design Documentation
więcej podobnych podstron