Partition recovery
Summary
This tutorial describes how to recover data when the MBR (partition table) is damaged.
It is by far the longest of ZAR tutorial series with its outrageous ten steps and fourteen (14) mouse
clicks.
Note: The older than current versions of ZAR might have been used to create the screenshots in
this tutorial. We did not update the screenshots if there is no significant difference between older
and current versions. If you see some option in the program which is not described in the tutorial,
just leave it at its default setting.
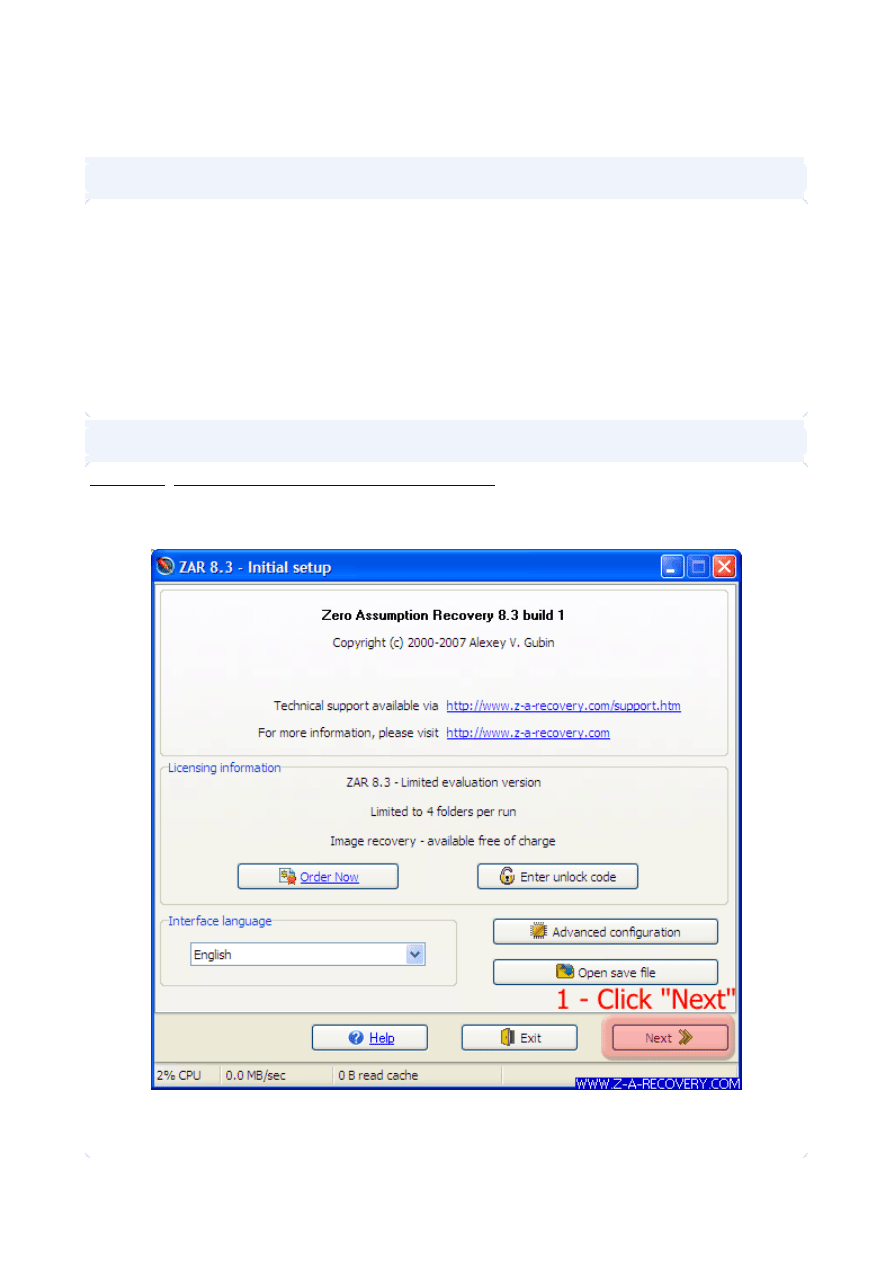
Step 1 - Get, install, and start ZAR
Download
http://www.z-a-recovery.com/download.htm
and install ZAR just like you do with any
regular program.
When you run it, ZAR displays the window like the one below:
1. Click "Next >>"
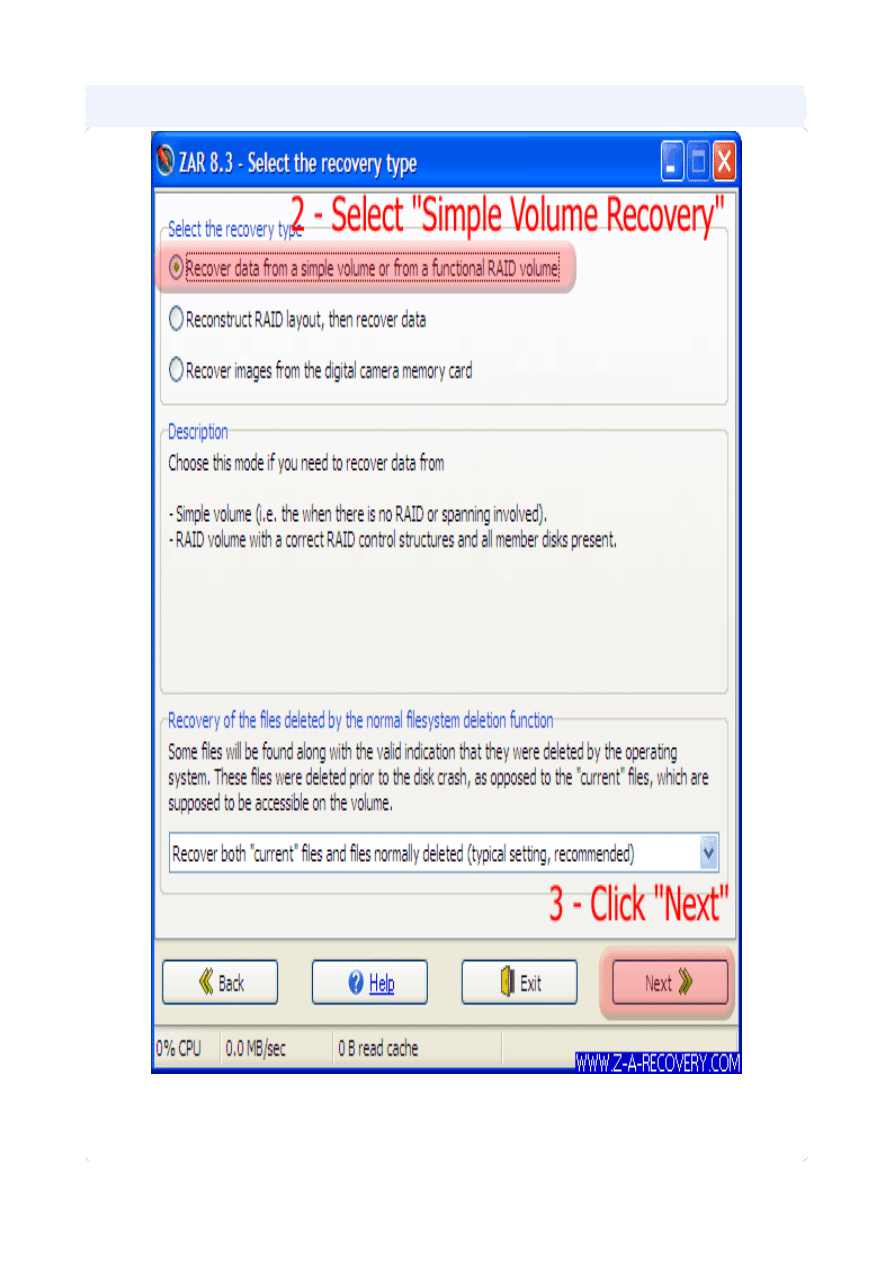
Step 2 - Select processing mode
2. Select "Recover data from a simple volume or from a functional RAID volume"
3. Click "Next >>"
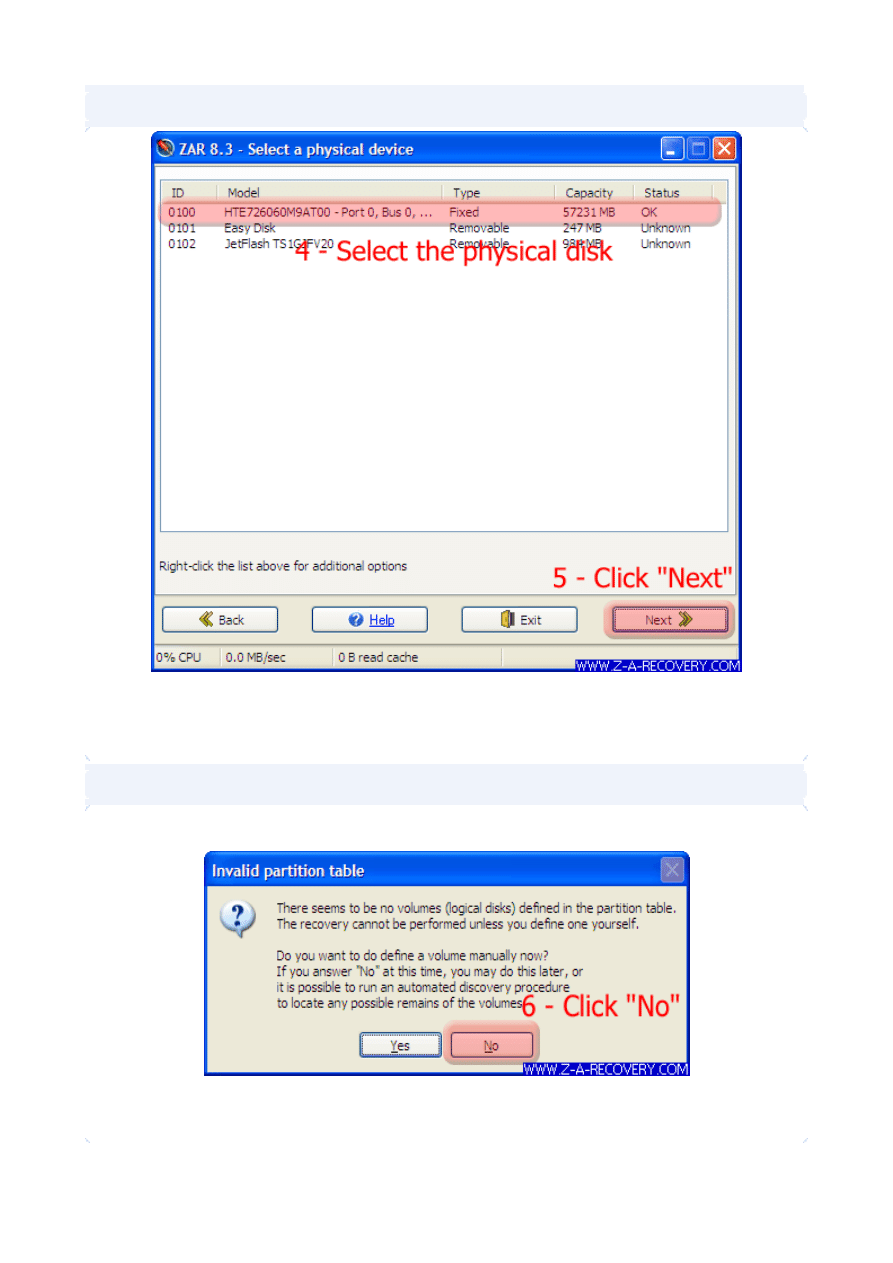
Step 3 - Select physical device to recover
4. Select the appropriate hard drive
5. Click "Next >>" for a list of volumes (logical disks) on this hard drive
Step 4 - Ascertain the problem
The error message will be displayed, indicating that there are no volumes readily identifiable
6. Dismiss the message by clicking "No"

Step 5 - Initiate partition scan
This will bring up the list of the volumes. It is empty barring the "Define volume manually" entry.
7. Right click an empty space anywhere in the volume list.
8. Select "Scan for missing partitions".
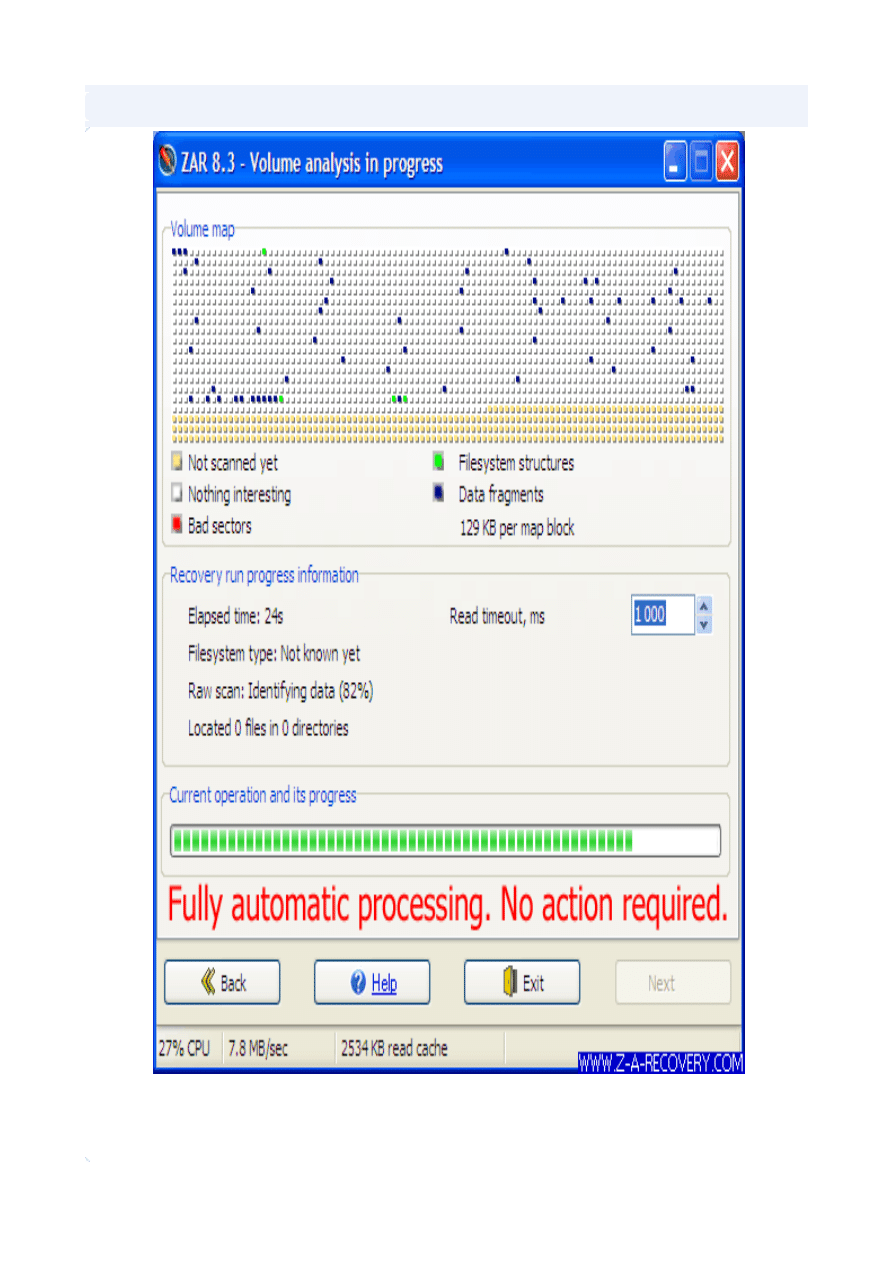
Step 6 - Partition scan progress
No action is required at this point. Just wait until the window closes automatically. This may take
reasonably long time.
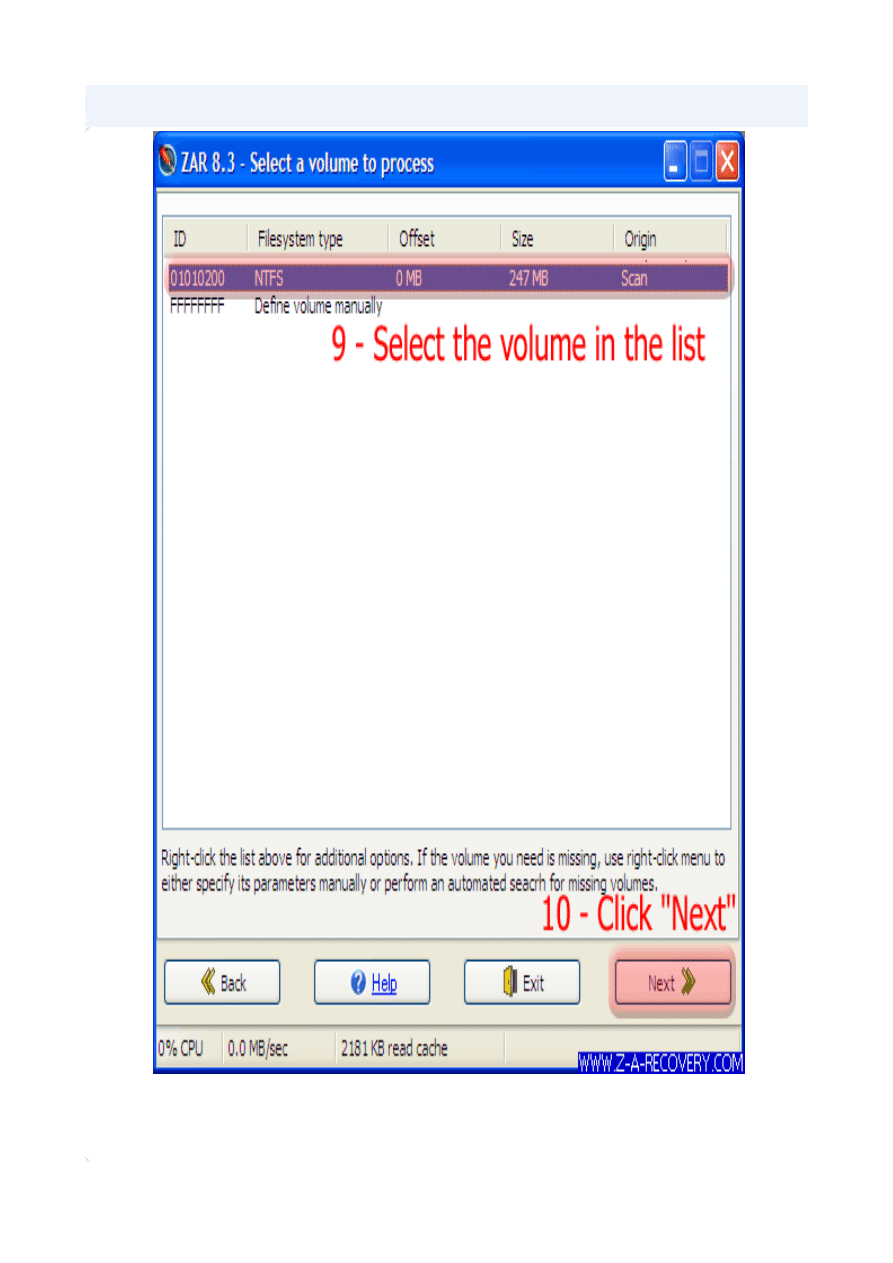
Step 7 - Select the volume
9. Click to select the appropriate volume from the list
10.Click "Next >>" to start processing
Step 8 - Recovery run
This part takes about two hours for every 100GB of a disk space to be processed and requires
absolutely no intervention.
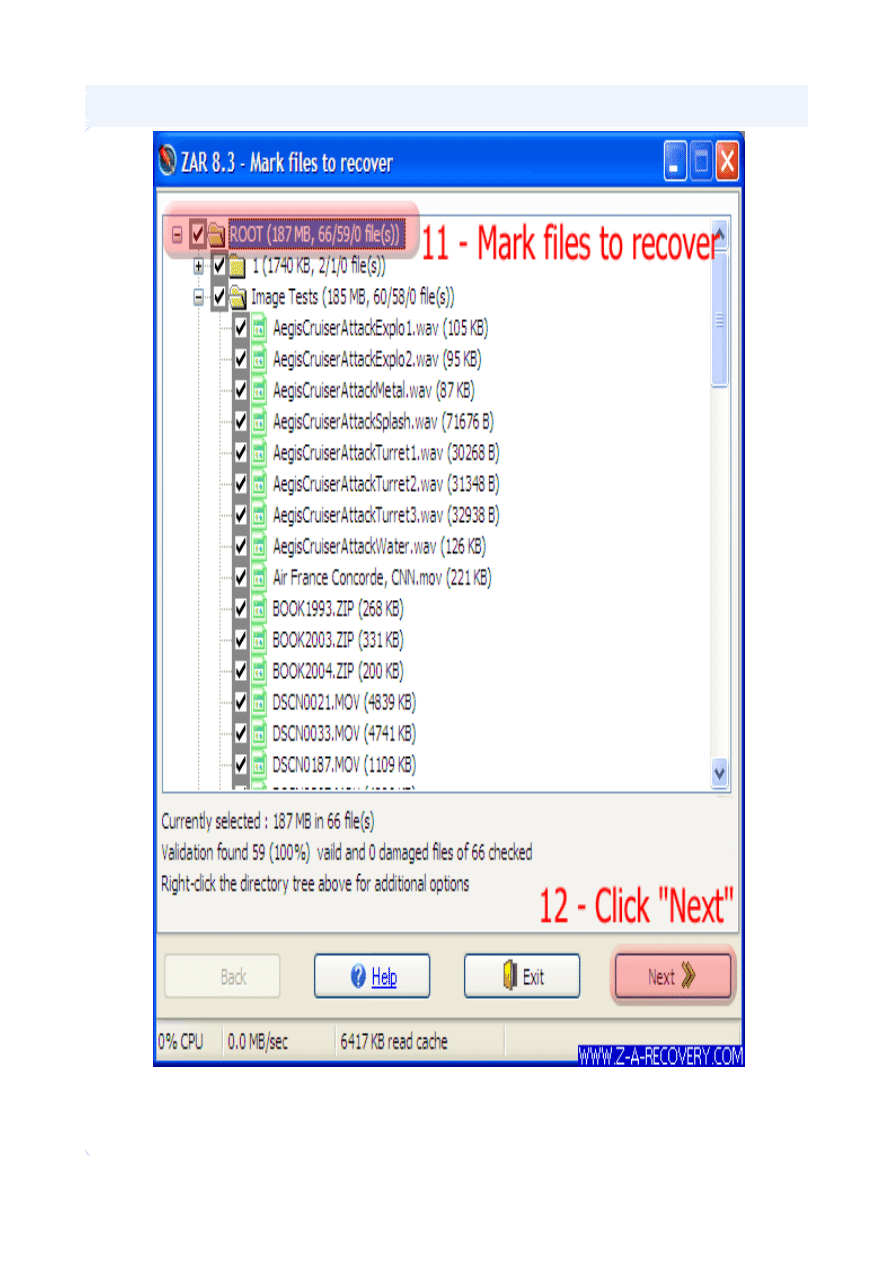
Step 9 - Select the files to recover
11.Mark files to recover by clicking their corresponding checkboxes
12.Click "Next >>"
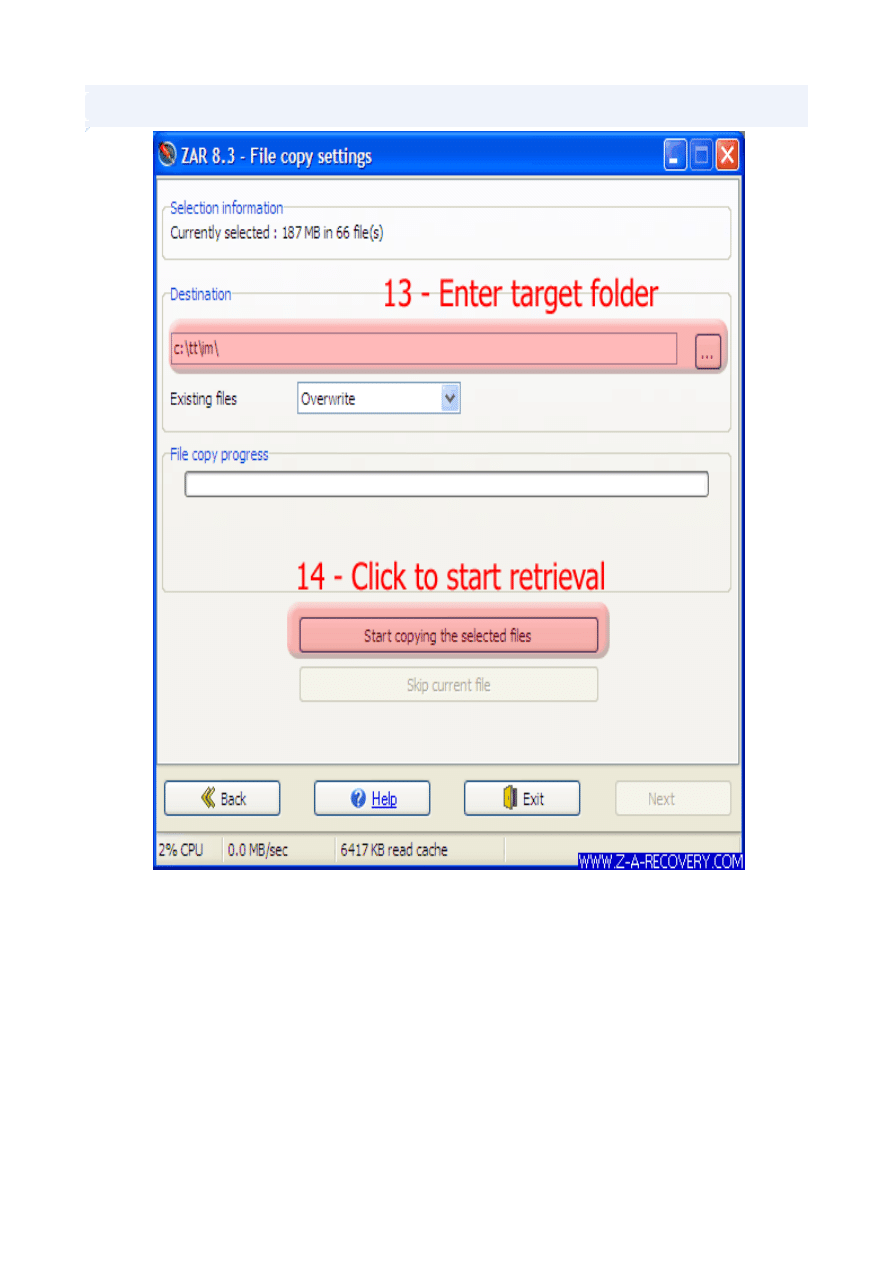
Step 10 - Copy files
13.Enter the name of the folder for the recovered files.
14.Click "Start copying the selected files" to start file copying.
Wyszukiwarka
Podobne podstrony:
Herbs for Sports Performance, Energy and Recovery Guide to Optimal Sports Nutrition
Password Recovery Tools, hakerskie
Drawing1 recover000 recover recover Layout1 (1)
8, 8-bit I/0 Recovery Time
[2006] Application of Magnetic Energy Recovery Switch (MERS) to Improve Output Power of Wind Turbine
200 Ways To Recover Revive Your Hard Drive
Dover Nous Blue Parts and Partitur(1)
Partition Table Doctor PTD
Continuous real time data protection and disaster recovery
Partition Table Doctor 3 5
Ovislink recovery, Routery WIFI - Firmware, Ovislink Airlive 5460v2
Recovery ACER, HP, DOC-LAPTOPY
Evasion & Recovery Manual
PARTITURA
Partition Magic za rączkę
Acronis PartitionExpert
HEAT PUMPS,recovery,cogeneration
HP Backup & Recovery
więcej podobnych podstron