iR Shell 3.8
User Guide
iR Shell is a multi-tasking shell for the PSP which allows you to launch applications (UMD
games/movies, legally owned Backups, PS1 games and Sony demos or homebrews) via a
menu driven interface. In addition to the standard shell functionalities, it includes a plethora of
advanced features.
Most features can be called upon either via the icon based menu system or a shortcut combo
key for fast access. Currently, iR Shell supports firmware 1.5, all OE revisions except for 3.30
as well as Team M33's custom firmwares up to 3.71 M33-3 and can also run under fw 1.5 &
2.71 emulation under DevHook on PSP Phat. iR Shell 3.8 is now finally also compatible with
PSP Slim & Lite !

Table of Contents
1 Feature Highlights
2 Changes from iR Shell 3.7 to iR Shell 3.8
2.1 Features exclusive to PSP Slim
2.2 Bugfixes
3 Installation Instructions
4 Main Menu View
4.1 View Choice Icons
4.1.1 Directory View and Context Menu
4.1.2 DIR Shortcut View
4.1.3 MP3 View
4.1.4 Application View
4.1.5 iR Remote View
4.1.6 Game Save View
4.2 Shortcut Launch Icons
4.2.1 Launch UMD
4.2.2 Predefined Homebrew 1 to 5
4.3 USB/WiFi Connection Icons
4.3.1 Toggle USB Mass Storage
4.3.2 Toggle USBHost
4.3.3 Toggle USBHost Redirection
4.3.4 Toggle NetHost
4.3.5 Toggle NetHost Redirection
4.3.6 Initiate Adhoc WiFi Transfer
4.4 Music Player Icons
4.4.1 Play/Pause
4.4.2 Stop
4.4.3 Previous Track
4.4.4 Next Track
4.4.5 MP3 Volume Down
4.4.6 MP3 Volume Up
4.5 Utilities and Tools Icons
4.5.1 File Management
4.5.2 Launch Devhook
4.5.3 Launch XMB
4.5.4 Set Alarm Clock
4.5.5 Toggle CPU Speed
4.5.6 Lock iR Shell
4.6 System Icons
4.6.1 Reset iR Shell
4.6.2 Exit iR Shell
4.6.3 iR Shell Configurator
4.6.4 System Info
4.6.5 Help
4.6.6 Mute Game Audio
5 Photo Viewer
6 iR Shell Button Configuration
6.1 General iR Shell button configuration
6.2 Menu View
6.3 Directory View
6.4 DIR Shortcut View
6.5 MP3 View
6.6 Application View
6.7 iR Remote View
6.8 Game Save View
7 USB and WiFi Host File Systems
7.1 Introduction
7.2 Installation & Configuration

7.2.1 USBhostFS
7.2.2 NetHostFS
7.2.3 Adhoc WiFi PC Configuration
7.2.4 Display Redirect via USBhostFS and RemoteJoy
7.2.5 2-Player PS1 games via USBhostFS/NetHostFS
7.2.6 2-Player PS1 games via Adhoc WiFi (2 PSPs required)
8 iR Configurator
8.1 Button Configuration
8.2 iR Configurator Options
9 Running Backups and Homebrew
9.1 Running homebrew
9.2 Running official Sony demos
9.3 Running PSP ISO Backups
9.4 Running PS1 games
9.5 Running UMD Video ISO Backups
10 iR Shell Directory Structure
10.1 IRSHELL Folder
10.2 SEPLUGINS Folder
10.3 PSP Folder
10.4 3rd Party Files
11 DevHook Setup (optional)
11.1 Install DevHook 0.46 and 0.52
11.2 Install modified DevHook files for iR Shell
12 Using HTML plugin as Webbrowser (optional)
12.1 Copy Webbrowser EBOOT to Shortcut folder
13 Using POPSloader with iR Shell (optional)
14 Turning the LED lights on/off (optional)
15 Technical Info about TV-Out (PSP Slim only)
16 Technical Info for PRX Plugin Programmers

1. Feature Highlights
These are just some of the features that iR Shell is capable of. Explore iR Shell fully and come
up with many more uses than these for yourself:
●
A true multi-tasking shell which allows you to multi-task between a UMD
game/homebrew/Backup ISO and any of the iR Shell built-in functions.
●
Allow listening to any of your favorite mp3s while playing UMD games, Backups or
homebrews. You can optionally mute the game specific audio channels while playing
mp3s. For example, you may want to play your own mp3s and mute the in-game
music, but leave the game sound effects intact.
●
Display anything that iR Shell can launch on your PC Monitor with the help of
RemoteJoy.
●
Supports the TV-OUT function found exclusively on the PSP Slim
●
With the built-in file browser, you can browse files on your Memory Stick, UMD Disc,
UMD Backups, your PC hard disks or DVDROM drives via USB or WiFi. You can even
open files directly from these devices by a single click, such as viewing PMP Movies,
Atrac3s, PMF movies, Backup ISOs, PS1 games, Text files, PDF files, Bitmap Photos,
Jpegs, PNG photos, PBP PSP apps, ZIP & RAR archives.
●
You can choose to install your PSP homebrew applications & files on your PC harddisk
and access them via USB or WiFi on your PSP. This will eventually give your PSP
unlimited storage access. With Infrastructure WiFi, you can access these homebrew
apps or files on your home PC via WiFi hotspots through Internet.
●
Ability to launch and multi-task with PS1 games which were launched from within iR
Shell. PS1 game launching is also possible via USB and WiFi by using a Host File
System.
●
You can now play 2-Player PSOne games also against another PSP wirelessly !
●
Backup UMD Video ISO support. You can launch Backup UMD Video ISOs straight from
the filebrowser. A complete firmware dump of FW1.5 (including flash1) is required.
●
A built-in Universal iR Remote supporting over 2000 devices.
●
Allow transfer of files between 2 PSPs via adhoc WiFi.
●
Adhoc WLAN connection to PC also possible
●
Advanced file management functions which can be performed on a complete directory
tree.
●
Take snapshots/screenshots of any homebrews, UMD games, Backups, PS1 games, MP4
movies or UMD Movies. For MP4 movies or UMD Movies snapshot, you can use the
'Launch XMB' feature.
●
Allow redirection of PSP keypad to PC Keyboard or PC Joystick via USB or WiFi. You can,
for example, use a Xbox/Xbox360 gamepad with 2 analog sticks to control movement
and aim in a FPS, like Syphon Filter. No more awkward control with PSP buttons for
aiming.
●
Allow the use of 4th brightness settings with homebrews & UMD games.
●
CPU clock settings, ranging from 100MHz to 333MHz.
●
Full support for firmwares 1.5, 2.71 with HenD, 2.71 SE-C, all 3.xx OE (except 3.30 OE)
and M33 custom firmwares up to 3.71 M33-3 as well as support for 1.5/2.71 Emulation
under Devhook with PSP Phat.
●
New Context Menu System from which you can choose the action to perform on the
selected file for quicker manipulation of files in Directory View
●
Auto sleep mode while idle
●
Ability to turn on/off the PSP's LED lights for Power, Memory Stick & WiFi. This is good if
you are annoyed by the MS LED constantly, for example. The orange charging LED isn't
affected.
●
Supports Multi-tasking PRX Plugin System. A TXT/HTML reader PRX plugin developed by
korDen is already included. It allows you to multi-task with TXT and HTML files such as
walkthroughs in the background while simultaneously playing a UMD game

2. Changes from iR Shell 3.7 to iR Shell 3.8
●
PSP Slim & Lite and PSP Phat are both now supported
●
2 Player PSOne games Adhoc support (see chapter 7.2.5)
●
POPSloader supported again under FW3.60 M33 (Slim) and 3.71 M33-3 (Slim or Phat)
●
Added a volume bar for the PSP main volume. Pressing volume keys will now show the
corresponding volume under iR Shell. Volume bar color is the same as clock color
●
Added a random start feature for single directory mp3 playback. Goto iR Configurator
and enable "MP3 Random Start...". Then, use CIRCLE to highlight a single MP3 directory
and press "R-Trigger + CROSS" to start playback. The system will randomly pick a mp3
file in the directory to start playback.
Please note: The sequence of subsequent play order will be the same as before, it's
just the first file will be picked randomly. The intention of this feature is to be used for
Alarm Clock wakeup with a random mp3 file. This is NOT A SHUFFLE feature.
●
Added a new Context Menu System. You can press the "START" button on a normal file
(not a directory) under DIR view and it will bring up a context menu. Then, you can
choose the action to perform on the selected file. For example, the sample context
menu has "View" & "Edit". When you choose the Edit action, it will call up the
corresponding editor plugin to allow you to modify the file.
The Context Menu System is very similar to the exiting Plugin system. They both share
the same plugins residing in ms0:/IRSHELL/EXTAPPxxx directories. The main difference
is that the content menu doesn't rely on the file extension and will always be available
to all types of files. You can have a maximum of 5 context menu items and they can be
customsized under iR Configurator.
Please note: Due to a shortage of spare hotkeys, the START key is used for both HELP
& Context Menu. The START key will act as a Context Menu key only when under DIR
view with the highlighting cursor over a normal file. In all other circumstances, the
START key will act as the HELP key.
●
Added Auto Sleep while idle. The auto sleep time can be configured under iR
Configurator. You can also choose to have auto sleep enabled only when no background
application is running. Please note: Auto sleep will not be activated under the following
scenarios:
•
When AC Adapter is connected.
•
When nethostfs is active.
•
When Adhoc WiFi Transfer is active.
•
When usbhostfs is active.
•
When usb mass storage is active.
•
When Slide Show is active.
•
When MP3 is playing.
●
Includes a new plugin "pspwrite" which is being used for the EDIT Context Menu
function. pspwrite is originally developed by zx81.
●
Added the ability to turn-off LEDs, including Power, Memory Stick & WiFi. If you are
annoyed by the MS Led constantly flashing while watching videos, then try this. The
orange charging LED isn't affected.
•
Press R-Trigger + Vol- to switch off LEDs.
•
Press R-Trigger + Vol+ to return back to normal.
●
Disable the HOME Exit Screen when switching back from app to iR Shell
●
Sony NP9660 and M33 No UMD drivers are supported now. These modes can be
configured under iR Configurator and they're independent from the ones in M33
Recovery Menu. To use the new modes, you'll need to apply the newest iR Shell
firmware patch that comes with this release. These two No UMD modes are supported
under all versions of 3.52 - 3.71 M33 CFWs.
●
Added a new Multi-tasking PRX Plugin System. This allows user written PRX Plugins for
iR Shell to multi-task with another game/app. A TXT/HTML reader PRX plugin developed
by korDen is already included.

2.1 Features exclusive to PSP Slim
These features are exclusive to the newly supported PSP Slim in iR Shell 3.8:
●
FW3.60 M33 and FW3.71 M33 supported. POPSloader also supported under FW3.60
●
iR Shell currently uses the PSP Slim's extra RAM for better support such as:
•
MP3 player always available, including nethostfs MAX mode
•
Background image will be available when switching from game to iR Shell when
running remotejoy
•
UMD Video can be displayed to PC via remotejoy under fw 1.5 & 3.x modes. The
PSP Phat version only supports UMD Video via remotejoy under 1.5 iR Shell.
●
Added support for TV out via Sony's component AV cable (only for Pb/Pr). Please note
the composite AV cable is not supported. To toggle between TV out & PSP LCD, press
"Left Trigger + Right". This setting is independent of the XMB setting. When you put
PSP to sleep mode, TV Out will be turned off. When you wakeup the PSP, you can turn
on TV out again. You can also turn on/off TV out even if a game/app is running. There is
some restrictions when XMB is loaded under iR Shell. iR Shell doesn't allow you to turn-
off TV out if XMB is in background. Allowing you to do so will screw up the XMB
resolution. You also shouldn't use "Switch Video Output" option under XMB after
launching XMB from iR Shell, as iR Shell will lose track of the current TV-Out mode.
2.2 Bugfixes since iR Shell 3.7
These bugs have been fixed since the last public release of iR Shell 3.7:
●
Fixed a bug in Adhoc WiFi File Transfer which would skip sending of files/dirs starting
with a "." when sending a directory.
●
Fixed Mute Game Audio for some of the UMD games which couldn't be completely
muted previously.
●
Under fw 3.71, 2 player PS1 support via keypad redirection was broken. This is now
fixed.
●
Fixed the bug to bypass the password protection screen upon startup.
●
Fixed the bug of missing background image when viewing photos after turning on
nethostfs MAX mode.
●
Launching XMB to view UMD Video Disc will no longer crash. Make sure you've placed
the UMD disc in drive before launching XMB from iR Shell.

3. Installation Instructions
iR Shell supports FW1.5, FW2.71 (SE-C and HenD), all OE custom firmware revisions except
3.30 OE by Dark_AleX as well as most custom firmwares by Team M33 for PSP including 3.71
M33-3. 3.51 M33-3 to 3.51 M33-7 are not supported.
1. If you have any previous installation of iR Shell: Please disable the iR Shell autoboot
PRX in recovery menu and delete all files related to iR Shell from your memory stick.
(This includes the autoboot plugin in /seplugins, the iR Shell EBOOTs in the GAME
folders and the IRSHELL folder itself).
2. Begin installation by unzipping the iR Shell 3.8 installation archive to a folder on your
harddrive. Please note that this installation archive contains files relevant to all
supported custom firmwares and the complete installation takes 50MB. If you don't
need fw 2.71, fw 1.5 or any other CFW files other than what you need for your
particular PSP then you can run the clean script in /IRSHELL/CLEANUP under Windows
and it will remove the unnessary files for those unwanted firmwares. The fw 3.x iR Shell
takes around 21MB after cleanup with this script. If you still want to cut down the size,
you can manually remove the unneeded plugins. The bare minimum iR Shell 3.x
installation takes around 6MB space. The /IRSHELL/CLEANUP folder itself may also be
deleted after running the script.
3. Next, copy all folders of the extracted archive after the cleanup script to the root
directory of your memory stick, overwriting any files already present.
4. If you would like to install additional skins, you can download the skin pack, unzip it
and also copy it to the root directory of your MS. You can also optionally copy the
Pronto Codes infrared device codes pack to the root of your memory stick if you would
like to have support for more than 2,000 infrared devices. Please note that the Pronto
Codes take up a lot of space if you install them all.
5.
To enable the iR Shell autoboot plugin, power off your PSP and then power it on again
while holding R-Trigger. Then, enable the "irsautoboot.prx" plugin. This plugin is
necessary to allow switching between fw 1.5 & fw 2.x/3.x versions of iR Shell.
6. Your PSP will now autostart with iR Shell upon power-on. If you wish you bypass the
autostart mechanism at any later point then hold down TRIANGLE when turning on your
PSP. You can also hold down CIRCLE to boot straight into 1.5 EBOOT of iR Shell. Booting
into 1.5 EBOOT is not supported under PSP Slim & Lite.
7.
To install iR Shell firmware patch for fw 3.71 (Phat or Slim) or fw 3.60 (Slim only),
use iR Shell's
3.xx
EBOOT and goto
ms0:/IRSHELL/PATCH/3.71 (or
ms0:/IRSHELL/PATCH/3.60 for 3.60 M33 respectively). Then, launch "btcnfpatch.prx"
and it'll install the irspatch.prx to 3.71/3.60 firmware. To install iR Shell firmware patch
for fw 3.5x (PSP Phat only), use iR Shell file browser in 1.5 EBOOT and goto
ms0:/IRSHELL/PATCH/3.5x/btcnfpatch. Then, launch "EBOOT.PBP" and it'll install the
irspatch.prx to 3.5x firmware. To install the iR Shell firmware patch for older OE CFWs,
copy /IRSHELL/PATCH/3.02-3.40/irspatch.prx to flash0:/kn/irspatch.prx on your PSPs
by using recovery menu or pspfiler. Then, edit the flash0:/kn/pspbtcnf_game.txt file
and add the irspatch.prx to it:
$/kd/ata.prx
/kd/irspatch.prx
$/kd/umdman.prx
Once done you may delete the /IRSHELL/PATCH folder from your memory stick to make
a little bit more room for other files.
8. Optional: For 3.71 M33: If you wish to use the infrared feature of iR Shell you'll need a
decrypted sircs.prx from fw3.52 because Sony has removed infra-red support from
firmware 3.71. Place the sircs.prx file under ms0:/IRSHELL/SYSTEM. To make the most
of the infrared feature you should download the Pronto Hex Codes or supply your own
RDF files. Infrared will only be available under PSP Phat and not PSP Slim & Lite.
9. Optional: If you wish you use DevHook with iR Shell then please refer to Chapter 10 of
this manual. Please note that DevHook is not compatible under fw 3.71 mode of
3.71M33. However, you can still launch devhook under fw 1.5 mode via the 1.5 kernel
add-on of 3.71M33. DevHook is also only compatible with PSP Phat and not PSP Slim &
Lite.
10. Optional: To use POPSloader together with iR Shell please read Chapter 13.

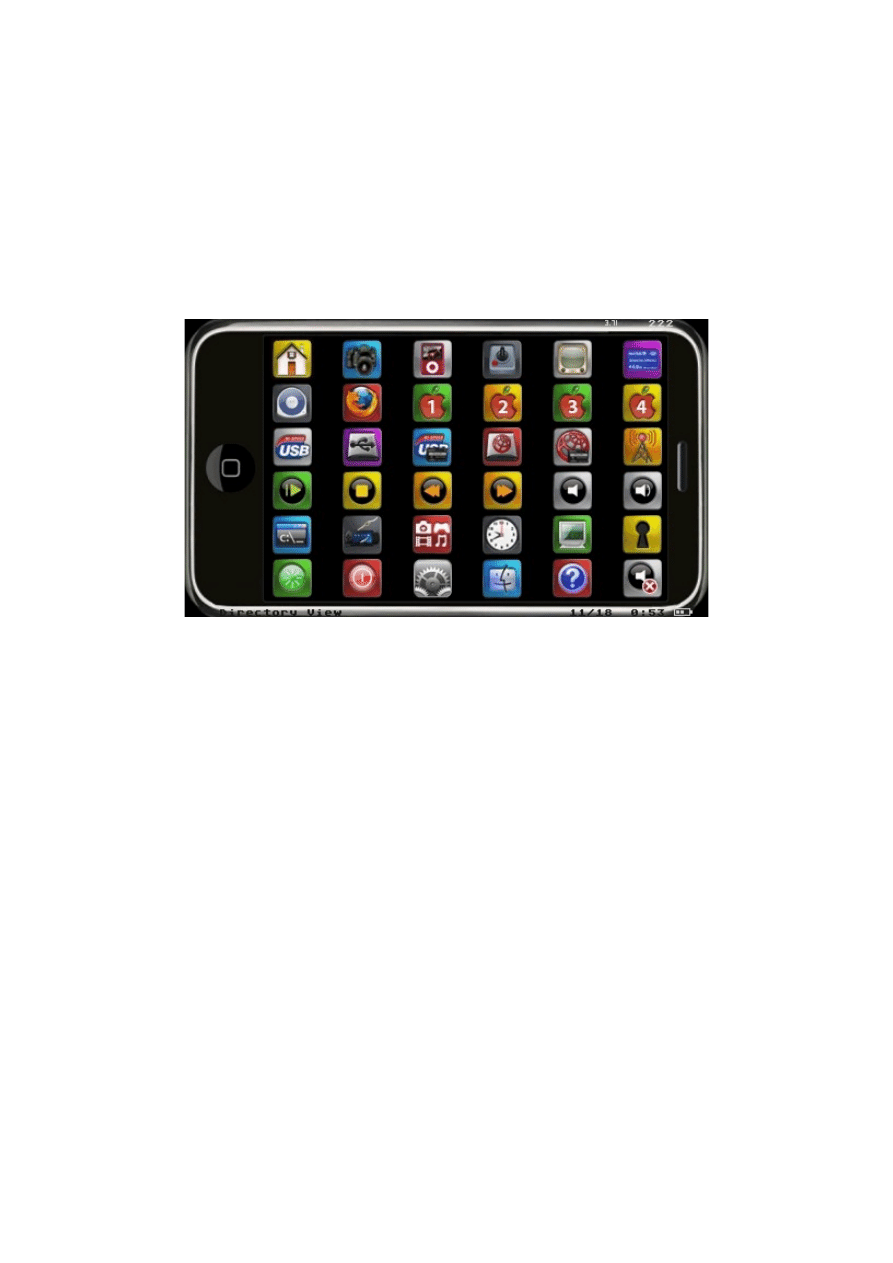
4. Main Menu View
By default, iR Shell will launch in Menu View. This is the View where you see an array of 6x6
icons to control iR Shell. You can change the default View Mode in iR Configurator at any time.
Below is a description of each function listed by icon group in the main Menu View. You can
bring up the Menu View at any time in the iR Shell main program by pressing SELECT.
For a detailed PSP button assignment list please refer to the chapter called "iR Shell Button
Configuration".
4.1 View Choice Icons
These icons control the different view modes of iR Shell apart from Menu View (SELECT
button). These views are mostly used for file operations of any kind.
4.1.1 Directory View and Context Menu:
Goes to ms0:/ directory view to access files under memory stick. Under Directory View, you
can open various files directly by pressing 'CROSS'. Press 'TRIANGLE' to go to the parent
directory.
You can access other media, such as disc0:, nethost0: or usbhost0: by pressing 'TRIANGLE'
while at 'ms0:/'. Below are the supported file types which allow direct launching with the
bundled plugins. Please note that your file extension must match the list below:
PMP/AVC:
PMP/PMP AVC Movies via PMPlayer Advance plugin. Use 'TRIANGLE' to
write a position file in order to resume the movie at a later point. Use
'HOME+SQUARE' to exit.
AT3:
Atrac3 plugin via Atrac3 Plus Player
PMF:
PMF Movie via PMF plugin (Use CROSS to pause/resume, TRIANGLE to
exit)
ZIP:
ZIP Unarchiver via AnonymousTipster's ZIP Plugin
RAR:
RAR Unarchiver via AnonymousTipster's RAR Plugin
TXT:
Text file via bookr plugin
PDF:
PDF file via bookr plugin
LUA:
LUA Player mod 4 plugin. This plugin is currently available in 1.5 EBOOT
of iR Shell only and not available for PSP Slim.
HTM/HTML:
HTML Viewer plugin. This plugin is only available in 2.xx/3.xx EBOOT
CBR/CBZ:
PSPComic Reader Plugin
OGG:
OGG media Plugin.
There is also a new Context Menu System. You can press the 'START' button on a normal
file (not a directory) under DIR view and it will bring up this context menu. Then, you can
choose the action to perform on the selected file. For example, the sample context menu has
'View' & 'Edit'. When you choose the Edit action, it will call up the corresponding editor plugin
(pspwrite by zx-81) to allow you to modify the file.
The Context Menu System is very similar to the existing Plugin system. They both share the
same plugins residing in ms0:/IRSHELL/EXTAPPxxx directories. The main difference is that the
content menu doesn't rely on the file extension and will always be available to all types of files.
You can have a maximum of five context menu items and they can be customized under iR
Configurator. The START key will act as a Context Menu key only when under DIR view with
the highlighting cursor over a normal file. In all other circumstances, the START key will act as
the HELP key.
4.1.2 DIR Shortcut View:
You can pre-define a directory shortcut via iR Shell Configurator, so that this DIR shortcut view
will directly jump to your pre-defined directory for faster access.

4.1.3 MP3 View:
MP3 view allows you to directly jump to the ms0:/PSP/MUSIC directory. You can play any mp3
songs by pressing 'CROSS'. You can also highlight multiple mp3 files by clicking 'CIRCLE'.
Then, press 'CROSS' after you've finished chosen your mp3 lists. Please note that you can also
highlight directories which can contain unlimited number of mp3 files. In this case, all files in
the directory will be played back 1 by 1.
4.1.4 Application View:
The Application View will list all your installed homebrew applications under the standard
ms0:/PSP/GAME. It supports standard firmware 1.5 kxploit naming convention (example:
bookr & bookr%) and also the traditional hidden directory naming. The new __SCE__ naming
& 1.0 EBOOT format are also supported. You can edit the folder that homebrew is displayed
from using iR Configurator. For example, set it to /PSP/GAME271/ under 2.71 SE-C by
Dark_AleX or /PSP/GAME352/ under 3.52 M33 – or leave it set at the default /PSP/GAME/.
4.1.5 iR Remote View:
RDF View allows you to access the built-in Universal Infra-Red remote control function. The
RDF View will list all remote controls that you've installed. You can download another archive
named "Pronto Hex Code v1.3" which included infra codes for over 2000 different devices. If
you've an unsupported device, you can visit www.remotecentral.com and download the pronto
codes for your particular device and place them in the RDF file format. Please note that you
need a decrypted sircs.prx in ms0:/IRSHELL/SYSTEM to use this feature on firmware 3.71
M33.
4.1.6 Game Save View:
Save View allows you to see the details of your game saves. This will be useful to find out
which save to send to your friends PSP via the Adhoc WiFi Transfer function.
4.2 Shortcut Launch Icons
These shortcut icons are used to quicklaunch the UMD and some homebrew applications which
you can define in the iR Configuator. More on this in the section about the iR Configurator.
4.2.1 Launch UMD:
Launches the inserted UMD Game disc. You can switch between the UMD Game & iR Shell by
pressing 'Left Trigger + Select' and perform various other file operations or other things
inside iR Shell at this point. Use the 'Left Trigger + Select' shortcut again to return to the
game.
4.2.2 Predefined Homebrew 1 to 5:
These icons allows you to directly launch 5 pre-defined homebrew applications for fast access
without the need to go through the APP View. First, you'll need to install the pre-defined
homebrews to any of these directories.
Available Shortcut folders:
ms0:/IRSHELL/HOMEBREWxx/RIGHT/
ms0:/IRSHELL/HOMEBREWxx/RLEFT/
ms0:/IRSHELL/HOMEBREWxx/RUP/
ms0:/IRSHELL/HOMEBREWxx/RRIGHT/
ms0:/IRSHELL/HOMEBREWxx/RDOWN/
(xx refers to the kernel version you would like to use: 15, 2X or 3X)
You can also optionally change your homebrew name from "Predefined Homebrew" to anything
you like in "iR Shell Configurator" for each EBOOT of iR Shell. Read the FAQ for more info.
For 1.5 homebrew you will have two folders, "Name" & "Name%". You copy your homebrew
files from the "Name" folder to "ms0:/IRSHELL/HOMEBREW15/RIGHT", or other shortcut
directories. You don't need the "Name" folder. Then, you rename your EBOOT.PBP from "Name
%" folder to EBOOT%.PBP and placed it to "ms0:/IRSHELL/HOMEBREW15/RIGHT".

The shortcut for Analog Right under FW2.xx/FW3.xx has already been set to the Webbrowser
plugin so you can quickly launch an internet session from within iR Shell and multi-task with it.
Please note: The HOMEBREW15 folder does not apply to PSP Slim & Lite since it can't run 1.5
kernel.
4.3 USB/WiFi Connection Icons
These icons are used to establish the different kinds of USB and WiFi connections that iR Shell
offers. They range from USB Mass Storage to USBhostFS and NetHostFS as well as Adhoc PSP-
to-PSP connections for file transfers.
4.3.1 Toggle USB Mass Storage:
Toggles USB Mass Storage On or Off. This is the same mechanism you know from the standard
Sony XMB.
4.3.2 Toggle USBHost:
Toggles the USBhostFS connection. With USBhostFS, you can browse your PC hard disks or
DVDROM drives via USB on your PSP. You'll need to install the usbhostfs driver on the PC and
run the nethostfs.exe server application before you can use this feature. More on this in the
section about setting up USBhostFS.
4.3.3 Toggle USBHost Redirection:
Toggle usbhost0 to ms0 mapping. With usbhost0 to ms0 mapping on, all access to ms0: device
(the memory stick) will be redirected to usbhost0: (your computer). This will make the
contents of your PC's USBhostFS root folder appear as if it is actually your memory stick. This
will allow your existing homebrew applications to access files on the PC without modifications.
Only use this option if absolutely necessary. There has been much confusion over its usage. In
most cases you do NOT need this.
4.3.4 Toggle NetHost:
Toggles the NetHostFS connection. With NetHostFS, you can browse your PC hard disks or
DVDROM drives via WiFi on your PSP. See the Host File System section for details on setting up
nethostfs access.
4.3.5 Toggle NetHost Redirection:
Toggle nethost0 to ms0 mapping. With nethost0 to ms0 mapping on, all access to ms0: device
(the memory stick) will be redirected to the nethost0: (your computer). This will make the
contents of your PC's NetHostFS root folder appear as if it is actually your memory stick.This
will allow your existing homebrew applications to access files on the PC without modifications.
There has been much confusion over its usage. In most cases you do NOT need this.
4.3.6 Initiate Adhoc WiFi Transfer:
With adhoc WiFi file transfer, you can send or receive files/directories to or from another PSP
without any access point.
4.4 Music Player Icons
These icons control the playback of mp3 songs. There shouldn't be any further explanation of
them necessary since they are the same as on any other media player.
4.4.1 Play/Pause:
Start or pause music playback of a song or playlist in the iR Shell music player.
4.4.2 Stop:
Stops iR Shell music player playback.

4.4.3 Previous Track:
Plays the previous track in the iR Shell music player playlist.
4.4.4 Next Track:
Plays the next track in the iR Shell music player playlist.
4.4.5 MP3 Volume Down:
Use this to lower the volume of MP3 output.
4.4.6 MP3 Volume Up:
Use this to increase the volume of MP3 output.
4.5 Utilities and Tools Icons
4.5.1 File Management:
An advanced File Management function including Copy, Paste, Delete, Rename & Create Dir.
These functions can work on a single file or a complete directory tree.
4.5.2 Launch Devhook:
This icon allows launching devhook directly from within iR Shell. You'll have to install devhook
0.4x and/or 0.5x on your PSP before you can use this feature. You can set the devhook
firmware version under iR Shell Configurator. The default firmware for DevHook 0.4x to launch
is set to fw 2.71 in iR Configurator where you may customize it to your liking. Please note that
DevHook does not work under FW 3.71 M33 for PSP Phat or PSP Slim anymore. It also doesn't
work under FW 3.60 M33 for PSP Slim.
4.5.3 Launch XMB:
This allows you to launch FW 3.xx or FW 1.5 XMB from within iR Shell. After launching of XMB,
you can switch between XMB & iR Shell via the standard hotkey 'Left Trigger + Select'. In order
to launch FW 1.5 XMB you need to have a working dump of FW 1.5 for DevHook 0.4x on your
memory stick. Together with the use of nethost0 or usbhost0 redirection, you can then use the
XMB Video player to playback mp4 movies on your PC harddisks via FW1.5 in DevHook.
Launching 1.5 EBOOT of iR Shell of 1.5's XMB is not supported on PSP Slim & Lite due to the
missing 1.5 kernel. On FW 3.71 you are required to have 1.5 kernel add-on installed to launch
fw1.5 XMB.
4.5.4 Set Alarm Clock:
This allows you to setup a one time or recurring alarm. For example, you can setup an alarm
to remind you stop playing a game at certain time. The alarm clock has been heavily improved
due to adrahil's discoveries. You can now set an alarm in iR Shell and then put your PSP in
suspend mode ("sleep"). It will power up at the time you set without wasting much (if any)
energy. The alarm is just an MP3 so in order to turn it off earlier please stop MP3 playback (a
shortcut would be R-Trigger + Cross). You can also set the alarm to wake you up with a
random MP3 from a chosen directory.
4.5.5 Toggle CPU Speed:
Toggle between 100, 222, 266 or 333MHz CPU Clock Speed. If you would like to use 333 MHz
together with NetHostFS then please set the CPU speed before you enable NetHostFS.
4.5.6 Lock iR Shell:
This will lock iR Shell access until you've given a correct password.
4.6 System Icons
These icons are used to configure, reset and shutdown iR Shell. They are also useful to provide

various information about the PSP such as battery level and muting game audio.
4.6.1 Reset iR Shell:
This will restart iR Shell. You will be given a few options like a normal restart, a complete
system reset as well as switching to EBOOT of the other firmware (1.5 or OE/M33). Please note
that in order to be able to switch to a different kernel EBOOT of iR Shell you will need to enable
the supplied autoboot plugin in OE/M33 recovery menu and will also need to have 1.5 kernel
addon installed if you are running FW 3.71 M33. Switching to 1.5 EBOOT of iR Shell is also not
available for PSP Slim & Lite due to the missing 1.5 kernel.
4.6.2 Exit iR Shell:
Exit iR Shell and return back to XMB.
4.6.3 iR Shell Configurator:
This will launch the iR Shell Configurator which allows you to customize iR Shell the way you
want it to be. There are over 70 options to customize. Within the Configurator, you can also
choose to install various skins.
4.6.4 System Info:
Displays various system information such as battery and memory status.
4.6.5 Help:
Call up the Help screen describing shortcut key combos for all iR Shell functions for fast &
direct access. Most functions can be access via icons or combo keys, except Snapshot
(Note/Music button) and the Application Switch hotkey (Left Trigger + Select) which can only
be access via key combos.
4.6.6 Mute Game Audio:
Allows muting of specific audio channels of UMD/Homebrew games. Depending on the "Mute
Game Audio Type" option under iR Shell Configurator the game audio will only be muted while
mp3 playback from within iR Shell is active, or always muted even when no mp3 is playing.
5. Photo Viewer

Photo viewer is activated when selecting a BMP, PNG or JPG file under Directory View. There
can be a maximum of 350 photos in a directory. This is the button assignment:
Square:
Toggle Slide Show (Slide show interval is changeable in iR
Configurator)
Right:
Next Picture
Left:
Previous Picture
Cross or Triangle:
Exit Photo Viewer
Circle:
Change JPEG photo scaling option (Note: Scaling option only works
on JPEG files and has no effect on others)
Left Trigger + Select:
Switch to the background app
6. iR Shell Button Configuration
This section will explain the button configuration in the different view modes of iR Shell.
Learning the basics of these will help you get the most out of iR Shell and in some cases you
will be completely lost without them.
The most important button combination to remember right now is: L Trigger + SELECT. This
combo enables "multi-tasking" between a homebrew, PSP/PS1 game or whatever else that you
launched from iR Shell and iR Shell itself.
6.1 General iR Shell button configuration:
Analog pad left:
Launch UMD
Analog pad right, R+Analog Pad (any direction):
Launch predefined homebrew from the shortcut folder
located at: /IRSHELL/HOMEBREW/<Direction>/EBOOT.PBP,
(5 Homebrew shortcuts in all)
Analog pad up:
USB mass storage On/Off toggle
Analog pad down:
Quit iR Shell
Left Trigger + Up Arrow:
Launch XMB
Left Trigger + Down Arrow:
Alarm Clock / Stop alarm
Left Trigger + Left Arrow:
Launch Devhook
Left Trigger + AUP:
Toggle USB HostFS (usbhost0:)
Left Trigger + ALEFT:
Toggle USB HostFS to ms0 redirection (usbhost0: -> ms0:,
ms0: -> ms1:)
Left Trigger + ADOWN:
Toggle NetHostFS (nethost0:)
Left Trigger + ARIGHT:
Toggle NetHostFS to ms0 redirection (nethost0: -> ms0:,
ms0: -> ms1:)
Left Trigger + Right Trigger:
Restart/Reset iR Shell
Left Trigger + Right:
Toggle TV-Out (PSP Slim only)
Left Trigger + Select:
Switch Task between the launched app and iR Shell
Left Trigger + Start:
CPU speed toggle between 100, 222, 266 & 333
Note button:
Take a screen snapshot (the snapshots are placed under
ms0:/PSP/PHOTO/SNAPSHOT).The folder ms0:/PSP/PHOTO
must exist on your memory stick for this function to work.
Left Trigger + Cross:
Adhoc WiFi File Transfer
Left Trigger + Square:
File Manipulation on selected file(s) in Directory View
Left Trigger + Circle:
Lock iR Shell. You'll need to enter a correct password to
regain access. Default password is null (nothing).
Left Trigger + Triangle:
Directory Shortcut View (directory selectable in iR
Configurator)
Left Trigger + Brightness:
Enable maximum brightness, 4
th
level (Press Brightness
button alone to return to normal setting). Not needed
anymore on M33 custom firmwares.
Right Trigger + Triangle:
Shortcut to browse /PSP/MUSIC directory
Right Trigger + Start:
Run iR Configurator
Right Trigger + Select:
System Information

Right Trigger + Vol-:
Turn off PSP's LED lights. Orange charging light not affected
Right Trigger + Vol+:
Turn on PSP's LED lights again (back to normal)
Start button:
In Directory View:
Brings up the Context Menu when pressed while
highlighting a single file. The contents of the context menu
can be customized. See chapter 4.1.1 for more details.
In all other view modes:
rings up the Help messages. Press Start again to see the
next help screen. Press any other button to close the help
messages.
6.2 Menu View:
Arrow Keys (Digital Pad):
Menu navigation
Cross:
Execute the iR Shell function we selected with arrow keys
Select:
Toggle Menu View and last used other view
Triangle:
Switch to last used other view (to go back to Menu View
again press SELECT)
Analog pad left:
Launch UMD
Analog pad right, R+Analog Pad (any direction):
Launch predefined homebrew from the shortcut folder
located at: /IRSHELL/HOMEBREW/<Direction>/EBOOT.PBP
Analog pad up:
USB mass storage On/Off toggle
Analog pad down:
Quit iR Shell
Left Trigger + Up Arrow:
Launch XMB
Left Trigger + Down Arrow:
Alarm Clock / Stop alarm
Left Trigger + Left Arrow:
Launch Devhook
Left Trigger + AUP:
Toggle USB HostFS (usbhost0:)
Left Trigger + ALEFT:
Toggle USB HostFS to ms0 redirection (usbhost0: -> ms0:,
ms0: -> ms1:)
Left Trigger + ADOWN:
Toggle NetHostFS (nethost0:)
Left Trigger + ARIGHT:
Toggle NetHostFS to ms0 redirection (nethost0: -> ms0:,
ms0: -> ms1:)
Left Trigger + Right Trigger:
Restart/Reset iR Shell
Left Trigger + Right:
Toggle TV-Out (PSP Slim only)
Left Trigger + Select:
Switch Task between the launched app and iR Shell
Left Trigger + Start:
CPU speed toggle between 100, 222, 266 & 333
Note button:
Take snapshot (photos are placed under
ms0:/PSP/PHOTO/SNAPSHOT)
Left Trigger + Cross:
Adhoc WiFi File Transfer
Left Trigger + Square:
File Manipulation on selected file(s) in Directory View
Left Trigger + Circle:
Lock iR Shell. You'll need to enter a correct password to
regain access. Default password is null (nothing).
Left Trigger + Triangle:
Directory Shortcut View (directory selectable in iR
Configurator)
Left Trigger + Brightness:
Enable maximum brightness, 4
th
level (Press Brightness
button alone to return to normal setting).
Right Trigger + Triangle:
Shortcut to browse /PSP/MUSIC directory
Right Trigger + Start:
Run Configurator.
Right Trigger + Select:
System Information
Right Trigger + Vol-:
Turn off PSP's LED lights. Orange charging LED not affected
Right Trigger + Vol+:
Turn on PSP's LED lights again (back to normal)
Start button:
Help messages. Press Start again to see the next help
screen. Press any other button to close the help messages.
6.3 Directory View:
This is the button assignment additionally to the shortcut combos when in Menu View:

Arrow Keys (Digital Pad):
File browser navigation
Triangle:
Go to parent directory under Directory View / Return to
Directory View under Menu
Square:
View toggle. Allows you to toggle between application view,
RDF view, directory view or Game save view. Does not work
in menu view (switch to any other view first). Use SELECT
to open Menu View.
Cross:
Item selection
Circle:
Highlight items or Display / Hide Icon (for APP/SAV Views).
Also used to add items to the mp3 player playlist.
Start button:
In Directory View: Brings up the Context Menu when
pressed while highlighting a single file. The contents of the
context menu can be customized. See chapter 4.1.1 for
more details.
6.4 DIR Shortcut View:
This is essentially just a "favorite" shortcut folder you can set up in iR Configurator. It gets
displayed in Directory View.
The same button assignment applies as well. You can use this shortcut to have quick access to
/PSP/PHOTO/ or /ISO/ for example.
6.5 MP3 View:
This is just another shortcut to /PSP/MUSIC directory on your memory stick. Essentially the
same as pressing "R Trigger + Triangle". Again, the same full button configuration as for
Directory View applies here. These are the most important ones for MP3 playback:
Arrow Keys (Digital Pad):
File browser navigation
Circle:
Mark item for Playback List (max playback list size: 30)
Square:
View toggle. Allows you to toggle between application view,
RDF view, directory view or Game save view. Does not work
in menu view (switch to any other view first). Use SELECT
to open Menu View.
Triangle:
Move up one folder
Cross:
Instant Playback (for single tracks only)
Right Trigger + Square:
Stop playback
Right Trigger + Cross:
Start Playlist / Playback Pause / Playback Resume
Right Trigger + Circle:
Mute Game Audio Channels
Right Trigger + Right Arrow:
Next MP3 Track
Right Trigger + Left Arrow:
Previous MP3 Track
Right Trigger + Up Arrow:
Volume Up (volume control for MP3 player only)
Right Trigger + Down Arrow: Volume Down
6.6 Application View:
This view lists the homebrew applications, PS1 games, and Sony demo's stored in the path you
defined in iR Configurator (/PSP/GAME/ by default). From here you can easily launch your
homebrew, rename it and so on. Most other system-wide shortcuts also still work.
Arrow Keys (Digital Pad):
File browser navigation
Cross:
Launch selected application
Square:
View toggle. Allows you to toggle between application view,
RDF view, directory view or Game save view. Does not
work in menu view (switch to any other view first). Use
SELECT to open Menu View
Circle:
Toggle application icon
6.7 iR Remote View:
If you haven't installed the Pronto Hex Codes before you'll need to download the archive, unzip

prontocodes13.zip, and place the files on your PSP under '/IRSHELL/IRCODES/' . Once installed
you can select any RDF remote control file in iR Remote View and launch it with Cross.
Please note: infrared control is not available on the PSP Slim & Lite.
Arrow Keys (Digital Pad):
Select remote control file
Cross:
Launch selected remote control file
Square:
Toggle between application view, RDF view, directory view
or Game save view. Does not work in menu view (switch to
any other view first). Use SELECT to open Menu View.
Start:
Switch to another remote control file directly (if shortcut list
is defined)
Select:
Exit iR Remote View
Once the remote control is launched all buttons have new mappings which will be displayed
on-screen.
6.8 Game Save View:
Arrow Keys (Digital Pad):
Select game save
Cross:
Show details of selected game save
Square:
View toggle. Allows you to toggle between application view,
RDF view, directory view or Game save view. Does not work
in menu view (switch to any other view first). Use SELECT
to open Menu View
Circle:
Toggle Game Save icon
Other general iR Shell button combinations also continue to work here. For example, "Left
Trigger + Square" which will let you copy or delete a game save.
7. USB and WiFi Host File Systems

The Host File Systems (NetHostFS and USBhostFS) are two of the most powerful features of iR
Shell that truly unleash the full power of the PSP.
7.1 Introduction
Using USB or WiFi connections, you can remotely browse your PC harddisk, CDROM, DVDROM,
etc. just like local files on your Memory Stick. You can open PC files on your PSP via the
familiar iR Shell file browser (DIR View). This allows you to play host mp3s, movies, photos,
etc. on your PSP without physically copy them to the MS. The files you selected are streamed
realtime to the PSP for playback. You can even launch PSP homebrews that are installed on
your PC harddisk. This will eventually turn your PC storage as your PSP local storage and open
up all kinds of possibilities.
Some homebrews are hardcoded to open files located on ms0: device (Memory Stick). To
achieve maximum homebrew compatibility, iR Shell supports device redirection. Once
enabled, your usbhost0: or nethost0: will appear as ms0: on your PSP. When your homebrew
tries to open files under ms0:, it will be redirected to the host file system. You can also choose
to install PSP homebrew applications on your host under usbhost0:/PSP/GAME or
nethost0:/PSP/GAME, similar to the way you install homebrews on ms0:. Afterwards, you can
enable the redirection and also enable the "Redirect APP View to Host" in iR Configuration. The
homebrews installed on your host harddisk will be presented to you under the regular iR Shell
APP View. You'll also notice the title of the APP View will be changed to "Homebrew
Applications [HOST]". The HOST keyword signals you that the homebrew listed are residing in
your PC host.
After you've enabled redirection, files on memory stick can still be chosen via ms1: device.
Depending on the particular homebrew application, files on ms1 may or may not be seen by
the homebrew.
7.2 Installation & Configuration
This section of the manuals details how to set up USBhostFS and NetHostFS in order to allow
access to files stored on your PC via your PSP.
7.2.1 USBhostFS:
For USBhostFS support, you'll need to first download the USB drivers on your PC (both
Windows & Linux are supported). Properly installed USBhostFS drivers are also required for
RemoteJoy video output. Start usbhostfs.exe (or RemoteJoy4iRS) on your PC and select
"Toggle USBHost" in iR Shell to enable USBhostFS support. The first time you do this on
Windows you will be asked to specify the location of the drivers. Point the driver installation to
the folder where you previously placed the USB drivers. Alternatively, RemoteJoy4iRS also
comes bundled with USBhostFS drivers which can be found in the \FILES\DRIVER subfolder
which will be created the first time you launch RemoteJoy4iRS.
Important: You will need to update your USBhostFS drivers to the new drivers even if you
previously had USBhostFS working with older iR Shell releases than iR Shell 3.7. Other
usbhostfs.exe releases are also incompatible with iR Shell and you must use AhMan's modified
files or RemoteJoy4iRS. If you already had a working setup for iR Shell 3.7 then you are fine.
USBhostFS can also be used for PSP keypad redirection to PC keyboard & Joystick. You’ll need
to enable the option "Redirect Keypad to Host" under iR Shell Configurator for this to work.
Usage
:
usbhostfs.exe [options] rootdir
rootdir:
The defined dir will be used as root dir for PSP. Use /cygdrive if you want the PSP
to see all drives in your PC.
Options:
-k
Disable PC keyboard redirection. PC Joystick redirection will still be active. Also,
the original usbhostfs command will be active.

-j
Enable the 2nd joystick (for PS1 games) – see below
-1 file
Joystick Mapping file for the first joystick – see below
-2 file
Joystick Mapping file for the second joystick – see below
Examples:
usbhostfs /cygdrive
This will allow you to access all drives on your PC.
usbhostfs -j -1 joy_1.map -2 joy_2.map
This will tell usbhostfs to use joy_1.map for the first joystick and joy_2.map for the 2nd
joystick. "-j" is to indicate you've 2 joysticks in the system and will only be used for PS1
games.
Joymap.exe
A new feature allows you attach two joysticks to your PC for PS1 games. Additional options to
specify map files for these joysticks have also been added.
In order to create such joystick map files for usage with iR Shell you should run the
joymap.exe utility (requires cygwin1.dll) from the command-line:
Usage:
joymap <0|1> mapfile
where <0|1> indicates the joystick numbder 0 or 1. mapfile is the result joystick mapping file
to be created.
Example:
joymap 0 xbox.map
This will create a xbox.map joystick mapping file for the first joystick in the system (Xbox
Controller).
7.2.2 NetHostFS:
For NetHostFS support, it's a bit more complicated as it involves a working internet connection
already present on your PSP. In order to proceed you should first set up a working internet
connection in the PSP's XMB and then go on.
Once you unzip the nethostfs archive to your PC (both Windows & Linux are supported), you
can launch it as follows. Unlike usbhostfs, however, you'll need to explicitly enable PSP keypad
redirection with -s option. You’ll also need to enable the option "Redirect Keypad to Host"
under iR Shell Configurator when using keypad redirection.
Please note: If your PC firewall asks if you want to allow nethostfs.exe access to the internet
then you will need to allow this at least for your local network (LAN). If you want to be able to
browse your PC files from a remote location via the internet then you will need to allow
nethostfs.exe to have access to the whole internet, of course.
Also note: Nethostfs.exe has also been updated with support for a second joystick (for PS1
games) which means that older versions are now incompatible with it. Please use only the
latest version with iR Shell 3.8.
Usage:
nethostfs.exe [options] rootdir
rootdir:
The defined dir will be used as root dir for PSP. Use /cygdrive if you want the PSP
to see all drives in your PC.
Options:
-p
port TCP port number
-l
login_password Password for client PSP to login
-c
max_clients Maximum number of client PSPs, valid range 4-1000, default 20
-r
Restrict to Read-Only access
-s
Tells the nethostfs to enable keypad redirection. Please note if you connect more
than 1 PSP to the same nethostfs server with the '-s' option enabled, the keypad
redirection will be forwarded to all PSPs. You can have more than 1 nethostfs
server running with each one listening to a different port & serving different PSP.

-k
disables keyboard redirection and only joypad will be redirected. This is similar
to the "-k" option for usbhostfs.
-h
Print this help messages
-j
Enable the 2nd joystick
-1 file
Joystick Mapping file for the first joystick
-2 file
Joystick Mapping file for the second joystick
Note on -r option:
This option is useful when you open your PC for public access via the Internet without worrying
about files being modified or deleted. You can also install various homebrews on the server
to allow others to run them from your PC without having the need to install them on their PSPs
(use the nethost redirection & enable Redirect APP View to Host). Some homebrews may need
to create files while they're running, such as updating high score files for games. In order to
achieve maximum compatibility all file update commands, issued by the PSP, will be simulated
without applying the updates on the file system. This means all update commands will return
successfully, so as not to cause any errors in homebrews.
Examples
nethostfs -p 7513 -l mypass -r /cygdrive
This will allow your PSP to access all drives in your PC in read-only mode (-r), which means
you can't modify or delete any files. You'll also need to configure the following under iR
Configurator.
nethostfs -p 7513 -l mypass -s -j -1 joy_1.map -2 joy_2.map
This will set up NetHostFS to use port 7513 (default) with the password mypass. The “-s”
option will enable Keypad Redirection. The “-j” option will enable second joystick support for
PS1 games and the -1 and -2 options define the names of the joystick map files.
7.2.3 Adhoc WiFi PC Configuration:
The PSP firmware 1.5 and 3.xx do not allow your PSP to connect directly to a PC without a
router via Adhoc WiFi. The Adhoc WiFi connection only supports PSP to PSP communication. To
connect your PSP to your PC, you'll normally need an Infrastructure Access Point. However, iR
Shell utilizes a little trick by using the network drivers from firmware 1.0 and 1.5 to allow you
to connect your PSP to your PC via Adhoc WiFi.
To use adhoc PC connection, follow the procedures below:
1. Place the following PRX modules from a 1.0 firmware dump. These files are not included
with iR Shell distribution for legal reasons. These files will need to be decrypted.
ms0:/IRSHELL/SYSTEM/ifhanlde.prx
ms0:/IRSHELL/SYSTEM/pspnet.prx
ms0:/IRSHELL/SYSTEM/pspnet_apctl.prx
ms0:/IRSHELL/SYSTEM/pspnet_inet.prx
ms0:/IRSHELL/SYSTEM/pspnet_resolver.prx
2. Place the following PRX module from a 1.5 firmware dump: wlan.prx. This file is also not
included with iR Shell for legal reasons. This file will also need to be decrypted:
ms0:/IRSHELL/SYSTEM/wlan15.prx
3. From your XMB, go to Network Settings->Infrastructure Mode.
•
Enter a connection name with "adhoc" as prefix (case insensitive). Example, "Adhoc
PC1". The adhoc prefix tells iR Shell this is an adhoc entry. Without adhoc prefix, iR
Shell will treat it as a regular Infrastructure settings for Access Point only.
•
Enter the SSID name for your adhoc network. Don't use Scan as it won't allow you
to scan adhoc networks.
•
Use WEP encryption to your preference. Any other encryption does not work !
•
Choose Custom under "Address Settings", then choose "Manual IP Address

Settings". Enter IP address manually, example "192.168.100.2". For "Default
Router" entry, type your PC's IP Address, example "192.168.100.1". Enter an
arbitrary DNS address.
•
For Proxy Server, choose "Do Not Use". Then save settings and skip test connection.
4. Goto iR Configurator, select the appropriate XMB Network Config entry. Then, enter
your PC IP Address under "NetHost IP (Adhoc)" entry. This PC IP Address is used for
adhoc connections. For infrastructure connections, iR Shell uses the IP Address/Name
defined under "Nethost IP/Name (AP)". The reason for having 2 different entries is to
avoid making changes to your configurator when switching from AP to Adhoc.
5. Done. You can now use nethost0 via Adhoc mode under iR Shell. If you enable to
option "Allow Adhoc PC Connection for Homebrew" under iR Configurator, this will even
allow your existing Infrastructure WiFi homebrew applications to use Adhoc WiFi to a
PC.
There is more info about Adhoc NetHostFS setup available at the unofficial iR Shell forums
located at http://www.irshell.org.
Important:
Adhoc NetHostFS via decrypted FW1.0 PRXs as described above is currently not possible under
FW3.71 M33 due to NID changes implemented by Sony in the newer firmwares.
7.2.4 Display Redirect via USBhostFS and RemoteJoy
iR Shell enables you to display all PSP screen contents on your PC monitor. It uses USBhostFS
and RemoteJoy (both originally by Tyranid) to achieve this.
The RemoteJoy implementation in iR Shell is about 99 per cent compatible and does not suffer
from the problems many of the other RemoteJoy modifications have. This means you will not
have any issues with Savegames not loading/saving, having to pull and replug the USB cable
at certain times and so on. Instead, it just works perfectly in either iR Shell EBOOT (1.5 or
2.x/3.x). Here's how to do it:
Preparations:
For all further steps, we will require a working USBhostFS connection. This means you will also
need to have the updated USBhostFS drivers for iR Shell installed. The current usbhostfs.exe
that comes with iR Shell is incompatible with other releases out there so be sure to use the
recommended files for iR Shell.
Please follow chapter 6.2.1 first and make sure that you can connect fine using USBhostFS.
Next you must launch iR Configurator and make sure that both "Non-MS Media Access" and
"Display Redirect to usbhost0" are set to "Enable" and save your changes.
Manual method:
First launch usbhostfs.exe on your PC. Then start remotejoy.exe with your preferred
commandline options such as "remotejoy.exe -c -d -r 0 -v". Finally choose "Toggle UsbhostFS"
in iR Shell to connect to the display. Now you can do whatever is possible with iR Shell and
display it on your screen including but not limited to displaying homebrew, UMD/ISO games,
PS1 games, the “launched” XMB, iR Shell itself and Sony demos on your PC Monitor.
Using RemoteJoy4iRS:
Copy RemoteJoy4iRS.exe to any folder and then launch it. At the first launch it will
extract some subfolders with the necessary files and also a folder structure to use with Host
Redirection. You're ready to go - just choose "Toggle USBhostFS" in iR Shell and you should
start to see your screen contents on your PC.
You can use the upper 4 buttons in the GUI to switch between windowed and fullscreen mode
with and without fps (frames per second) counter. The lower four buttons allow you to switch
between different modes for usbhostfs.exe. Get more info about RemoteJoy4iRS usage from

the readme.txt or the unofficial iR Shell forums.
Please note:
Please use "F12" to close the RemoteJoy window or return from Full Screen View (and not
"ESC" which will send iR Shell the Quick Exit command - similar to HOME+SQUARE).
Restrictions:
Please note the iR Shell background image (except for menu view) will be removed when an
application is loaded and you switch back to iR Shell under PSP Phat. PSP Slim & Lite will still
display the image.
7.2.5 2-Player PS1 Games via USBhostFS/NetHostFS
It is now possible to play 2-Player PS1 games with iR Shell using a PC with USBHostFS (and
optionally some joysticks). Enjoy all those great classics with your buddies again. If you wish
you can also show the PSP screen content on your PC monitor by using Remote Joy (see next
chapter).
To enable 2-Player support for PS1games open iR Configurator & set "POP 2 Player Support" to
either "1P: PSP, 2P: Host" or "1P: PSP/Host, 2P: Host" or "Adhoc Wi-Fi” (see next chapter).
"1P: PSP, 2P: Host"
Player 1 uses PSP keypad & Player 2 uses host keypad
redirection.
"1P: PSP/Host, 2P: Host"
Player 1 can use PSP Keypad & Host keypad redirection and
Player 2 uses Host keypad redirection.
"Adhoc Wi-Fi”
Player 1 uses PSP #1 and Player 2 uses PSP #2 to connect
wirelessly with each other (see next chapter).
Please also make sure "Redirect Keypad to Host:" is set to "Via usbhost0" or "Via nethost0" (or
even "Via usbhost0 or nethost0"), depending on which Host File System you would like to use.
Next, start nethostfs.exe or usbhostfs.exe on your Windows PC with any other command-line
parameters you require. If "1P: PSP/Host, 2P: Host" is set under Configurator, Player 1 will use
the PSP or PC Joypad 1 and Player 2 will use PC keyboard by default.
If you've two joypads on your PC, you can start nethostfs/usbhostfs with option "-j", this will
allow player 2 to also use a joypad. For nethostfs.exe you will also need to enable "-s" option.
You can assign joystick map files to use with "-1" and "-2" options. Please see chapters 6.2.1
and 6.2.2 for more details.
7.2.6 2-Player PS1 Games via Adhoc WiFi (2 PSPs required)
Currently, this feature isn't very stable. Games may lose synchronization during 2-Player
battle. Some games seem to work better than others, however. You may also try the same
game using different POP version and see if it helps. POP from firmware ver 3.52, 3.71 & 3.72
are not supported.
Supported POPS Versions for 2-Player Adhoc:
●
3.10 - 3.51 & 3.60 (You can choose these POPS versions under CFWs 3.52 M33-4, 3.60
M33 and 3.71 M33-3 when using Popsloader.
Usage Instructions:
●
Make sure both PSPs are using the same POP version.
●
To enable 2 Player Adhoc, goto iR Configurator and set "POP 2 Player Support" to "Adhoc
WiFi".
●
Choose the same PS1 game on both PSPs. Please note that this must be the exact same
game generated by the same popstation and must have the same Game ID.
●
You'll see the other player on the PSP screen. The one who initiates the connection request
will be the Client and the other will be the Server.
●
Once the Server confirms the connection request, the Server will send the PS1 game save
to the other PSP. This game save is important as different saves will not be able to sync. In
order to avoid overwriting with the original save on the Client PSP. iR Shell will rename your

original game save directory and prepend it with a "~". For example, your original save
directory is "SLPS12345" and it will be renamed as "~SLPS12345".
●
When you no longer wants to play Adhoc WiFi for the specific game, you can then delete
the new save and rename your original save back. If you don't care about your original
game save, you don't have to take any actions.
Limitations:
●
Make sure you don't press the HOME button while Adhoc is running. Doing so will result in
lose sync.
●
If you need to convert a game save to another POP version, do it before activating adhoc
mode. If you convert the game save under adhoc mode, it won't sync.
8. iR Configurator
The iR Configurator is the main configuration program for iR Shell's default settings. You can
launch the configurator from inside iR Shell with the button combination "R Trigger + START"

or by selecting its icon from Menu View.
8.1 Button Configuration:
Inside the iR Configurator, this button configuration is being used:
Up & Down (Digital Pad):
Choose setting to edit
Left & Right (Digital Pad):
For settings with multiple defaults you can use Left and
Right on the digital pad to choose other defaults or change
values
Cross:
Edit a setting if it requires entering text or choosing a
directory
Circle:
Save changes and exit iR Configurator
Triangle:
Exit iR Configurator without applying changes
When using DIR view to set paths for iR configurator options, please note the slightly different
button assingments: Circle enters a path, Cross selects the path in iR Configurator.
8.2 iR Configurator Options:
The following is a list of all iR Configurator settings and options with a short explanation of
what each does where necessary:
Devhook Launcher Ver:
0.4x, 0.5x - sets the version of DevHook to be used for the
"Launch DevHook" shortcut in Menu View and via shortcut.
DevHook does not work on FW 3.60 M33 or fw 3.71 mode
of 3.71M33. You can use fw 1.5 mode of 3.71 M33, though.
DevHook FW Dir for 0.4x:
ms0:/dh/271/ - sets the firmware folder to be used when
running DevHook 0.4x
UMD Mode:
UMD Required, OE No UMD Mode, M33 NoUMD Mode, Sony
NP9660 NoUMD Mode – set to whether to use No-UMD
mode or not for ISO launching. iR Shell overrides your
recovery menu setting and uses its own configuration.
POP Ver:
Flash, Use Popsloader Plugin – You can set if you would like
to use POPSloader when launching PS1 games from within
iR Shell or use the one from flash. It doesn't matter
whether you have POPSloader enabled or disabled in
recovery menu. iR Shell doesn't care about that setting in
recovery menu. You can still launch POPs via XMB with
the posloader plugin.
POP CPU Speed Override:
Default (333Mhz), Same as iR Shell – sets the default CPU
speed when running PS1 games from within iR Shell
Default CPU Speed:
222, 266, 333, 100 – sets the default bootup CPU speed in
general
Date Format:
Month/Day, Day/Month, Month.Day, Day.Month – sets the
way you would like the date to be displayed in iR Shell
Startup Splash:
Bitmap Image, PMF Movie, No Splash – sets the type of
startup splash, be it none, an image or a PMF Movie
Initial View:
Menu View, DIR MP3 View, DIR Shortcut View, SAV View,
DIR View, RDF View, APP View - sets the initial View Mode
to be used when iR Shell launches
Hide Save View:
Yes, No – allows you to hide Save View if you don't use it
Hide RDF View:
Yes, No – allows you to hide RDF View (infrared remote
control view) if you don't use it
Hide RDF Sub-directory:
Yes, No – allows you to hide any subfolders in RDF view
(infrared remote control view) if you have no use for them.
Slide Show Interval in Seconds (1-60):
5 – sets the interval between loading a new
image when running a slide show. Enter any number
representing seconds.
Initial JPG Viewer Scaling:
Original, Scale to fit, Fit to Width, Fill Screen – sets how to
scale JPG images if they don't fully fit the screen
PMF Movie Scaling:
Enable, Disable – sets, whether PMF movies should be
scaled when played

PSP Headphone Remote:
Disable, Always Enable, Enable Only Under iR Shell – allows
you to set if and when you would like the PSP's remote
control to work
MP3 Randon Start for
Enable, Disable – when enabled, you can use CIRCLE to
Single Dir Playback:
highlight a single MP3 directory and then press “R-Trigger+
CROSS” to start playback. The system will randomly pick
an mp3 file from that directory and start playback. Only the
first song will be picked at random, however, playback will
continue from the next song after the randomly picked one.
Default Mute Game Audio:
Enable, Disable – sets if Mute Game Audio should be
enabled by default
Mute Game Audio Type:
Mute while MP3 Active, Mute Always – sets when Mute
Game Audio actually mutes game audio, for example only if
an MP3 is played in iR Shell's mp3 player.
Eboot 1.0 Format Support for fw1.5:
Disable, Enable – enables support for 1.0
style EBOOTs in iR Shell so kxploit is not needed (applies to
FW 1.5 EBOOT of iR Shell)
Enable Music Button for Screen Capture:
Enable, Disable – allows you disable the
"Music" button for taking screenshots with iR Shell. This can
be useful if a game needs the "Music" button, for example.
A folder /PSP/PHOTO must exist on your memory stick for
the screen capture to work
__SCE__ Naming Support:
Disable, Enable – enables support for FW1.5 homebrew
named with the SCE naming convention to hide corrupted
icons
Skip Help Files Installation:
Yes, No – when installing a skin, this option will allow you
to skip installing the skin's help files i(maybe because you
use translated help images, for example).
Disable Analog Pad:
Analog Pad Disabled, Analog Pad Working - This will allow
you to disable the analog stick completely if you have
problems with it or it is broken.
Non-MS Media Access:
Disable, Enable – this setting basically enables or disables
the Host File Systems (USBhostFS and NetHostFS). Set this
to enabled if you would like to use either.
Redirect APP View to Host:
Enable, Disable – enable this setting if you would like to
have homebrew which is stored on your PC directly appear
in iR Shell's Application View when using host redirection.
Please note that you will need to have a cloned memory
stick folder layout in your host file system's shared root
folder for this to work.
Redirect Keypad to Host:
Via usbhost0, Via nethost0, Via usbhost0 or nethost0 –
enables or disables keypad redirection to the host PC via
the specified Host File System(s). You cannot use your PC
gamepad to control any PSP games via host file system if
you disable this setting in iR Configurator.
POP 2 Player Support:
Disable, 1P: PSP - 2P: Host, 1P: PSP/Host – 2P: Host,
Adhoc Wifi. Enable this if you would like to enable support
for a second joystick (or PSP) when playing PS1games
using USB/NethostFS or via Adhoc WiFi. The option “ 1P:
PSP - 2P: Host” will have Player1 controlling the game via
the PSP while Player2 uses the keyboard (or joystick1). The
option “ 1P: PSP/Host – 2P: Host” will allow player1 either
use the PSP or joystick1 while Player2 uses joystick2 or the
keyboard. The option “Adhoc WiFi” will allow you to play
the game against somebody with another PSP wirelessly.
Display Redirect to PC via usbhost0:
Disable, Enable – By enabling this option you
will be able to redirect the PSP display output to a PC
monitor using usbhostfs.exe and RemoteJoy (or the
RemoteJoy4iRS Gui package). See chapter 6.2.4 for more

details.
XMB Network for NetHost:
<your XMB WiFi connections> - use Left and Right on the
digital pad to choose which XMB WiFi connection you would
like to use for NetHostFS.
NetHost IP/Name (AP):
<your PC address IP or host name> - enter here the IP
address or host name of your PC when using infrastructure
NetHostFS.
NetHost IP (Adhoc):
<PC IP address when using Adhoc> - enter here the IP
address of your PC when using adhoc NetHostFS with your
PC. Most people will NOT need this ! Sorry, Adhoc
NetHostFS is not available under FW3.71 M33 due to
technical reasons.
NetHost Port:
7513 – you can set a different port to be used for
NetHostFS here. Do not change this if you don't know what
you are doing.
NetHost Password:
<type in password here> - you can set a password to be
used for NetHostFS communication between your PC and
your PSP here to make it a little more safe.
NetHost/UMD Compatibility:
Normal, Maximum – allows you choose a compatibility
mode for launching ISOs via NetHostFS. Maximum mode
provides best compatibility but does not allow you to play
MP3 in background, use Mute Game Audio functions and
also does not support WPA encryption. Switch to WEP
instead, if you would like to use Maximum Compatibility
mode with NetHostFS. This restriction does not apply to
PSP Slim & Lite.
Allow Adhoc PC Connection for Homebrew:
Enable, Disable – allows homebrew
apps to access iR Shell's own adhoc PC connection as if the
PSP were connected to an access point.
Homebrew Path:
ms0:/PSP/GAME – folder you store your homebrew in. APP
view will show the application stored in this path. Please
make sure that you run 1.5 homebrew only from within the
1.5 EBOOT of iR Shell and vice versa.
DIR Shortcut (L Trigger + Triangle):
ms0:/PSP/PHOTO/ - defines the folder to be
directly opened in Directory View when someone uses the
"L Trigger + Triangle" shortcut.
Homebrew#1 (Analog Right): here you can browse to an EBOOT which will be launched
when you move your analog stick to the right.
Homebrew#2 (R Trigger + Analog Left):
here you can browse to an EBOOT which will
be launched when you use the mentioned button combo.
Homebrew#3 (R Trigger + Analog Up):
here you can browse to an EBOOT which will
be launched when you use the mentioned button combo.
Homebrew#4 (R Trigger + Analog Right): here you can browse to an EBOOT which will
be launched when you use the mentioned button combo.
Homebrew#5 (R Trigger + Analog Down): here you can browse to an EBOOT which will
be launched when you use the mentioned button combo.
Default Alarm State:
Off, On – sets if the alarm state will be on or off by default
when you launch iR Shell
Default Alarm Clock (HHMM): 0000 – sets the default alarm time when arming the alarm
clock.
Alarm Repeat:
Enable, Disable – enables or disables repeating of the
alarm.
Alarm MP3 File:
ms0:/IRSHELL/SYSTEM/ALARM.MP3 – sets the MP3 file to
be used for the alarm. Turning off the alarm is the same as
stopping any other MP3.
Low Battery Warning Alarm:
Off, 3%, 5%, 10%, 15%, 20%, 25%, 30%, 35%, 40% -
sets the battery level threshold at which point you will get a
battery warning
Low Battery Warning Repeat: Enable, Disable – you can set if the battery warning should

be continuously repeated here. Turning off the alarm MP3 is
the same as stopping any other MP3.
Auto Sleep:
Disable, Auto, When No Background App Running – When
set to “Auto”, iR Shell will automatically go to Sleep/
Suspend mode when it's idle after the time you specify in
the next option. When set to “When No Background App is
Running” this will only happen if you have no other
homebrew, PSOne game or ISO/CSO backup running in the
background.
Sleep Mode will not be activated in the following scenarios:
•
AC Adapter is connected
•
NetHostFS or USBHostFS are active
•
Adhoc WiFi Transfer is active
•
USB mass storage is active
•
Slide Show is active
•
MP3 is playing
Auto Sleep (1-60 minutes):
You can set the idle time after which the PSP should be put
to sleep (or “suspend mode”) here. Press CROSS to change
the time.
Launching App Confirmation: Yes, No – sets if you will need to confirm launching any
homebrew applications from within iR Shell
Launching UMD Confirmation: Yes, No – sets if you will need to confirm launching any
UMDs from within iR Shell
Launching ISO Confirmation: Yes, No - sets if you will need to confirm launching any
ISOs from within iR Shell
Launching Shortcut Homebrew Confirmations:
Yes, No – sets if you will need to
confirm launching any homebrew that you started via a
shortcut.
APP/Save Icon Position:
Defined by Skin, Override by Configurator – sets if the
Application and Save icon positions will be defined by the
skin settings or the following settings in iR Configurator.
APP Icon State:
On Top/Initial On, On Top/Initial Hidden, Overlay with
Text/Initial On, Overlay with Text/Initial Hidden – sets if
and how to display the application's icon in iR Shell's
Application view.
APP Icon X Position (0-336): sets the X Position of the application icon if "APP/Save Icon
Position" is set to "Override by Configurator"
APP Icon Y Position (0-192): sets the Y Position of the application icon if "APP/Save Icon
Position" is set to "Override by Configurator"
Save Icon State:
On Top/Initial On, On Top/Initial Hidden, Overlay with
Text/Initial On, Overlay with Text/Initial Hidden - sets if and
how to display game save icon in iR Shell's Game Save
view.
Save Icon X Position (0-336): sets the X Position of the game save icon if "APP/Save Icon
Position" is set to "Override by Configurator"
Save Icon Y Position (0-192): sets the Y Position of the game save icon if "APP/Save Icon
Position" is set to "Override by Configurator"
External Plugin Suffix:
PMF
APP#: 1
External Plugin Suffix:
AVC
APP#: 2
(...)
This is the plugin setup for external ("EBOOT") and internal ("special PRX") plugins. The
supported file extensions are listed under "External Plugin Suffix" for each iR Shell EBOOT
version respectively. Each supported firmware mode (1.5, 2.71 or 3.xx) has it's own plugins,
too.
External plugins are located at /IRSHELL/EXTAPP15/ for FW1.5, /IRSHELL/EXTAPP2X/
for FW2.71 and /IRSHELL/EXTAPP3X/ for FW3.xx mode respectively.

Internal (special PRX) plugins are always located at /IRSHELL/PRXPLUGIN/. Instead of
using folders to differentiate between different firmware modes, there may be multiple PRX
files for each mode inside a single folder or the plugin supports multiple firmwares.
Each of these folders has subfolder such as APP1, APP2 etc. which contain the actual plugins
for that firmware mode. The "APP#" setting in iR Configurator from above controls which of
these APP folders will be used for the plugin integration. So, the external PMF plugin for
FW3.xx EBOOT of iR Shell can be found it /IRSHELL/EXTAPP3X/APP3/.
If you would like to assign an internal plugin to a file extension instead then choose "PRX
Plugin x" (where "x" is a number between 1 and 5 that corresponds with the subfolders APP1
to APP5 in /IRSHELL/PRXPLUGIN/).
Context Menu 1:
MT-Viewer
APP#: PRX Plugin 1
Context Menu 2:
View
APP#: 5
Context Menu 3:
Edit
APP#: 20
(...)
This is the Context Menu setup. The Context Menu System is very similar to the exiting
Plugin system. They both share the same external plugins in ms0:/IRSHELL/EXTAPPxxx
directories (xxx = corresponds to the iR Shell firmware EBOOT for which the extension is
designed) and the Context Menu also supports internal ("special PRX") plugins located in
/IRSHELL/PRXPLUGIN/.
The main difference is that the content menu doesn't rely on the file extension and will always
be available to all types of files. You can have a maximum of 5 context menu items and they
can be customized here under iR Configurator. Please note that the START key will act as a
Context Menu key only when under DIR view with the highlighting cursor over a normal file.
In all other circumstances, the START key will act as the HELP key.
Password Mode:
Off, iR Shell Startup – sets if iR Shell startup should be
protected by a password.
File Manipulation:
No Password, Password protected – allows you to also
protect any file manipulation with a password
Configurator:
No Password, Password protected – allows you to protect iR
Configurator with a password to protect iR Shell from any
unwanted changes made by others.
Change Password
<enter new password> - use this to enter a new password.
Skin Browser
choose this option to run the iR Configurator. It has it's own
on-screen help.
Save Changes & Return to iR Shell
use this to save your changes and exit iR
Configurator
Cancel Changes & Return to iR Shell use this to cancel your changes and exit iR
Configurator.

9. Running Demos, Backups and Homebrew
Launching Sony demos, homebrew applications and backups of any kind (PSP ISOs, UMD
Video ISOs, PS1 games) is very easy with iR Shell. You can either select them in APP view (for
homebrew and Sony demos) or you can run them from Directory View.
Launching any application should work regardless of where it is stored – be it the PSP's
memory stick or your PC's harddrive via USBhostFS or NetHostFS. You can multi-task between
iR Shell and the launched Demo/Backup/homebrew by using the system-wide hotkey "L
Trigger + Select". That way you can use other iR Shell functions like the file browser or Mute
Game Audio after you have already launched the application.
9.1 Running homebrew:
Running homebrew is very simple. Either select it in APP view or launch the EBOOT.PBP from
Directory View. Homebrew may either be on your memory stick or available via Host File
System such as USBhostFS or NetHostFS. Homebrew may also be launched from the XMB after
using "Launch XMB".
Please also note that you can only launch homebrew coded for FW1.5 in the FW1.5 EBOOT of
iR Shell. For the same reason you can only launch official Sony demos from within the FW3.xx
EBOOT of iR Shell. Please set your homebrew path accordingly for each iR Shell EBOOT version
in it's respective iR Configurator. A recommendation would be to set the Homebrew path
to /PSP/GAME150/ for the FW1.5 EBOOT of iR Shell in iR Configurator. On FW 3.71 you will
need to have the 1.5 kernel addon installed to use the 1.5 EBOOT of iR Shell and 1.5
homebrw. PSP Slim & Lite does not support 1.5 kernel at all, so 1.5 EBOOT of iR Shell also
won't work.
If you have problems with some homebrew then try enabling host redirection for those
problem cases. However, try to avoid host redirection where possible.
9.2 Running official Sony demos:
Running official Sony demos is very similar to launching homebrew. You must make sure,
however, that the Sony demo resides in /PSP/GAME/ and that you have GAME set to use 3.xx
kernel. Furthermore, you can only launch Sony demos from the 3.xx EBOOT of iR Shell.
9.3 Running PSP ISO Backups:
To launch a PSP ISO simply select the desired ISO or CSO file in Directory View and launch it.
The ISO/CSO files may either be on your memory stick or available via Host File System such
as USBhostFS or NetHostFS. If you're launching an ISO/CSO via USBHostFS or NetHostFS,
make sure you do NOT enable host redirection. Host redirection is only designed for
homebrews, not ISOs ! Also do NOT "Launch XMB" and then run the ISO. Launch it from
Directory View as intended. The ISO Backup capability is based on OE/M33 firmwares.
Please note that when launching an ISO from inside the 1.5 EBOOT of iR Shell, you will only be
able to launch ISOs that do not require a higher firmware. Switch to the 3.xx EBOOT of iR

Shell for newer ISO. Also, do not use redirection when running ISO/CSO files via Host File
System.
9.4 Running PS1 games:
PS1 games may be run from Application View and Directory view in the 3.xx EBOOT of iR
Shell. PS1 games won't work when launched from 1.5. PS1 games may either be on your
memory stick or available via Host File System such as USBhostFS or NetHostFS. PS1 games
may also be launched from the XMB after using "Launch XMB". Ability to launch PS1 games
are based on OE/M33 firmwares.
9.5 Running UMD Video ISO Backups:
iR Shell's 2.xx/3.xx EBOOT can now use M33's Video UMD ISO support (since 3.52 M33-3) to
play Video UMD ISOs, additionally to the still possible "old" method via 1.5 EBOOT and a 1.5
firmware dump.
To allow UMD Video autostart from 2.xx/3.xx iR Shell file browser, make sure "UMD Auto-
Start" under XMB System Settings is set to "On". To disable auto UMD start upon PSP power-
on, set "Skip Sony logo" to "Enabled" under M33 Recovery Menu. Same as when using the
“old” method with 1.5 EBOOT, you'll need to name your video iso with extension ".umv", not
".iso".
Be careful: There is a chance of bricking your PSP when changing XMB UMD Auto-Start
setting or other system settings under M33 3.71. There is a bug in M33 3.71 which may brick
your PSP when modifying system settings. It's been said that you can avoid bricking by choose
"System Defaults" in XMB but it's not confirmed. Make sure you've a Pandora's battery before
messing around with system settings. To be on the safe side, everyone should upgrade to 3.71
M33-3 to avoid possible brickage.
In order to run UMD Video ISOs under 1.5 EBOOT (“old method”), you will need a full FW1.50
dump for DevHook (including flash1) on your memory stick in /DH/150/ folder. Next, rename
your UMD Video .ISO to .UMV and put it on your memory stick, too. You can then launch the
UMD Video ISO Backup by selecting the .UMV in Directory View. Exit the emulated XMB by
pressing HOME+SQUARE. Playing UMD Video ISO backups is based on Dark_AleX's version of
UMD Emulator.

10. iR Shell Directory Structure
This section of the manual will explain the iR Shell folders on your memory stick to you, so you
always know what you are working on.
10.1 IRSHELL Folder:
/IRSHELL/BIN
contains all iR Shell binary program modules.
/IRSHELL/CFG15
contains iR Shell configuration files for fw 1.5.
/IRSHELL/CFG2X
contains iR Shell configuration files for fw 2.71.
/IRSHELL/CFG3X
contains iR Shell configuration files for fw 3.xx.
Since iR Shell can now run under fw 1.5, 2.71 and 3.xx PSPs, you can choose to have a
common configuration for all firmware versions or use different configuration for fw 1.5 and
2.71 and 3.xx respectively.
To use a common configuration for both fw 1.5 & 2.71, define a directory "/IRSHELL/CFG":
/IRSHELL/CFG contains your iR Shell configuration files.
If "/IRSHELL/CFG" is not present, iR Shell will assume you would want to have 2 different
configurations for fw 1.5 and 2.71.
NOTE:
Make sure you only use one of the configuration options. If you've CFG, CFG15, CFG2X &
CFG3X together, iR Shell will only use CFG. The included archive provides default configuration
for CFG15, CFG2X & CFG3X. If you want to have a common configuration, delete CFG2X and
CFG3X and rename CFG15 to CFG.
/IRSHELL/CLEANUP
contains a Windows script which helps you find and delete
iR Shell files you don't need prior to installation.
/IRSHELL/EXTAPP15
external plugin modules for firmware 1.5
/IRSHELL/EXTAPP2X
external plugin modules for firmware 2.71
/IRSHELL/EXTAPP3X
external plugin modules for firmware 3.xx
Each EXTAPP folder contains APP folders numbered from 1-20. These refer to the plugin
number you can set under "APP#" in iR Configurator for the respective file extension.
/IRSHELL/HOMEBREW15
shortcut apps for firmware 1.5
/IRSHELL/HOMEBREW2X
shortcut apps for firmware 2.71
/IRSHELL/HOMEBREW3X
shortcut apps for firmware 3.xx
Each HOMEBREW folder contains the folders RDOWN, RIGHT, RLEFT, RRIGHT and RUP.
These refer to the shortcut apps available in iR Shell. Any file you place in the RIGHT folder
will be launched as soon as you move the analog stick to the RIGHT. The remaining shortcut
folders with an additional "R" in the front of the folder name refer to the shortcut apps
available via RIGHT TRIGGER + ANALOG PAD (in all four directions). Refer to chapter 5 for
a list of the button configuration in iR Shell including the shortcut apps.
/IRSHELL/IRCODES
Infra-Red Universal Remote Code database.
Needs to be installed from a separate archive

protocodes13.zip, or you can move your code database
over from your old installation.
/IRSHELL/PATCH
Contains the UMD/ISO compatibility patches you should
apply during installation. Please refer to the installation
instructions for more information.
/IRSHELL/PRXPLUGIN
Contains subfolders for internal (multi-tasking) PRX plugin
integration. You can choose these instead of the external or
context menu plugins in iR Configurator instead.
/IRSHELL/SKINS
Skins directory. iR Shell 3.8 doesn't come with any
additional skins by default anymore. Please download the
separately available skin pack to install them instead.
/IRSHELL/SYSTEM
system files and some special tools from 3rd party.
Decrypted WLAN PRXs for Adhoc NetHostFS and infrared
usage under FW3.71 M33 also go here.
10.2 SEPLUGINS Folder:
Copy this folder to the root of your memory stick and enable the plugin in recovery mode:
/seplugins/irsautoboot.prx
Autoboot PRX for iR Shell. Also necessary in order to quickly
switch between 3.xx EBOOT and 1.5 EBOOT of iR Shell.
/seplugins/vsh.txt
Necessary VSH.TXT file in order to be able to enable the
Autoboot PRX plugin to be enabled in recovery menu.
10.3 PSP Folder:
Please note that your iR Shell installation archive came with a PSP folder that contains three
folders: GAME150, GAME271 and GAME352. The GAME150 folder contains the iR Shell
EBOOT for FW1.5, the GAME271 folder contains the FW2.x EBOOT (for DevHook emulation
and HenD users) and the GAME351 folder contains the iR Shell EBOOT for FW3.xx kernel (and
previous SE/OE firmwares). If you ran the CleanUp script then you may not have these folders:
/PSP/GAME150/irshell150
contains the FW 1.5 EBOOT of iR Shell
/PSP/GAME150/irshell150% also contains the FW1.5 EBOOT of iR Shell
/PSP/GAME352/irshell2x3x
contains the FW2.x/FW3.x EBOOT of iR Shell for custom
firmwares SE, OE and M33 (except 3.30 OE)
10.4 DEVHOOK folder (optional – PHAT ONLY):
This folder contains the necessary modification to make DevHook work with iR Shell. Please
refer to chapter 10 for more info about this. No further file details are given.
/dh/05/kd/usbhostfs.prx
/dh/05/kd/vshex.prx
/dh/271/flash0/kd/pspbtcnf.txt
/dh/271/flash0/kd/pspbtcnf_game.txt
/dh/303/CFG/pspbtcnf_dh.txt
/dh/303/CFG/pspbtcnf_game_dh.txt
/dh/kd/devhook.prx
/dh/kd/msreboot.bin
/dh/kd/systemctrl_dh.prx
/dh/kd/umdciso.prx
/dh/kd/usbhostfs.prx
/dh/kd/vshex.prx
Please note: DevHook does not work under FW3.71 M33. This is due to changes implemented
by Sony and not an iR Shell bug.
10.5 3rd Party Files:
These are files that are not included with the iR Shell distribution archive by default. You will
need to obtain these files from other places and put them in the correct folders for yourself.

All of these files are optional and most iR Shell functionality will work. Some functions,
however, require you to have these files. Refer to the various feature descriptions to see if you
need these files.
/IRSHELL/SYSTEM/IFHANDLE.prx
/IRSHELL/SYSTEM/pspnet.prx
/IRSHELL/SYSTEM/pspnet_apctl.prx
/IRSHELL/SYSTEM/pspnet_inet.prx
/IRSHELL/SYSTEM/pspnet_resolver.prx
These are the fw 1.0 Network Modules required for adhoc PC connection. These files are Sony
copyright materials and are not included in this distribution, they need to be decrypted in order
to be used with iR Shell. You don't need these files if you only use Infrastructure NetHostFS PC
connection like most people do. Adhoc NetHostFs will NOT work under 3.71 M33 and 3.60 M33.
/IRSHELL/SYSTEM/wlan15.prx
Firmware 1.5 Network Module (renamed from wlan.prx !) required for adhoc PC connection
under FW3.xx. This file is also by Sony and not included in this distribution. You will need to
decrypt this file in order to be used with iR Shell. You don't need this file if you only use
Infrastructure NetHostFS PC connection like most people do. AdHoc NetHostFS will not work
under 3.71 M33 and 3.60 M33.
/IRSHELL/SYSTEM/sircs.prx
Firmware 3.52 infrared module required in order to use the infrared remote control feature
under FW3.71 M33. You will need to get this module from a 3.52 firmware dump and decrypt
it. Use M33's Psardumper with the decrypt option (SQUARE) to dump it. Infrared will still not
work on the PSP Slim & Lite, however.
/dh/150/
To be able to launch FW1.5 XMB and use the Video UMD ISO playback function, you'll need to
have a complete firmware 1.5 dump for DevHook 0.4x under ms0:/dh/150 directory. This is
because SE/OE/M33 only has a subset of 1.5 firmware files. the firmware files for launching
XMB are not present. Launching DevHook is not possible under FW 3.71. Under PSP Slim & Lite
it is additionally not possible to launch 1.5 XMB.
DevHook 0.46 and DevHook 0.52 including firmware dumps
DevHook is purely optional. If you wish to use it then you must first install it with some
firmware dumps. Refer to the next section on how to set up DevHook for use with iR Shell.
DevHook does not work under FW 3.60 M33 (Slim & Lite only) or FW 3.71 M33 (Slim & Lite or
Phat).
11. DevHook Setup (optional – PHAT ONLY)
If you would still like to use DevHook firmware emulation for whatever reason, then please
follow the following procedure. Afterwards, when using "Launch DevHook" from iR Shell, you
can choose to start a UMD with iR Shell in the background. You may also launch any ISO from
Application view and you will be given a chance to load it with DevHook, too. You can specify
the DevHook version to use (0.46 or 0.52) in iR Configurator.
The included archive contains modded versions of devhook 0.46 and 0.52 which have the
game exit key changed from Right-Trigger+Left-Trigger to Left-Trigger only.
Please note that you do NOT need to completely set up DevHook in order to use the Video
UMD ISO playback or "Launch XMB" in 1.5 EBOOT functions. You simply need a full FW1.5
dump (including flash1) present but not the actual DevHook installation.
Important:
DevHook does not work under FW3.71 M33 due to changes implemented by
Sony. This is not an iR Shell bug.
11.1 Install DevHook 0.46 and 0.52:

It is out of the scope of this manual to explain how to install DevHook and the necessary
firmware files in order to use this function in iR Shell. Simply follow some installation
instructions which can be found in all the various PSP forums. In order to use 1.5 firmware files
you will need DevHook 0.46 and for the last supported firmware (3.03) you will need DevHook
0.52.0100. It is recommended that you install both and also create the necessary firmware
dumps for FW1.5 and FW3.03. If you have problems emulating FW1.5 then try replacing the
vshex.prx with the one from Dark_AleX's 1.5 POC custom firmware.
11.2 Install modified DevHook files for iR Shell:
Copy the contents of /devhook/ to the root of your memory stick, effectively replacing some
files in the ms0:/dh/ folder. The archive contains the modded files for both DevHook 0.46 and
DevHook 0.52. You should now be able to use DevHook from within iR Shell provided you did
everything correctly.
12. Using HTML plugin as Webbrowser
(optional)
iR Shell's FW2.71 and FW3.xx EBOOTs come with a HTM/HTML plugin by Dark_AleX which uses
Sony's XMB browser. You can also use this plugin as a shortcut app and have instant access to
a webbrowser that way. The webbrowser will establish the network connection for you. Please
note that you cannot run NetHostFS and the Webbrowser at the same time. To exit the web
browser press HOME+SQUARE. You can also multi-task with the webbrowser while listening to
music in iR Shell in the background this way.
12.1 Copy Webbrowser EBOOT to Shortcut folder
In order to use Dark_AleX's HTML plugin as a webbrowser you will need to copy it to a shortcut
folder for iR Shell.
In order to do this copy the EBOOT.PBP from /IRSHELL/EXTAPP3X/APP6/ to
/IRSHELL/HOMEBREW3X/RIGHT/. This will set up the browser to be launched as soon as
you move the analog stick to the right when running FW3.xx iR Shell.
If you would like to use a different shortcut combo such as "Right Trigger + Analog Up" then
please refer to chapter 9 for more information.
Please note: This special iR Shell release already comes with preconfigured Webbrowser
mapped to Analog Right on your PSP. It will load the unofficial support forums located at
ww.irshell.org for your convenience.
13. Using POPSloader with iR Shell (optional)
iR Shell now supports M33 POPSloader for launching PS1 games with older versions of the
Sony PS1 emulator. This is especially useful when wanting to use the new 2-Player PSOne
Games via Adhoc WiFi feature. To use POPSloader please open the iR Configurator of iR Shell's
3.xx EBOOT and change "Pop Ver" from "Flash" to "Use Popsloader Plugin". Then install
POPSloader and the required PRXs as you usually would. Upon next launch of a PS1 game from
within iR Shell you will be asked which POPS version you would like to use.
Please note: POPSloader for FW3.71 currently only works in FW3.71 M33-3. PSP Slim users
may either use FW3.60 M33 or FW3.71 M33-3 if they would like to use POPSloader. Older
CFWs such as 3.52, 3.40 and so on are also still supported, of course. Follow the instructions
to install POPSloader for FW3.71 M33-3 or your custom firmware and acquire the necessary
POPS files. You do NOT need to enable the plugin in your PSP's recovery menu. iR Shell's uses
POPSloader independently of your recovery menu settings.
14. Turning the LED lights on/off (optional)

If you have ever been annoyed by the memory stick or any of other LED light constantly
flashing while watching videos, then this new option is especially for you:
●
Press R-Trigger + Vol- to switch off LEDs.
●
Press R-Trigger + Vol+ to return back to normal.
The orange power charging LED isn't affected by this setting at all.
15. Technical Info about TV-Out
(PSP Slim only)
TV out is only possible via Sony's component AV cable (only for Pb/Pr). Please note that the
composite AV cable is not supported. To toggle between TV-Out & PSP LCD, press "Left
Trigger + Right".
When you put PSP to sleep mode or use Auto Sleep, TV Out will be turned off automatically.
When you wakeup the PSP, you can turn on TV out again. You can also turn on/off TV out even
if a game/app is running. There are some restrictions when XMB is loaded under iR Shell. iR
Shell wouldn't allow you to turn-off TV out if XMB is in background. Allowing you to do so will
screw up the XMB resolution. You also shouldn't use "Switch Video Output" option under XMB
after launching XMB from iR Shell, as iR Shell will lose track of the current TV-Out mode.

16. Technical Info for PRX Plugin
Programmers
iR Shell PRX Plugin Requirements:
●
You'll only have 50KB memory space to work on the plugin. This includes code & data
segement. Stack is not included and will share the one from iR Shell. However, care
should be taken not to over use the stack.
●
Needs to be a kernel mode PRX only. User mode not supported.
●
Standard memory allocation functions, like malloc, sceKernelAllocPartitionMemory can't
be used. Remember we've working on a very tight memory footprint. Of course, you
can have your own memory management functions to tingle within those 50KB of
memory space.
●
GU shouldn't be used. You can use the Primitive Graphics lib (or mods) by Nem which
can be found in Hello World.
The PRX Plugin will need to provide these 3
APIs
as exported functions:
int pluginMain(const char *filename, int *param1) // main entry point which iR Shell will
// call to start the plugin
input param: filename
This is the file selected by user via iR Shell file browser.
input/output param: param1
This parameter allows the plugin to save an integer value for the specific filename. If user
chooses to launch the plugin on the same file, iR Shell will pass the saved value from last exit.
If it's a new file, the integer value will always be zero.
return 0 for normal exit and
< 0 for error, if any.
void pluginSuspend()
// iR Shell will call this function when
// the system is being put into
// suspend mode.
void pluginResume()
// iR Shell will call this one when the
// system is waking up.
Sample exports.exp file for a PRX plugin:
# Define the exports for the prx
PSP_BEGIN_EXPORTS
# These four lines are mandatory (although you can add other functions like module_stop)
# syslib is a psynonym for the single mandatory export.
PSP_EXPORT_START(syslib, 0, 0x8000)
PSP_EXPORT_FUNC(module_start)
PSP_EXPORT_VAR(module_info)

PSP_EXPORT_END
PSP_EXPORT_START(irsplugin, 0, 0x0001)
PSP_EXPORT_FUNC(pluginMain)
PSP_EXPORT_FUNC(pluginSuspend)
PSP_EXPORT_FUNC(pluginResume)
PSP_EXPORT_END
PSP_END_EXPORTS
All program logic should be provided in pluginMain. It's suggested the module_start just
simply return 0.
Within the main loop, use irsGetPad() to read keypads instead of the standard
sceCtrlReadBufferPositive.
Handle these two keys in the plugin:
TRIANGLE:
cleanup resources and then return back to iR Shell. iR Shell will
then unload your module from memory.
LTRIGGER + SELECT:
call irsSwitchApp() to switch to background app.
These APIs are provided by iR Shell:
int irsGetPad(void)
// returns the keypad button pressed
void irsSwitchApp(void) // switches to background app if present
iR Shell exported function stub (irshell.S):
.set noreorder
#include "pspstub.s"
STUB_START "irshell",0x00090000,0x00020005
STUB_FUNC 0x9C575BB0,irsGetPad
STUB_FUNC 0x9E272C4D,irsSwitchApp
STUB_END
One the PRX Plugin is completed, you can place it under /IRSHELL/PRXPLUGIN/APP#.
There can be a maximum of 5 PRX Plugins and they can be configured under iR Configurator.
Just use the External Plugin or Context Menu section to define the PRX Plugin. The "APP #"
field allows you to choose normal External Plugin or PRX Plugin.

This manual was last updated by StoneCut on November, 20
th
2007. It may contain
errors but I hope that it proves useful to you. Please also refer to the FAQ document
for any further questions you may have.
Many thanks also to beelzebub06660 and AhMan for their help in updating the
documentation.
Wyszukiwarka
Podobne podstrony:
iR Shell 3 9 User Guide
iR Shell 3 9 User Guide
FX2N 422 BD User's Guide JY992D66101
NoteWorthy Composer 2 1 User Guide
BlackBerry 8820 User Guide Manual (EN)
intel fortran user guide 2
06 User Guide for Artlantis Studio and Artlantis Render Export Add ons
Flash Lite User Guide Q6J2VKS3J Nieznany
Active HDL 63SE User Guide
ACCU Check compact user guide products
Proc SQL User's Guide
01 vpuml user guide
01 bpva user guide
arduino mini user guide id 6826 Nieznany (2)
cinestyle profile user guide v1 Nieznany
ANSYS LS Dyna User's Guide
AE CS3 USER GUIDE EPIC TRAILER TEMPLATE
więcej podobnych podstron