
http://www.instructables.com/id/How-to-Silk-Screen/
How to Silk Screen
on July 5, 2006
Table of Contents
.
.
.
.
.
.
.
.
.
.
.
.
.
.
.
.
.
.
.
.
.
.
.
.
.
.
.
.
.
.
.
.
.
.
.
.
.
.
.
.
.
.
.
.
.
.
.
.
.
.
.
.
.
.
.
.
.
.
.
.
.
.
.
.
.
.
.
.
.
.
.
.
.
.
.
.
.
.
.
.
.
.
.
.
.
.
.
.
.
.
.
.
.
.
.
.
.
.
.
.
.
.
.
.
.
.
.
.
.
.
.
.
.
.
.
.
.
.
.
.
.
.
.
.
.
.
.
.
.
.
.
.
.
.
.
.
.
.
.
.
.
.
.
.
.
.
.
.
.
.
.
.
.
.
.
.
.
.
.
.
.
.
.
.
.
.
.
.
.
.
.
.
.
.
.
.
.
.
.
.
.
.
.
.
.
.
.
.
.
.
.
.
.
.
.
.
.
.
.
.
.
.
.
.
.
.
.
.
.
.
.
.
.
.
.
.
.
.
.
.
.
.
.
.
.
.
.
.
.
.
.
.
.
.
.
.
.
.
.
.
.
.
.
.
.
.
.
.
.
.
.
.
.
.
.
.
.
.
.
.
.
.
.
.
.
.
.
.
.
.
.
.
.
.
.
.
.
.
.
.
.
.
.
.
.
.
.
.
.
.
.
.
.
.
.
.
.
.
.
.
.
.
.
.
.
.
.
.
.
.
.
.
.
.
.
.
.
.
.
.
.
.
.
.
.
.
.
.
.
.
.
.
.
.
.
.
.
.
.
.
.
.
.
.
.
.
.
.
.
.
.
.
.
.
.
.
.
.
.
.
.
.
.
.
.
.
.
.
.
.
.
.
.
.
.
.
.
.
.
.
.
.
.
.
.
.
.
.
.
.
.
.
.
.
.
.
.
.
.
.
.
.
.
.
.
.
.
.
.
.
.
.
.
.
.
.
.
.
.
.
.
.
.
.
.
.
.
.
.
.
.
.
.
.
.
.
.
.
.
.
.
.
.
.
.
.
.
.
.
.
.
.
.
.
.
.
.
.
.
.
.
.
.
.
.
.
.
.
.
.
.
.
.
.
.
.
.
.
.
.
.
.
.
.
.
.
.
.
.
.
.
.
.
.
.
.
.
.
.
.
.
.
.
.
.
.
.
.
.
.
.
.
.
.
.
.
.
.
.
.
.
.
.
.
.
.
.
.
.
.
.
.
.
.
.
.
.
.
.
.
.
.
.
.
.
.
.
.
.
.
.
.
.
.
.
.
.
.
.
.
.
.
.
.
.
.
.
.
.
.
.
.
.
.
.
.
.
.
.
.
.
.
.
.
.
.
.
.
.
.
.
.
.
.
.
.
.
.
.
.
.
.
.
.
.
.
.
.
.
.
.
.
.
.
.
.
.
.
.
.
.
.
.
.
.
.
.
.
.
.
.
.
.
.
.
.
.
.
.
.
.
.
.
.
.
.
.
.
.
.
.
.
.
.
.
.
.
.
.
.
.
.
.
.
.
.
.
.
.
.
.
.
.
.
.
.
.
.
.
.
.
.
.
.
.
.
.
.
.
.
.
.
.
.
.
.
.
.
.
.
.
.
.
.
.
.
.
.
.
.
.
.
.
.
.
.
.
.
.
.
.
.
.
.
.
.
.
.
.
.
.
.
.
.
.
.
.
.
.
.
.
.
.
.
.
.
.
.
.
.
.
.
.
.
.
.
.
.
.
.
.
.
.
.
.
.
.
.
.
.
.
.
.
.
.
.
.
.
.
.
.
.
.
.
.
.
.
.
.
.
.
.
.
.
.
.
.
.
.
.
.
.
.
.
.
.
.
.
.
.
.
.
.
.
.
.
.
.
.
.
.
.
.
.
.
.
.
.
.
.
.
.
.
.
.
.
.
.
.
.
.
.
.
.
.
.
.
.
.
.
.
.
.
.
.
.
.
.
.
.
.
.
.
.
.
.
.
.
.
.
.
.
.
.
.
.
.
.
.
.
.
.
.
.
.
.
.
.
.
.
.
.
.
.
.
.
.
.
.
.
.
.
.
.
.
.
.
.
.
.
.
.
.
.
.
.
.
.
.
.
.
.
.
.
.
.
.
.
.
.
.
.
.
.
.
.
.
.
.
.
.
.
.
.
.
.
.
.
.
.
.
.
.
.
.
.
.
.
.
.
.
.
.
.
.
.
.
.
.
.
.
.
.
.
.
.
.
.
.
.
.
.
.
.
.
.
.
.
.
.
.
.
.
.
.
.
.
.
.
.
.
.
.
.
.
.
.
.
.
.
.
.
.
.
.
.
.
.
.
.
.
.
.
.
.
.
.
.
.
.
.
.
.
.
.
.
.
.
.
.
.
.
.
.
.
.
.
.
.
.
.
.
.
.
.
.
.
.
.
.
.
.
.
.
.
.
.
.
.
.
.
.
.
.
.
.
.
.
.
.
.
.
.
.
.
.
.
.
.
.
.
.
.
.
.
.
.
.
.
.
.
.
.
.
.
.
.
.
.
.
.
.
.
.
.
.
.
.
.
.
.
.
.
.
.
.
.
.
.
.
.
.
.
.
.
.
.
.
.
.
.
.
.
.
.
.
.
.
.
.
.
.
.
.
.
.
.
.
.
.
.
.
.
.
.
.
.
.
.
.
.
.
.
.
.
.
.
.
.
.
.
.
.
.
.
.
.
.
.
.
.
.
.
.
.
.
.
.
.
.
.
.
.
.
.
.
.
.
.
.
.
.
.
.
.
.
.
.
.
.
.
.
.
.
.
.
.
.
.
.
.
.
.
.
.
.
.
.
.
.
.
.
.
.
.
.
.
.
.
.
.
.
.
.
.
.
.
.
.
.
.
.
.
.
.
.
.
.
.
.
.
.
.
.
.
.
.
.
.
.
.
.
.
http://www.instructables.com/id/How-to-Silk-Screen/
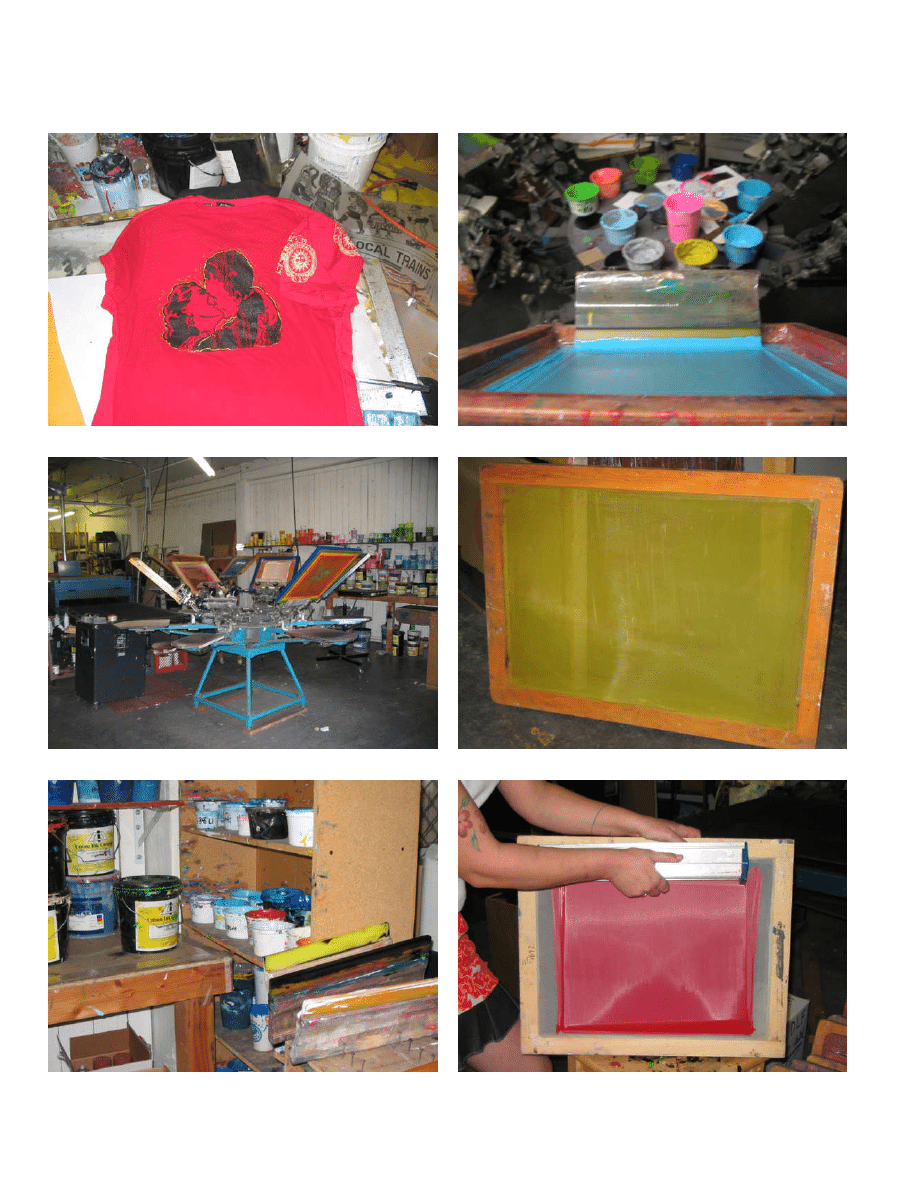
intro:
How to Silk Screen
Courtesy of Megan Overman
Supplies:
Clean screen, Squeegee, Emulsion, Ink, Ttransparency (film) of image desired
http://www.instructables.com/id/How-to-Silk-Screen/
http://www.instructables.com/id/How-to-Silk-Screen/
http://www.instructables.com/id/How-to-Silk-Screen/
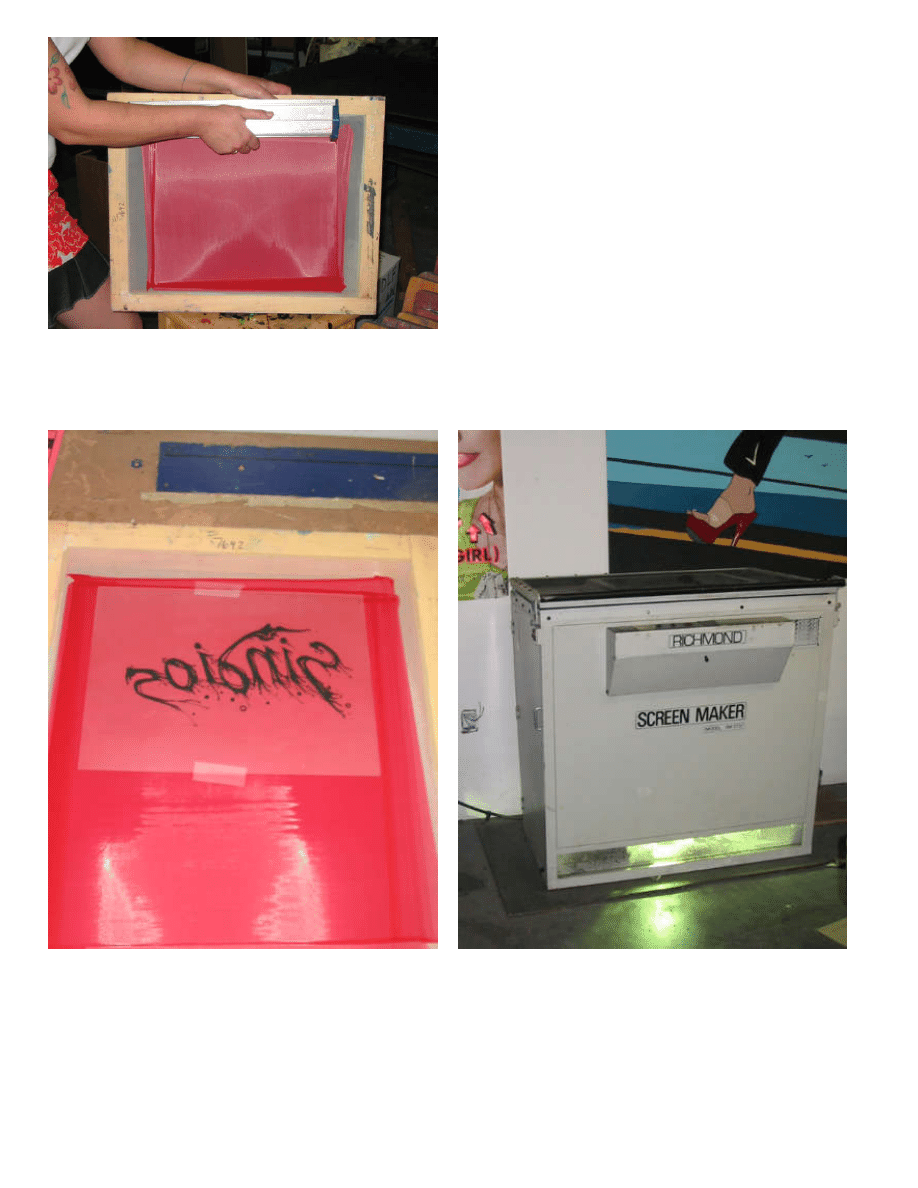
step 1:
Coat screen
Coat screen with photo sensitive emulsion. This should be done in an area not well lit and while emulsion is drying keep screen out of light.
http://www.instructables.com/id/How-to-Silk-Screen/
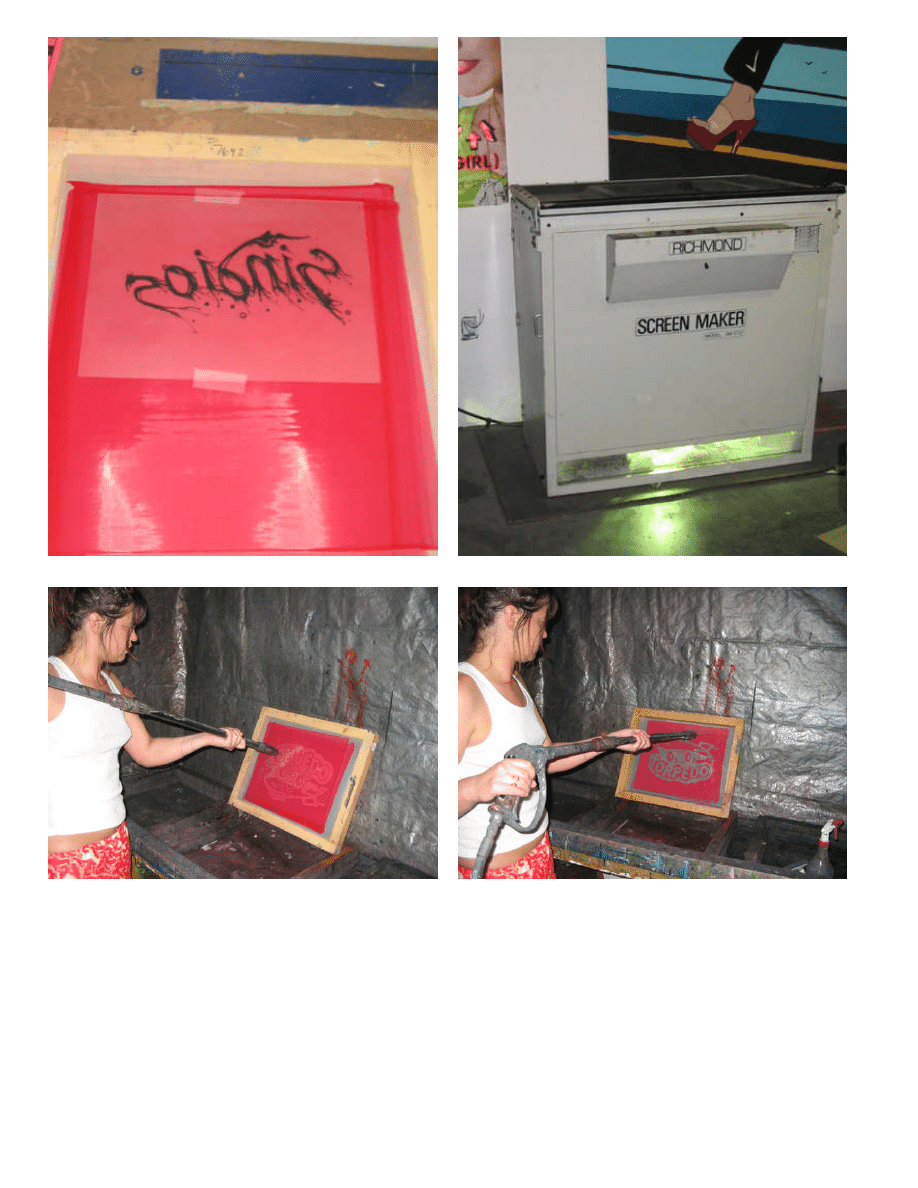
step 2:
Burn Screen
Take transparency and place on outside of screen, right side down, with clear tape. Locations on screen vary due to placement on textile. Place screen in exposure unit
or in direct light to expose emulsion.
http://www.instructables.com/id/How-to-Silk-Screen/
step 3:
Rinse Out Image
After emulsion has been exposed, remove transparency and take to wash out sink. Here gently rinse out entire screen- the emulsion where the image was will completely
wash away as well as any excess emulsion that could run into image while drying. After rinse set screen aside to dry.
step 4:
Tape Up Screen
Clear packing tape works best to go around the inside of screen to prevent ink from running into edges of screen which would go through and to preserve screens. At this
time pin-holing is also done. Pin holing is carefully checking the screen for specs in the screen where emulsion was missed or washed out and is not part of image. Cover
pin holes via block out, tape or emulsion pen.
http://www.instructables.com/id/How-to-Silk-Screen/
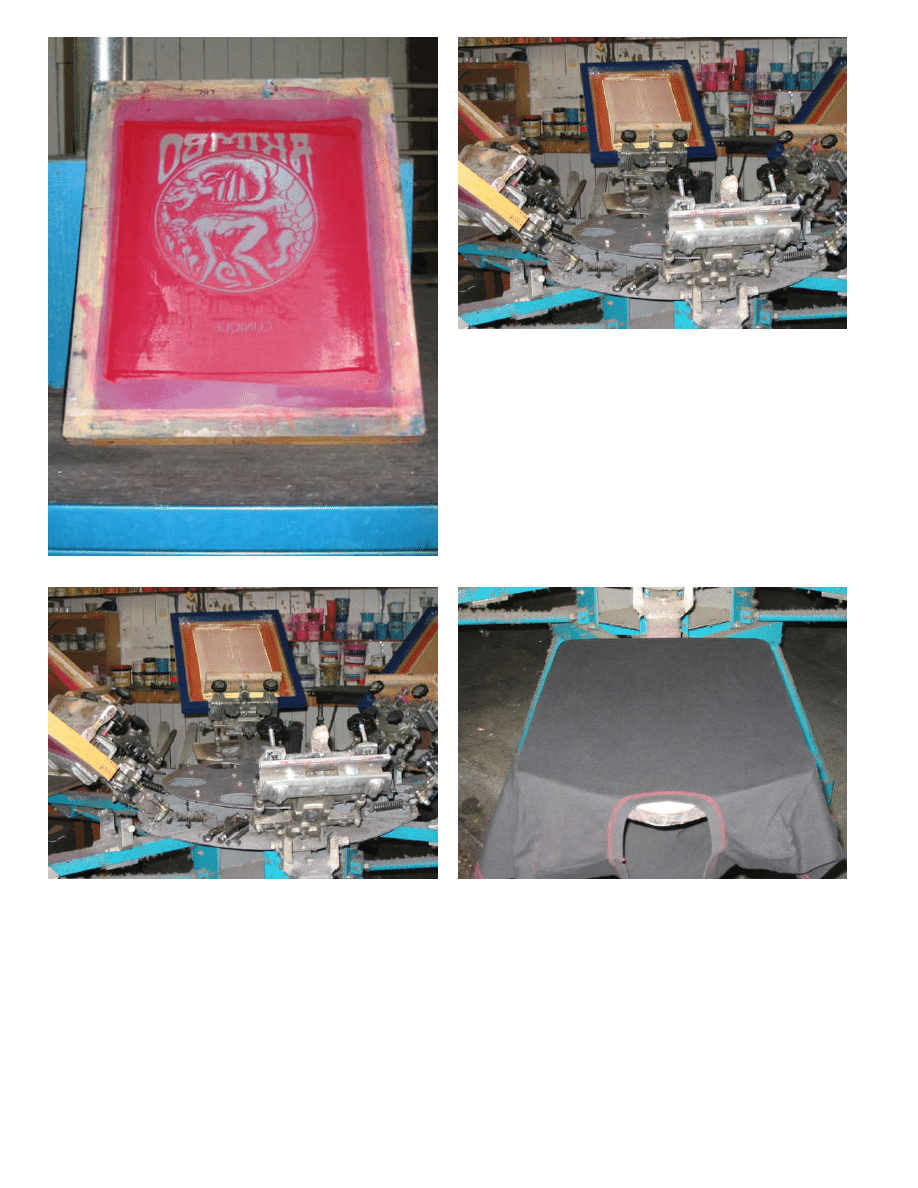
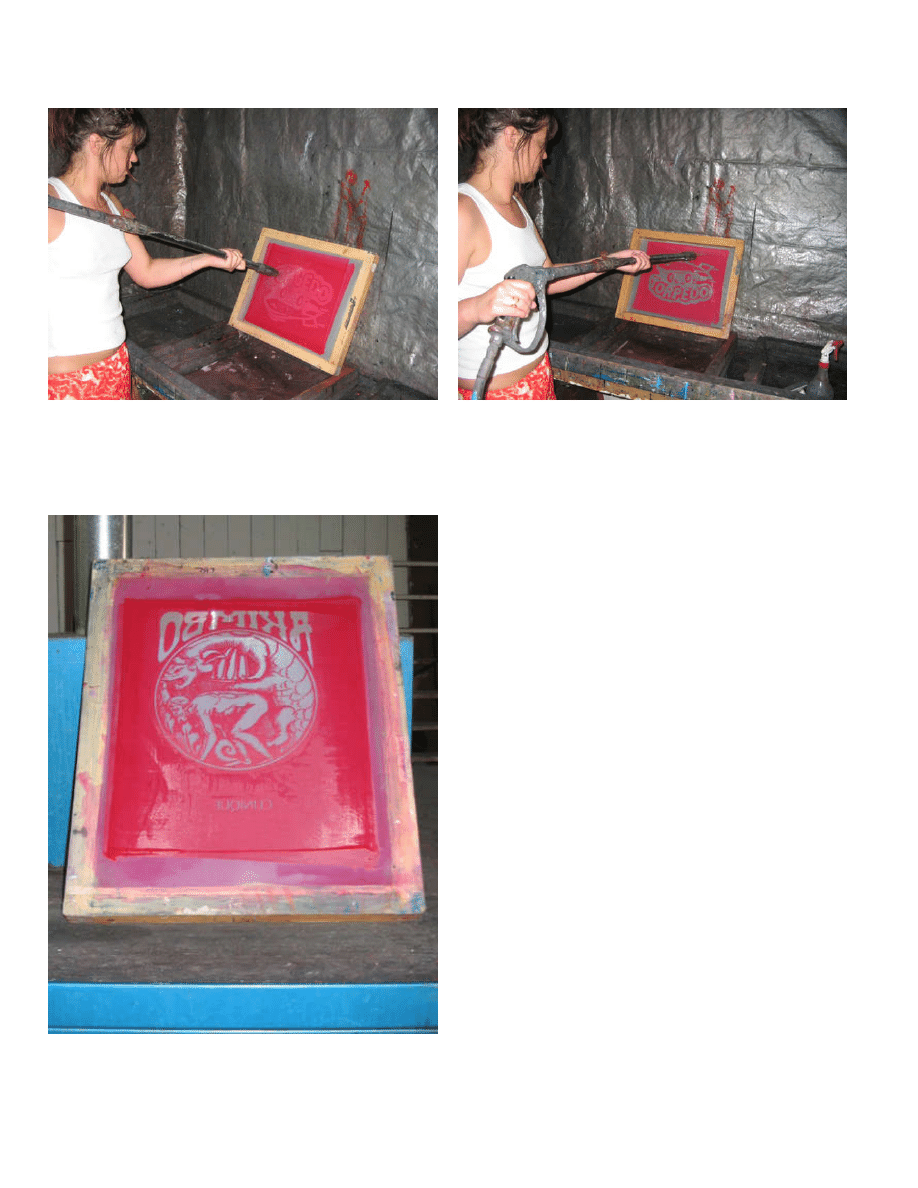
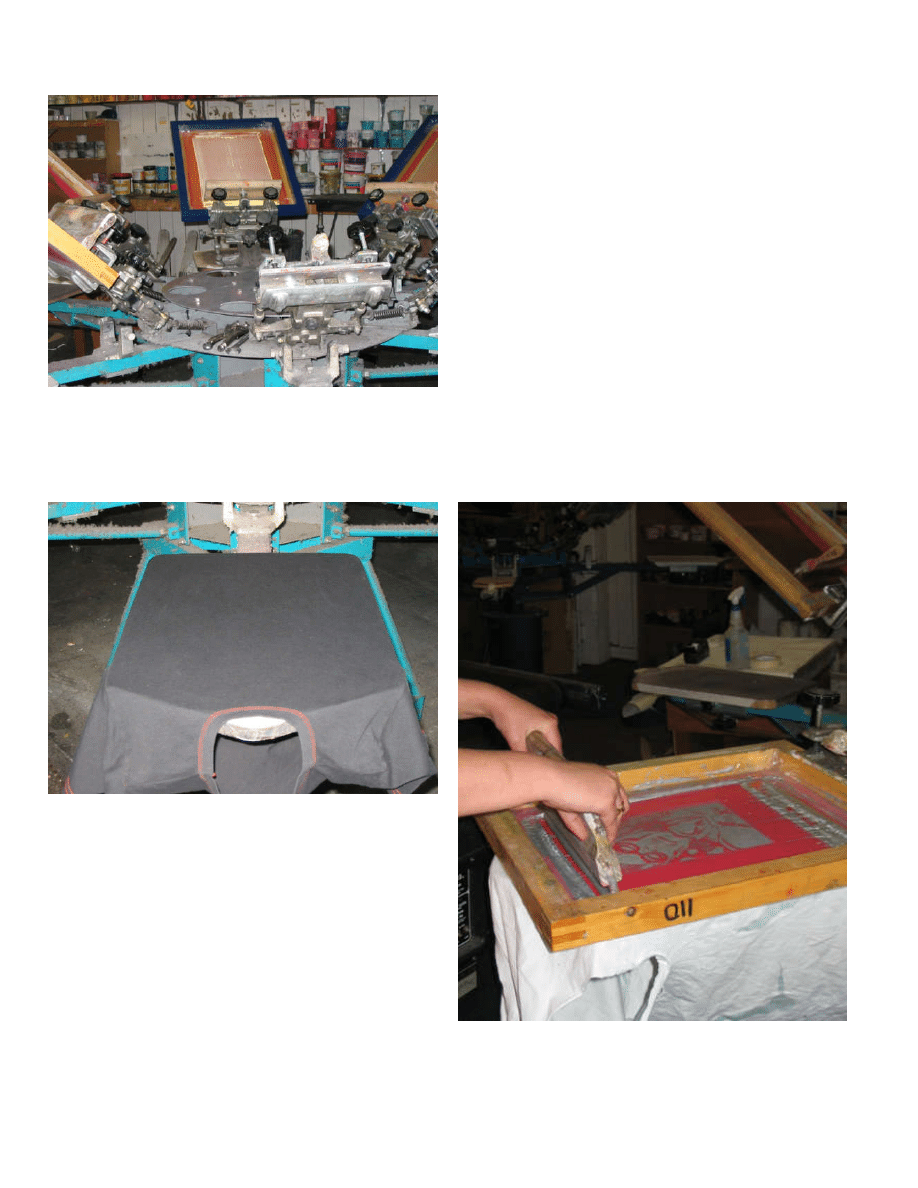
step 5:
Set Up Screen
Take screen to press, set in, line up (t-squares work nicely) center and screw in.
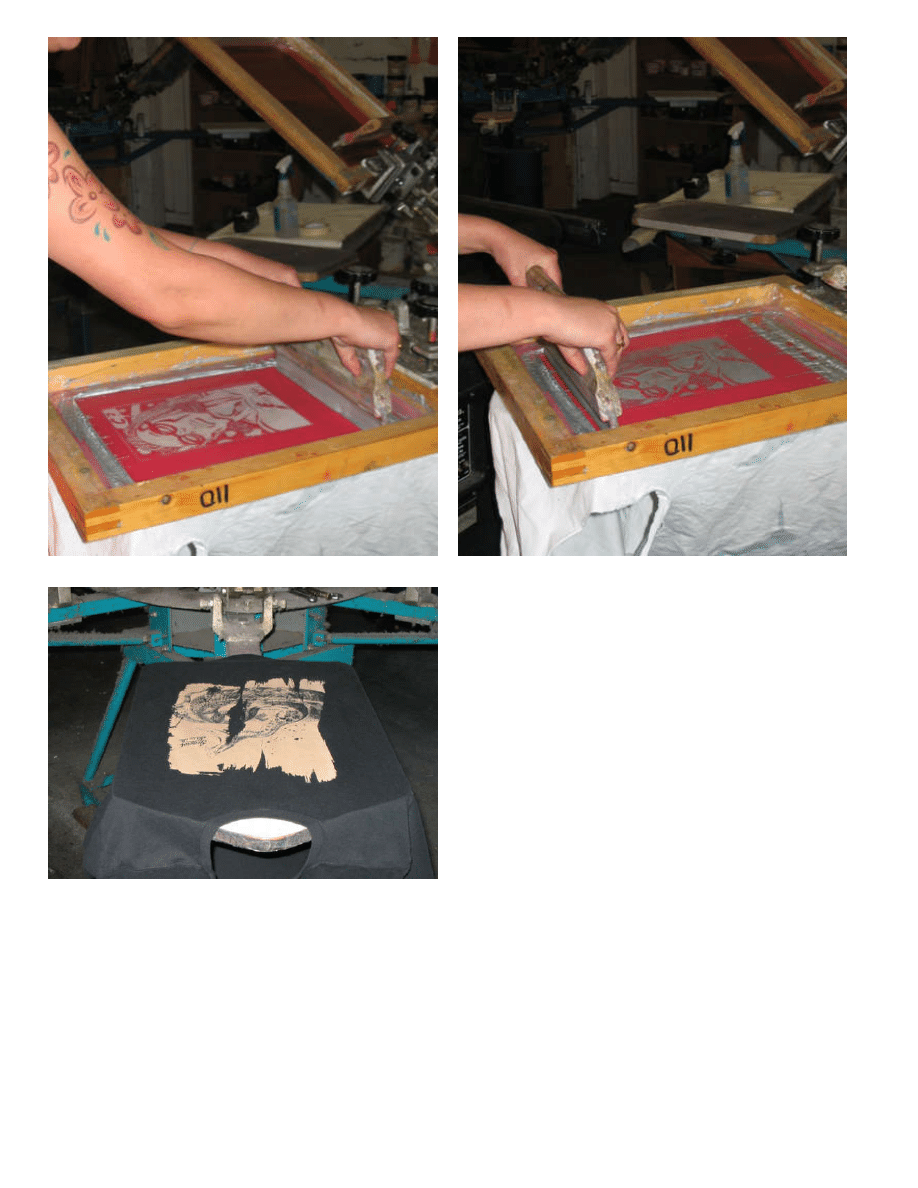
step 6:
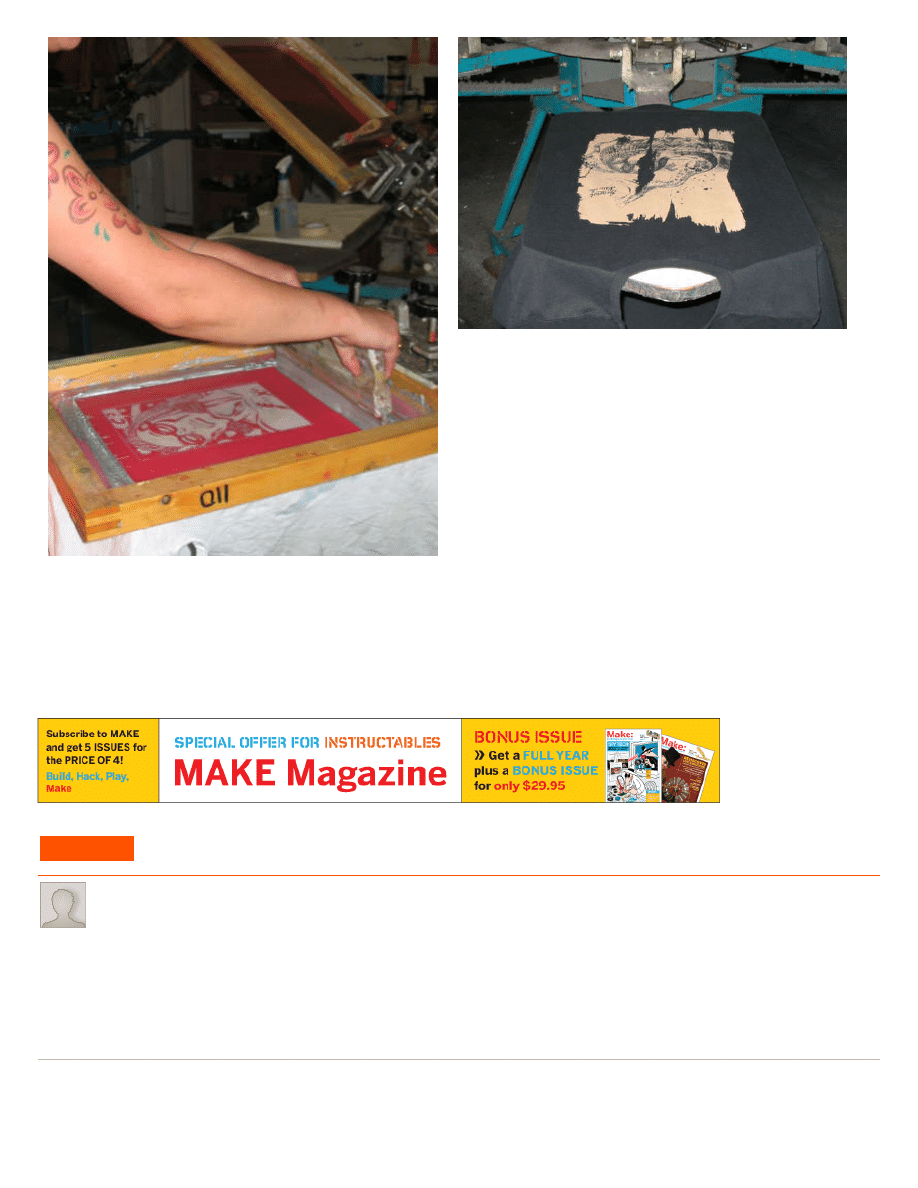
Take desired ink and spread across screen below image. Take squeegee (squeegee should span just slightly larger than width of image) and pull ink through screen.
Best results for pulling squeegee are at a almost a straight up and down angle. A test pull should be done first to check for any discrepancies etc. Take textile and place
on platen for desired placement and continue with print.
http://www.instructables.com/id/How-to-Silk-Screen/
step 7:
Cure Ink
Depending on type of ink used, curing processes will differ. Be careful removing textile from platen as ink will still be wet. Set to dry or heat cure. Curing pvc (plastisol) ink
generally takes 30 seconds at 320 degrees.
Related Instructables
Advertisements
Make Magazine Special Offer
Comments
23 comments
says:
another way to save some time is by cutting your motions down...
many printers 'flood' the screen (cover it lightly with ink) then move the squeegee all the way to the top, pull the ink down and then put the squeegee back to
the top which is 4 movements...
however, what i do and it works just the same is.:
'flood' the screen, then when all the ink is at the bottom of the screen you 'push' the ink to the top of the screen with the squeegee at about 45 degrees. then
for your next print the squeegee is already at the top ready to flood again... only 2 movements per print.
so you are cutting your movments in half, and in bulk orders of, lets say, 400 that will save you 800 movements...lol, that is A LOT of time and more
importantly A LOT of muscle strain.

http://www.instructables.com/id/How-to-Silk-Screen/
says:
Sep 10, 2008. 5:22 PM
quick question...
where can i get screens from?
preferably a store not online
says:
does anyone know where I can order this emulsion online in europe? I'm from Germany and I'd like to save the shipping costs. ulano seems to be sold only
in US
says:
Dec 13, 2006. 5:03 PM
I must be doing something wrong because I can't get my image to burn on screen. I put a black sheet of paper on bottom, then screen, then image, then
glass. Do I need to put the printed side towards screen. If I do that, then i need to reverse the image.. Help
says:
Aug 10, 2006. 5:34 PM
What's the common name of the emulsion? Can I make it? Do I buy it?
says:
Dec 10, 2006. 4:53 AM
Ulan QTX mclogan.com
says:
Jul 8, 2006. 11:26 AM
http://community.livejournal.com/craftgrrl/3674467.html
That is the easiest (possibly not the best) method of silk screening I have seen. It was on Make a long time ago.
says:
Sep 27, 2006. 4:26 PM
That is way harder then the above method.
says:
Nov 2, 2006. 10:45 PM
harder, but way cheaper and a good start if you don't really want to buy all the chemicals right away
says:
That is cool. But waaaaay too much work for a lazy-Daisy like myself.
says:
nice instructable. but how do you make multi-color screens? what mesh do you use?
says:
you can also put the screen in the sun, for people who don't have those fancy tools.
says:
if you had read the instructions, you might have noticed that it already says that.
says:
this would be easy if we all had a silk screening studio like you do...but some of us just aren't that cool...
says:
Sep 27, 2006. 4:24 PM
It is a nice set up but if you look at the text it clearly says how to do it without the facilities at her disposal.
Besides silkscreening is really easy, studio is only needed if you are constantly doing it.
says:
Aug 10, 2006. 5:42 PM
Yah this is kinda ridiculous. It's not so much a 'how to' as much as a 'wouldn't you like to be like me'.

http://www.instructables.com/id/How-to-Silk-Screen/
says:
reminds me of the one instructable about fixing your porsche's headrest.
says:
Really Cool! Thanks for sharing
says:
I just made one for printing on the cheap and at home:
http://www.instructables.com/id/EFAN6S16FTEQ2W3MOV/?ALLSTEPS
says:
Cool, I remember doing this in "Art" classes from 10th-12th grades... fun stuff.
says:
It seems pretty intresting, but I find your tutorial rather difficult to understand. Maybe I'm just stupid today . . . Nice pictures.
says:
wow... I did not realize that the screen was literally burned... but I guess that makes sense... cutting with a knife would take a lot of time and would probably
not come out as nice...
says:
hold the squeegee at a 45 degree angle for best results. anyway looks awesome. i made an apple logo shirt in art class, i used freezer paper for a screen. i
am very primitive when it comes to screen printing.
Wyszukiwarka
Podobne podstrony:
How To Format Your Screenplay Like A Pro
How To Draw Manga Screen Tones Tutorial Painter 7
How To Begin Writing A Screenplay
How to read the equine ECG id 2 Nieznany
CISCO how to configure VLAN
O'Reilly How To Build A FreeBSD STABLE Firewall With IPFILTER From The O'Reilly Anthology
How to prepare for IELTS Speaking
How To Read Body Language www mixtorrents blogspot com
How to summons the dead
How to draw Donkey from Shrek
How to Use Linked In
How to build a Raised Formal Pool
How to make
How to make an inexpensive exte Nieznany
how to write great essays id 20 Nieznany
how to use toyota lexus smart key programmer
How to Install the Power Quality Teaching Toy
więcej podobnych podstron