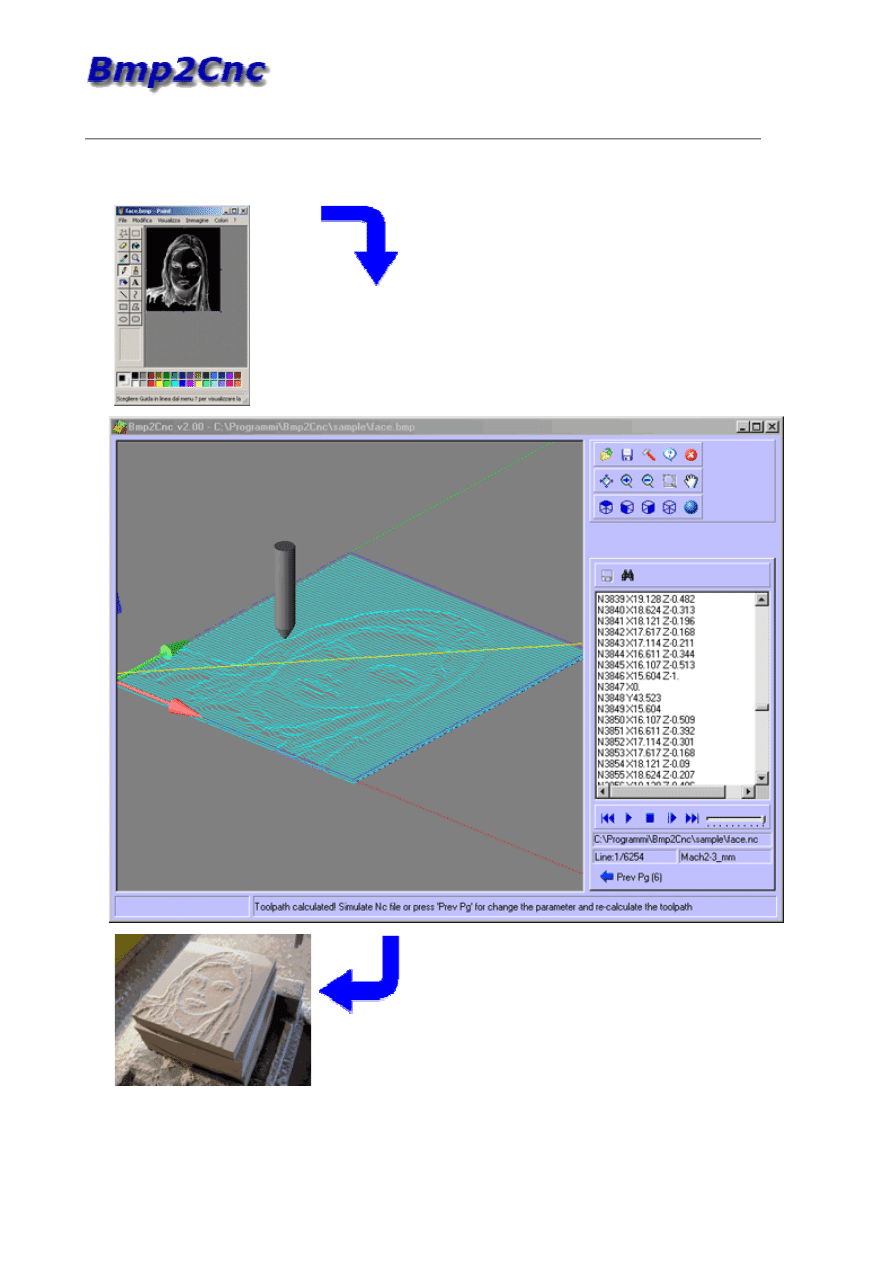
Tutorial 1 - Creating 3d toolpath from 2d Bmp image.
In this tutorial we will open an image file and create the toolpaths to cut out the part.
Caution:
CNC machines are potentially dangerous. The post-processor can output an unsuitable code for your
machine's control: check the Nc file before sending it to a CNC machine.

1.
Open the image file with the "Open" button.
2.
Select in "..\Bmp2Cnc\Sample\" folder the “face.bmp” file.
3.
The Dimension dialog will appear with the infos of image.
4.
Scale image to desidered dimension and press "Apply" button.
5.
Press "Next Pg" button.
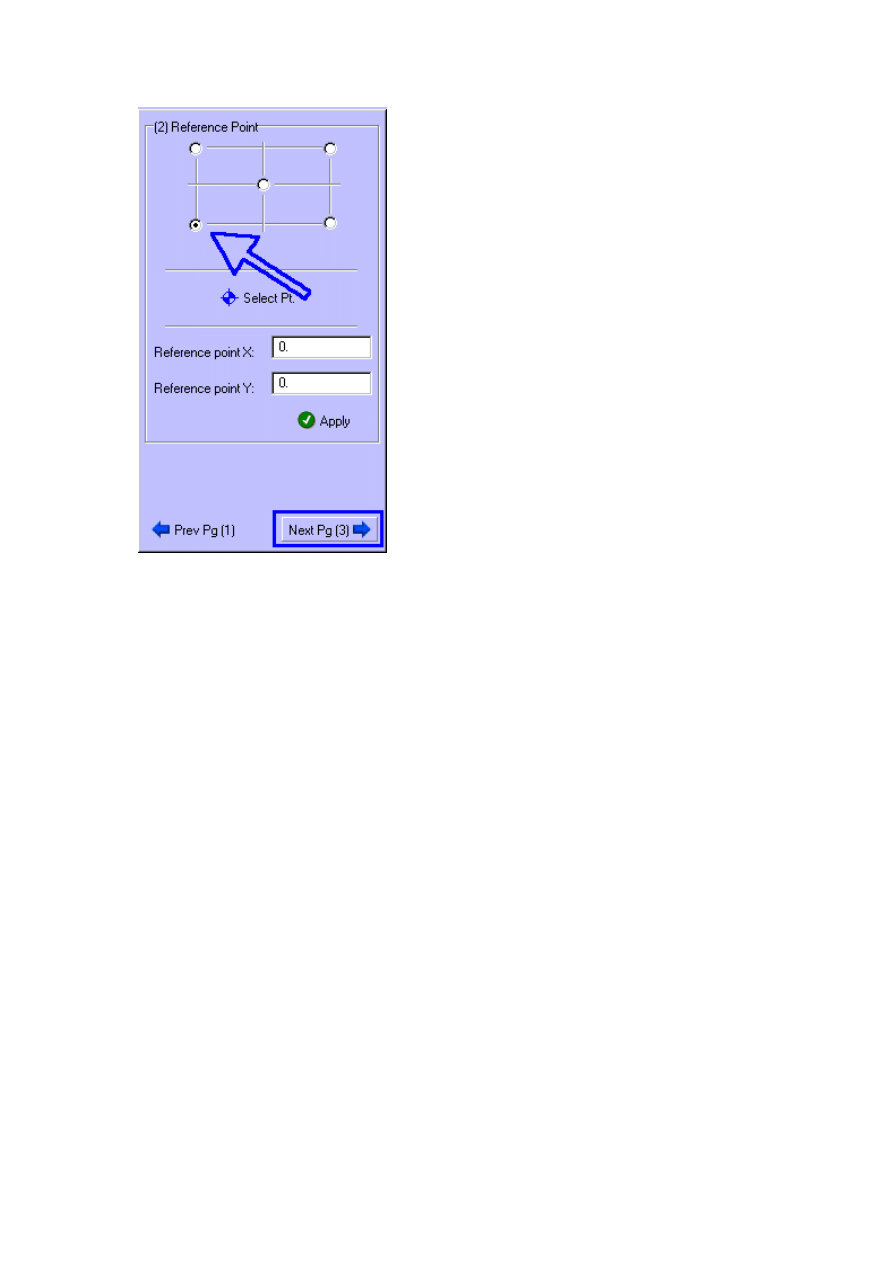
6.
Define the reference point of image and press "Next Pg" button.
6.
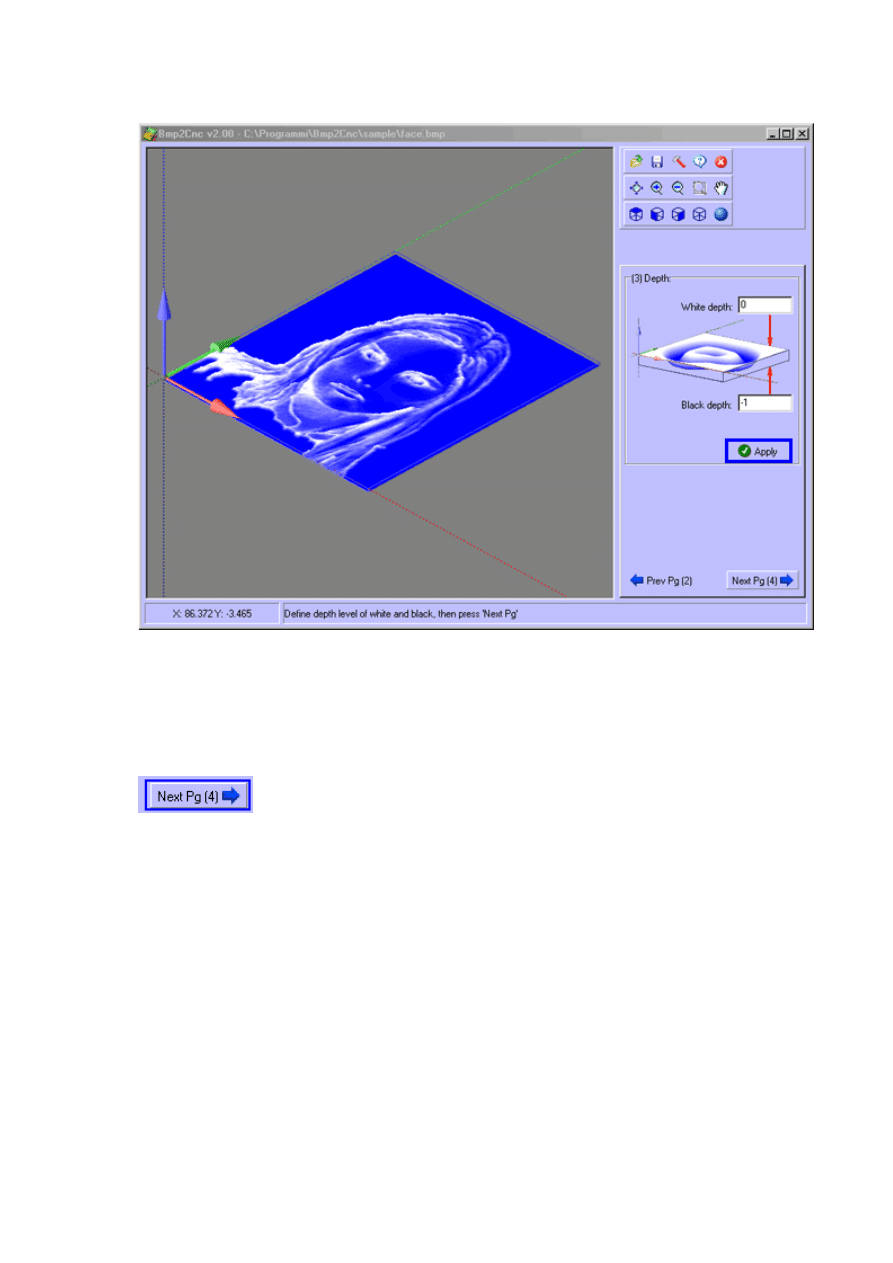
The Depth dialog and 3d image will appear.
Change the white and black depth value and press “Apply” button.
Within graphics area, for change the view and / or magnification, use as follow
To rotate: press left mouse button and move the mouse.
To zoom: press CTRL + left mouse button and move the mouse.
To pan: press SHIFT + left mouse button and move the mouse.
7.
Press "Next Pg" button.
8.
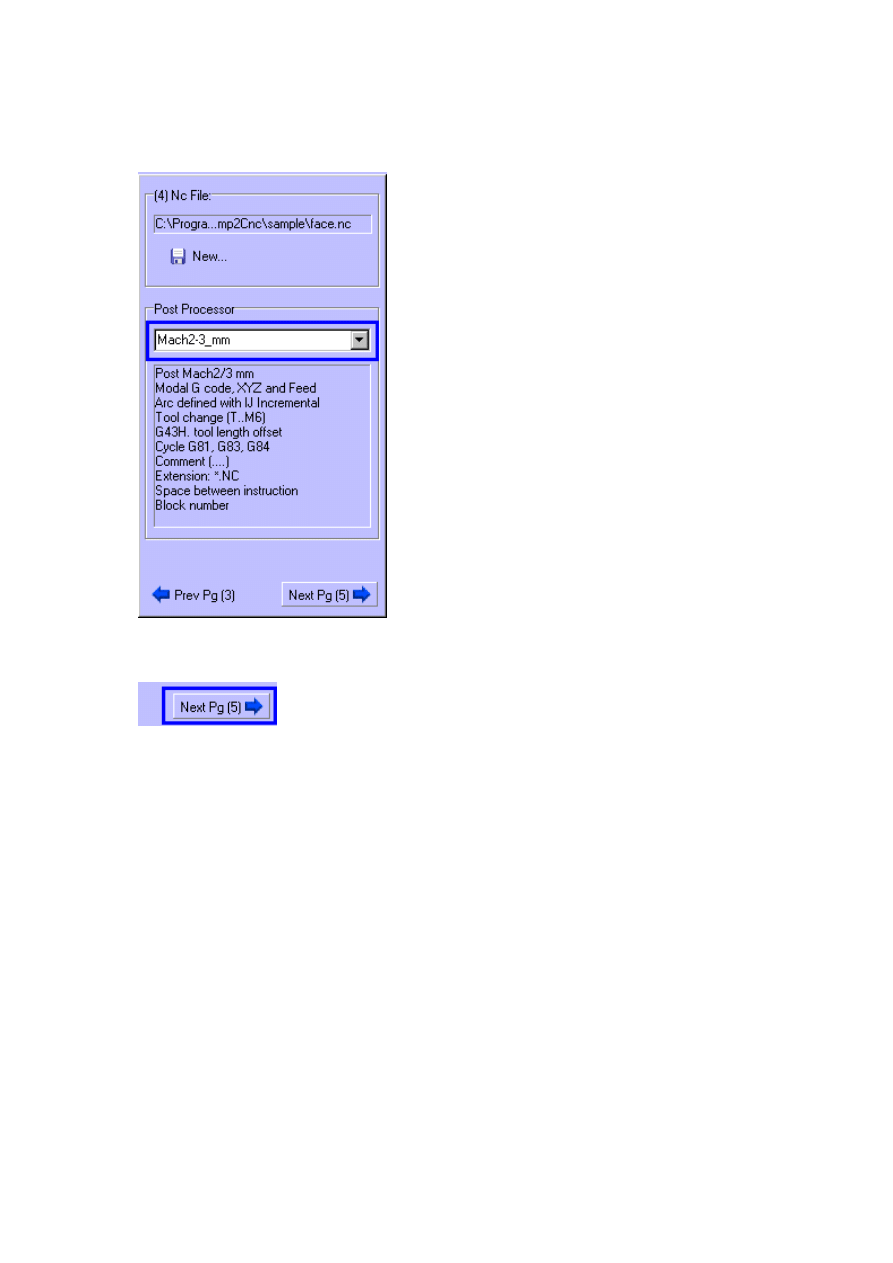
The NC file dialog will appear.
Type "face" in the Windows file dialog.
9.
Select the postprocessor of your cnc machine.
10.
Press "Next Pg" button.
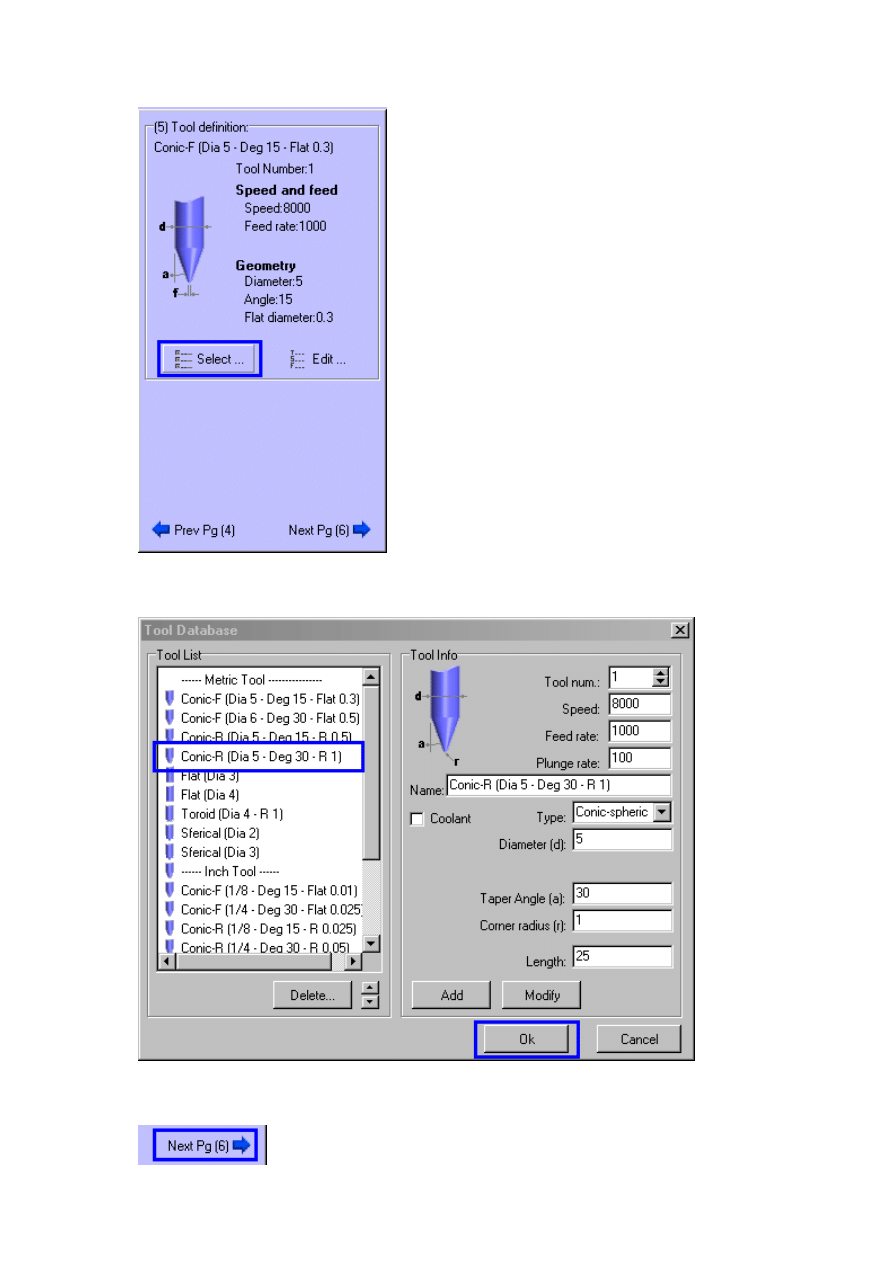
11.
In Tool definition press "Select" button to retrieve a tool from a tool library or create a new tool.
12.
Click in the Tool List to select the tool. Set feed and speed of the tool. Press the "OK" button.
13.
Press "Next Pg" button.
14.
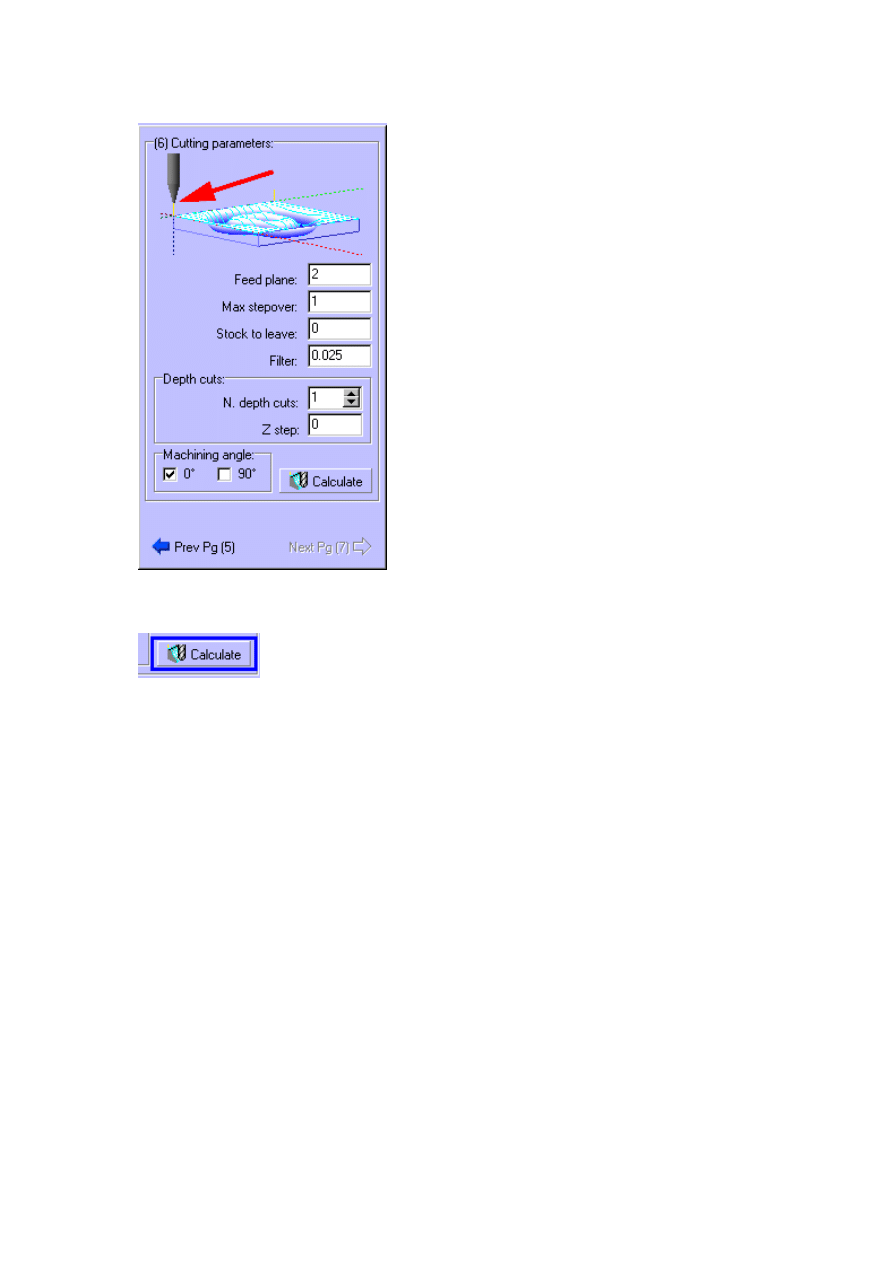
The Cutting parameters page will appear. Set up the following parameters (this example work in
millimeters):
15.
Press the "Calculate" button.
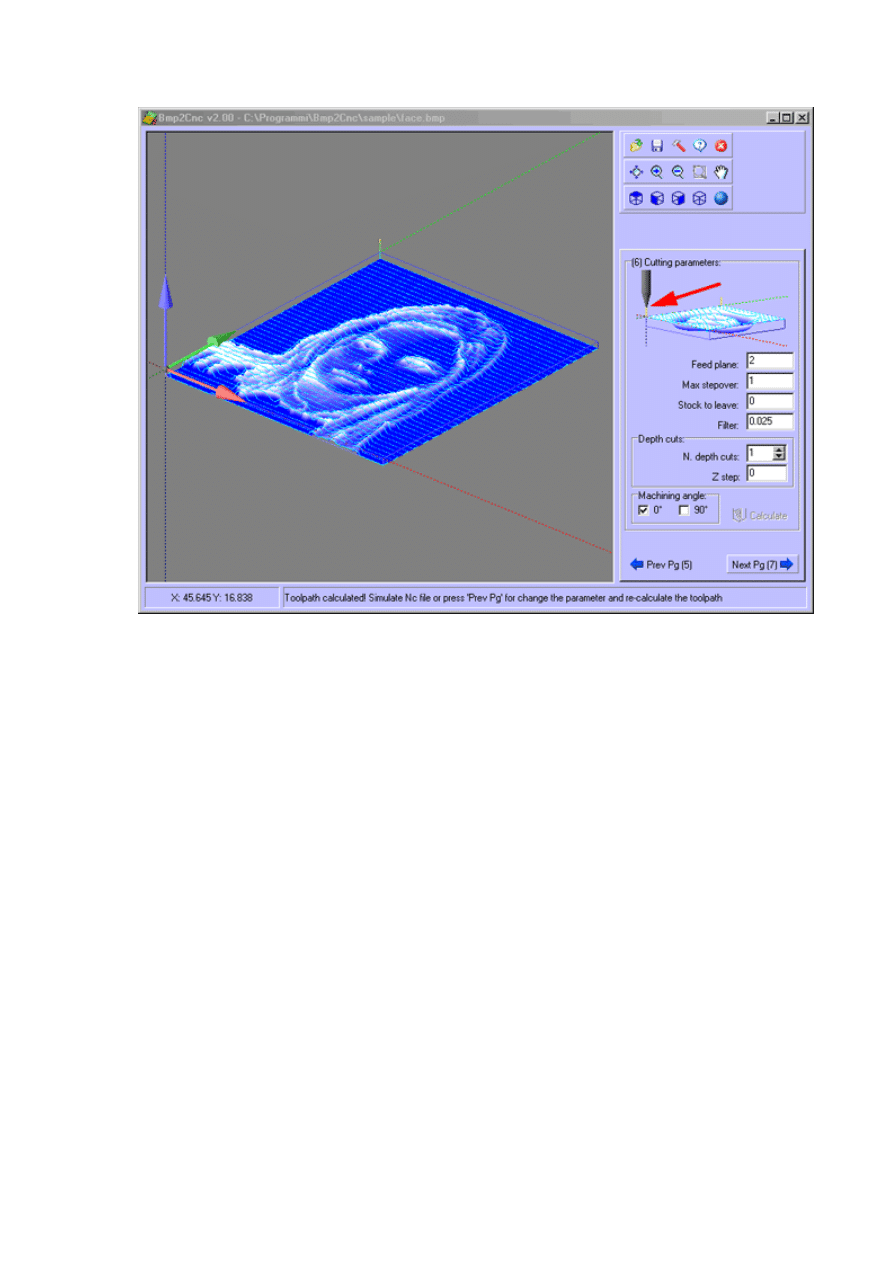
16.
The toolpath is calculated and displayed together with the 3d image.
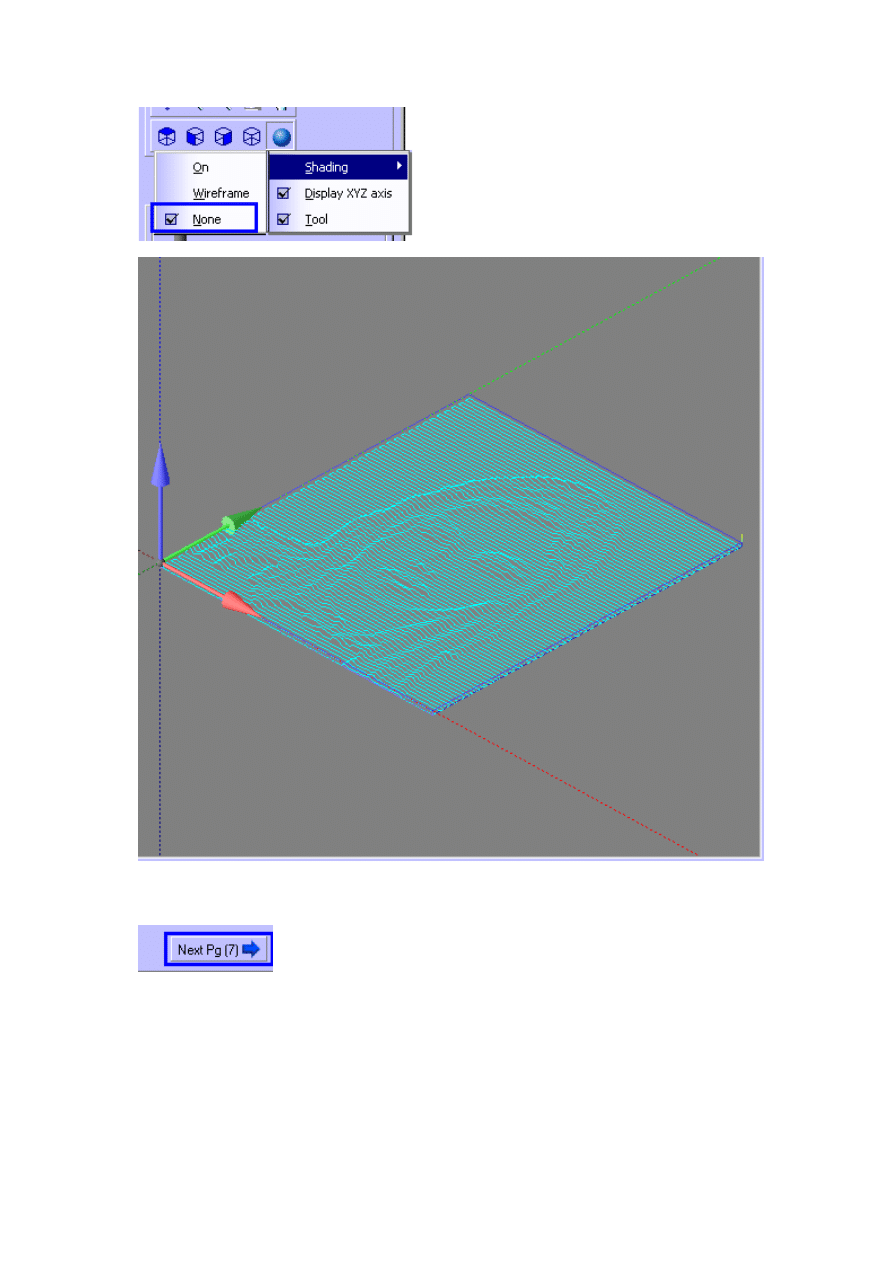
17.
Turn Off the shading: only the toolpath will be displayed.
18.
Press "Next Pg" button.
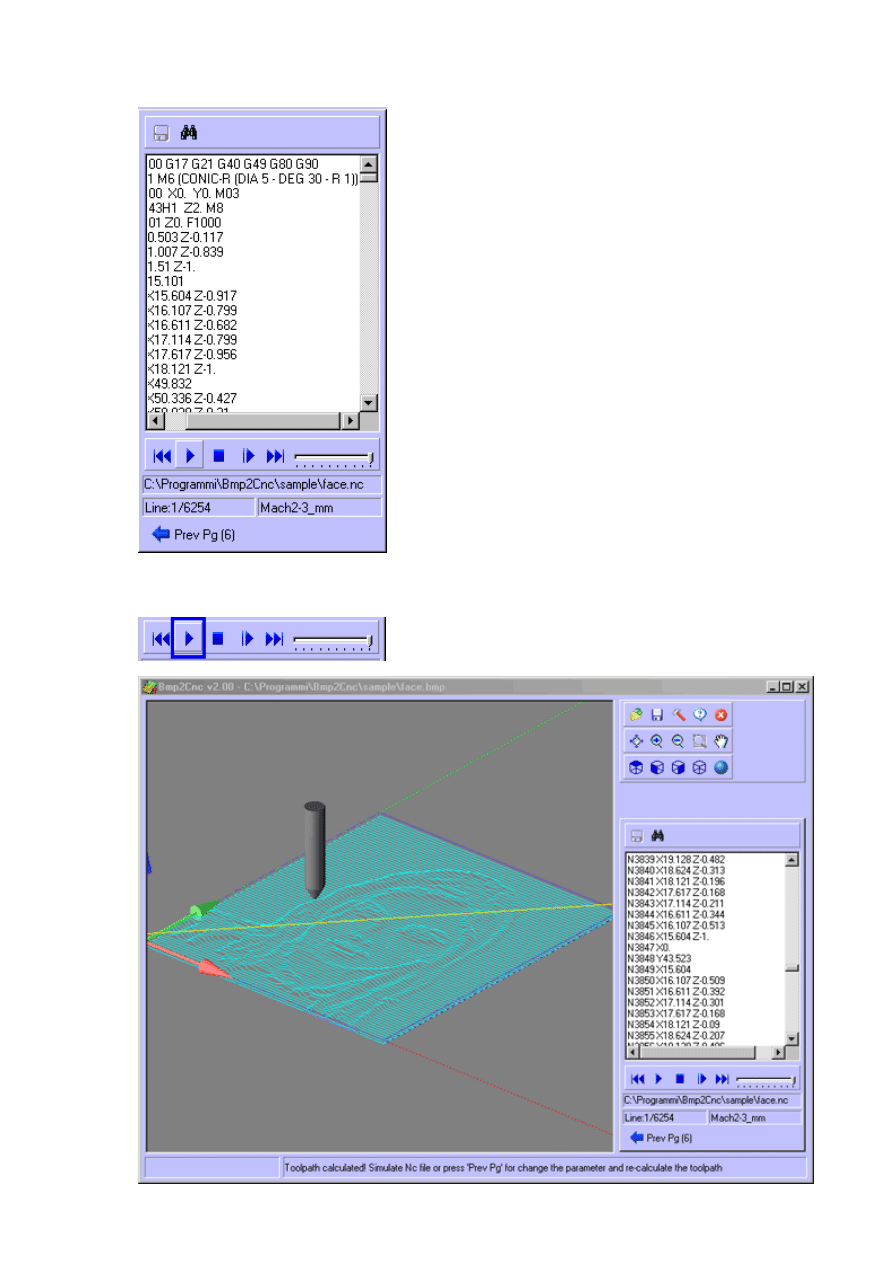
19.
The NC file text is diplayed.
20.
Press the "Play" button to simulate the toolpath (Yellow=Rapid, Cyan=Feed).

21.
You have successfully created your first Nc file with Bmp2Cnc.
Caution:
CNC machines are potentially dangerous. The post-processor can output an unsuitable code for your
machine's control: check the Nc file before sending it to a CNC machine.
Wyszukiwarka
Podobne podstrony:
OPIS DZIAŁALNOŚ ĆI GOSPODARCZEJ STUDIA
leki opis działania, ratownictwo
Opis działania OWS(D) 0106(8)K
Fine Reader Opis działania
Opis działań przy wykonaniu zegara, Dokumenty do szkoły, przedszkola; inne, wykłady i ćwiczenia
174 opis i działanie O7IBSYE6PX67OFYB47OLW3ALYX4KAUIK5ACNDBY
silnik opis działania
Witaminy - opis i działanie, Kulturystyka
OPIS DZIAŁALNOŚ ĆI GOSPODARCZEJ STUDIA
Muzyka Brahmana opis działania
Dodatkowy zoom optyczny opis działania
Balans bieli w cyfrówce opis działania
opis dzialania drukarki laserowej
więcej podobnych podstron