Lesson 7
Working with Type
One of the most powerful features of
Adobe Illustrator is the ability to use
type as a graphic element. Like other
objects, type can be painted, scaled,
rotated, and so on. You can also wrap
type around objects, make it follow along
the shape of a path, create type masks,
import text files into containers, and
modify the shapes of individual letters
in a block of type.
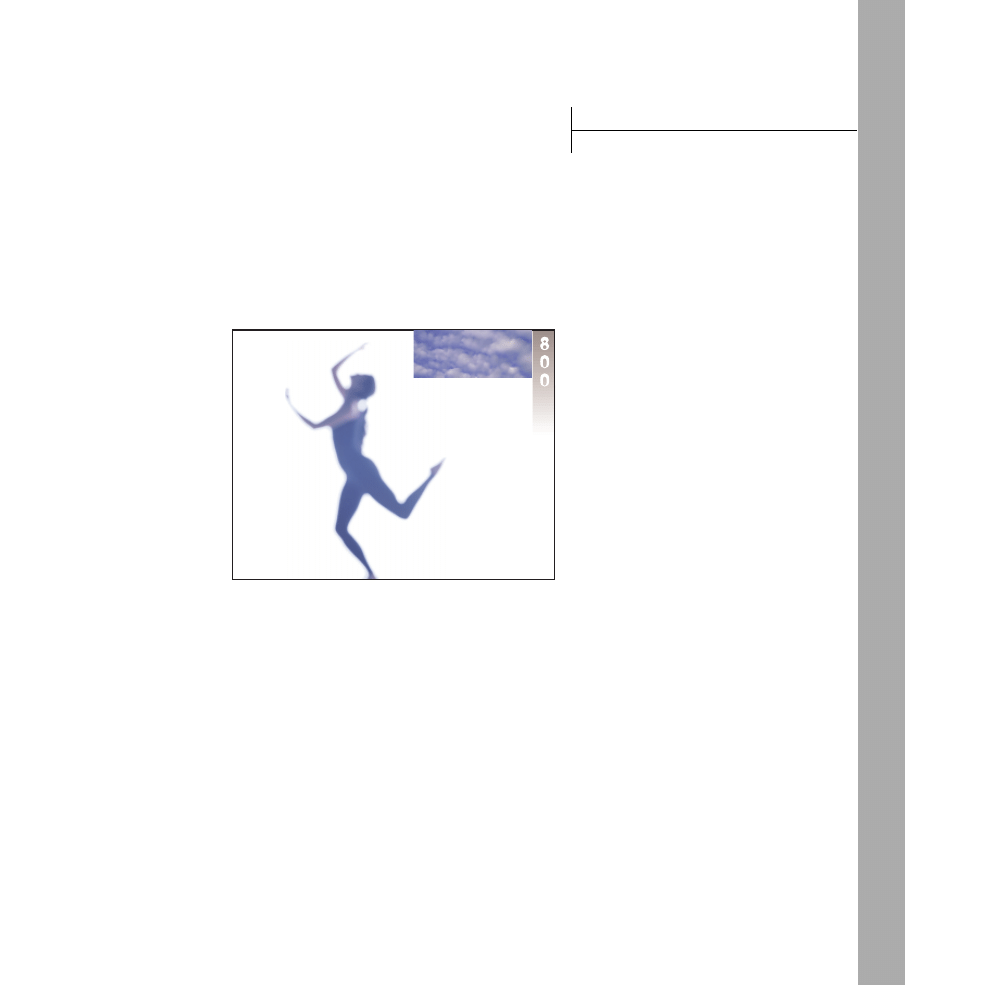
Origins of Tai Chi
Lecture Series 800
Tai Chi
“The mastery of one move is
superior to the learning of
one hundred moves.”
—Master Instructor of
Tai Chi Chuan, 1610
A.D.
Experience the power of Tai Chi Chuan
and become one with nature. Part 1
introduces a series of moves that simplify
and clarify the mental and physical
dynamics that empower Tai Chi.
Explore the structural mechanics
universal to all Tai Chi movements and
styles, learn how to loosen and lubricate
all of the joints of the body, and integrate
the structural mechanics into ten Tai Chi
movements. Combine mind intent and
inner body skill to maximize strength,
energy, circulation and power.
Class meets Mondays, Wednesdays, and
Fridays, April 12–May 16. Time
7:30–8:30. Room 1112.
Ph
ot
o
fr
om
A
do
be
Im
ag
e
Li
br
ar
y

LESSON 7
210
Working with Type
In this lesson, you’ll learn how to do the following:
•
Create type in containers and along paths.
•
Import text files into type containers.
•
Adjust type attributes and formatting, including the font, leading, and paragraph
alignment.
•
Wrap type around a graphic.
•
Create stylized letterforms with outlined type.
•
Create type masks.
•
Save a file in PDF format.
Getting started
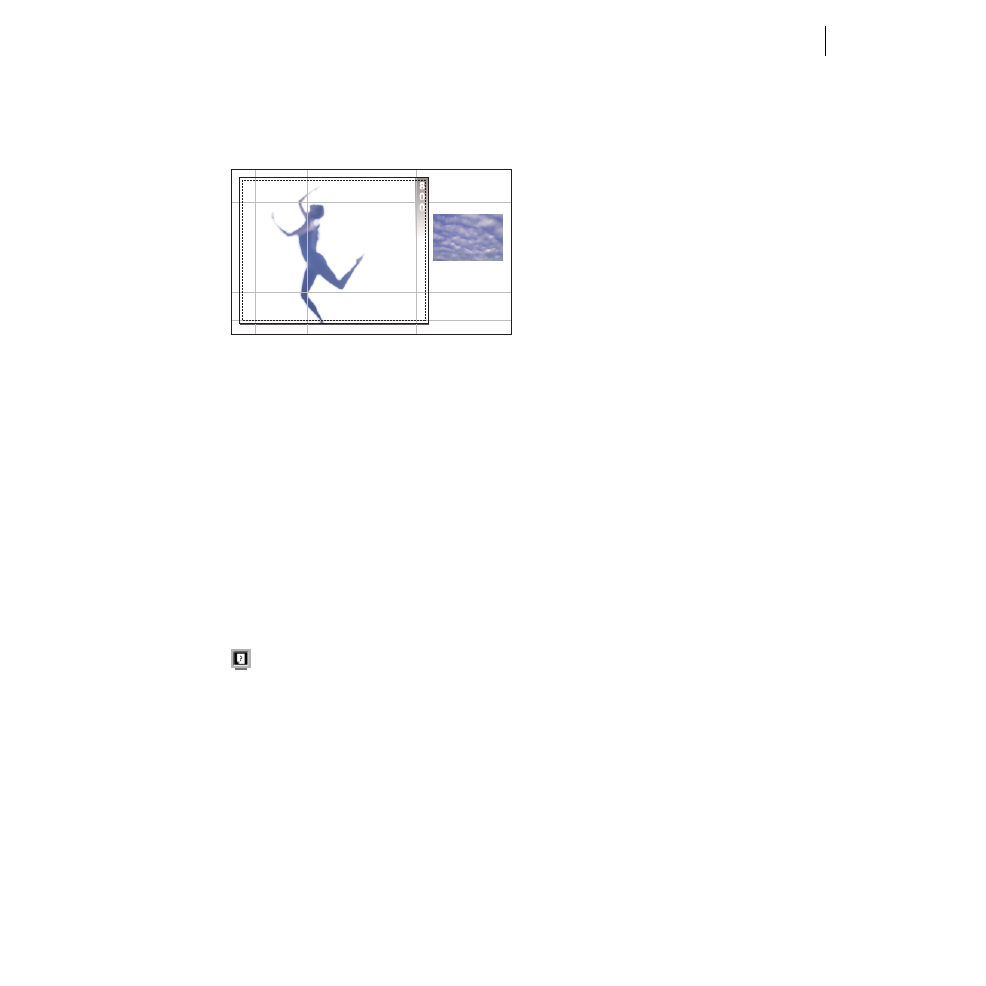
In this lesson, you’ll create a Tai Chi lecture series poster. Before you begin, you’ll need to
restore the default preferences for Adobe Illustrator and then you’ll open the finished art
file for this lesson to see an example of what you’ll create.
1
To ensure that the tools and palettes function exactly as described in this lesson, delete
or deactivate (by renaming) the Adobe Illustrator 9.0 preferences file. See “Restoring
default preferences” on page 3.
2
Start Adobe Illustrator.
3
Choose File > Open, and open the L7end.ai file in the Lesson07 folder, located inside
the Lessons folder within the AICIB folder on your hard drive.
4
If you like, choose View > Zoom Out to make the finished artwork smaller and leave it
on your screen as you work. (Use the hand tool (
) to move artwork where you want it
in the window.) If you don’t want to leave the image open, choose File > Close.
For an illustration of the finished artwork in this lesson, see the color section.
Now open the start file to begin the lesson.
211
ADOBE ILLUSTRATOR 9.0
Classroom in a Book
5
Choose File > Open, and open the L7start.ai file in the Lesson07 folder, located inside
the Lessons folder within the AICIB folder on your hard drive.
6
Choose File > Save As, name the file
TaiChi
.ai
, and select the Lesson07 folder. Leave the
Format option set to Adobe Illustrator® Document, and click Save. In the Illustrator
Native Format Options dialog box, select Illustrator 9.0 Compatibility and click OK.
For now you’ll hide the palettes that you don’t need yet.
7
Click the close boxes or choose Window > Hide Appearance, Window > Hide Color,
and Window > Hide Styles to close these palettes.
8
Bring the Links palette forward by clicking the Links tab behind the Actions palette.
Notice that the Links palette displays two links: the image of the dancing figure, which is
linked to the original image file; and the image of the sky to the right of the artboard,
which is an embedded image (it was pasted into the document).
9
Click the close box or choose Window > Hide Links to close the Links palette.
For information on using the Links palette, see “Managing linked and embedded
images” in online Help or Chapter 2 in the Adobe Illustrator User Guide.
Origins of Tai Chi
Lecture Series 800
LESSON 7
212
Working with Type
Adding type to a document
Adobe Illustrator lets you add type to a document several different ways. You can type
directly in the artwork, copy and paste type from other documents, and import entire
text files.
To begin adding type to your artwork, you’ll type the Tai Chi title on the poster.
1
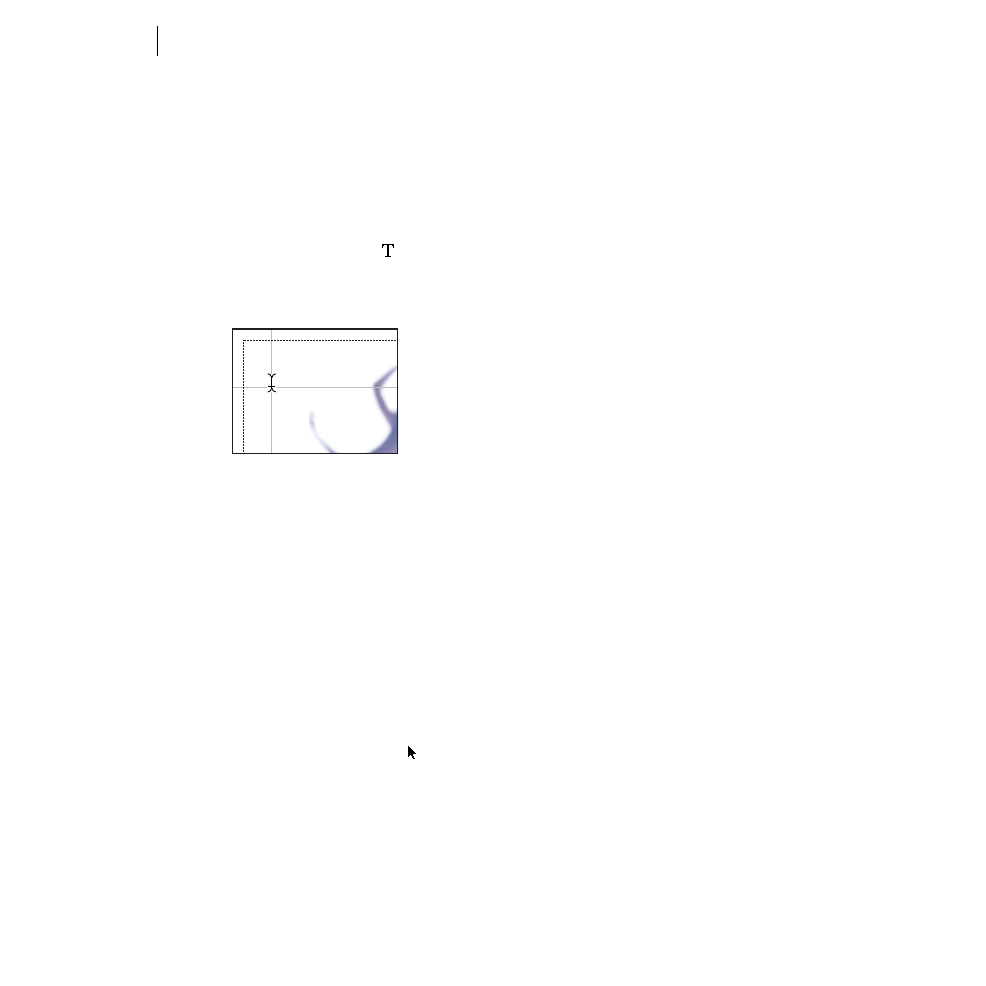
Select the type tool ( ) in the toolbox. Position the pointer so that the I-beam cross
hair is in the top left corner of the artwork, using the guides that already exist in the
document.
Position type tool at intersection
of guides.
The small horizontal line near the bottom of the I-beam—its cross hair—marks the
position of the type
baseline
. The baseline is the line on which the type rests.
2
Click to set the type baseline where the guides intersect, and type
Tai Chi
.
By default, the type you create is 12-point Helvetica, filled with black, and stroked with
None. The Fill and Stroke boxes in the toolbox display the type’s current paint attributes.
Sampling type
Now you’ll use the eyedropper tool to pick up, or sample
,
the attributes of other type in
the artwork and apply it to the Tai Chi title.
1
Click the selection tool ( ) in the toolbox to select the words
Tai Chi
.
Clicking the selection tool immediately after typing with the type tool automatically
selects the words you typed.
213
ADOBE ILLUSTRATOR 9.0
Classroom in a Book
2
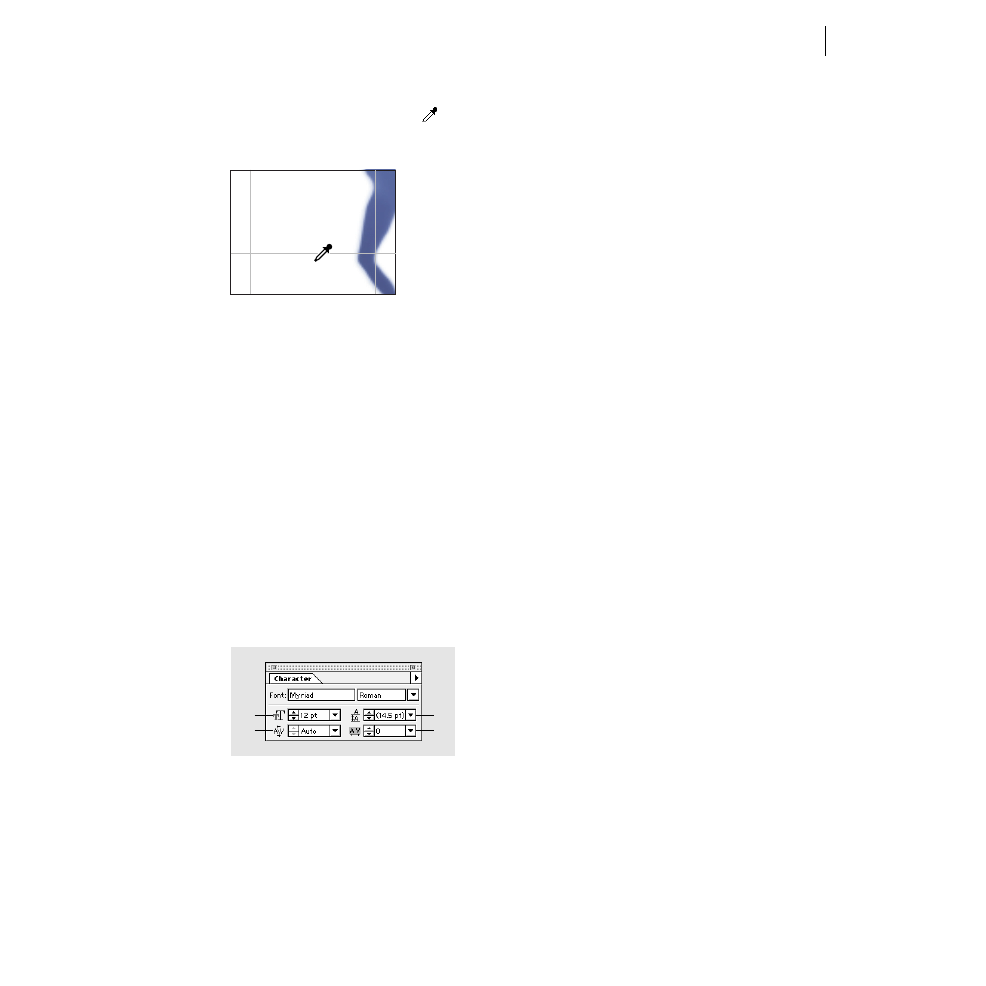
Click the eyedropper tool ( ) in the toolbox, and click anywhere in the line “Lecture
Series 800” to sample the type’s attributes.
Sample type attributes
Sampled attributes are applied to any selected text (in this case,
Tai Chi
), and the type
colors appear in the Fill and Stroke boxes in the toolbox.
Changing the character size
Now you’ll use the Character palette to make the title bigger.
1
With the Tai Chi type still selected, choose Type > Character to display the Character
palette.
By default, the Character palette displays the selected font and its style, size, kerning,
leading, and tracking values. If the type selection contains two or more attributes, the
corresponding text boxes are blank. (
Leading
is the amount of space between lines or
paragraphs.
Kerning
is the space between two characters.
Tracking
is the spacing in a string
of characters.)
A.
Font Size
B.
Kerning
C.
Leading
D.
Tracking
2
Type
125
in the Font Size text box, and press Enter or Return to increase the font size
to 125 points.
Origins of Tai Chi
Lecture Series 800
A
B
C
D
LESSON 7
214
Working with Type
Creating columns of type
Another way to add type to your document is to import a text file. You can divide the type
container to hold three columns of type for this layout.
You’ll create a container that overlaps the bottom leg of the figure so that later you can
wrap the text around the leg.
1
Choose File > Place. Select the text file, Text.rtf, located in the Lesson07 folder, and
click Place.
2
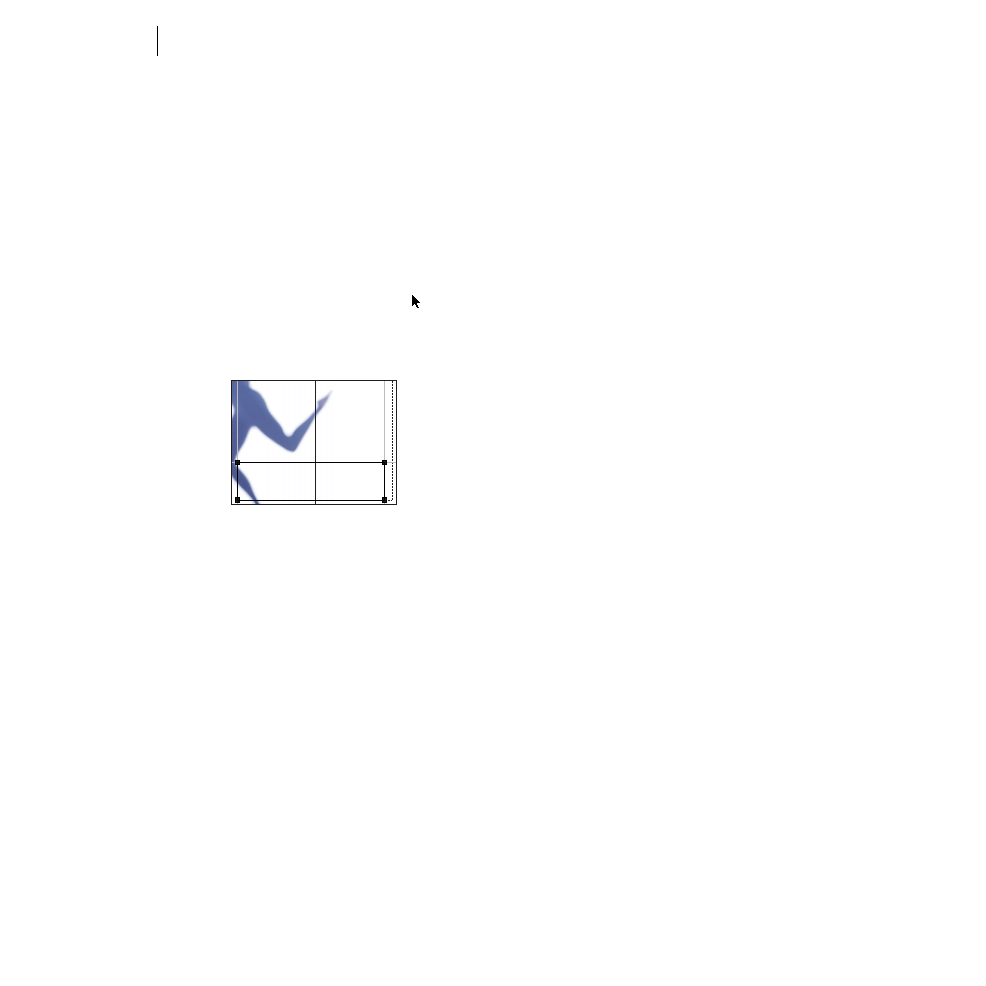
Select the selection tool ( ) in the toolbox. Move the placed text to the guides at the
bottom right of the poster, aligning the top left corner of the text container with the
guides that intersect beneath the figure’s knee.
Move placed text file to guides at bottom right.
Illustrator supports more than a dozen text formats for Windows and Mac OS, including
Microsoft Word®, Rich Text Format, and WordPerfect®. You can also bring text into
Illustrator by copying and pasting text from the Clipboard. However, the copied text
may lose its type attributes (such as its font and styles) when pasted into the document.
3
Choose View > Guides > Hide Guides.
Next you’ll divide this type and its container into a group of three type containers that will
each hold a column of type. (You’ll use the Rows & Columns command to divide and resize
the type block precisely.)
4
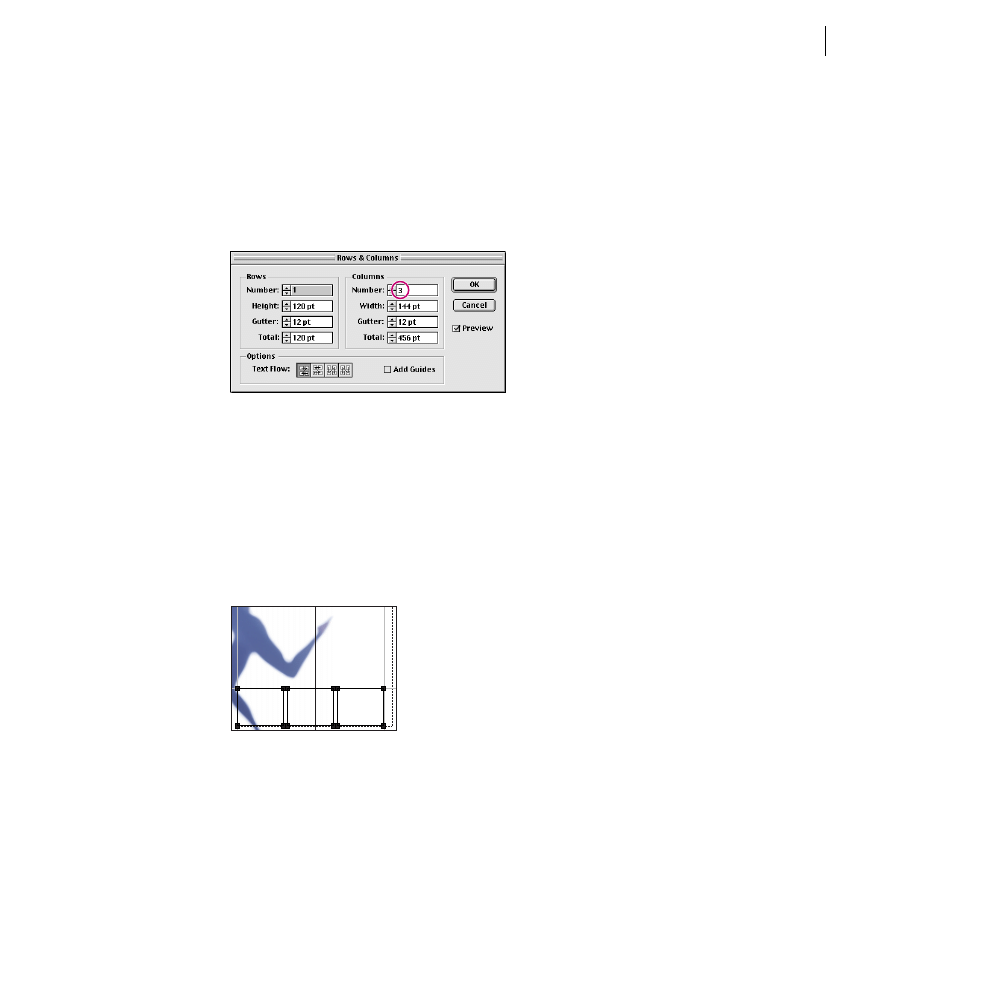
Choose Type > Rows & Columns.
The Rows & Columns dialog box is useful for changing the height, width, and gutter size
between rows and columns. The Text Flow option lets you control the direction in which
text flows (from left to right or up and down).
5
In the Rows section, double-click the amount for Total and enter
120 pt
. Press Tab to
enter the amount without closing the dialog box.
“The mastery of one move is superior to the learning of one hundred moves.”
—Master Instructor of Tai Chi Chuan, 1610 A.D.
Experience the power of Tai Chi Chuan and become one with nature. Part 1 introduces
a series of moves that simplify and clarify the mental and physical dynamics that
empower Tai Chi.
Explore the structural mechanics universal to all Tai Chi movements and styles, learn
how to loosen and lubricate all of the joints of the body, and integrate the structural
mechanics into ten Tai Chi movements. Combine mind intent and inner body skill to
215
ADOBE ILLUSTRATOR 9.0
Classroom in a Book
6
In the Columns section, double-click the amount for Total and enter
456 pt
. Press Tab
to enter the amount.
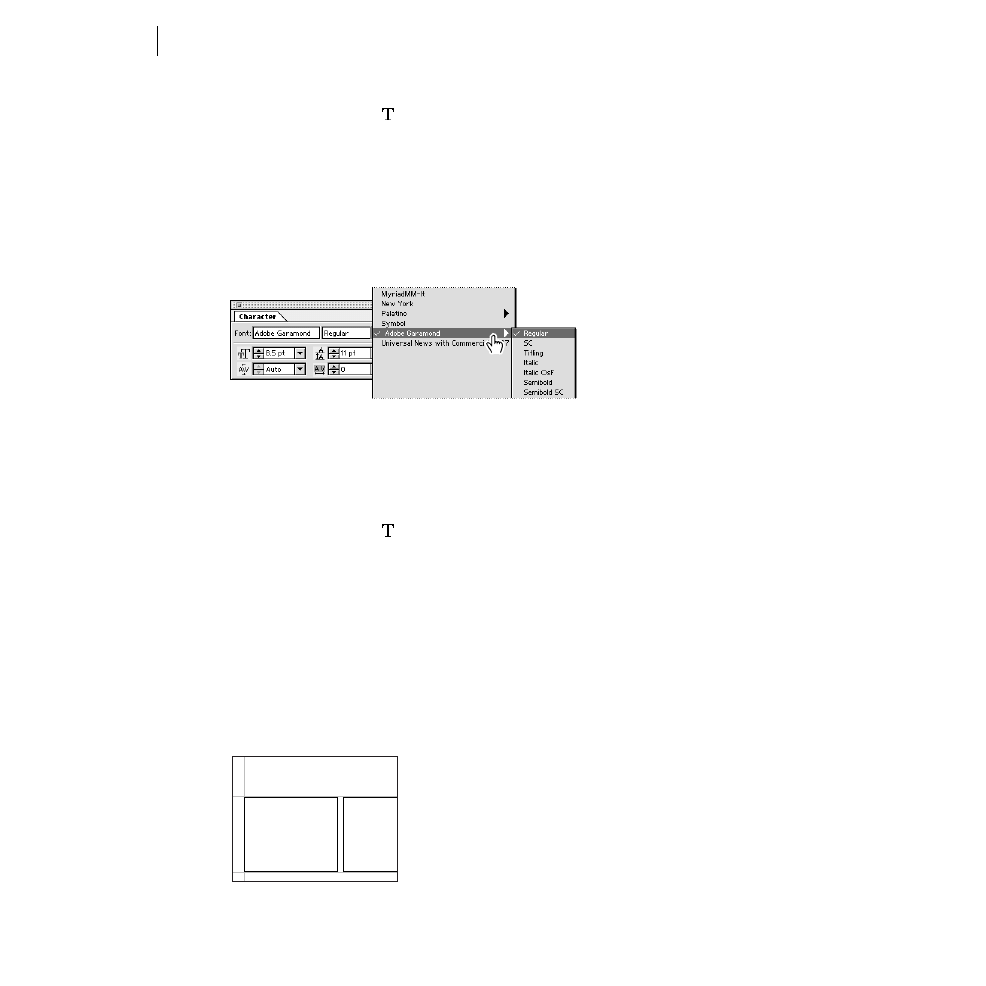
You have just changed the size of the text container. Next you’ll divide it into columns and
gutters.
7
In the Columns area, type
3
in the Number text box for three columns, and click OK.
The three type containers are linked so that text flows between containers in the order
that the containers are created and grouped—selecting one container selects all three
containers. Each container can be moved and resized individually using the direct-
selection tool.
8
Before continuing, choose View > Zoom In to magnify your view of the type
containers.
9
Click outside of the artwork to deselect the type columns, and choose File > Save.
Text container divided into three columns
Changing character attributes of placed text
Next you’ll format the type that you just imported. You’ll change the character font of the
placed text to match the rest of the poster, and reformat the first two paragraphs, which
are a quote and a byline.
“The mastery of one move
is superior to the learning
of one hundred moves.”
—Master Instructor of Tai
Chi Chuan, 1610 A.D.
Experience the power of
Tai Chi Chuan and
become one with nature.
Part 1 introduces a series
of moves that simplify and
clarify the mental and
physical dynamics that
empower Tai Chi.
Explore the structural
mechanics universal to all
Tai Chi movements and
styles, learn how to loosen
and lubricate all of the
joints of the body, and
integrate the structural
mechanics into ten Tai Chi
movements. Combine
mind intent and inner body
skill to maximize strength,
LESSON 7
216
Working with Type
1
Select the type tool ( ), click anywhere in one of the three text columns, and then
choose Edit > Select All to select all of the imported text automatically after it is placed.
2
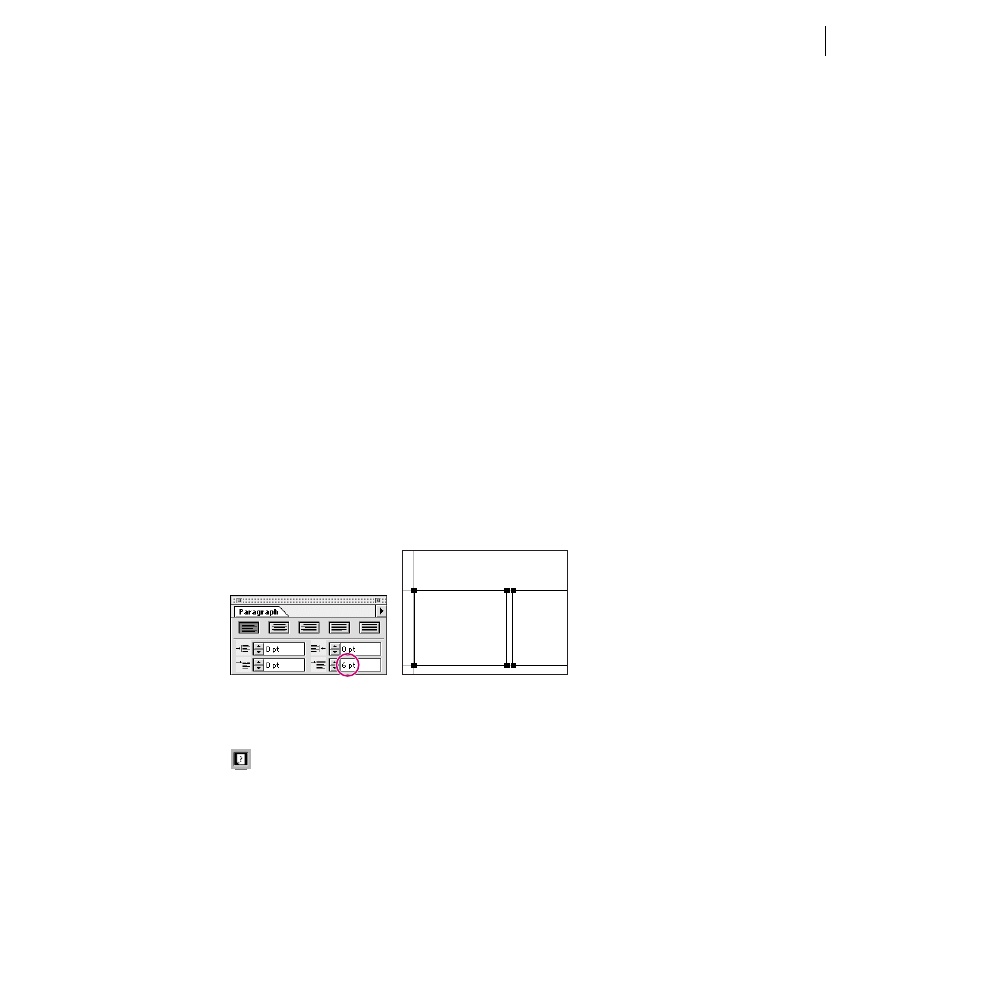
In the Character palette, hold down the mouse button on the Font Menu button (in the
top right corner of the palette) and choose a font (we chose Adobe Garamond Regular).
Enter sizes for the type and the leading in the Font Size and Leading text boxes. (We
specified 8.5 in the Font Size text box and 11 in the Leading text box.) Press Enter or
Return to apply the attributes.
Select font from Character palette menu.
Next you’ll select the first two paragraphs and format them as a quote and a byline.
3
First, choose Type > Show Hidden Characters to display all of the hidden characters in
the text, such as spaces and paragraph breaks.
4
Using the type tool ( )
,
triple-click inside the first paragraph to select only that
paragraph. (You can also select it by dragging.)
5
In the Character palette, choose a font from the pop-up menu (we selected Adobe
Garamond Italic), and enter sizes for the font and leading (we specified 11 points in the
Font Size text box and 16 points in the Leading text box). Press Enter or Return to apply
the changes.
6
Using the type tool again, triple-click inside the second paragraph to select it, and
experiment with different fonts and sizes for the byline. (We used Adobe Garamond
Italic, 11 points for font size, and 16 points for leading.)
Select and reformat first two paragraphs.
“The mastery of one move is
superior to the learning of one
hundred moves.”
—Master Instructor of Tai Chi Chuan,
1610 A.D.
Experience the power of Tai Chi Chuan
and become one with nature. Part 1
introduces a series of moves that simplify
and clarify the mental and physical
dynamics that empower T
Explore the structural me
universal to all Tai Chi m
styles, learn how to loose
all of the joints of the bod
the structural mechanics i
movements. Combine mi
inner body skill to maxim
energy, circulation and po
Class meets Mondays, W
Fridays, April 12–May 16
217
ADOBE ILLUSTRATOR 9.0
Classroom in a Book
7
Choose Type > Show Hidden Characters to turn off the display of all hidden characters
in the text.
8
Choose File > Save.
Changing paragraph attributes
You can set paragraph attributes (such as alignment or indenting) before you enter new
type, or reset them to change the appearance of existing, selected type. If you select several
type paths and type containers, you can set attributes for all of them at the same time.
Now you’ll add more space before all of the paragraphs in the column text.
1
Hold down Ctrl (Windows) or Command (Mac OS) to temporarily convert the type
tool to the selection tool, and click the edge of one of the type containers to select it.
(Clicking one of the type containers selects all three containers.)
2
Click the Paragraph tab behind the Character palette to display the Paragraph palette.
3
In the Paragraph palette, type
6
in the Space Before Paragraph text box (in the bottom
right corner), and press Enter or Return to separate all of the paragraphs by 6 points of
spacing. The space before the first paragraph adjusts so that the quote is aligned with the
top of the column.
Add space before paragraphs.
4
Choose File > Save.
For information on other features you can use when working with type, such as
kerning, tracking, tabs, and searching, see “Using Type” in online Help or Chapter 12 in
the
A
dobe Illustrator User Guide.
“The mastery of one move is
superior to the learning of one
hundred moves.”
—Master Instructor of Tai Chi
Chuan, 1610 A.D.
Experience the power of Tai Chi Chuan
and become one with nature. Part 1
introduces a series of mov
and clarify the mental and
dynamics that empower T
Explore the structural me
universal to all Tai Chi mo
styles, learn how to loosen
all of the joints of the bod
the structural mechanics i
movements. Combine min
inner body skill to maxim
LESSON 7
218
Working with Type
Adjusting the text flow
You’ll shorten the first text column to fit the quote and byline and force the rest of the type
to begin in the second column. Because the type containers are linked, adjusting any of
the columns affects all of them and the type within them.
1
Choose Edit > Deselect All to deselect the artwork.
2
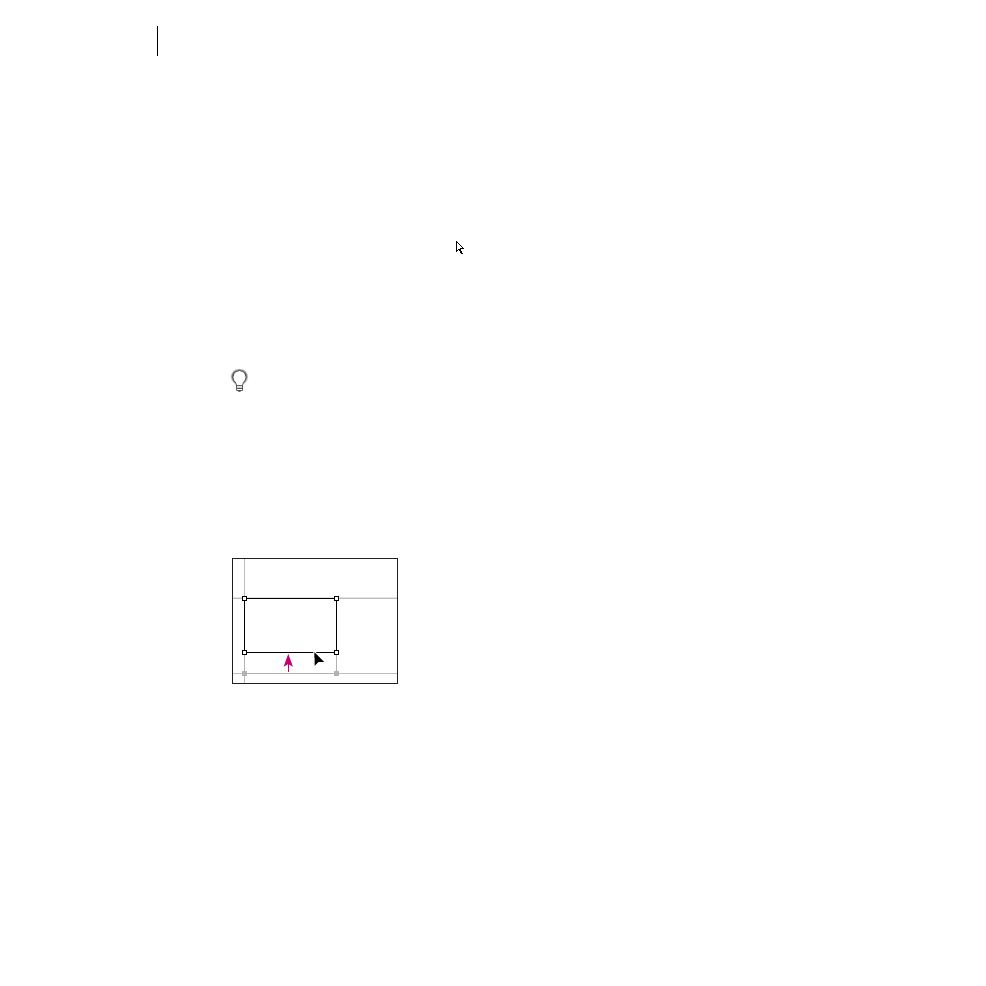
Select the direct-selection tool ( ) in the toolbox. The direct-selection tool lets you
resize one type container without resizing the others.
3
Select the bottom of the left column (don’t release the mouse button), and then hold
down Shift and drag the bottom of the column up to just below the byline (the second
paragraph).
You can easily locate the edges of type containers in two ways. Choose View > Smart
Guides to turn on the Smart Guides and display the outlines, center points, and points of
hidden objects whenever the pointer is over them. Or choose View > Outline to see the
outlines of all the objects in the artwork without the fills or strokes hiding them.
Shift-dragging constrains the movement to a straight line. (Shift-clicking the bottom
edge of the container with the direct-selection tool alternates between selecting and
deselecting the container.)
Shift-drag type container to resize.
Notice how the type flows into the second column as you adjust it. Type flows from one
object to another based on the type containers’ stacking order. In this case, the stacking
order is from left to right, in the order in which the columns were created.
4
Click away from the artwork to deselect it, and then choose File > Save.
“The mastery of one move is
superior to the learning of one
hundred moves.”
—Master Instructor of Tai Chi
Chuan, 1610 A.D.
Experience the power of T
and become one with natu
introduces a series of mov
and clarify the mental and
dynamics that empower T
Explore the structural me
universal to all Tai Chi mo
styles, learn how to loosen
all of the joints of the bod
the structural mechanics i
219
ADOBE ILLUSTRATOR 9.0
Classroom in a Book
Wrapping type around a graphic
You can make type wrap around any graphic object in Illustrator. To complete the column
layout, you’ll wrap the left column of type around the bottom leg of the figure.
In this example, we’ve added an unpainted object around the leg in the bitmap image so
that you can control the way the type will wrap around the figure.
1
Press Ctrl+Y (Windows) or Command+Y (Mac OS) to switch to Outline view.
2
Click the selection tool ( ) in the toolbox, and choose Object > Unlock All to unlock
and select the object that overlaps the left side of the type containers. (The object was
locked so that it wouldn’t interfere with drawing the containers.)
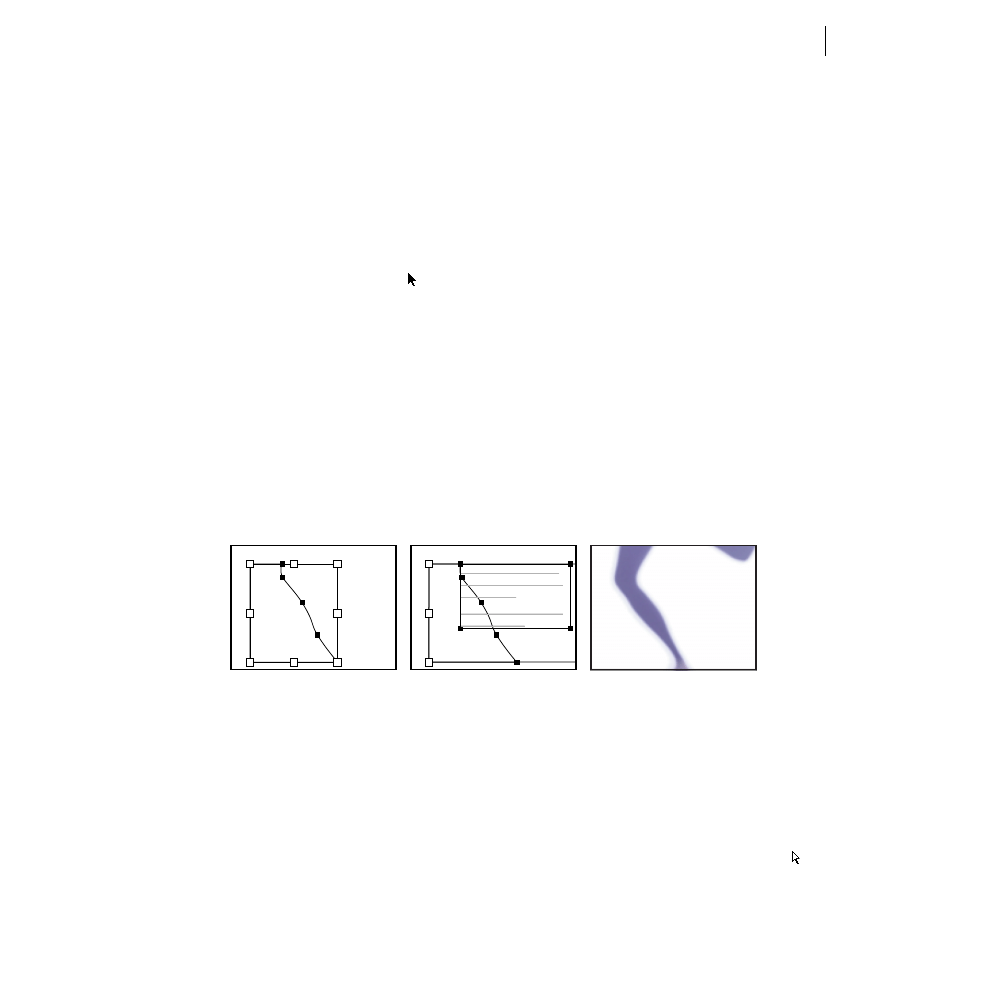
Objects that you use for wrapping type around must be in front of the type container.
3
Choose Object > Arrange > Bring to Front, and then Shift-click the border of the left
column to select the type containers too.
Because the containers are linked together, Shift-clicking one of the type containers
selects all three containers.
4
Choose Type > Wrap > Make to wrap the type around the object, and then choose
View > Preview.
Bring object border to the front.
Select type and object to be
Result
wrapped.
The type is wrapped around the object, and the type containers are now grouped with it.
You can use the direct-selection tool to select parts of the group and make changes.
5
Press Ctrl+Y (Windows) or Command+Y (Mac OS) to toggle between Preview view
and Artwork view as you work. Artwork view lets you see the unpainted object over the
leg.
6
Click away from the artwork to deselect it, and then select the direct-selection tool ( )
in the toolbox.
“The mastery of one move is
superior to the learning of one
hundred moves.”
—Master Instructor of Tai Chi
Chuan, 1610 A.D.
“The mastery of one move is
superior to the learning of one
hundred moves.”
—Master Instructor of Tai Chi
Chuan, 1610 A.D.
“The mastery of one move is
superior to the learning of
one hundred moves.”
—Master Instructor of
Tai Chi Chuan, 1610
A.D.

LESSON 7
220
Working with Type
7
Select the object over the leg and drag segments of the object’s path outward, or select
an anchor point and drag the direction lines to change the shape of the object and, conse-
quently, the shape of the wrapped type.
8
If necessary, use the direct-selection tool to select the bottom of the left column (don’t
release the mouse button), and drag it down to adjust the last line of the byline.
You can use the type tool to click anywhere in the columns of placed text and make
changes as you wish, such as typing some new words or correcting the spelling.
9
When you are satisfied with how the type wraps, choose Edit > Deselect All to deselect
the artwork.
10
Choose File > Save.
Typing along a path
Another way to create type in Illustrator is to enter type along a path. Now you’ll add a
credit line to the image of the dancing figure.
1
If necessary, press Ctrl+Y (Windows) or Command+Y (Mac OS) to switch to
Preview view.
The current fill and stroke settings were both set to None when you selected the path
along the bottom leg. You’ll change the paint settings so you can see a path as you draw it
along the upper leg in Preview view.
2
With the artwork deselected, set the paint attributes in the toolbox to a fill of none and
a black stroke (by clicking the Fill box and the None button, and then clicking the Stroke
box and the Color button).
3
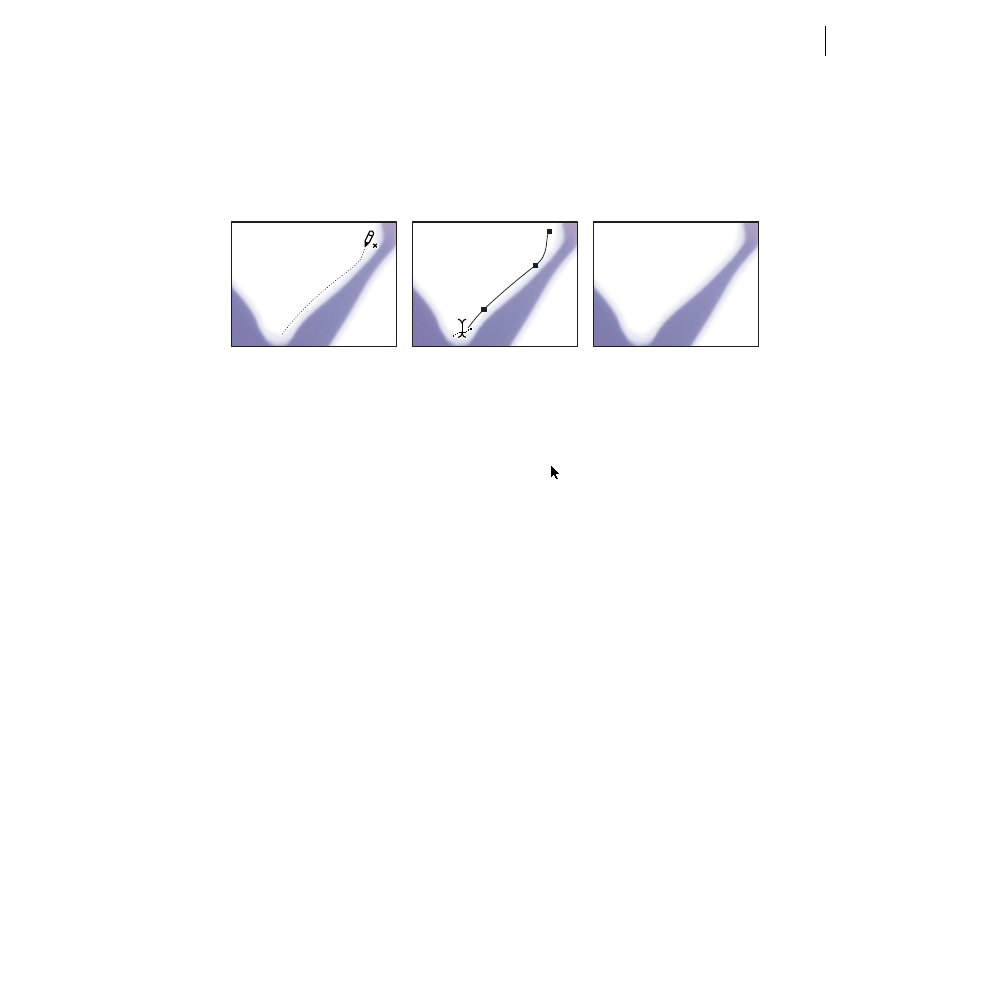
Select the pencil tool ( ) in the toolbox, and drag it to draw a line along the back of the
figure’s raised leg. The line remains selected after you draw it.
4
Select the path-type tool (
) from the same group as the type tool in the toolbox, and
click at the beginning of the line.
Clicking a line with the path-type tool converts the line to an invisible path (without any
fill or stroke color), and a blinking insertion point appears.
221
ADOBE ILLUSTRATOR 9.0
Classroom in a Book
5
Click the Character tab behind the Paragraph palette to display the Character palette,
choose a font from the pop-up menu (we selected Adobe Garamond Regular), type 6
points in the Font Size text box, and press Enter or Return to set the new attributes.
6
Type the credit for the figure: Photo from Adobe Image Library.
Draw a line.
Convert line to type path.
Type words along path.
When you turn a path or object into a type path, the path becomes unstroked and
unfilled, even if the path was originally stroked or filled. After the type is selected, any
changes to the paint settings affect only the type, not the path.
7
To move the type path, use the selection tool ( ) to select the block of type, and drag
it to the new position.
8
To adjust the starting position of the type along the path, select the path-type tool, and
then click before the word Photo. Press the spacebar to move the type further along
the path.
9
Choose File > Save.
P
ho
to
fr
om
A
do
be
Im
ag
e L
ib
ra
ry
LESSON 7
222
Working with Type
Creating type outlines
You can modify the shapes of individual letters in a block of type by converting the block
to type outlines or letterforms. When you create type outlines, each character becomes a
separate object with compound paths outlining the character.
Now you’ll convert the number 800 into outlines and change the shape of the letterforms
to create a special effect.
1
Choose View > Outline, and then choose Window > Show Navigator to display a
thumbprint of the artboard in the Navigator palette. Click in the top right corner of the
thumbprint image to move the red box over the number 800.
2
Use the selection tool ( ) to select the type 800 in the top right corner of the artwork,
and then choose Type > Create Outlines.
The type is converted to a set of compound paths around each number that can be edited
and manipulated like any other object.
3
Click away from the artwork to deselect the numbers, and then select the group-
selection tool ( ) from the same group as the direct-selection tool in the toolbox.
The group-selection tool lets you select individual outlines in a compound path.
4
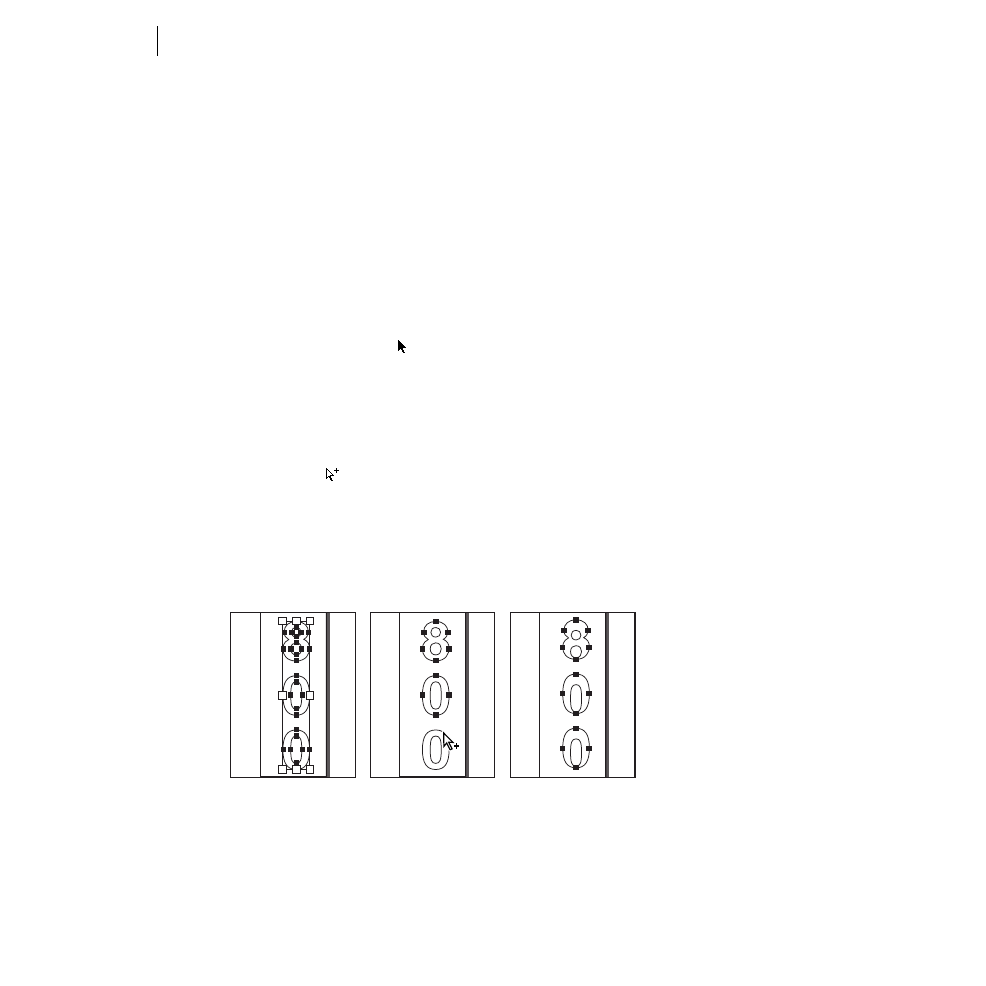
Shift-click to select the outer paths of all three numbers, and press the Up Arrow key a
few times to move the paths up, leaving the inner paths of all three in their original
position.
Create outlines.
Select the outer lines.
Press the Up Arrow key.
You can also change the shape of letterforms by using the direct-selection tool to select
path segments or anchor points in the outlines and dragging the direction lines in new
directions.
223
ADOBE ILLUSTRATOR 9.0
Classroom in a Book
5
Click away from the artwork to deselect it, and press Ctrl+Y (Windows) or
Command+Y (Mac OS) to switch back to Preview view.
Creating type masks
Masks crop part of an image so that only a portion of it is revealed through the shape or
shapes that you create. You can use type as a mask without having to convert the type to
outlines first. After creating a mask using type, you can still edit it—for example, by
adjusting the font or size and even by typing in new text.
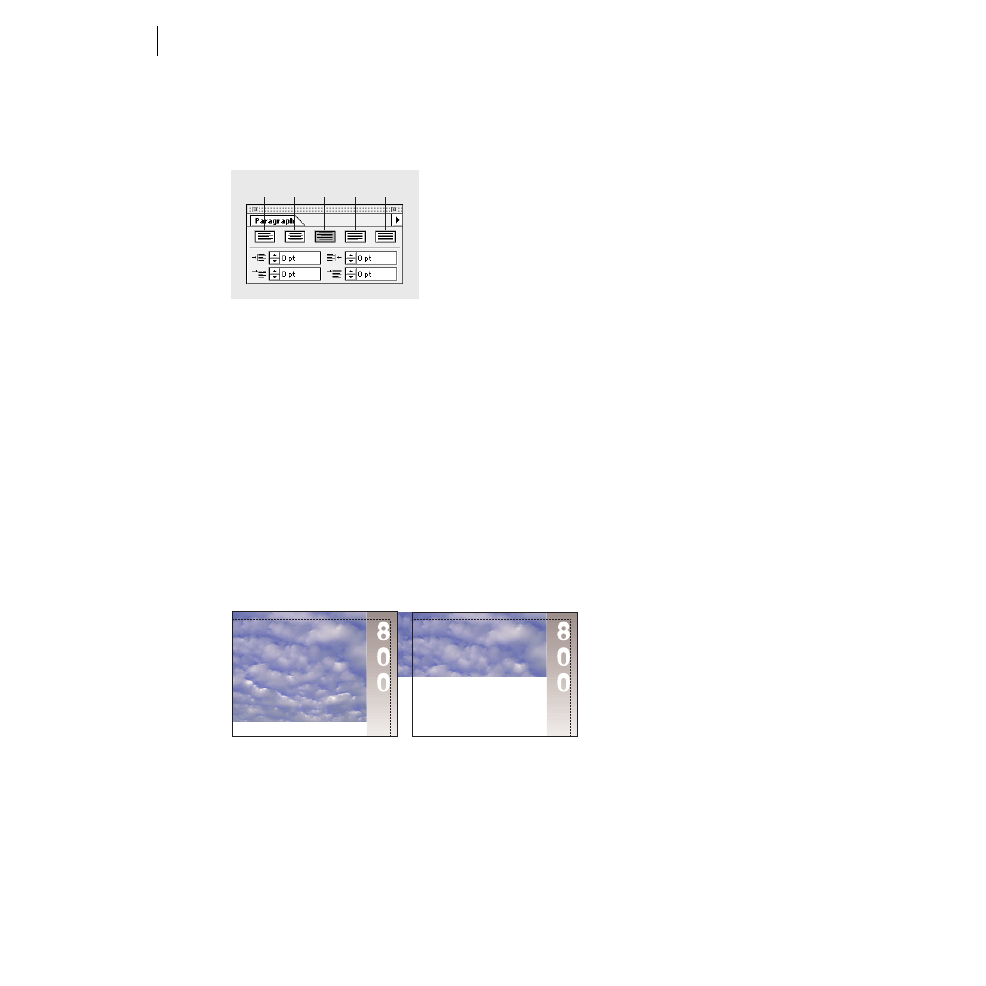
In this example, you’ll create a mask using type and an embedded bitmap image. We
pasted an image of a cloudy sky into the document to use as the background of the mask.
For information on embedding and linking image files in your artwork, see
“Setting Up Artwork in Illustrator” in online Help or Chapter 2 in the Adobe Illustrator
User Guide.
Now you’ll add the heading “ASIAN STUDIES PROGRAM” in the top right corner of the
poster and convert it to a type mask over the cloudy sky image.
1
Click the selection tool ( ) in the toolbox, and move the image of the sky from the area
outside of the artboard to the top right corner of the artwork next to the 800 rectangle.
2
Select the type tool ( ) from the same group as the path-type tool (
) in the toolbox,
and click in the sky next to the number 8.
Move the sky image.
Select the type tool and click.
3
In the Character palette, choose a font from the pop-up menu (we chose Myriad Bold),
enter sizes for the font and the leading (we specified 28 points in the Font Size text box
and 28 points in the Leading text box), and press Enter or Return to apply the settings.
LESSON 7
224
Working with Type
4
Click the Paragraph tab to display the Paragraph palette, and click the Align Right
button.
A.
Align left B.
Align center
C.
Align right D.
Justify full lines
E.
Justify all lines
5
Press the Caps Lock key to type in all uppercase letters. Type ASIAN, and then press
Enter or Return to move the insertion point to the next line. Type STUDIES, press Enter
or Return, and then type PROGRAM.
6
Click the selection tool to select the entire block of type, and Shift-click to select the sky
image behind it.
The object that will be the mask can be a single shape, multiple shapes, or type. The
masking object (in this case, the type) must be on top of the artwork you want to mask.
7
Choose Object > Clipping Mask > Make to convert the front object into a mask and
see through to the image.
Select type and sky image.
Apply clipping mask.
The type mask loses its paint attributes and is assigned a fill and stroke of None. Thus, if
you moved the type away from the background image, you would no longer see the type
mask in Preview view unless you select it or assign it new paint attributes.
A
B
C
D
E
ASIAN
STUDIES
PROGRAM

225
ADOBE ILLUSTRATOR 9.0
Classroom in a Book
Once you have created a mask, you can still adjust the artwork and the type (the mask)
independently. For example, you can resize either the artwork (here an embedded photo)
or the type, as well as rotate, skew, and reflect them.
8
Double-click the hand tool ( ) in the toolbox to fit the artwork in the window.
9
Choose File > Save.
You’ve completed the artwork for the Tai Chi poster using a variety of options for working
with type.
Saving your file for electronic distribution
Now you’ll save a copy of the poster in Portable Document Format (PDF) so you can
distribute it electronically, or link it to your Web site. When you save your artwork in PDF
format, Illustrator creates an exact snapshot of the page that lets you view it online
without the fonts, linked images, or software used to create it.
1
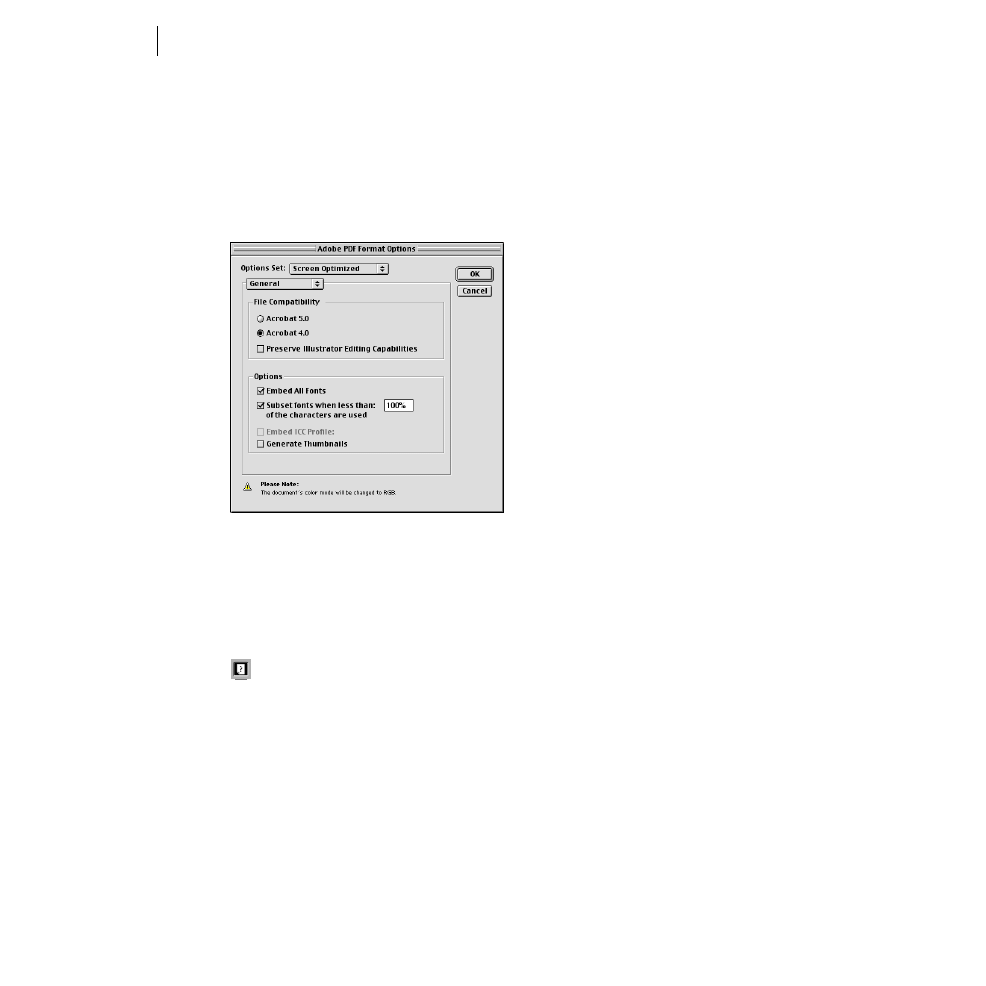
Choose File > Save a Copy. In the dialog box, choose Adobe PDF (PDF) from the Save
as Type (Windows) or Format (Mac OS) pop-up menu, name the file TaiChi.pdf, and
click Save.
2
In the Adobe PDF Format Options dialog box, choose Screen Optimized from the
Options Set pop-up menu to display a set of options for the Web. (Notice that the
document’s color mode will automatically be converted to RGB for optimal screen
viewing.) Leave the other settings as they are and click OK.
LESSON 7
226
Working with Type
3
In the warning dialog box on “Preserve Illustrator Editing Capabilities” not being
checked, click OK to save the file.
Note: Select the Preserve Illustrator Editing Capabilities when exporting a file only if you
want to be able to reopen and edit the file in Adobe Illustrator. If you are posting the file on a
Web site, you probably don’t want it to be editable.
Illustrator saves the copy of the poster as a Web-ready PDF file that can be viewed
electronically in Adobe Acrobat Reader® and linked to your Web pages to be viewed in a
browser. Acrobat Reader—electronic publishing software for Windows, DOS, UNIX®,
and Macintosh®—is provided on the Adobe Illustrator CD and is available on the Adobe
Web site (http://www.adobe.com) for free distribution.
For information on saving Illustrator files in different formats, see “Saving and
Exporting Artwork” in online Help or Chapter 14 in the Adobe Illustrator User Guide.
For information on converting artwork to GIF and JPEG images for your Web pages, see
Lesson 15, “Preparing Graphics for Web Publication.”
To learn about printing your poster, see Lesson 13, “Printing Artwork and Producing
Color Separations.”

227
ADOBE ILLUSTRATOR 9.0
Classroom in a Book
Review questions
1
Describe three ways to enter text into the artwork.
2
How do you change the leading between lines in a paragraph? How do you change the
leading between paragraphs?
3
How can you divide a type container into smaller containers?
4
How do you create type that follows the shape of a path or an object?
5
What is a reason for converting type to outlines?
6
How do you create a type mask?
Review answers
1
To enter text in the artwork, do any of the following:
•
Select the type tool ( ) and start typing.
•
Import text from another file by choosing File > Place.
•
Select the path-type tool, click on any path, and start typing.
2
To change the leading between lines in a paragraph, select the paragraph and then enter
a new leading value in the Character palette. (Choose Type > Character to display the
Character palette.) To change the leading (or space) between paragraphs, select the block
of type and then enter a new leading value in the Space Before Paragraph text box in the
Paragraph palette. (Choose Type > Paragraph to display the Paragraph palette.)
3
To divide a type container into smaller containers, select the container and choose
Type > Rows & Columns. In the Rows & Columns dialog box, enter the number of
horizontal or vertical containers, or both, into which you’ll divide the container, their size,
and the space between each container.
4
You can use the path-type tool (
) to type words along an existing path. You can also
wrap a block of type around an object by selecting the type and the object and choosing
Type > Wrap > Make. (The object must be in front of the type.)

LESSON 7
228
Working with Type
5
Convert type to outlines when you want to transform (scale, reshape, and so on) letters
individually in the word or block of type. Outlines are also useful for filling type with a
gradient fill.
6
One way to create a type mask is to select the type that you want to be the mask,
and select the object, bitmap image, or type that you want to show through the mask.
(The masking type must be in front of any other objects.) Then choose Object >
Clipping Mask > Make to create the type mask.
Document Outline
- Front
- Table of Contents
- A Quick Tour of Adobe Illustrator
- 1.Getting to Know the Work Area
- 2.Creating Basic Shapes
- 3.Painting
- 4.Drawing with the Pen Tool
- 5.Working with Brushes
- 6.Transforming Objects
- Color Section
- 7.Working with Type
- 8.Blending Shapes and Colors
- 9.Using Appearance Attributes, Styles, and Effects
- 10.Working with Layers
- 11.Creating Airbrush Effects
- 12.Drawing Cylinders and Boxes
- 13.Printing Artwork and Producing Color Separations
- 14.Combining Illustrator Graphics and Photoshop Images
- 15.Preparing Graphics for Web Publication
- Index
- Production Notes
- ACE Ad
Wyszukiwarka
Podobne podstrony:
ai9 cib ch02 basicshapes
ai9 cib ch06 transforming
ai9 cib ch04 pentool
adobe type library 3L4OQ6UISISW Nieznany (2)
Numery nadwozi samochodów Volkswagen Type 1, AUTA NAPRAWA, Volkswagen
AI9 1
Le type injonctif se?ractérise par?ux modes
Alcyon Type Movitesse 175cc 1923 Manual Entretenimiento 5541
Coracoclavicular Ligament (Regular Type) tapeSP
CH07
Plantar I shape (Longitudinal Arch Type) tapeSP
istqb test type
Coracoclavicular Ligament (Pad Type) KT method
[Paper Model] [Submarine] [Wilhelmshavner] U 96 Type VII C U Boat
Congenital pericardial defect with Gerbode type
Genomes3e ppt ch07
więcej podobnych podstron