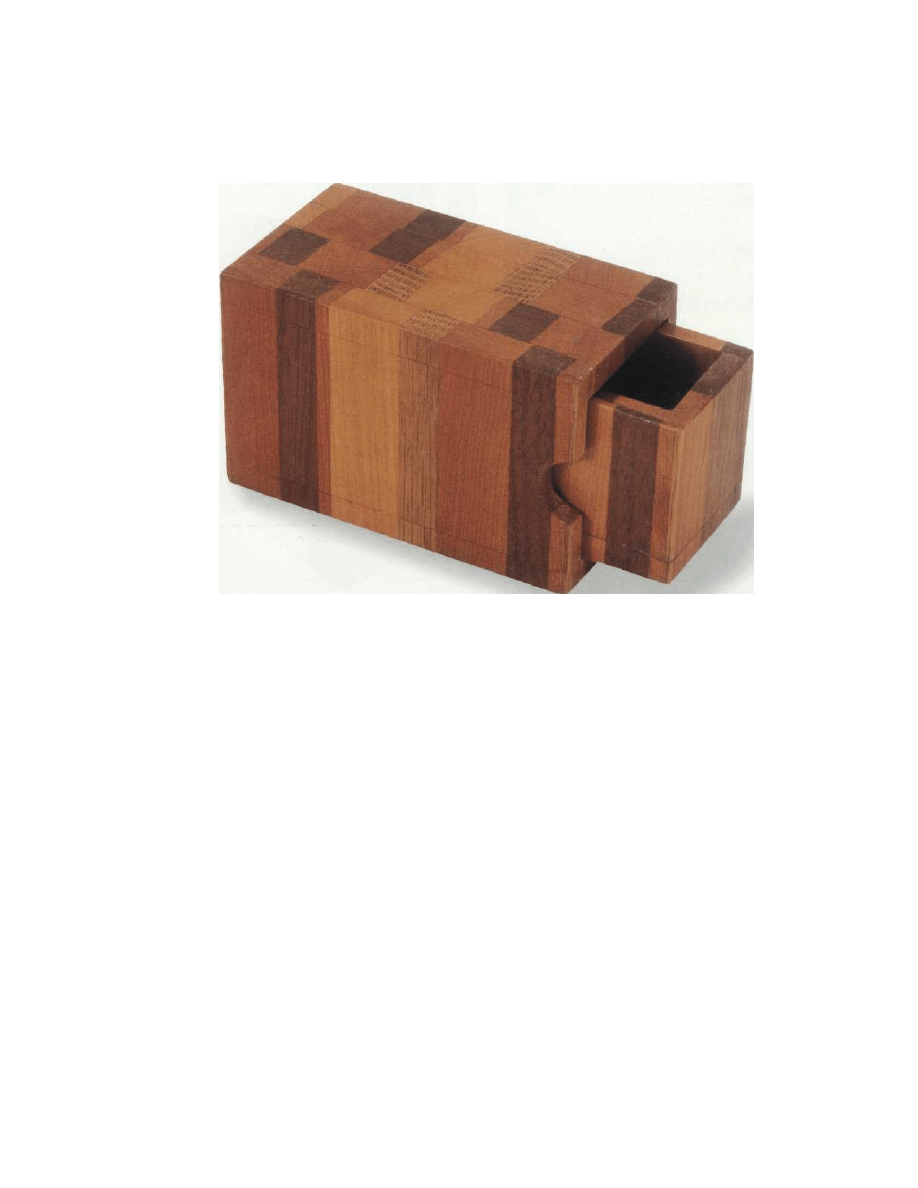
Laminated Jewelry Box
his project draws its inspiration from the English
decorative woodworking technique known as Tun-
bridgeware. This ware is characterized by small items that
give the appearance of being worked with delicate tessera
inlay. The technique involves gluing colored sticks of
wood together in bundles and then repeatedly slicing,
repositioning and re-gluing.
With this little box, the slicing and laminating tech-
nique is used in conjunction with what has come to be
called "band saw joinery."
MAKING THE LAMINATED BOX
First and foremost, you have to understand that with this
project there are several steps along the way where there
is a high risk of the whole thing falling to pieces. This
being so, we decided at the outset to work on two boxes
at the same time, just in case of mistakes. Well, as you
can see in the photographs, we got so far with one box
and—Splap!—it came to grief.
When you have studied the working drawings, gather
your chosen offcuts, and plane them down to smooth-
sided sections. Stick them together side by side, like a
long fence. When the glue is dry, plane both sides of
the fence, cut it into short lengths, and then re-glue the
resultant lengths into a layered sandwich. Continue slic-
ing, planing, gluing and laminating, until you have what
you consider an interesting multicolored brick. And of
course, the more you slice and laminate, the smaller the
design and the greater the complexity of the pattern.
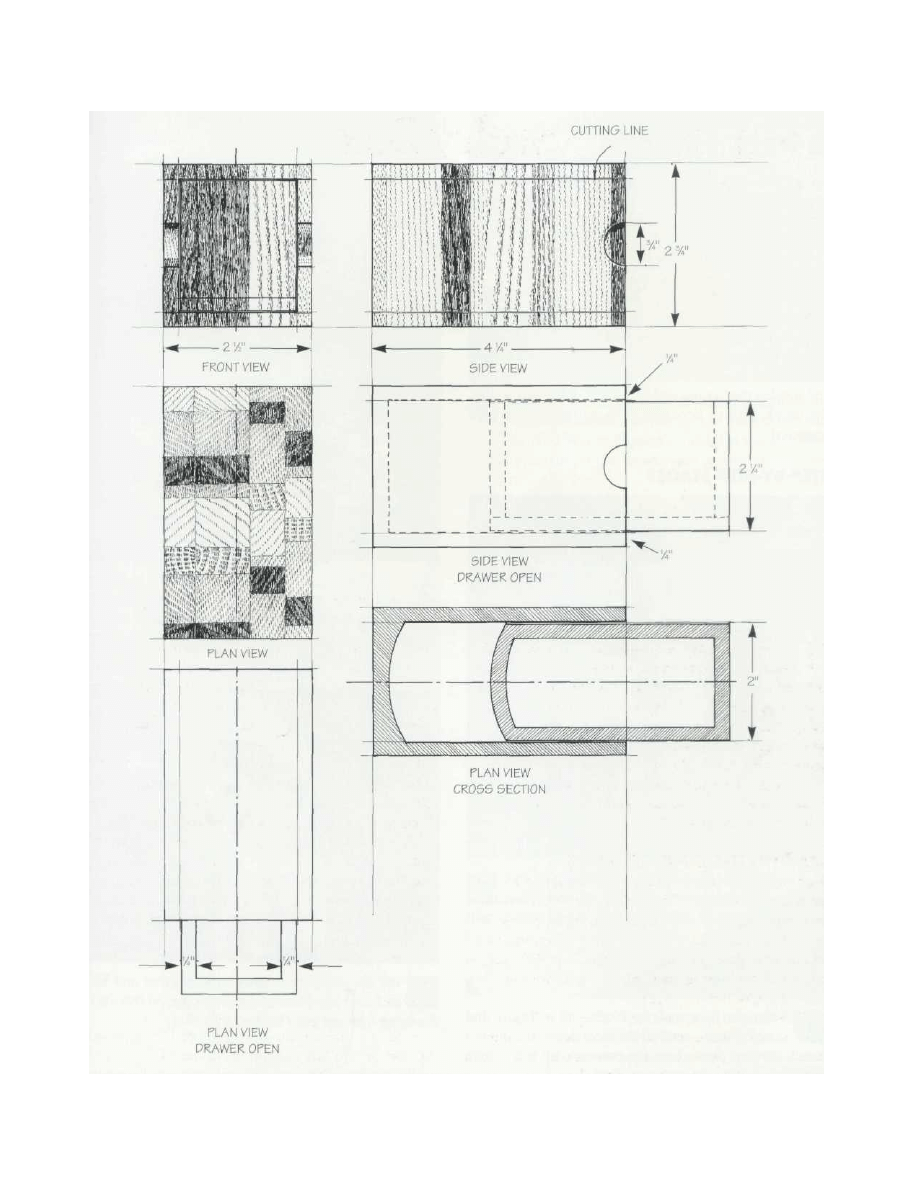
Plane your brick to size so that it is 2 1/2" X 2 3/4" in
section and 4" long, with all six sides being smooth and
at right angles to each other. Pencil label the various sides
"top," "bottom," "back," "front," "left side" and "right
side."
Use the band saw to cut a 1/4" slice from the "top" and
"bottom," label the slices and put them carefully to one
side. This done, set the shape of the drawer out on the
rough face of the block, and use either a fine-bladed band
saw or a scroll saw to cut it out. Next, slice the bottom off
the drawer, label it and put it to one side. Then use the
scroll saw to clear away the waste from what will be the
inside of the drawer. While the saw is handy, cut away the
two finger holes and run a cut straight down back-center
of the shell-like piece that wraps around the drawer.
When you have made all six component parts—the
top and bottom slabs of the brick, the all-in-one-piece
back and sides that has been cut into two halves, the
T
Copyright 2004 Martian Auctions
976
Copyright 2004 Martian Auctions
977
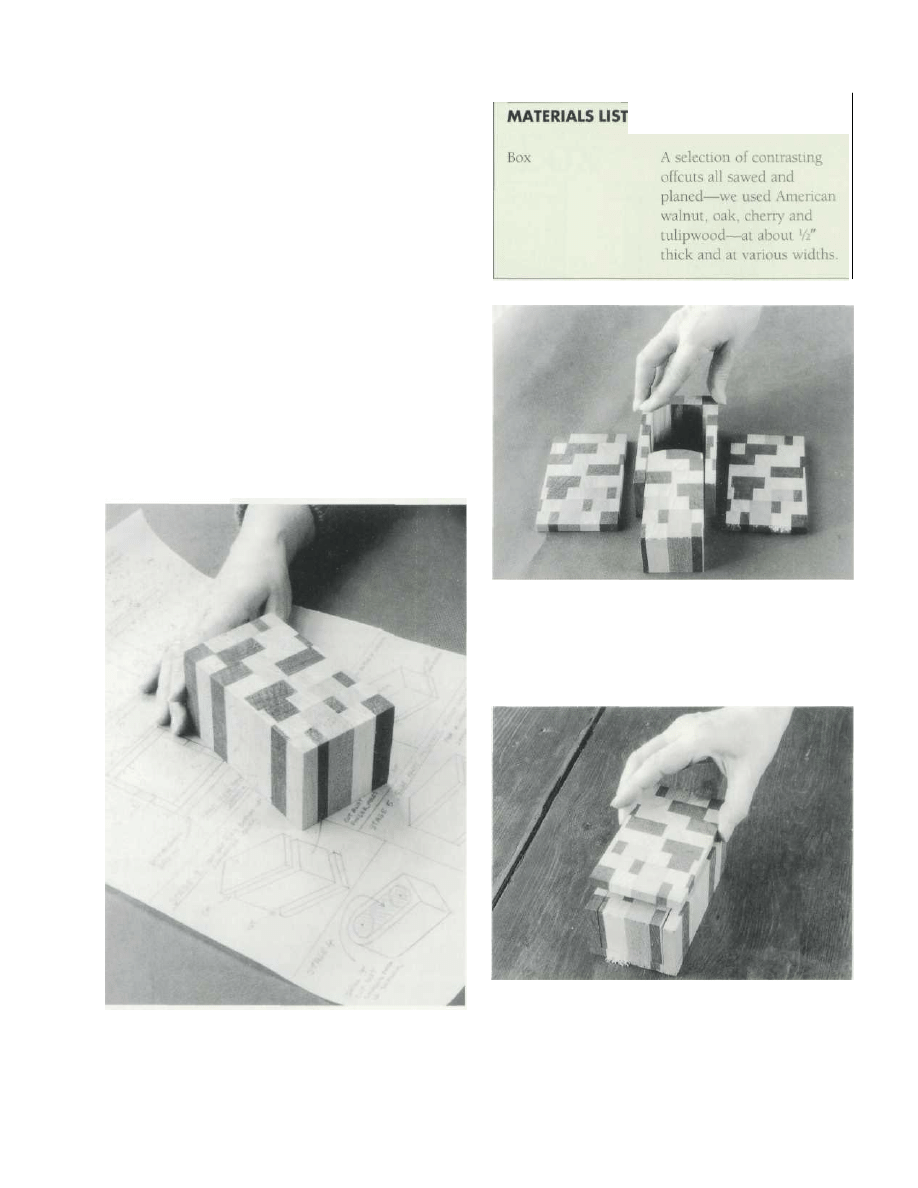
drawer with the inside cut away, and the bottom to the
drawer—take the finest-grade sandpaper and rub all the
sides and faces down to a smooth finish. Be careful that
you don't blur the corners.
To put the little box together, start by gluing the base
onto the drawer. Then smear glue on mating faces and
reconstruct the block so that the drawer is nicely and
closely contained. Finally, when the glue is dry, sand and
finish the box.
SPECIAL TIP
If you like the idea of this project and want to try some-
thing a little more complex, you could experiment with
cross-laminating. For example, you could turn the slices
around at the sandwiching steps so that all faces of the
brick show end grain. Then again, you could try swapping
and turning the bottom and side slices of the box so that
t h e block pattern becomes even more complex and
staggered.
STEP-BY-STEP STAGES
When you have made the block—all well glued and
sawed to size—sand all the faces down to a
smooth finish. Do your best to keep the corners crisp and
at right angles.
2 Saw slices off the top and bottom of the block and
cut out the shape that goes to make the drawer. Be
mindful that the drawer surround—meaning the piece
that you see me holding—is very fragile at this stage and
liable to break apart at the corners.
3 Put the component parts back together and label
each and every face and mating edge, so there is no
doubting how the parts fit one to another.
1
Copyright 2004 Martian Auctions
978
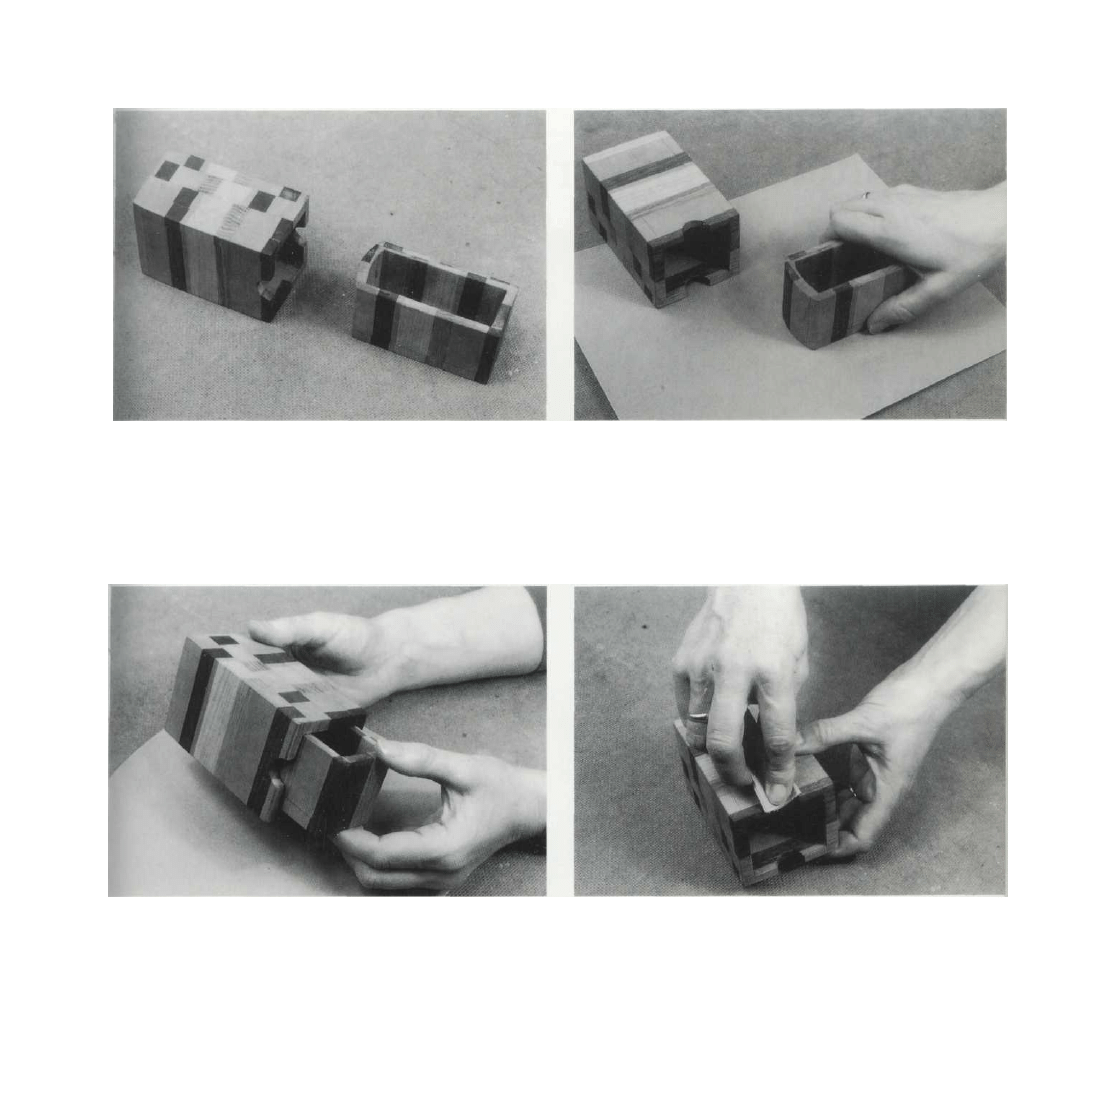
4 Having sliced off the bottom of the drawer block, saw
out the inside-drawer waste and then glue the base back
on the drawer. And just in case you have noticed that
this photograph shows another block, the sad truth is the
original block fell to bits when 1 was cutting the drawer.
I think the problem was that I was a bit anxious and
heavy-handed, and the glue hadn't quite cured.
Sanding the various faces is a very slow business for
the simple reason that you have to work slowly and
with care. You have to be most careful that you don't put
undue pressure on the drawer—no squeezing the sides
together.
6 If you find that the drawer is a somewhat loose fit,
it's a good idea to give the inside of the box a couple
of coats of sealer and then sand back to a nice push fit.
The best procedure is to sand a little and test the fit, then
sand some more, and so on until you are satisfied.
Sand the finger holes to a rounded finish. You have
a choice at this stage . . . do you want to round and
blur all the corners, or do you want to keep them sharp?
Copyright 2004 Martian Auctions
979
Wyszukiwarka
Podobne podstrony:
jewelry box scroll patterns
Box jewelry box
2009 jewelry box beginner
Jewelry Box
Box Jewelry Box 1
jewelry box scroll patterns
Crafts Woodworking Magazine (Ebook) Shopnotes #150 Extra Oval Jewelry Box Lid Pattern
picket window box
christmas box
DiagLab UkładKrzepnięcia 2 BOX
horse creep box
Ortopedia Egzamin 2012 BOX
gift box a p
Bentwood Box
kostka 3DSolid Box, makra zwcad
więcej podobnych podstron