Jewelry Box
Plan No. 906
Copyright U-Build, Inc., 2000.
All rights reserved. Printed in the U.S.A.
Bill of Material
Quantity
Size
Material
Item
1
3/4
”
x 6
”
x 6
’
Maple
A, B, D
1
3/8
”
x 6
”
x 6
’
Maple
C, G, H,
I, J, K
1
1/2
”
x 3/4
”
x 5
’
Maple Molding
E, F
1 Pair
1 1/2
”
Butt Hinges
1
Small Box Lock
1
Small Bottle
Wood Glue
1
Pint
Finish
Cutting Schedule
Part
Qty
T
W
L
Material
A
2
3/4
”
4 1/4
”
8 1/4
”
Maple
B
2
3/4
”
4 1/4
”
12
”
Maple
C
1
3/8
”
7 1/2
”
10 1/2
”
Maple
D
1
3/4
”
9
”
12
”
Maple
E
2
1/2
”
3/4
”
10
”
Maple
F
2
1/2
”
3/4
”
13
”
Maple
G
2
3/8
”
1 3/4
”
7
”
Maple
H
2
3/8
”
1 3/4
”
10 3/8
”
Maple
I
2
3/8
”
6 5/8
”
9 5/8
”
Maple
J
1
3/8
”
1 3/8
”
6 5/8
”
Maple
K
2
3/8
”
1 1/2
”
7 1/2
”
Maple
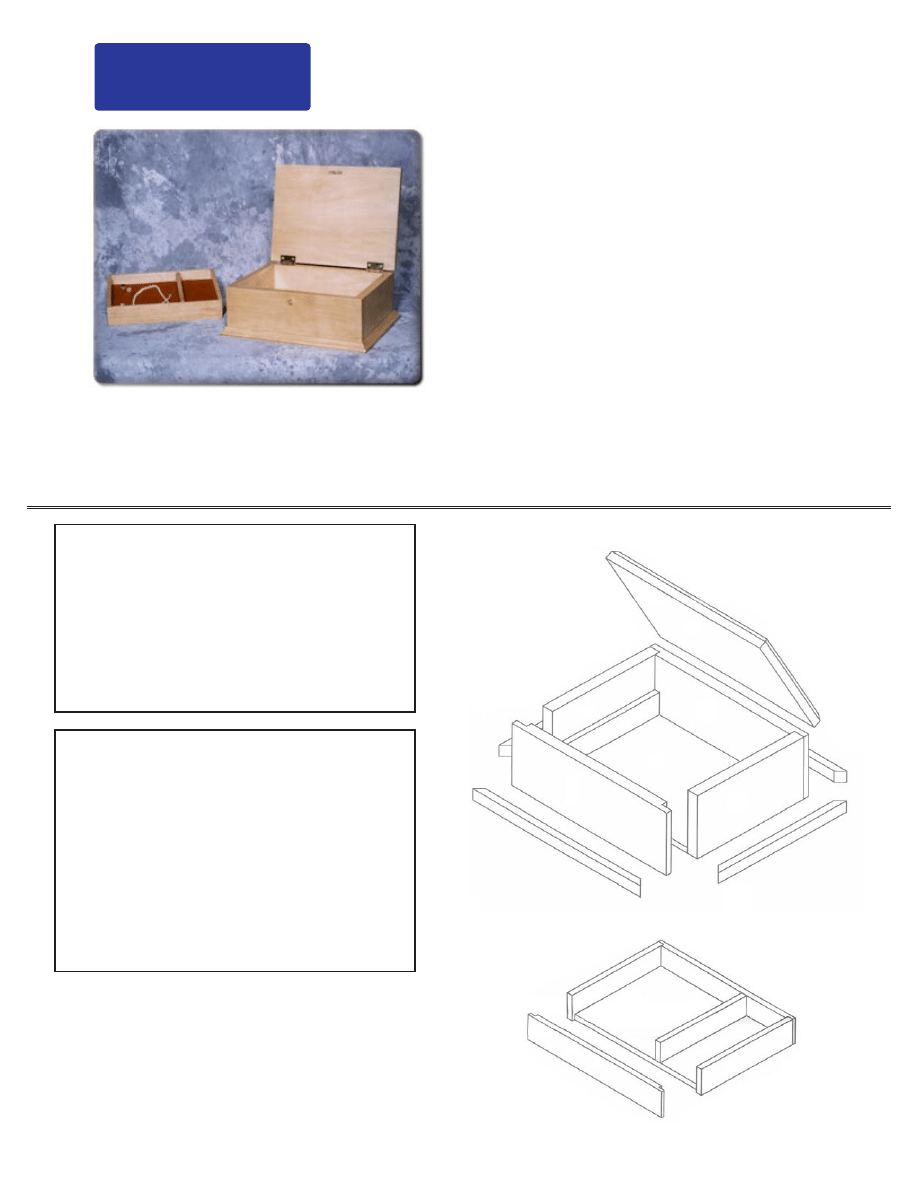
Even costume jewelry shines when it’s housed in an elegant,
handcrafted jewelry box. That’s what makes this jewelry box
project ideal for any collection. Made of maple for it’s beauty and
durability, the box features a lock for security and a convenient lift-out tray.
Utilizing all straight cuts and simple joinery techniques, the jewelry box is a good project for beginners. Just cut the
pieces to size, assemble, finish and install the hardware. The inside may be flocked or lined, or simply finished like the
outside.
The completed jewelry box measures 13 inches wide by 10 inches deep by 5 inches tall.
NOTES
1.
Although maple is preferred for this project, other
wood may be substituted.
2.
You may add more partitions to or relocate board (J) in
the removable tray.
4.
Read manufacturer’s instructions before operating
equipment.
3.
Always wear safety glasses.
G
H
A
K
C
B
D
B
A
E
F
E
F
I
H
G
J
A
M E R I C A
'
S
F
AVO R I T E
W
O O D WO R K I N G
P
L A N S
U - B I L D
1. Read all instructions before beginning any work.
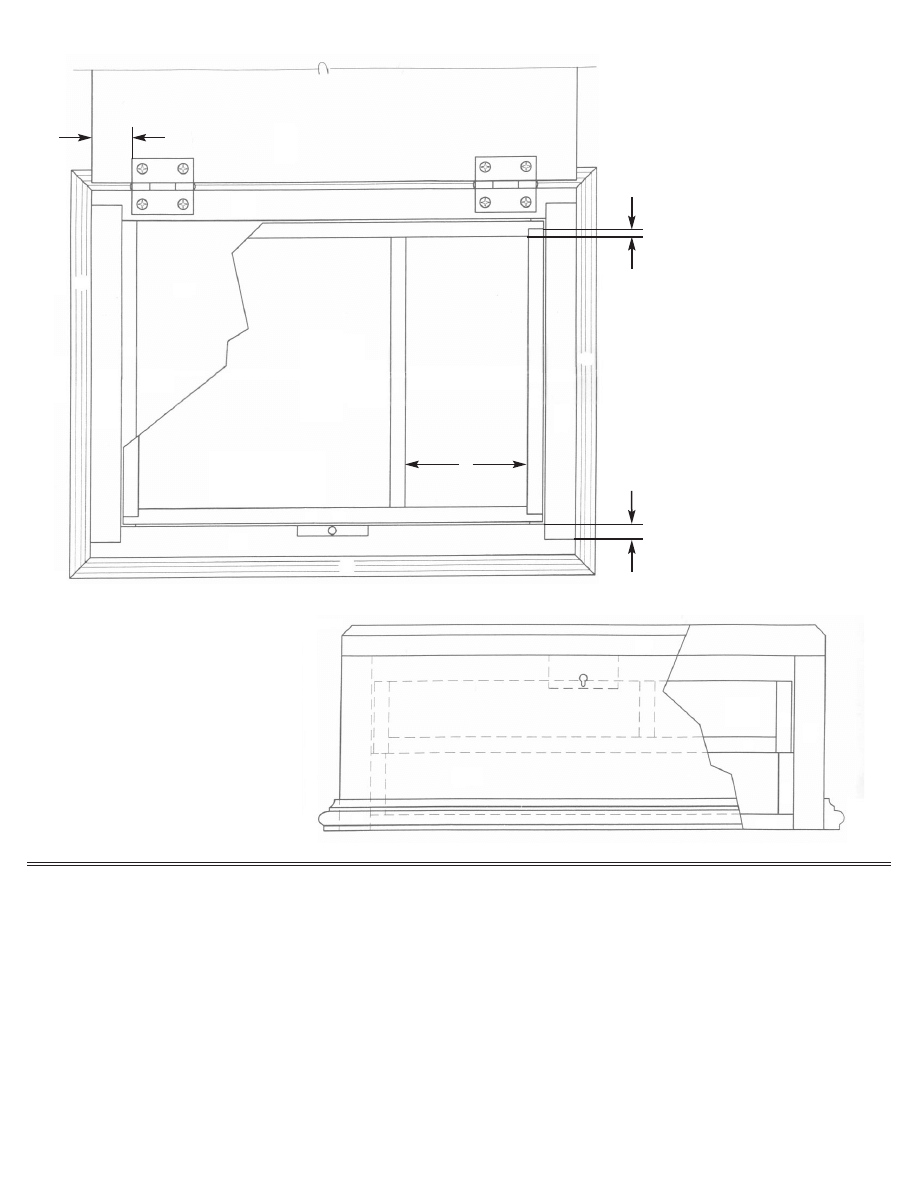
2. Cut all material to sizes shown in cutting schedule. (This is a good time to cut out the area for installing a lock.)
3. Glue and clamp boards (B) to boards (A). Check assembly for squareness.
4. Glue the bottom of the box (C) to assembly (A, B).
5. Glue and clamp boards (G) to boards (H). Check assembly for squareness. Glue the bottom of the box (I) to
assembly (G, H).
6. Install board (J) with glue to tray assembly. Cut tray supports (K) to fit box assembly.
7. Cut 45 degree miter on molding pieces (E) and (F) and glue to box.
8. Sand, apply finish and install hardware.
Assembly Instructions
A
G
H
D
D
1
3/16 TYP
3/8 TYP
B
C
E
I
H
G
3
E
A
J
K
A
G
B
F
H
B
F
K
C
E
I
Wyszukiwarka
Podobne podstrony:
jewelry box scroll patterns
Jewelry Box 2
2009 jewelry box beginner
Jewelry Box
Box Jewelry Box 1
jewelry box scroll patterns
Crafts Woodworking Magazine (Ebook) Shopnotes #150 Extra Oval Jewelry Box Lid Pattern
picket window box
christmas box
DiagLab UkładKrzepnięcia 2 BOX
horse creep box
Ortopedia Egzamin 2012 BOX
gift box a p
Bentwood Box
kostka 3DSolid Box, makra zwcad
więcej podobnych podstron