How to Replace Terminals
How to Replace Terminals
With Terminal Retainer or Secondary Locking Device
a.
Locking device must be disengaged before the terminal locking clip can be released and the terminal removed from the
connector.
b.
Use a special tool or the terminal pick to unlock the secondary locking device or terminal retainer. NOTE: Do not remove the
terminal retainer from connector body.
ZOOM
SIZED FOR PRINT
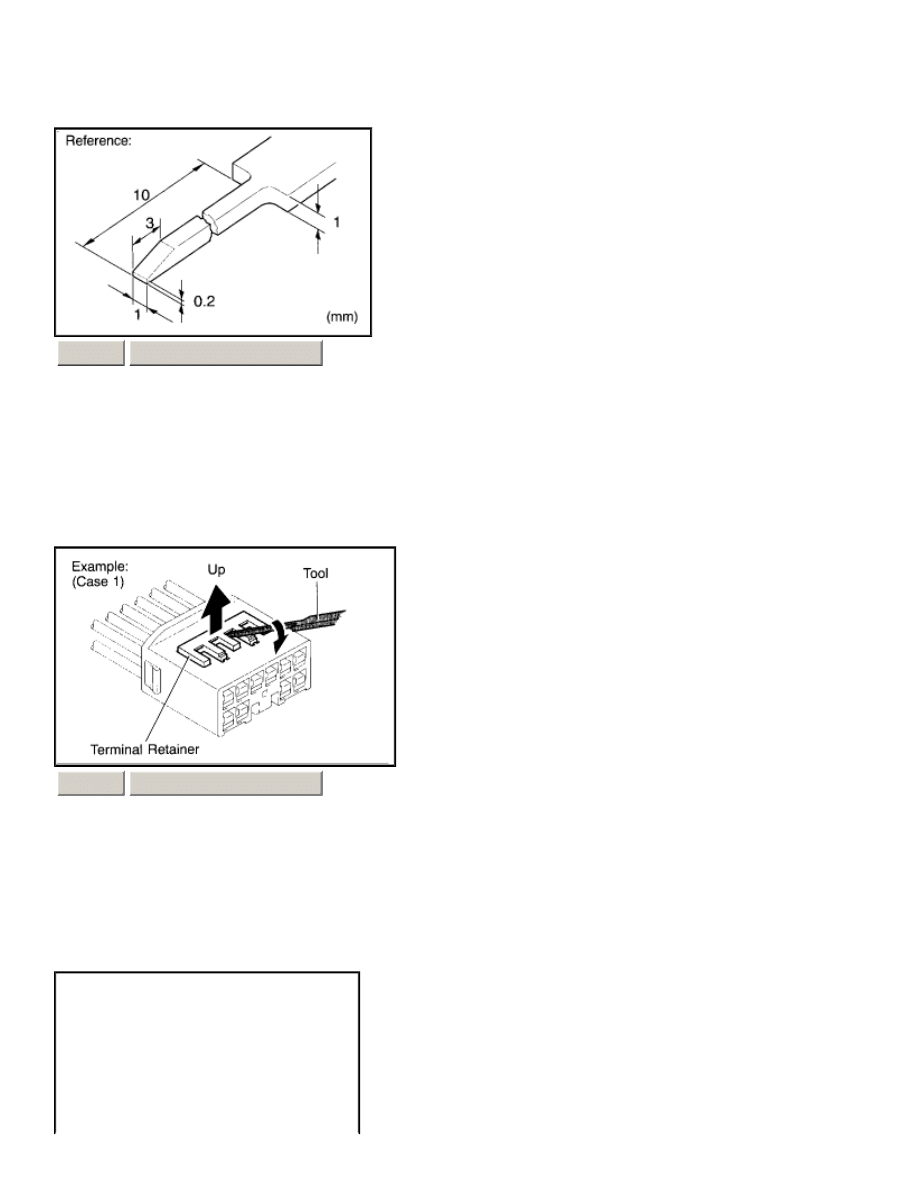
1.
PREPARE THE SPECIAL TOOL
HINT: To remove the terminal from the connector, please construct and use the special tool or like object shown on the left.
2.
DISCONNECT CONNECTOR
ZOOM
SIZED FOR PRINT
3.
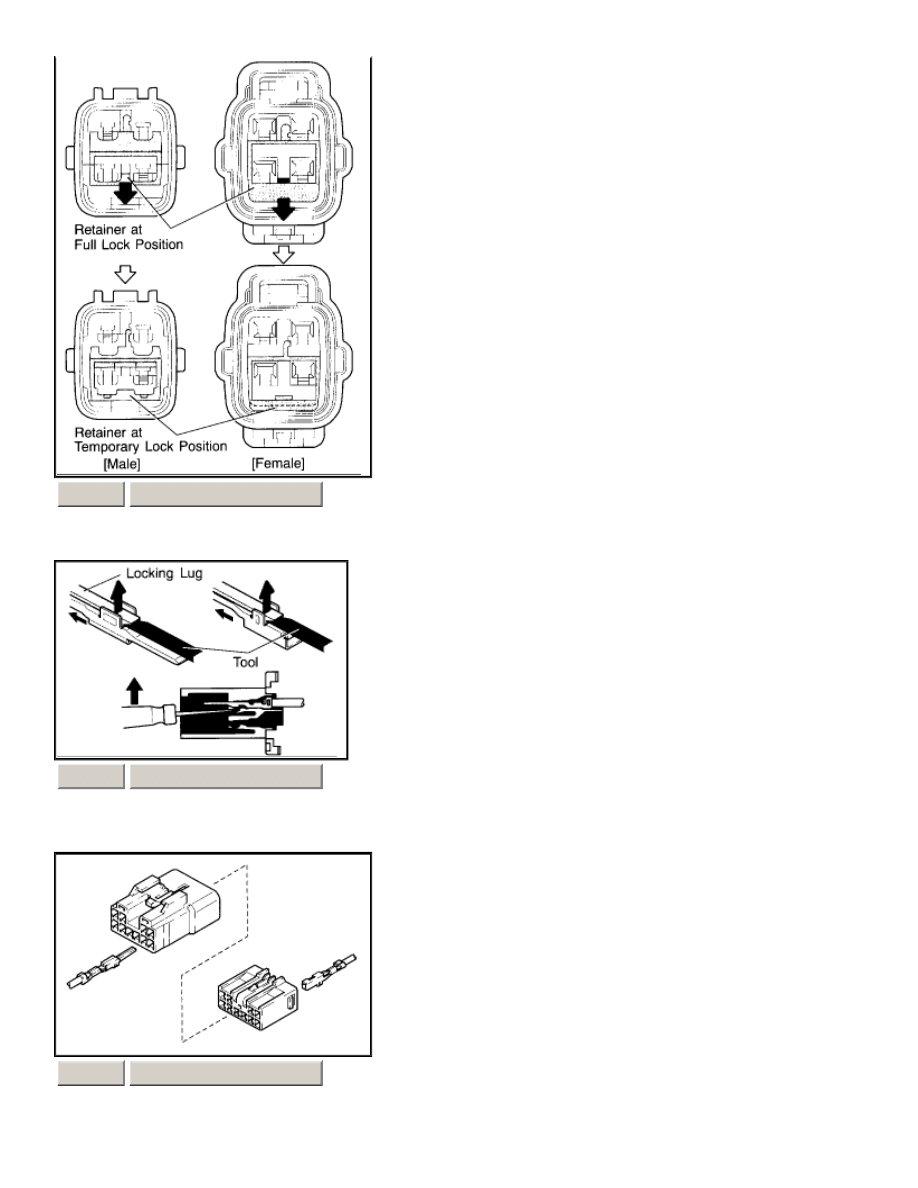
DISENGAGE THE SECONDARY LOCKING DEVICE OR TERMINAL RETAINER.
Page 1 of 6
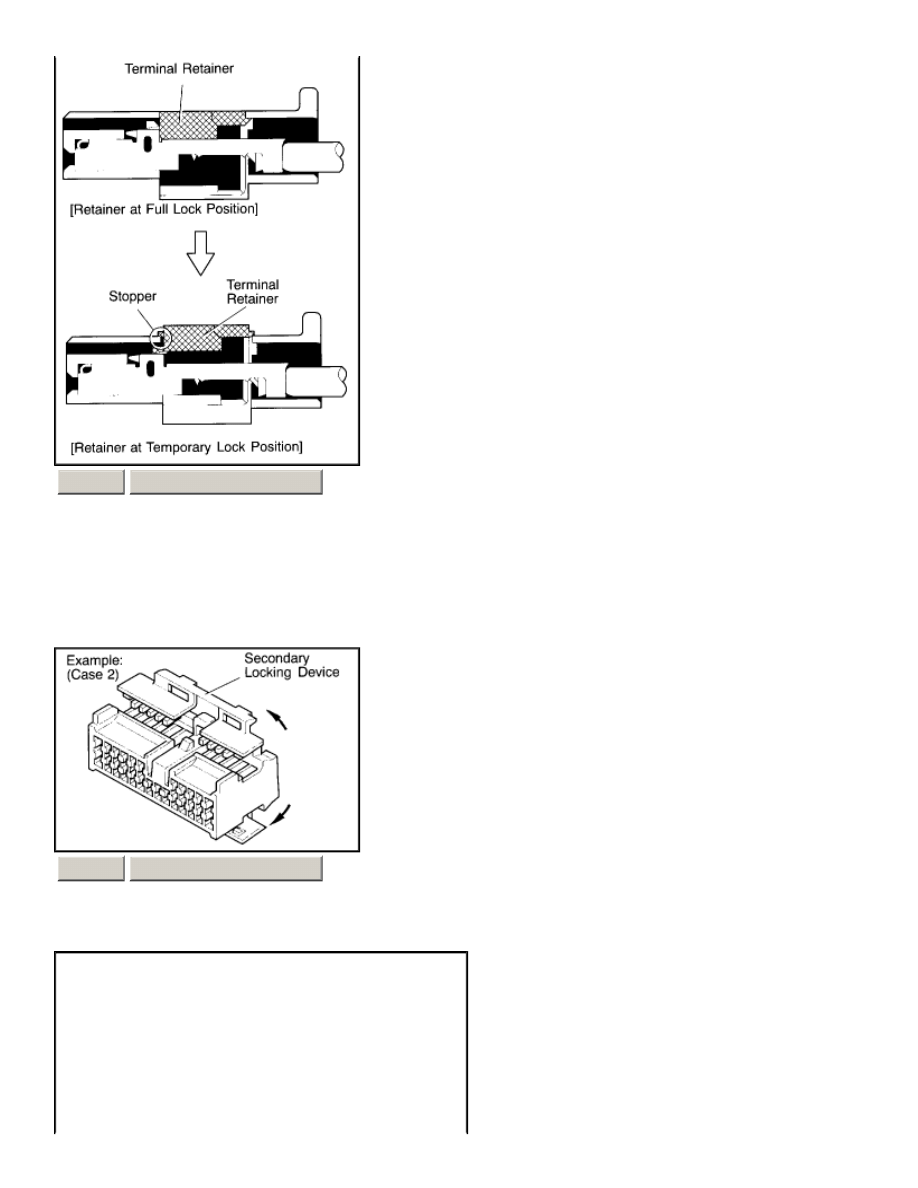
A - For Non-Waterproof Type Connector
HINT : The needle insertion position varies according to the connector's shape (number of terminals etc.), so check the position
before inserting it.
"Case 1"
Raise the terminal retainer up to the temporary lock position.
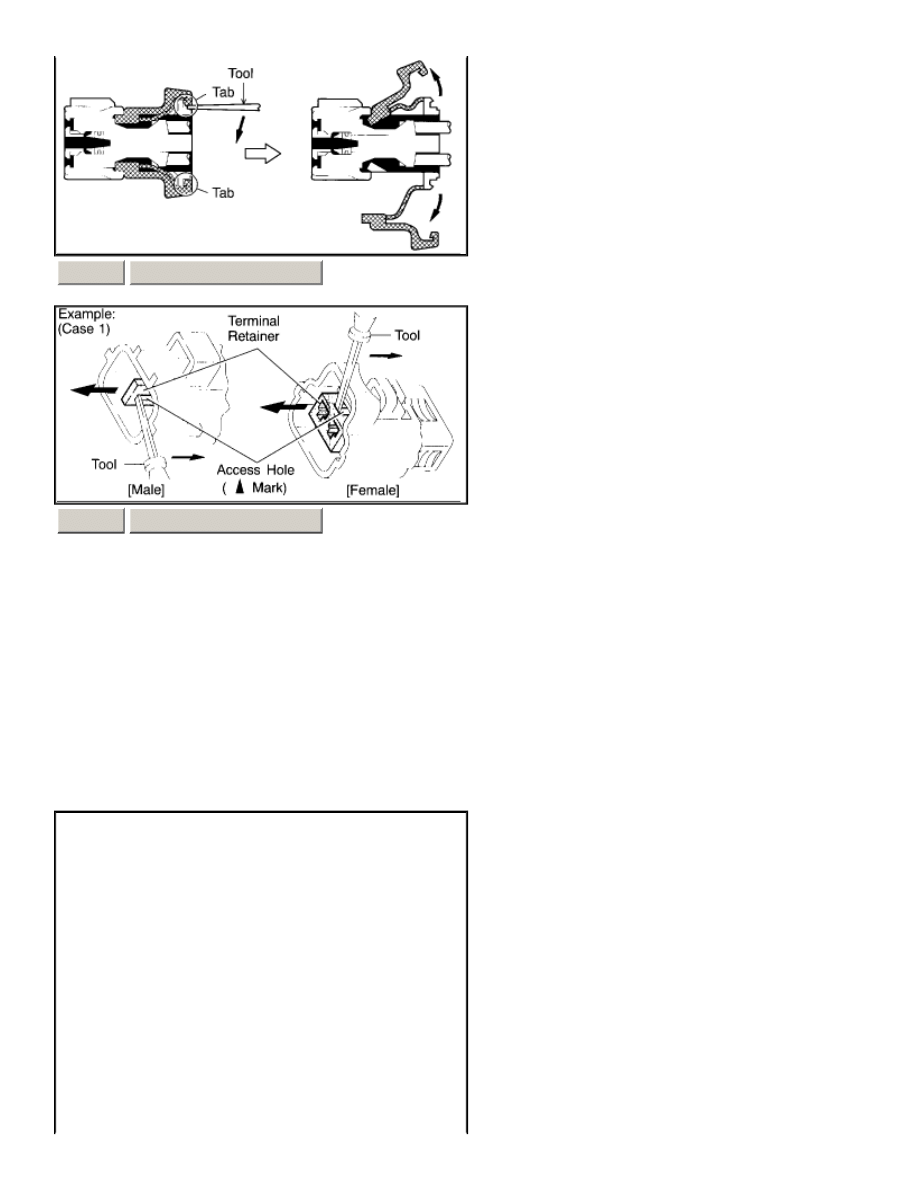
"Case 2"
Open the secondary locking device.
ZOOM
SIZED FOR PRINT
ZOOM
SIZED FOR PRINT
Page 2 of 6
B - For Waterproof Type Connector
HINT: Terminal retainer color is different according to connector body.
Example:
ZOOM
SIZED FOR PRINT
ZOOM
SIZED FOR PRINT
Terminal Retainer :
Connector Body
Black or White
:
Gray
Black or White
:
Dark Gray
Gray or White
:
Black
Page 3 of 6
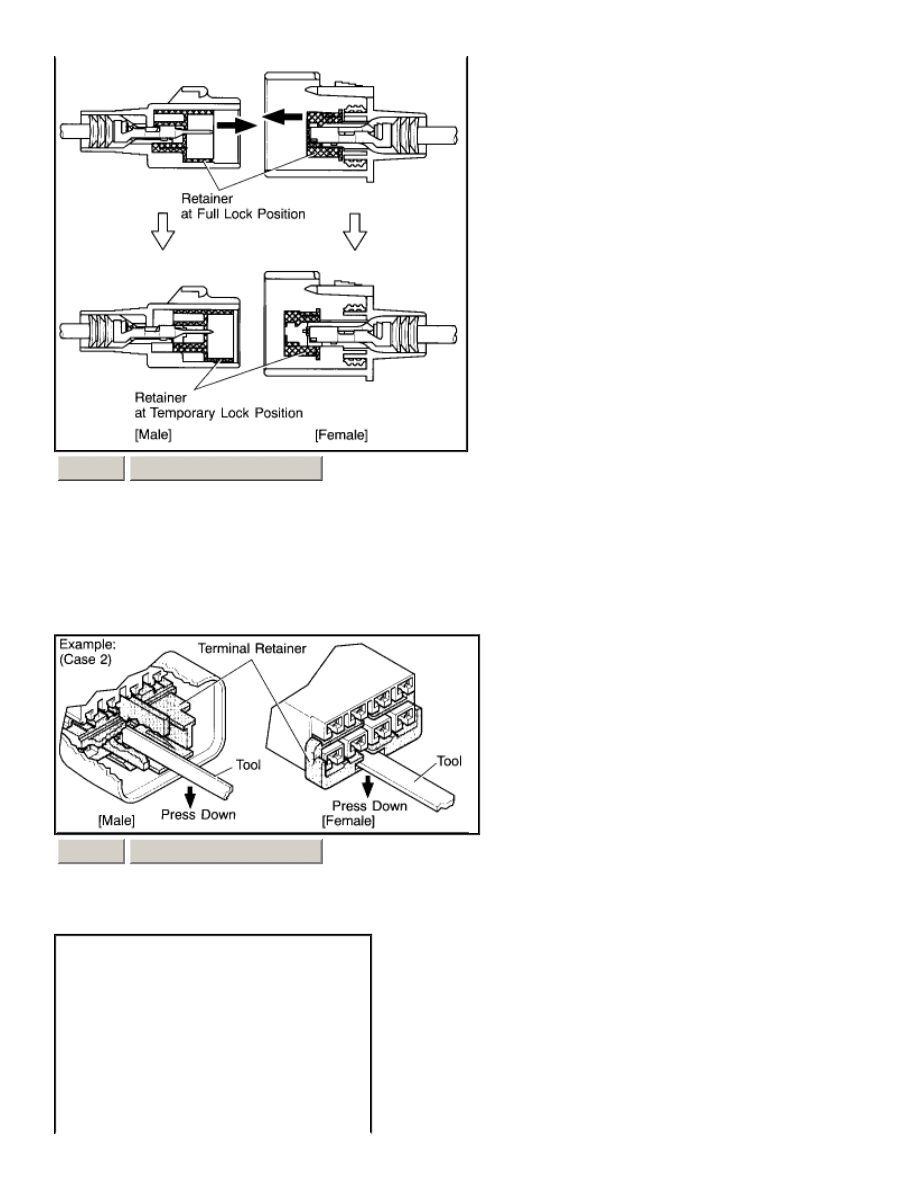
"Case 1"
Type where terminal retainer is pulled up to the temporary lock position (Pull Type).
Insert the special tool into the terminal retainer access hole ( Mark) and pull the terminal retainer up to the temporary lock position.
HINT: The needle insertion position varies according to the connector's shape (Number of terminals etc.), so check the position
before inserting it.
"Case 2"
Type which cannot be pulled as far as Power Lock insert the tool straight into the access hole of terminal retainer as shown.
ZOOM
SIZED FOR PRINT
ZOOM
SIZED FOR PRINT
Page 4 of 6
Push the terminal retainer down to the temporary lock position.
c.
Release the locking lug from terminal and pull the terminal out from rear.
ZOOM
SIZED FOR PRINT
ZOOM
SIZED FOR PRINT
ZOOM
SIZED FOR PRINT
Page 5 of 6
a.
Insert the terminal. HINT:
1.
Make sure the terminal is positioned correctly.
2.
Insert the terminal until the locking lug locks firmly.
3.
Insert the terminal with terminal retainer in the temporary lock position.
b.
Push the secondary locking device or terminal retainer in to the full lock position.
4.
INSTALL TERMINAL TO CONNECTOR
ZOOM
SIZED FOR PRINT
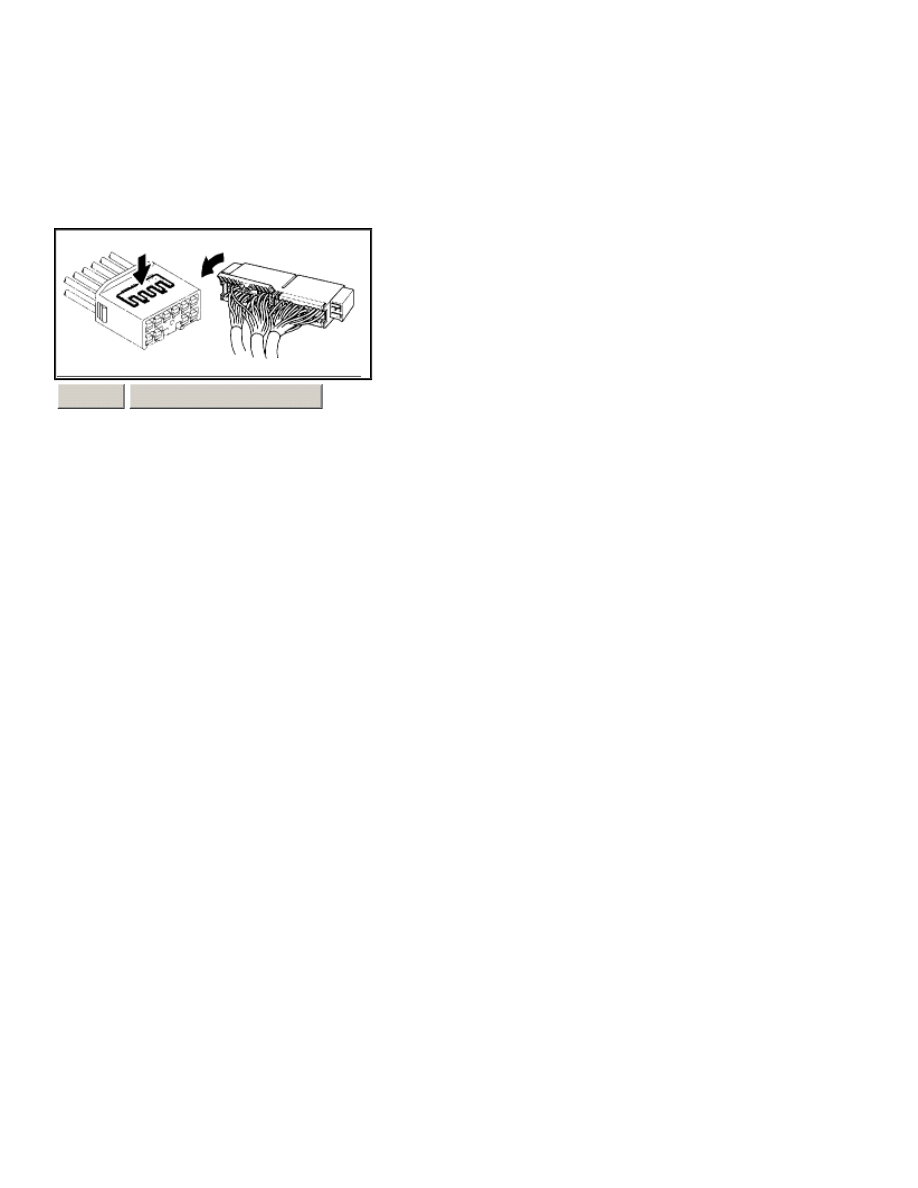
5.
CONNECT CONNECTOR
Page 6 of 6
Wyszukiwarka
Podobne podstrony:
ARTICLE SUSPENSION STRUT FRONT REPLACE INSTALL
ARTICLE TENSIONER REPLACEMENT
ARTICLE CONNECTORS LIST
ARTICLE SUSPENSION STRUT REAR REPLACE INSTALL
ARTICLE FUEL PUMP REPLACEMENT
ARTICLE ENGINE SPARK PLUG REPLACEMENT
ARTICLE SUSPENSION STRUT FRONT REPLACE INSTALL
Connectionism Past, Present, and Future [jnl article] J Pollack WW
Advanced Polyphthalamide (PPA) Metal Replacement Trends
connections pre intermediate minimock test 0 4 b
Pryda Timber Connectors Catalogue March 2007
więcej podobnych podstron