Systemy wizyjne
Vision systems
Laboratory 1
High speed camera test stand
ISSUES:
1. Camera technical parameters, camera usage, record modes & settings ,
- rate vs. exposure, aperture vs. exposure, acquisition settings (record modes)
Lecturer: Piotr Kohut, PhD eng.
Date:
Grade
Students' names:
1.
2.
3.

Idea of this test stand is to record an object in
motion.
Then using a proper software analyse
this images and gain data (position x,y,z and
orientation yaw,pitch,roll) describing motion of this
object is 3D space.
Idea of test stand

Test stand procedure
Test stand procedure is divided into 3 main parts:
Lab_1_Image aquisition
– using Motion Studio
Lab_2_Camera calibration
– using GML Camera
Toolbox
Lab_3_Image analysis, trajectory tracking,
displaying results
– using Tema software
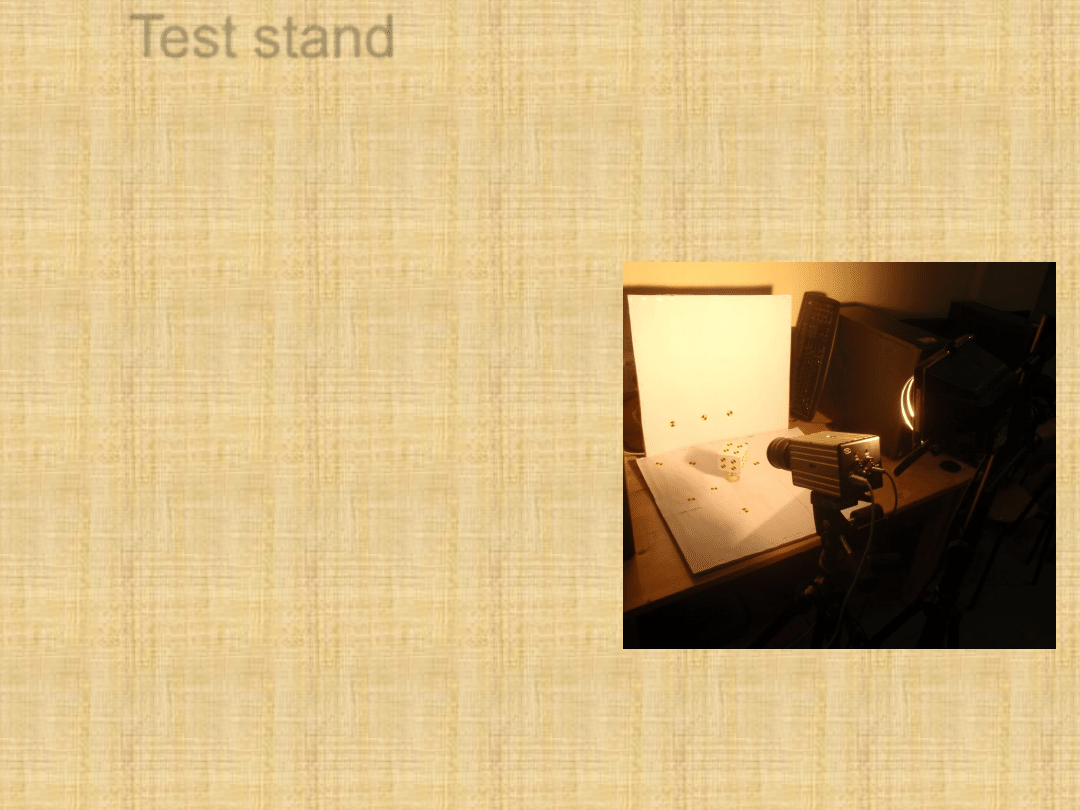
Test stand
A model to track, with
quadrant markers placed
at known positions
A
scene
-
uniform
background for a model
Camera
recording
3
marked
walls
of
the
model
Lighting - as close to the
model as possible and
aproximately
along
the
axis of camera
Motion Studio
Main feature
– acquisition of the sequence
of images recorded by the high-speed
camera
Setting the parameters of recording, such
as frequency rate, exposure time, region of
interest
Simple image processing, filters.
Internal or external trigger
Motion Studio
1. Open
camera
2. Camera
control - Live
3. Acquisition
settings -
Camera
4. Set
aperture
5. Set rate and
exposure
6. Position the
model
7. Adjust the
focus
8. Acquisition
settings
–
Record
9. Camera
control -
playback
10. Save
acquisition
Motion Studio
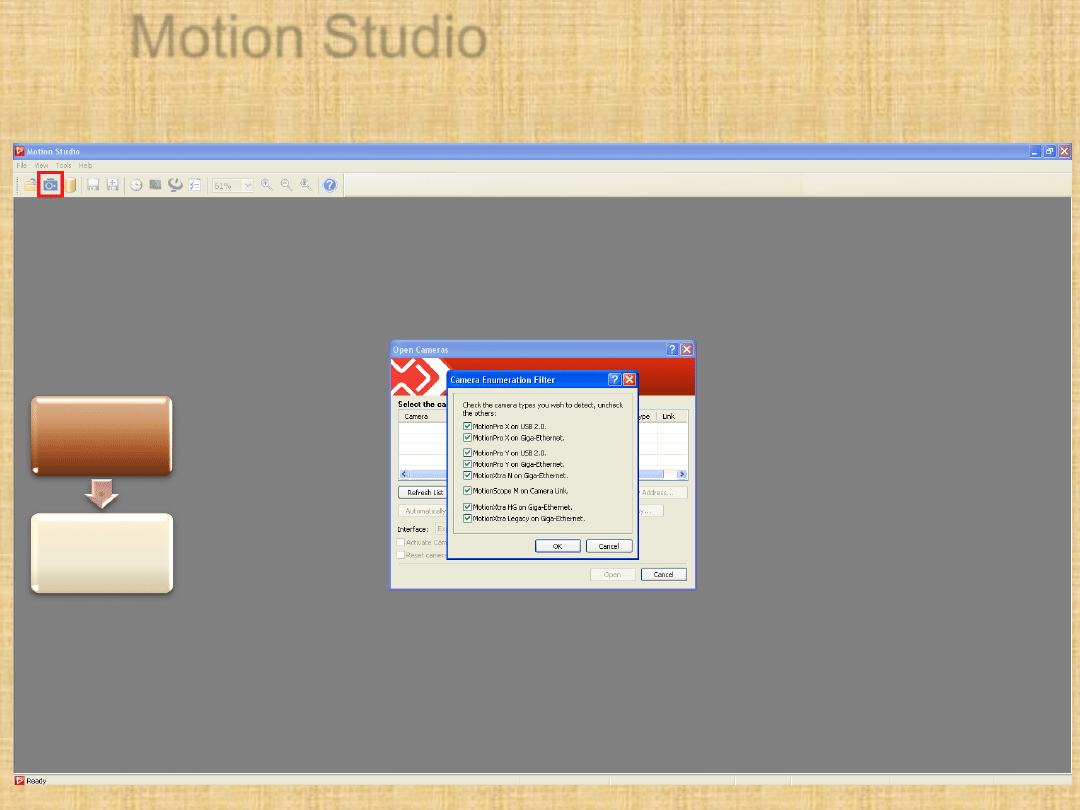
1. Open camera. Select all the available types of cameras.
1. Open
camera
2. Camera
control - Live
Motion Studio
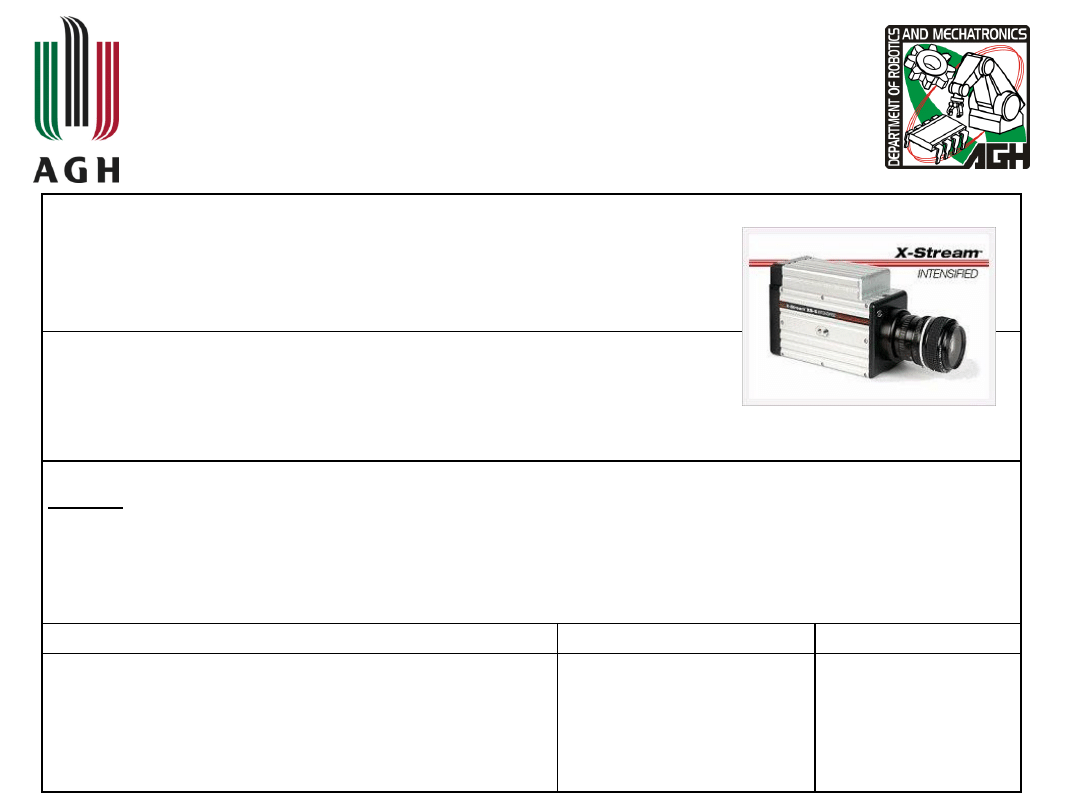
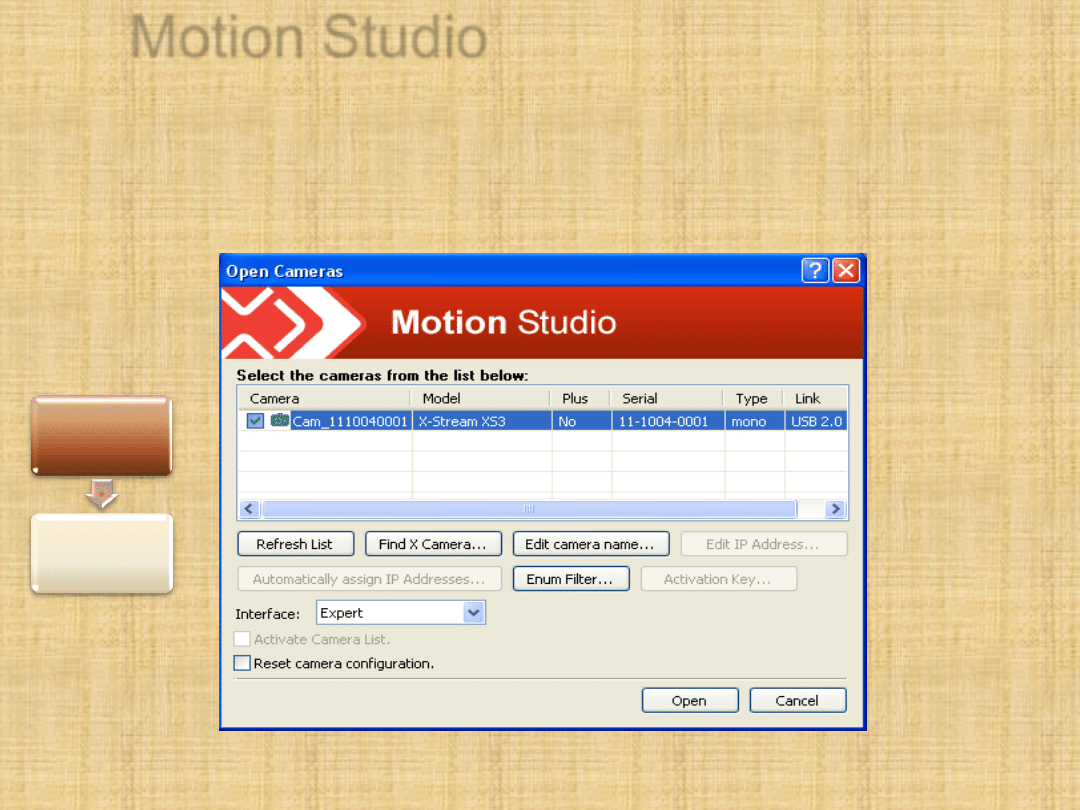
Choose the X-Stream XS3 camera, USB 2.0
1. Open
camera
2. Camera
control - Live
Motion Studio
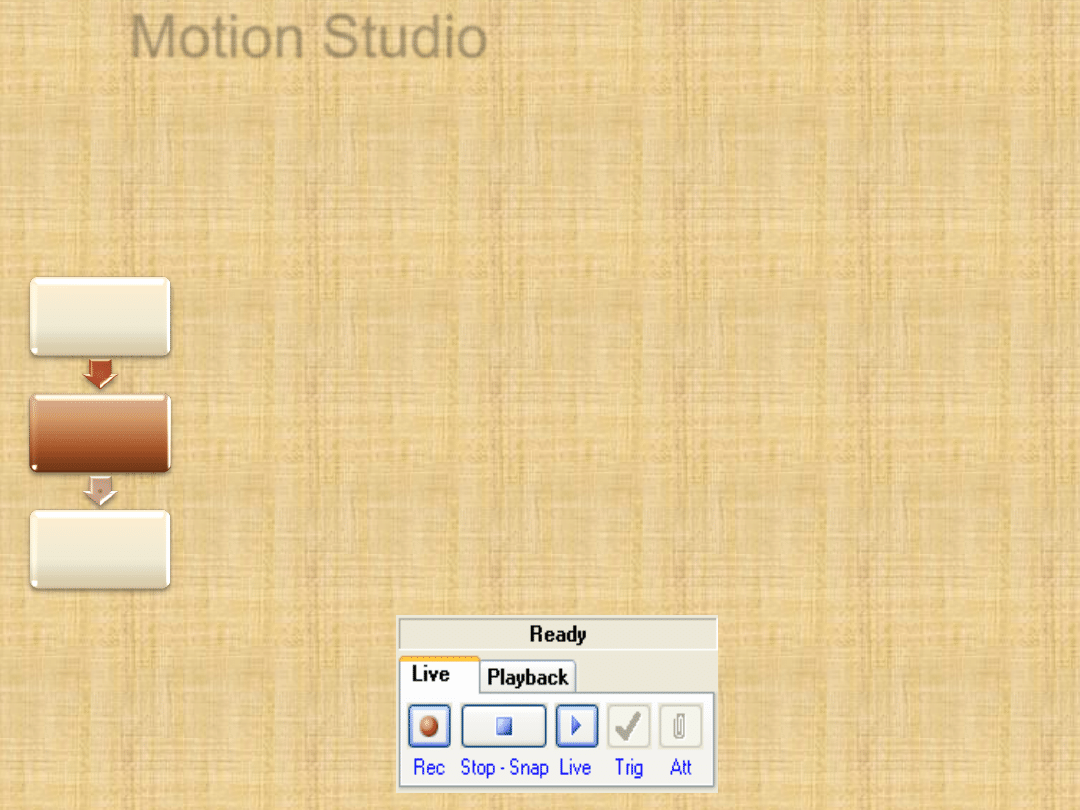
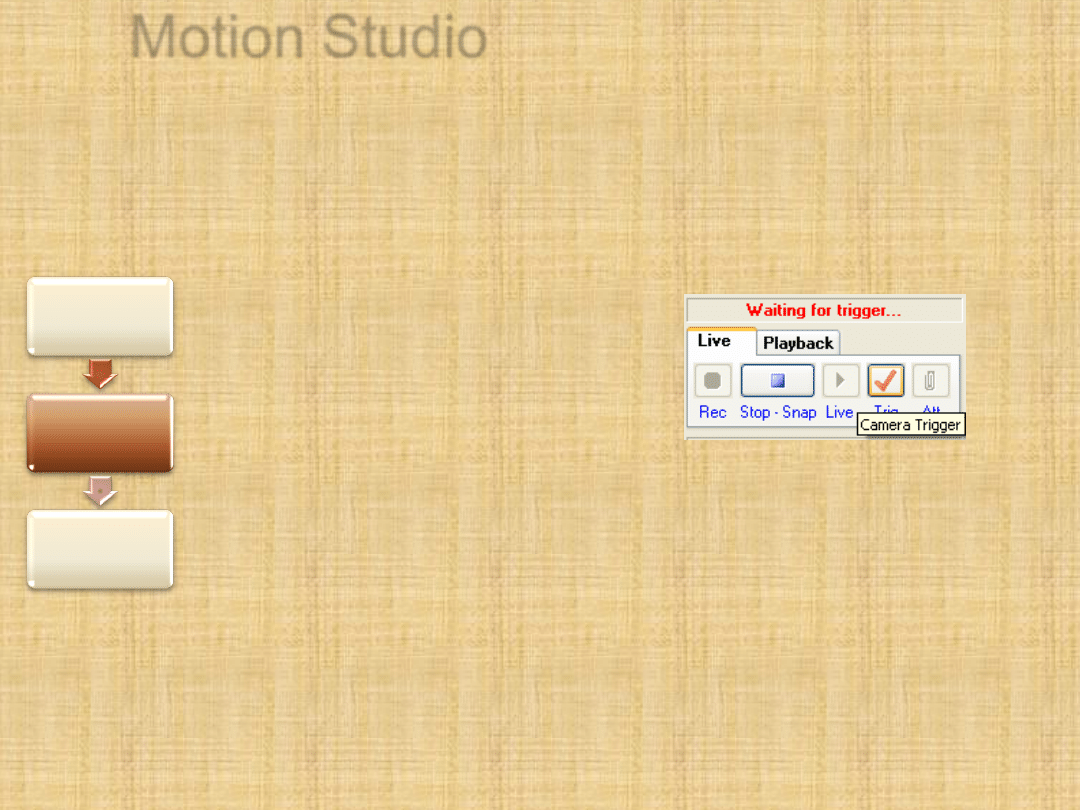
2. Camera control - Live
•
Rec - switches record mode on. However, it does not
starts acquiring
•
Trigger - while in record mode, sets the moment of
acquisition
•
Live - sends live preview from the camera onto the
screen, but not records images
•
Stop
Now, choose Live mode.
1. Open
camera
2. Camera
control - Live
3. Acquisition
settings -
Camera

Experimental Tests_1
Camera control - Live
Motion Studio
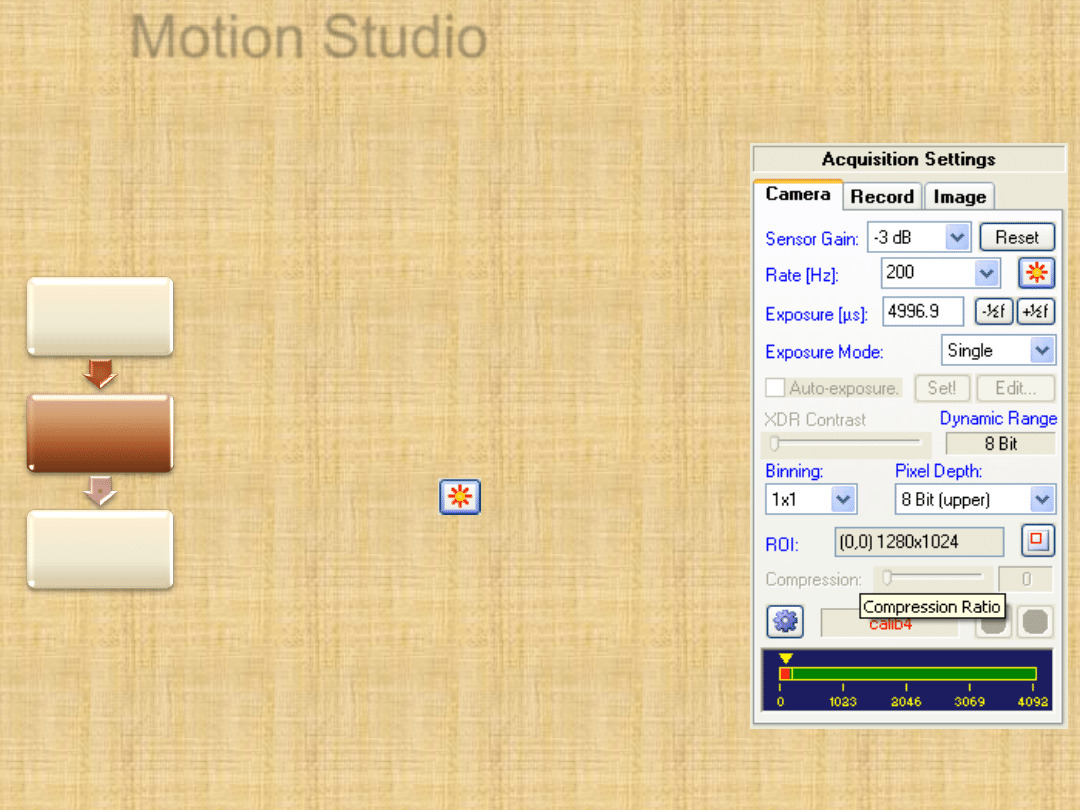
3. Acquisition settings - Camera
Rate - number of frames per second.
Exposure - time of acquisition of a single
frame in microseconds. It can be adjusted
by the buttons -1/2f and 1/2f.
Maximum time is determined by set Rate.
The higher rate, the lower maximum
exposure time. Longer exposure provides
more light and brighter image; shorter -
darker image.
Low light mode (
) - Temporarily sets
Rate to 25Hz and exposure to four times the
current value. It is useful for preview in low-
light conditions.
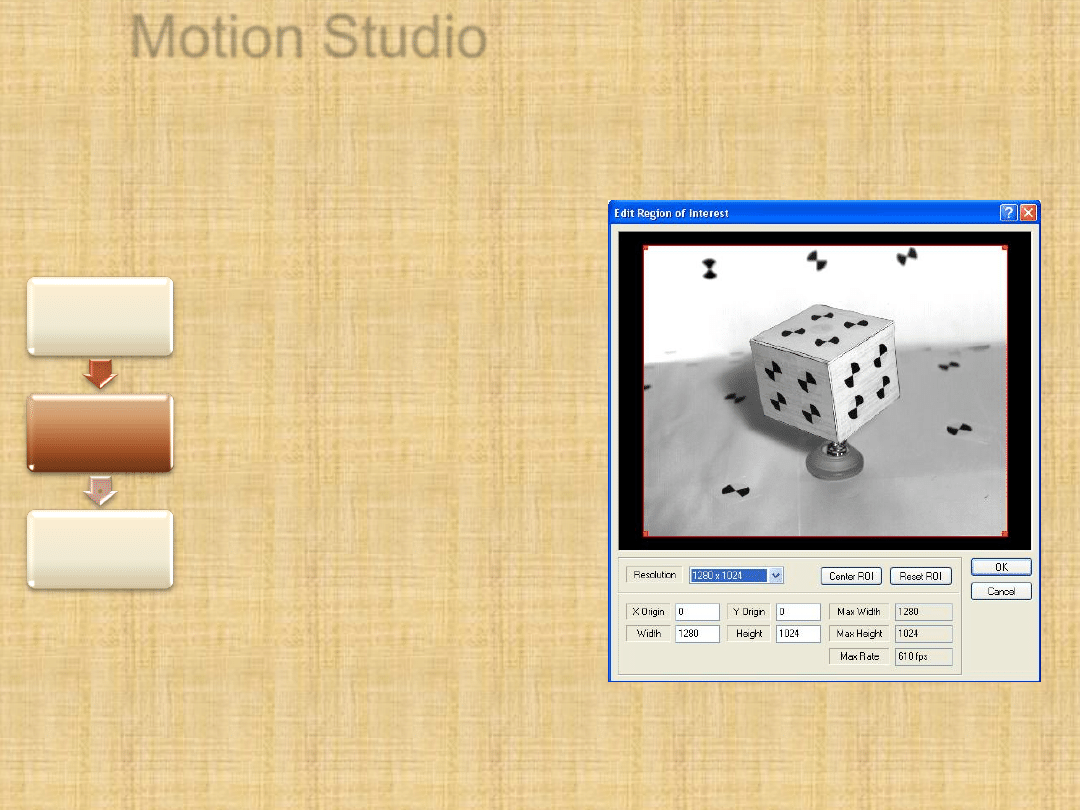
ROI - region of interest - Sets the area of
frames, we want to acquire. Maximum is
1280x1024. Number of lines determines the
maximum Rate. For largest ROI, maximum
rate is 610Hz
2. Camera
control - Live
3. Acquisition
settings -
Camera
4. Set
aperture
Motion Studio
ROI - region of interest
Sets the area of
frames, we want to
acquire. Maximum is
1280x1024. Number
of lines determines
the maximum Rate.
For largest ROI,
maximum rate is
610Hz
2. Camera
control - Live
3. Acquisition
settings -
Camera
4. Set
aperture
Experimental test_2
Rate
…
ROI….
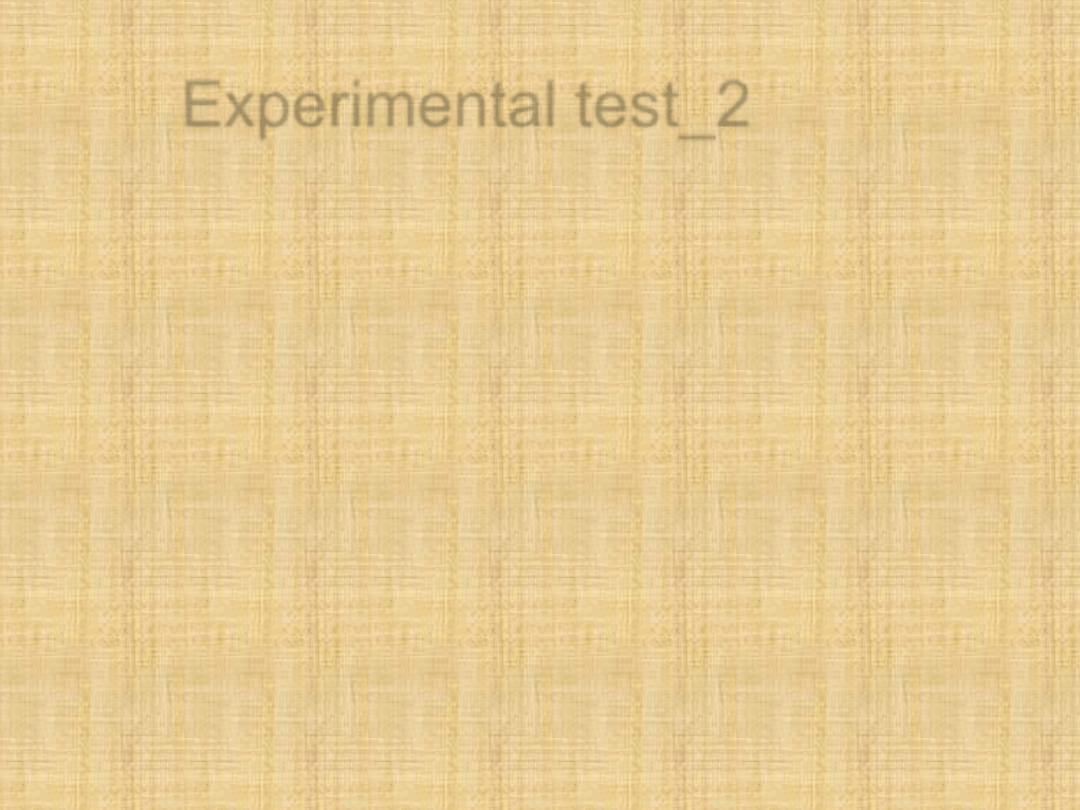
Motion Studio
4. Adjusting aperture
Should be relatively high
to provide high depth of
field and ensure that all
markers will be tracked
properly
On the other hand
higher aperture reduces
amount of light and
longer exposure time
has to be set
Set the value from 4 to 8
3. Acquisition
settings -
Camera
4. Set
aperture
5. Set rate
and exposure
Motion Studio
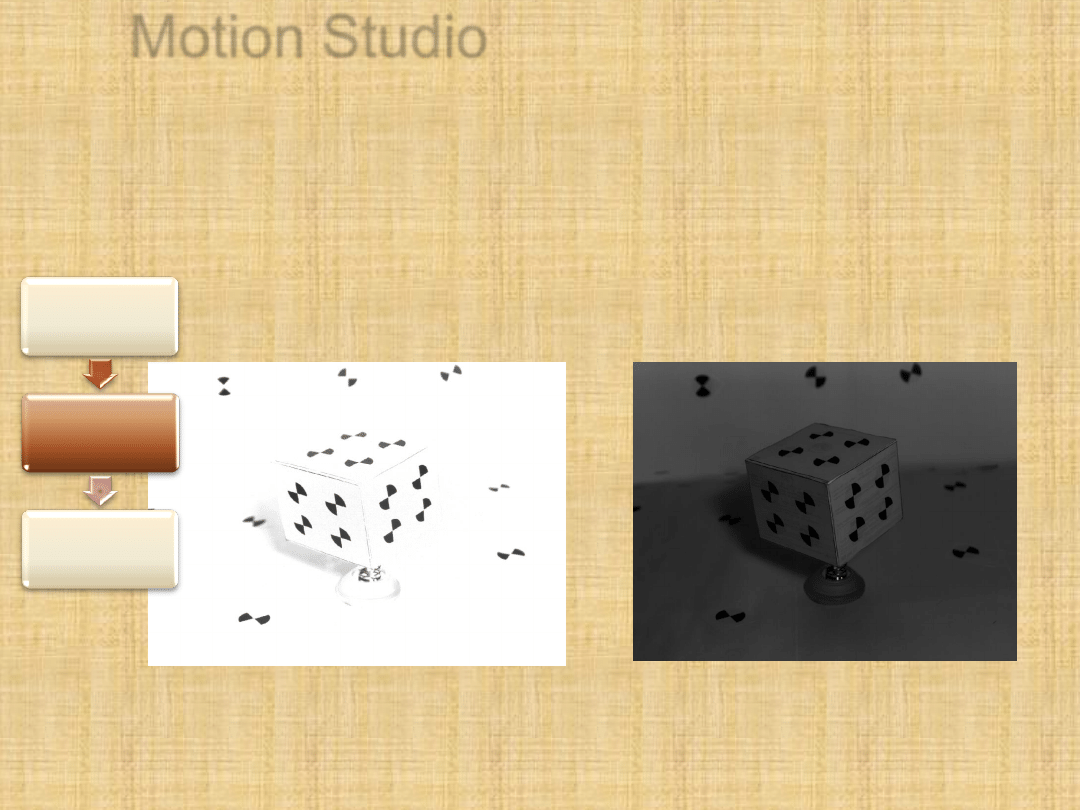
5. Choosing appropriate rate and exposure
For high precision of tracking a movement, it is
good to provide as high rate as possible. However,
you have to provide enough light. Because of this,
set maximum exposure for given rate.
Appropriate
amount of light
4. Set
aperture
5. Set rate
and exposure
6. Position the
model
Motion Studio
Too much light
Too little light:
4. Set
aperture
5. Set rate
and exposure
6. Position the
model

Experimental test_3
Aperture
Exposure
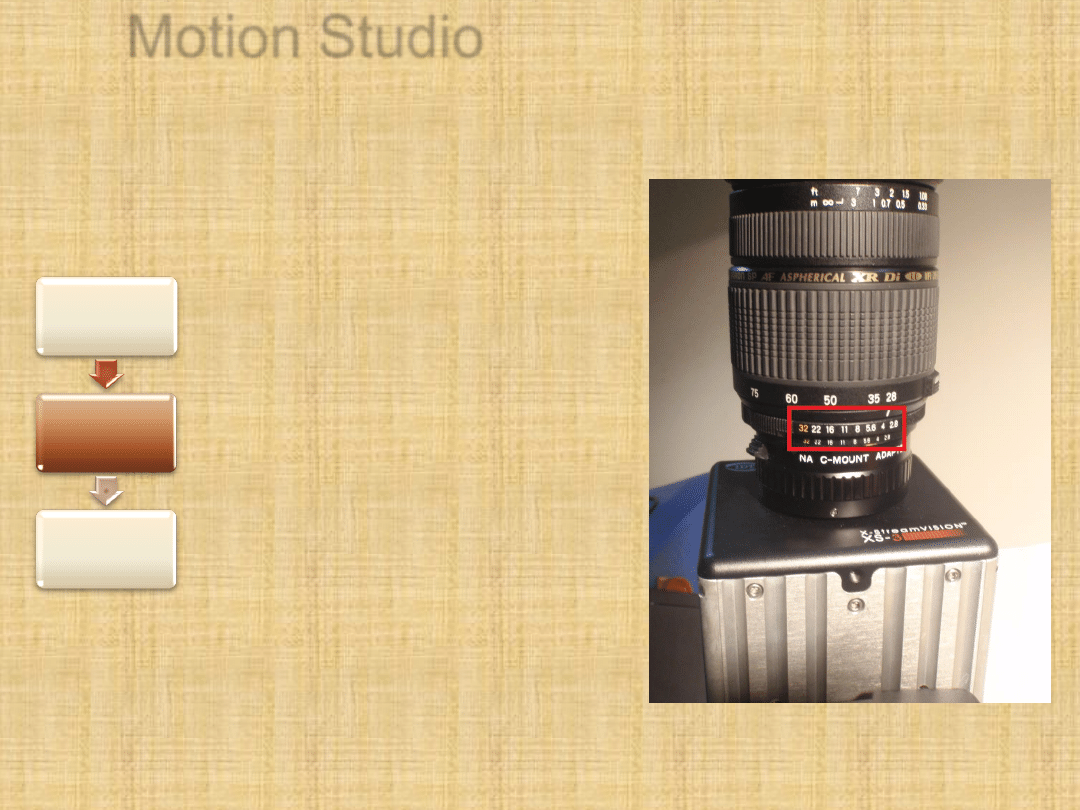
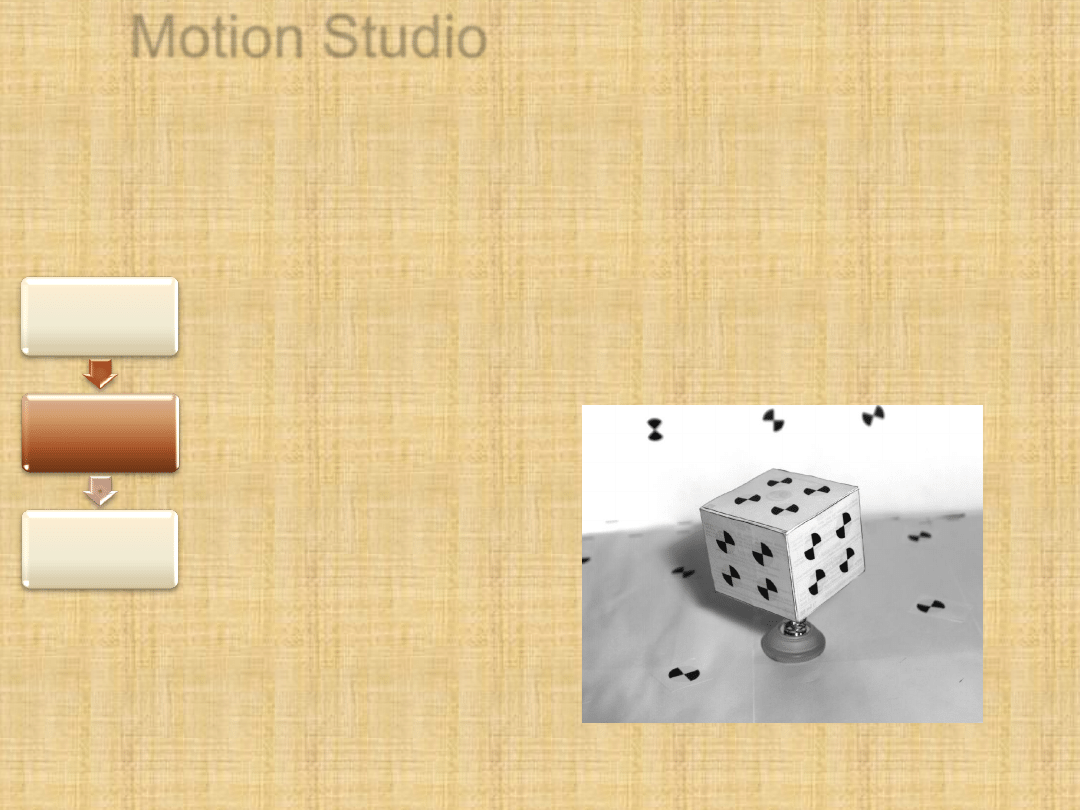
Motion Studio
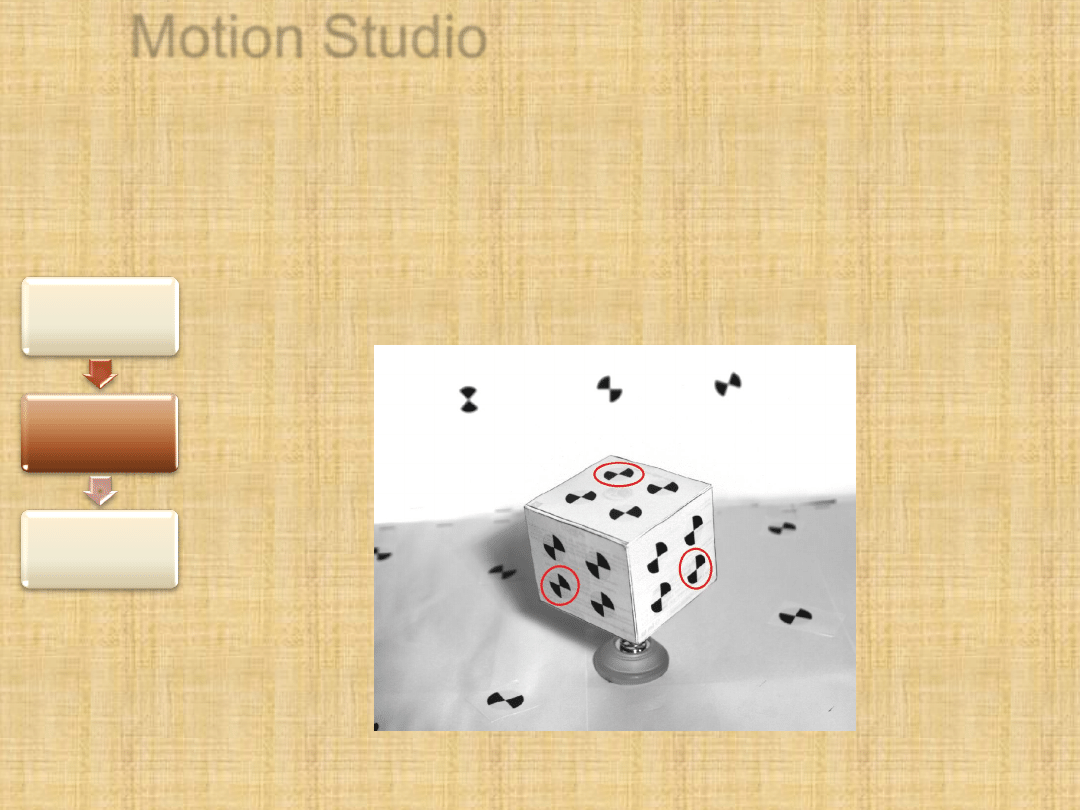
6. Positioning of a model:
Model should occupy major part in the centre of a frame.
All three walls should be equally, well visible. The closer to
perpendicular they are, the more reliable tracking is. Three markers,
which are most difficult to be tracked properly are marked on the
image:
5. Set rate
and exposure
6. Position
the model
7. Adjust the
focus

Motion Studio
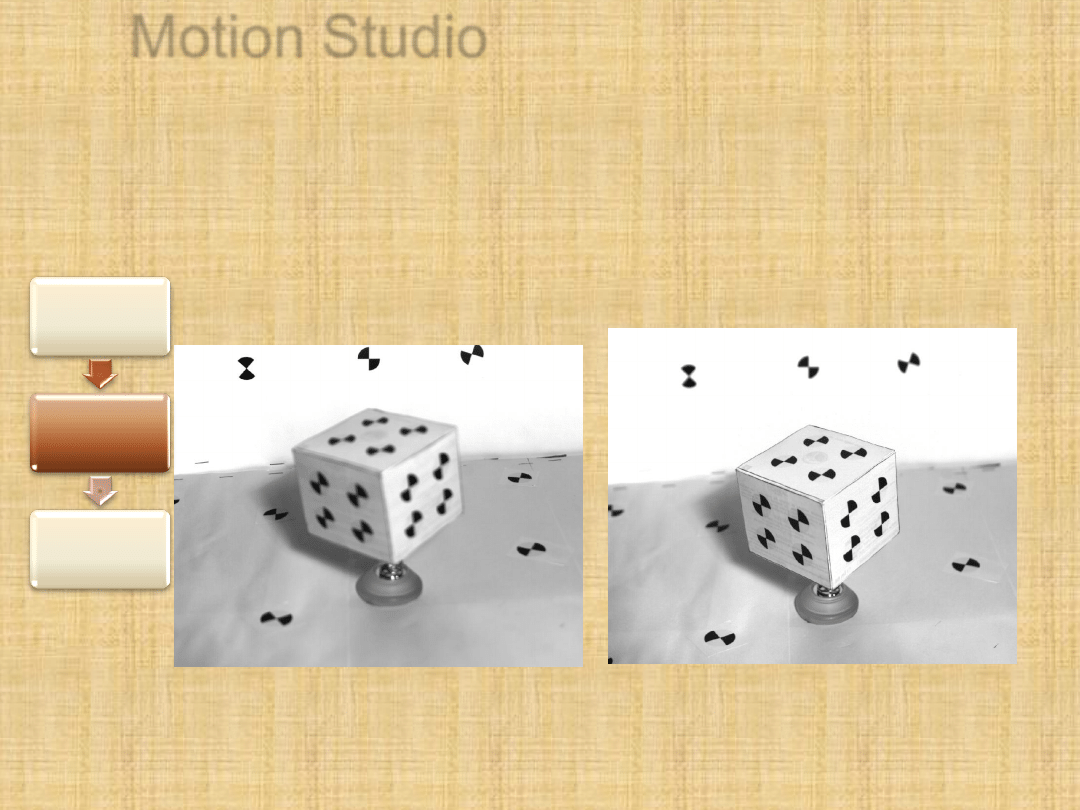
7. Adjusting the focus
After positioning of a model, the focus
has to be adjusted on the lens of the
camera. It has to be set so, that
images of all the markers: the closest
to the camera, as well as furthest
ones, has to be equally sharp.
ATTENTION! Focus cannot be
changed between acquiring the
sequence and calibration!
6. Position
the model
7. Adjust the
focus
8. Acquisition
settings
–
Record
Motion Studio
Bad focused image
Well focused image
6. Position
the model
7. Adjust the
focus
8. Acquisition
settings
–
Record
Experimental test4
Focus
Motion Studio
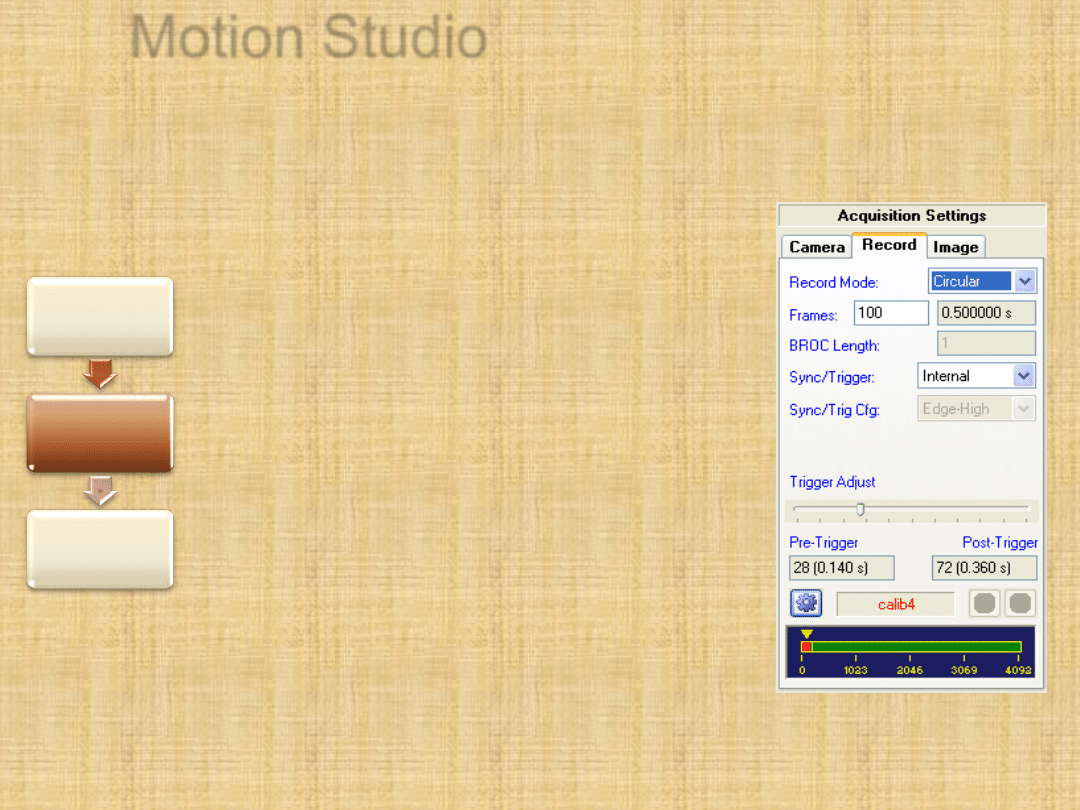
8.Acquisition settings
– Record
Record mode:
Normal - the camera acquires and
stops when assumed number of
frames was recorded
Circular - enables to acquire
frames which occurred before and
after "Trigger" button. Length of pre-
and post-trigger can be adjusted by
Trigger Adjust
BROC (Burst Record on
Command) - enables to acquire
several sequences in one record,
each at the time of trigger.
7. Adjust the
focus
8. Acquisition
settings
–
Record
9. Camera
control -
playback
Motion Studio
Choose circular
mode, set the
number of frames to
obtain sequence of
length 0.5s - 1s, set
pre-trigger to, e.g.
25% of length.
Record and trigger
7. Adjust the
focus
8. Acquisition
settings
–
Record
9. Camera
control -
playback
Motion Studio
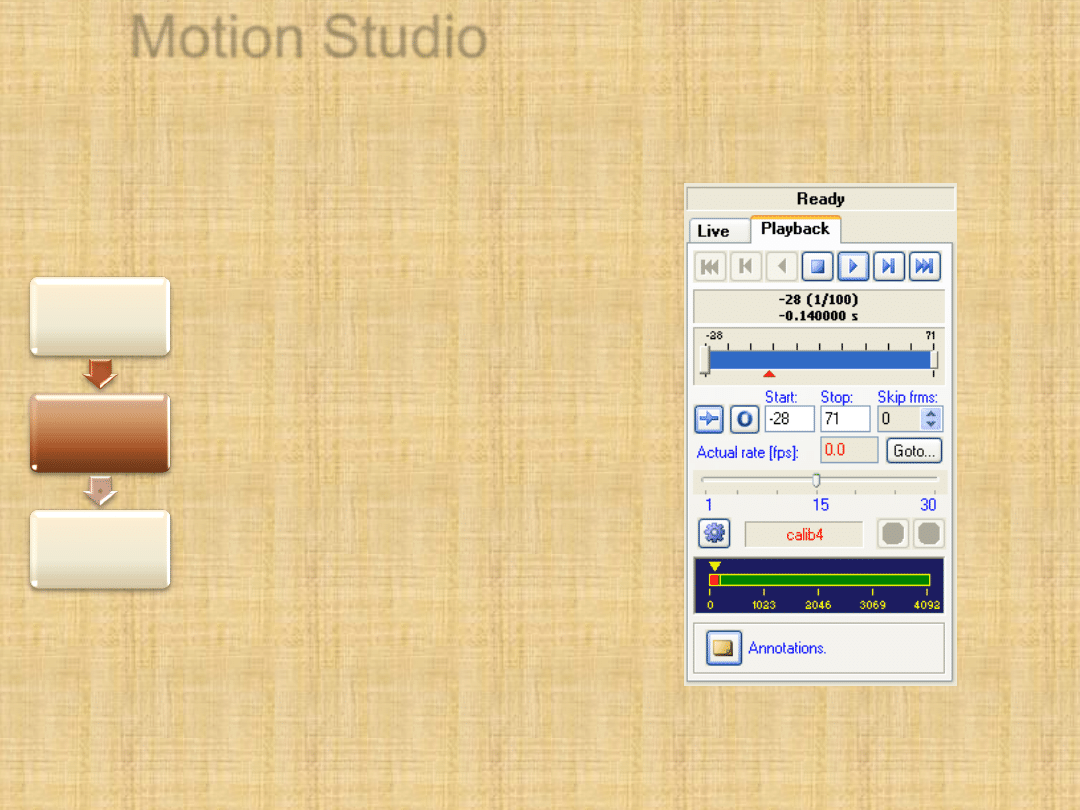
9. Camera control -
playback
A sequence after
acquisition can be
played with a Play
button. The speed can
be adjusted with a
slider
8. Acquisition
settings
–
Record
9. Camera
control -
playback
10. Save
acquisition
Motion Studio
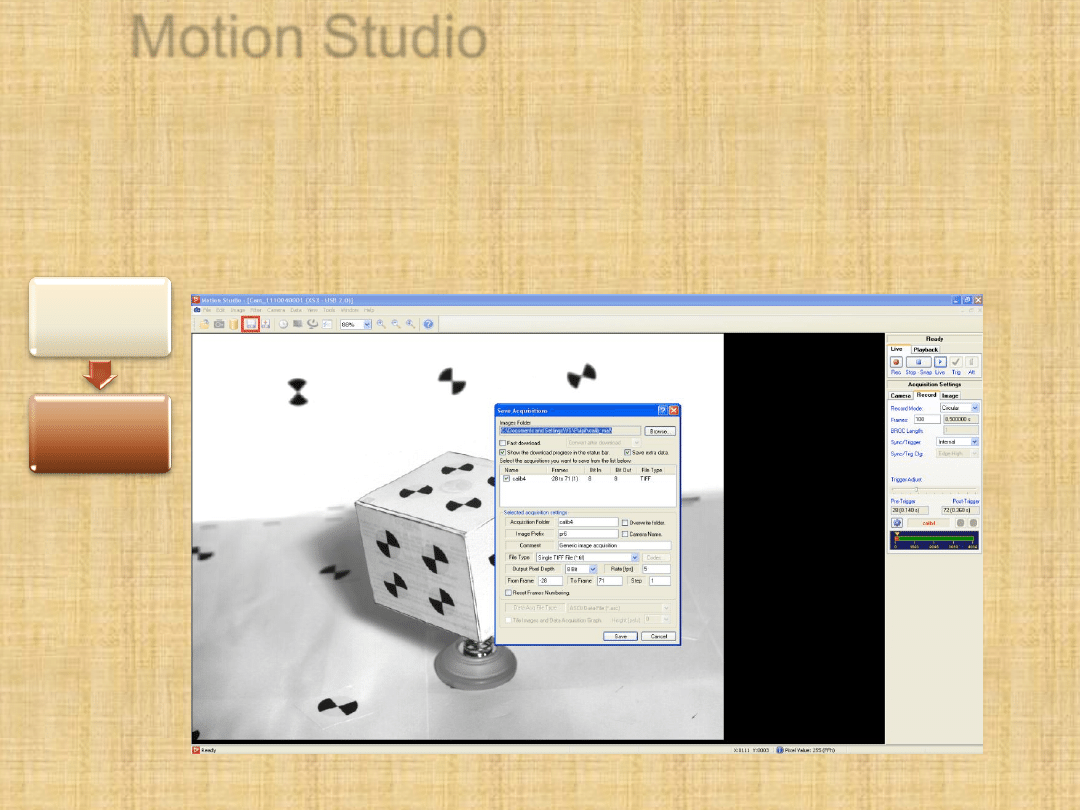
10. Saving acquisition
Use "Save Acquisition" button (marked with red rectangle).
You can choose folder, name for files and format.
9. Camera
control -
playback
10. Save
acquisition

Experimental test5
Recording modes
Wyszukiwarka
Podobne podstrony:
antybiotyki High Speed Countercurrent
high speed usb pcb layout recom Nieznany
ADSL High Speed Internetzugang
Fotopolis pl High speed photography w warunkach domowych
High Speed Countercurrent Chromatography
Ir2111 High Voltage High Speed Power Mosfet And Igbt Driver
CD74HCT86 High Speed CMOS Logic Quad 2 Input EXCLUSIVE OR Gate
87 1237 1248 Machinability and Tool Wear During the High Speed Milling of Some Hardened
High speed photography sound trigger ZPT
High Speed Photography, czyli j Nieznany
Fast virus detection by using high speed time delay neural networks
2SD1682 2SB1142 HIGH SPEED
Auto Sign an automatic signature generator for high speed malware filtering devices
An investigation of shock induced temperature rise and melting of bismuth using high speed optical p
więcej podobnych podstron