Folk Art Pipe Box
wonder why our great-great-great-grandparents put
such a huge amount of energy and enthusiasm into
making pieces of woodwork that were used for everyday
chores. Okay, so they had to have such functional items
as dough troughs, candle boxes and flour bins. But re-
membering that every stick of wood had to be laboriously
cut, planed, fretted and finished by hand, why did they
put extra time and trouble into decorating their wood-
work with so many fancy curlicues?
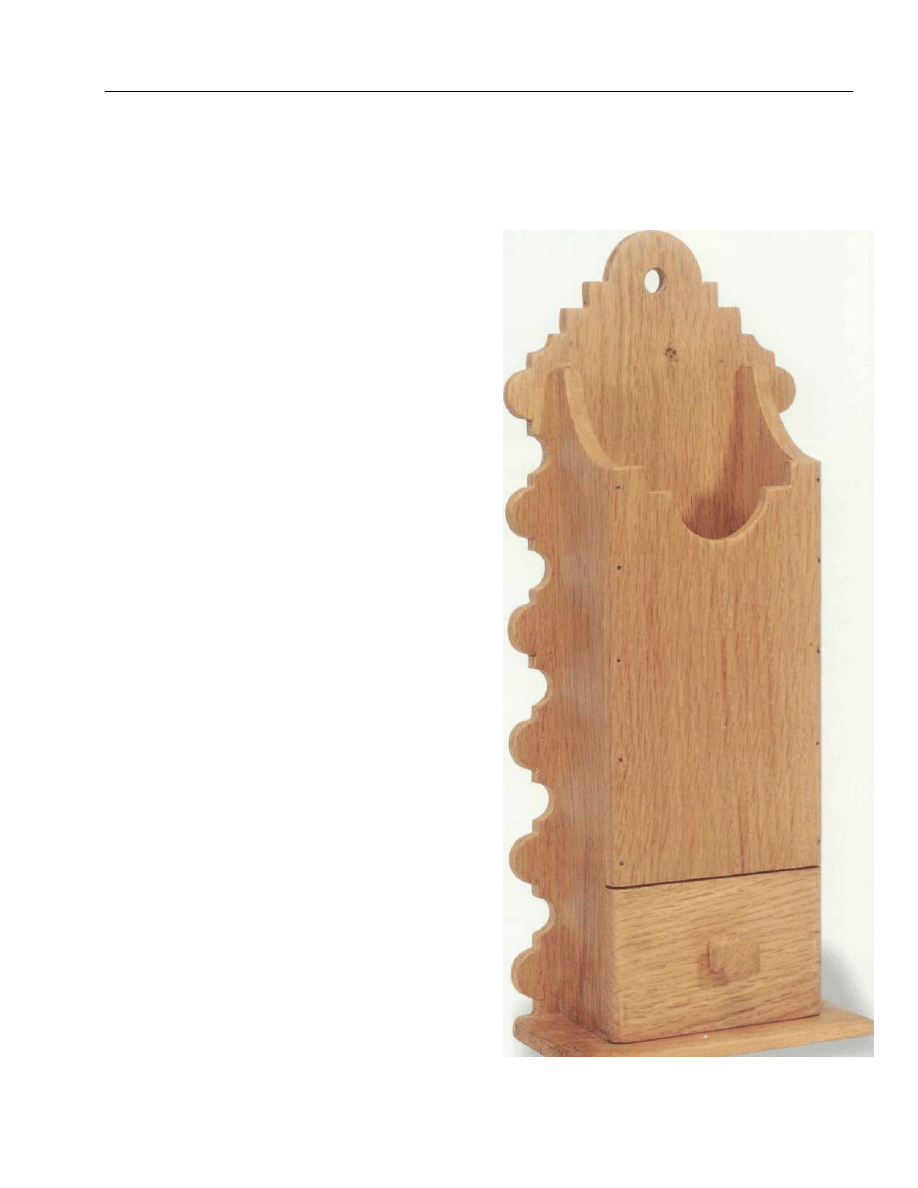
If you want to try your hand at a piece of woodwork
that perfectly illustrates this point, then this pipe box is
for you. Inspired by an English eighteenth-century folk
art original, boxes of a similar type, design and construc-
tion can be found all over—in England, in Wales, in Scot-
land, in America—in fact, just about anyplace people
smoked long-stemmed clay pipes. The design of the box
is beautifully fitting for its task. The pipes fit in the top
half of the box, the "makings" fit in the little drawer, and
the whole works hangs on the wall alongside the fireplace.
As to the fancy compass-worked edge design, it can be
found on all kinds of eighteenth- and nineteenth-century
woodwork—on everything from overmantel and cup-
board shelves to bench trim, door surrounds and plate
racks.
I
Copyright 2004 Martian Auctions
972
Copyright 2004 Martian Auctions
973
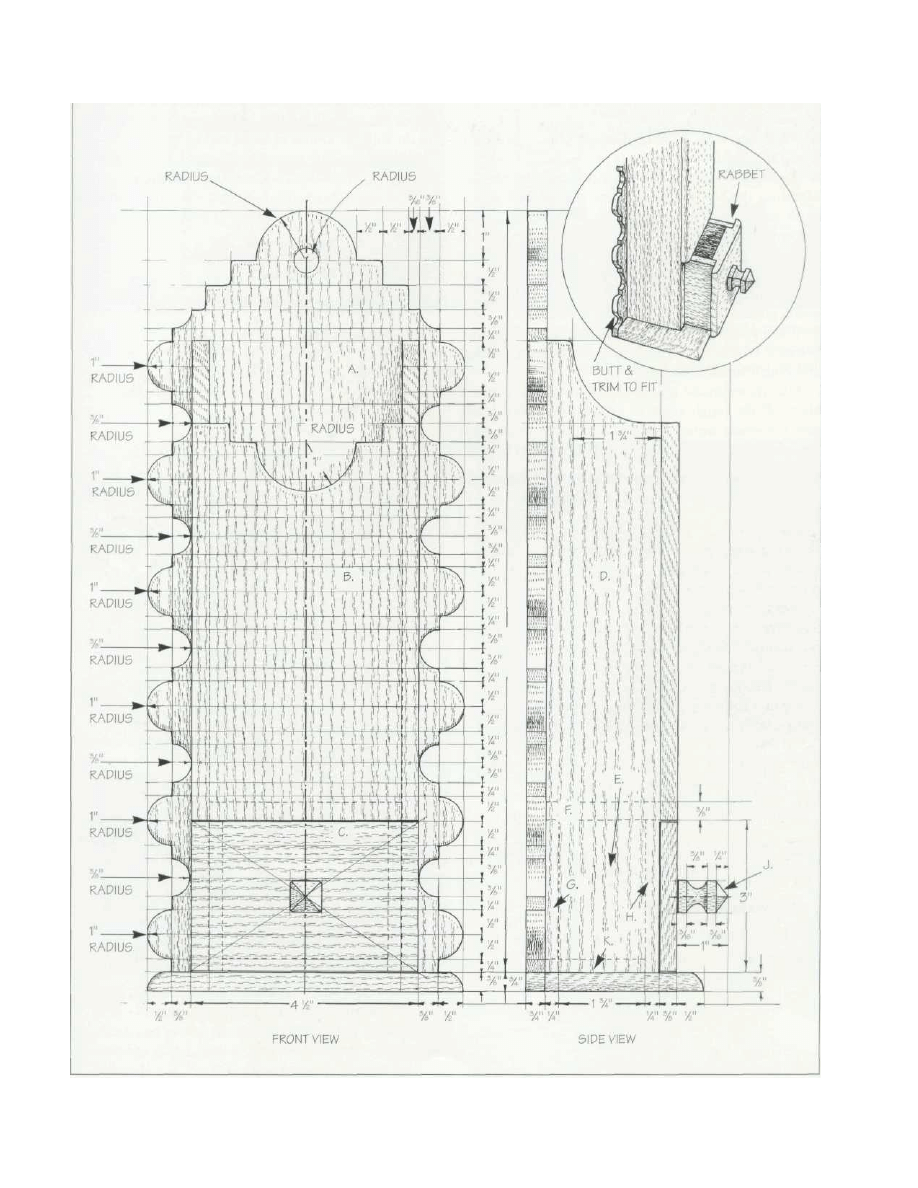
MAKING THE PIPE BOX
Having set the wood out with all the dip-and-arch curves,
fret out the design.
When you have made all the component parts and
pencil labelled them so there is no doubting what goes
where and how, then comes the tricky, sticky-finger task
of putting the box together. I found that the best way to
work was to drill, pin and glue the components in the
following order: (1) the main backing board to the main
baseboard; (2) the side boards to the backing board; (3)
the inside-box piece that forms the bottom to the pipe
part of the box; (4) the front to the box. And lastly, I
glued, pinned and adjusted the little drawer to fit the box.
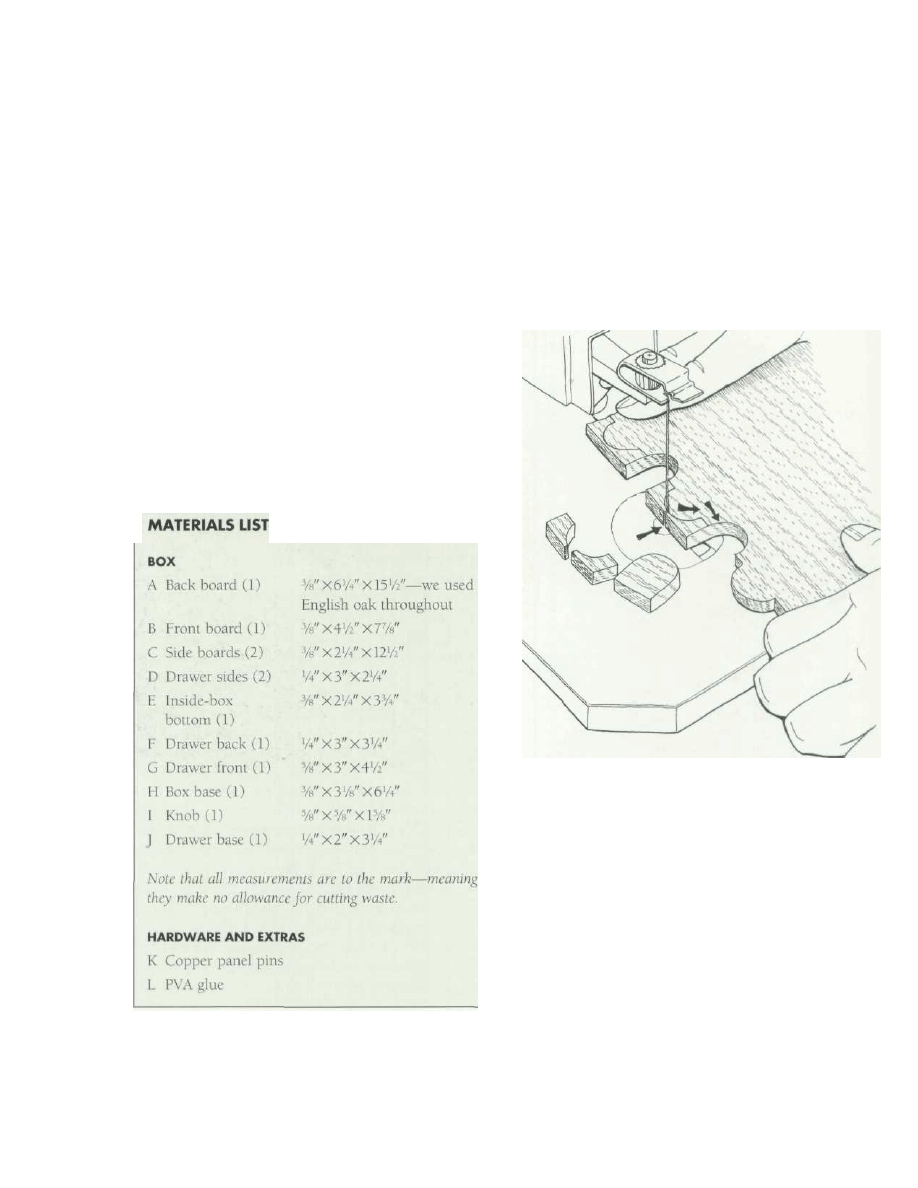
When you come to the little drawer knob, all you do
is trim a
3/4
" X
3/4
"-square section of wood down to shape
and plug it into a drilled hole.
Finally, when the glue is completely dry, trim and
shape all the rough edges to a slightly rounded finish,
give the whole works a rubdown with the finest-grade
sandpaper, and then lay on a thin coat of wax or varnish.
SPECIAL TIP
If you have a good close-up look at museum boxes of this
character, you will see that a good part of the charm has
to do with the choice of wood and the degree of finish.
For example, while a good native wood looks beautifully
fresh and understated—something like cherry, maple,
pine or oak is just perfect—a fancy wood like mahogany
or one of the exotic African woods tends to look too pre-
cious or "overdressed."
STEP-BY-STEP STAGES
To work the fancy edge, start by cutting out all the deep
concave U shapes—along the whole length of the wood—
and then fret out the remaining convex forms. If you look
at the arrows, you will notice that I always work in the
direction of the grain—that is, two cuts that run down-
and-out from the peak of the l i t t l e bridge shape.
Copyright 2004 Martian Auctions
974
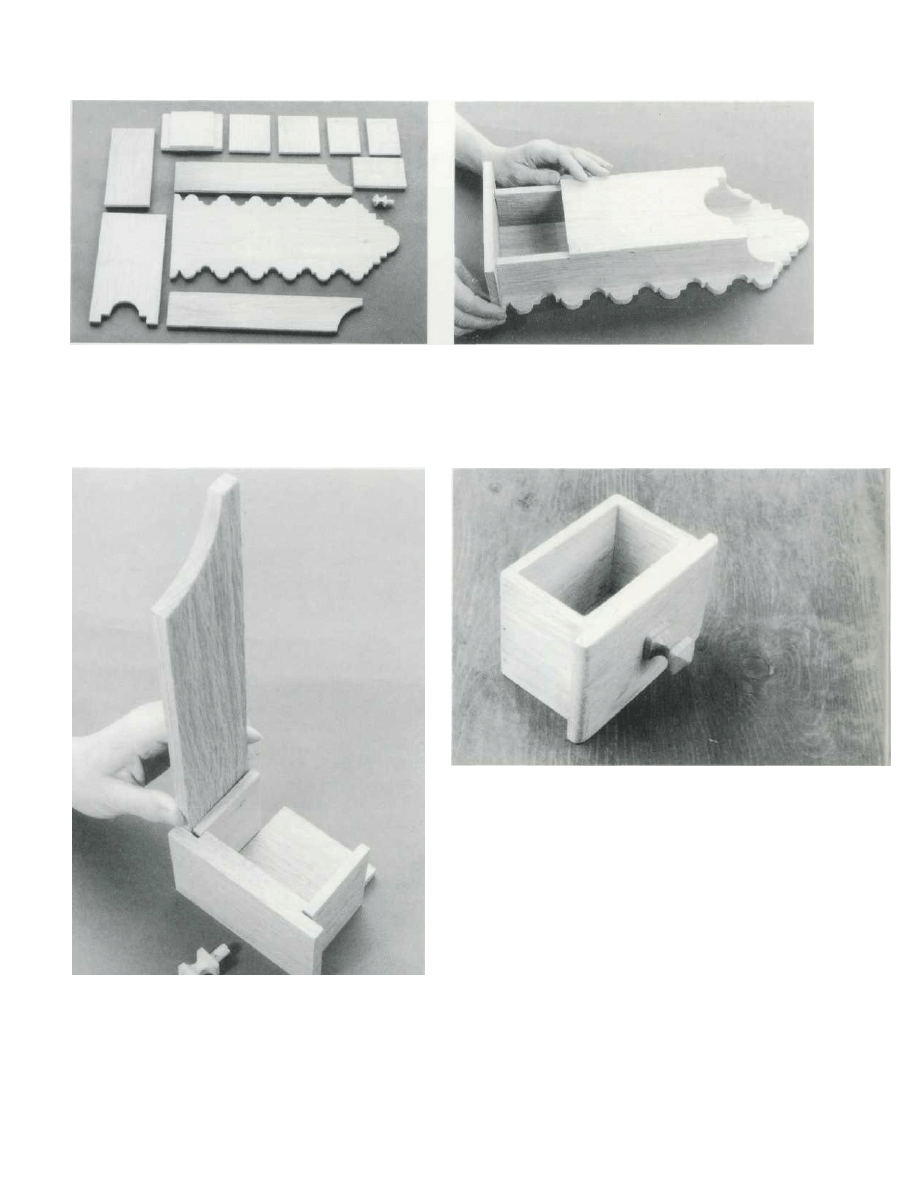
2 Having made all the component parts, pencil label
them so that you know precisely how they fit one
to another. If one side of a part is more attractive, or
damaged, then now is the time to make decisions as to
its placing.
3 Do a trial fitting to make sure that you haven't made
any mistakes. Test for the squareness of the butting
edges and mark in the position of the nail/panel pin holes.
5 Here's the finished drawer—all glued, pinned and
rubbed down. Putting the drawer together is a l i t tle bit
tricky, not because any single cut is complicated, but
because the total form needs to be true, square and a
good fit.
4 Do a t r i a l fitting of the sides of the box and the sides
of the drawer. If necessary, you can trim back the
rabbet and/or the thickness of the wood. Establish the
position of the drawer pull by marking with crossed
Copyright 2004 Martian Auctions
975
Wyszukiwarka
Podobne podstrony:
picket window box
christmas box
pipe expansion id 121780 Nieznany
DiagLab UkładKrzepnięcia 2 BOX
horse creep box
Ortopedia Egzamin 2012 BOX
gift box a p
Bentwood Box
kostka 3DSolid Box, makra zwcad
Bluebird Nesting Box Project
przetworstwo tworzyw sztucznych plast box sa
sprawko tworzywa cold box
więcej podobnych podstron