59
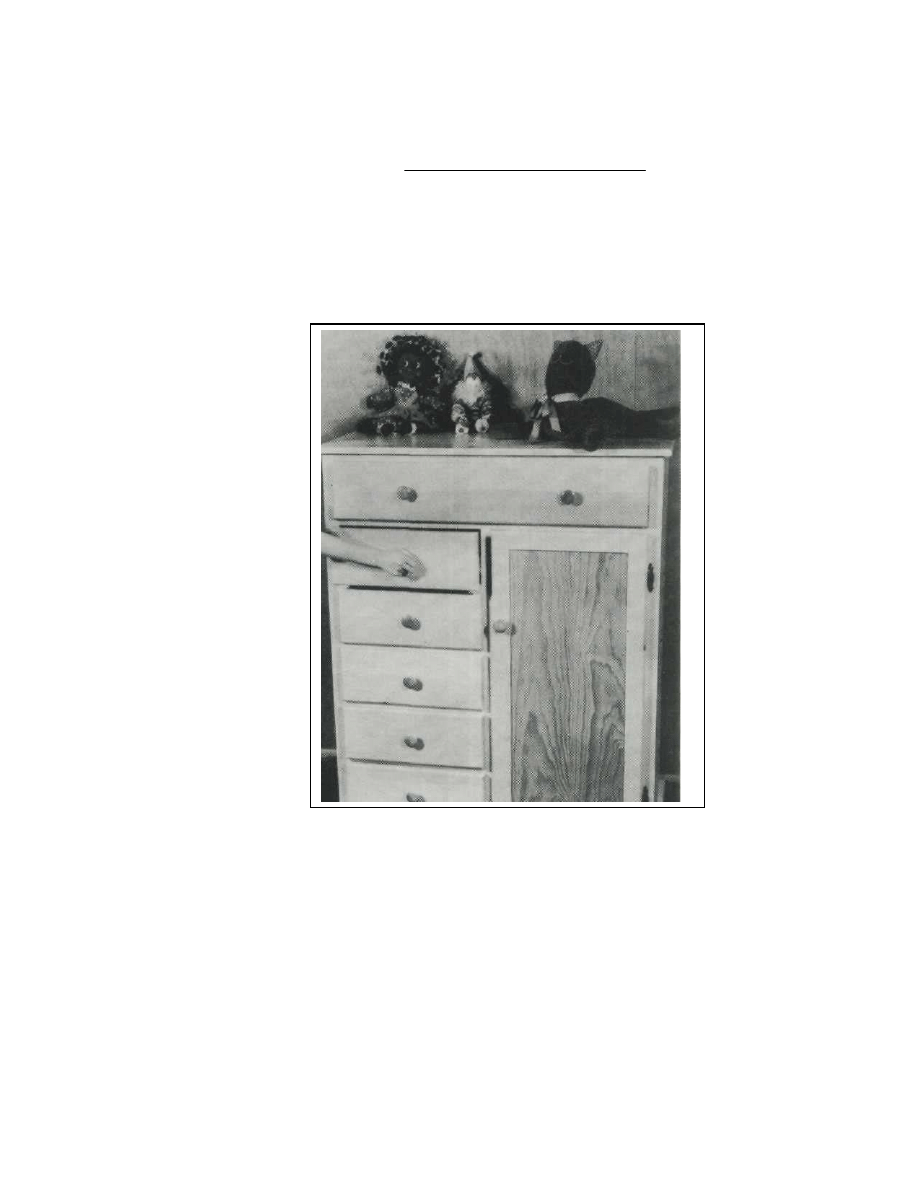
CHILD’S ARMOIRE
Copyright 2004 Martian Auctions
275
THIS CHILD'S ARMOIRE will make it
easy for kids to
keep their rooms neat and orderly. Its six drawers
and two shelves provide enough storage space to
house a substantial wardrobe. By following a
simple modification to be described below, the
shelf compartment can even be replaced with a
small closet complete with clothes pole for
hanging dresses, suits, or coats. Best of all, the
ar-moire is designed especially with the pint-sized
set in mind. No more standing on tippy toes just
to reach a clean pair of socks!
Before starting on the project, carefully study
all photos, diagrams, lists, and building
instructions. One attractive feature worth noting
at the outset is that no fancy joinery is required.
With the exception of a few simple rabbets,
nothing more complicated than butt joints is
called for. On all of these joints, use 1 1/4" finish
nails and glue unless otherwise specified.
Another plus is that only the most basic of shop
tools are needed, although a router is essential,
and you 11 probably also find a table saw to be
helpful.
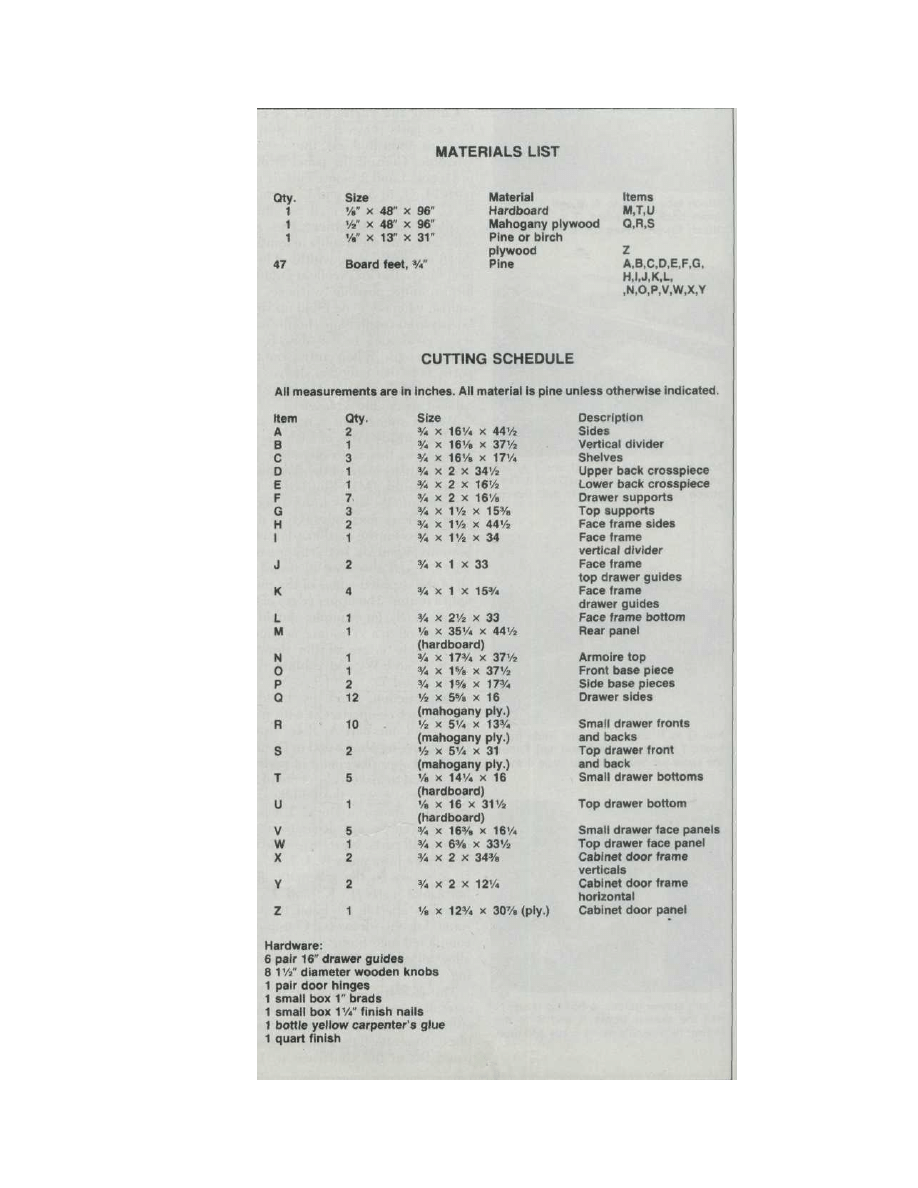
Because of the variety of dimensions encountered
in the plan, we've simply indicated the total
amount of 3/4" pine required, which is 47 board
feet. This figure allows approximately 15% for
scrap. When shopping at the lumberyard, bear in
mind that the largest single width of pine called
for in the plan is 6 3/8" (parts V and W).
Procuring the hardware should not be much of a
problem. If you do have difficulty, though, a
complete
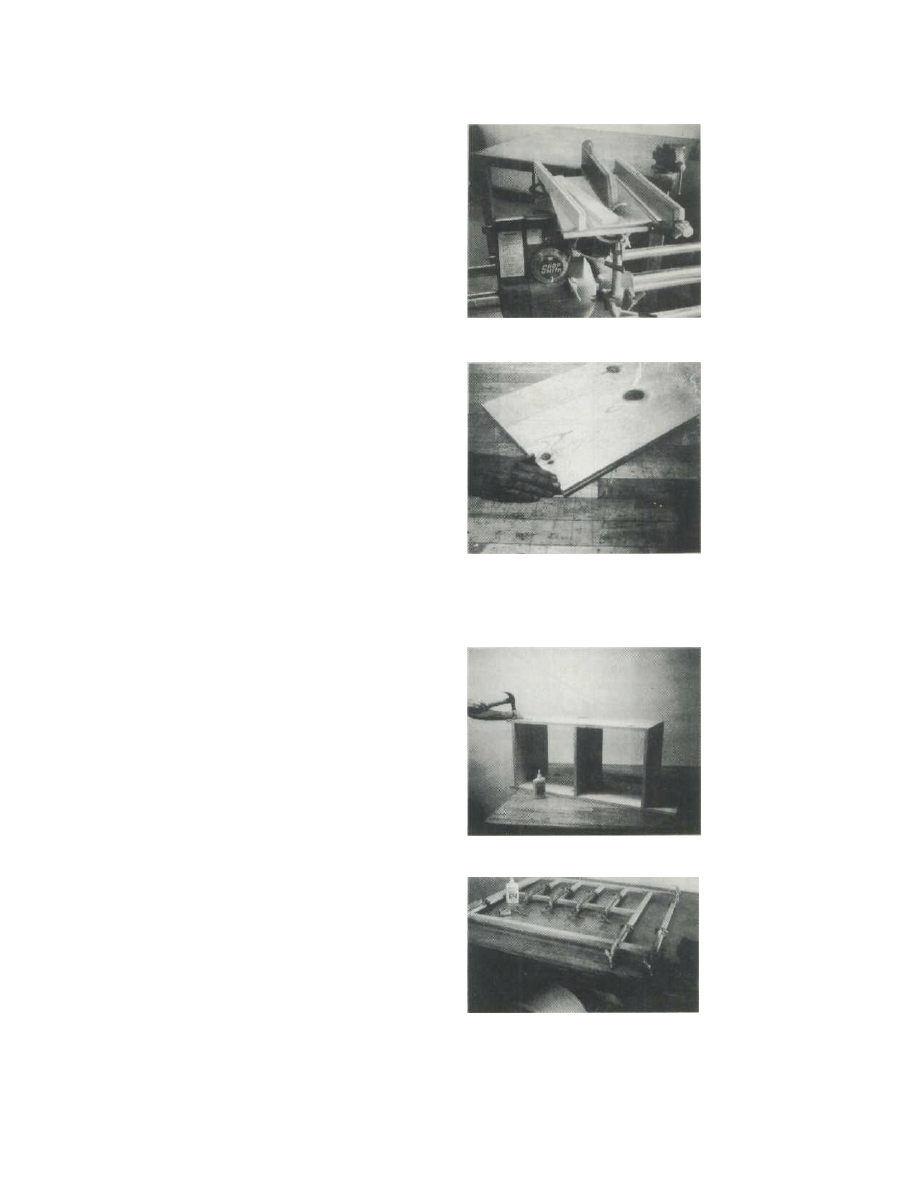
The first step is to cut all wood to proper size. Refer to
the cutting schedule and Details 1 and 2 for further
instructions.
Glue boards together to make up boards A, B, C, and N.
With a router, cut a thin rabbet on the back inside edge of
board A.
Attach A to boards B, and C. Attach board B to boards C.
Don't forget to check for squareness. See Detail 3 for
measurements
Glue face frame H, I, J, K, and L together. Note that parts
J, K, and L are each 6" apart. Refer to drawing on the
next page.
Copyright 2004 Martian Auctions
276

Copyright 2004 Martian Auctions
277
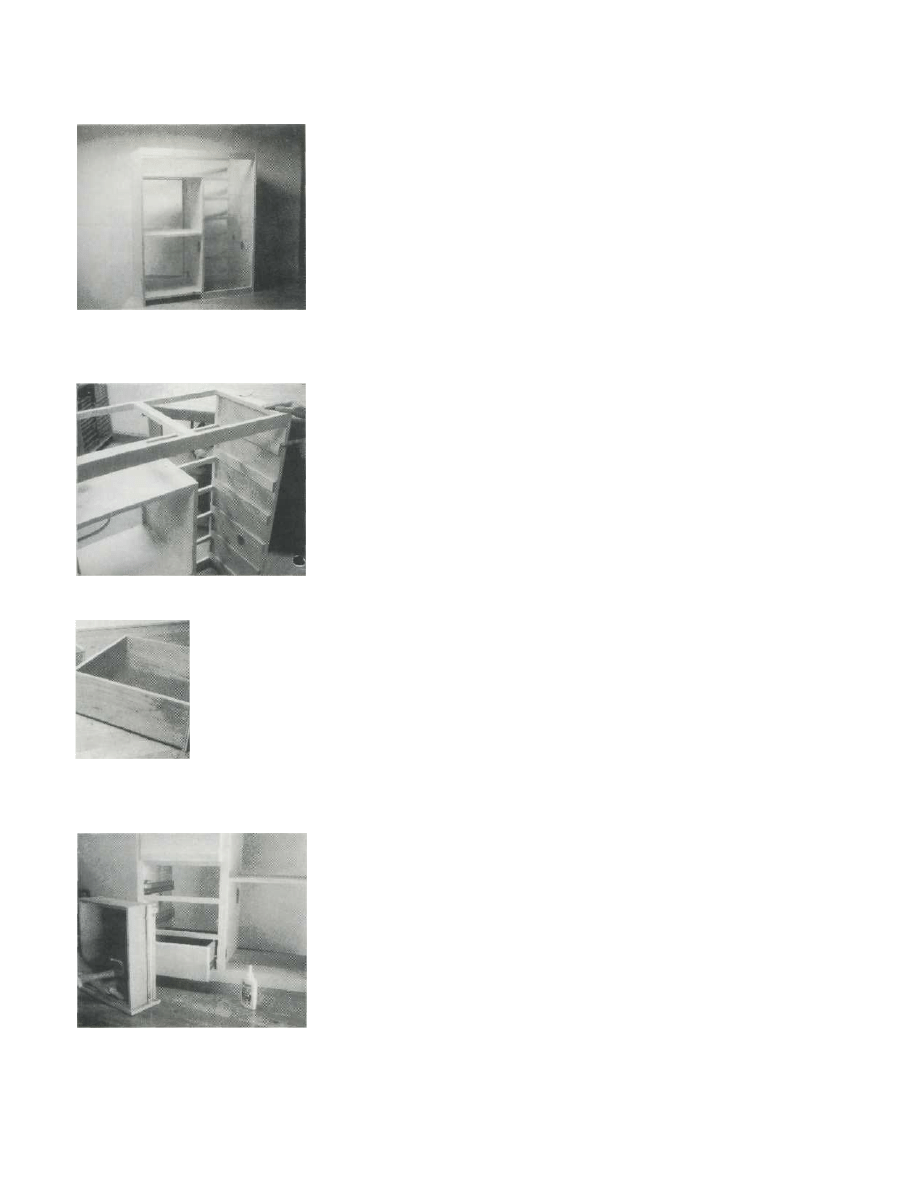
Attach face frame to A, B.and C. Attach upper
back crosspiece D to boards A. Attach lower
crosspiece E to A and B.
Attach two boards G to A, D, and J. Attach one
board G to the center of D and J. Then attach
drawer supports F to both boards A.
Nail Q to R using 1" brads. Slide hard-board T
into groove in Q and nail. Follow the same
procedure for the large drawer.
Attach drawer guides to boards Q and F. Nail
the drawer fronts R and S to the drawer face
panels using brads and glue.
set of hardware, replete with mount-
ing instructions and all necessary
screws, can he ordered through the
mail. Write to the address found
at the end of this article for more
information.
Cutting the Parts. Begin by cut-
ting all parts down to their proper
sizes as indicated on the cutting
schedule. Consult the panel
layouts in Details 1 and 2 before
cutting out parts M, Q, R, S, T,
and U. Farts A, B, C, and N are
formed by gluing smaller hoards
together. This not only saves you
the trouble of hunting down
unusually large widths of lumber,
but is also an excellent strategy for
avoiding possible warpage. Of
course, whenever you build up
large boards from smaller ones in
this way, it's a good idea to use
dowels for extra strength. When
cutting out the parts, note that
only two shelves (C) are needed if
you intend to make the cabinet
space into a closet.
With a router, cut a rabbet
into the back inside edge of each
part A side piece; this is to allow
for the eventual placement of the
rear hard-board panel (M).
Similarly, cut grooves into the
lower inside edge of each of the
drawer sides (Q) to provide access
for the hardboard drawer bottoms
(T and U). In the interests of
safety, you'll also want to round
off all of the exposed edges of the
piece with a router. The upper
edges of the top piece (N), for
example, should be rounded off to
a 1/4" radius, as should the
outside edges of the drawers
(parts V and W) and cabinet door
(parts X and Y).
Construction. Start by
building the cabinet
compartment with parts B, C, and
one part A. Refer to the
accompanying photos and to
Detail 3 for the proper placement
of parts. If you intend to make a
closet out of the shelf space,
ignore the middle shelf board (C)
shown in Detail 3. Check for
squareness and accurate alignment
of all parts. Next, assemble the
face frame from parts I I , I, J, K,
glue here, and drive the nails through
part II (on the drawer side of the face
frame) into the front edge of the side
panel. To secure the construction, attach
the upper back crosspiece (D) between
the two parts A, following the placement
indicated on the schematic. This
crosspiece must be aligned with the
rabbets on the two parts A in order to
accommodate the rear hardboard panel
(M). The lower back crosspiece (E), span-
ning from part B to the drawer-side part
A, is similarly aligned with the rabbet on
A.
On each side of the unit now, attach
a top support (G) between the face frame
and the upper rear cross-piece (D), as
shown in the schematic and Detail 3.
Then take the remaining part G top
support and fasten it to parts D and J in
the center of the unit. The drawer
supports (F) are added next. Detail 3
shows how one part F is to be situated on
the cabinet-side part A. The remaining
six drawer supports are arranged on the
drawer-side part A according to the
measurements given on Detail 4. Once
all the drawer supports are in place,
carefully center the armoire top (N) and
fasten it to parts D, G, and J. Set the
unit aside now, and allow all glue to
dry.
Drawers. Each of the five small drawers
consists of two sides (Q), a front and back
(both parts R), a hard-board bottom (T),
and a face panel (V). Start by attaching
the front and back to the sides with 1"
brads and glue. As seen in the schematic,
the tops of the two parts R are flush with
the tops of the drawer sides. Next, slide
the hardboard bottom (T) into the
grooves of parts Q, and secure it with a
nail or two. Repeat this procedure in
assembling the large drawer from parts
S, U, and the remaining parts Q.
Following the manufacturer's in-
structions, attach the 16" drawer guides
now to the drawer supports (F) within
the armoire unit and to the sides (Q) of
each drawer. Assembly of the drawers
is completed then with the addition of
the face panels (parts V for the- small
drawers; W for the large drawer). Use
glue here, and drive 1" brads through the
drawer fronts (R or S) into the face panels.
Again using 1" brads, fasten the hardboard
rear panel (M) to the back of the armoire,
driving the brads through M into parts A,
Copyright 2004 Martian Auctions
278
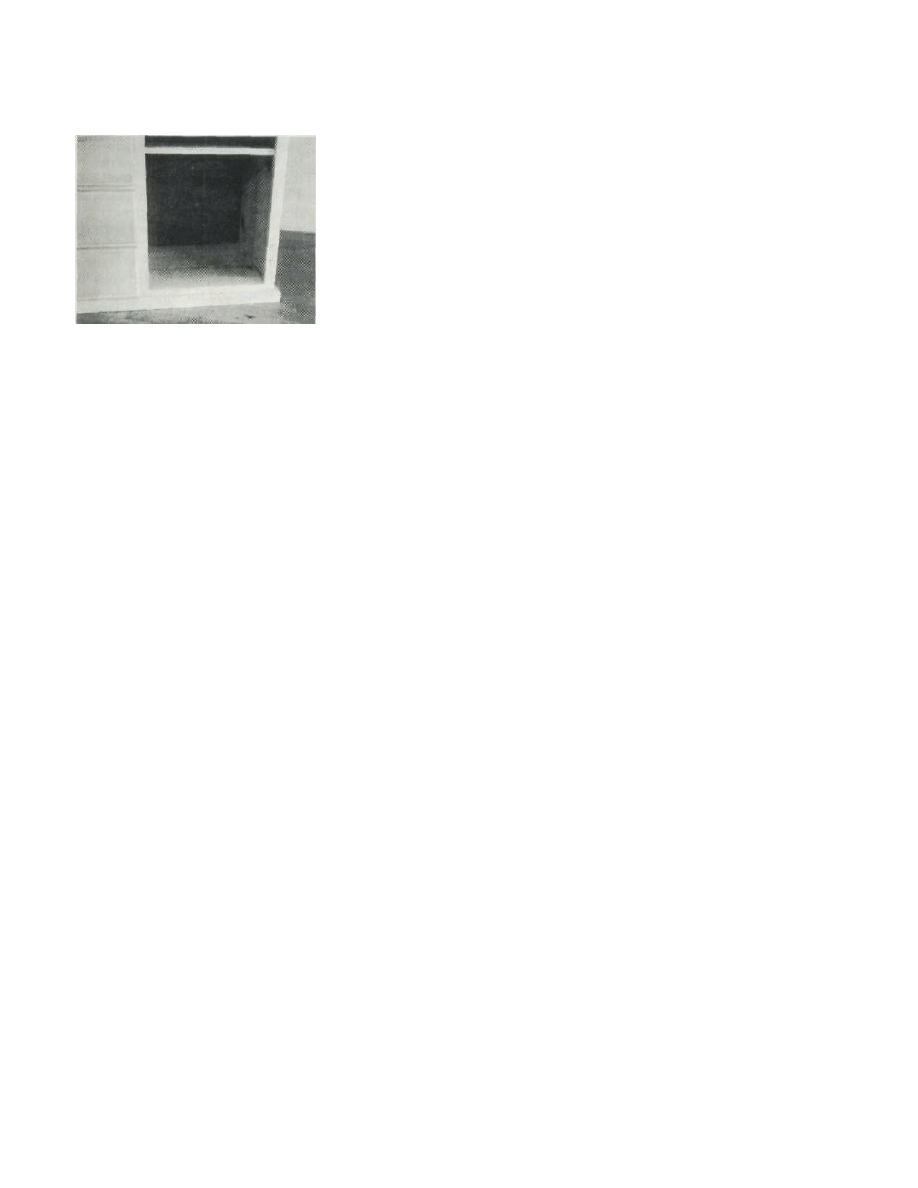
Use 1" brads to attach M to A, D, and E. Miter
front ends of boards P and attach to A. Miter
both ends of O and attach to L.
attached next. First, miter both ends of
the front base piece (O) at a 45° angle,
and miter the matching end of each of
the two side base pieces (P). Parts P are
then glued and nailed to parts A, while
O is fastened to the face frame bottom
(L).
Cabinet. The cabinet door comprises
parts X, Y, and Z. Start by routing out
a 1/8"'-wide x 3/8"-deep channel
centered along the inside edges of parts
X and Y. The cabinet door panel (Z) is
nestled within these channels and
secured in place with glue. The excess
channel space on both ends of each part
X may be concealed with a wood filler.
Otherwise, cut four 1/8"
x 3/8" x 1 1/2"
splines from scrap and glue into place.
Hang the door with hinges mounted 4"
in from each end. Attach wooden knobs
to the drawers and cabinet door, sand
the entire unit and finish as desired.
Assuming you've left out the middle
shelf (C), it's an easy matter to make
the cabinet compartment into a closet
for hanging clothes. All that's needed is
a pair of 1 3/8" diameter clothes pole
sockets and a 17" length of l 3/8" dowel.
Just locate the sockets 3" below the
cabinet ceiling (C), and centered on
parts A and B. Detail 5 shows the
arrangement found in the closet option.
and L, as shown in the schematic.
The horizontal parts J, K, and L
are spaced 6" apart in the frame to
make room for the drawers. Clamp
the completed face frame
securely, and allow all glue to dry
before continuing.
The face frame assembly is then
carefully positioned on the cabinet
compartment and fastened into
place. Now attach the remaining
side panel (A) to the construction.
Use
B, D, and E. The front and side base
pieces are
Copyright 2004 Martian Auctions
279
Copyright 2004 Martian Auctions
280
Wyszukiwarka
Podobne podstrony:
Childs Easel
Childs Cradle
Instilling a Childs Values
Childs Easel
armoire student desk
Dominique Spring 2008 Articles Reformatted Articles Chito childs Navigating Interracial Borders
childs computer table
Grigor Iliev A Childs Wish
Toto Childs Anthem
Cabinet Pine Country Armoire
Silhouette Nocturne 77 Holiday With A Vampire III Jones, Childs, Vanak
Childs, Tera Lynn Oh My Gods 01 Oh My Gods
Haunted Witch Hunt Book 1 Lisa Childs
Desk Armoire Student Computer Desk
Cabinet Rustic Armoire
więcej podobnych podstron