WIRE JEWELRY MAKING
PATTERN #105
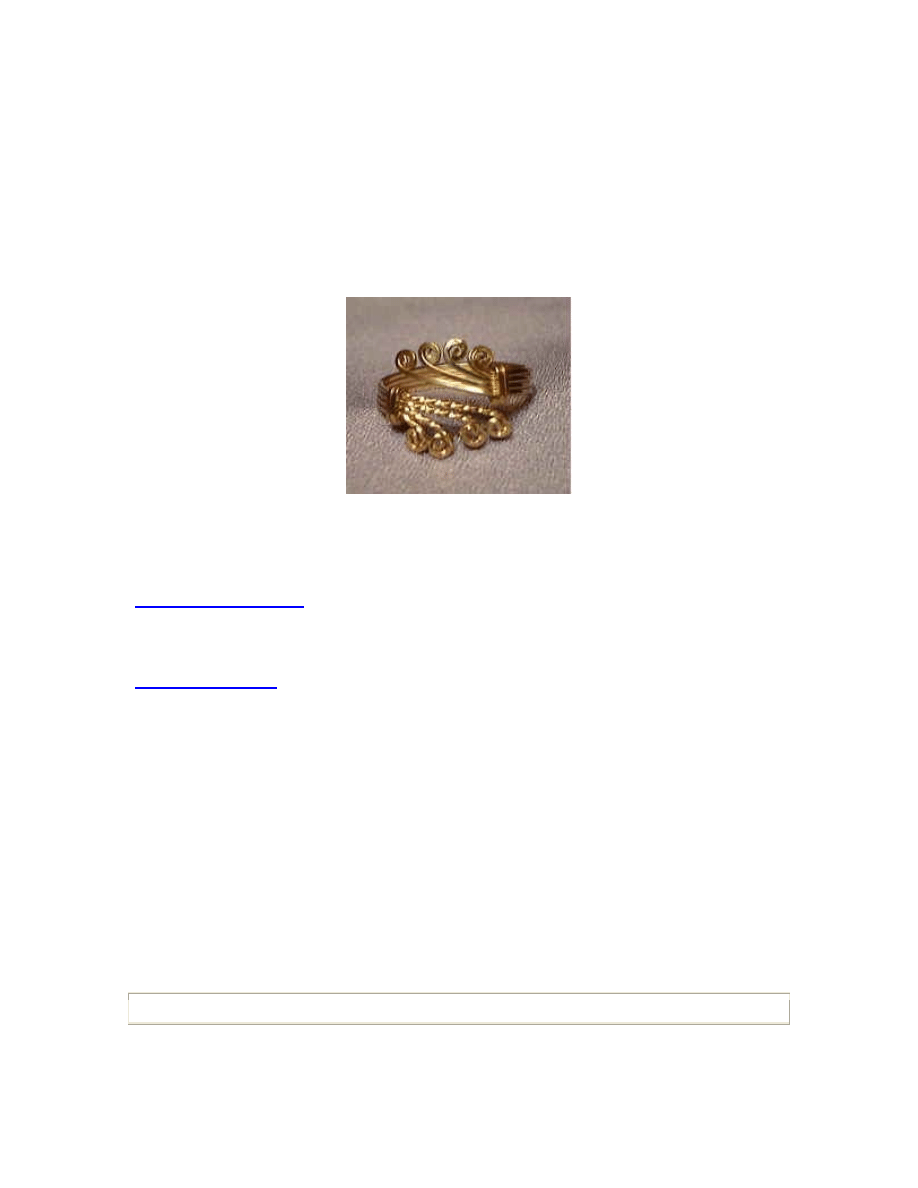
Adjustable Filigree Gold Ring
Copyright by Preston and Mary Reuther
Project 105 is an adjustable gold ring -- wear it on any finger or on a toe. These rings can be
made in just a few minutes and because they are adjustable, they can be sold on the spot. It is
best made with gold filled 21 gauge square half hardwire.
• 18 inches of 14kt. gold filled 21 gauge square half hard wire or brass practice wire
• flat nose pliers
• chain nose pliers
• wire cutter or flush cutter
• Sharpie marking pen
• steel ruler
• steel ring mandrel
• rawhide hammer
PRICING YOUR FINISHED PROJECT
Cost of material-----(prices are approximate)
• 18 in. 14kt. gold filled 21 gauge square half hard wire $1.50
Suggested retail price $10.00-15.00
Let's get started:
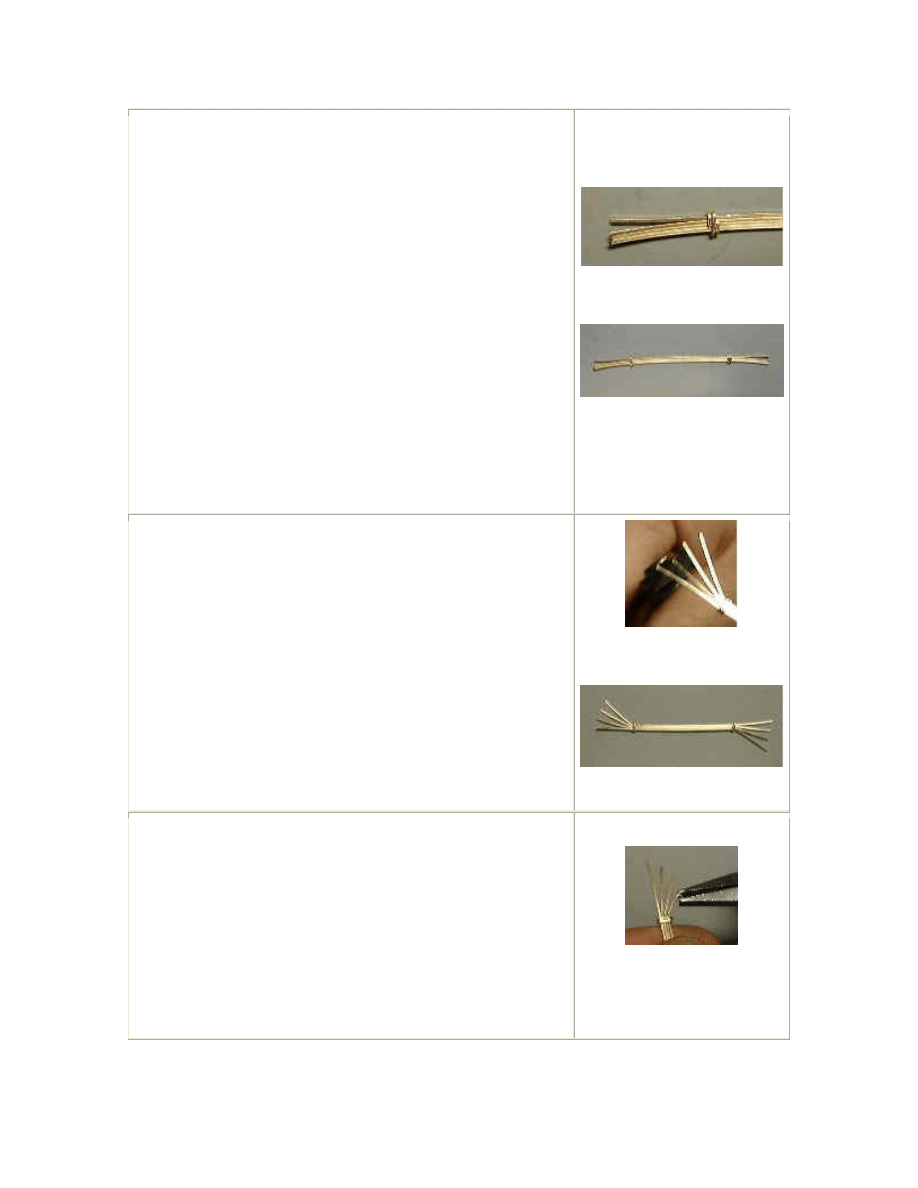
• Cut four pieces of 21 gauge gold filled square half hard
wire--each 3-1/2 inches long. These will be the wires of
your ring.
• Cut two pieces of 21 gauge gold filled square half hard
wire --- each 2 inches long. These will be your wrap
wires.
• Lay the four 3-1/2 inch long shank wires together.
• TIP: Wrap the center of the bundle with masking tape to
help hold your wires together.
• Using your flat nose pliers, make a small hook about 3/4
inch long on the end of one wrap wire.
• Measure 3/4 of an inch from one end of the bundle,
place the hook around the bundle, and start making two
complete wraps around the bundle. Cut the excess wires
off on the backside of the ring shank. See DIAGRAM #1.
• Next measure 3/4 of an inch from the other end of the
bundle and make two complete wraps using the second
wrap wire. Cut off the excess wires on the backside of
the ring shank.
• This is what your bundle should look like. See DIAGRAM
#2.
DIAGRAM #1
DIAGRAM #2
• Using a smooth kitchen knife, start on one end of the
bundle and bend the end wires one by one in an outward
direction. See DIAGRAM #3.
• Using your knife, bend the wires one by one outward in
the opposite direction on the other end of the bundle.
• The bundle with bent wires should look like this. See
DIAGRAM #4.
DIAGRAM #3
DIAGRAM #4
• Start with one end of the bundle and work from the left to
the right. Do not cut the wire on the far left at all. Cut off
1/8 inch from the wire next to the far left wire. Then cut
1/4 inch off of the next wire and cut 3/8 inch off of the
last wire.
• With your chain nose pliers, catch the tip of the shortest
wire and start to curl the wire outwards around itself.
This is the beginning of a rosette. Always start with the
shortest wire. See DIAGRAM #5
• Press the curl flat with your flat nose pliers and start to
turn the wire into a coil. See DIAGRAM #6.
DIAGRAM #5
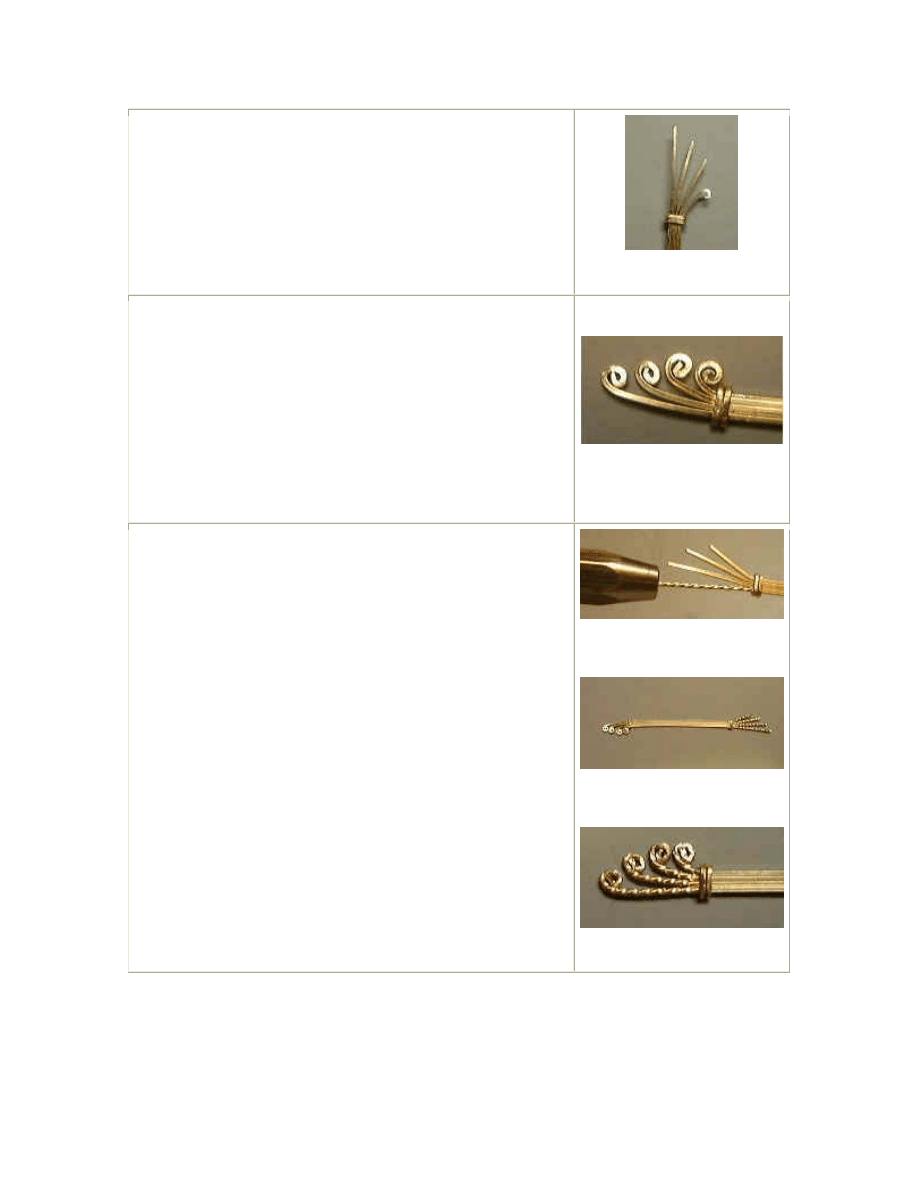
DIAGRAM #6
• Continue to roll the wire into a complete coil--a small
rosette and flatten the rosette with your flat nose pliers.
• Working from the shortest to the longest wire, begin a
small curl with the next wire, flatten the curl and continue
to make a rosette in the next wire. Bring the rosette right
up to the first rosette and flatten it.
• Make a rosette on the next wire bringing the rosette right
up to the last rosette. And make a rosette on the last
wire.
• This is what the rosettes should look like. See DIAGRAM
#7.
DIAGRAM #7
• Using your pin vise, twist each of the wires at the
opposite end of the bundle. See DIAGRAM #8.
• Now clip the wires on the other end of the bundle, cutting
them opposite of the other end -- the shortest wire on
other end will be the longest wire on this end. Do NOT
cut the long wire. Cut 1/8 inch off the next wire. Cut 1/4
inch off the next wire and cut 3/8 inch off the last wire.
• This is what your bundle should look like. See DIAGRAM
9.
• With your flat nose pliers, make a rosette facing
outwards on the shortest wire. Flatten the rosette and
continue to make a rosette on each wire working from
the shortest wire to the longest wire. Your finished
rosettes should look like this. See DIAGRAM 10.
DIAGRAM #8
DIAGRAM 9
DIAGRAM 10
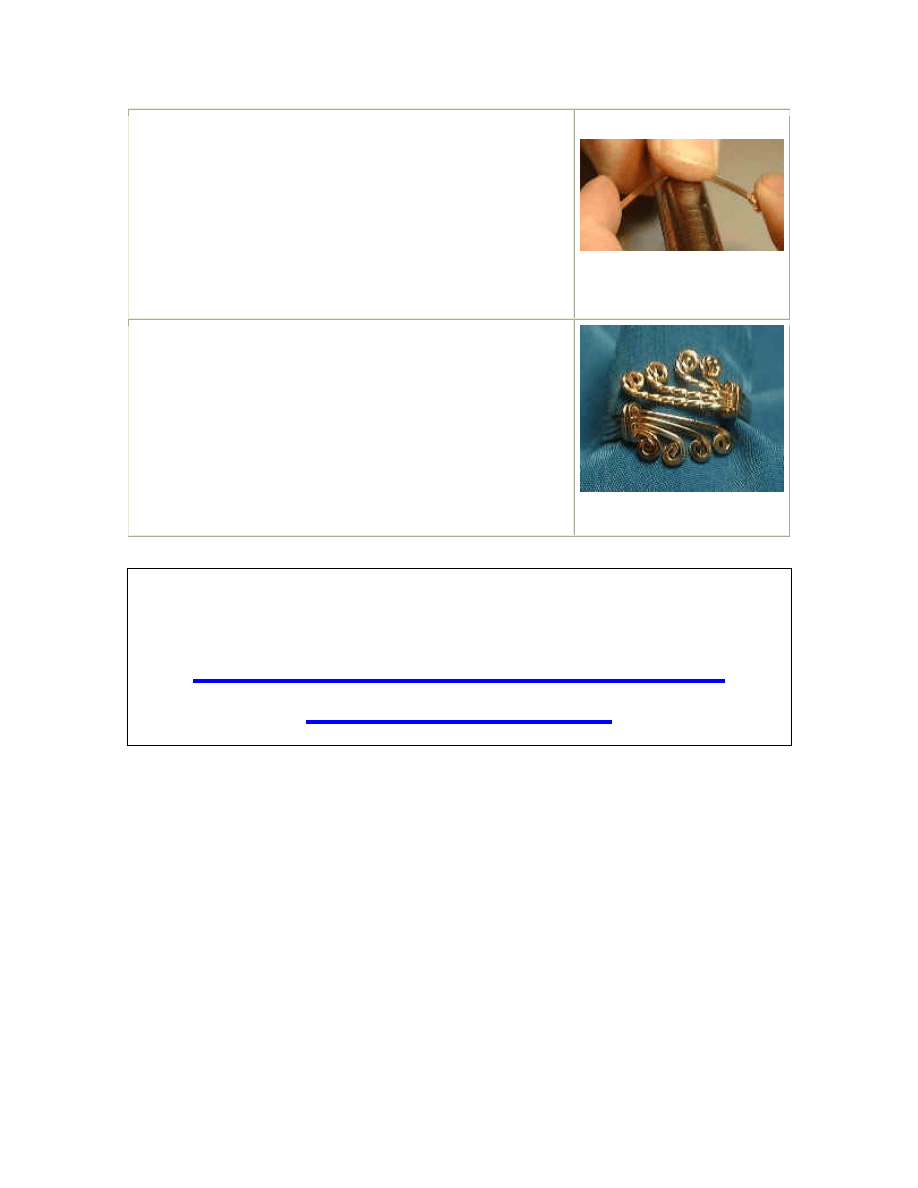
• Put your bundle on the ring mandrel at about 5-1/2 and
bend it completely around your ring mandrel. See
DIAGRAM 11.
• Flatten and gently shape your ring by putting it on the
ring mandrel and tapping it with a rawhide hammer.
• TIP: By starting with a smaller size, you will be able to
easily open the ring up to a larger size ring by pushing
the ring to a larger size on the mandrel. If you start with
a larger size ring, you will not be able to make the ring
smaller.
DIAGRAM #11
• The finished adjustable filigree gold ring.
• NOTE: This project produces a ring that will fit sizes 6-
1/2 to 11-1/2. To make a smaller ring, use 3 inch long
wires for the bundle.
• NOTE: To make a toe ring, use only 3 wires instead of 4
wires.
DIAGRAM #12
Pattern created by Master Wire Sculptor Preston J Reuther.
Wyszukiwarka
Podobne podstrony:
coiled wire ring
jewelry box scroll patterns
jewelry box scroll patterns
viking knit wire jewelry
Woven Wire Trinochopoly Arm Ring
20090954 Making Wire Jewelry Wire Wrapped Jewelry(1)
Crafts Woodworking Magazine (Ebook) Shopnotes #150 Extra Oval Jewelry Box Lid Pattern
Pattern Peyote Little Mouse Amulet
JG RUST Patterns 9 15
canoe purse pattern2 flap1
Patterson Ch J Rodzicielstwo lesbijek i gejów
Artistic Wire Green or Magenta Single Spiral Bead Necklace & Earrings
Pattern Peyote Tiny Ladybug Earrings
J R R TOLKIEN 1 The Fellowship of the Ring
gingerbread patterns
Dietary Patterns Associated with Alzheimer’s Disease
mallard pond pattern
więcej podobnych podstron