
planter box
Georgia-Pacific
from
backyard projects
ASSEMBLY INSTRUCTIONS
NOTE: This planter can fit any size pot.
1. Decide on your pot size. Measure it from side to side.
Then add 4 inches for easy access in and out of
your planter.
2. Measure the height of the container (pot) and add 2
inches so that the container will not easily be seen inside
the planter box.
3. Cut 4 (2 x 4) boards the height of the pot plus 2 inches.
Then cut the 1 x 6’s needed for the side panels,
remembering that they should be overlapped one inch.
For instance, if 6 (1 x 6s) are used per side, add one more
1 x 6 for the 6 one inch overlaps. The 1 x 6s should be cut
the width of the pot to be used in the planter plus 4
inches. For instance, if the pot is 24 inches wide, cut the
1 x 6s 28 inches long.
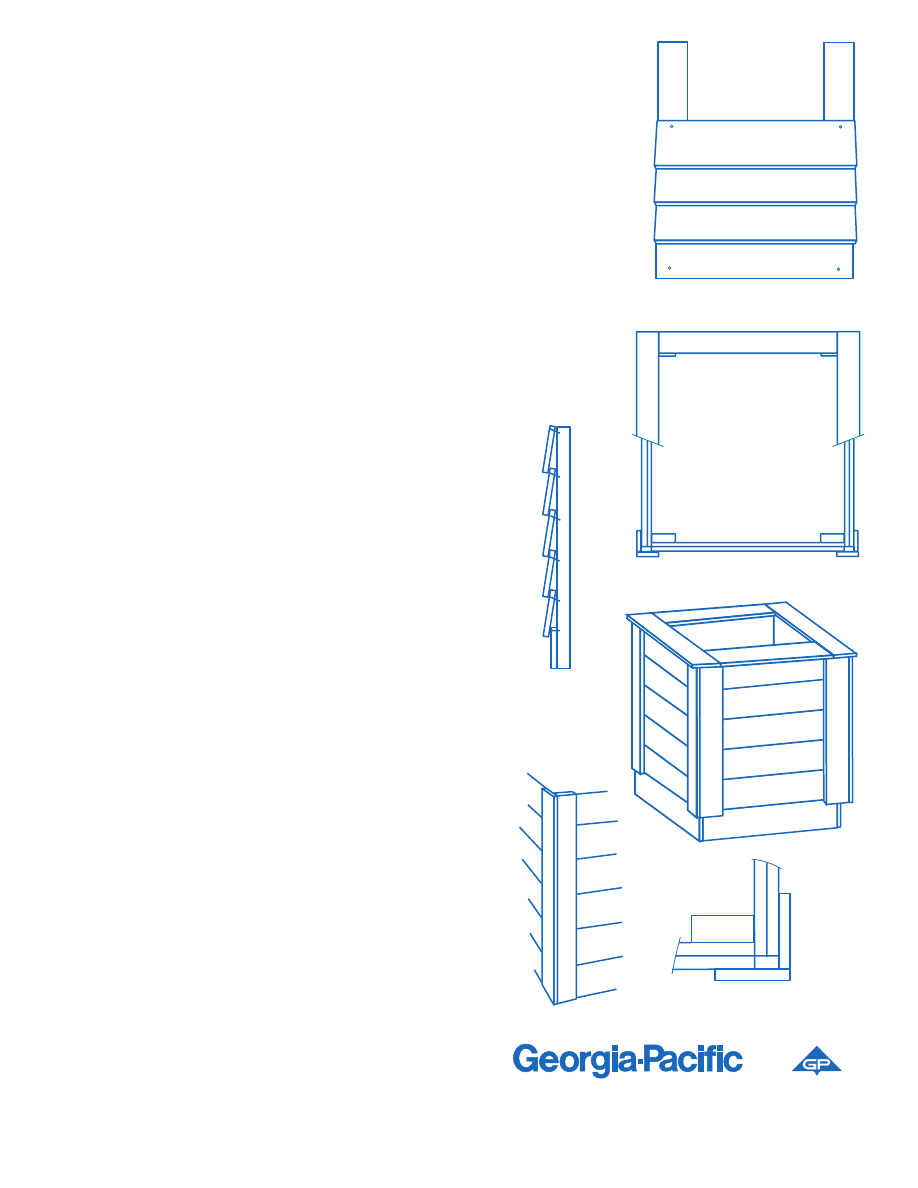
4. Lay two of the 2 x 4s on a flat surface, square them with
a large square. Nail the first board (1 x 6) with two
galvanized nails at each end. Then lay the next 1 x 6
overlapping the previous 1 x 6 one inch. Repeat this
process until you have completed the side using only one
nail per end in each 1 x 6.
5. Repeat this process (see ELEVATION) one more time.
Now you have two sides of your container. Next lay the
sides onto their edges and start the process all over
again. The remaining sides need no 2 x 4s because you
can nail straight into the 2 x 4s used on the other sides.
6. Measure the height from the bottom edge of the lower
overlapping 1 x 6 to the top edge of the upper overlapping
1 x 6. Using this measurement, cut 8 (1 x 4) boards to
length, 2 for each corner of the planter for vertical
dressing (see DRESSING DETAIL). Nail 2 (1 x 4) boards
side to edge. Then nail to the overlapping 1 x 6s at each
corner of the planter, making sure they are flush - top
and bottom.
7. Last cap the top with 1 x 4s (see PLAN).
MATERIALS LIST
2" x 4"s treated lumber
1" x 6"s treated lumber
1" x 4"s treated lumber
6d hot-dipped galvanized
or zinc coated nails
8d hot-dipped galvanized
or zinc coated nails
TIP: Use water
repellent or stain
with water repellent
when your job is
finished to help
protect your
pressure treated
wood from splitting,
checking, and
warping.
NOTE: All wood products are pressure treated with
Chromated Copper Arsenate preservative. All wood
products in contact with the ground should be treated
to a .40 ground contact retention.
NOTE: In some applications you may use
screws instead of nails for better hold
down power.
DRESSING DETAIL
PLAN
SECTION
THRU
PLANTER
ELEVATION
planter box
Georgia-Pacific Corporation makes no warranties expressed or implied
regarding this plan and specifically disclaims the warranties of merchant-
ability and fitness for a particular purpose. Check with an architect or a
building expert to make sure that this plan is appropriate to your situation
and meets local building codes. Read carefully the consumer information
sheet on pressure treated wood before starting construction.
NOTE: For the best aesthetic value, make 3 of these in different
sizes or heights, then place in a group with plants like citrus,
azaleas or geraniums.
planter box
WHENEVER YOU BUILD WITH
TREATED WOOD PRODUCTS FROM
GEORGIA-PACIFIC, BUILD CORRECTLY.
Whatever you build with Georgia-Pacific treated wood prod-
ucts should last a long time. So, it makes good sense to build
in a craftsmanlike manner. Here are some helpful tips to make
your job easier and look better.
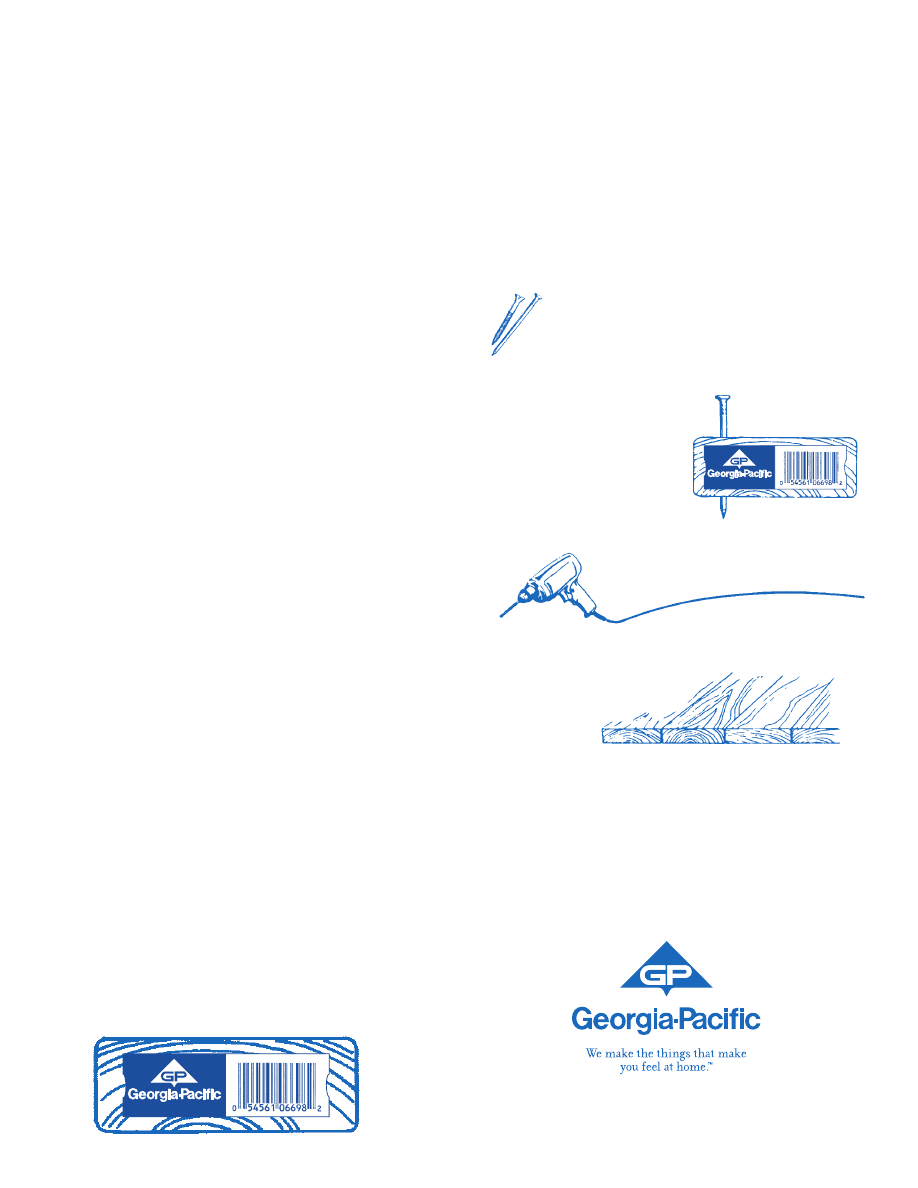
USE GALVANIZED FASTENERS.
Use galvanized or stainless nails, screws, or bolts
when working with pressure treated wood. These types of
fasteners are corrosion-resistant and should minimize rust
stains on your project.
NAIL BARK SIDE UP.
Always nail boards bark side up
(annual rings arc upward) to
reduce cupping. Nail thin
boards to thicker boards to
maintain structural integrity.
DRILL PILOT HOLES.
Especially when nailing near the edge or end
of a board, it’s a good idea to drill pilot holes
for your fasteners.
BUTT BOARDS TIGHTLY.
Butt decking boards together firmly. As drying occurs,
some shrinkage can be expected.
APPLY A
WEATHER-RESISTANT FINISH…
Any exposed wood, pressure treated or not, should be pro-
tected from the weather. Application of a finish coat of clear
water repellent or semi-transparent stain will help to minimize
warping, checking, or splitting. The finish coat should be
applied to pressure treated wood as soon as it is dry to the
touch, and immediately to untreated wood. (Option: stain or
water repellent may be applied when the wood is surface dry.)
Consumer information approved by the U.S.
Environmental Protection Agency For Inorganic
Arsenical Pressure Treated Wood.
CONSUMER INFORMATION
This wood has been preserved by pressure-treatment
with an EPA-registered pesticide containing inorganic arsenic
to protect it from insect attack and decay. Wood treated with
inorganic arsenic should be used only where such protection
is important.
Inorganic arsenic penetrates deeply into and remains in
the pressure-treated wood for a long time. Exposure to inorganic
arsenic may present certain hazards. Therefore, the following pre-
cautions should be taken both when handling the treated wood
and in determining where to use or dispose of the treated wood.
USE SITE PRECAUTIONS
Wood pressure-treated with waterborne arsenical
preservatives may be used inside residences as long as all
sawdust and construction debris are cleaned up and disposed
of after construction. Do not use treated wood under circum-
stances where the preservatives may become a component of
food or animal feed. Examples of such sites would be struc-
tures or containers for storing silage food.
Do not use treated wood for cutting-boards or countertops.
Only treated wood that is visibly clean and free of surface
residue should be used for patios, decks, and walkways.
Do not use treated wood for construction of those portions
of beehives which may come into contact with the honey.
Treated wood should not be used with public drinking
water, except for uses involving incidental contact such as
docks and bridges.
HANDLING PRECAUTIONS
Dispose of treated wood by ordinary trash collection or
burial. Treated wood should not be burned in open fires or in
stoves, fireplaces, or residential boilers because toxic chemicals
may be produced as part of the smoke and ashes. Treated
wood from commercial or industrial use (e.g., construction sites)
may be burned only in commercial or industrial incinerators or
boilers in accordance with state and Federal regulations.
Avoid frequent or prolonged inhalation of sawdust from
treated wood, When sawing and machining treated wood, wear
a dust mask. Whenever possible, these operations should be
performed outdoors to avoid indoor accumulations of airborne
sawdust from treated wood.
When powersawing and machining, wear goggles to protect
eyes from flying particles. Gloves can provide extra protection
against splinters and freshly treated wet wood. Allow freshly treat-
ed wet wood to dry thoroughly before handling. Follow good per-
sonal hygiene practices in the shop and on the job. After working
with the wood, and before eating, drinking, and use of tobacco
products, wash exposed areas thoroughly. If preservatives or
sawdust accumulates on clothes, launder before reuse. Wash
work clothes separately from other household clothing.
Treated Lumber
Treated Lumber
www.gp.com
© 2000 Georgia-Pacific Corporation. All rights reserved.
Printed in the U.S.A.
6/00.
Lit. Item #121766.
Wyszukiwarka
Podobne podstrony:
planter box 2
planter box with trellis
Planter Box
planter box with trellis
Square Planter Box
Planter Box
Picket Fence Planter Box
Planters The Basic Box
Window Box Planter
box shaped planter
Planter Salt box planter
picket window box
Plantene opis
christmas box
więcej podobnych podstron