199
FOLDING TRAY
Copyright 2004 Martian Auctions
863

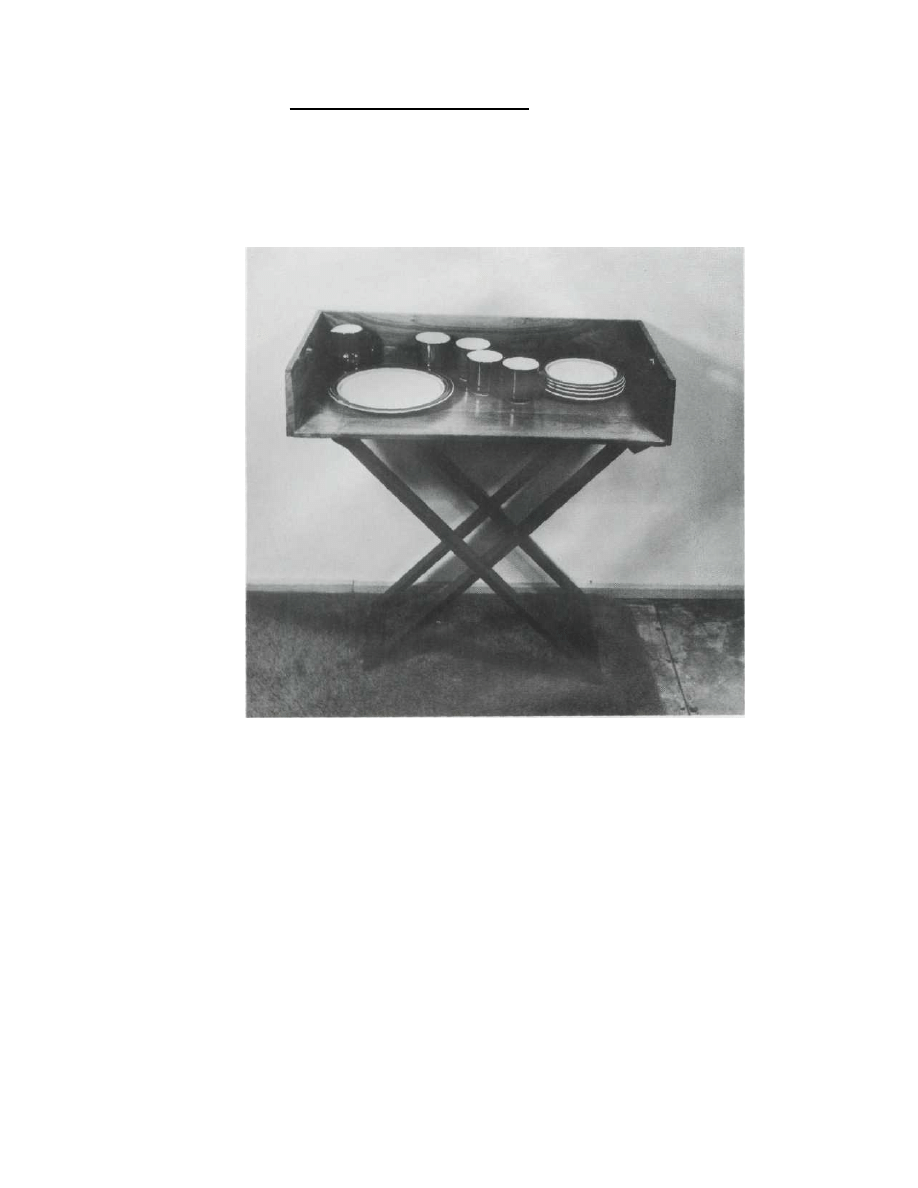
This generously sized tray can be
used separately or placed perma-
nently on the folding stand. The
classic design and rich walnut goes
well with either contemporary or
country furnishings.
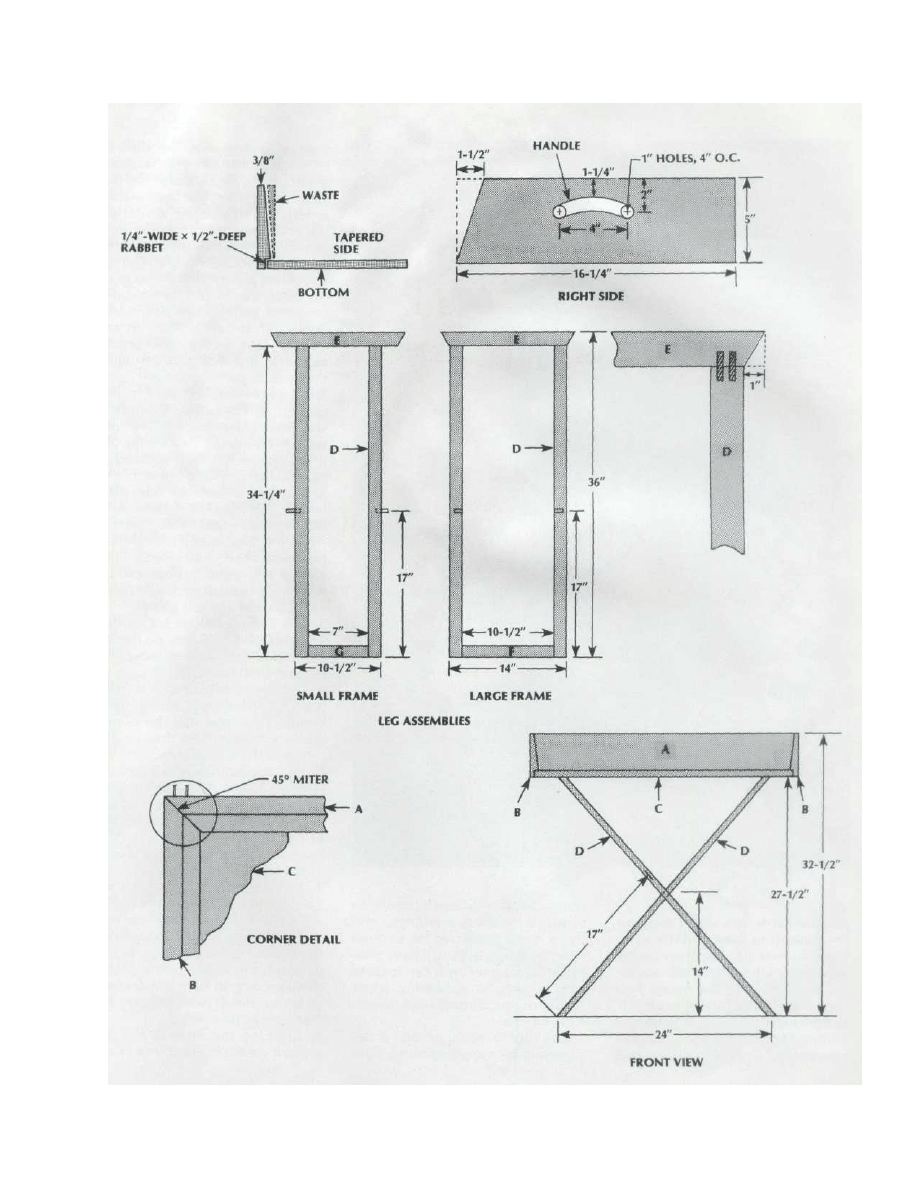
1. Cut all stock to size according to
the dimensions provided.
2. Glue up random width stock to
make the tray bottom (C) slightly
oversized. When the glue has
dried, sand on both sides and trim
the bottom to final size.
3. Miter the corners for connect
ing the back (A) and the tray sides
(B).Cut1/4"-wide x 1/2"-deep rab
bets on the lower inside edges of
the back and sides. Taper the inner
face on each piece down to 3/8"
thickness, beginning the taper at
the top of the rabbet as shown.
4. Drill and cut out the handholes
on the tray sides as shown.
5. Final sand the tray pieces, in-
cluding the handholes. Assemble
the tray using glue and 4d finishing
nails at the corners, and glue and
2d finishing nails through the bot-
tom into the sides. Predrill all nail
holes for easier construction; set
the nails and fill the holes with
matching wood putty.
6. Angle-cut the ends of the top
rails (E) as shown.
7. Assemble the narrow inside
frames first. Begin by locating and
drilling 1/4"-diameter dowel holes
1" deep at the joints for the legs (D)
and top and bottom rails (E, G).
8. On the outside of the narrow
frame legs, drill 1/4"-diameter
holes 1" deep exactly 17" from the
bottom of the legs. This is the loca
tion of the pivot pins for folding
the stand.
9. Glue the pivot pins in place,
then assemble the narrow frame.
Glue the dowel joints and clamp
until dry. Check for squareness.
10. Drill 1/4"-diameter holes 1"
deep exactly 17" from the bottom
of the inside of the large frame
legs. Assemble the top and bottom
(F) rails and one side of the large
frame.
11. Insert the small frame inside
the large frame, lining up the pivot
pins in the frame holes. Do not
glue pins in the large frame legs.
12. Position and glue the remain
ing outside frame leg in place.
Sand all stand parts at the joints and
the surface.
13. Finish with clear polyurethane
finish. When dry, you might want
to tack or staple fabric strapping to
the underside of the top rails so the
frame opens up to 24" in width.
Copyright 2004 Martian Auctions
864
Copyright 2004 Martian Auctions
865
Wyszukiwarka
Podobne podstrony:
Lap Tray and Coasters
[Martial Arts Aikido] Tying And Folding The Hakama #2
[Martial Arts Aikido] Tying And Folding The Hakama
Native American Designs Apache Tray
Protein Folding
080
Martial Arts Aikido hakama folding
Folding Sawhorse
Folding Instructions(1)
iris folding palma
na czym polega technika iris folding
Kartki wykonane techniką Iris folding
iris folding traktor
iris folding domek
iris folding pociąg
więcej podobnych podstron