
Contents
Overview
1
Introduction to Operators
2
Operator Overloading
8
Lab 12.1: Defining Operators
21
Creating and Using Delegates
40
Defining and Using Events
50
Demonstration: Handling Events
56
Lab 12.2: Defining and Using Events
57
Module 12: Operators,
Delegates, and Events
This course is based on the prerelease Beta 1 version of Microsoft
®
Visual Studio .NET.
Content in the final release of the course may be different from the content included in
this prerelease version. All labs in the course are to be completed with the Beta 1
version of Visual Studio .NET.

Information in this document is subject to change without notice. The names of companies,
products, people, characters, and/or data mentioned herein are fictitious and are in no way intended
to represent any real individual, company, product, or event, unless otherwise noted. Complying
with all applicable copyright laws is the responsibility of the user. No part of this document may
be reproduced or transmitted in any form or by any means, electronic or mechanical, for any
purpose, without the express written permission of Microsoft Corporation. If, however, your only
means of access is electronic, permission to print one copy is hereby granted.
Microsoft may have patents, patent applicat ions, trademarks, copyrights, or other intellectual
property rights covering subject matter in this document. Except as expressly provided in any
written license agreement from Microsoft, the furnishing of this document does not give you any
license to these patents, trademarks, copyrights, or other intellectual property.
2001 Microsoft Corporation. All rights reserved.
Microsoft, ActiveX, BackOffice, BizTalk, IntelliSense, JScript, Microsoft Press, MSDN,
PowerPoint, Visual Basic, Visual C++, Visual C#, Visual Studio, Windows, and Windows Media
are either registered trademarks or trademarks of Microsoft Corporation in the U.S.A. and/or other
countries.
Other product and company names mentioned herein may be the trademarks of their respective
owners.

Module 12: Operators, Delegates, and Events 1
Overview
n
Introduction to Operators
n
Operator Overloading
n
Creating and Using Delegates
n
Defining and Using Events
This module covers three areas of useful functionality that can be implemented
in a class or struct: operators, delegates, and events.
Operators are the basic components of a language. You use operators to
perform manipulations and comparisons between variables that may be logical,
relational, or conditional in nature.
Delegates specify a contract between an object that issues calls to a function
and an object that implements the called function.
Events provide the way for a class to notify its clients when a change occurs in
the state of any of its objects.
After completing this module, you will be able to:
n
Define operators, to make a class or struct easier to use.
n
Use delegates to decouple a method call from a method implementation.
n
Add event specifications to a class to allow subscribing classes to be
notified of changes in object state.

2 Module 12: Operators, Delegates, and Events
u
Introduction to Operators
n
Operators and Methods
n
Predefined C# Operators
n
Conversion Operators
Operators are different from methods. They have special requirements that
enable them to function as expected. C# has a number of predefined operators
that you can use to manipulate the types and classes supplied with the
Microsoft
®
.NET Framework.
In this section, you will see why C#, like most languages, has operators. You
will be presented with the complete list of operators that C# supports. You will
learn to use operators to convert data from one type to another, and you will be
introduced to the concept of defining your own operators.
Module 12: Operators, Delegates, and Events 3
Operators and Methods
n
Using Methods
l
Reduces clarity
l
Increases risk of errors, both syntactic and semantic
n
Using Operators
l
Makes expressions clear
myIntVar1 = Int.Add(myIntVar2,
Int.Add(Int.Add(myIntVar3,
myIntVar4), 33));
myIntVar1 = Int.Add(myIntVar2,
Int.Add(Int.Add(myIntVar3,
myIntVar4), 33));
myIntVar1 = myIntVar2 + myIntVar3 + myIntVar4 + 33;
myIntVar1 = myIntVar2 + myIntVar3 + myIntVar4 + 33;
The purpose of operators is to make expressions clear and easy to understand. It
would be possible to have a language with no operators, relying instead on
well-defined methods, but this would most likely have an adverse affect on the
clarity of the language.
Using Methods
For example, suppose the arithmetic addition operator was not present, and the
language instead provided an Add method of the Int class that took parameters
and returned a result. Then, to add two variables, you would write code similar
to the following:
myIntVar1 = Int.Add(myIntVar2, myIntVar3);
myIntvar2 = Int.Add(myIntVar2, 1);

4 Module 12: Operators, Delegates, and Events
Using Operators
By using the arithmetic addition operator, you can write the more concise lines
of code that follow:
myIntVar1 = myIntVar2 + myIntVar3;
myIntVar2 = myIntVar2 + 1;
Code would become almost indecipherable if you were to add a series of values
together by using the Add method, as in the following code:
myIntVar1 = Int.Add(myIntVar2, Int.Add(Int.Add(myIntVar3,
ÊmyIntVar4), 33));
If you use methods in this way, the likelihood of errors, both syntactic and
semantic, is enormous. Operators are actually implemented as methods by C#,
but their syntax is designed to make them easy to use. The C# compiler and
runtime automatically convert expressions with operators into the correct series
of method calls.

Module 12: Operators, Delegates, and Events 5
Predefined C# Operators
Type information
Assignment
Indirection and address
Overflow exception control
Object creation
Relational
Delegate concatenation and
removal
Shift
Conditional
Increment and decrement
Cast
String concatenation
Indexing
Logical (Boolean and
bitwise)
Member access
Arithmetic
Operator Categories
The C# language provides a large set of predefined operators. Following is the
complete list.
Operator category
Operators
Arithmetic
+, -, *, /, %
Logical (Boolean and bitwise)
&, |, ^, !, ~, &&, ||, true, false
String concatenation
+
Increment and decrement
++, --
Shift
<<, >>
Relational
==, !=, <, >, <=, >=
Assignment
=, +=, -=, *=, /=, %=, &=, |=, <<=, >>=
Member access
.
Indexing
[ ]
Cast
( )
Conditional
? :
Delegate concatenation and remo val
+, -
Object creation
new
Type information
is, sizeof, typeof
Overflow exception control
checked, unchecked
Indirection and address
*, ->, [ ], &

6 Module 12: Operators, Delegates, and Events
You use operators for building expressions. The function of most operators is
well understood. For example, the addition operator (+) in the expression
10 + 5
will perform arithmetic addition, and in this example the expression
will yield the value of 15.
Some of the operators may not be as familiar as others, and some are defined as
keywords rather than symbols, but their functionality with the data types and
classes supplied with the .NET Framework is completely defined.
Operators with Multiple Definitions
A confusing aspect of operators is that the same symbol may have several
different meanings. The + in the expression
10 + 5
is clearly the arithmetic
addition operator. You can determine the meaning by the context in which it is
used— no other meaning of + makes sense.
However, the following example uses the + operator to concatenate strings:
"Adam " + "Barr"
It is the function of the parser, when the program is compiled, to determine the
meaning of an operator in any given context.
Module 12: Operators, Delegates, and Events 7
Conversion Operators
n
Implicit Conversion Is Safe
n
Explicit Conversion Requires a Cast
int intVar = 99;
float floatVar;
floatVar = intVar;
int intVar = 99;
float floatVar;
floatVar = intVar;
float floatVar = 99.9F;
int intVar;
intVar = (int)floatVar;
float floatVar = 99.9F;
int intVar;
intVar = (int)floatVar;
By using the predefined C# operators, you can convert data of one type to
another type. Data conversion can be implicit or explicit.
An implicit conversion is one that is guaranteed not to lose information. An
explicit conversion may lose information. An explicit conversion is specified
by using a cast, and it becomes the programmers’
responsibility to handle any
lost data.
Implicit Conversions
When an implicit conversion is performed, you may not even be aware that it
has happened. The following code provides an example:
int intVar = 99;
float floatVar;
floatVar = intVar; // Implicit conversion from int to float
In this example, the compiler generates code that automatically converts the
value in intVar into a floating-point value before storing the result in floatVar.
Converting from an int to a float is considered a safe conversion by C# because
there will be no loss of data.
Explicit Conversions
Some types of conversions are not considered to be safe by the compiler. For
example, converting from a float to an int is not safe:
float floatVar = 99.9F;
int intVar;
intVar = (int)floatVar; // Explicit – a cast is needed
In this case, you must use casting to perform explicit data conversion. The
conversion could result in some loss of data. In the preceding code, the value
stored in intVar will be 99 and the 0.9 will be lost. Without the cast, the
program will not compile.

8 Module 12: Operators, Delegates, and Events
u
Operator Overloading
n
Introduction to Operator Overloading
n
Overloading Relational Operators
n
Overloading Logical Operators
n
Overloading Conversion Operators
n
Overloading Operators Multiple Times
n
Quiz: Spot the Bugs
Many predefined operators in C# perform well-defined functions on classes and
other data types. This clear definition widens the scope of expression for the
user. You can redefine some of the operators provided by C# and use them as
operators that work only with classes and structs that you have defined. In a
sense, this is the same as defining your own operators. This process is known as
operator overloading.
Not all predefined C# operators can be overloaded. The unary arithmetic and
logic operators can be overloaded freely, as can the binary arithmetic operators.
The assignment operators cannot be overloaded directly, but they are all
evaluated using the arithmetic, logical, and shift operators, which in turn can be
overloaded.
In this section, you will learn how to overload relational, logical, and
conversion operators. You will also learn how to overload an operator multiple
times.

Module 12: Operators, Delegates, and Events 9
Introduction to Operator Overloading
n
Operator Overloading
l
Define your own operators only when appropriate
n
Operator Syntax
l
Operatorop, where op is the operator being overloaded
n
Example
public static Time operator+(Time t1, Time t2)
{
int newHours = t1.hours + t2.hours;
int newMinutes = t1.minutes + t2.minutes;
return new Time(newHours, newMinutes);
}
public static Time operator+(Time t1, Time t2)
{
int newHours = t1.hours + t2.hours;
int newMinutes = t1.minutes + t2.minutes;
return new Time(newHours, newMinutes);
}
Though operators make expressions simpler, you should only define operators
when it makes sense to do so. Operators should only be overloaded when the
class or struct is a piece of data (like a number), and will be used in that way.
An operator should always be unambiguous in usage; there should be only one
possible interpretation of what it means. For example, you should not define an
increment operator (++) on an Employee class (
emp1++;
) because the
semantics of such an operation on an Employee are not clear. What does it
actually mean to “increment an employee”? Would you be likely to use this as
part of a larger expression? If by increment you mean “give the employee a
promotion,” define a Promote method instead (
emp1.Promote();
).
Syntax for Overloading Operators
All operators are public static methods and their names follow a particular
pattern. All operators are called operatorop, where op specifies exactly which
operator is being overloaded. For example, the method for overloading the
addition operator is operator+.
The parameters that the operator takes and the types of parameters it returns
must be well defined. All arithmetic operators return an instance of the class
and manipulate objects of the class.
Example
As an example, consider the Time struct shown in the following code. A Time
value consists of two parts: a number of hours and a number of minutes. The
code in bold shows how to implement the binary addition operator (+) for
adding two Times together, and the binary subtraction operator (-) for
subtracting one Time from another.

10 Module 12: Operators, Delegates, and Events
The unary increment (++) and decrement (--) operators are also shown. They
add or subtract one minute from a Time.
public struct Time
{
public Time(int minutes) : this(0, minutes)
{
}
public Time(int hours, int minutes)
{
this.hours = hours;
this.minutes = minutes;
Normalize( );
}
// Arithmetic
public static Time operator+(Time lhs, Time rhs)
{
return new Time(lhs.hours + rhs.hours,
lhs.minutes + rhs.minutes
);
}
public static Time operator-(Time lhs, Time rhs)
{
return new Time(lhs.TotalMinutes( )
– rhs.TotalMinutes( )
);
}
...
// Helper methods
private void Normalize( )
{
if (hours < 0 || minutes < 0) {
throw new ArgumentException("Time too small");
}
hours += (minutes / 60);
minutes %= 60;
}
private int TotalMinutes( )
{
return hours * 60 + minutes;
}
private int hours;
private int minutes;
}

Module 12: Operators, Delegates, and Events 11
Overloading Relational Operators
n
Relational Operators Must Be Paired
l
< and >
l
<= and >=
l
== and !=
n
Override the Equals Method If Overloading == and !=
n
Override the GetHashCode Method If Overriding Equals
Method
You must overload the relational or comparison operators in pairs. Each
relational operator must be defined with its logical antonym. This means that if
you overload <, you must also overload >, and vice versa. Similarly, != must be
overloaded with ==, and <= must be overloaded with >=.
For consistency, create a Compare method first and define all the
relational operators by using Compare . The code example on the following
page shows you how to do this.
Overriding the Equals Method
If you overload == and !=, you should also override the Equals virtual method
that your class inherits from Object. This is to ensure consistency when two
objects of this class are compared, whether by == or the Equals method, so that
a situation in which == returns true and the Equals method returns false is
avoided.
Overriding the GetHashCode Method
The GetHashCode method (also inherited from Object ) is used to identify an
instance of your class if it is stored in a hash table. Two instances of the same
class for which Equals returns true should also hash to the same integer value.
By default, this is not the case. Therefore, if you override the Equals method,
you should also override the GetHashCode method.
Tip

12 Module 12: Operators, Delegates, and Events
Example
The following code shows how to implement the relational operators, the
Equals method, and the GetHashCode method for the Time struct:
public struct Time
{
...
// Equality
public static bool operator==(Time lhs, Time rhs)
{
return lhs.Compare(rhs) == 0;
}
public static bool operator!=(Time lhs, Time rhs)
{
return lhs.Compare(rhs) != 0;
}
// Relational
public static bool operator<(Time lhs, Time rhs)
{
return lhs.Compare(rhs) < 0;
}
public static bool operator>(Time lhs, Time rhs)
{
return lhs.Compare(rhs) > 0;
}
public static bool operator<=(Time lhs, Time rhs)
{
return lhs.Compare(rhs) <= 0;
}
public static bool operator>=(Time lhs, Time rhs)
{
return lhs.Compare(rhs) >= 0;
}
(Code continued on following page.)

Module 12: Operators, Delegates, and Events 13
// Inherited virtual methods (from Object)
public override bool Equals(object obj)
{
return obj is Time && Compare((Time)obj) == 0;
}
public override int GetHashCode( )
{
return TotalMinutes( );
}
private int Compare(Time other)
{
int lhs = TotalMinutes( );
int rhs = other.TotalMinutes( );
int result;
if (lhs < rhs)
result = -1;
else if (lhs > rhs)
result = +1;
else
result = 0;
return result;
}
...
}

14 Module 12: Operators, Delegates, and Events
Overloading Logical Operators
n
Operators && and || Cannot Be Overloaded Directly
l
They are evaluated in terms of &, |, true, and false,
which can be overloaded
l
x && y is evaluated as T.false(x) ? x : T.&(x, y)
l
x || y is evaluated as T.true(x) ? x : T.|(x, y)
You cannot overload the logical operators && and || directly. However, they
are evaluated in terms of the &, |, true , and false operators, which you can
overload.
If variables x and y are both of type T, the logical operators are evaluated as
follows:
n
x && y is evaluated as T.false(x) ? x : T.&(x, y)
This expression translates as “if x is false as defined by the false operator of
T, the result is x; otherwise it is the result of using the & operator of T over
x and y.”
n
x || y is evaluated as T.true(x) ? x : T.|(x, y)
This expression means “if x is true as defined by the true operator of T, the
result is x; otherwise it is the result of using the | operator of T over x and
y.”
Module 12: Operators, Delegates, and Events 15
Overloading Conversion Operators
n
Overloaded Conversion Operators
n
If a Class Defines a String Conversion Operator
l
The class should override ToString
public static explicit operator Time (float hours)
{ ... }
public static explicit operator float (Time t1)
{ ... }
public static implicit operator string (Time t1)
{ ... }
public static explicit operator Time (float hours)
{ ... }
public static explicit operator float (Time t1)
{ ... }
public static implicit operator string (Time t1)
{ ... }
You can define implicit and explicit conversion operators for your own classes
and create programmer-defined cast operators that can be used to convert data
from one type to another. Some examples of overloaded conversion operators
are:
n
explicit operator Time (int minutes)
This operator converts an int into a Time. It is explicit because not all ints
can be converted; a negative argument results in an exception being thrown.
n
explicit operator Time (float minutes)
This operator converts a float into a Time. Again, it is explicit because a
negative parameter causes an exception to be thrown.
n
implicit operator int (Time t1)
This operator converts a Time into an int. It is implicit because all Time
values can safely be converted to int.
n
explicit operator float (Time t1)
This operator converts a Time into a float. In this case the operator is
explicit because, although all Times can be converted to float, the floating-
point representation of some values may not be exact. (You always take this
risk with computations involving floating-point values.)
n
implicit operator string (Time t1)
This operator converts a Time into a string. This is also implicit because
there is no danger of losing any information in the conversion.
Overriding the ToString Method
Design guidelines recommend that, for consistency, if a class has a string
conversion operator, it should override the ToString method, which should
perform the same function. Many classes and methods in the System
namespace – Console.WriteLine for example – use ToString to create a
printable version of an object.

16 Module 12: Operators, Delegates, and Events
Example
The following code shows how to implement the conversion operators. It also
shows one way to implement the ToString method. Note how the Time struct
overrides ToString, which is inherited from Object.
public struct Time
{
...
// Conversion operators
public static explicit operator Time (int minutes)
{
return new Time(0, minutes);
}
public static explicit operator Time (float minutes)
{
return new Time(0, (int)minutes);
}
public static implicit operator int (Time t1)
{
return t1.TotalMinutes( );
}
public static explicit operator float (Time t1)
{
return t1.TotalMinutes( );
}
public static implicit operator string (Time t1)
{
return t1.ToString( );
}
// Inherited virtual methods (from Object)
public override string ToString( )
{
return String.Format("{0}:{1:00}", hours, minutes);
}
...
}
If a conversion operator could throw an exception or return a partial result,
make it explicit. If a conversion is guaranteed to work without any loss of data,
you can make it implicit.
Tip

Module 12: Operators, Delegates, and Events 17
Overloading Operators Multiple Times
n
The Same Operator Can Be Overloaded Multiple Times
public static Time operator+(Time t1, int hours)
{...}
public static Time operator+(Time t1, float hours)
{...}
public static Time operator-(Time t1, int hours)
{...}
public static Time operator-(Time t1, float hours)
{...}
public static Time operator+(Time t1, int hours)
{...}
public static Time operator+(Time t1, float hours)
{...}
public static Time operator -(Time t1, int hours)
{...}
public static Time operator -(Time t1, float hours)
{...}
You can overload the same operator multiple times to provide alternative
implementations that take different types as parameters. At compile time, the
system establishes the method to be called depending upon the types of the
parameters being used to invoke the operator.

18 Module 12: Operators, Delegates, and Events
Example
The following code shows more examples of how to implement the + and –
operators for the Time struct. Both examples add or subtract a specified
number of hours from the supplied Time:
public struct Time
{
...
public static Time operator+(Time t1, int hours)
{
return t1 + new Time(hours, 0);
}
public static Time operator+(Time t1, float hours)
{
return t1 + new Time((int)hours, 0);
}
public static Time operator-(Time t1, int hours)
{
return t1 – new Time(hours, 0);
}
public static Time operator-(Time t1, float hours)
{
return t1 – new Time((int)hours, 0);
}
...
}
Module 12: Operators, Delegates, and Events 19
Quiz: Spot the Bugs
public bool operator != (Time t1, Time t2)
{ ... }
public bool operator != (Time t1, Time t2)
{ ... }
1
1
public static operator float(Time t1) { ... }
public static operator float(Time t1) { ... }
2
2
public static Time operator += (Time t1, Time t2)
{ ... }
public static Time operator += (Time t1, Time t2)
{ ... }
public static bool Equals(Object obj) { ... }
public static bool Equals(Object obj) { ... }
3
3
4
4
public static int operator implicit(Time t1)
{ ...}
public static int operator implicit(Time t1)
{ ...}
5
5
In this quiz, you can work with a partner to spot the bugs in the code on the
slide. To see the answers to this quiz, turn the page.

20 Module 12: Operators, Delegates, and Events
Answers
1. Operators must be static because they belong to the class rather than an
object. The definition for the != operator should be:
public static bool operator != (Time t1, Time t2) { ... }
2. The “type” is missing. Conversion operators must either be implicit or
explicit. The code should be as follows:
public static implicit operator float (Time t1) { ... }
3. You cannot overload the += operator. However, += is evaluated by using
the + operator, which you can overload.
4. The Equals method should be an instance method rather than a class
method. However, if you remove the static keyword, this method will hide
the virtual method inherited from Object and not be invoked as expected, so
the code should use override instead, as follows:
public override bool Equals(Object obj) { ... }
5. The int and implicit keywords have been transposed. The name of the
operator should be int, and its type should be implicit, as follows:
public static implicit operator int(Time t1) { ... }
All the cases listed above will result in compile-time errors.
Note

Module 12: Operators, Delegates, and Events 21
Lab 12.1: Defining Operators
Objectives
After completing this lab, you will be able to:
n
Create operators for addition, subtraction, equality testing, multiplication,
division, and casting.
n
Override the Equals, ToString, and GetHashCode methods.
Prerequisites
Before working on this lab, you must be familiar with the following:
n
Using inheritance in C#
n
Defining constructors and destructors
n
Compiling and using assemblies
n
Basic C# operators
Estimated time to complete this lab: 30
minutes

22 Module 12: Operators, Delegates, and Events
Exercise 1
Defining Operators for the BankAccount Class
In previous labs, you created classes for a banking system. The BankAccount
class holds customer bank account details, including the account number and
balance. You also created a Bank class that acts as a factory for creating and
managing BankAccount objects. The bank classes were wrapped in a single
class library: bank.dll. Completed code is supplied as part of this lab, in case
you did not finish the earlier labs.
In this exercise, you will define the == and != operators in the Bank Account
class. The default implementation of these operators, which is inherited from
Object, tests to check whether the references are the same. You will redefine
them to examine and compare the information in two accounts.
You will then override the Equals and ToString methods. The Equals method
is used by many parts of the runtime and should exhibit the same behavior as
the equality operators. Many classes in the .NET Framework use the ToString
method when they need a string representation of an object.
å
To define the == and != operators
1. Open the Bank.sln project in the install folder\Labs\Lab12\Starter\Bank
folder.
2. Add the following method to the BankAccount class:
public static bool operator == (BankAccount acc1,
ÊBankAccount acc2)
{
...
}
3. In the body of operator ==, add statements to compare the two
BankAccount objects. If the account number, type, and balance of both
accounts are the same, return true; otherwise return false.
4. Compile the project. You will receive an error.
(Why will you receive an error when you compile the project?)
5. Add the following method to the BankAccount class:
public static bool operator != (BankAccount acc1,
ÊBankAccount acc2)
{
...
}
6. Add statements in the body of operator != to compare the contents of the
two BankAccount objects. If the account number, type, and balance of both
accounts are the same, return false; otherwise return true. You can achieve
this by calling operator == and inverting the result.
7. Save and compile the project. The project should now compile successfully.
The previous error was caused by having an unmatched operator ==
method. (If you define operator ==, you must also define operator !=, and
vice versa.)

Module 12: Operators, Delegates, and Events 23
The complete code for both of the operators is as follows:
public class BankAccount
{
...
public static bool operator == (BankAccount acc1,
ÊBankAccount acc2)
{
if ((acc1.accNo == acc2.accNo) &&
(acc1.accType == acc2.accType) &&
(acc1.accBal == acc2.accBal)) {
return true;
} else {
return false;
}
}
public static bool operator != (BankAccount acc1,
ÊBankAccount acc2)
{
return !(acc1 == acc2);
}
...
}

24 Module 12: Operators, Delegates, and Events
å
To test the operators
1. Open the TestHarness.sln project in the install folder\
Labs\Lab12\Starter\TestHarness folder.
2. Create a reference to the Bank component that you created in the previous
labs. To do this:
a. Expand the TestHarness project in Solution Explorer.
b. Right-click References, and click Add Reference .
c. Click Browse, and navigate to the install
folder\Labs\Lab12\Starter \Bank\bin\debug folder.
d. Click Bank.dll, and then click Open.
e. Click OK.
3. Create two BankAccount objects in the Main method of the
CreateAccount class. To do this:
a. Use Bank.CreateAccount(), and instantiate the BankAccount objects
with the same balance and account type.
b. Store the account numbers generated in two long variables called
accNo1 and accNo2.
4. Create two BankAccount variables called acc1 and acc2. Populate them
with the two accounts created in the previous step by calling
Bank.GetAccount().
5. Compare acc1 and acc2 by using the == operator. This test should return
false because the two accounts will have different account numbers.
6. Compare acc1 and acc2 by using the != operator. This test should return
true.
7. Create a third BankAccount variable called acc3. Populate it with the
account that you used to populate acc1 by calling Bank.GetAccount(),
using accNo1 as the parameter.
8. Compare acc1 and acc3 by using the == operator. This test should return
true, because the two accounts will have the same data.

Module 12: Operators, Delegates, and Events 25
9. Compare acc1 and acc3 by using the != operator. This test should return
false.
If you have problems, a utility function called Write is available that you
can use to display the contents of a BankAccount that is passed in as a
parameter.
Your completed code for the test harness should be as follows:
class CreateAccount
{
static void Main( )
{
// Create two bank accounts. Use Bank.CreateAccount(...)
// with the same balance and type.
// Store the numbers of these two accounts in long
//variables accNo1 and accNo2 long accNo1 =
Ê Bank.CreateAccount(AccountType.Checking, 100);
long accNo2 =
Ê Bank.CreateAccount(AccountType.Checking, 100);
// Create two BankAccount variables, acc1 and acc2.
// Use Bank.GetAccount( ) to populate them with the
// two accounts just created.
BankAccount acc1 = Bank.GetAccount(accNo1);
BankAccount acc2 = Bank.GetAccount(accNo2);
// Compare acc1 and acc2 by using the == operator.
// (Should be false because the account numbers will be
// different.)
if (acc1 == acc2) {
Console.WriteLine(
Ê "Both accounts are the same. They should not be!");
} else {
Console.WriteLine(
Ê "The accounts are different. Good!");
}
// Compare acc1 and acc2 by using the != operator.
// (Should be true because the account numbers will be
// different.)
if (acc1 != acc2) {
Console.WriteLine(
Ê "The accounts are different. Good!");
} else {
Console.WriteLine(
Ê "Both accounts are the same. They should not be!");
}
(Code continued on following page.)

26 Module 12: Operators, Delegates, and Events
// Create a third BankAccount variable, acc3, and
// populate it with the account whose
// account number is in accNo1. Use Bank.GetAccount
BankAccount acc3 = Bank.GetAccount(accNo1);
if (acc1 == acc3) {
Console.WriteLine(
Ê "The accounts are the same. Good!");
} else {
Console.WriteLine(
Ê "The accounts are different. They should not be!");
}
// Compare acc1 and acc3 by using the == operator.
// (Should be true because all the data wil l be the
// same.)
// Compare acc1 and acc3 by using the != operator.
// (Should be false.)
if (acc1 != acc3) {
Console.WriteLine(
Ê "The accounts are different. They should not be!");
} else {
Console.WriteLine(
Ê "The accounts are the same. Good!");
}
}
...
}
10. Compile and run the test harness.
å
To override the Equals, ToString, and GetHashCode methods
1. Open the Bank.sln project in the install folder\Labs\Lab12\Starter\Bank
folder.
2. Add the Equals method to the BankAccount class:
public override bool Equals(Object acc1)
{
...
}
The Equals method should perform the same function as the == operator,
except that it is an instance rather than a class method. Use the == operator
to compare this to acc1.
3. Add the ToString method as follows:
public override string ToString( )
{
...
}
The body of the ToString method should return a string representation of
the instance.

Module 12: Operators, Delegates, and Events 27
4. Add the GetHashCode method as follows:
public override int GetHashCode( )
{
...
}
The GetHashCode method should return a unique value for each different
account, but different references to the same account should return the same
value. The easiest solution is to return the account number. (You will need
to cast it to an int first.)
5. The completed code for Equals, ToString, and GetHashCode is as follows:
public override bool Equals(Object acc1)
{
return this == acc1;
}
public override string ToString( )
{
string retVal = "Number: " + this.accNo + "\tType: ";
retVal += (this.accType == AccountType.Checking) ?
Ê"Checking" : "Deposit";
retVal += "\tBalance: " + this.accBal;
return retVal;
}
public override int GetHashCode( )
{
return (int)this.accNo;
}
6. Save and compile the project. Correct any errors.

28 Module 12: Operators, Delegates, and Events
å
To test the Equals and ToString methods
1. Open the TestHarness.sln project in the install folder\
Labs\Lab12\Starter\TestHarness folder.
2. In the Main method of the CreateAccount class, replace the use of ==
and != with Equals, as follows:
if (acc1.Equals(acc2)) {
...
}
if (!acc1.Equals(acc2)) {
...
}
3. After the if statements, add three WriteLine statements that print the
contents of acc1, acc2, and acc3, as shown in the following code. The
WriteLine method uses ToString to format its arguments as strings.
Console.WriteLine("acc1 – {0}", acc1);
Console.WriteLine("acc2 – {0}", acc2);
Console.WriteLine("acc3 – {0}", acc3);
4. Compile and run the test harness. Check the results.

Module 12: Operators, Delegates, and Events 29
Exercise 2
Handling Rational Numbers
In this exercise, you will create an entirely new class for handling rational
numbers. This is a brief respite from the world of banking.
A rational number is a number that can be written as a ratio of two integers.
(Examples of rational numbers include ½, ¾, and -17.) You will create a
Rational class, which will consist of a pair of private integer instance variables
(called dividend and divisor) and operators for performing calculations and
comparisons on them. The following operators and methods will be defined:
n
Rational(int dividend)
This is a constructor that sets the dividend to the supplied value and the
divisor to 1.
n
Rational(int dividend, int divisor)
This is a constructor that sets the dividend and the divisor.
n
== and !=
These will perform comparisons based upon the calculated numeric value of
the two operands (for example,
Rational(6, 8) == Rational(3, 4)
).
You must override the Equals( ) methods to perform the same comparison.
n
<, >, <=, >=
These will perform the appropriate relational comparisons between two
rational numbers (for example,
Rational(6, 8) > Rational(1, 2)
).
n
binary + and –
These will add one rational number to or subtract one rational number from
another.
n
++ and --
These will increment and decrement the rational number.

30 Module 12: Operators, Delegates, and Events
å
To create the constructors and the ToString method
1. Open the Rational.sln project in the install folder\
Labs\Lab12\Starter\Rational folder.
2. The Rational class contains two private instance variables called dividend
and divisor. They are initialized to 0 and 1, respectively. Add a constructor
that takes a single integer and uses it to set dividend, leaving divisor with the
value 1.
3. Add another constructor that takes two integers. The first is assigned to
dividend, and the second is assigned to divisor. Check to ensure that divisor
is not set to zero. Throw an exception if this occurs and raise
ArgumentOutOfRangeException.
4. Create a third constructor that takes a Rational as a parameter and copies the
values it contains.
C++ developers will recognize the third constructor as a copy
constructor. You will use this constructor later in this lab.
The completed code for all three constructors is as follows:
public Rational(int dividend)
{
this.dividend = dividend;
this.divisor = 1;
}
public Rational(int dividend, int divisor)
{
if (divisor == 0) {
throw new ArgumentOutOfRangeException(
"Divisor cannot be zero");
} else {
this.dividend = dividend;
this.divisor = divisor;
}
}
public Rational(Rational r1)
{
this.dividend = r1.dividend;
this.divisor = r1.divisor;
}
5. Override the ToString method that returns a string version of the Rational,
as follows:
public override string ToString( )
{
return String.Format(“{0}/{1}”, dividend, divisor);
}
6. Compile the project and correct any errors.
Note

Module 12: Operators, Delegates, and Events 31
å
To define the relational operators
1. In the Rational class, create the == operator as follows:
public static bool operator == (Rational r1, Rational r2)
{
...
}
2. The == operator will:
a. Establish the decimal value of r1 by using the following formula.
decimalValue1 = r1.dividend / r1.divisor
b. Establish the decimal value of r2 by using a similar formula.
c. Compare the two decimal values and return true or false, as appropriate.
The completed code is as follows:
public static bool operator == (Rational r1, Rational
Êr2)
{
decimal decimalValue1 =
(decimal)r1.dividend / r1.divisor;
decimal decimalValue2 =
(decimal)r2.dividend / r2.divisor;
return decimalValue1 == decimalValue2;
}
Why are the decimal casts necessary when performing the division?
3. Create and define the != operator by using the == operator, as follows:
public static bool operator != (Rational r1, Rational r2)
{
return !(r1 == r2);
}
4. Override the Equals method. Use the == operator, as follows:
public override bool Equals(Object r1)
{
return (this == r1);
}
5. Define the < operator. Use a strategy similar to that used for the == operator,
as follows:
public static bool operator < (Rational r1, Rational r2)
{
return (r1.dividend * r2.divisor) < (r2.dividend *
Êr1.divisor);
}

32 Module 12: Operators, Delegates, and Events
6. Create the > operator, using == and <, as shown in the following code. Be
sure that you understand the Boolean logic used by the expression in the
return statement.
public static bool operator > (Rational r1, Rational r2)
{
return !((r1 < r2) || (r1 == r2));
}
7. Define the <= and >= operators in terms of > and <, as shown in the
following code:
public static bool operator <= (Rational r1, Rational r2)
{
return !(r1 > r2);
}
public static bool operator >= (Rational r1, Rational r2)
{
return !(r1 < r2);
}
8. Compile the project and correct any errors.
å
To test the constructors, the ToString method, and the relational
operators
1. In the Main method of the TestRational class of the Rational project, create
two Rational variables, r1 and r2, and instantiate them with the value pairs
(1,2) and (1,3), respectively.
2. Print them by using WriteLine to test the ToString method.
3. Perform the following comparisons, and print a message indicating the
results:
a. Is r1 > r2?
b. Is r1 <= r2?
c. Is r1 != r2?
4. Compile and run the program. Check the results.
5. Change r2 and instantiate it with the value pair (2,4).
6. Compile and run the program again. Check the results.

Module 12: Operators, Delegates, and Events 33
å
To create the binary additive operators
1. In the Rational class, create the binary + operator. Create two versions for:
a. Adding two Rationals together.
To add two rational numbers together, you need to establish a common
divisor. Unless both divisors are the same (if they are you can skip this step
and the next), do this by multiplying the divisors together. For example,
assume you want to add 1/4 to 2/3. The common divisor is 12 (4 * 3). The
next step is to multiply the dividend of each number by the divisor of the
other. Hence, 1/4 would become (1 * 3)/12, or 3/12, and 2/3 would become
(4 * 2)/12, or 8/12. Finally, you add the two dividends together and use the
common divisor. So 3/12 + 8/12 = 11/12, and hence 1/4 + 2/3 = 11/12.
If you use this algorithm, you will need to make copies of the parameters
passed in (using the copy constructor defined earlier) to the + operator. If
you modify the formal parameters, you will find that the actual parameters
will also be changed because of the way in which reference types are passed.
b. Adding a rational number and an integer.
To add an integer to a rational number, convert the integer to a rational
number that has the same divisor. For example, to add 2 and 3/8, convert 2
into 16/8, and then perform the addition.
Both versions should return a Rational. (Do not worry about producing a
normalized result.)
2. Create the binary – operator. Create two versions, one each for:
a. Subtracting one rational number from another.
b. Subtracting an integer from a rational number.
Tip
Tip

34 Module 12: Operators, Delegates, and Events
Both versions should return a Rational (non-normalized). The completed
code for the + and – operators is as follows:
public static Rational operator + (Rational r1, Rational
Êr2)
{
// Make working copies of r1 and r2
Rational tempR1 = new Rational(r1);
Rational tempR2 = new Rational(r2);
// Determine a common divisor.
// That is, to add 1/4 and 2/3, convert to 3/12 and 8/12
int commonDivisor;
if (tempR1.divisor != tempR2.divisor) {
commonDivisor = tempR1.divisor * tempR2.divisor;
// Multiply out the dividends of each rational
tempR1.dividend *= tempR2.divisor;
tempR2.dividend *= tempR1.divisor;
} else {
commonDivisor = tempR1.divisor;
}
// Create a new Rational.
// For example, 1/4 + 2/3 = 3/12 + 8/12 = 11/12.
Rational result = new Rational(tempR1.dividend +
tempR2.dividend, commonDivisor);
return result;
}
public static Rational operator + (Rational r1, int i1)
{
// Convert i1 into a Rational
Rational r2 = new Rational(i1 * r1.divisor,
r1.divisor);
return r1 + r2;
}
(Code continued on following page.)

Module 12: Operators, Delegates, and Events 35
// Perform Rational addition
public static Rational operator - (Rational r1, Rational
Êr2)
{
// Make working copies of r1 and r2
Rational tempR1 = new Rational(r1);
Rational tempR2 = new Rational(r2);
// Determine a common divisor.
// For example, to subtract 2/3 from 1/4,
// convert to 8/12 and 3/12.
int commonDivisor;
if (tempR1.divisor != tempR2.divisor) {
commonDivisor = tempR1.divisor * tempR2.divisor;
// Multiply the dividends of each rational
tempR1.dividend *= tempR2.divisor;
tempR2.dividend *= tempR1.divisor;
} else {
commonDivisor = tempR1.divisor;
}
// Create a new Rational.
// For example, 2/3 - 1/4 = 8/12 - 3/12 = 5/12.
Rational result = new Rational(tempR1.dividend –
tempR2.dividend, commonDivisor);
return result;
}
public static Rational operator - (Rational r1, int i1)
{
// Convert i1 into a Rational
Rational r2 = new Rational(i1 * r1.divisor, r1.divisor);
// Perform Rational subtraction
return r1 - r2;
}

36 Module 12: Operators, Delegates, and Events
å
To define the increment and decrement operators
1. In the Rational class, create the unary ++ operator.
Use the + operator that you defined earlier. Use it to add 1 to the
parameter passed to the ++ operator.
2. In the Rational class, create the unary -- operator. The completed code for
both operators is as follows:
public static Rational operator ++ (Rational r1)
{
return r1 + 1;
}
public static Rational operator -- (Rational r1)
{
return r1 - 1;
}
å
To test the additive operators
1. In the Main method of the TestRational class, add statements to:
a. Add r2 to r1 and print the result.
b. Add 5 to r2 (use +=) and print the result.
c. Subtract r1 from r2 (use -=) and print the result.
d. Subtract 2 from r2 and print the result.
e. Increment r1 and print the result.
f. Decrement r2 and print the result.
2. Compile and run the program. Check the results.
Tip

Module 12: Operators, Delegates, and Events 37
If Time Permits
Creating Additional Rational Number Operators
In this exercise, you will create the following additional operators for the
Rational class:
n
Explicit and implicit casts
These casts are for conversion between Rational, float, and int types.
n
*, /, %
These binary multiplicative operators are for multiplying, for dividing, and
for extracting the remainder after integer division of two rational numbers.
å
To define the cast operators
1. Define an explicit cast operator for converting a rational number to a
floating-point number, as follows:
public static explicit operator float (Rational r1)
{
...
}
2. In the body of the of the float cast operator, return the result of dividing
dividend by divisor. Ensure that floating-point division is performed.
3. Create an explicit cast operator for converting a rational number to an
integer, as follows:
public static explicit operator int (Rational r1)
{
...
}
This operator is explicit because information loss is likely to occur.
4. In the body of the int cast operator, divide dividend by divisor. Ensure that
floating-point division is performed. Truncate the result to an int and return
it.
5. Create an implicit cast operator for converting an integer to a rational
number, as follows:
public static implicit operator Rational (int i1)
{
...
}
It is safe to make this operator implicit.
Note
Note

38 Module 12: Operators, Delegates, and Events
6. In the body of the Rational cast operator, create a new Rational with
dividend set to i1 and divisor set to 1. Return this Rational. The complete
code for all three cast operators is as follows:
public static implicit operator float (Rational r1)
{
float temp = (float)r1.dividend / r1.divisor;
return temp;
}
public static explicit operator int (Rational r1)
{
float temp = (float)r1.dividend / r1.divisor;
return (int) temp;
}
public static implicit operator Rational (int i1)
{
Rational temp = new Rational(i1, 1);
return temp;
}
7. Add statements to the test harness to test these operators.
å
To define the multiplicative operators
1. Define the multiplication operator (*) to multiply two rational numbers, as
follows:
public static Rational operator * (Rational r1, Rational r2)
{
...
}
To multiply two rational numbers, you multiply the dividend and the
divisor of both rational numbers together.
2. Define the division operator (/) to divide one rational number by another, as
follows:
public static Rational operator / (Rational r1, Rational
Êr2)
{
...
}
To divide Rational r1 by Rational r2, multiply r1 by the reciprocal of
r2. In other words, exchange the dividend and divisor of r2, and then
perform multiplication. (1/3 / 2/5 is the same as 1/3 * 5/2.)
Tip
Tip

Module 12: Operators, Delegates, and Events 39
3. Define the modulus operator (%). (The modulus is the remainder after
division.) It returns the remainder after dividing by an integer:
public static Rational operator % (Rational r1, int i1)
{
...
}
Convert r1 to an int called temp, and determine the difference between
r1 and temp, storing the result in a Rational called diff . Perform temp % i1,
and store the result in an int called remainder. Add diff and remainder
together.
4. Add statements to the test harness to test these operators. The completed
code for the operators is as follows:
public static Rational operator * (Rational r1, Rational r2)
{
int dividend = r1.dividend * r2.dividend;
int divisor = r1.divisor * r2.divisor;
Rational temp = new Rational(dividend, divisor);
return temp;
}
public static Rational operator / (Rational r1, Rational
Êr2)
{
// Create the reciprocal of r2, and then multiply
Rational temp = new Rational(r2.divisor, r2.dividend);
return r1 * temp;
}
public static Rational operator % (Rational r1, int i1)
{
// Convert r1 to an int
int temp = (int)r1;
// Compute the rounding difference between temp and r1
Rational diff = r1 - temp;
// Perform % on temp and i1
int remainder = temp % i1;
// Add remainder and diff together to get the
// complete result
diff += remainder;
return diff;
}
Tip

40 Module 12: Operators, Delegates, and Events
u Creating and Using Delegates
n
Scenario: Power Station
n
Analyzing the Problem
n
Creating Delegates
n
Using Delegates
Delegates allow you to write code that can dynamically change the methods
that it calls. This is a flexible feature that allows a method to vary
independently of the code that invokes it.
In this section, you will analyze a power station scenario for which delegates
prove useful, and learn how to define and use delegates.

Module 12: Operators, Delegates, and Events 41
Scenario: Power Station
n
The Problem
l
How to respond to temperature events in a power station
l
Specifically, if the temperature of the reactor core rises
above a certain temperature, coolant pumps need to be
alerted and switched on
n
Possible Solutions
l
Should all coolant pumps monitor the core temperature?
l
Should a component that monitors the core turn on the
appropriate pumps when the temperature changes?
To understand how to use delegates, consider a power station example for
which using a delegate is a good solution.
The Problem
In a power station, the temperature of the nuclear reactor must be kept below a
critical temperature. Probes inside the core constantly monitor the temperature.
If the temperature rises significantly, various pumps need to be started to
increase the flow of coolant throughout the core. The software controlling the
working of the nuclear reactor must start the appropriate pumps at the
appropriate time.
Possible Solutions
The controlling software could be designed in many ways that would meet
these criteria, two of which are listed below:
n
The software driving the coolant pumps could constantly measure the
temperature of the nuclear core and increase the flow of coolant as the
temperature requires.
n
The component monitoring the core temperature could start the appropriate
coolant pumps every time the temperature changes.

42 Module 12: Operators, Delegates, and Events
Both of these techniques have drawbacks. In the first technique, the frequency
with which the temperature must be measured needs to be determined.
Measuring too frequently could affect the operation of the pumps because the
software has to drive the pumps as well as monitor the core temperature.
Measuring infrequently could mean that a very rapid rise in temperature could
be missed until it is too late.
In the second technique, there may be many dozens of pumps and controllers
that need to be alerted about each temperature change. The programming
required to achieve this could be complex and difficult to maintain, especially if
there are different types of pumps in the system that need to be alerted in
different ways.

Module 12: Operators, Delegates, and Events 43
Analyzing the Problem
n
Existing Concerns
l
There may be several types of pumps, supplied by
different manufacturers
l
Each pump could have its own method for activation
n
Future Concerns
l
To add a new pump, the entire code will need to change
l
A high overhead cost will result with every such addition
n
A Solution
l
Use delegates in your code
To start solving the problem, consider the dynamics involved in implementing a
solution in the power station scenario.
Existing Concerns
The major issue is that there could be several different types of pumps supplied
by different manufacturers, each with its own controlling software. The
component monitoring the core temperature will have to recognize, for each
type of pump, which method to call to turn the pump on.
For this example, suppose that there are two types of pumps: electric and
pneumatic. Each type of pump has its own software driver that contains a
method to switch the pump on, as follows:
public class ElectricPumpDriver
{
...
public void StartElectricPumpRunning( )
{
...
}
}
public class PneumaticPumpDriver
{
...
public void SwitchOn( )
{
...
}
}

44 Module 12: Operators, Delegates, and Events
The component monitoring the core temperature will switch the pumps on. The
following code shows the main part of this component, the CoreTempMonitor
class. It creates a number of pumps and stores them in an ArrayList, a
collection class that implements a variable-length array. The
SwitchOnAllPumps method iterates through the ArrayList, determines the
type of pump, and calls the appropriate method to turn the pump on:
public class CoreTempMonitor
{
public void Add(object pump)
{
pumps.Add(pump);
}
public void SwitchOnAllPumps()
{
foreach (object pump in pumps) {
if (pump is ElectricPumpDriver) {
((ElectricPumpDriver)pump).StartElectricPumpRunning();
}
if (pump is PneumaticPumpDriver) {
((PneumaticPumpDriver)pump).SwitchOn();
}
...
}
...
private ArrayList pumps = new ArrayList();
}
public class ExampleOfUse
{
public static void Main( )
{
CoreTempMonitor ctm = new CoreTempMonitor();
ElectricPumpDriver ed1 = new ElectricPumpDriver();
ctm.Add(ed1);
PneumaticPumpDriver pd1 = new PneumaticPumpDriver();
ctm.Add(pd1);
ctm.SwitchOnAllPumps();
}
}

Module 12: Operators, Delegates, and Events 45
Future Concerns
Using the structure as described has a serious drawback. If a new type of pump
is installed later, you will need to change the SwitchOnAllPumps method to
incorporate the new pump. This would also mean that the entire code would
need to be thoroughly retested, with all the associated downtime and costs,
since this is a crucial piece of software.
A Solution
To solve this problem, you can use a mechanism referred to as a delegate. The
SwitchOnAllPumps method can use the delegate to call the appropriate
method to turn on a pump without needing to determine the type of pump.
46 Module 12: Operators, Delegates, and Events
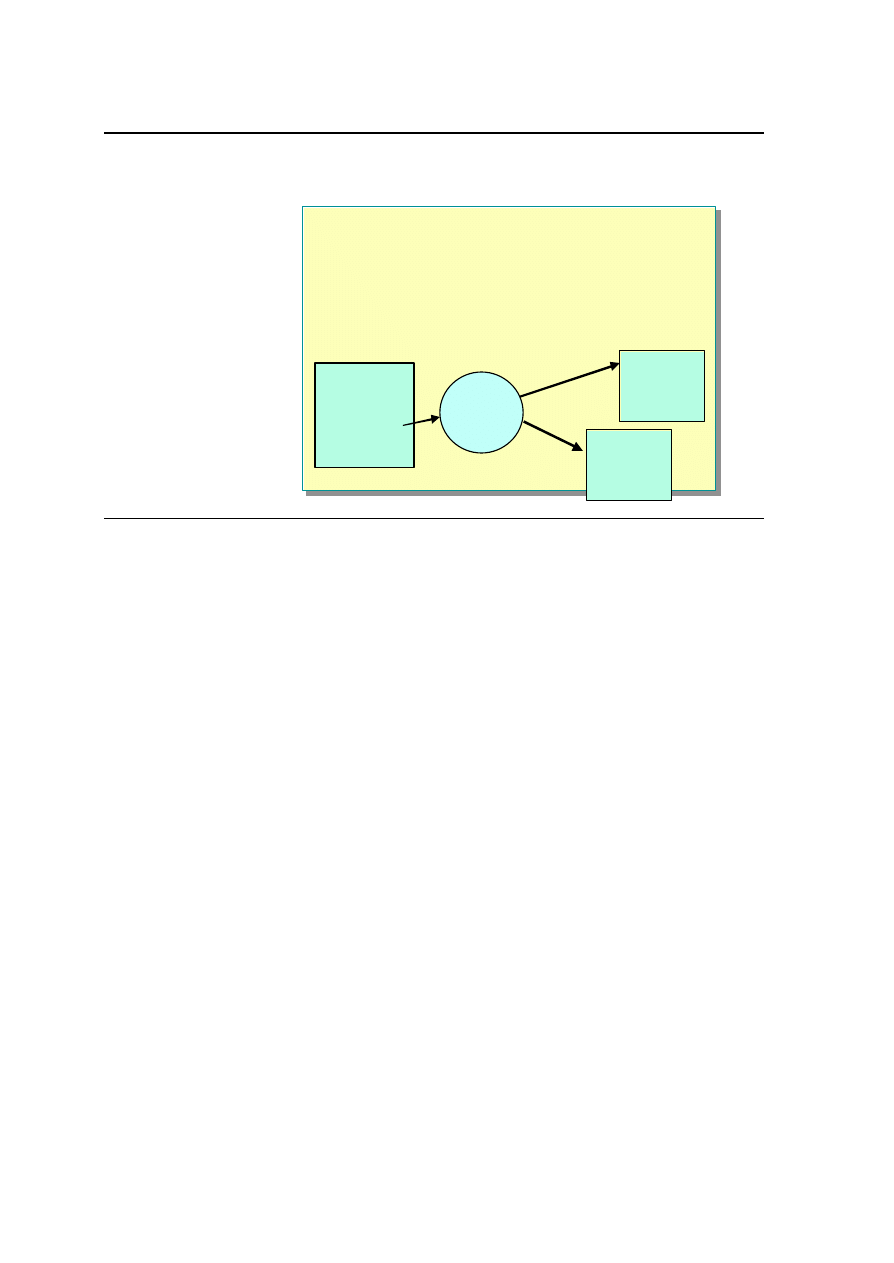
Creating Delegates
n
A Delegate Allows a Method to Be Called Indirectly
l
It contains a reference to a method
l
All methods invoked by the same delegate must have
the same parameters and return value
MethodX
delegate
?
Method1()
{
...
}
Method2()
{
...
}
DoWork()
{
...
MethodX();
...
}
A delegate contains a reference to a method rather than the method name. By
using delegates, you can invoke a method without knowing its name. Calling
the delegate will actually execute the method referenced by the delegate.
In the power station example, rather than use an ArrayList to hold pump
objects, you can use it to hold delegates that refer to the methods required to
start each pump.
A delegate is a similar to an interface. It specifies a contract between a caller
and an implementer. A delegate associates a name with the specification of a
method. An implementation of the method can be attached to this name, and a
component can call the method by using this name. The primary requirement of
the implementing methods is that they must all have the same signature and
return the same type of parameters. In the case of the power station scenario,
the StartElectricPumpRunning and SwitchOn methods are both void, and
neither takes any parameters.
To use a delegate, you must first define it and then instantiate it.

Module 12: Operators, Delegates, and Events 47
Defining Delegates
A delegate specifies the return type and parameters that each method must
provide. You use the following syntax to define a delegate:
public delegate void StartPumpCallback( );
Note that the syntax for defining a delegate is similar to the syntax for defining
a method. In this example, you define the delegate StartPumpCallback as
being for a method that returns no value (void) and takes no parameters. This
matches the specifications of the methods StartElectricPumpRunning and
SwitchOn in the two pump driver classes.
Instantiating Delegates
After you define a delegate, you must instantiate it and make it refer to a
method. To instantiate a delegate, use the delegate constructor and supply the
object method it should invoke when it is called. In the following example, an
ElectricPumpDriver, ed1, is created, and then a delegate, callback, is
instantiated, referencing the StartElectricPumpRunning method of ed1:
public delegate void StartPumpCallback( );
void Example()
{
ElectricPumpDriver ed1 = new ElectricPumpDriver( );
StartPumpCallback callback;
callback =
Ênew StartPumpCallback(ed1.StartElectricPumpRunning);
...
}
48 Module 12: Operators, Delegates, and Events
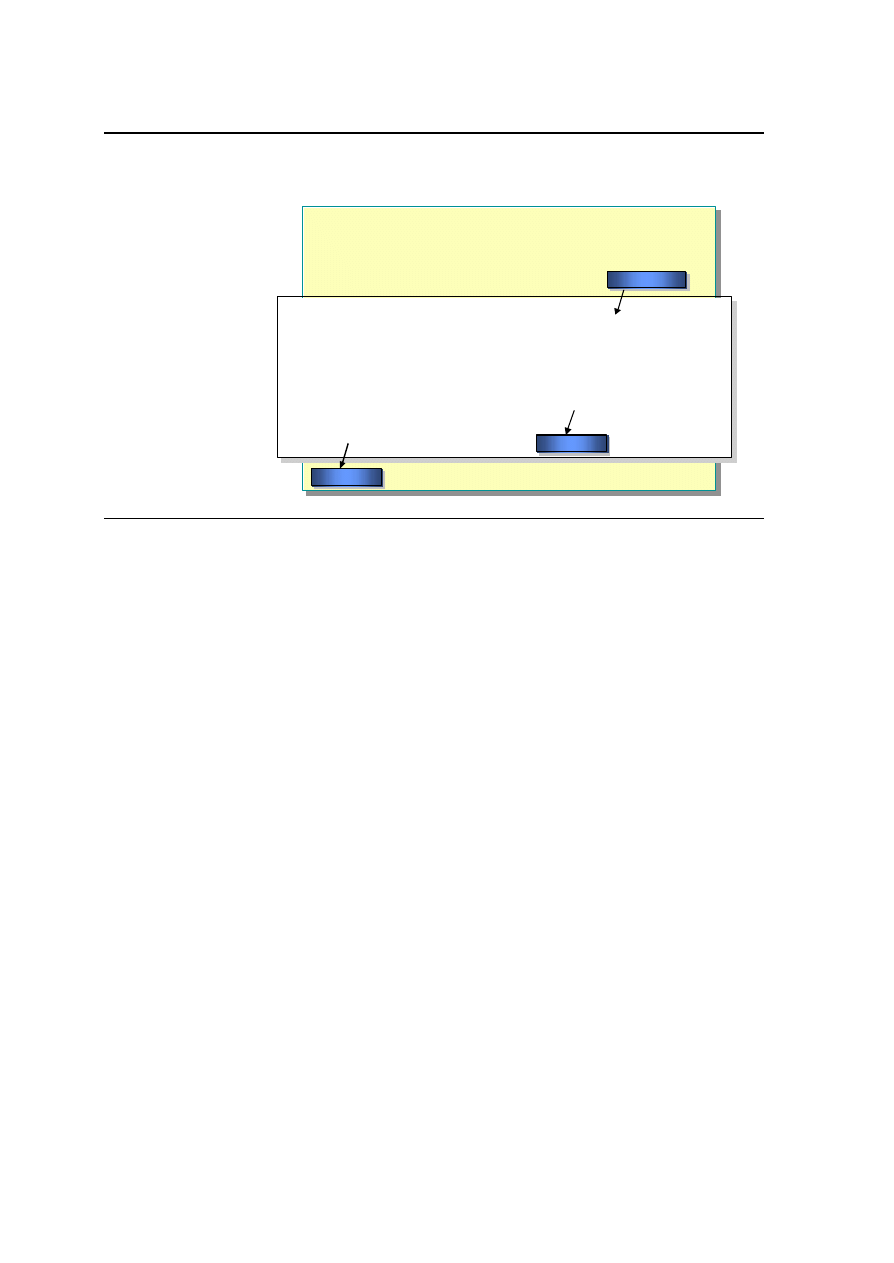
Using Delegates
n
To Call a Delegate, Use Method Syntax
public delegate void StartPumpCallback( );
...
StartPumpCallback callback;
...
callback = new
ÊStartPumpCallback(ed1.StartElectricPumpRunning);
...
callback( );
public delegate void StartPumpCallback( );
...
StartPumpCallback callback;
...
callback = new
ÊStartPumpCallback(ed1.StartElectricPumpRunning);
...
callback( );
No Method Body
No Method Body
No Method Body
Call Here
Call Here
Call Here
No Call Here
No Call Here
No Call Here
A delegate is a variable that invokes a method. You call it in the same way you
would call a method, except that the delegate replaces the method name.

Module 12: Operators, Delegates, and Events 49
Example
The following code shows how to define, create, and call delegates for use by
the power station. It populates an ArrayList named callbacks with instances of
delegates that refer to the methods used to start each pump. The
SwitchOnAllPumps method iterates through this ArrayList and calls each
delegate in turn. With delegates, the method need not perform type checking
and is much simpler than the previous solution.
public delegate void StartPumpCallback( );
public class CoreTempMonitor2
{
public void Add(StartPumpCallback callback)
{
callbacks.Add(callback);
}
public void SwitchOnAllPumps( )
{
foreach(StartPumpCallback callback in callbacks)
{
callback( );
}
}
private ArrayList callbacks = new ArrayList( );
}
class ExampleOfUse
{
public static void Main( )
{
CoreTempMonitor2 ctm = new CoreTempMonitor2( );
ElectricPumpDriver ed1 = new ElectricPumpDriver( );
ctm.Add(
new StartPumpCallback(ed1.StartElectricPumpRunning)
);
PneumaticPumpDriver pd1 = new PneumaticPumpDriver( );
ctm.Add(
new StartPumpCallback(ed2.StartElectricPumpRunning)
);
ctm.SwitchOnAllPumps( );
}
}

50 Module 12: Operators, Delegates, and Events
u
Defining and Using Events
n
How Events Work
n
Defining Events
n
Passing Event Parameters
n
Demonstration: Handling Events
In the power station example, you learned how to use a delegate to solve the
problem of how to start different types of pumps in a generic manner. However,
the component that monitors the temperature of the reactor core is still
responsible for notifying each of the pumps in turn that they need to start. You
can address the issue of notification by using events.
Events allow an object to notify other objects that a change has occurred. The
other objects can register an interest in an event, and they will be notified when
the event occurs.
Events are very closely related to delegates. In this section, you will learn how
to define and handle events to address the remaining problems with the power
station.

Module 12: Operators, Delegates, and Events 51
How Events Work
n
Publisher
l
Raises an event to alert all interested objects
(subscribers)
n
Subscriber
l
Provides a method to be called when the event is raised
Events allow objects to register an interest in changes to other objects. In other
words, events allow objects to register that they need to be notified about
changes to other objects. Events use the publisher and subscriber model.
Publisher
A publisher is an object that maintains its internal state. However, when its state
changes, it can raise an event to alert other interested objects about the change.
Subscriber
A subscriber is an object that registers an interest in an event. It is alerted when
a publisher raises the event. An event can have zero or more subscribers.
Events can be quite complex. To make them easier to understand and maintain,
there are guidelines that you should follow when using them.
52 Module 12: Operators, Delegates, and Events
Defining Events
n
Defining an Event
n
Subscribing to an Event
n
Notifying Subscribers to an Event
public delegate void StartPumpCallback( );
private event StartPumpCallback CoreOverheating;
public delegate void StartPumpCallback( );
private event StartPumpCallback CoreOverheating;
PneumaticPumpDriver pd1 = new PneumaticPumpDriver( );
...
CoreOverheating += new StartPumpCallback(pd1.SwitchOn);
PneumaticPumpDriver pd1 = new PneumaticPumpDriver( );
...
CoreOverheating += new StartPumpCallback(pd1.SwitchOn);
public void SwitchOnAllPumps( ) {
if (CoreOverheating != null) {
CoreOverheating( );
}
}
public void SwitchOnAllPumps( ) {
if (CoreOverheating != null) {
CoreOverheating( );
}
}
Events in C# use delegates to call methods in subscribing objects. They are
multicast. This means that when a publisher raises an event, it may result in
many delegates being called. However, you cannot rely on the order in which
the delegates are invoked. If one of the delegates throws an exception, it could
halt the event processing altogether, resulting in the other delegates not being
called at all.
Defining an Event
To define an event, a publisher first defines a delegate and bases the event on it.
The following code defines a delegate named StartPumpCallback and an
event named CoreOverheating that invokes the StartPumpCallback delegate
when it is raised:
public delegate void StartPumpCallback( );
private event StartPumpCallback CoreOverheating;

Module 12: Operators, Delegates, and Events 53
Subscribing to an Event
Subscribing objects specify a method to be called when the event is raised. If
the event has not yet been instantiated, subscribing objects specify a delegate
that refers to the method when creating the event. If the event exists, then
subscribing objects add a delegate that calls a method when the event is raised.
For example, in the power station scenario, you could create two pump drivers
and have them both subscribe to the CoreOverheating event:
ElectricPumpDriver ed1 = new ElectricPumpDriver( );
PneumaticPumpDriver pd1 = new PneumaticPumpDriver( );
...
CoreOverheating = new
StartPumpCallback( Êed1.StartElectricPumpRunning);
CoreOverheating += new StartPumpCallback(pd1.SwitchOn);
You must declare delegates (and methods) that are used to subscribe to
an event as void. This restriction does not apply when a delegate is used
without an event.
Notifying Subscribers to an Event
To notify the subscribers, you must raise the event. The syntax you use is the
same as that for calling a method or a delegate. In the power station example,
the SwitchOnAllPumps method of the core-temperature monitoring
component no longer needs to iterate through a list of delegates:
public void SwitchOnAllPumps( )
{
if (CoreOverheating= null) {
CoreOverheating( );
}
}
Executing the event in this way will cause all of the delegates to be invoked,
and, in this example, all of the pumps that subscribe to the event will be
activated. Notice that the code first checks that the event has at least one
subscribing delegate. Without this check, the code would throw an exception if
there were no subscribers.
For information about guidelines and best practices to follow when using events,
search for “event guidelines” in the .NET Framework SDK Help documents.
Note

54 Module 12: Operators, Delegates, and Events
Passing Event Parameters
n
Parameters for Events Should Be Passed As EventArgs
l
This is because of marshalling
l
Define a class descended from EventArgs to act as a
container for event parameters
n
The Same Subscribing Method May Be Called by
Several Events
l
Always pass the event publisher (sender) as the first
parameter to the method
Because of the marshalling process that is used to call subscribing methods
when an event is raised, there are some guidelines to follow when defining the
methods, especially if they require parameters.
Event Parameter Guidelines
To pass parameters to a subscribing method, enclose the parameters in a single
class that supplies accessor methods to retrieve them. Derive this class from
System.EventArgs.
For example, in the power station scenario, assume that the methods that start
the pumps, StartElectricPumpRunning and SwitchOn, need the current core
temperature to determine the speed at which the pumps should run. To address
this issue, you create the following class to pass the core temperature from the
core-monitoring component to the pump objects:
public class CoreOverheatingEventArgs: EventArgs
{
private readonly int temperature;
public CoreOverheatingEventArgs(int temperature)
{
this.temperature = temperature;
}
public int GetTemperature( )
{
return temperature;
}
}
The CoreOverheatingEventArgs class contains an integer parameter. The
constructor stores the temperature internally, and you use the method
GetTemperature to retrieve it.

Module 12: Operators, Delegates, and Events 55
The sender Object
An object may subscribe to more than one event from different publishers and
could use the same method in each case. Therefore, it is customary for an event
to pass information about the publisher that raised it to the subscribers. By
convention, this is the first parameter passed to the subscribing method, and it is
usually called sender. The following code shows the new versions of the
StartElectricPu mpRunning and SwitchOn methods, modified to expect
sender as the first parameter and the temperature as the second parameter:
public class ElectricPumpDriver
{
...
public void StartElectricPumpRunning(object sender,
ÊCoreOverheatingEventArgs args)
{
// Examine the temperature
int currentTemperature = args.GetTemperature( );
// Start the pump at the required speed for
// this temperature
...
}
...
}
public class PneumaticPumpDriver
{
...
public void SwitchOn(object sender,
ÊCoreOverheatingEventArgs args)
{
// Examine the temperature
int currentTemperature = args.GetTemperature( );
// Start the pump at the required speed for
// this temperature
...
}
...
}
You will also need to modify the delegate in the core-temperature
monitoring component. In the power station example, the delegate will become:
public delegate void StartPumpCallback(object sender,
ÊCoreOverheatingEventArgs args);
Note
56 Module 12: Operators, Delegates, and Events
Demonstration: Handling Events
In this demonstration, you will see an example of how you can use events to
communicate information between objects.

Module 12: Operators, Delegates, and Events 57
Lab 12.2: Defining and Using Events
Objectives
After completing this lab, you will be able to:
n
Publish events.
n
Subscribe to events.
n
Pass parameters to events.
Prerequisites
Before working on this lab, you must be familiar with the following:
n
Creating classes in C#
n
Defining constructors and destructors
n
Compiling and using assemblies
Estimated time to complete this lab: 30 minutes

58 Module 12: Operators, Delegates, and Events
Exercise 1
Auditing Bank Transactions
This exercise extends the bank example used in Lab 12.1 and other earlier labs.
In this exercise, you will create a class called Audit. The purpose of this class is
to record the changes made to account balances in a text file. The account will
be notified of changes by an event published by the BankAccount class.
You will use the Deposit and Withdraw methods of the BankAccount class to
raise the event, called Auditing, which is subscribed to by an Audit object.
The Auditing event will take a parameter containing a BankTransaction
object. If you completed the earlier labs, you will recall that the
BankTransaction class contains the details of a transaction, such as the amount
of the transaction, the date it was created, and so on. A BankTransaction
object is created whenever a deposit or withdrawal is made by using a
BankAccount.
You will make full use of the event-handling guidelines discussed in the
module.
å
To define the event parameter class
In this exercise, the event that will be raised will be passed a BankTransaction
object as a parameter. Event parameters should be derived from
System.EventArgs, so a new class will be created that contains a
BankTransaction.
1. Open the Audit.sln project in the install folder\Labs\Lab12\Starter\Audit
folder.
2. Create a new class by using Add New Item on the Project menu. Make
sure that you create a New C# Class, and name it AuditEventArgs.cs.
3. When the class has been created, add a comment that summarizes the
purpose of the AuditEventArgs class. Use the exercise description to help
you.
4. Change the namespace to Banking.
5. Change the definition of AuditEventArgs so that it is derived from
System.EventArgs, as follows:
public class AuditEventArgs : System.EventArgs
{
...
}
6. Create a private readonly BankTransaction variable called transData, and
initialize it to null, as follows:
private readonly BankTransaction transData = null;

Module 12: Operators, Delegates, and Events 59
7. Create a constructor that takes a single BankTransaction parameter called
transaction and sets this.transData to this parameter. The code for the
constructor is as follows:
public AuditEventArgs(BankTransaction transaction)
{
this.transData = transaction;
}
8. Provide a public accessor method called getTransaction that returns the
value of this.transData, as follows:
public BankTransaction getTransaction( )
{
return this.transData;
}
9. Compile the project and correct any errors.
å
To define the Audit class
1. In the Audit project, create a new class by using Add New Item from the
Project menu. Make sure that you create a New C# Class, and name it
Audit.cs. This is the class that will subscribe to the Auditing event and
write details of transactions to a file on disk.
2. When the class has been created, add a comment that summarizes the
purpose of the Audit class. Use the exercise description to help you.
3. Change the namespace to Banking.
4. Add a using directive that refers to System.IO.
5. Add a private string variable called filename to the Audit class.
6. Add a private StreamWriter variable called auditFile to the Audit class.
A StreamWriter allows you to write data to a file. You used
StreamReader for reading from a file in Lab 6. In this exercise, you will
use the AppendText method of the StreamWriter class.
The AppendText method opens a named file to append text to that file. It
writes data to the end of the file. You use the WriteLine method to actually
write data to the file once it is open (just like the Console class).
7. Create a constructor in the Audit class that takes a single string parameter
called fileToUse. In the constructor:
•
Set this.filename to fileToUse.
•
Open this named file in AppendText mode and store the file descriptor
in auditFile.
Note

60 Module 12: Operators, Delegates, and Events
The completed code for the constructor is as follows:
private string filename;
private StreamWriter auditFile;
public Audit(string fileToUse)
{
this.filename = fileToUse;
this.auditFile = File.AppendText(fileToUse);
}
8. In the Audit class, add the method that will be used to subscribe to the
Auditing event of the BankTransaction class. It will be executed when a
BankTransaction object raises the event. This method should be public
void and called RecordTransaction. It will take two parameters: an object
called sender, and an AuditEventArgs parameter called eventData.
9. In the RecordTransaction method, add code to:
•
Create a BankTransaction variable called tempTrans.
•
Execute eventData.getTransaction( ) and assign the result to
tempTrans.
•
If tempTrans is not null, use the WriteLine method of this.auditFile to
append the amount of tempTrans (use the Amount( ) method) and the
date created (use the When( ) method) to the end of the audit file. Do
not close the file.
The sender parameter is not used by this method, but by convention
all event-handling methods expect the sender of the event as the first
parameter.
The completed code for this method is as follows:
public void RecordTransaction(Object sender,
AuditEventArgs eventData)
{
BankTransaction tempTrans = eventData.getTransaction( );
if (tempTrans == null) {
return;
}
this.auditFile.WriteLine("Amount: {0}\tDate: {1}",
tempTrans.Amount( ), tempTrans.When( ));
}
10. Add a destructor to the Audit class that closes this.auditFile.
Note

Module 12: Operators, Delegates, and Events 61
11. In the Audit class, create a public void Dispose method that invokes the
destructor and suppresses any further garbage collection for this object. The
complete code for the destructor and the Finalize method is as follows:
~Audit( )
{
this.auditFile.Close( );
}
public void Dispose( )
{
this.Finalize( );
GC.SuppressFinalize(this);
}
12. Compile the project and correct any errors.
å
To test the Audit class
1. Open the AuditTestHarness.sln project in the install folder\
Labs\Lab12\Starter\AuditTestHarness folder.
2. Perform the following steps to add a reference to the library containing your
compiled Audit class. It will be in a dynamic-link library (DLL) called
Bank.dll in install folder\Labs \Lab12\Starter\Audit\Bin\Debug.
a. In Solution Explorer, expand the AuditTestHarness project tree.
b. Right-click References.
c. Click Add Reference.
d. Click Browse.
e. Navigate to install folder\Labs\Lab12\Starter\Audit\ Bin\Debug.
f. Click Bank.dll.
g. Click Open, and then click OK.
3. In the Test class, review the Main method. This class:
a. Creates an instance of the Audit class, using the name AuditTrail.dat for
the file name in which it stores the audit information.
b. Creates a new BankTransaction object for an amount of 500 Dollars.
c. Creates an AuditEventArgs object that uses the BankTransaction
object.
d. Invokes the RecordTransaction method of the Audit object.
The test is repeated with a second transaction for –200 Martian Wombats.
After the second test, the Dispose method is called to ensure that audit
records are stored on the disk.
4. Compile the project.
5. Open a Command window and navigate to the folder install folder\
Labs\Lab12\Starter\AuditTestHarness\Bin\Debug. This folder will contain
the AuditTestHarness.exe and Bank.dll files. It will also contain the
AuditTestHarness.pdb file, which you can ignore.

62 Module 12: Operators, Delegates, and Events
6. Execute AuditTestHarness.
7. Using a text editor of your choice (Wordpad, for example), examine the
contents of the file AuditTrail.dat. It should contain the data for the two
transactions.
å
To define the Auditing event
1. Open the Audit.sln project in the install folder\Labs\Lab12\Starter\Audit
folder.
2. In the BankAccount.cs file, above the BankAccount class, declare a public
delegate of type void that is called AuditEventHandler and takes two
parameters— an Object called sender and an AuditEventArgs called
data— as shown:
public delegate void AuditEventHandler(Object sender,
ÊAuditEventArgs data);
public class BankAccount
{
...
}
3. In the BankAccount class, declare a private event of type
AuditEventHandler called AuditingTransaction, and initialize it to null,
as follows:
public class BankAccount
{
private event AuditEventHandler AuditingTransaction =
Ênull;
...
}
4. Add a public void method called AddOnAuditingTransaction. This
method will take a single AuditEventHa ndler parameter called handler.
The purpose of the method is to add handler to the list of delegates that
subscribe to the AuditingTransaction event. The method will look as
follows:
public void AddOnAuditingTransaction(AuditEventHandler
Êhandler)
{
this.AuditingTransaction += handler;
}
5. Add another public void method called RemoveOnAuditingTransaction.
This method will also take a single AuditEventHandler parameter called
handler. The purpose of this method is to remove handler from the list of
delegates that subscribe to the AuditingTransaction event. The method
will look as follows:
public void RemoveOnAuditingTransaction(AuditEventHandler
Êhandler)
{
this.AuditingTransaction -= handler;
}

Module 12: Operators, Delegates, and Events 63
6. Add a third method that the BankAccount object will use to raise the event
and alert all subscribers. The method should be protected virtual void and
should be called OnAuditingTransaction. This method will take a
BankTransaction parameter called bankTrans. The method will examine
the event this.AuditingTransaction. If it contains any delegates, it will
create an AuditEventArgs object called auditTrans, which will be
constructed by using bankTrans. It will then cause the delegates to be
executed, passing itself in as the sender of the event along with the
auditTrans parameter as the data. The code for this method will look as
follows:
protected virtual void
ÊOnAuditingTransaction(BankTransaction bankTrans)
{
if (this.AuditingTransaction != null) {
AuditEventArgs auditTrans = new
AuditEventArgs(bankTrans);
this.AuditingTransaction(this, auditTrans);
}
}
7. In the Withdraw method of BankAccount, add a statement that will call
OnAuditingTransaction. Pass in the transaction object created by the
Withdraw method. This statement should be placed just prior to the return
statement at the end of the method. The completed code for Withdraw is as
follows:
public bool Withdraw(decimal amount)
{
bool sufficientFunds = accBal >= amount;
if (sufficientFunds) {
accBal -= amount;
BankTransaction theTran = new BankTransaction(-
Êamount);
tranQueue.Enqueue(theTran);
this.OnAuditingTransaction(theTran);
}
return sufficientFunds;
}
8. Add a similar statement to the Deposit method. The completed code for
Deposit is as follows:
public decimal Deposit(decimal amount)
{
accBal += amount;
BankTransaction theTran = new BankTransaction(amount);
tranQueue.Enqueue(theTran);
this.OnAuditingTransaction(theTran);
return accBal;
}
9. Compile the project and correct any errors.

64 Module 12: Operators, Delegates, and Events
å
To subscribe to the Auditing event
1. The final stage is to create the Audit object that will subscribe to the
Auditing event. This Audit object will be part of the BankAccount class,
and will be created when the BankAccount is instantiated, so that each
account will get its own audit trail.
Define a private Audit variable called accountAudit in the BankAccount
class, as follows:
private Audit accountAudit;
2. Add a public void method to BankAccount called AuditTrail. This method
will create an Audit object and subscribe to the Auditing event. It will take
a string parameter, which will be the name of a file to use for the audit trail.
The method will:
•
Instantiate accountAudit by using this string.
•
Create an AuditEventHandler variable called doAuditing and
instantiate it by using the RecordTransaction method of accountAudit.
•
Add doAuditing to the list of subscribers to the Auditing event. Use the
AddOnAuditingTransaction method, passing doAuditing as the
parameter.
The completed code for this method is as follows:
public void AuditTrail(string auditFileName)
{
this.accountAudit = new Audit(auditFileName);
AuditEventHandler doAuditing = new
ÊAuditEventHandler(this.accountAudit.RecordTransaction);
this.AddOnAuditingTransaction(doAuditing);
}
3. In the destructor for the BankAccount class, add a statement that invokes
the Dispose method of the accountAudit object. (This is to ensure that all
audit records are correctly written to disk.)
4. Compile the project and correct any errors.
å
To test the Auditing event
1. Open the EventTestHarness.sln project in the install folder\
Labs\Lab12\Starter\EventTestHarness folder.
2. Perform the following steps to add a reference to the DLL (Bank.dll)
containing your compiled Audit and BankAccount classes. The Bank.dll is
located in install folder\Labs\Lab12\Starter\Audit\ Bin\Debug.
a. In Solution Explorer, expand the EventTestHarness project tree.
b. Right-click References.
c. Click Add Reference.
d. Click Browse.
e. Navigate to install folder\Labs\Lab12\Starter\Audit\ Bin\Debug.
f. Click Bank.dll.
g. Click Open, and then click OK.

Module 12: Operators, Delegates, and Events 65
3. In the Test class, review the Main method. This class:
a. Creates two bank accounts.
b. Uses the AuditTrail method to cause the embedded Audit objects in
each account to be created and to subscribe to the Auditing event.
c. Performs a number of deposits and withdrawals on each account.
d. Closes both accounts.
4. Compile the project and correct any errors.
5. Open a Command window and navigate to the install folder\
Labs\Lab12\Starter\EventTestHarness\Bin\Debug folder. This folder will
contain the EventTestHarness.exe and Bank.dll files. It will also contain the
EventTestHarness.pdb file, which you can ignore.
6. Execute EventTestHarness.
7. Using a text editor of your choice, examine the contents of the Account1.dat
and Account2.dat files. They should contain the data for the transactions
performed on the two accounts.

66 Module 12: Operators, Delegates, and Events
Review
n
Introduction to Operators
n
Operator Overloading
n
Creating and Using Delegates
n
Defining and Using Events
1. Can the arithmetic compound assignment operators (+=, -=, *=, /=, and %=)
be overloaded?
2. Under what circumstances should a conversion operator be explicit?
3. How are explicit conversion operators invoked?
4. What is a delegate?
5. How do you subscribe to an event?
6. In what order are the methods that subscribe to an event called? Will all
methods that subscribe to an event always be executed?


THIS PAGE INTENTIONALLY LEFT BLANK
Wyszukiwarka
Podobne podstrony:
CSharp Module 11 Aggregation Namespaces and Advanced Scope
CSharp Module 5 Methods and Parameters
CSharp Module 9 Creating and Destroying Objects
CSharp Module 13 Properties and Indexers
CSharp Module 4 Statements and Exceptions
Module 12
Covert Operation Panama and Nicaragua
12. Operatory logiczne, Programowanie, Klasa III
Module 12
Module 12
12 FOREX Tools and Trading Systems
CSharp Module 1 Overview of the Microsoft NET Platform
Phoenix Club 12 GABRIEL 3 Heroes and Villains C J Bishop
syllabus itil operational support and analysis 201312
Pulse controlled inverter with variable operating sequence and wind power plant having such an inver
CSharp Module 8 Using Reference Type Variables
12 Education debates and issues
CE Elementary module 12 web worksheet
więcej podobnych podstron